


Would you like to save this?
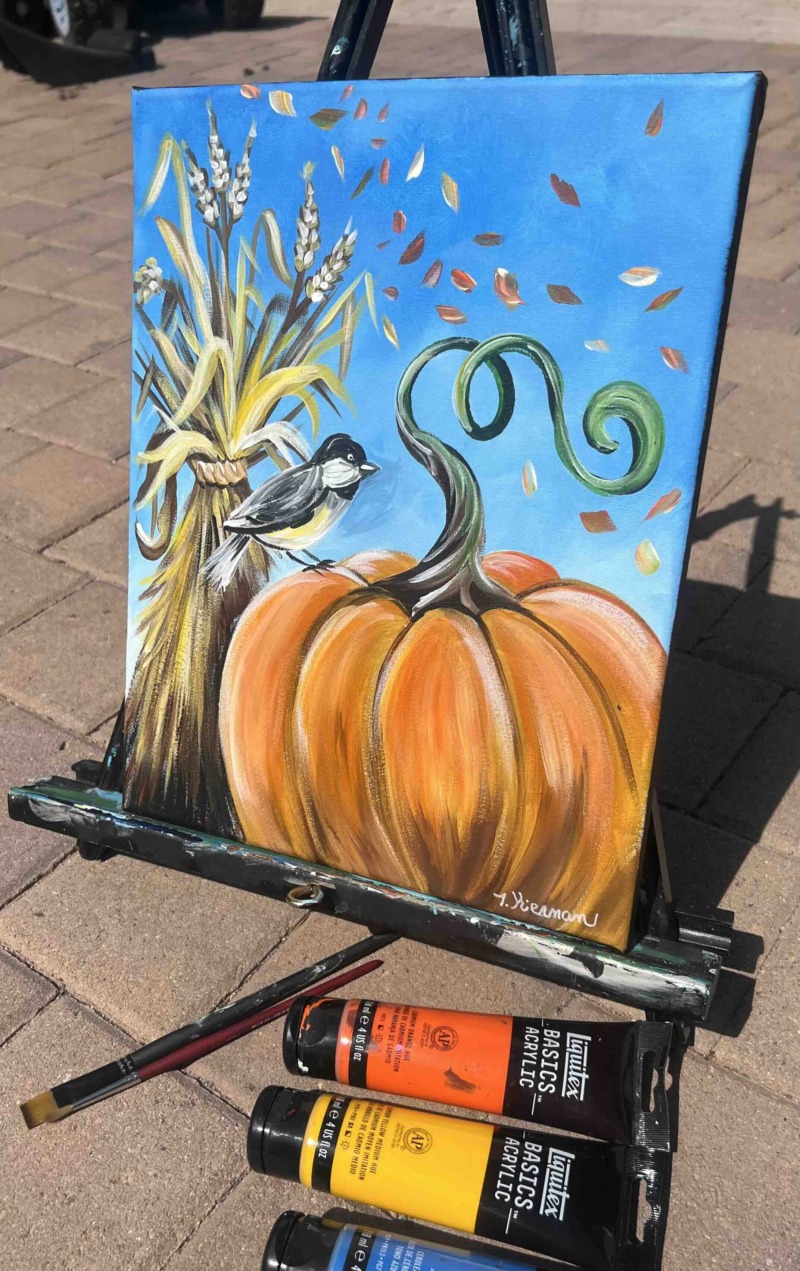
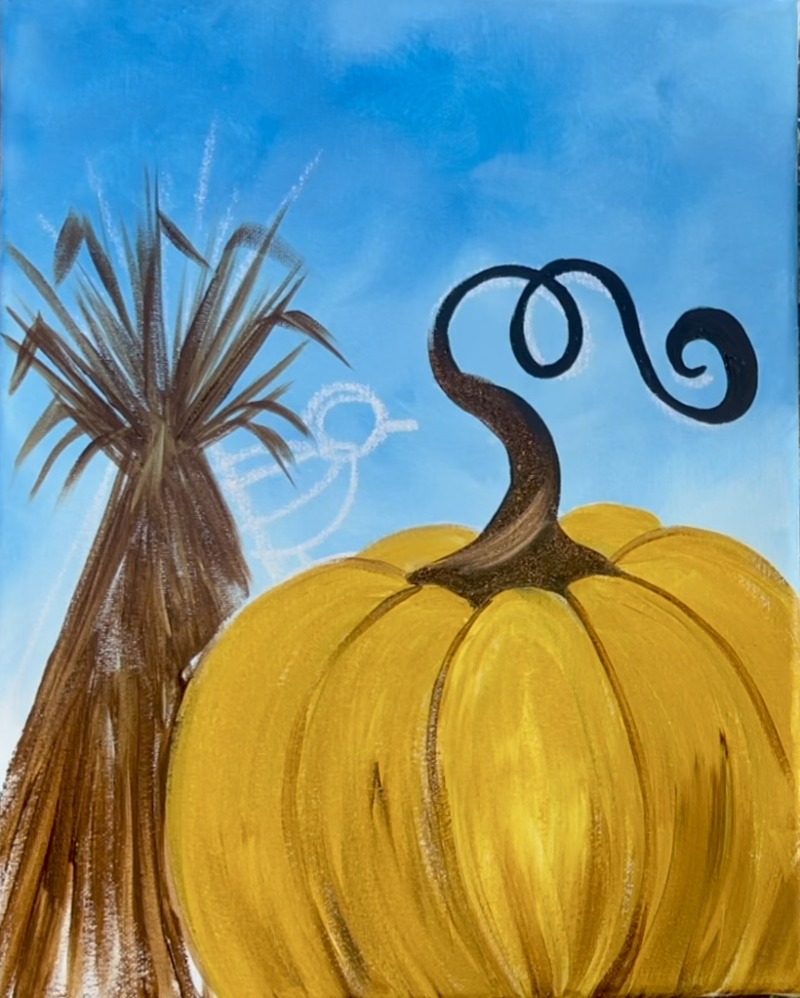
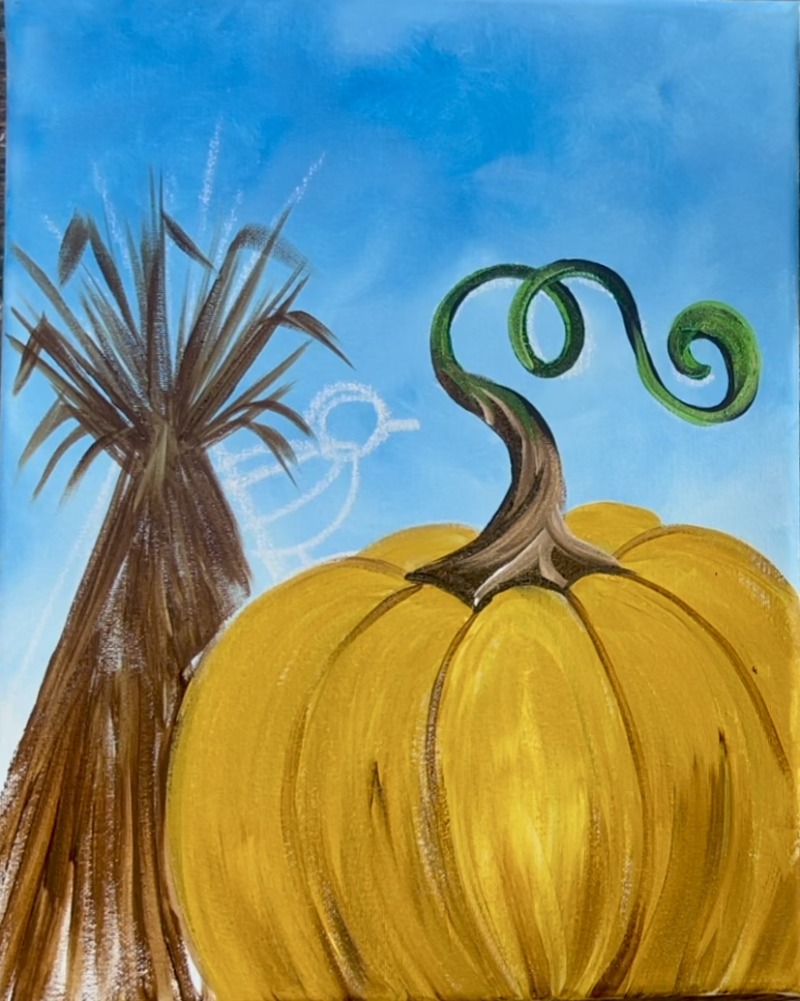
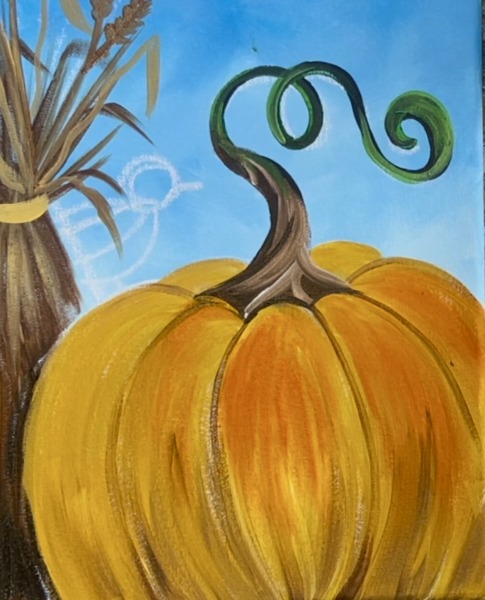
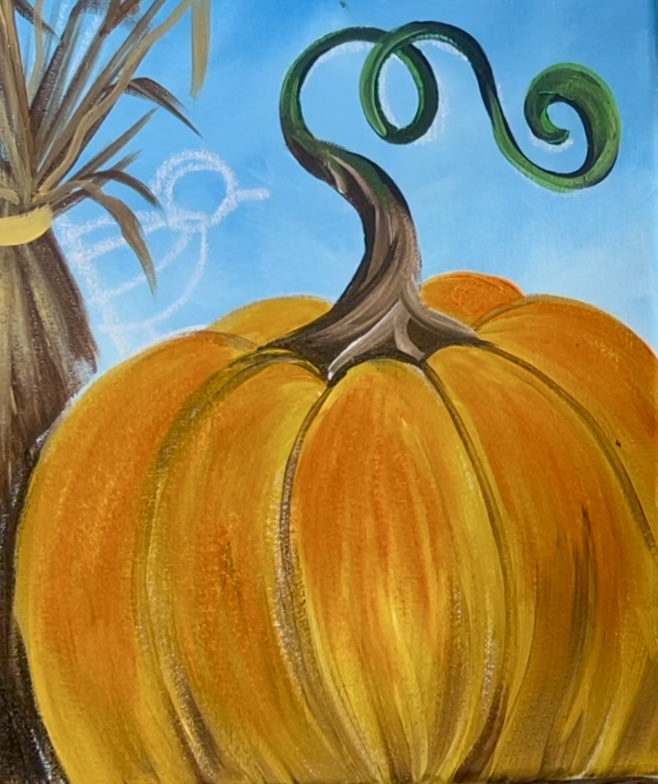
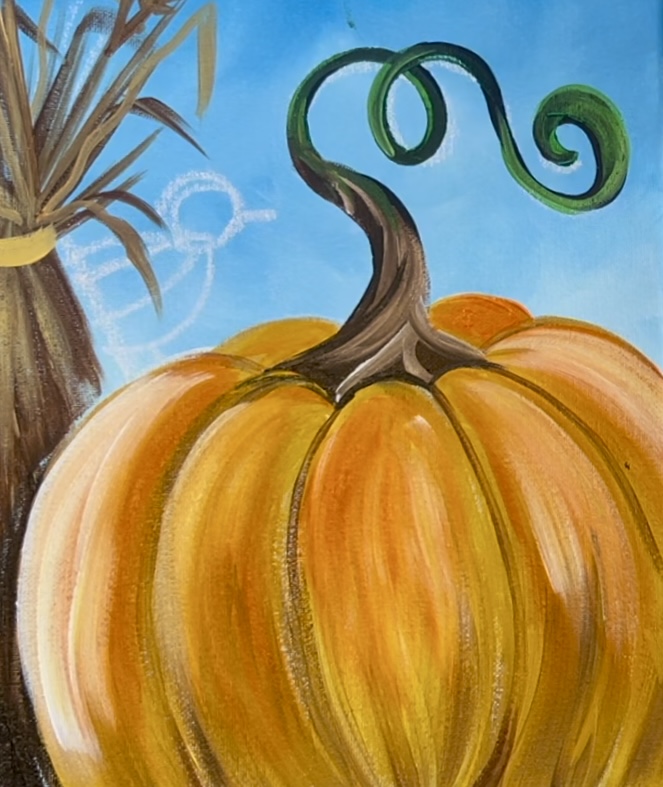
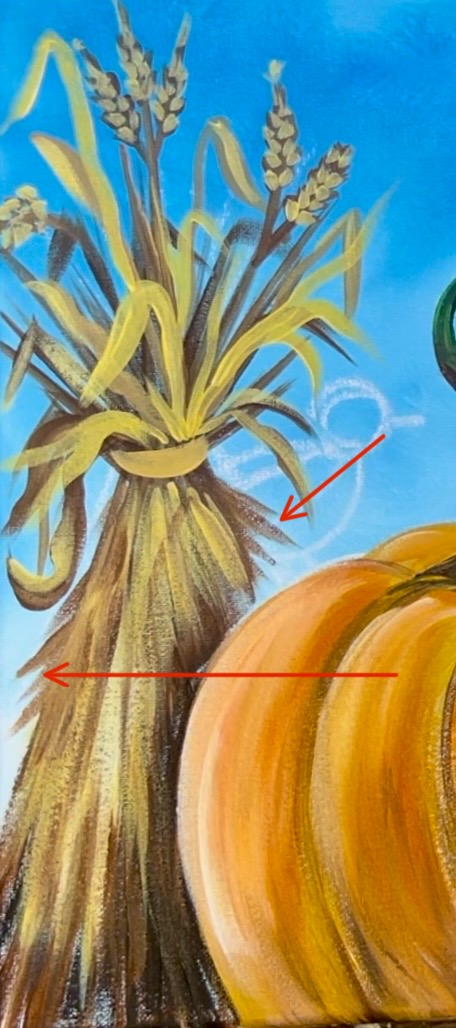
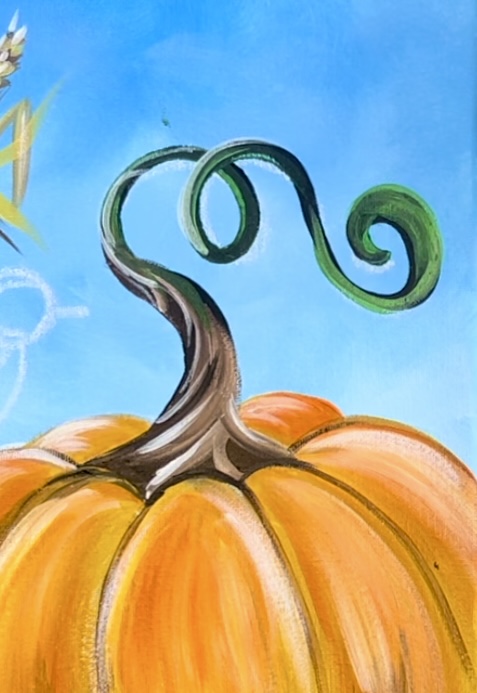
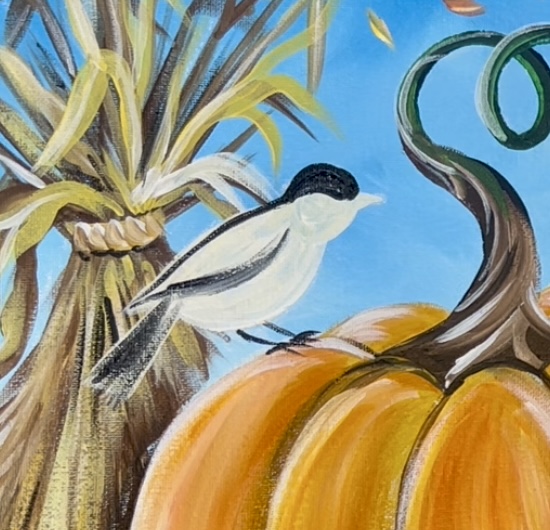
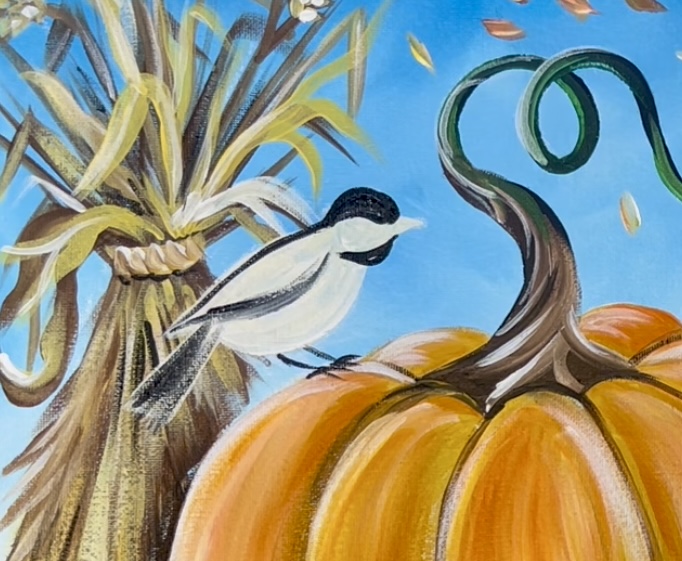
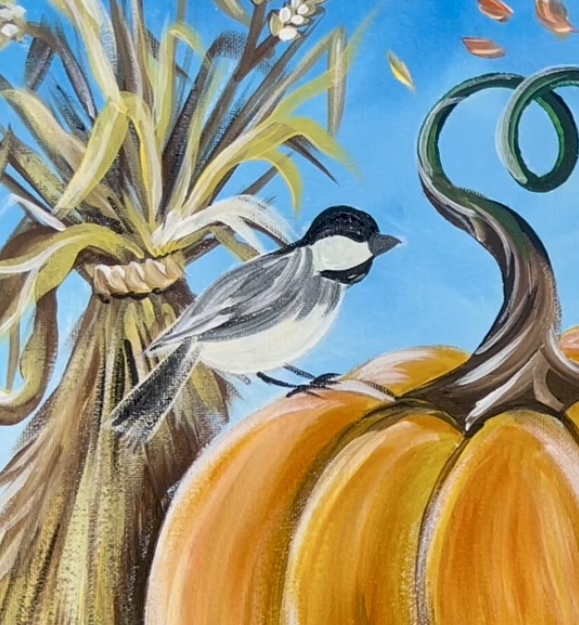
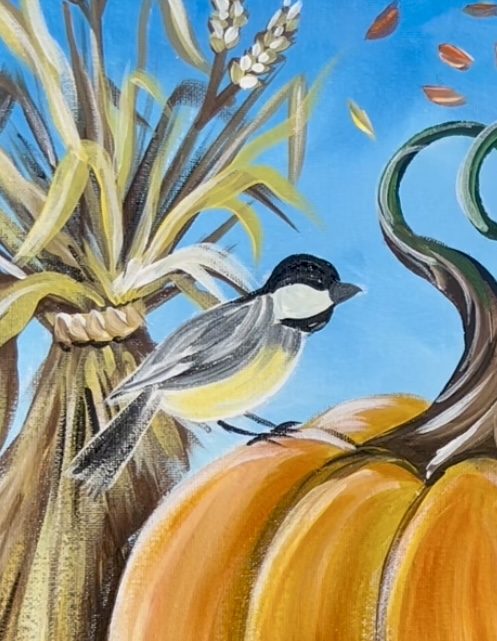
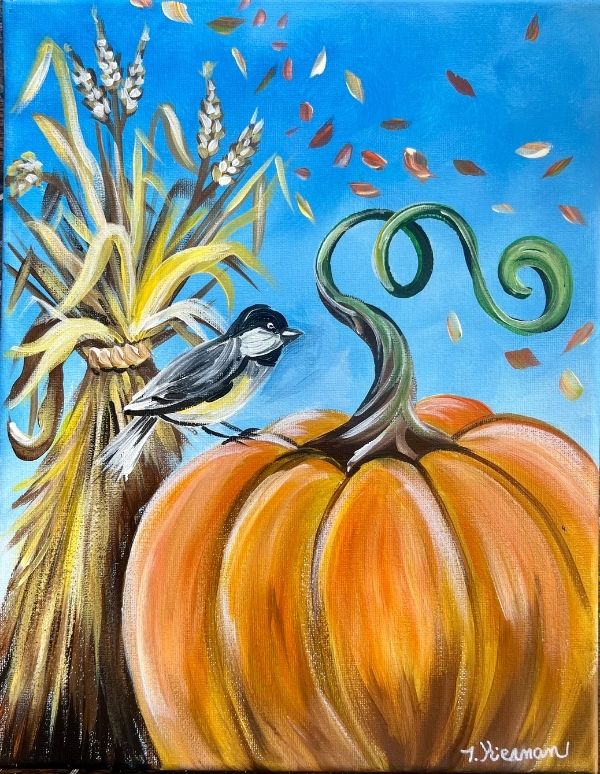
This painting depicts a bright, cheerful autumn scene under a clear blue sky. In the foreground sits a large, round orange pumpkin with a curling green vine that sweeps gracefully upward. Perched on the pumpkin is a small chickadee. To the left, a bundle of golden cornstalks tied with twine stands tall. Scattered in the air are colorful autumn leaves!
This tutorial will show you how to paint “Cornstalk Harvest”!
Enjoy and happy painting!
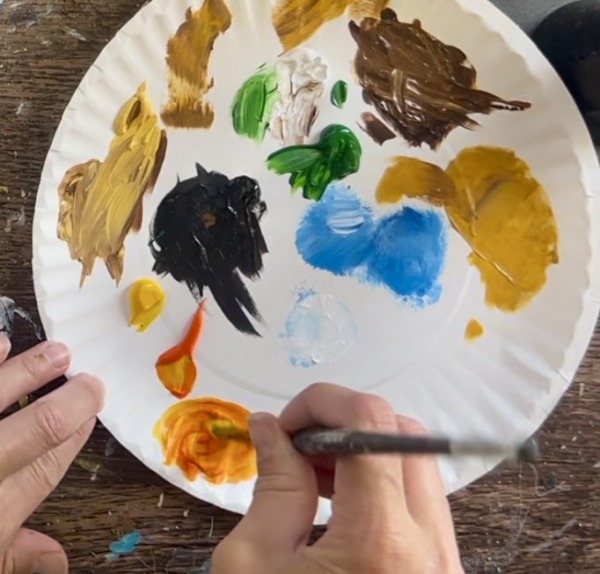
Materials Needed:
- 11 x 14 Canvas
- Acrylic Paints (I use Liquitex BASICS)
- Paint Brushes
- Optional Foundation Makeup Brush to create the soft background
- White chalk for drawing
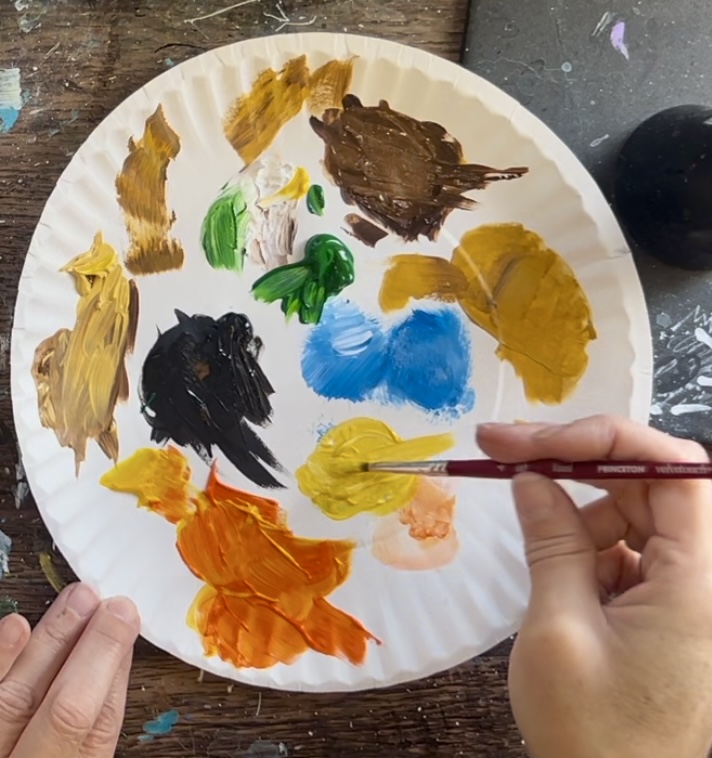
Colors:
- Naples Yellow
- Yellow Oxide
- Cadmium Yellow Medium Hue
- Cadmium Orange Hue
- Hooker’s Green Hue
- Cerulean Blue
- Mars Black
- Titanium White
- Burnt Sienna
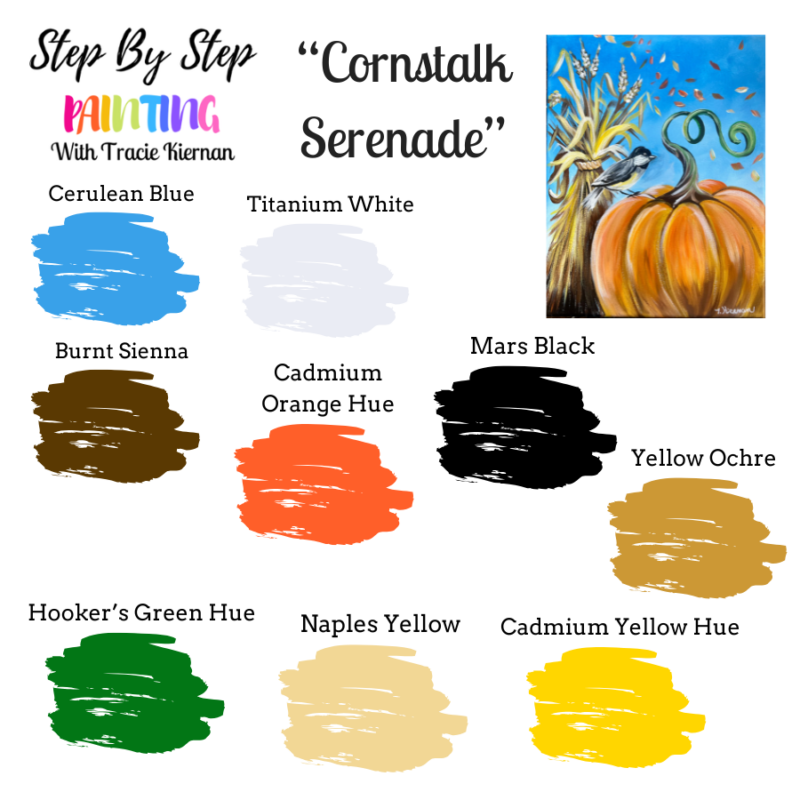
*Yellow Oxide is the color, not Yellow Ochre 🙂
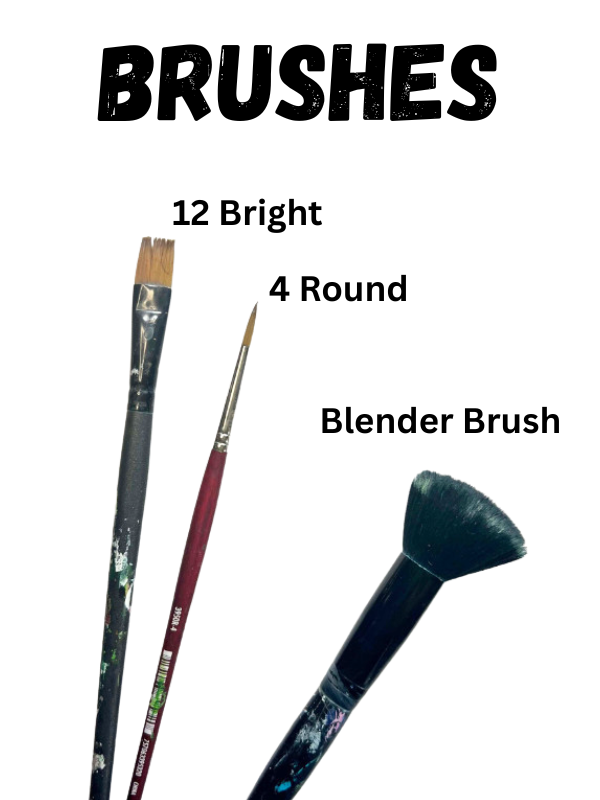
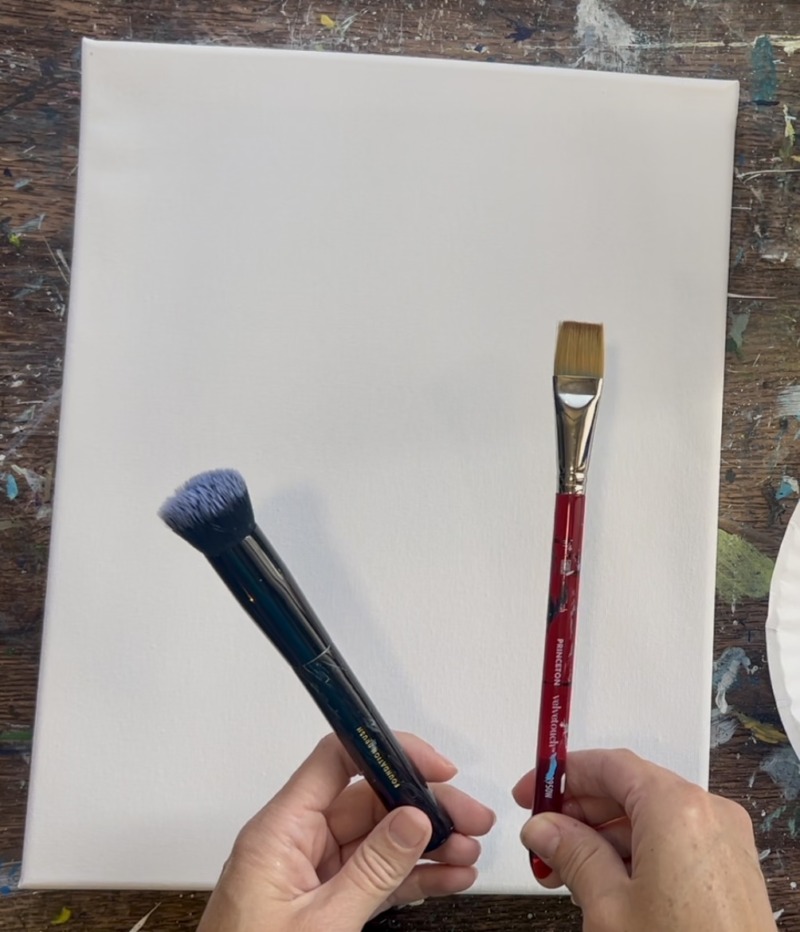
Brushes:
- *Foundation Brush (Or 3/4 flat)
- 4 Round
- 12 Bright
*This brush that I used is technically a “makeup brush” but it helps to get the soft strokes in the background. Alternatively, you can use a 3/4 flat brush.
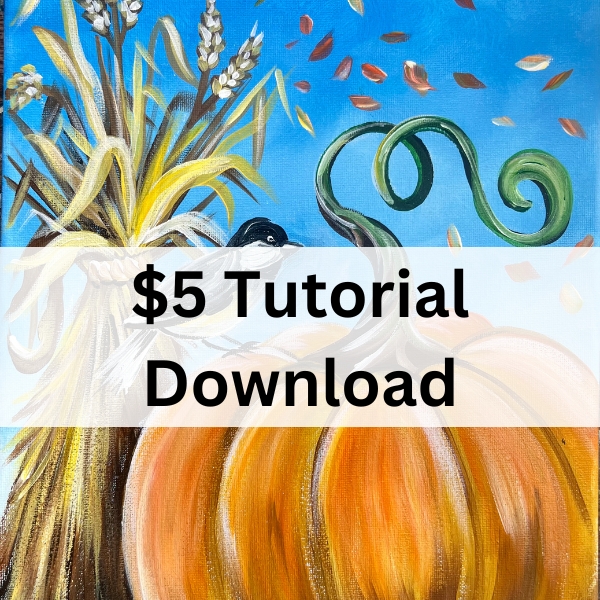
Download this tutorial!
This tutorial can be purchased in my PDF shop. Tutorial comes with PDF instructions (ad-free), video download and traceables sized to different canvas sizes. Find out more here!
Directions At A Glance:

Traceable:
This traceable is optional! Tracie will show you how to draw basic shapes and render them into a beautiful painting. However, if you love using the traceable, you are welcome to use this!
You can trace this on a blank white canvas and trace over the lines with a sharpie. It will show through the first layer of paint! You can also paint the first layer (the blue layer) and then trace your traceable over the blue background.

Video:
Step By Step Directions:
1. Paint background
For the background, you can use either a “blender brush” or a “3/4 flat brush”. The blender brush helps the paint to be smooth with no sharp brush strokes showing. The 3/4 flat can achieve a similar effect if you don’t have a blender brush.
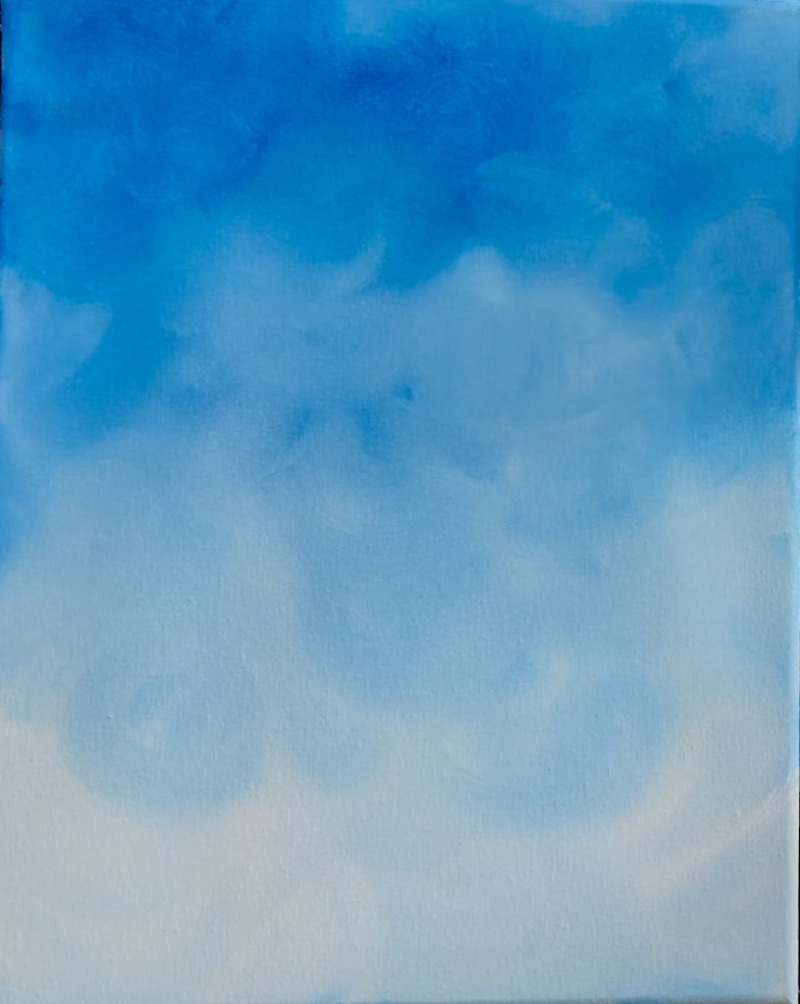
Load your palette into the two colors: cerulean blue and titanium white. Load your blender brush into “cerulean blue” and “titanium white” (about equal parts). The whole canvas background of this painting is all sky blue!
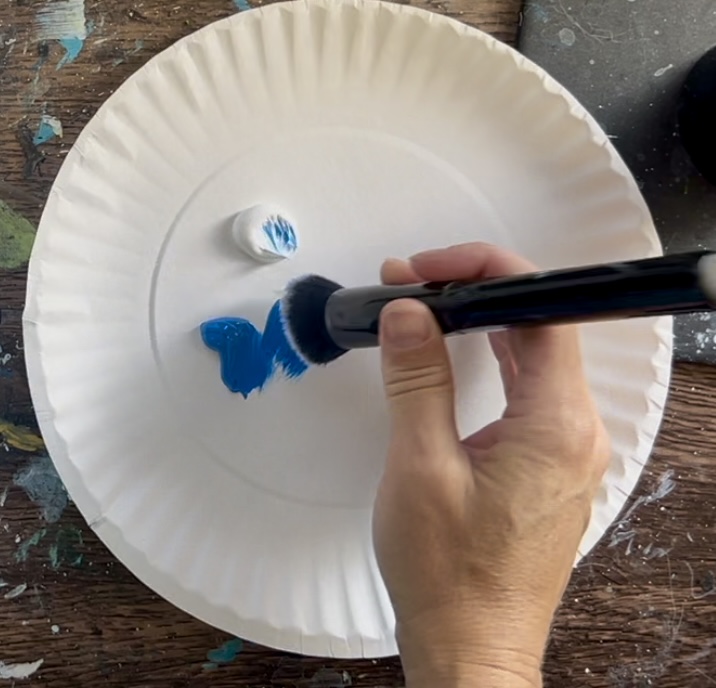
Start on the top of the canvas and paint in circular, soft paint strokes. Blend your blue and white right onto the canvas. Try to make the sky darker on the top and lighter towards the bottom of the canvas. To do this, load more white on your brush as you work your way to the bottom and blend with the blue.
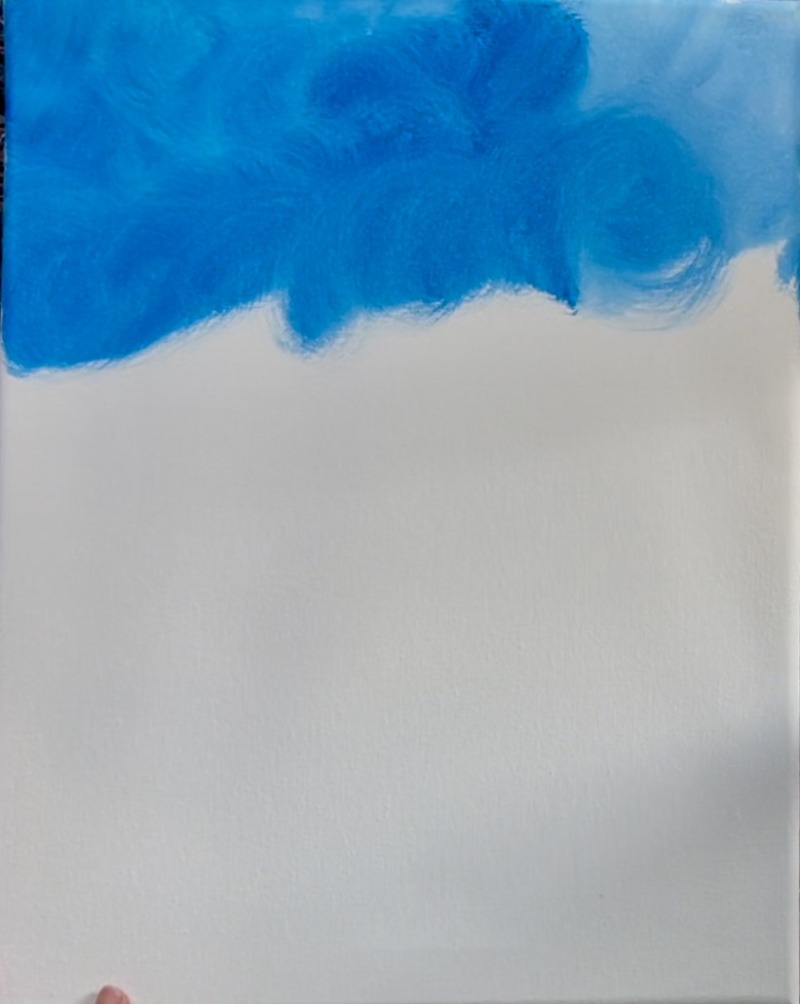
Blend using soft, circular brush strokes! Add more and more white as you work your way down and keep blending!
Tip: if you are using the 3/4 flat brush, you would do the same techniques. You could also make it so your background shows more of the sharp brush strokes.
Let this dry before going onto the next step.
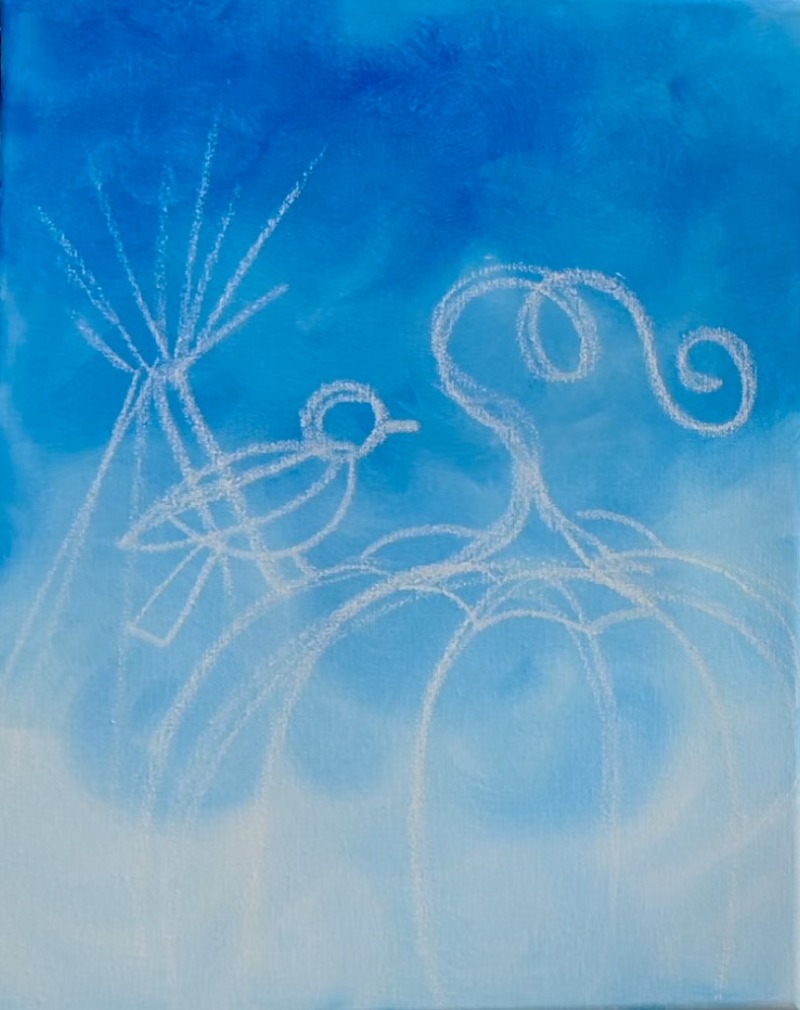
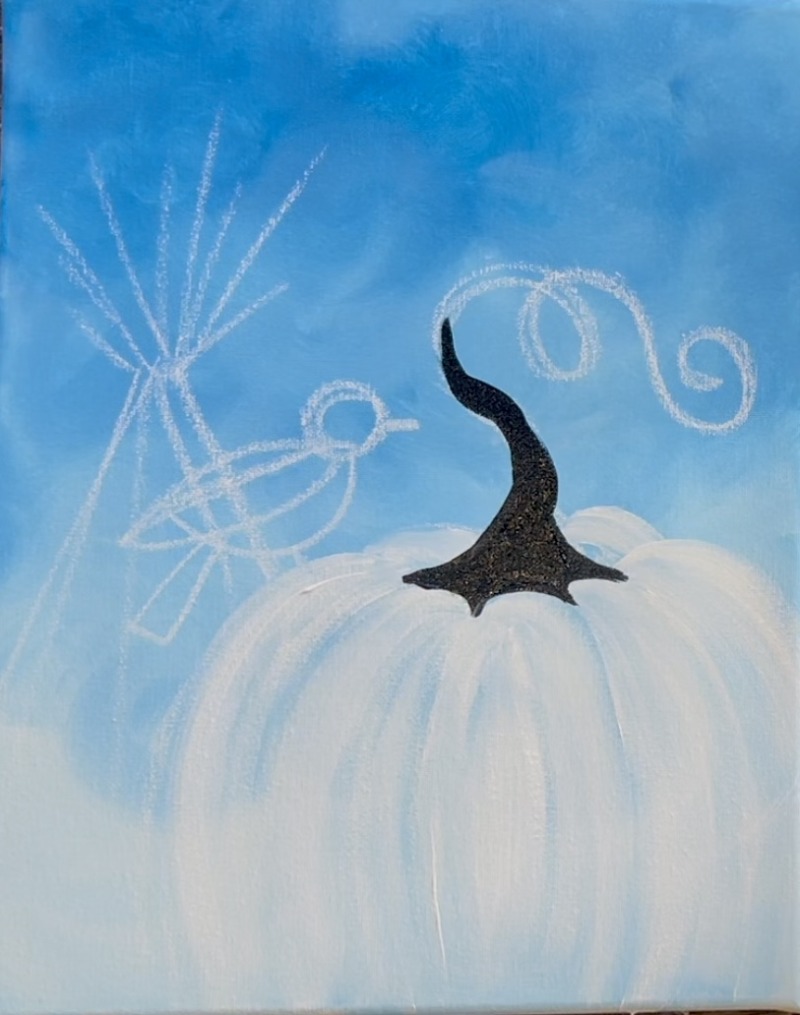
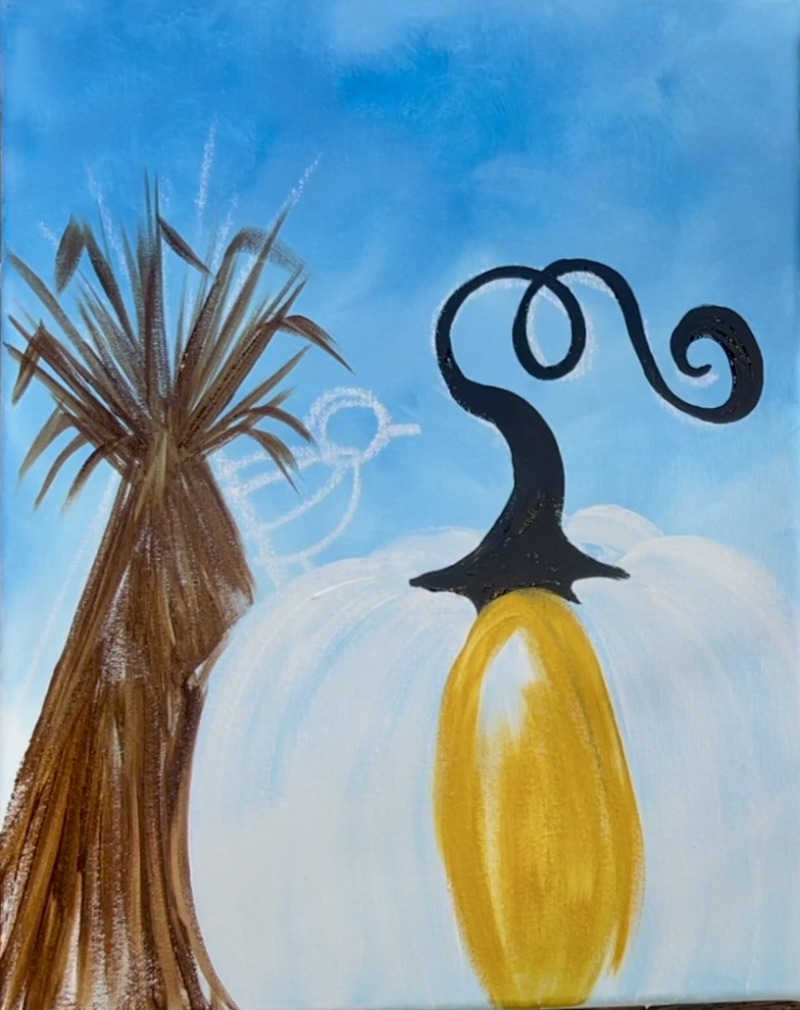
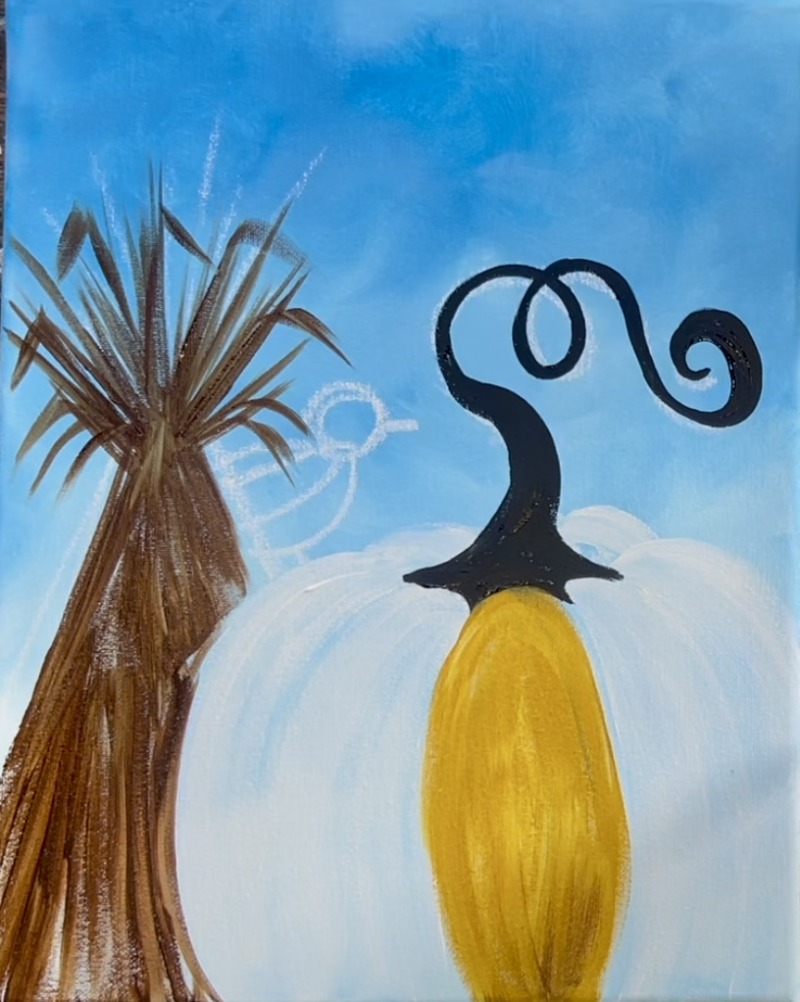
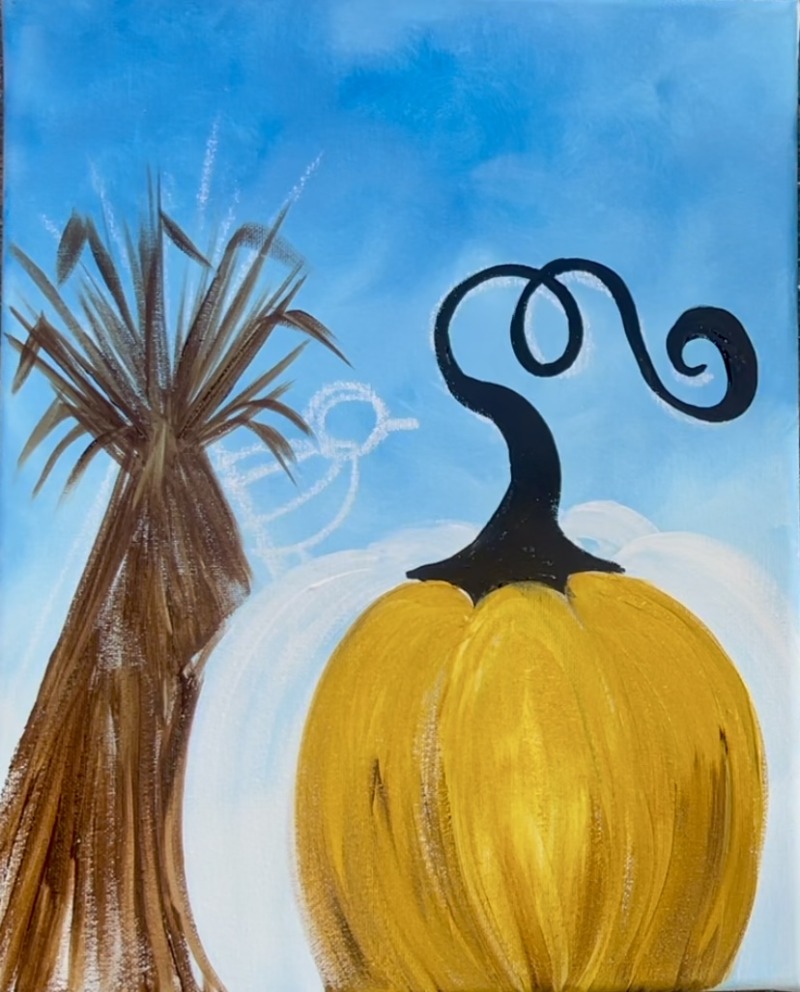
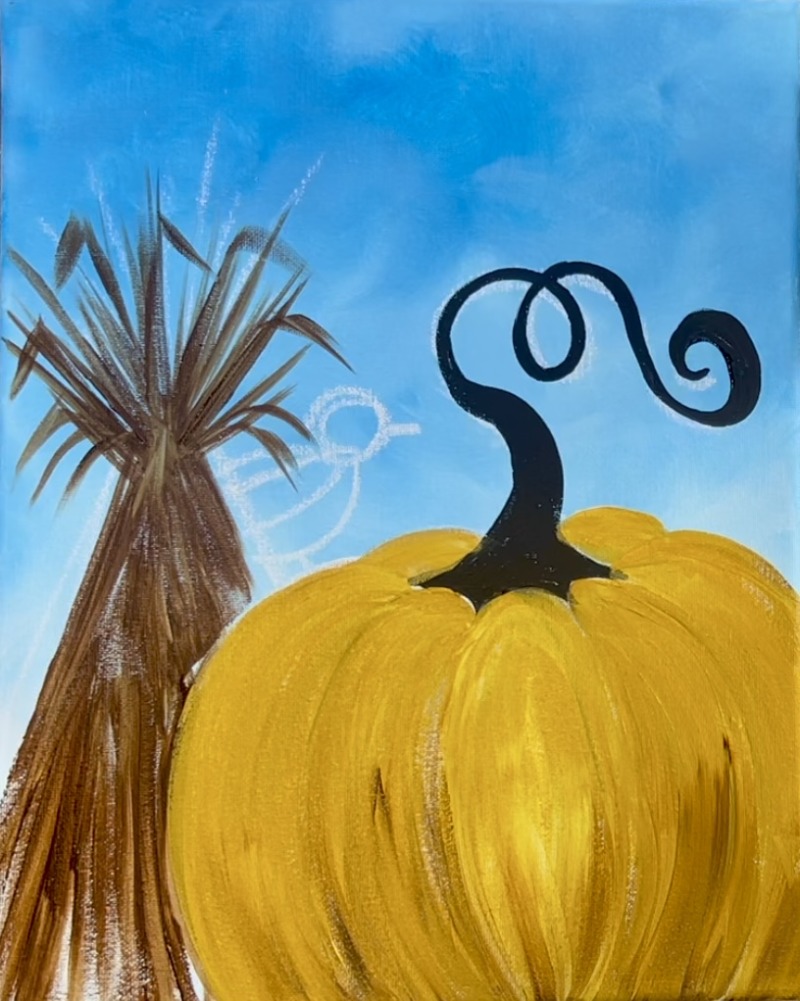
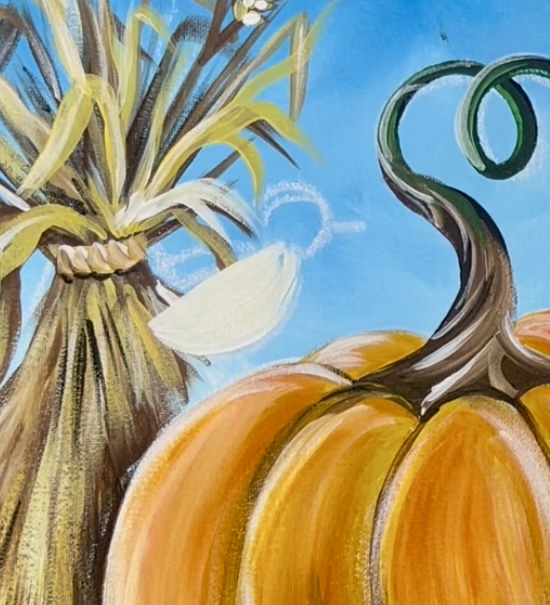
2. Draw Pumpkin, Cornstalk & Bird
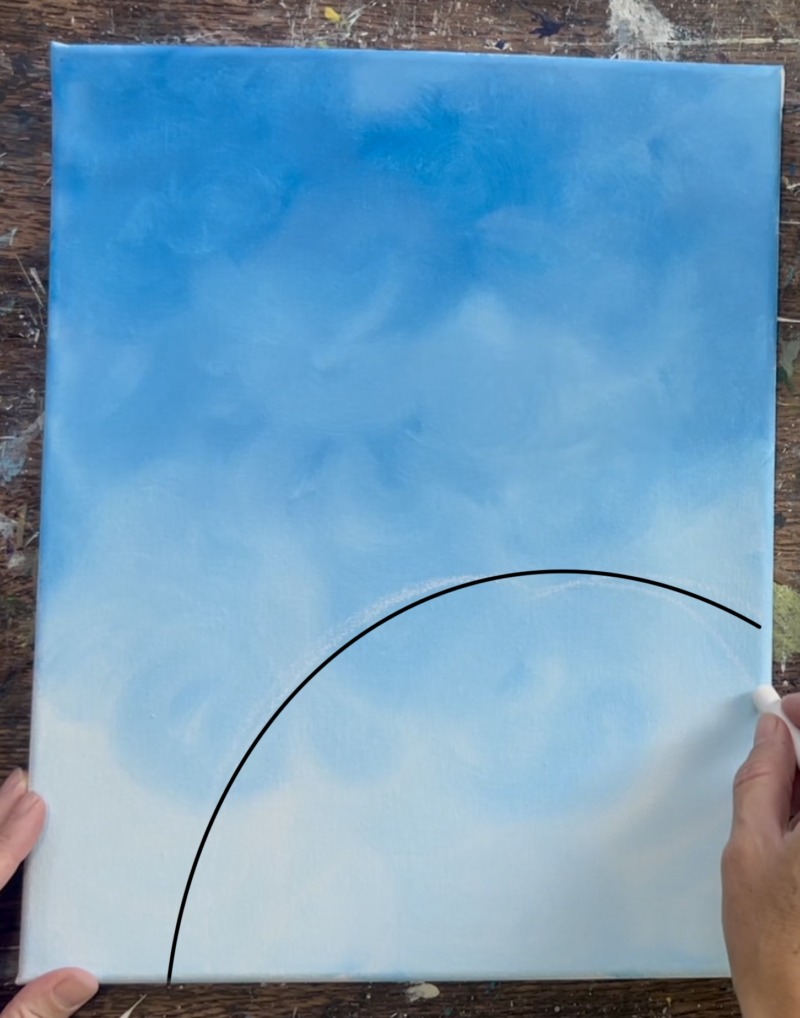
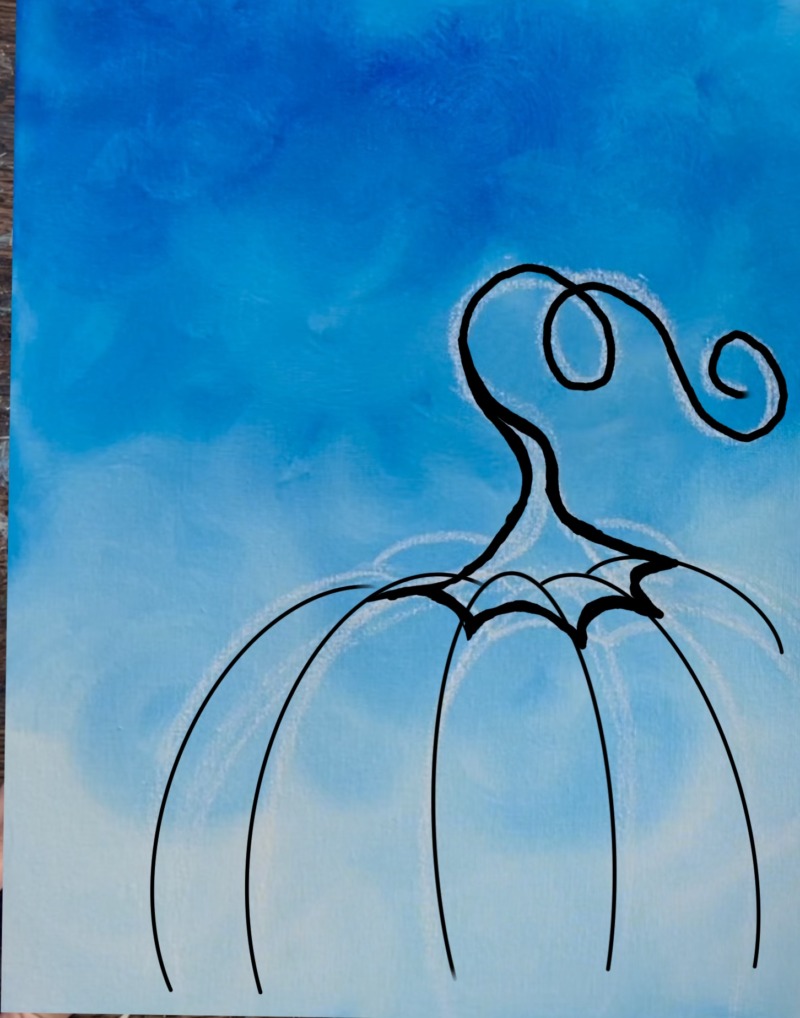
Use a piece of white chalk to do this drawing. Start with the large pumpkin in the lower right corner of the canvas. Draw a large circle/ arc line (we only see mostly the top of the pumpkin and not the bottom). The top of this arc extends as high as about the mid point of the canvas on the right.
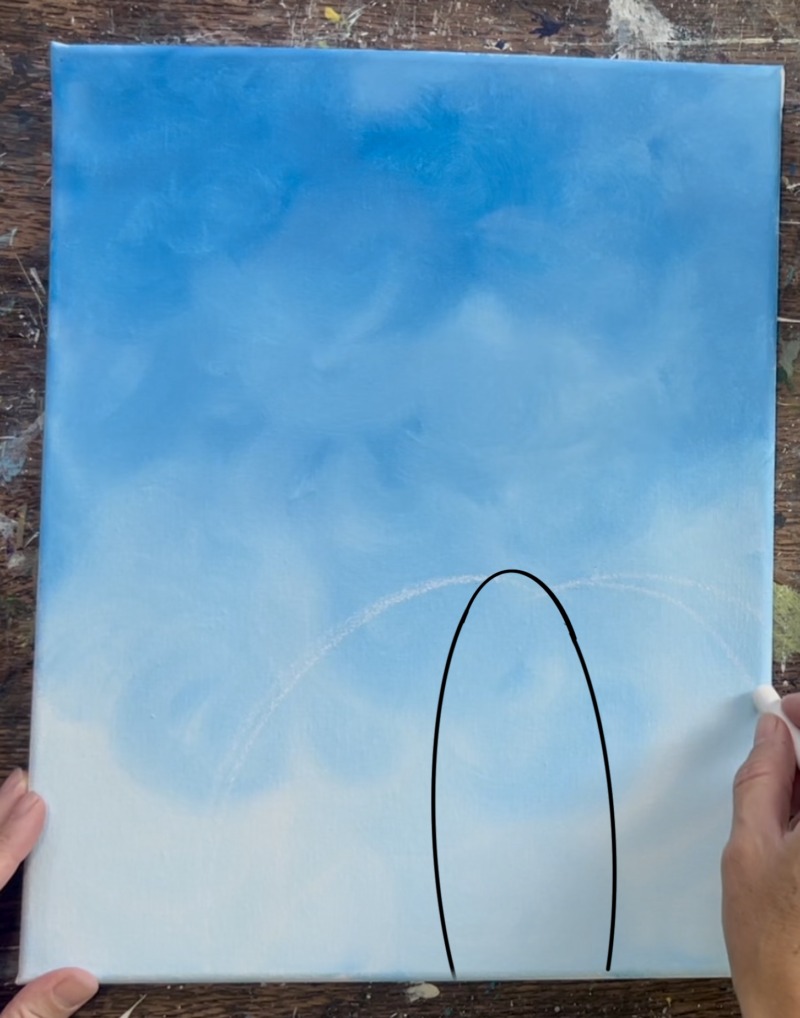
Next, use that arc as a guideline to draw the “pumpkin ribs”. Start in the middle of the pumpkin and draw an oval shape.
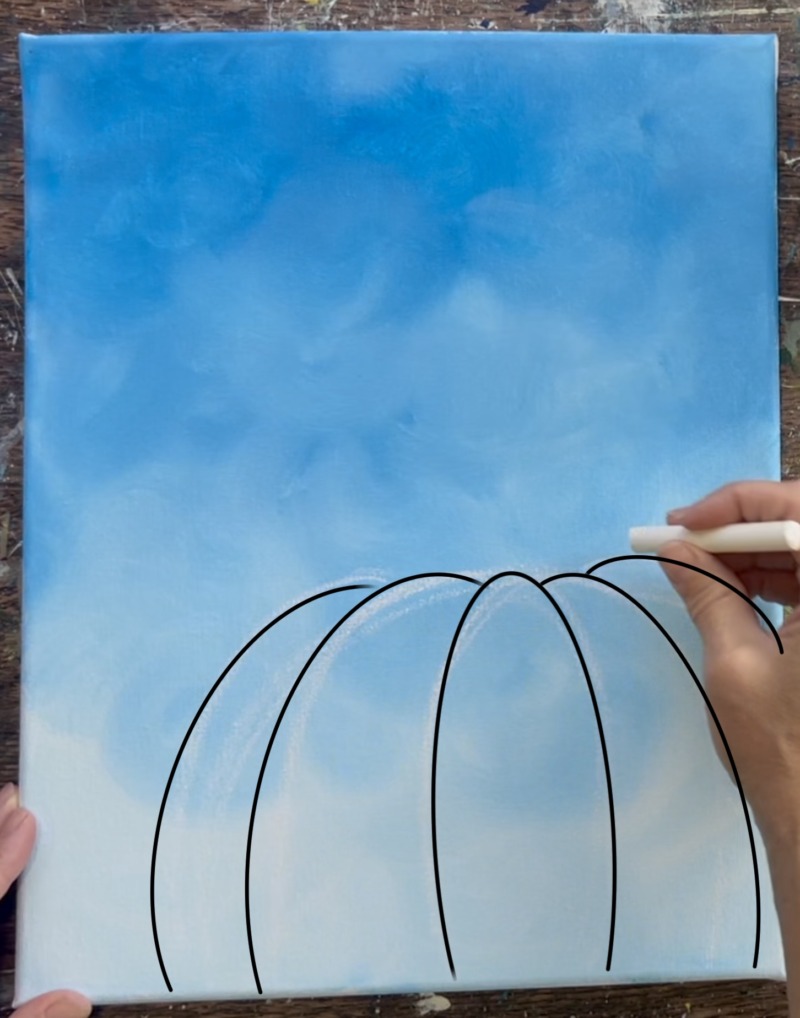
Then use that middle shape to create a set of two curved rib lines on each side. Start at the top and draw your curve downwards and off the bottom edge of the canvas.
After drawing your pumpkin ribs, you create your pumpkin shape! Now draw the stem. Start your stem so that it is below the very top of the pumpkin. Draw “scalloped lines” for the base of the stem.
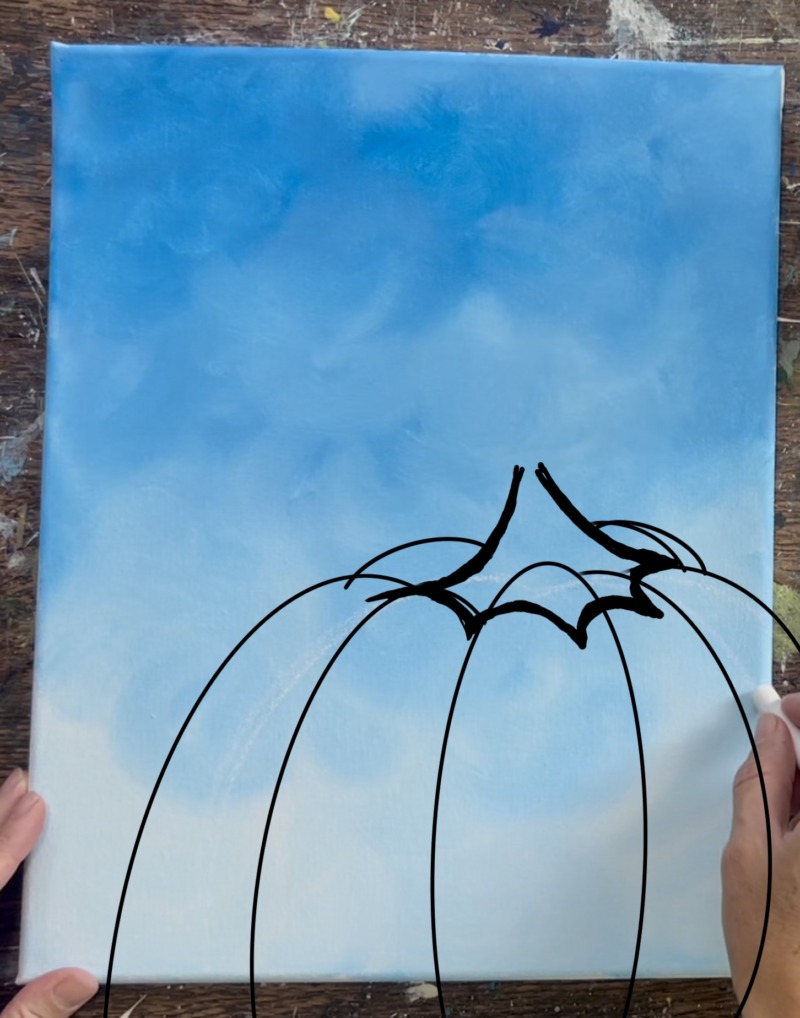
Then draw the stem so that it goes narrow and curves to the left and then makes a loop and twists on the right! You’re welcome to change the style of this if you want.
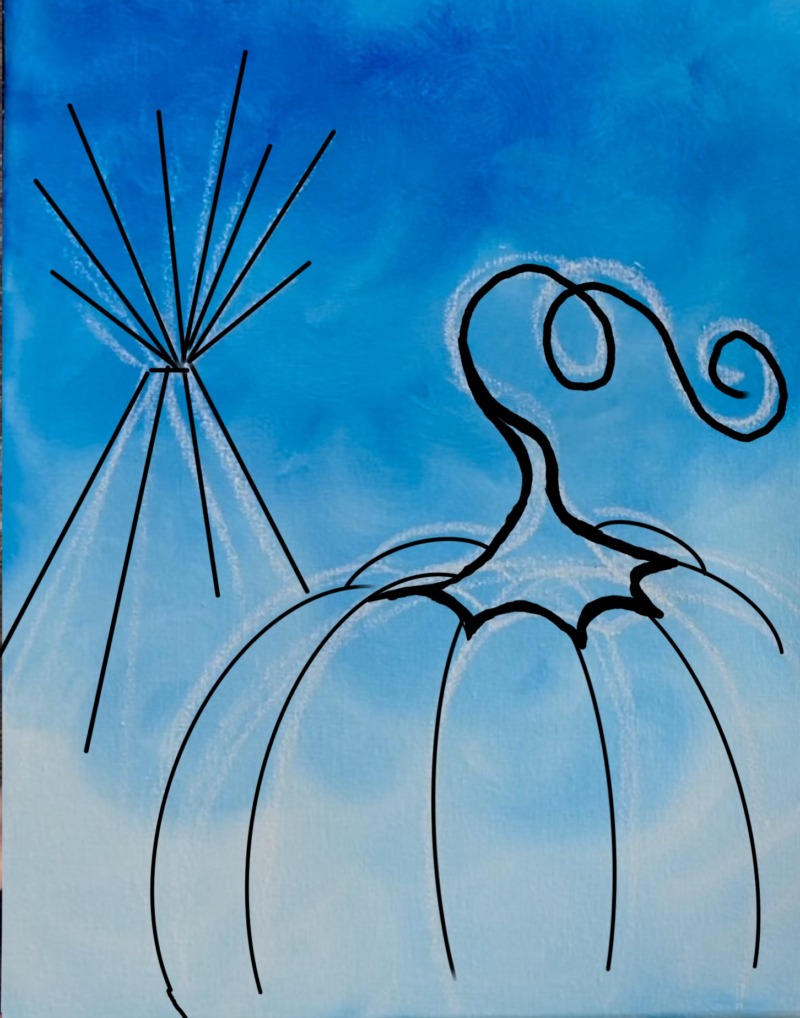
Next, draw the cornstalk “shock” to the left and behind the pumpkin. Draw diagonal lines on the bottom that form a triangular region. Then draw diagonal lines that extend out of it at the top and fan outwards.
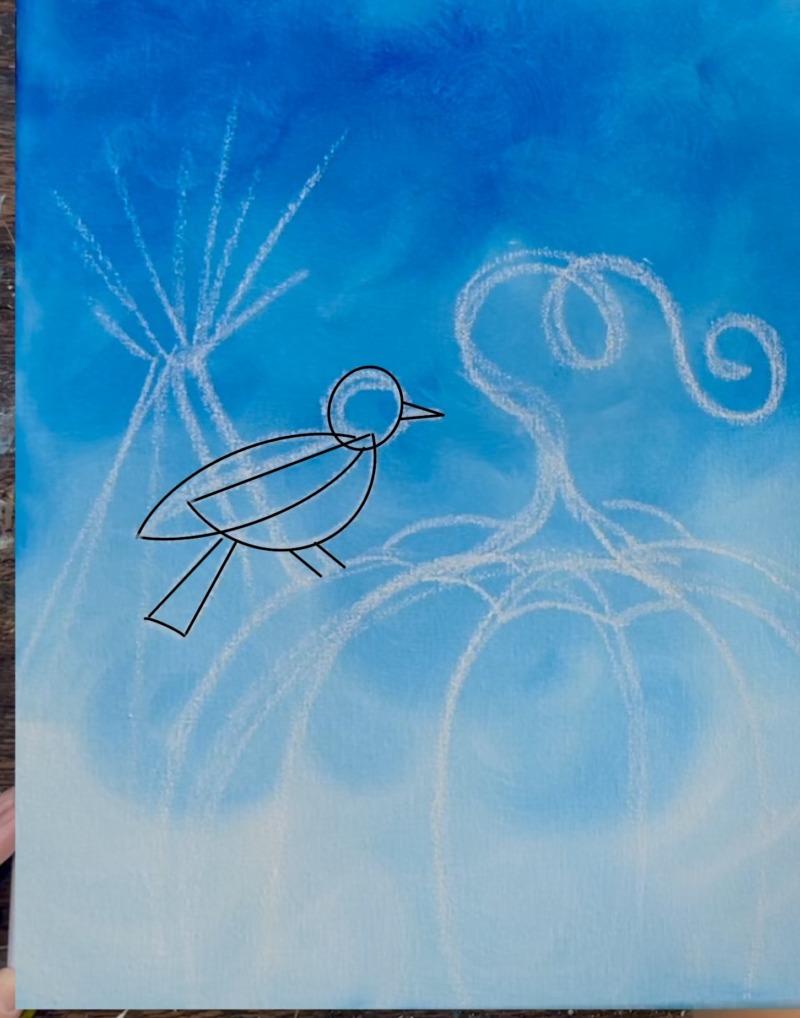
Next draw the bird! Start by drawing a semi-circles shape above where you want it to be perched on the left side of the pumpkin.
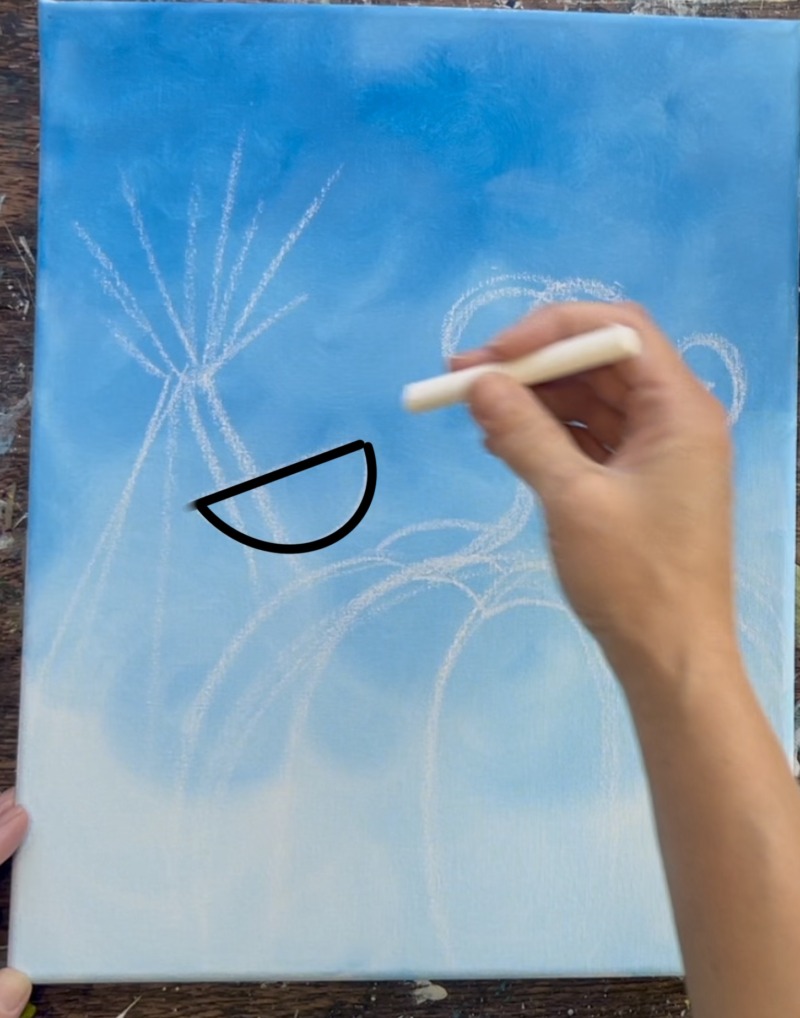
Then draw a narrow triangular shape for the tail. Draw an almond shape for the side wing (this overlaps the semi-circle at the top). Draw a circle for the head and a triangle for the beak. Draw two diagonal lines for the legs and extend them to the pumpkin.
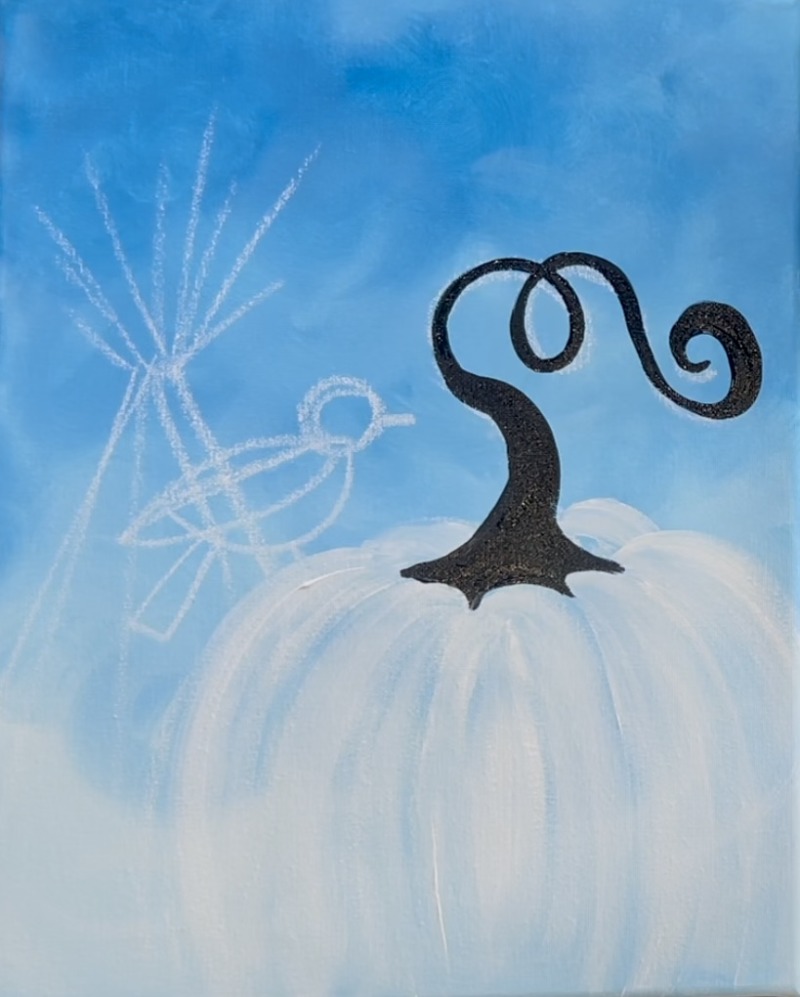
3. Paint Pumpkin White & Stem Black
Use the #12 bright brush and titanium white to paint the pumpkin white. I like to start in the middle of the pumpkin and paint each little section one at a time. When you paint each shape in, brush downwards. Start at the top of the pumpkin and drag your brush down in the direction of the curved part of the pumpkin.
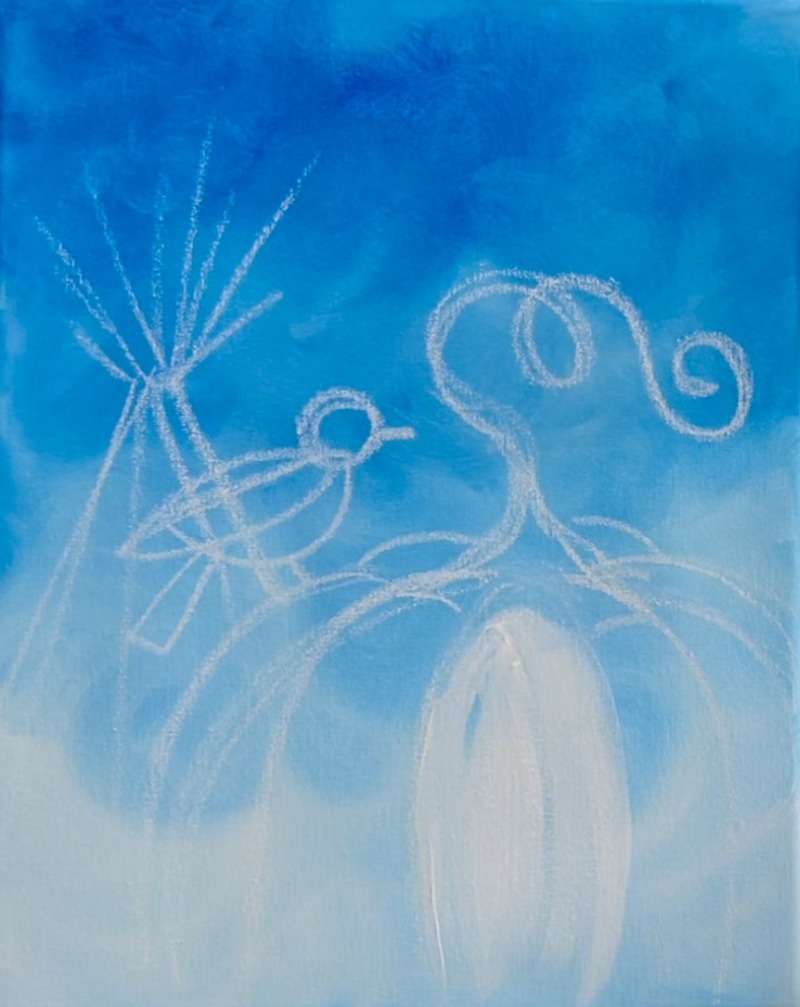
You do not need this to be a thick layer of white! In fact, leaving some of that background showing through our paint strokes is helpful for creating the texture of the pumpkin. Don’t load too much paint on your brush!
Also, as you paint each section, try to leave a little background showing through that creates lines for each of the pumpkin sections. This will help to create form for the pumpkin.
Don’t forget to paint the two small bumps that are popping up in the back of the pumpkin (behind the stem).
Next, use a #4 round brush and “mars black” to paint the stem of the pumpkin. Paint the bottom of the stem that looks “scalloped”. The stem twists and curves to the left and then turns into two spirals on the right. Feel free to change this design if you want!
For now, the stem is black. We will add highlights and color to it in a later step.
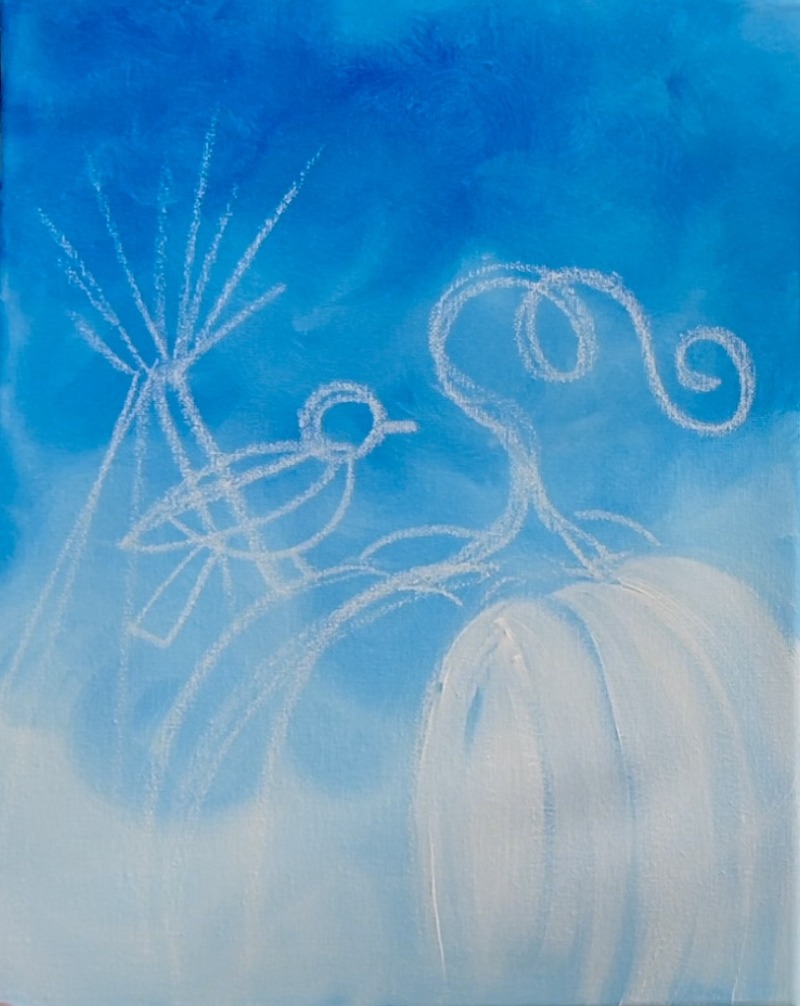
4. Paint Cornstalk Brown
Use the color “burnt Sienna” to paint the cornstalk. Use the #12 bright brush to paint the triangular bottom. You want to do this by painting individual brush strokes that go in angles in the direction of the shape of the cornstalk shape on the bottom. Then when you get to the part where it gathers at the top, paint lines that are fraying outwards in a fanned direction. To create these thin lines, use the edge of your #12 bright brush on its side.
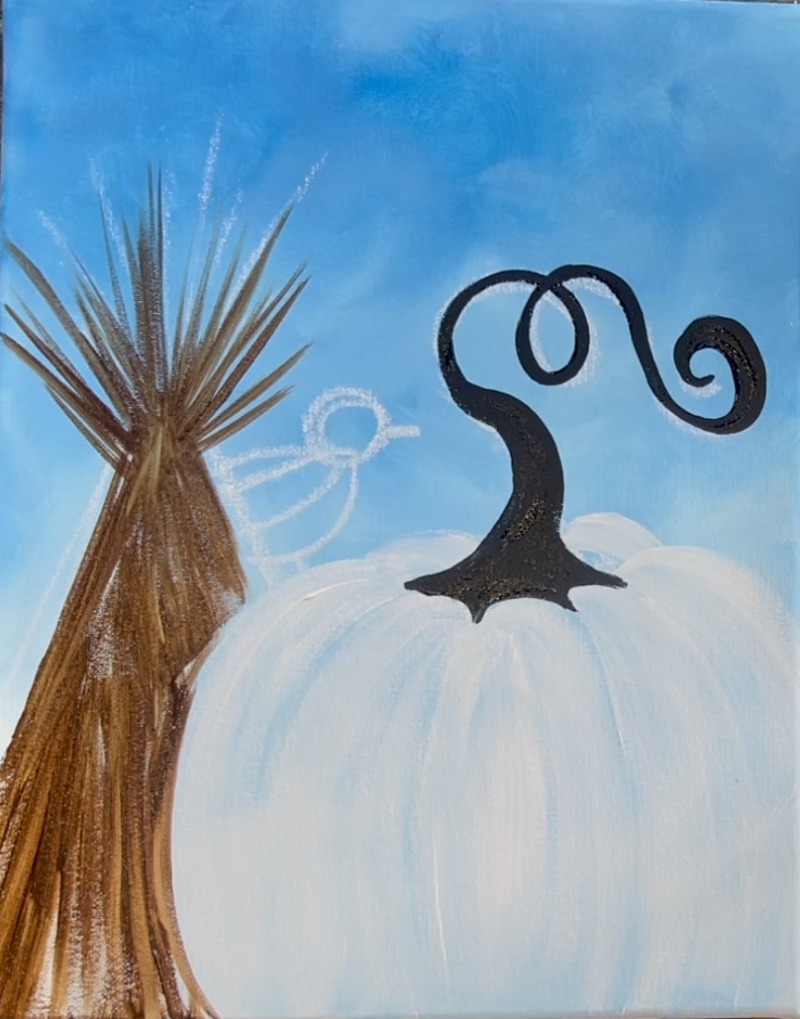
Next, paint a few pieces that bend downwards at an angle. Use the same color and brush to paint the little angled pieces.
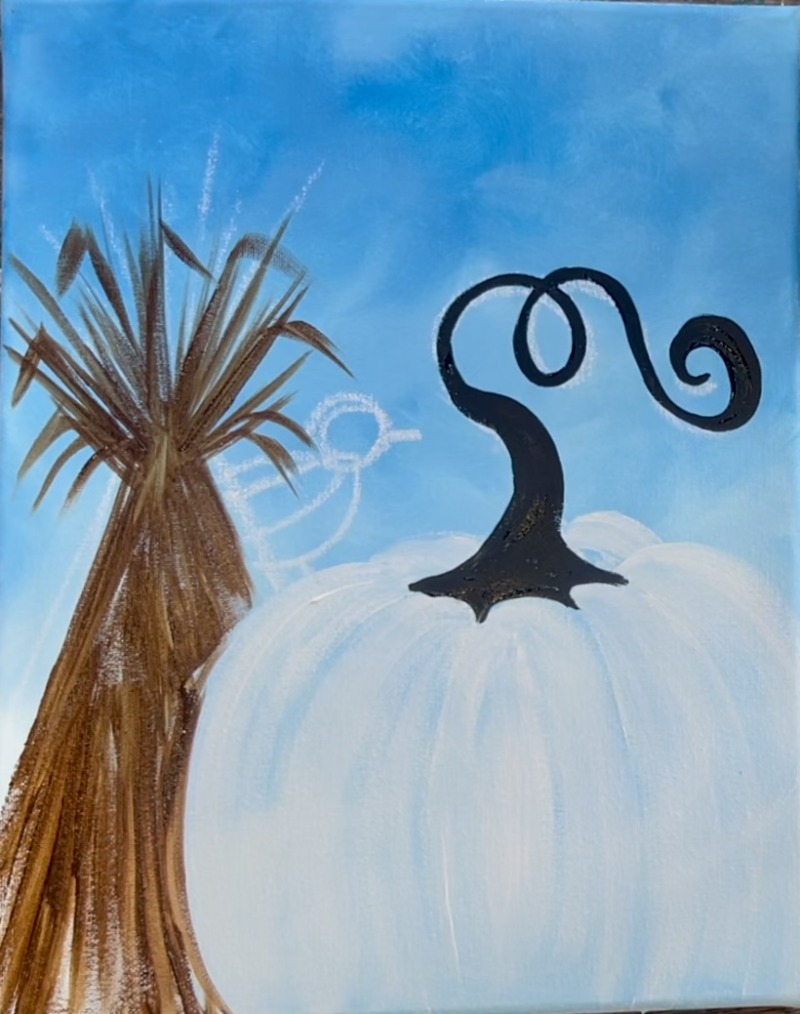
We will add more layers and highlighting to this cornstalk later! For now, this is the base shape of it!
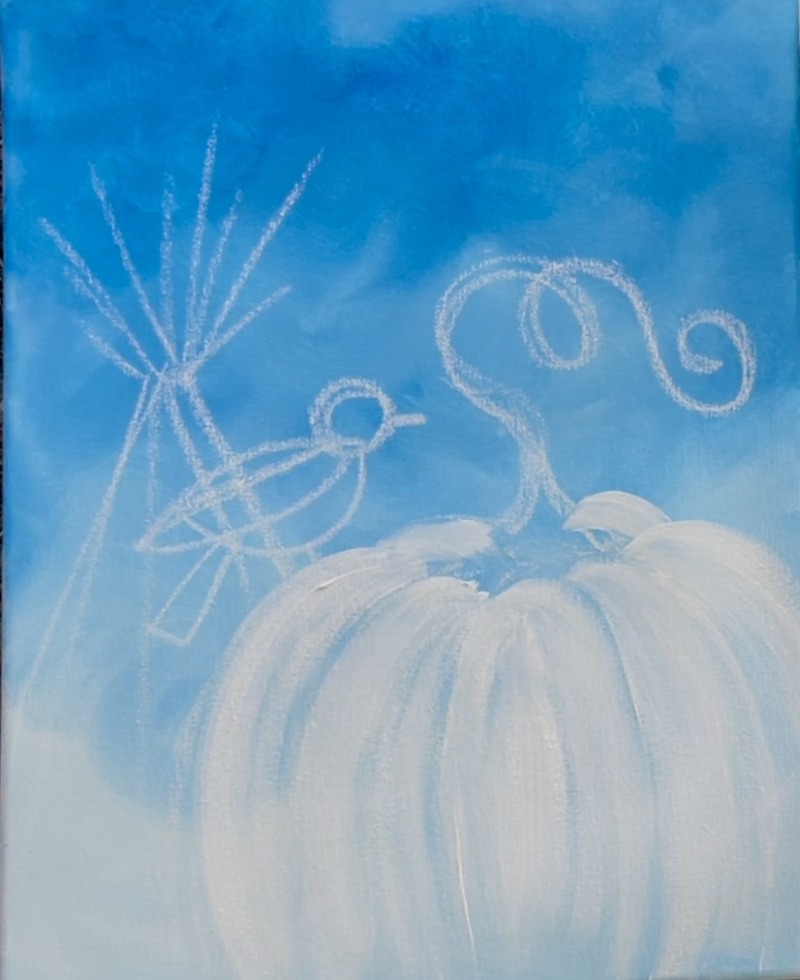
5. Next Layer Of Pumpkin
Load onto your palette the color “yellow oxide”. This is a deep yellow and makes for a great pumpkin color! Use the #12 bright brush. Start in the middle of the pumpkin. Outline the oval shape and then fill it in with paint strokes that curve and go downwards in the direction of the shape.
After filling in this first oval, load your brush into “burnt Sienna” without rinsing the brush. Then paint some of this brown from the bottom of the pumpkin and stroke upwards. Let it blend gently with the yellow oxide color. Adding brown on the bottom of the pumpkin helps to create shadow.
Repeat this step for each of the “pumpkin ridges” one section at a time. You don’t need to rinse the brush between loading it into yellow oxide and brown. You can wipe the brush with changing the colors.
Paint each section of the pumpkin and paint the two bumps in the back behind the stem. Those don’t need brown on the bottom because we only see the top part of the pumpkin there.
Next, use a #4 round brush and “burnt Sienna”. Use the round brush and the brown to outline the lines between each of the pumpkin sections. This helps to create shadow in those “crease” areas.
Next highlight the stem using the #4 round brush. Start by painting the bottom half of the stem (everything but the swirly part) with “bunt Sienna”. This will show up dark initially because of the black background of the stem. Then, without rinsing the brush, add “titanium white” to your brush. Paint a curve as pictured below. This curve starts the twist of the pumpkin stem. It will show up light brown because the white will blend with the dark brown.
Then paint another set of these light brown lines. This time make three that branch out and down to the bottom base of the stem.
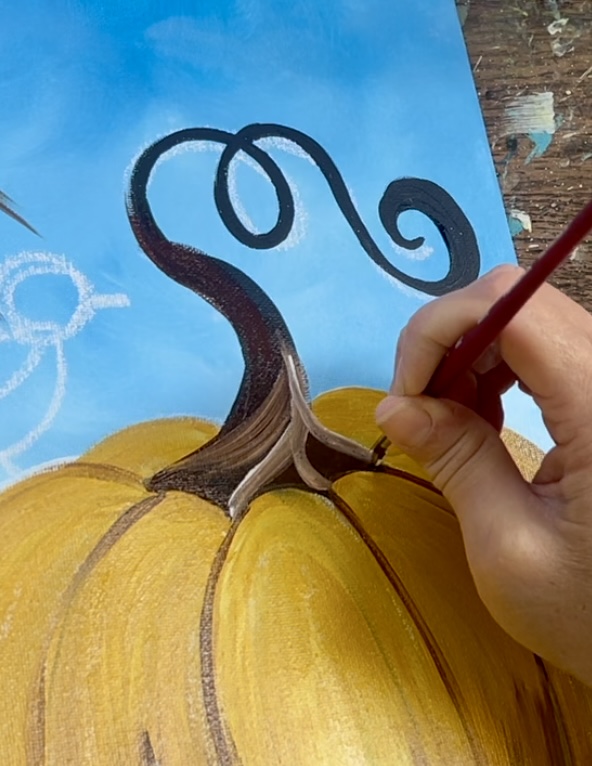
Then paint more curved lines going up the stem. Leave dark brown between each little twist that you paint so as to keep the shadow of the color still visible.
Then paint the rest of the curly part of the stem with “hooker’s green hue”. Rinse the brush and use the green to follow the curved line that you painted black earlier. Add little bits of “titanium white” to your brush that blends with the green for “color variation”.
6. Next Layer Of Cornstalk
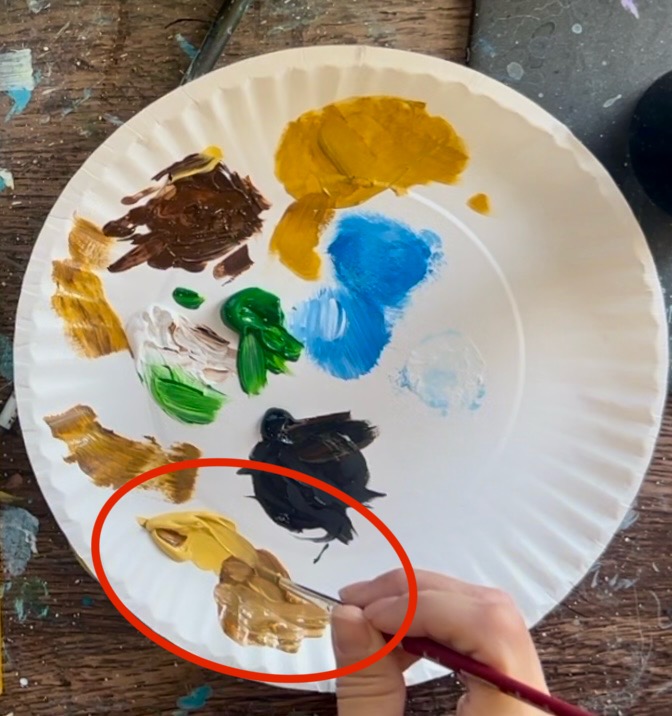
Mix on your palette equal parts “naples yellow” and “burnt Sienna”. This will make a dark golden brown color. Use the #4 round brush and this color to paint the next details on the cornstalk.
Paint pieces of corn leaves and stems sticking up at the top. Paint a few that are bending downwards at a sharp angle.

Then paint corn tassels. For this, I recommend painting the first layer on those darker. So mix a little more brown into your “golden color” you were just using. Paint little stems. Then on the ends of the stems, paint little marks to form the pollen pieces on the ends of the tassels.
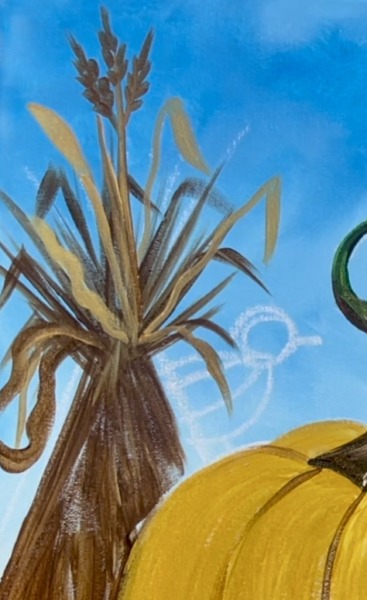
You can paint multiple clusters of these tassels.
Then use “naples yellow” to paint a little band that gathers the cornstalk together. Use the naples yellow to also paint some steaks of lighter color on the bundled cornstalk on the bottom. Leave the bottom of the cornstalk (bottom of the canvas) dark and the area just to the left of the pumpkin also dark. In fact, go back over the bottom and the left area with a little bit of black mixed with brown to add more textured line strokes of paint for more shadowing.
7. Next Layer Of Pumpkin
We could leave the pumpkin as is or take this further and add more layers of color! This time, we are going to add some pure “orange” to the pumpkin to brighten it up more.
On your palette, mix equal parts “cadmium orange hue” and “cadmium yellow medium hue”.
Then take your #12 bright brush and paint this orange layer over the pumpkin. Brush the orange on the top of the pumpkin and downwards towards the middle but don’t go all the way down with it. This orange is a bit translucent so when it’s applied over the layer that is already there, it shouldn’t cover it completely.
Do this to each of the sections of the pumpkin.
Then, mix equal parts “titanium white” with the same orange you were just using. Use this light colored orange to gently brush the far left of the pumpkin. This will highlight the left edge. Then add a little bit of white towards the top of each of the pumpkin sections and brush down.
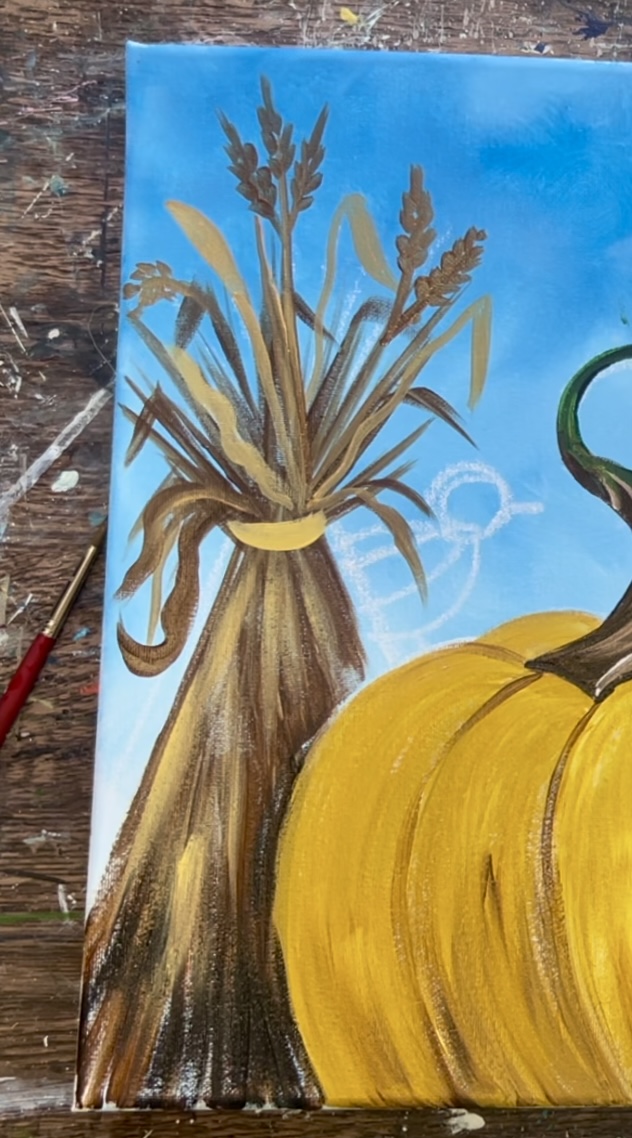
8. Next Layer Of “Corn Shock”
Earlier we added a medium gold color to our “corn shock”. We are going to make a lighter golden color for our next layer! When you layer paint from dark to light, you can create dimension in your painting.
On your palette mix equal parts “cadmium yellow medium hue”, “titanium white” and “naples yellow”.
Then, use this color to paint more corn leaves/ stalks over your previous layers. Add a bit of this golden yellow colors on the bottom with diagonal paint strokes creating more layers of texture. Remember to keep the bottom and the left of the pumpkin dark and shadowy.
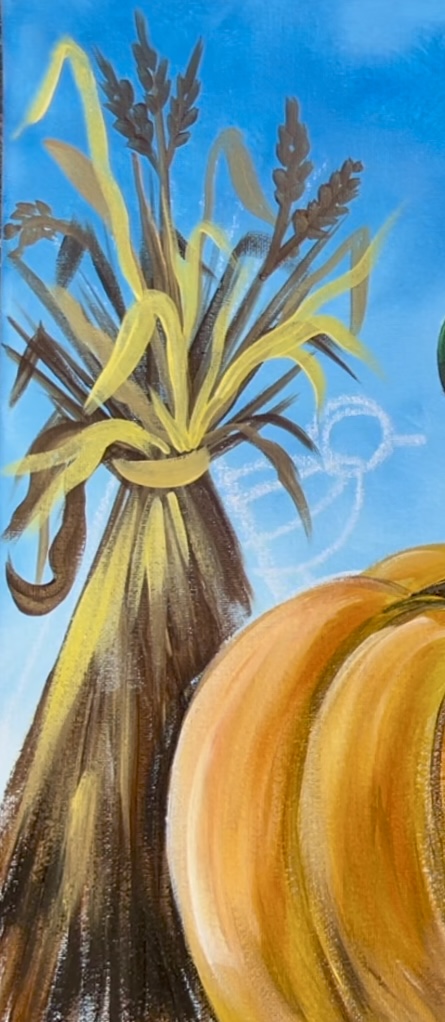
Use this golden color to highlight the corn tassels. Paint little marks over the darker marks without covering all of the dark brown layer.

Next, flair some of the corn stalks outwards under the part that is tied and gathered. Use the color “burnt umber” and the #4 round brush. Paint textured diagonal strokes that go downwards and outwards.
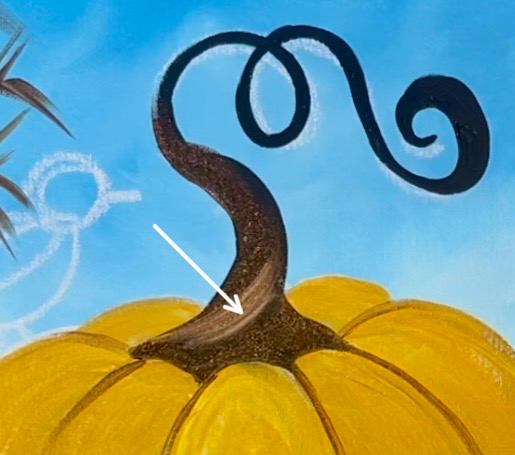
9. Highlight Pumpkin Stem
Use “titanium white” and the #4 round brush to very lightly outline the edges of the light brown curves you painted earlier on the stem. Paint a little bit of white on some of the edges of the green area as well. Only a little white is needed to highlight this!
10. Paint Bird White
Use the #4 round brush and titanium white. Paint the bird shape white starting with the half circle shape. This should overlap the corn shock.
Paint the head, beak, side wing and talk white as well.
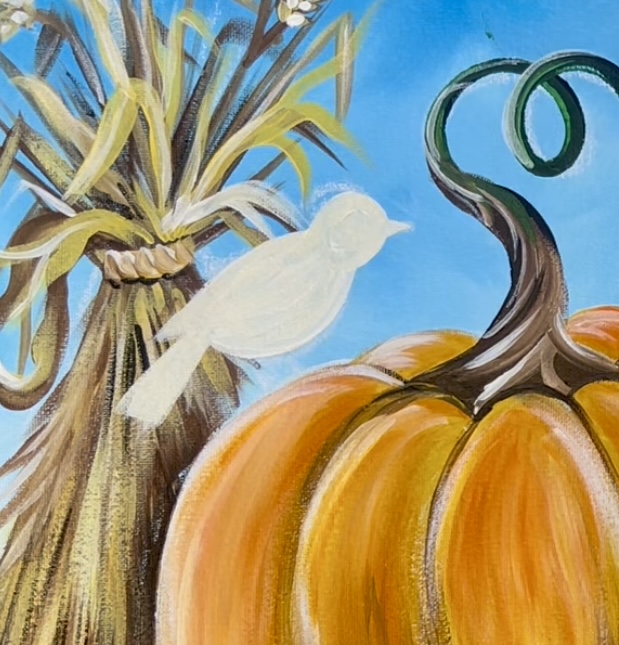
Use “mars black” and the #4 round brush to paint the legs and claws of the bird. You can keep this very simple and just draw little diagonal lines for the claws.
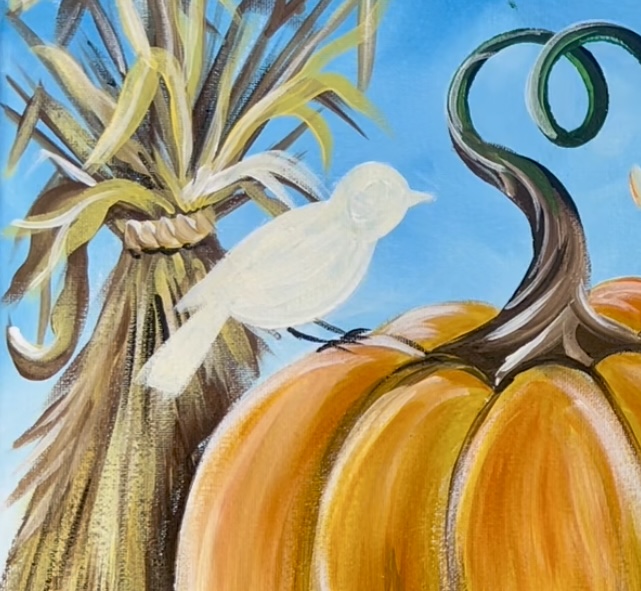
Wait for this to dry before painting the rest of the bird.
11. Paint Flying Leaves
Use the #12 bright brush to paint easy abstract falling leaves. These are done simply by painting one paint stroke of either orange, yellow, beige, white and a combination of all the colors! Load your brush into the color and paint a single thick paint stroke to create falling leaves everywhere.
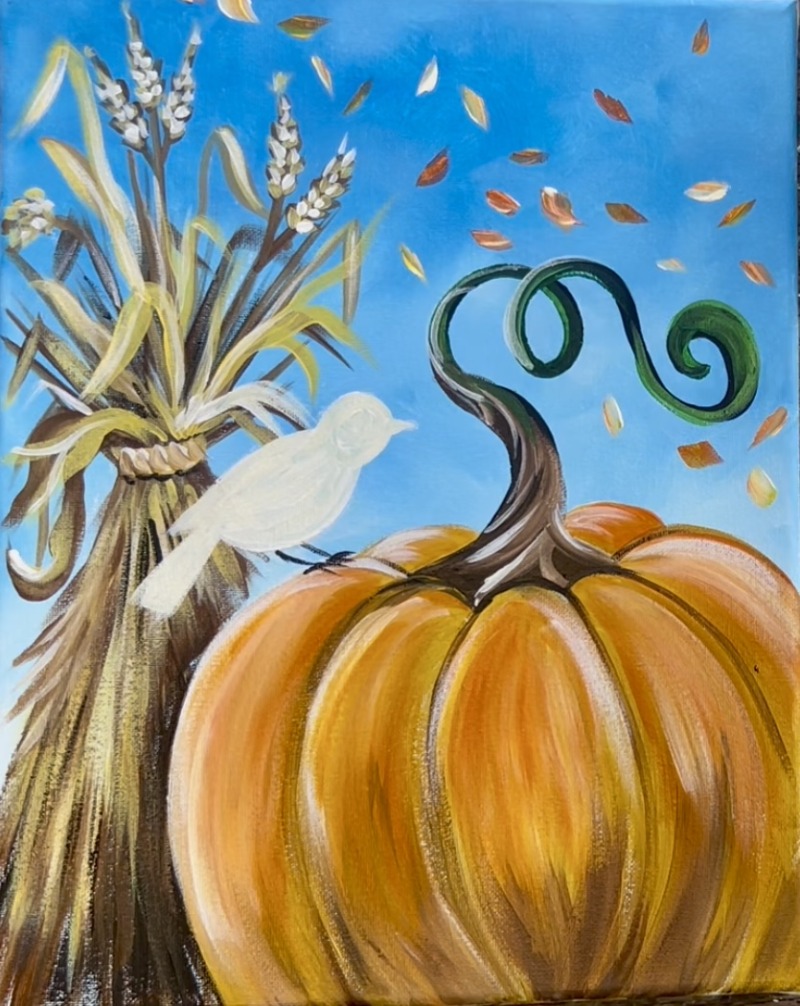
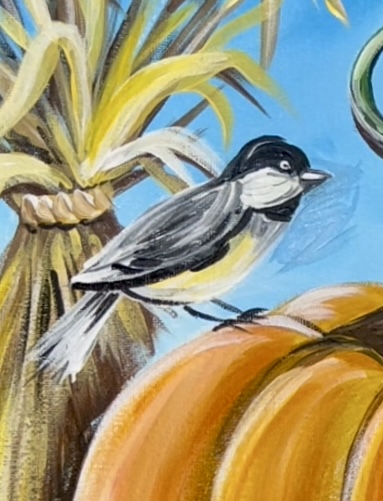
12. Paint Chickadee
Use a #4 round brush and “mars black”. Paint the top of the head a “cap shape”. Then outline the side wing. Lightly paint the tail feathers.
Paint black on the bottom of the head (a little crescent shape).
Then mix a gray on your palette by mixing equal parts “titanium white” and “mars black”. Use this gray and the #4 round brush to paint the side wing. Do this with “light” and “curved” paint brush strokes. Leave a lot of that initial white layer still showing through. Then paint a little bit of the gray on the front chest area under the head. Paint the beak gray as well.
Next, paint the belly area of the bird with a light coat of “naples yellow”. Use the #4 round brush to lightly brush this and blend it a little with the gray in the upper part of the chest. Leave a lot of the white layer still showing through.
Next, paint a little white dot for the eye. Use “titanium white” to paint the cheek of the bird and add just a tiny bit of gray into it. This layer is already white but painting another layer with little curved paint marks that blend a little bit of gray will give the cheek some more texture.
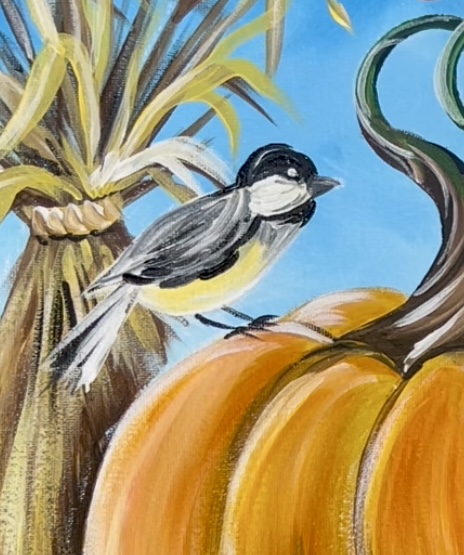
Use “mars black” to paint black on the bottom of the wing and also a few black curved marks over the side wing. Paint a tiny black dot in the middle of the white eye. Then paint a line down the middle of the triangular beak.
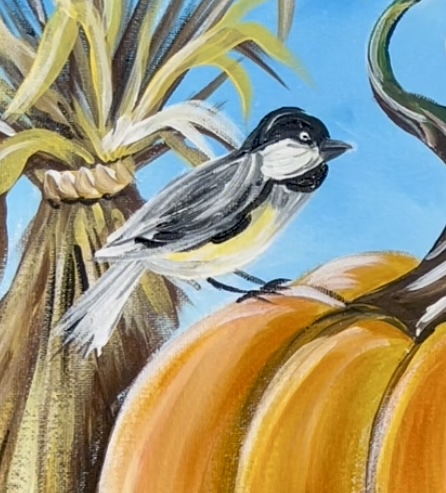
A few final touches for this painting: paint a white mark/ highlight on the very top of the bird’s beak.
Finished!
Sign your name and show it off!
In the colors list, do you mean yellow ochre or yellow oxide? Or both? Yellow oxide is not listed and is used in the painting, but I can’t seem to find where the yellow ochre is used. Just want to make sure I buy the correct paints. Thanks!!
I’m so sorry I didn’t see this comment right away! It was Yellow Oxide, not Yellow Ochre. Whoops! I’ll go ahead and fix that 🙂