

Would you like to save this?
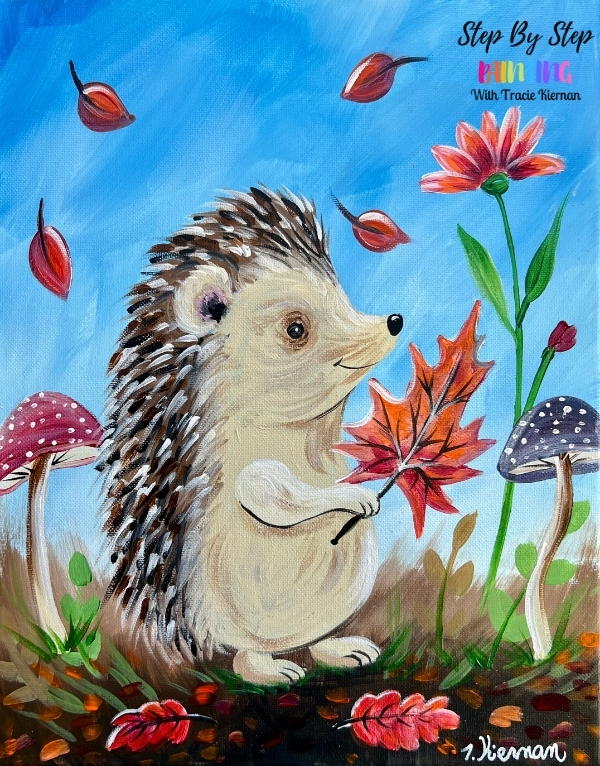
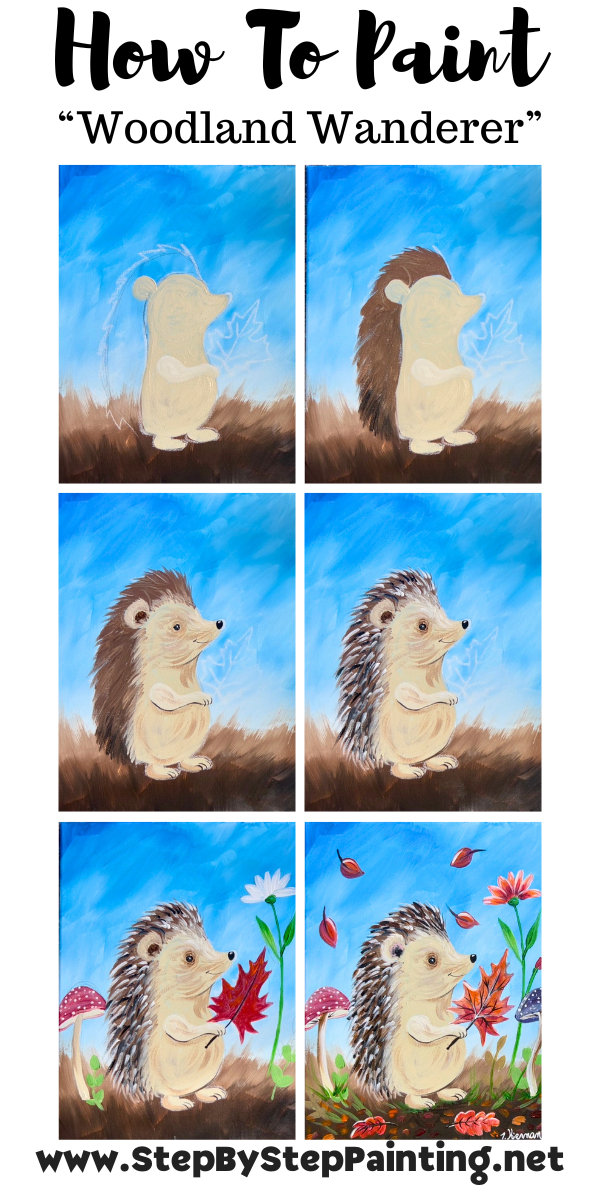
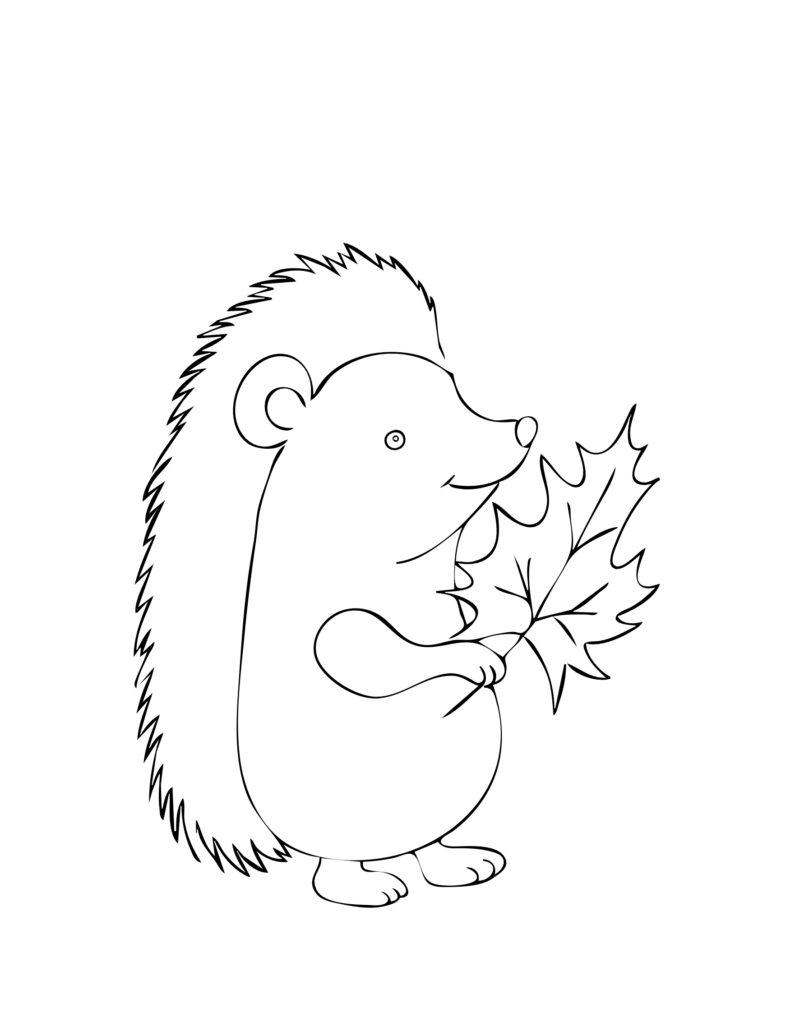
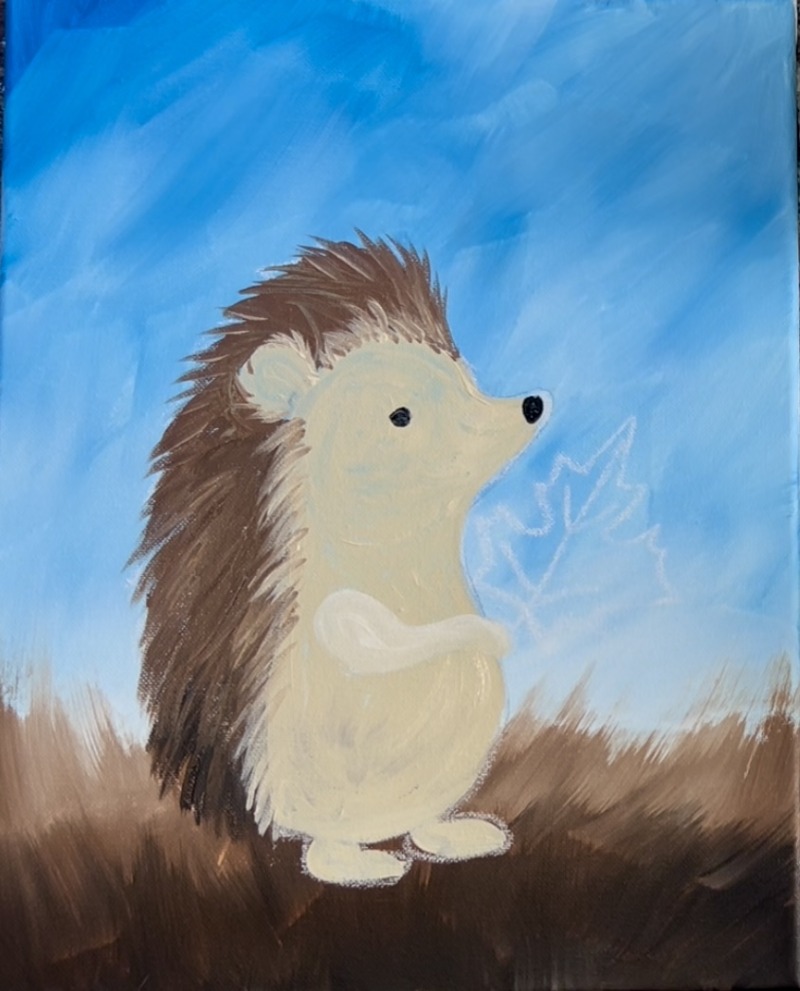
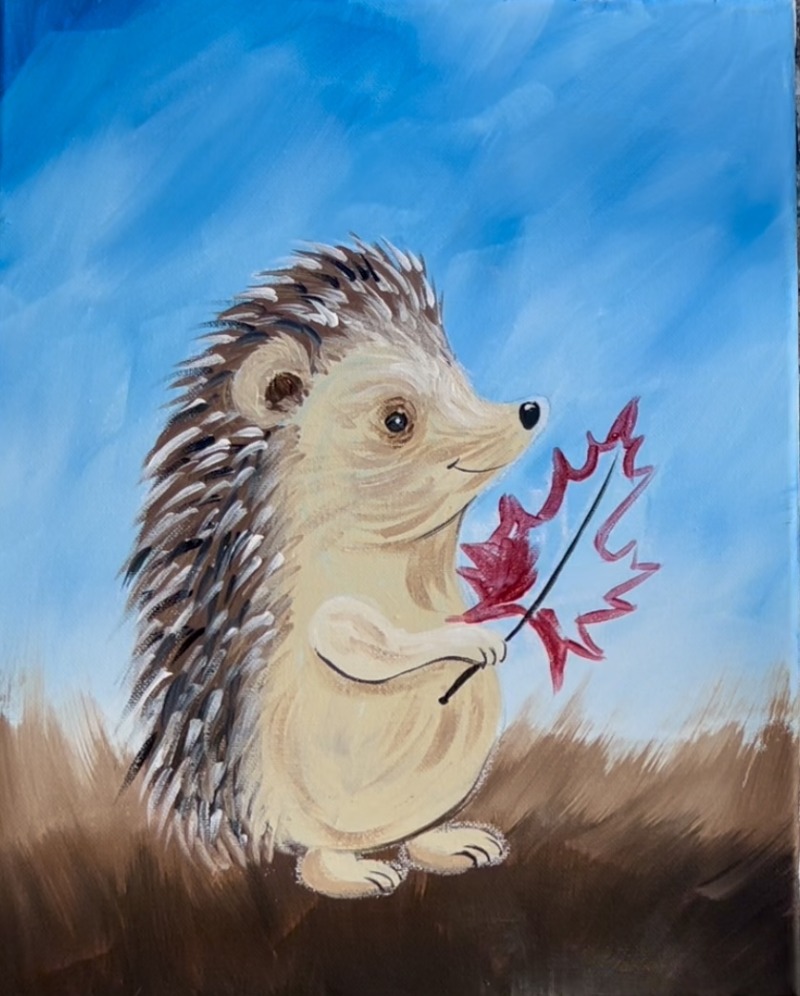
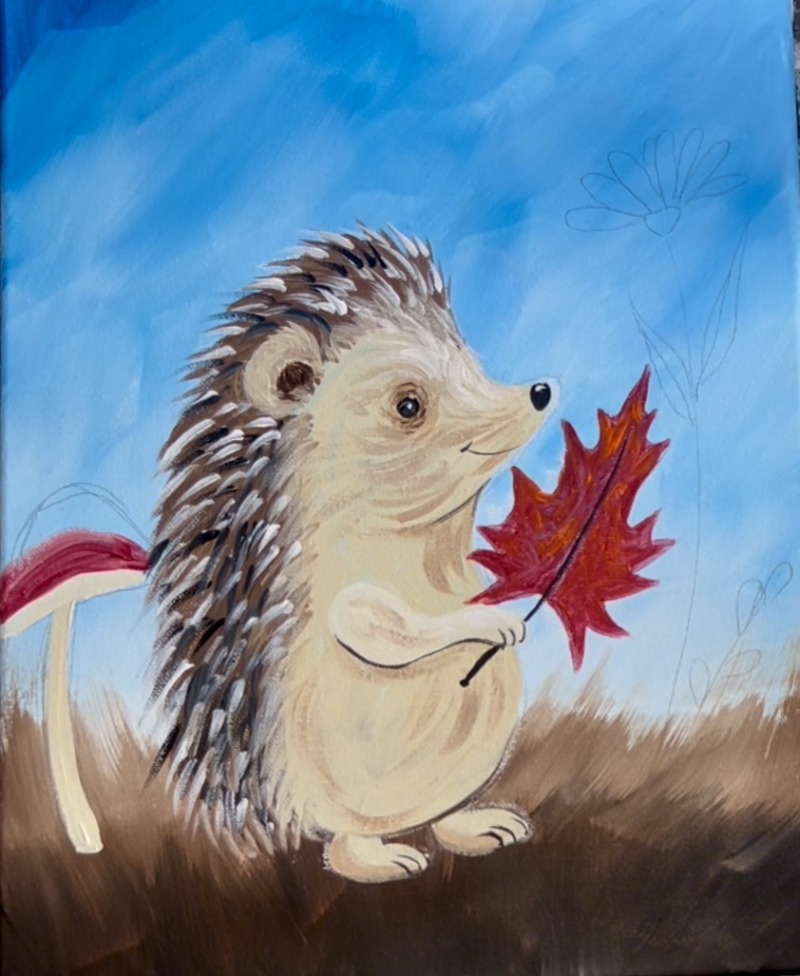
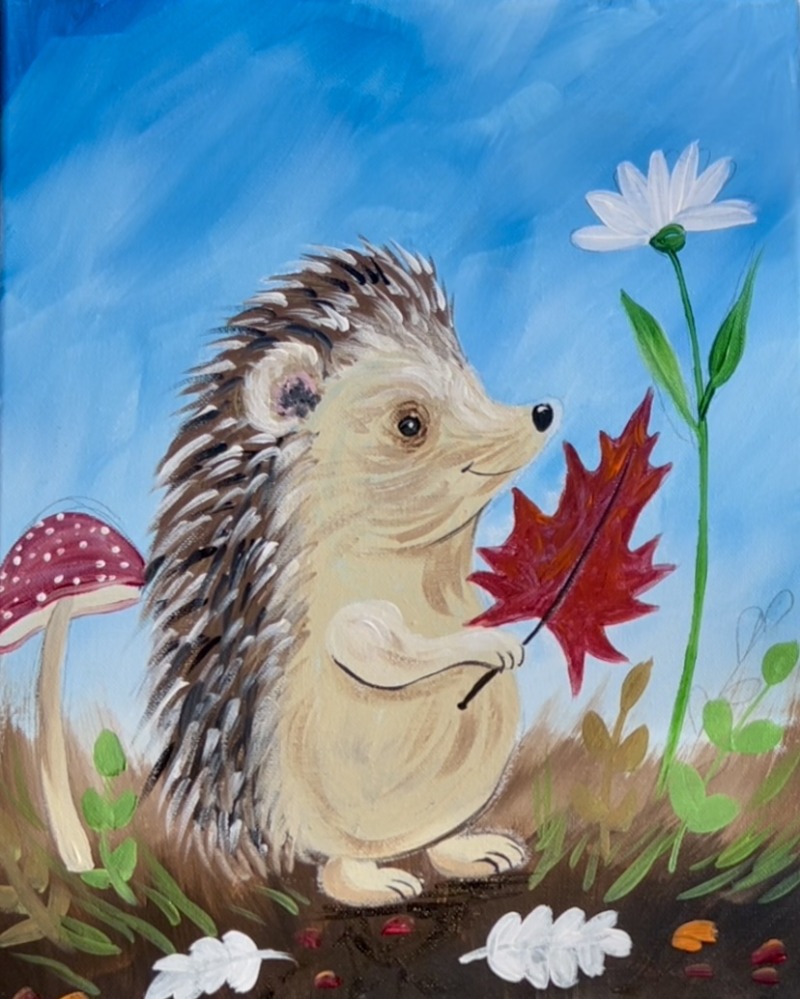
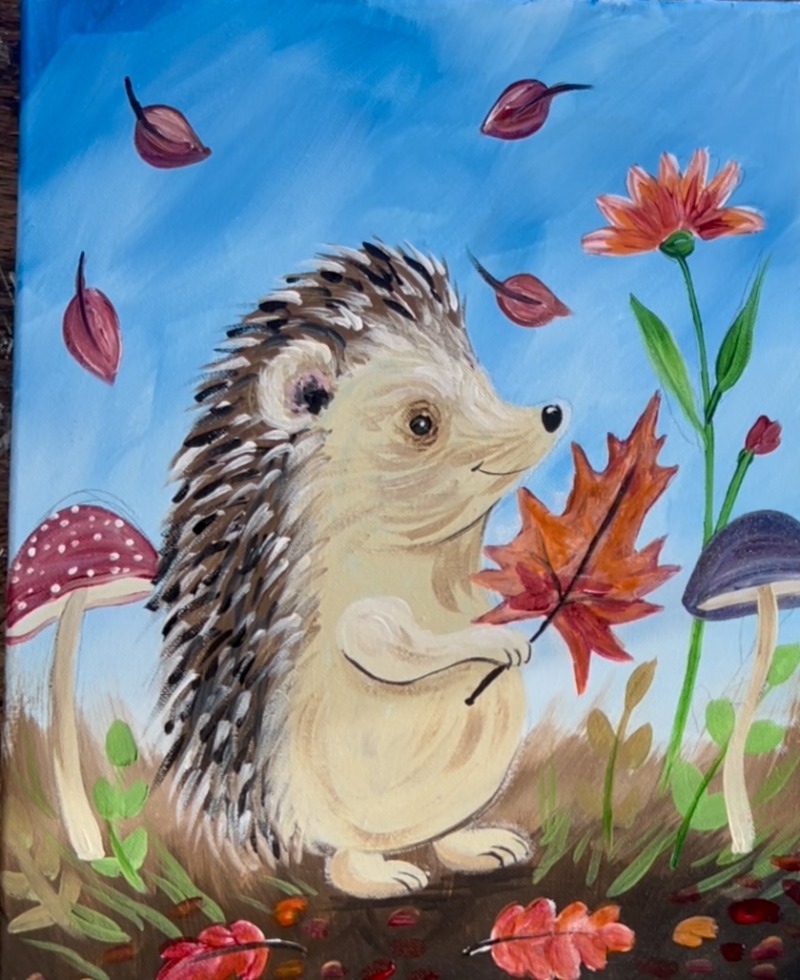
This is a whimsical, autumn-themed painting of a cute hedgehog standing upright in a colorful forest scene. The hedgehog is smiling gently and holding a large orange-red maple leaf with both front paws.
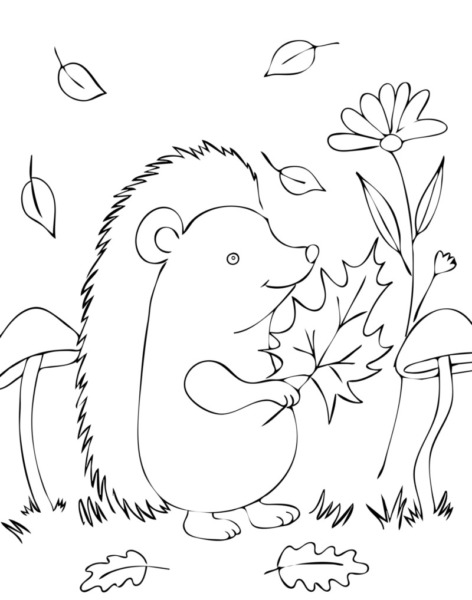
This tutorial comes with an optional traceable for the hedgehog!
Enjoy and happy painting!
Materials Needed:
- 11 x 14 Canvas (or any size)
- Acrylic Paints (colors listed below)
- Brushes (sizes listed below)
- Chalk or Pencil (or both) for drawing
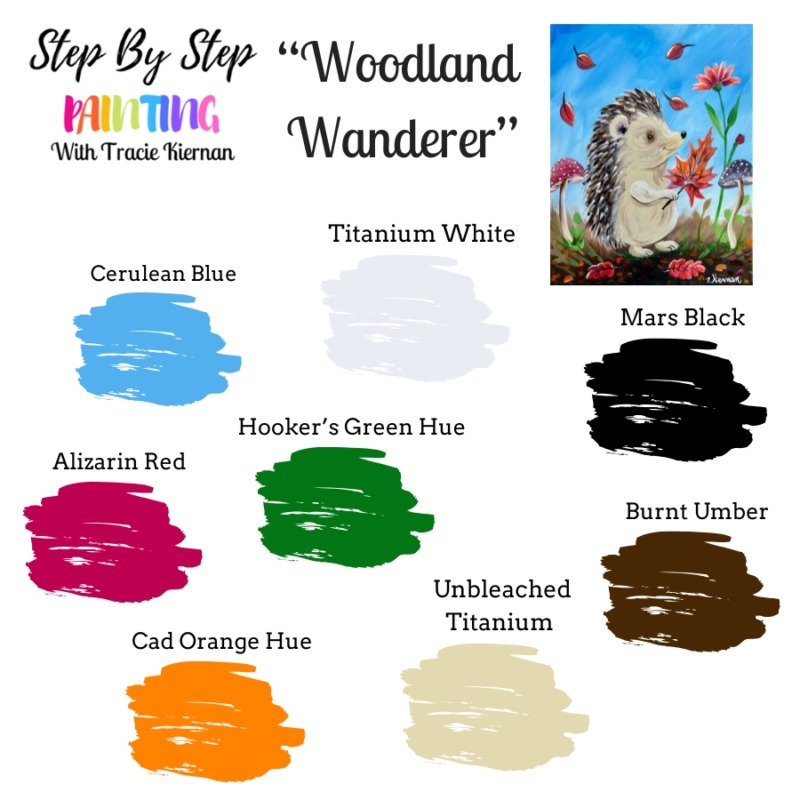
Colors:
- Titanium White
- Mars Black
- Burnt Umber
- Unbleached Titanium
- Hooker’s Green Hue
- Cadmium Orange Hue
- Alizarin Crimson Hue Permanent
- Cerulean Blue
Brushes
- 1″ Flat (or 3/4 flat)
- #4 Round
Color Palette:
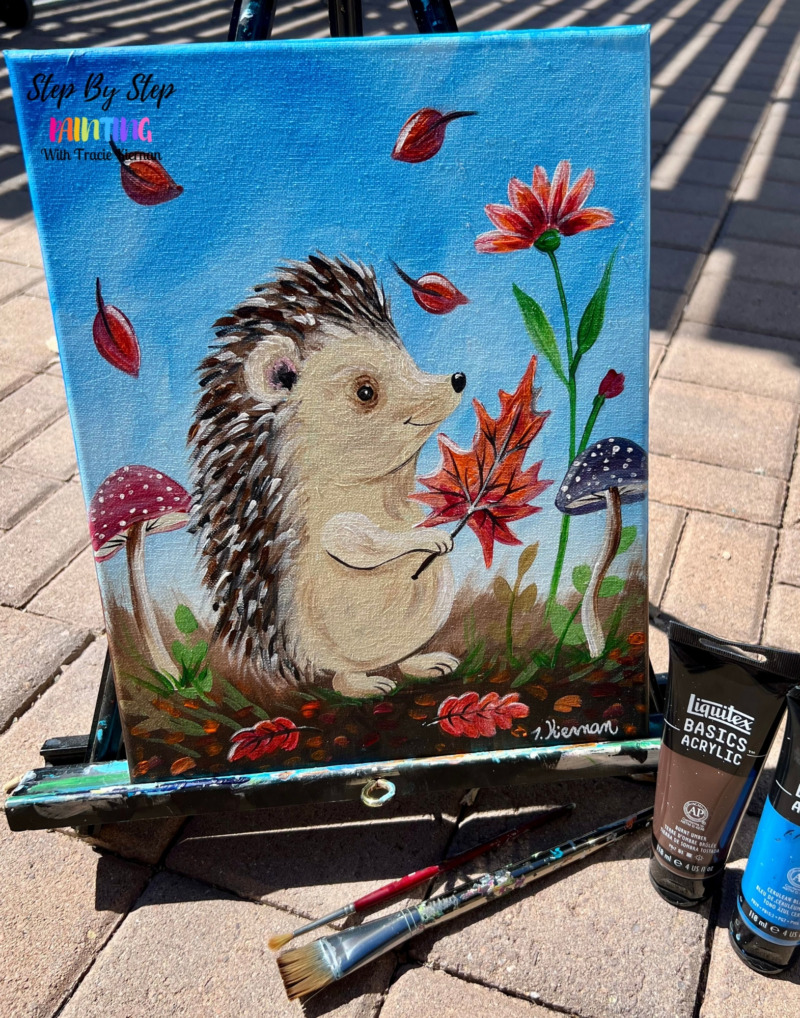
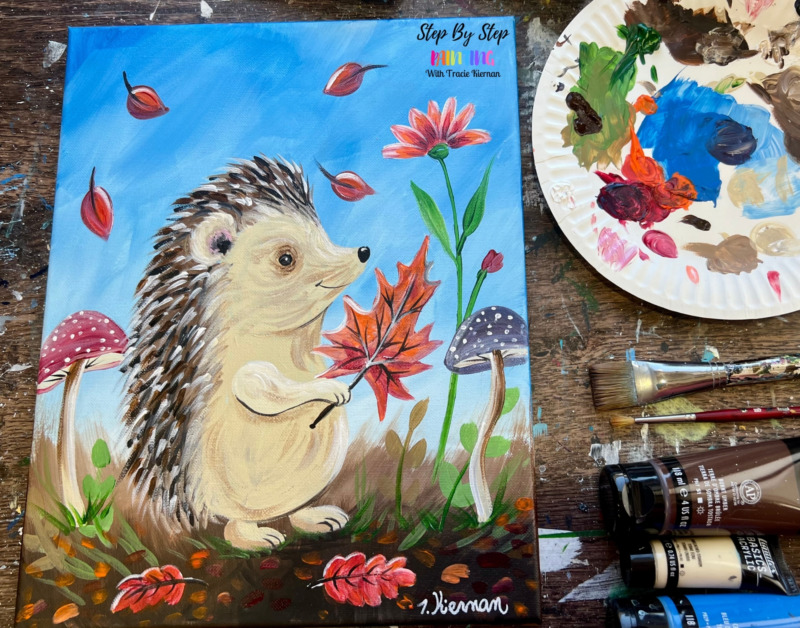
I use Liquitex BASICS paints. Use whatever you have! You can even use craft paints for this. Some like to look at the color chart below to match colors to other brand.
Brushes:

Traceable
Directions At A Glance
Video
Step By Step Directions
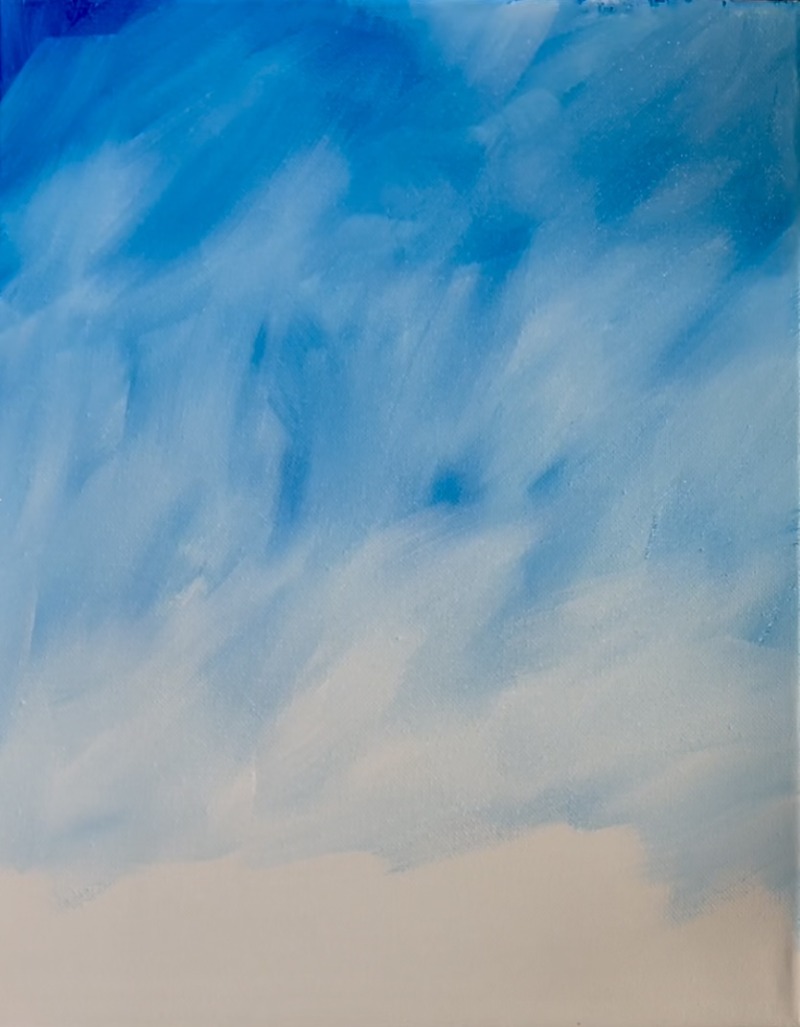
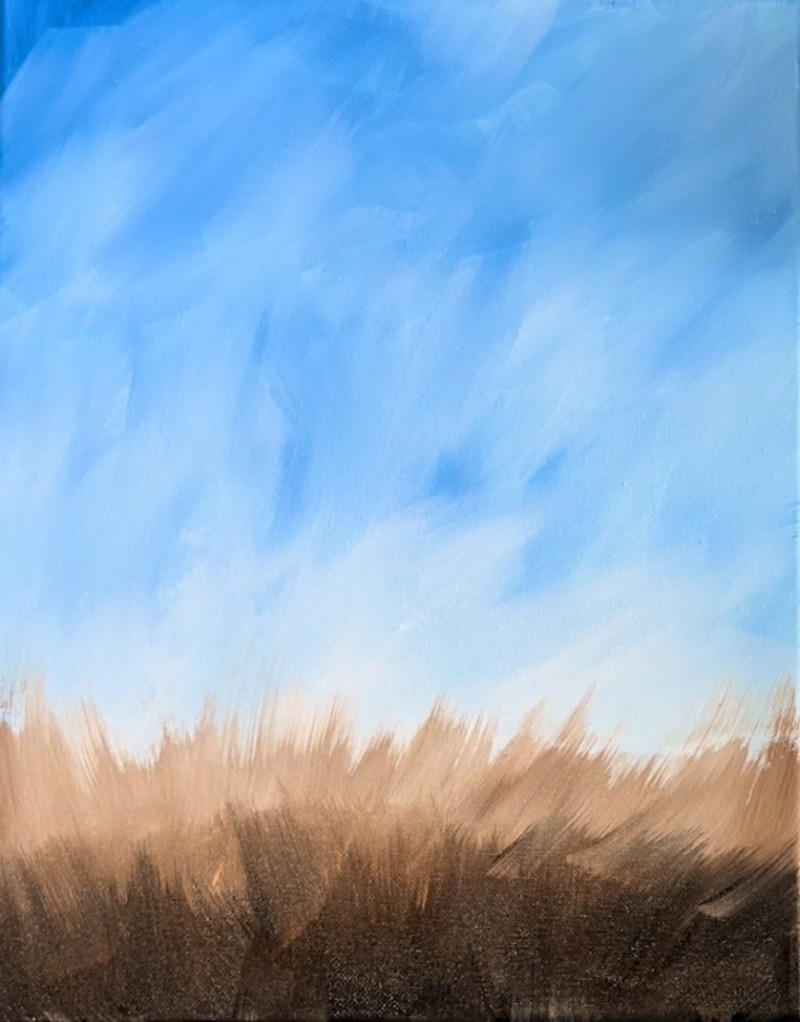
1. Paint Sky
Load your paint palette with the two colors: cerulean blue and titanium white. Use the 1″ flat brush and load it into about 1 part titanium white and 2 parts cerulean blue. Start on the top of the canvas. Paint large angle paint strokes that are textured and choppy. Go down a few inches on the top of the canvas.
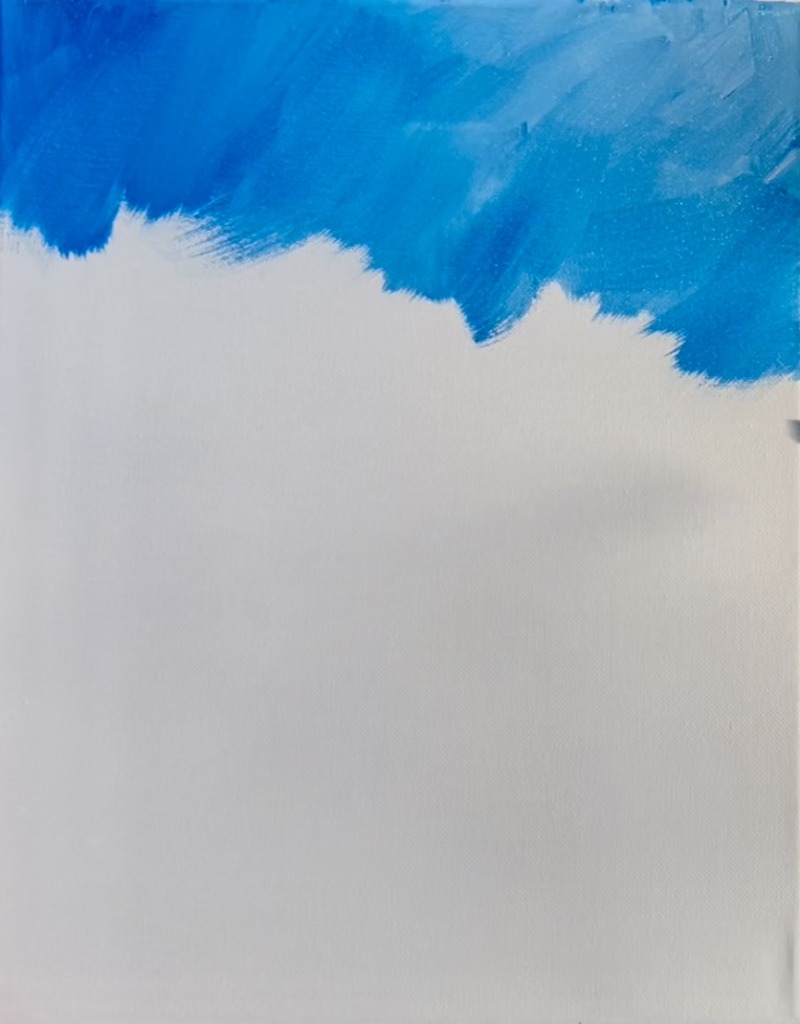
Then load your brush into more “titanium white”. Blend this white into that top color to create a lighter blue. This blue will gradually get lighter as you work your way down the canvas. Continue to paint these angle choppy and textured brush strokes with the blue and white blending on the canvas.
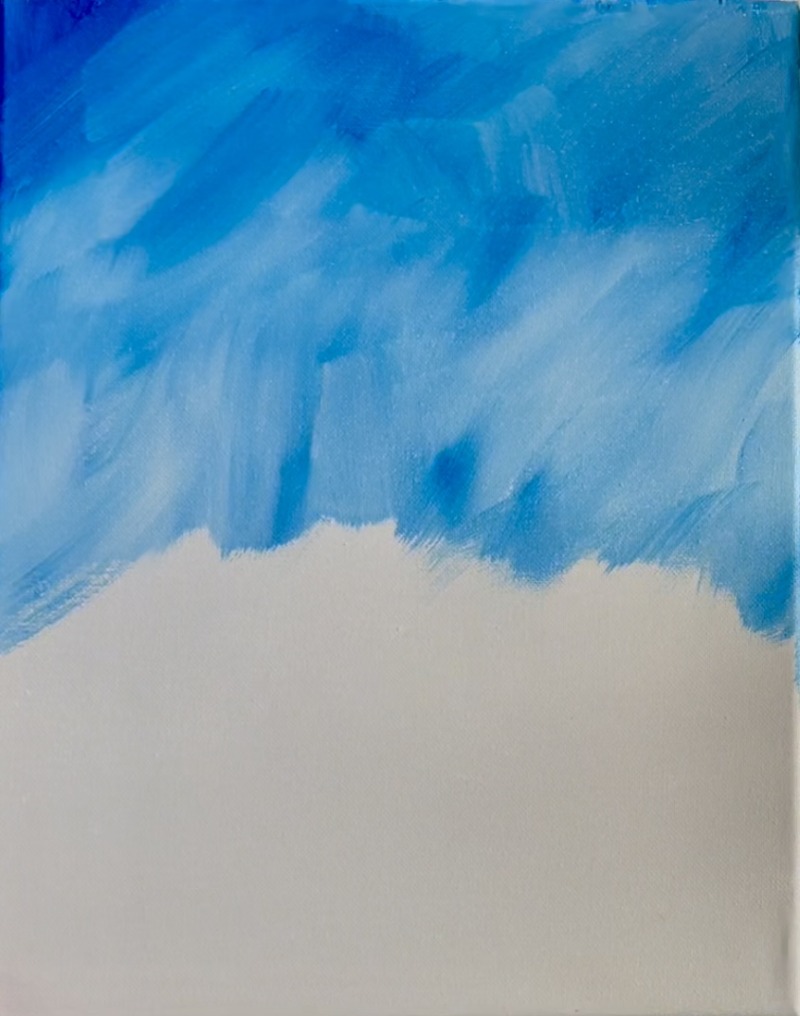
As you work your way down, continue to add more white to your brush and blend the color with the same textured brush strokes. Leave about 2 inches of blank canvas on the bottom.
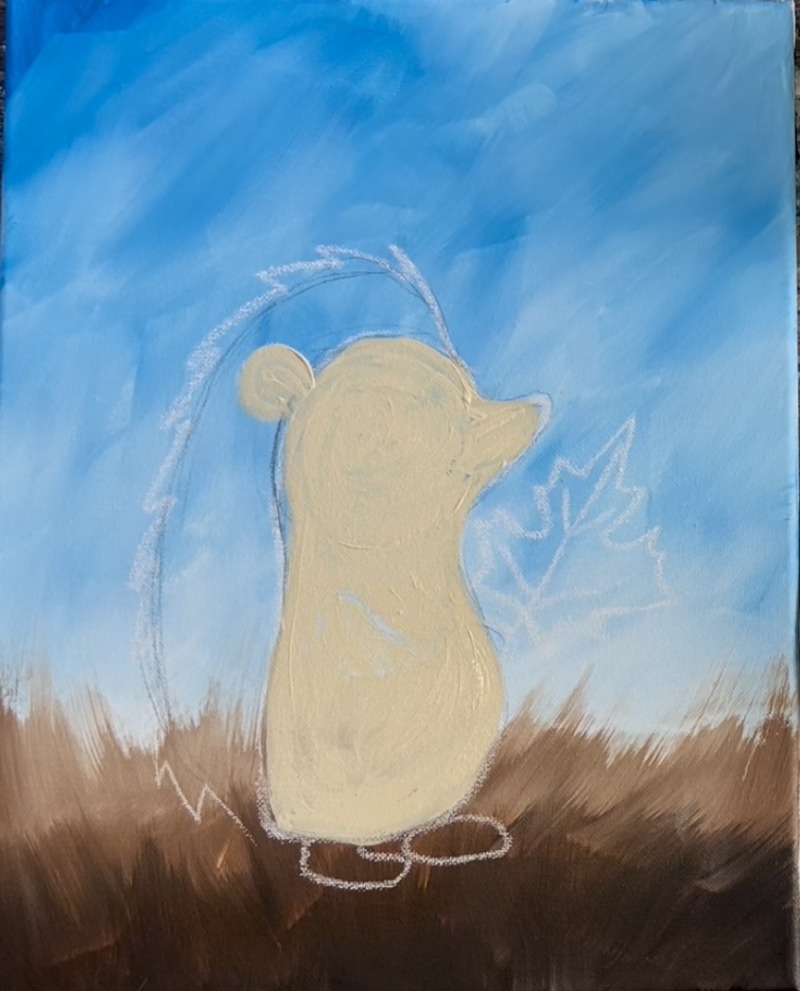
2. Paint Ground
Rinse your brush. Load your paint palette with the color “burnt umber”. Use the 1″ flat brush to paint the ground. This starts out as a small hill that slopes upwards in the center.
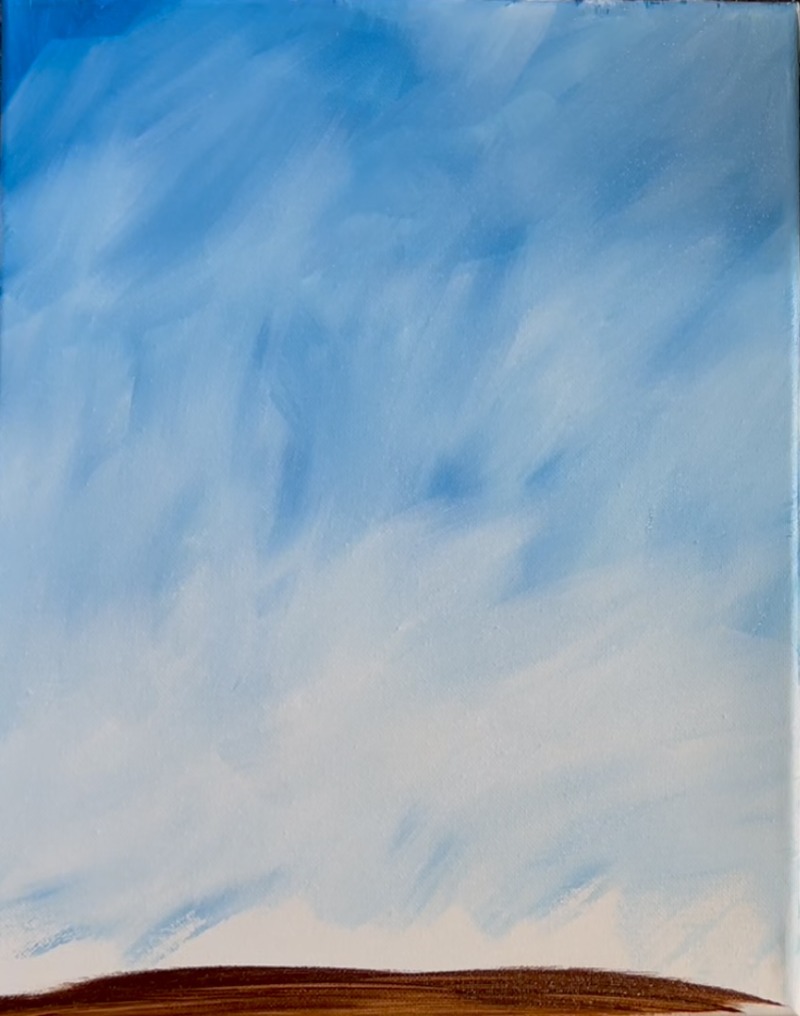
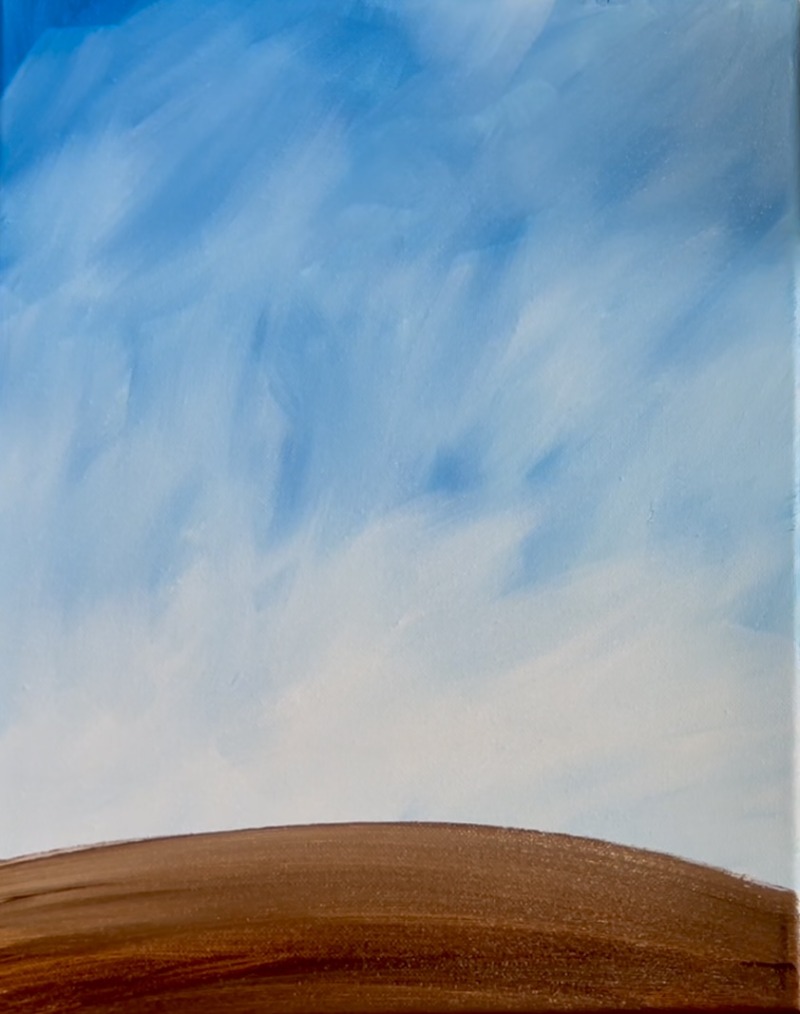
Paint this hill across the bottom of the canvas. The height of the hill in the middle is about 2 inches. It’s okay if the blue background color hasn’t dried all the way. You can paint this brown color over the wet background and it may mix a little with that white/ blue.
Then we will add some texture on this ground. Mix about equal parts “titanium white” with “burnt umber”. Load this lighter brown on the 1″ flat brush but only load a small amount on the brush! If needed, wipe off excess paint. You want to drag this brown in an upwards direction along the top edge of the hill to create a textured grassy area along this edge.
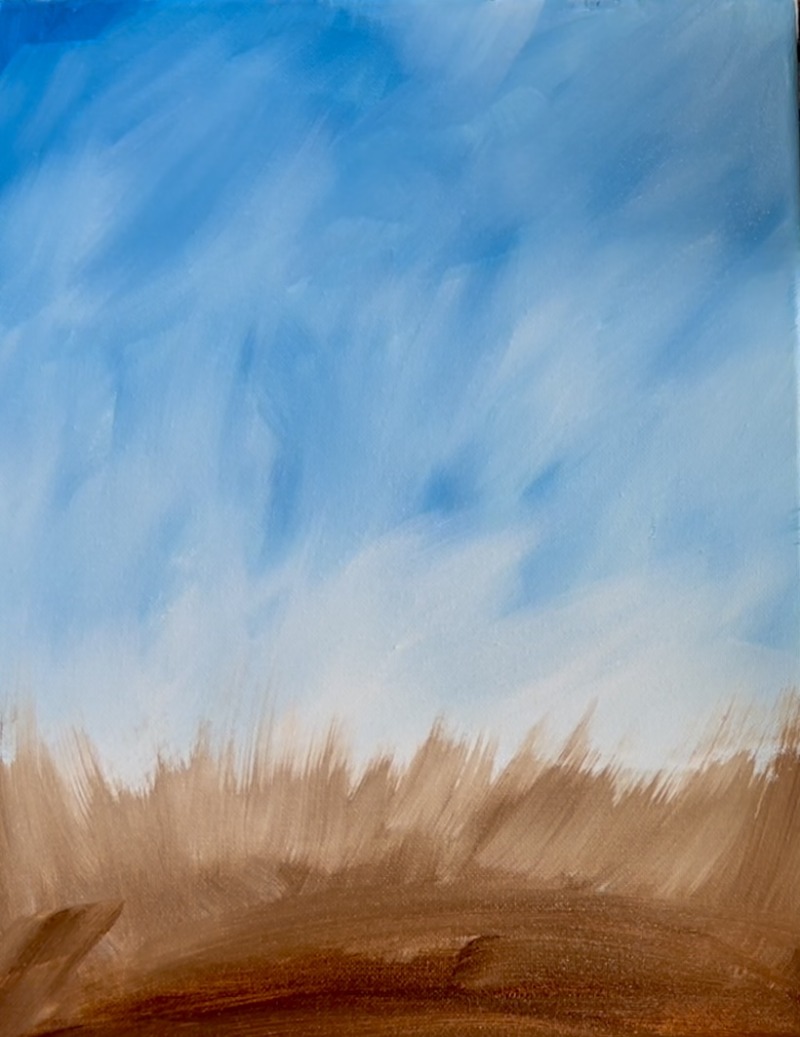
Then wipe the brush off. Load the color “mars black” onto your palette and load a small amount of this black onto the brush (wipe off excess paint if needed). Then paint this same style of “dragging upwards paint strokes” but only on the bottom of the ground area. This makes this bottom area look darker and more shadowy.
Wait for this to dry before going onto the next step.
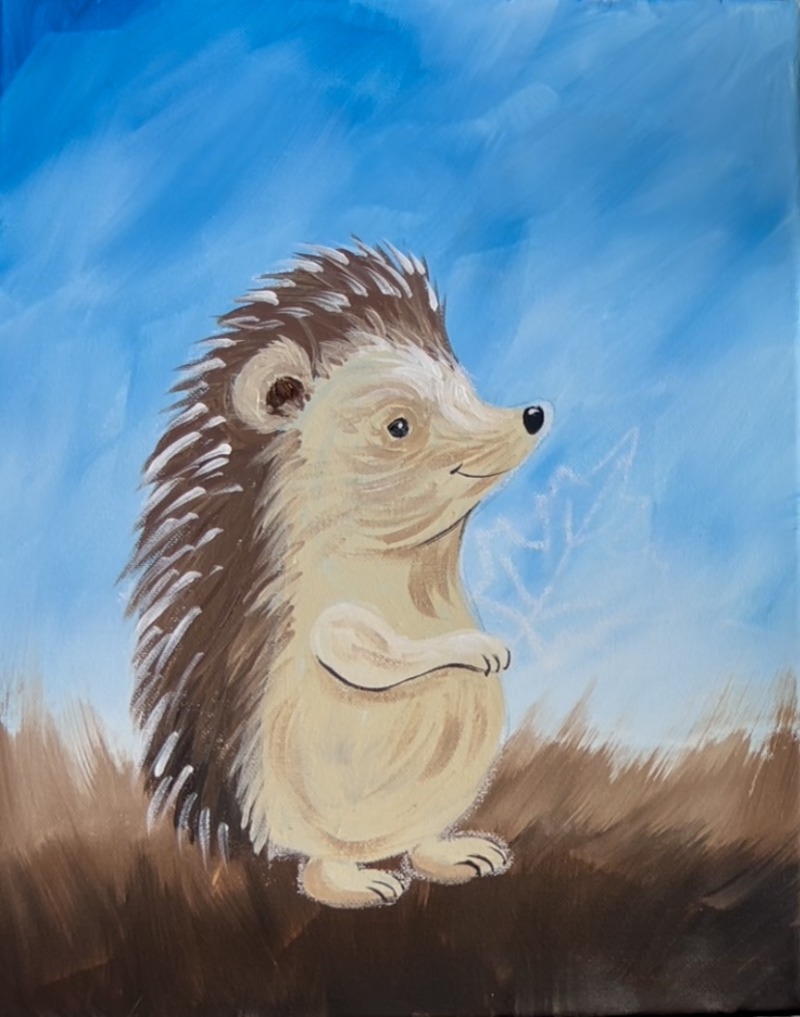
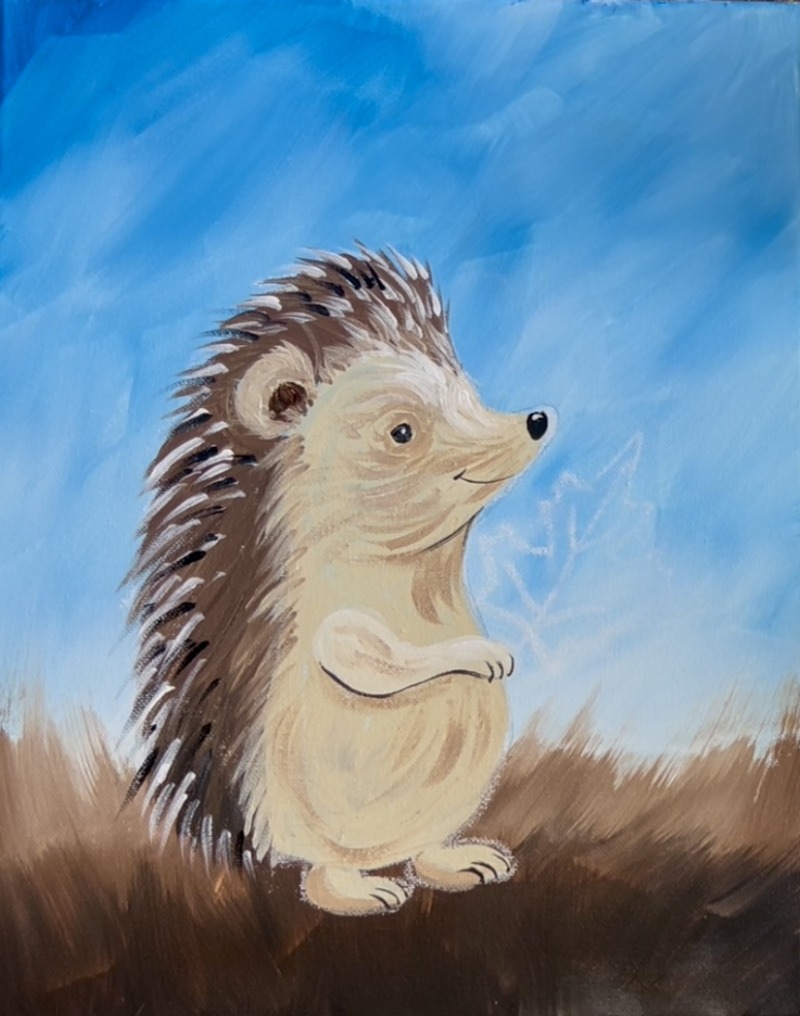
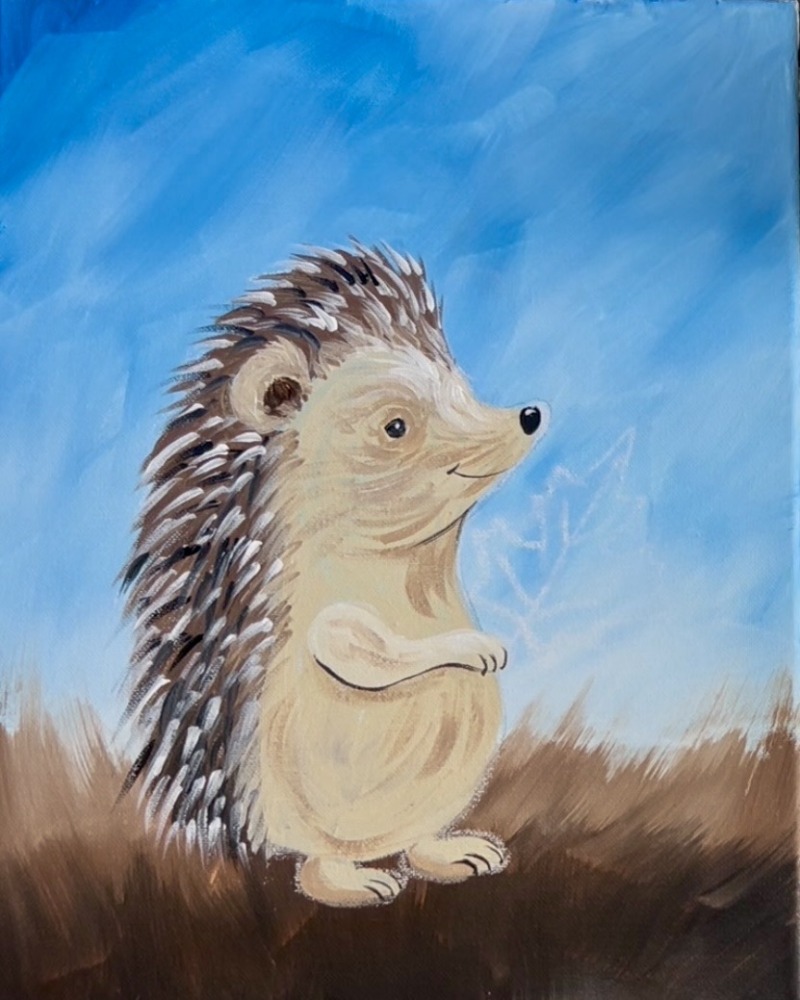
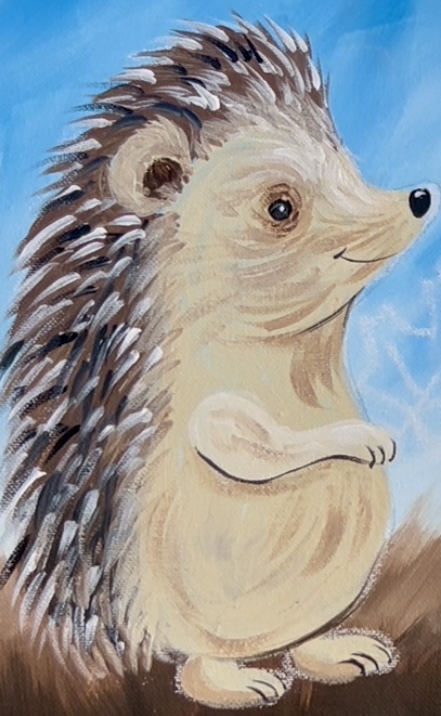
3. Draw Hedgehog (or us traceable)
If using traceable, print the template. Then place a sheet of graphite paper below the traceable and transfer it to the canvas by tracing over the lines.
Use a pencil or piece of chalk (or both) to sketch the hedgehog. Start by drawing a medium size circle in the center of the canvas (about 3-4 inches in diameter if you are working on 11 x 14 canvas). Then draw the nose on the right. The bridge of the hedgehog’s nose curves slightly upwards. Then the bottom of this nose/mouth area connects to the front chest which will be a large rounded curve.
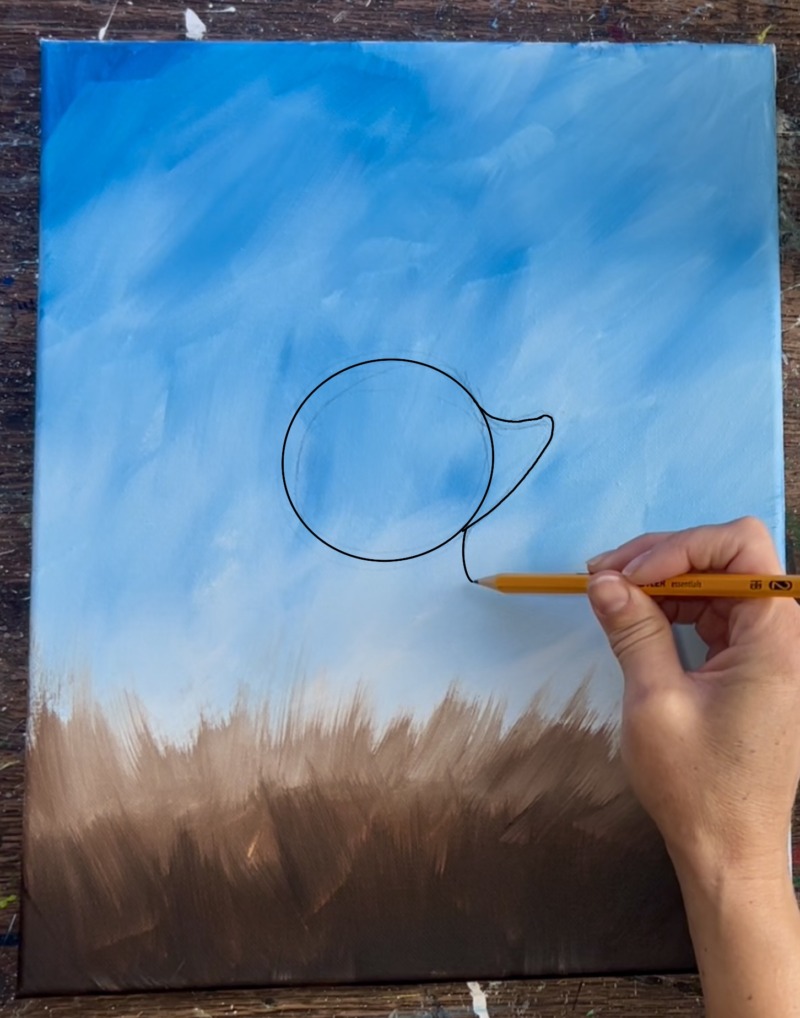
Extend that line on the front chest under the mouth to form a rounded body shape (kind of like the bottom of a bowling pin).
Draw the arm of the hedgehog so that it overlaps the side and a small part of the hand sticks out over the right.
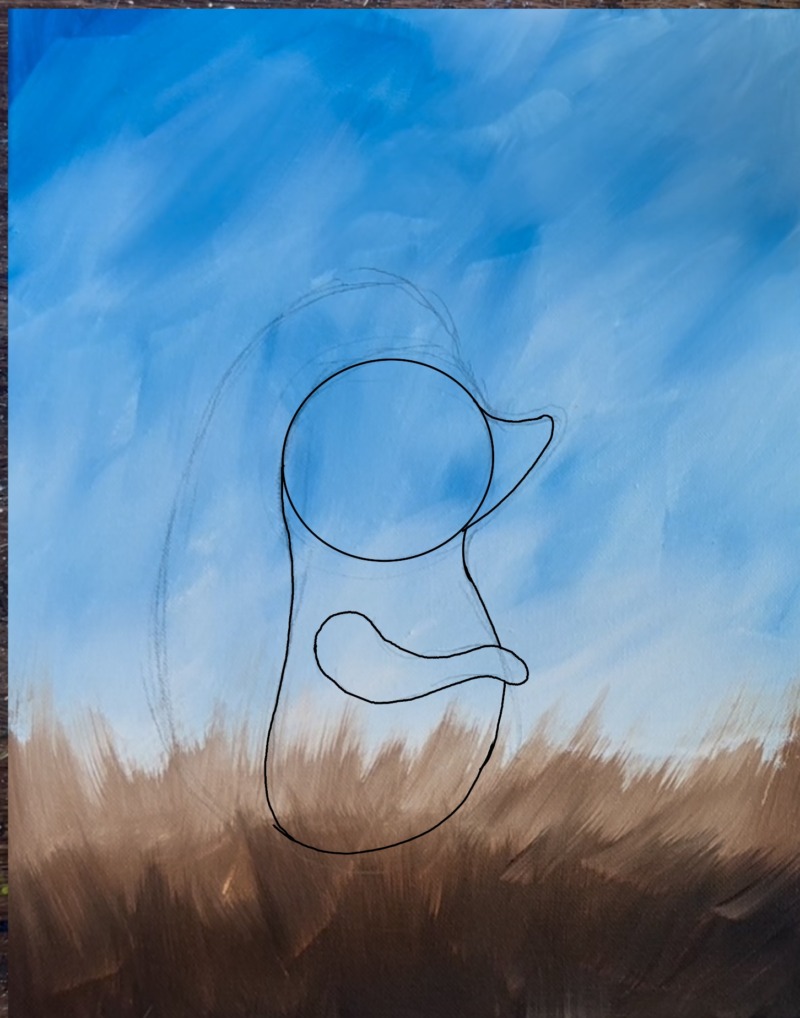
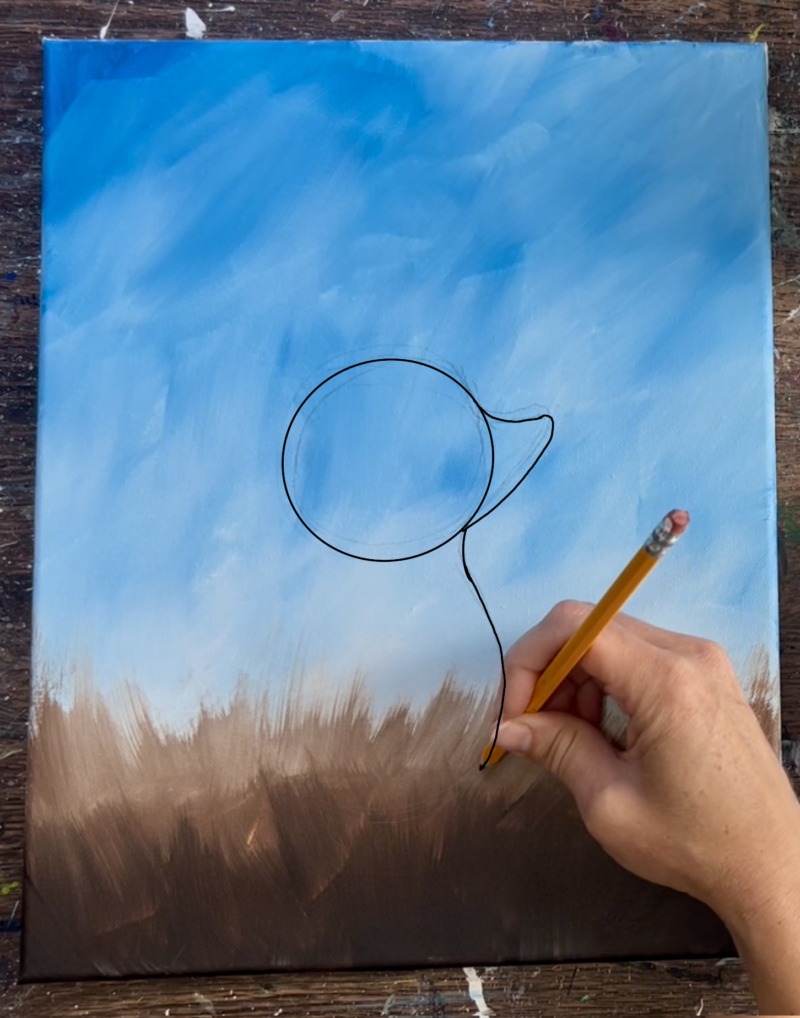
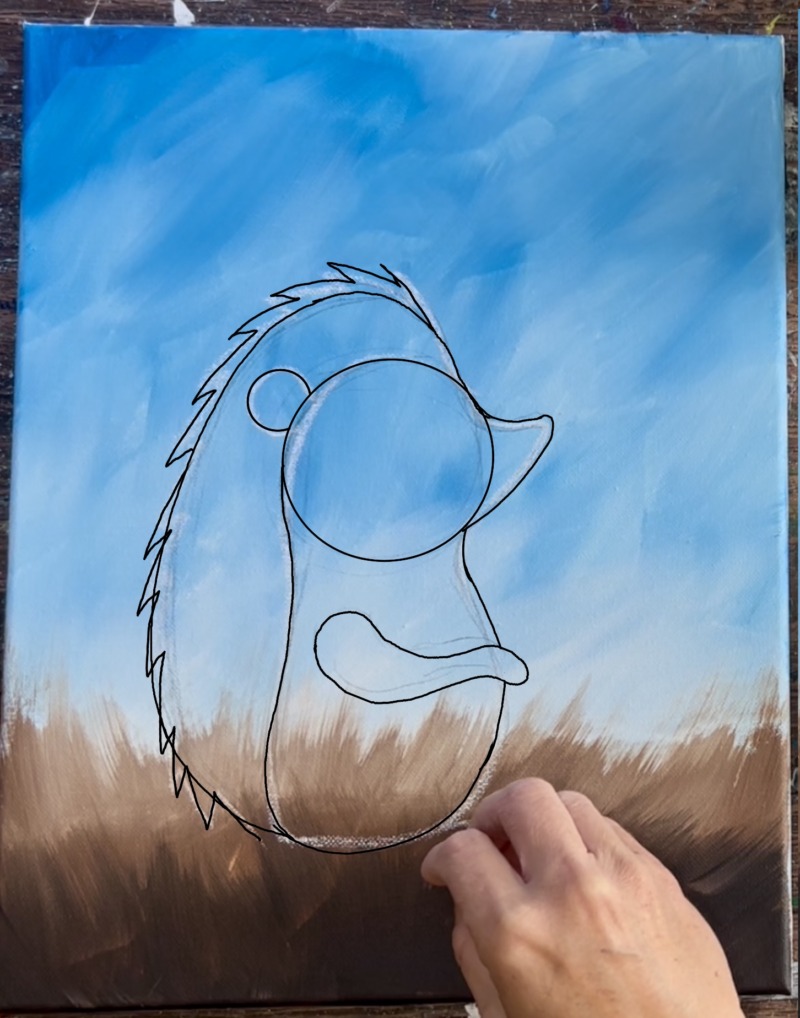
In order to draw the spines on the back of the hedgehog, first draw the shape of the back area as a continuous line. Start at the front of the head where the roof of the mouth meets the circle. Draw a line that curves up and around and then back down.

Draw the quills along the back of the hedgehog. Use the back line as a guide and draw a pointed zig-zag line with points going left and downwards. Also, draw a circular ear on the left of the head circle just a little higher than center.
Draw an almond shape in the middle of the head for the eye, draw an oval shape on the end tip of the mouth for the nose and draw a little curve for a smile. Then draw the hedgehog’s feet. You can simplify this by drawing them as basic oval shaped feet that connect to the bottom of the hedgehog’s body.
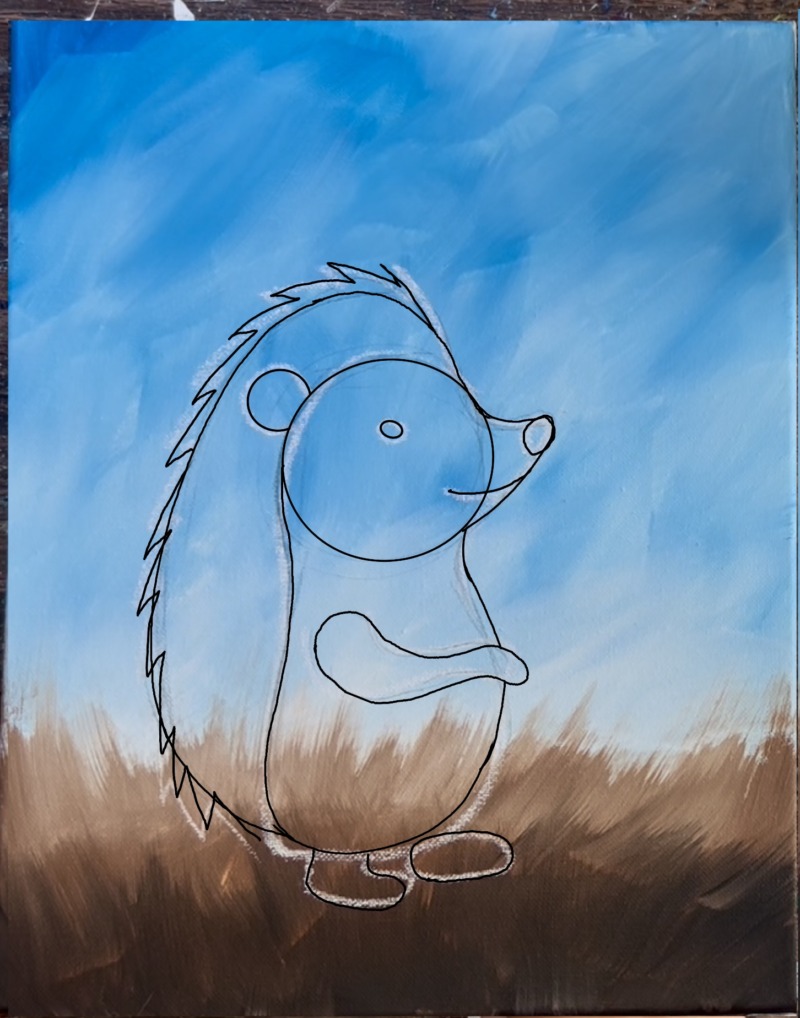
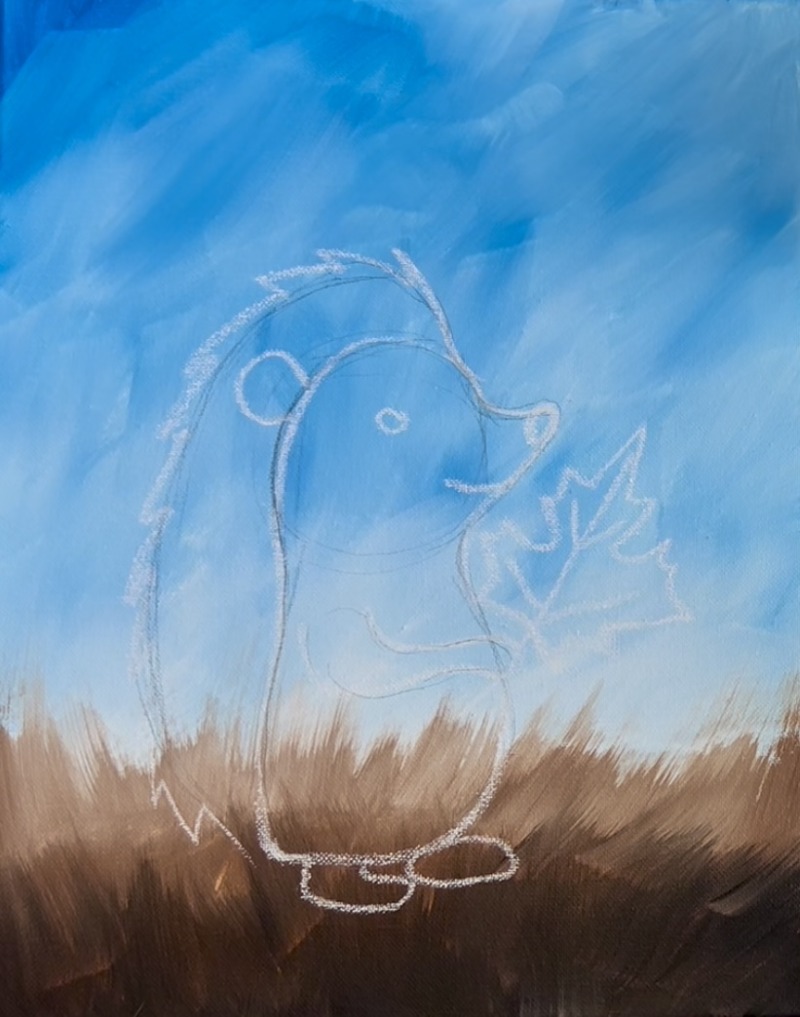
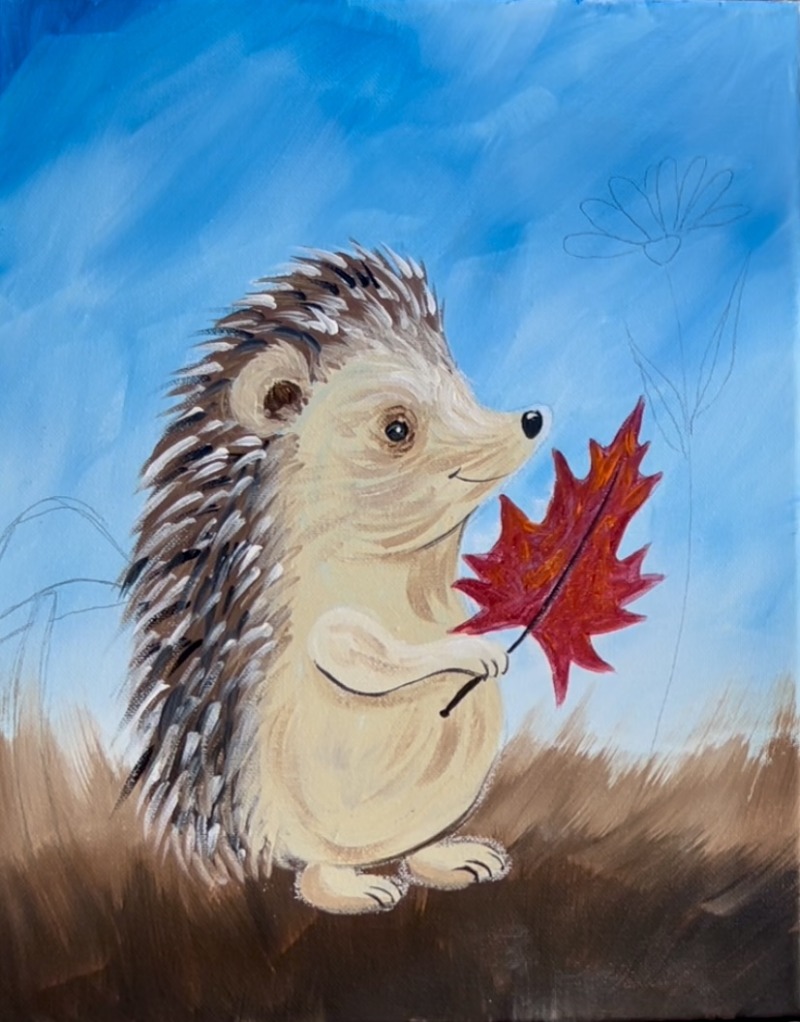
The drawing below is outlined with chalk so that it can show up on the darker background. Draw the maple leaf so the hedgehog is holding the bottom of the leaf stem. I find it helpful to draw the middle vein lines first of the leaf and then the outwards shape. See leaf visual below for the shape/ style of the leaf.

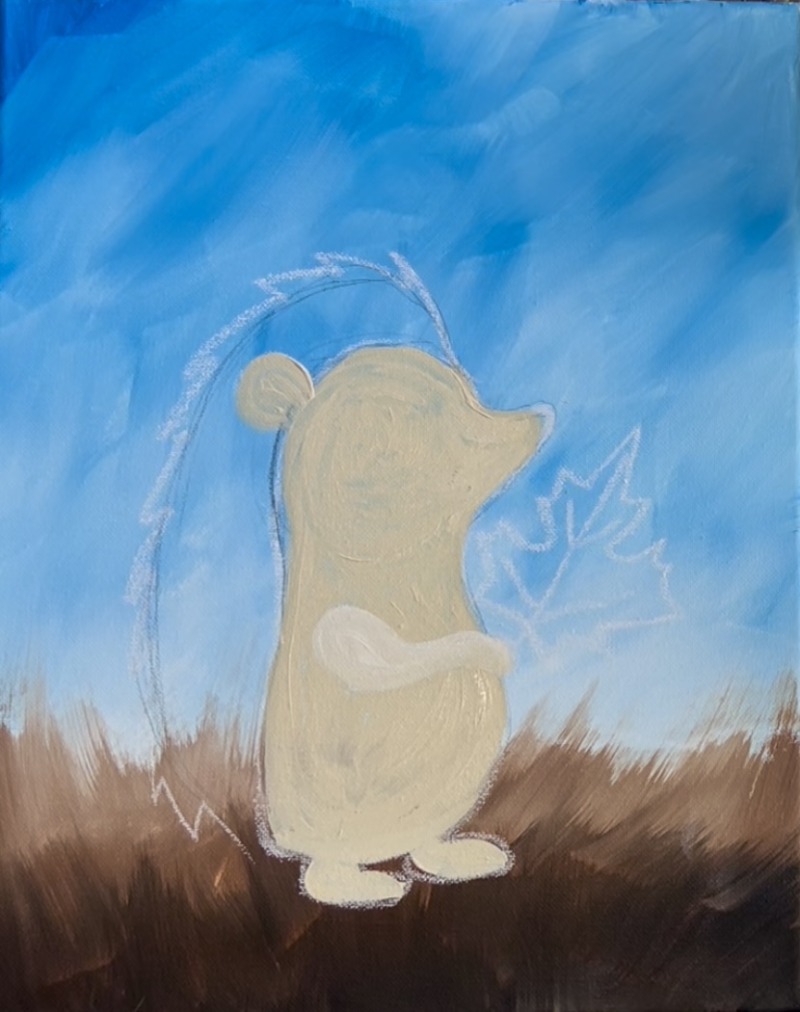
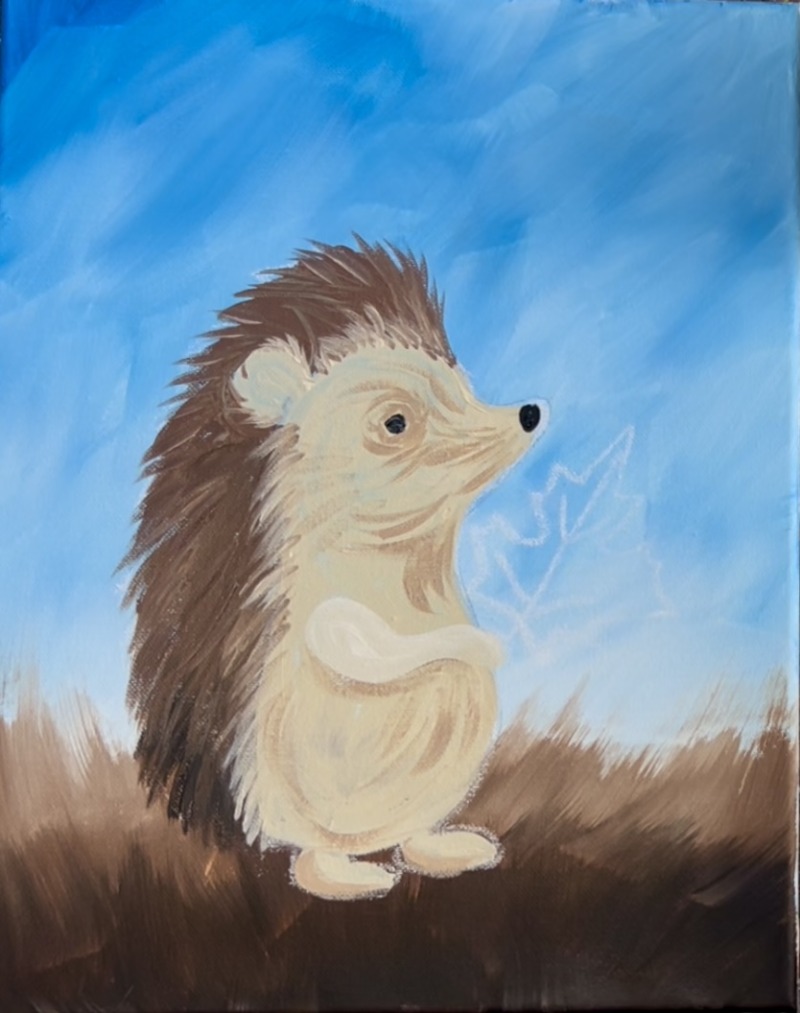
4. Paint Front Of Hedgehog
Load your paint palette with the color “unbleached titanium”. Use the #4 round brush to paint the front part of the hedgehog including the ear, nose, head and front belly. Outline the shape and fill it in solid with paint strokes that go in the direction of the shape.
When it comes time to paint the arm, mix a little “titanium white” into the “unbleached titanium” to make a lighter color. Paint the arm with this lighter color so that it stands out.
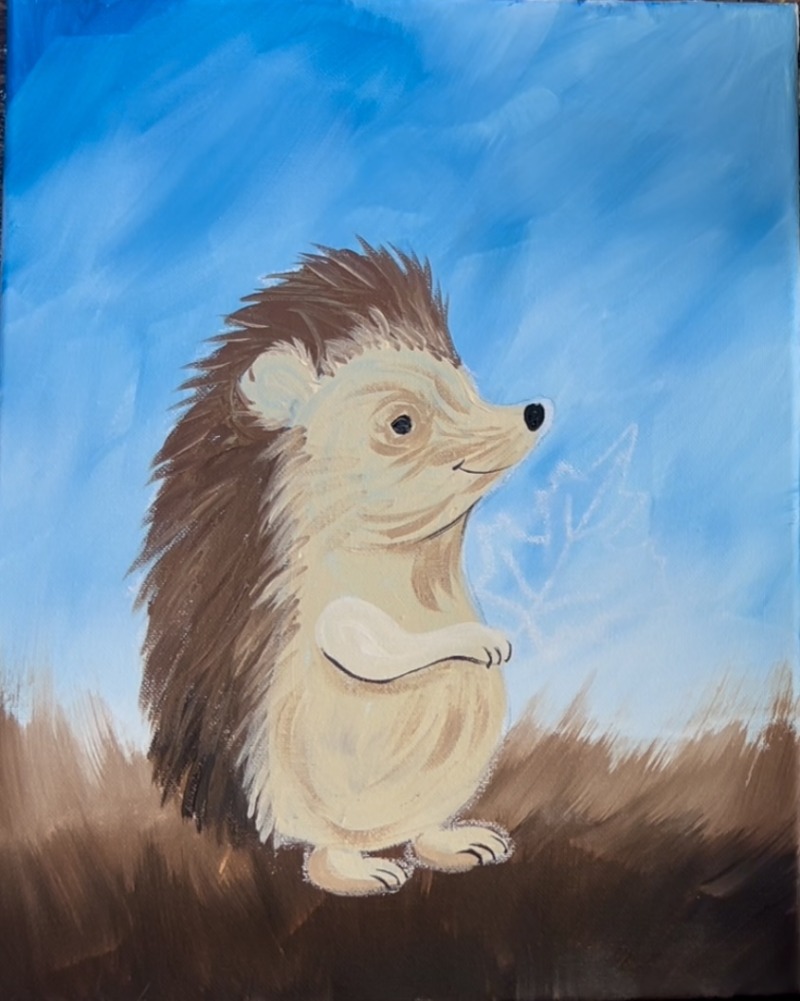
5. Paint Back Of Hedgehog & Eye/ Nose
Mix about equal parts “burnt umber” with “unbleached titanium”. Use the #4 round brush to paint the dark brown back area of the hedgehog. When you paint the edges, make pointed brush strokes go outwards to create the texture of the spines/ quills. When you get to the bottom, add a little black to the brush to make this area a little darker and stand out from the brown on the ground.
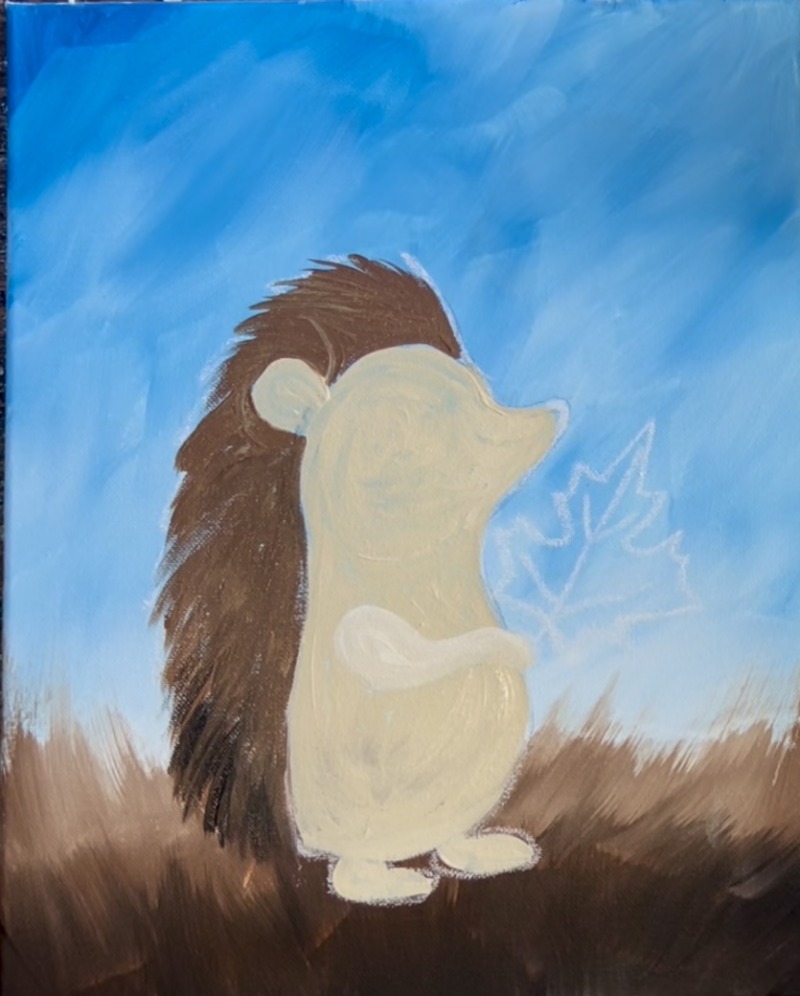
Then use the #4 round brush and “mars black” to paint the eye and the nostrils. To do the eye, paint a small “almond shape” in the very center of the head. Then paint a little oval on the end of the nose.
Next, paint the edging where the light color part of the hedgehog overlaps the dark color of the hedgehog. Use the color “unbleached titanium” and add a little bit of “burnt umber into it” (about 3 parts unbleached titanium and 1 part burnt umber). Use the #4 round brush and paint “quills” that overlap the light color over the dark color along the edge where the light and dark meet.
6. Add texture & outlining on front of hedgehog (advanced/ optional)
Use this same color and the #4 round brush to lightly paint curved strokes around the eye, a little bit of light curved strokes along the front of the belly, under the neck to the right of the chest and along the snout of the nose. This gives the lighter part of the hedgehog a little bit of fur texture.
Use “mars black” to lightly outline under the hedgehog’s arm, curves for the finger and curves for the toes. Lightly outline under the head and also lightly outline a mouth.
Paint the inner part of the ear with “mars black” mixed with “burnt umber”. This is a small oval shape on the very center of the ear. Then go back with the “unbleached titanium” color and paint little fur strokes around the inner part of the ear to overlap parts of it.
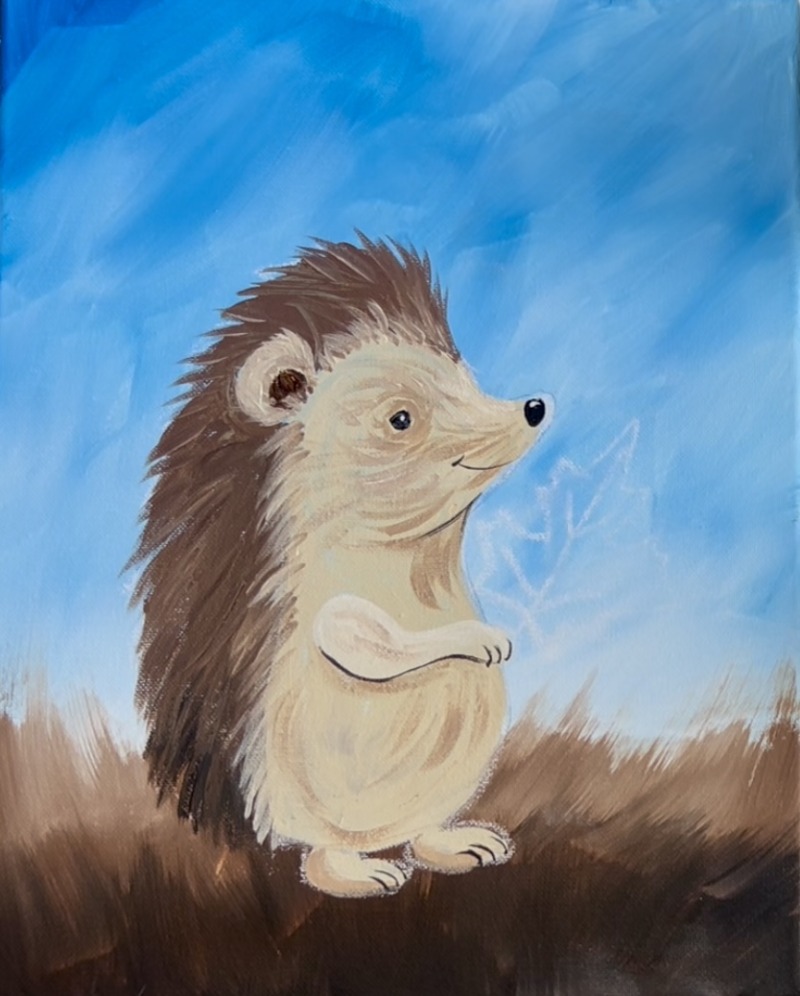
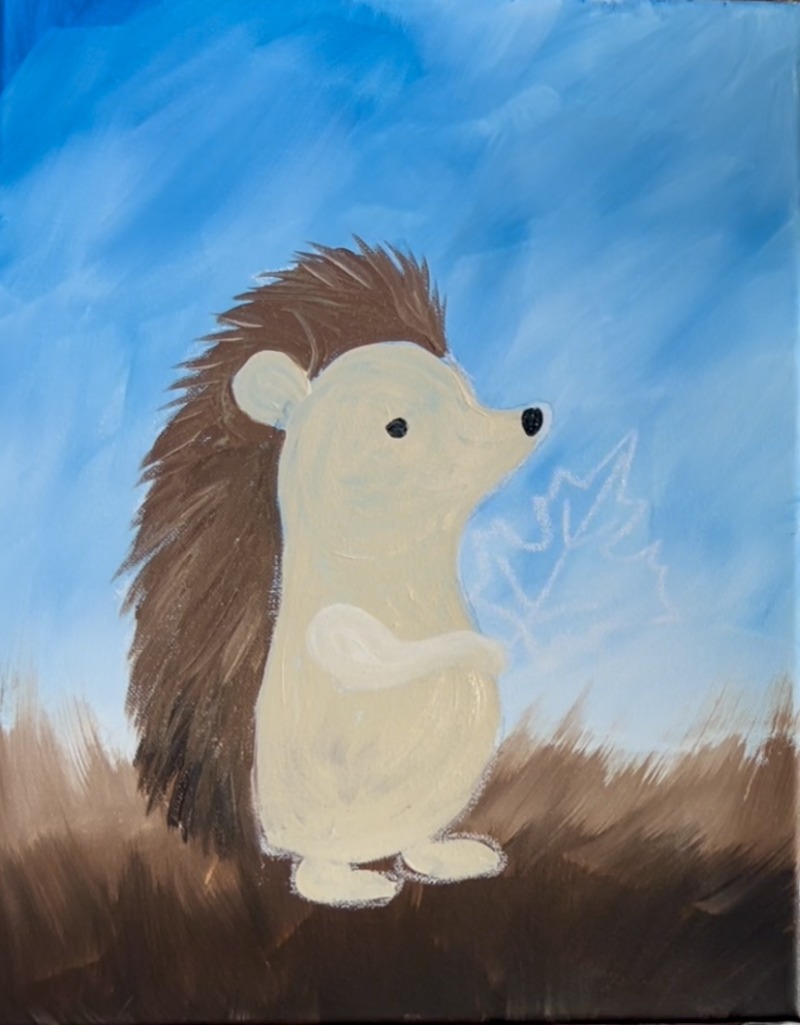
7. Paint Quills On Back Of Hedgehog
The quills on this hedgehog consist of pointed line paint strokes that are white, black, gray and brown. Use the #4 round brush and start with the color “titanium white”. Start at the top of the head and paint little pointed brush strokes that go to the left and outwards.
After adding a set of the white quills, rinse the brush and load it into “mars black”. Paint a set of black quills using the same technique. It’s okay to overlap some of the white that you just painted.
After adding black, load your brush with white without rinsing the black off. Paint a set of quills using this black and white on your brush (this creates a set of gray quills). The more quills you add to the hedgehog, the more textured it will look! Go back and add more white or black if needed.
8. Add dark circle around eye
Use the #4 round brush and the “burnt umber”. Paint sketch-like paint strokes with the brown around the eye. This creates a dark area of fur around the eye.
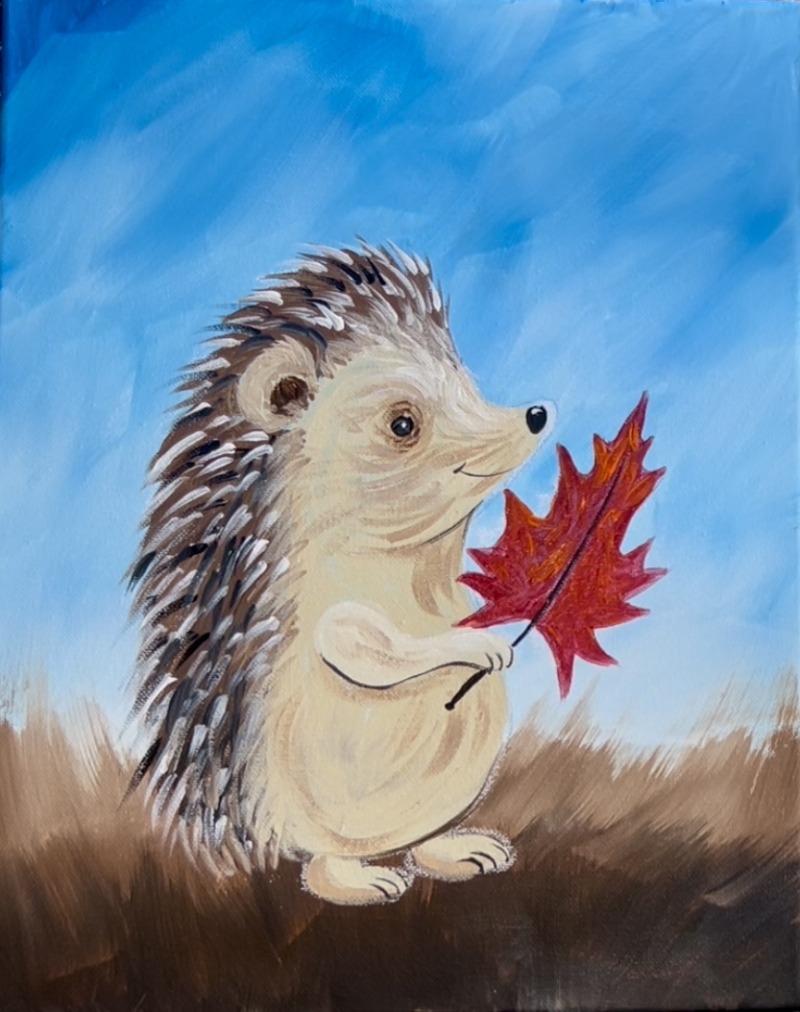
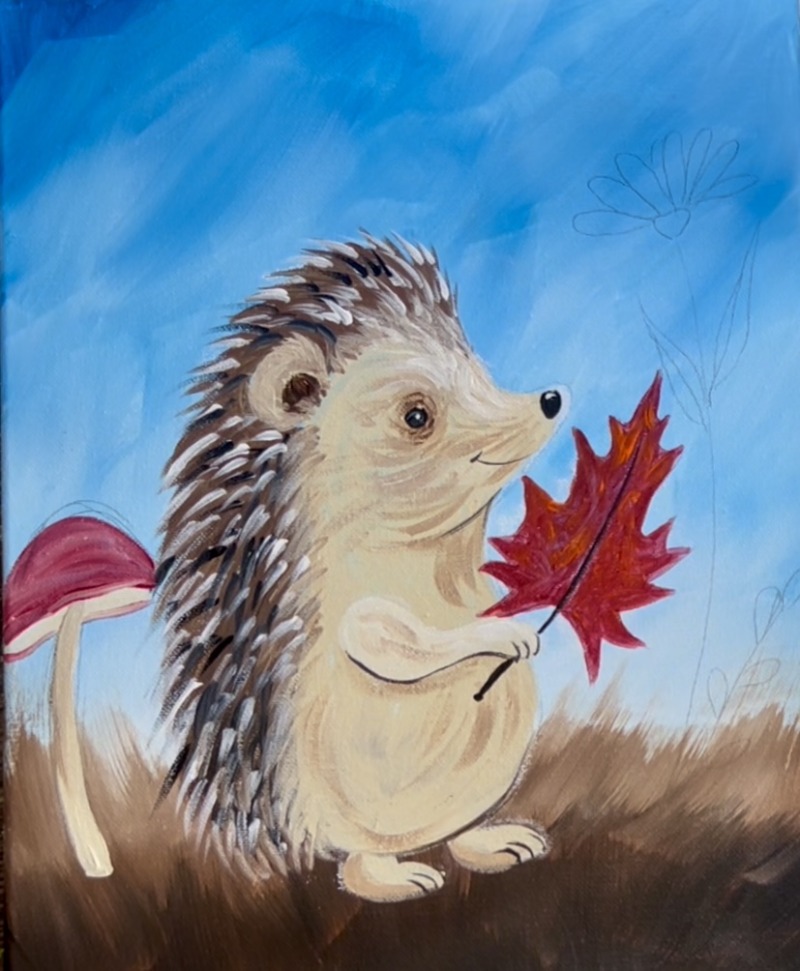
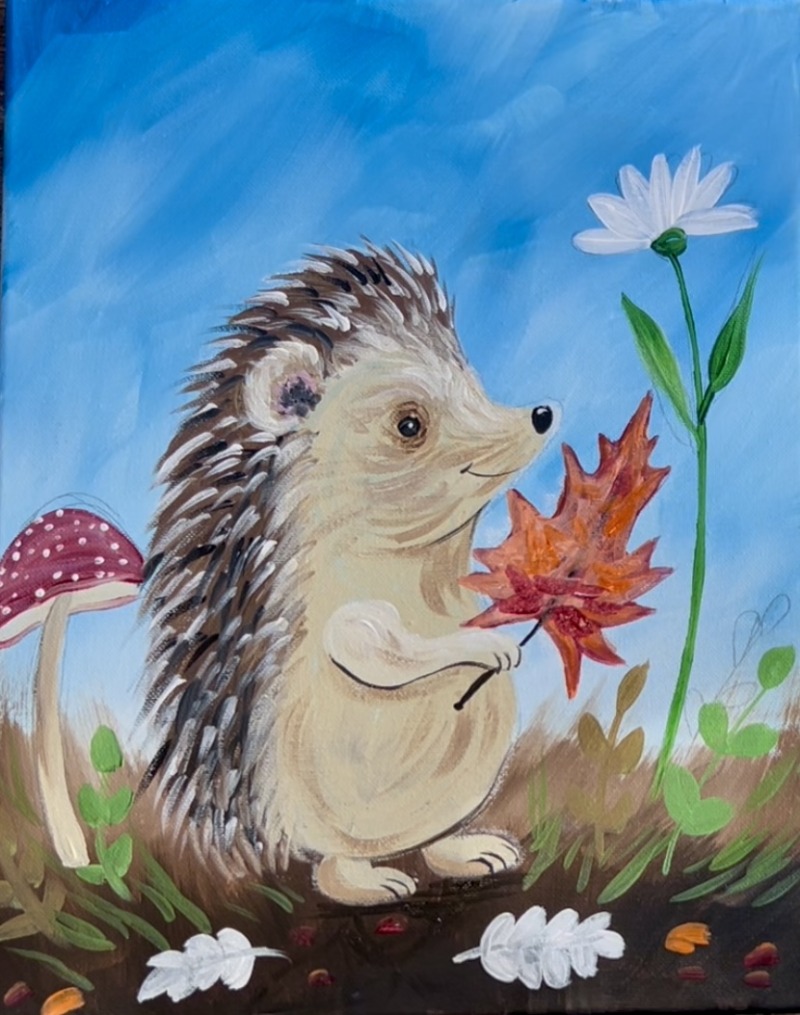
9. Paint leaf
Use “mars black” and the #4 round brush to paint the stem of the leaf. This extends up to the center vein of the leaf. Then use “alizarin crimson hue” (dark magenta-red) to pain the outline of the leaf shape.
Oil the leaf shape in with the red. Then add little bits of “cadmium orange hue” and blend it into areas of the red. Fill the leaf shape in solid with this red and orange. Let it dry before adding any more details to it.
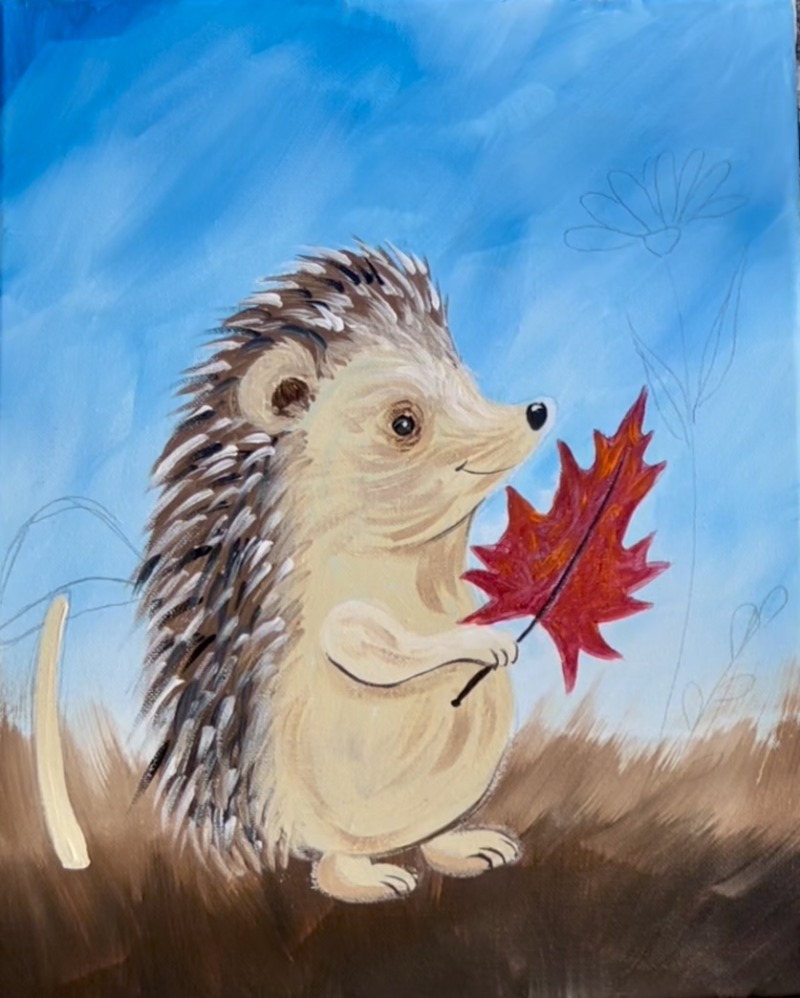
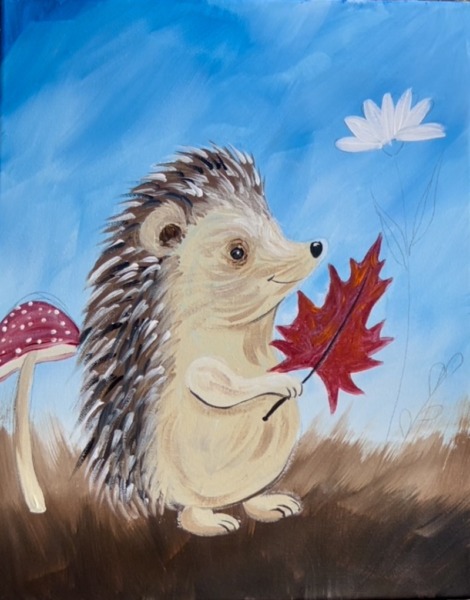
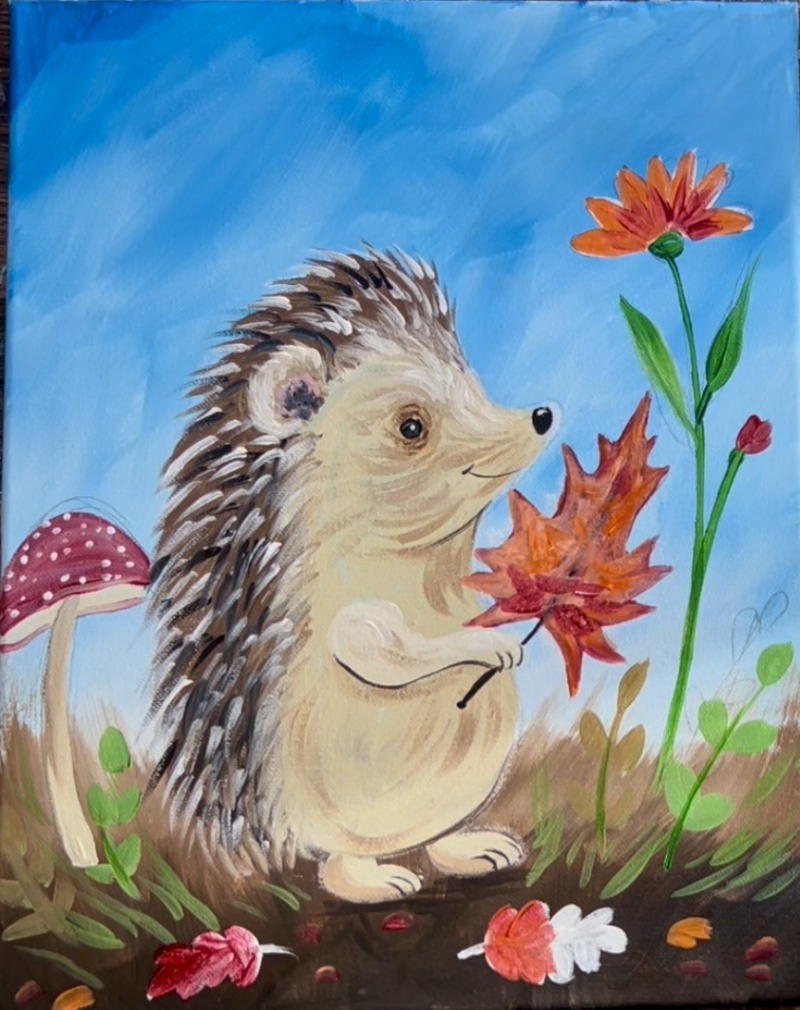
10. Draw And Paint Mushroom/ Florals
Use a pencil to draw the mushroom, flowers and leaf stems. This helps you decide on the layout for the background details in the painting. You are welcome to change these or simplify and not do as many details.
After drawing those items, paint them in! I started with painting the mushroom on the left. Use “unbleached titanium” for the stem of the mushroom.
Use “titanium white” for the under part of the mushroom. Then use “alizarin crimson” for the top bell shape of the mushroom.
Paint little white dots on the mushroom using “titanium white”. Then paint the petals of the large flower on the right with white petals. Wait for the white to dry before painting them the orange color.
Use the color “hooker’s green hue” to paint the stem of the flower plus the leaves. Mix a little white or beige into the green to lighten the green if needed. Also, paint a few stems with rounded leaves. These are on the ground and may overlap the mushroom and flower stem.
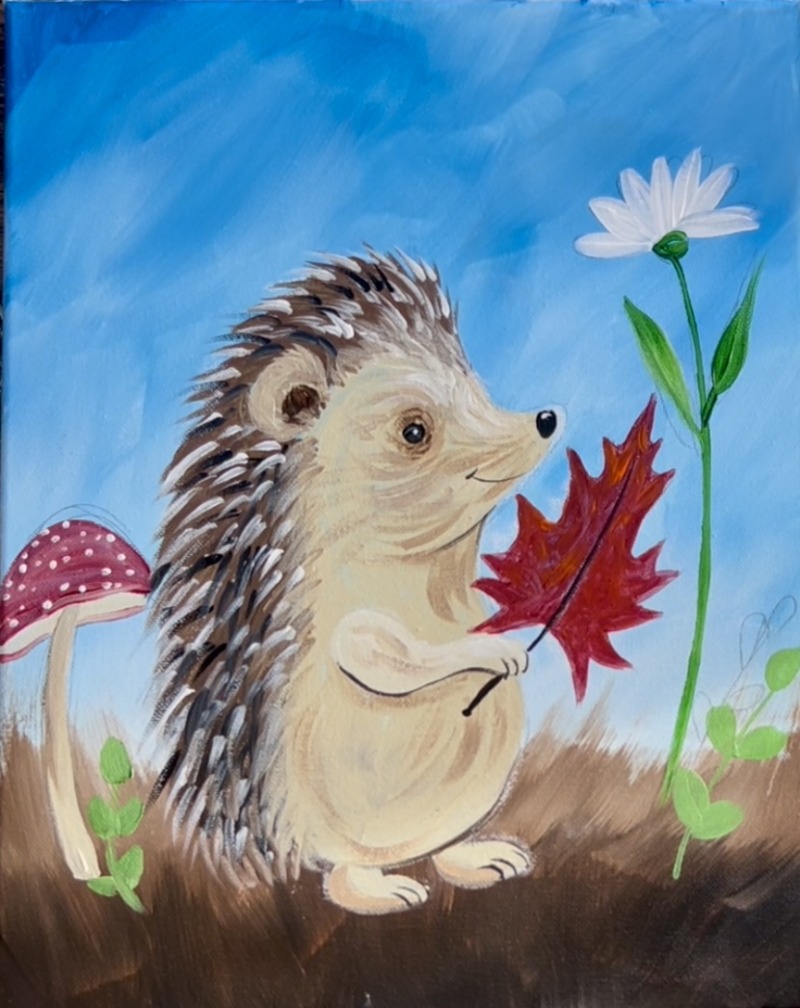
Paint more ground details including: little grass blades, little brush marks using the red and orange and paint two oak leaves. The oak leaves should be painted white first so the orange/red will show up bright after the white dries. For the grass, mix a little orange or beige into the green to make it more of a golden fall green color.
Then add more color to the maple leaf! Mix white with some of the orange and then loosely paint that color over your first layer of the leaf. Add some more “alizarin crimson” if needed. Basically the leaf is multi-color of the red, orange and a little bit of white all blended together to create different color variations.
After the white oak leaves dry, paint them over with orange/ red and have the colors sort of mix together like you did with the maple leaf.
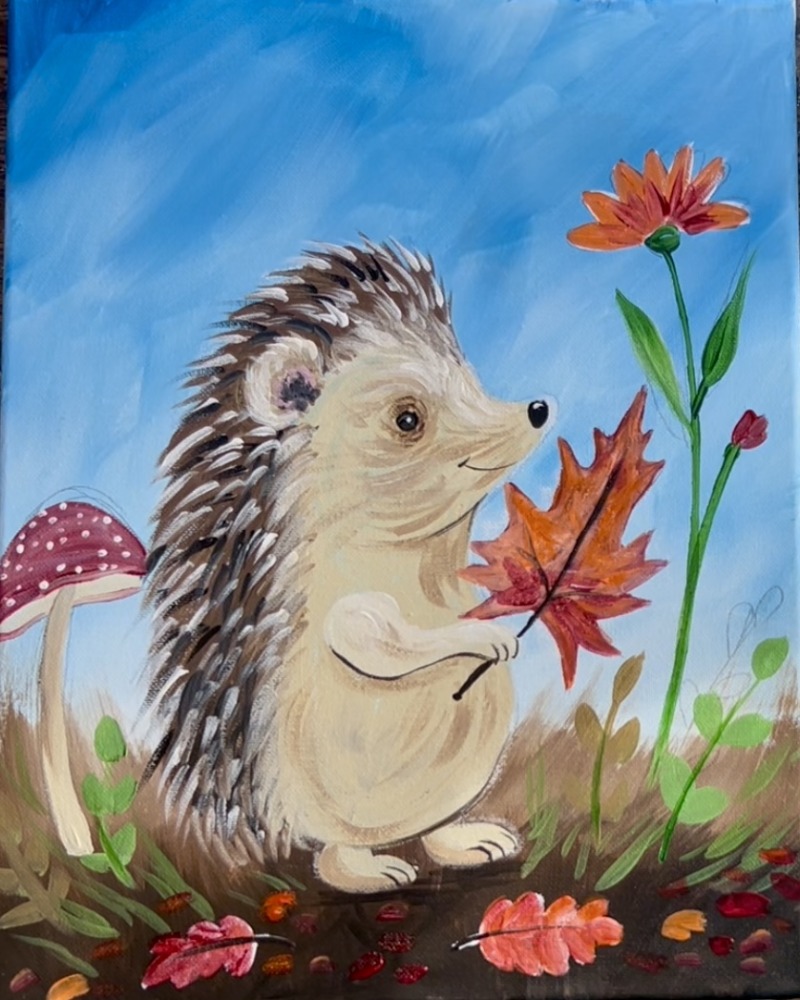
11. Paint Falling Leaves
Use the #4 round brush to paint rounded/ pointed leaves that are falling in different directions. I used “alizarin crimson hue” to paint the first layer, however, if you want you can paint them white first and then paint them the color.

Highlight the leaves with a little bit of “titanium white” that blends with the “alizarin crimson” before it dries. I did this on the top parts of each of the leaves. Then use “mars black” to paint the stems of the leaves.

12. Another Mushroom/ Final Touches
Add another mushroom on the right that overlaps some of the flower/ leaf. Use the color “unbleached titanium” to paint the stem and under side of the mushroom top.
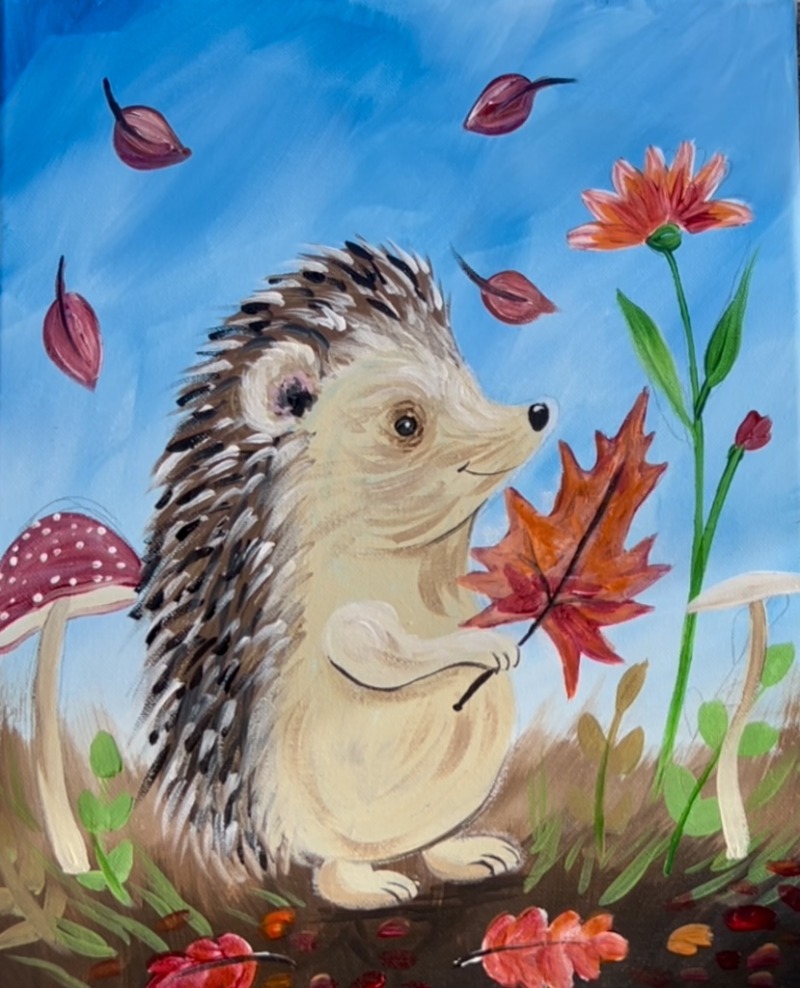
To make that “purple color”, mix equal parts “alizarine crimson” with “cerulean blue”. Paint the top part of the mushroom with this purple.
Then add little dots!

Some other details in this painting include: painting the black vein lines on the maple leaf, vein lines on the oak leaves. Highlight some of the edges of the flower petals with white and also add a white highlight on the top of all the falling leaves.
