

Would you like to save this?
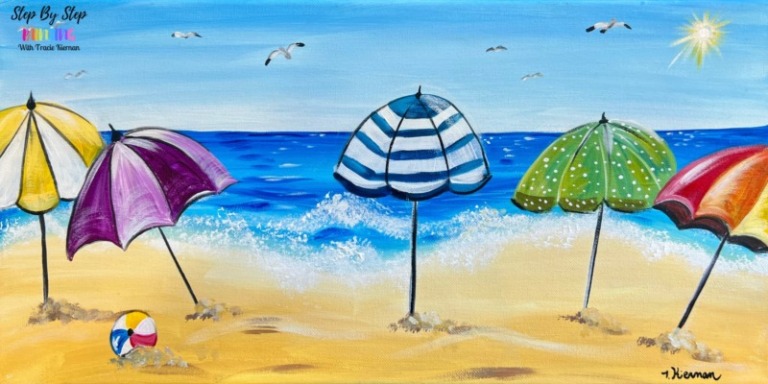
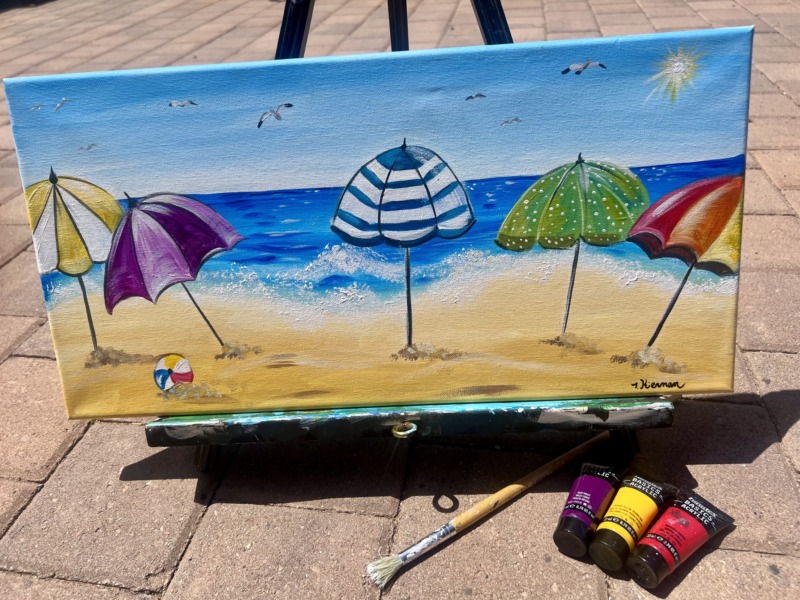
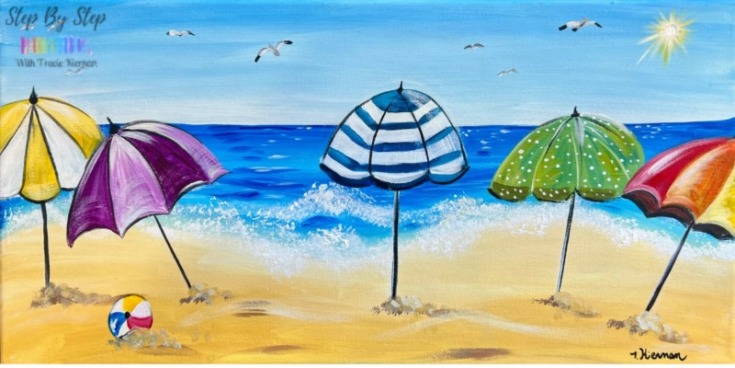
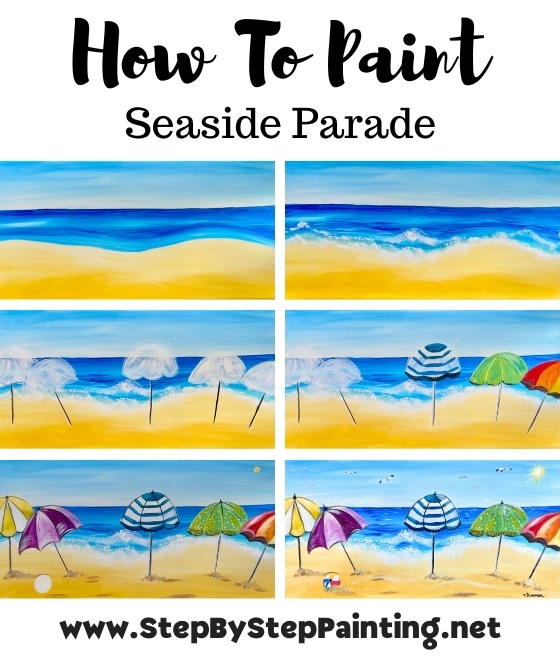
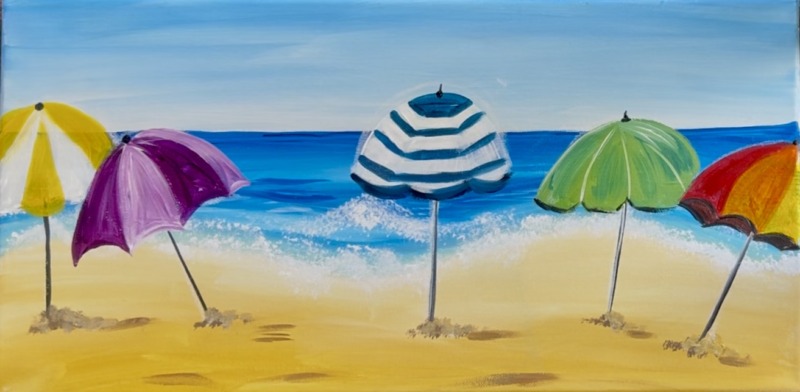
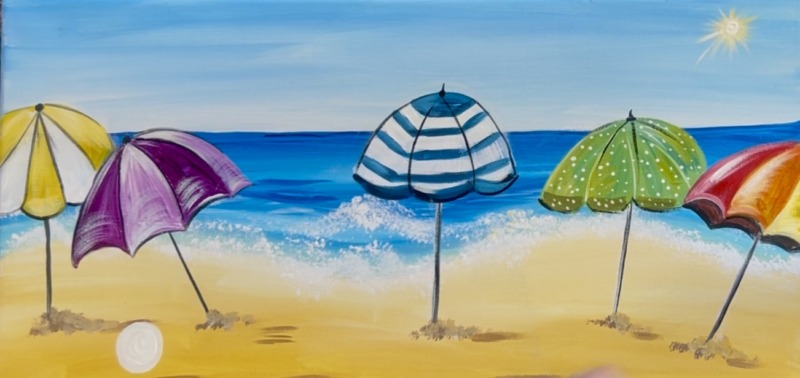
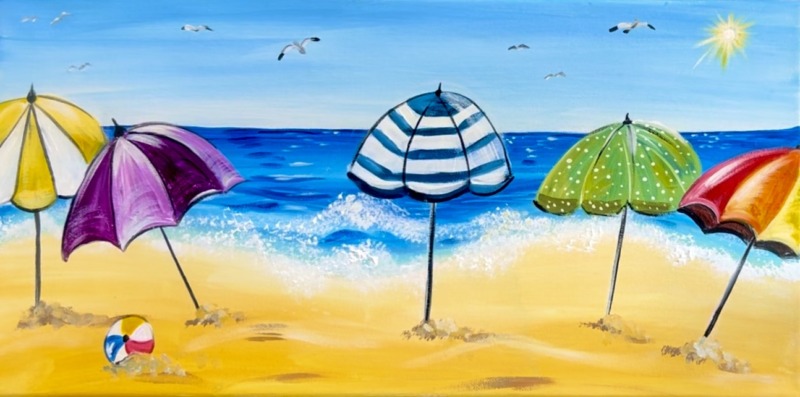
This tutorial will show you how to paint a fun set of colorful umbrellas along a beach! The painting is done on a 10 x 20 long canvas in panoramic mode. You can, however, paint this on a different size canvas instead!
Enjoy and happy painting!
Materials:
Seaside Parade - Acrylic Tutorial Of Umbrellas On A Beach
Materials
- 10 x 20 Canvas (you can also do this on any size)
- Acrylic Paint
- Brushes
- White Chalk Or Pencil For Drawing
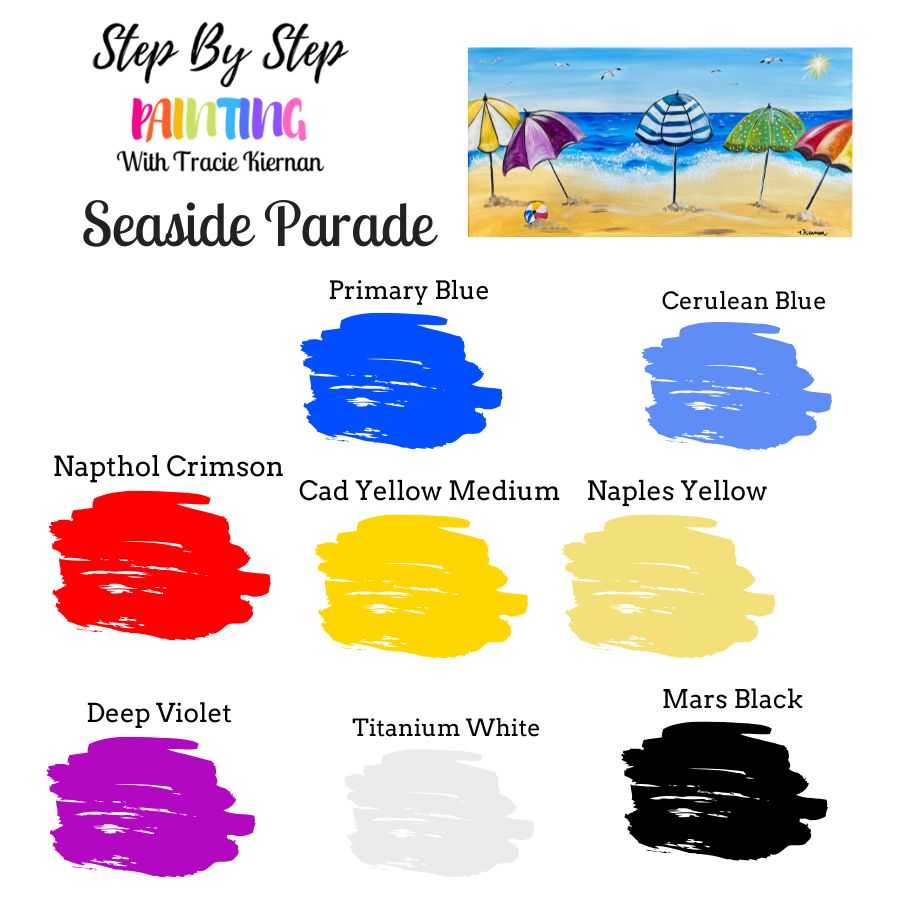
Colors
- Titanium White
- Mars Black
- Napthol Crimson
- Cadmium Yellow Medium Hue
- Cerulean Blue
- Primary Blue
- Naples Yellow
- Deep Violet
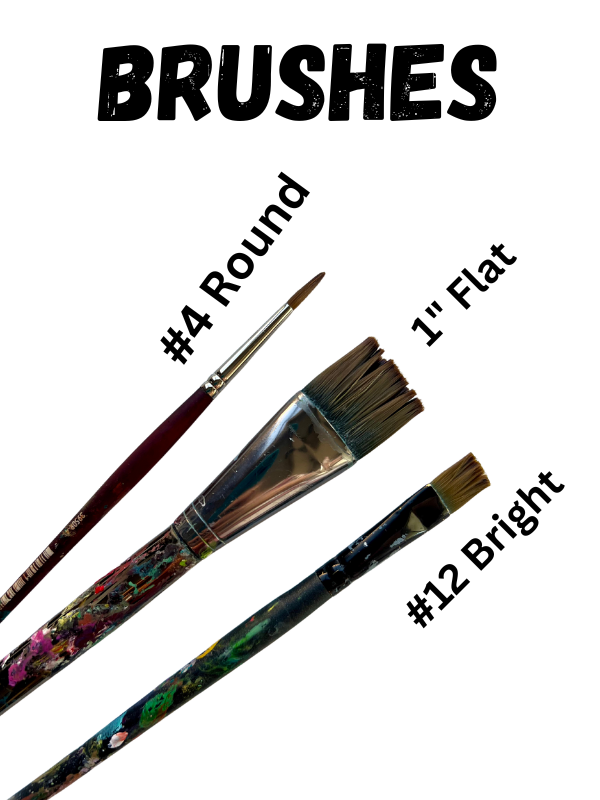
Brushes
- 3/4 Flat
- 12 Bright
- 4 Round
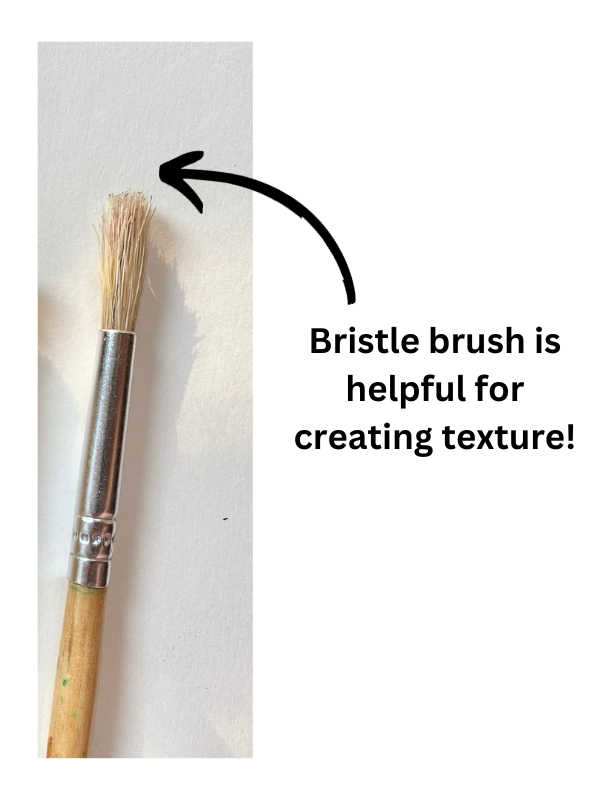
- *Round Bristle Brush (see notes)
- 3/8" Angle Brush
Notes
Look for a "bristle brush" or a "stencil brush" that has natural stiff bristles and a flat tip. This will be used to create the wave texture in our ocean painting.
Color Palette
Optional: A 3/8″ angle brush is helpful for some of the water lines in the ocean.

The bristle brush will be really helpful for creating texture in the ocean waves!
Directions At A Glance
Video
Step By Step Directions
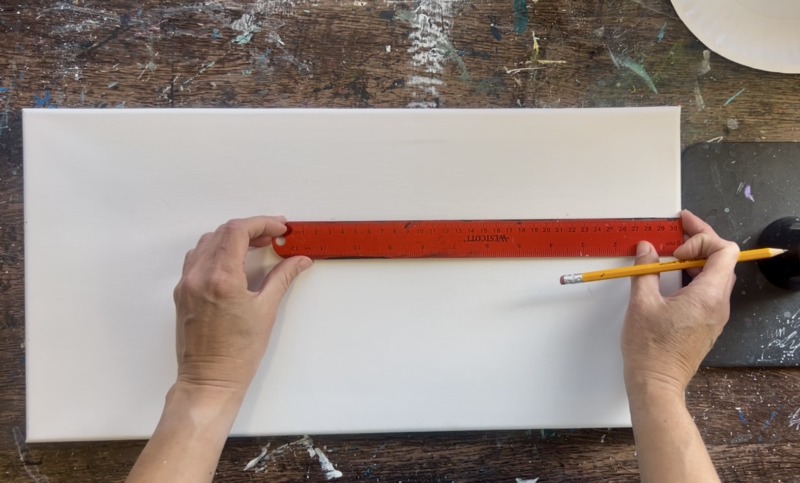
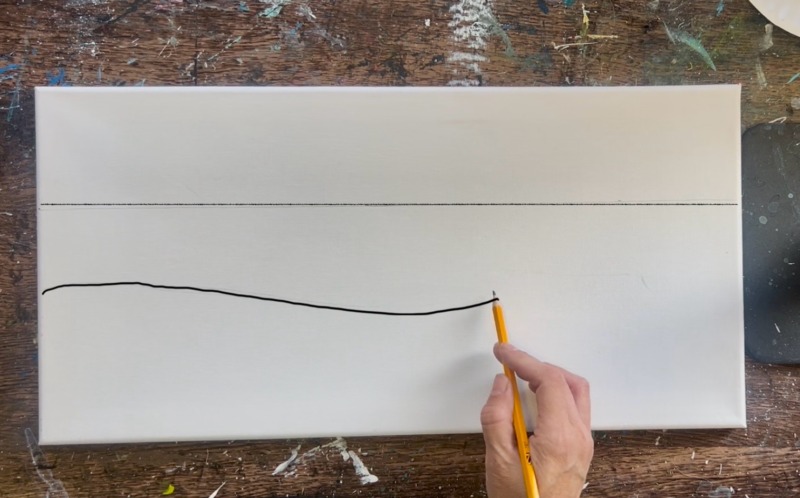
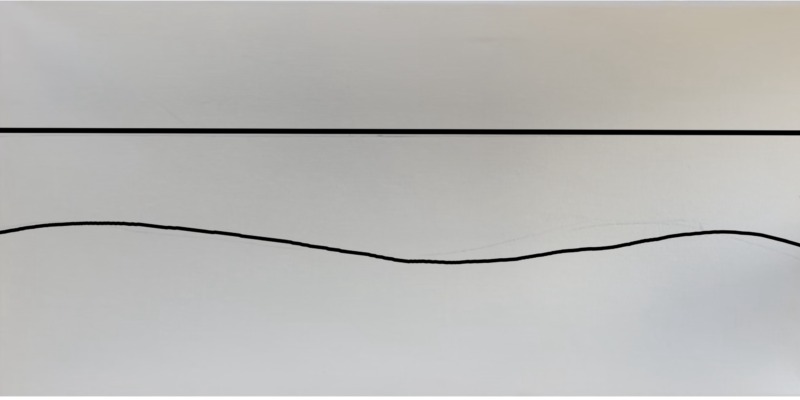
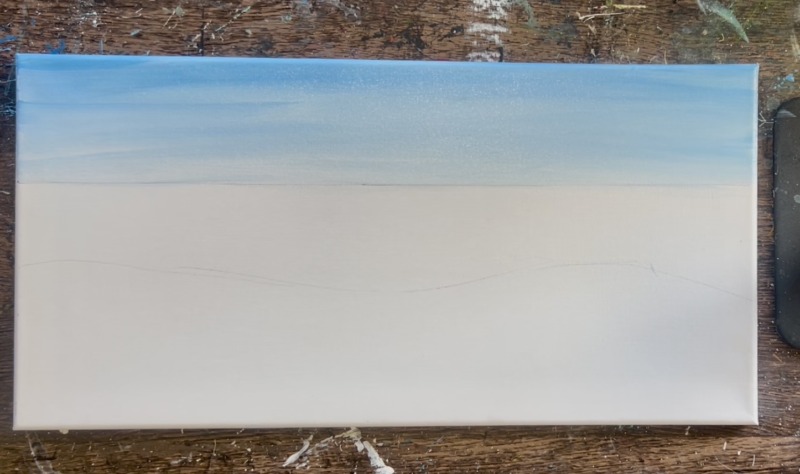
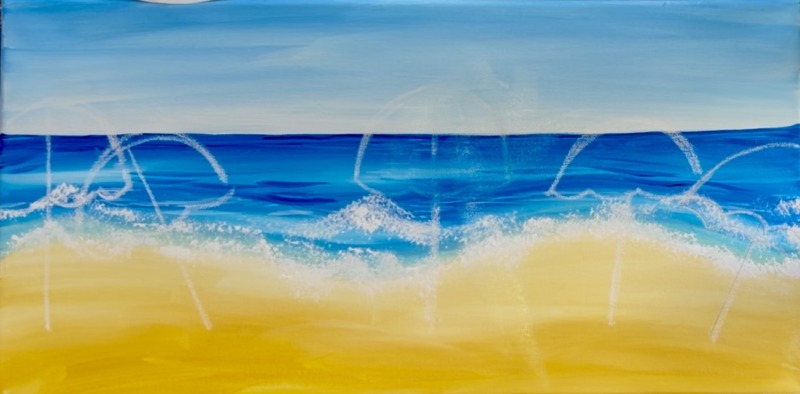
1. Draw Horizon Line & Shoreline
Position your canvas horizontally. Locate the 1/3 point of the height of the canvas. Since I am doing this on a canvas that is 10″ high, I measured about 3.25″ from the top of the canvas.
Use a ruler to draw a straight line across. This will be the horizon line for our painting!
Next, draw the shoreline. This line wasn’t measured. Estimate about halfway between the horizon line and the bottom of your canvas. Draw a long and slightly wavy line to represent the line where the water will be meeting the sand.
2. Paint Sky
Paint the top half of the sky with “cerulean blue” mixed with “titanium white” (equal amounts). Use the 3/4″ flat brush and paint a horizontal area across the canvas from one end to the next. Do this with full width, horizontal paint strokes.
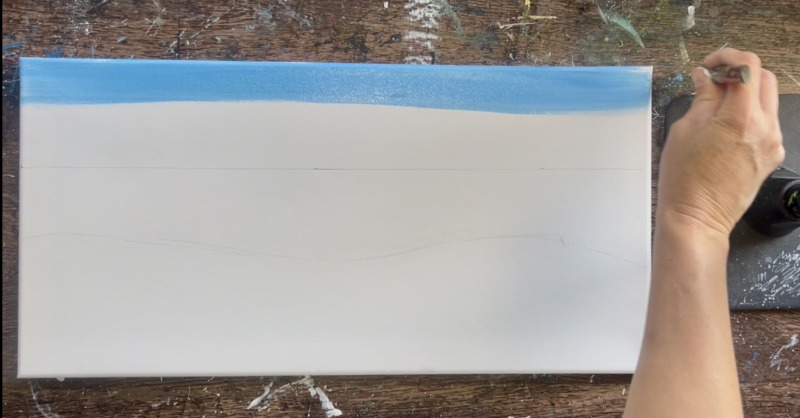
After going about halfway down, load your 3/4″ flat brush into “titanium white” but do not rinse the brush. Blend the white with the light blue so that the blue becomes lighter. You want to create a gradient blend of light blue on the top of the sky transitioning to a very light blue above the horizon line.
Stop when you get to the horizon line. It’s okay if your sky isn’t blended perfectly! You can have “streaks” of dark and light in the sky that don’t blend all the way. That adds character and interest in our sky!
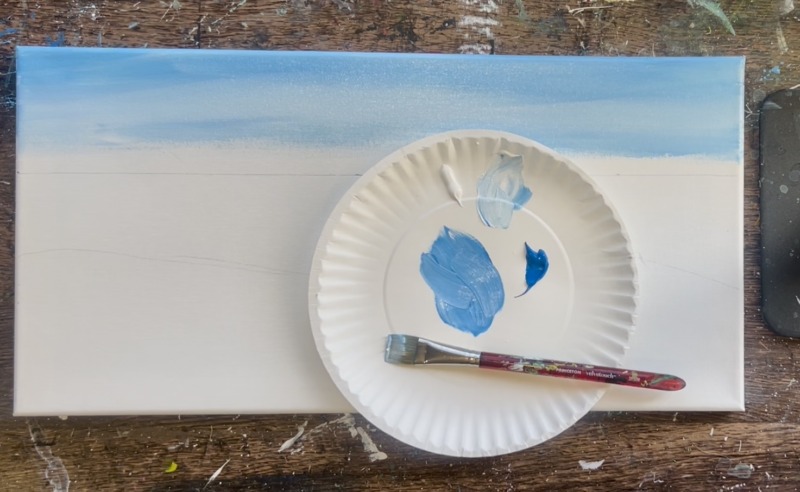
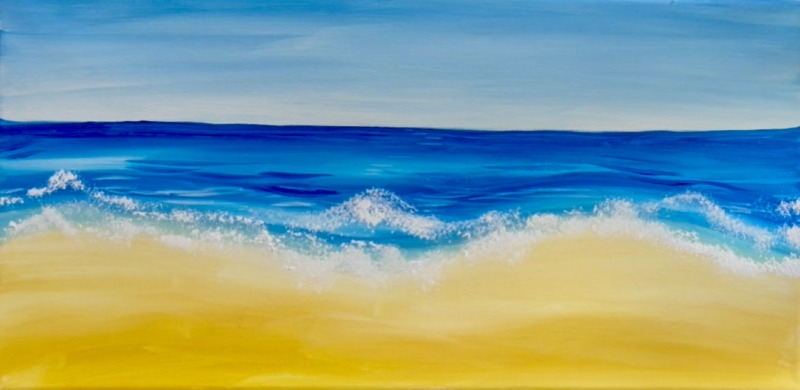
3. Paint Water
You will need “primary blue” for this next step! Rinse the 3/4″ flat brush. Start below the horizon line and paint this darker blue using left and right, full width paint strokes. Cut in as close as possible to the horizon line making sure that line is nice and straight (but it’s okay if it’s not perfect). Go about halfway down your water area with this dark blue.
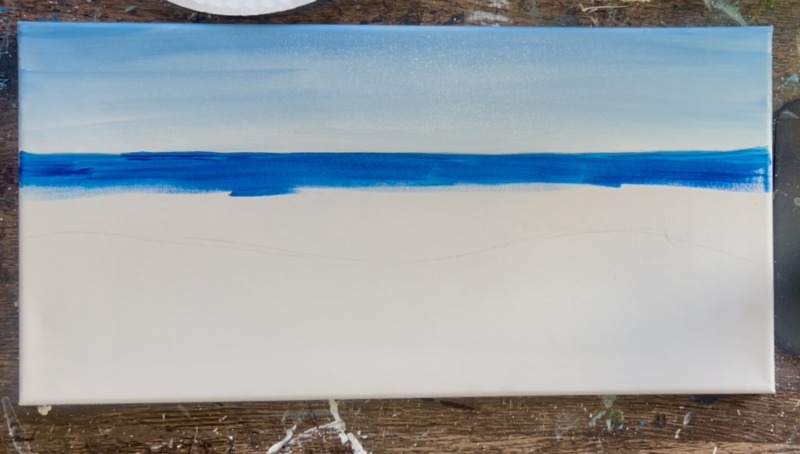
Next we want to blend white into our blue! The ocean in this painting is darkest just under the horizon line and it blends (like a gradient) to a lighter blue as it approaches the “shoreline”.
Load your brush into as small amount of “titanium white” without rinsing the blue off. Lightly blend the white into your dark blue by painting left and right paint strokes.
Go to the edge of your shoreline. The ocean isn’t exactly a perfect gradient of dark to light. There are some lighter blues in the center, darker blues towards the shore and then lighter blues along the shoreline. Do this by blending your colors on the canvas but don’t blend all the way. Add more primary blue to your brush if you need to create some darker areas closer to the shore.

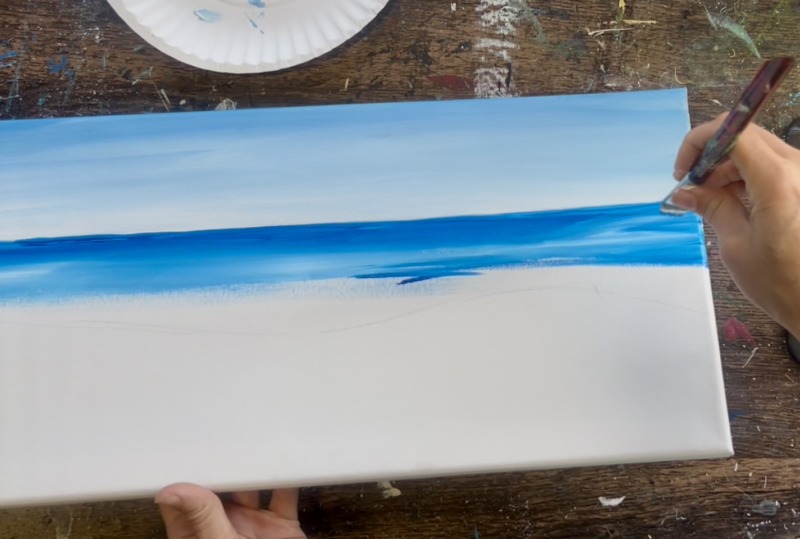
4. Paint Sand
Rinse all the blue off of your paint brush. Load your paint palette with the color “naples yellow”. Use the 3/4 flat brush. Start on the bottom of your canvas (this is where the sand is). Then paint left and right paint strokes with the yellow. Go about halfway up. Then add “titanium white” to your brush. Blend this white with the yellow as you approach your “shoreline”. We want the sand to become lighter as it approaches the water.
Bring this sand color all the way to the water and stop. The sand is lighter at the water line and darker on the bottom of the canvas.

Next, blend the blue shoreline edge with the sand edge. Rinse the 3/4″ flat brush. Load it into “primary blue” mixed with “titanium white”. Slightly water this down. Brush this light blue color over your light yellow color. It may turn a light aqua color from the blue mixing with yellow and this is okay. This will create the illusion that sand is under this water area.
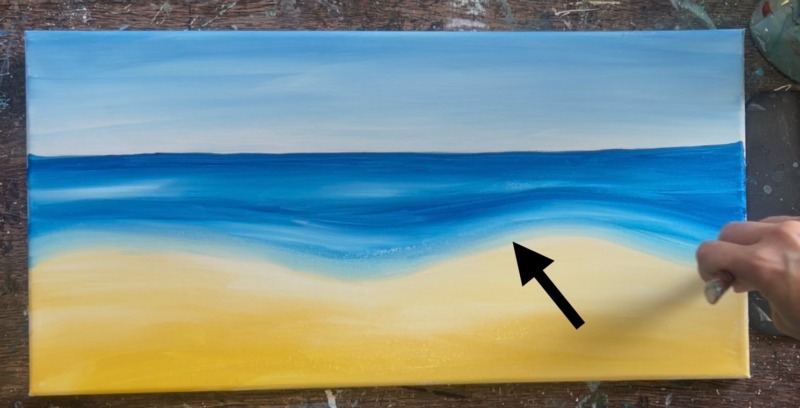
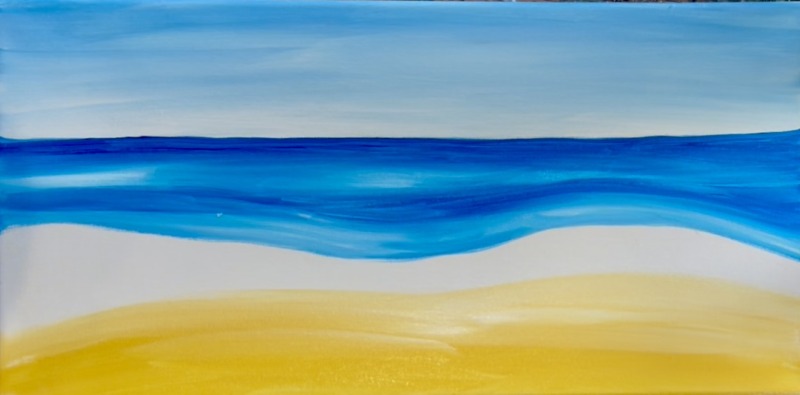
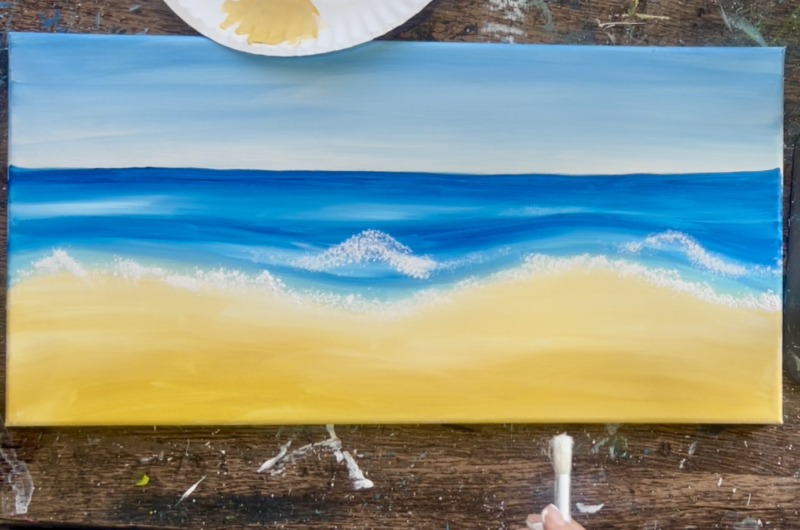
5. Paint Ocean Waves
Next we will be using a bristle brush to create texture on our ocean to create waves. Use a brush that has the stiff natural bristles and a flat tip.
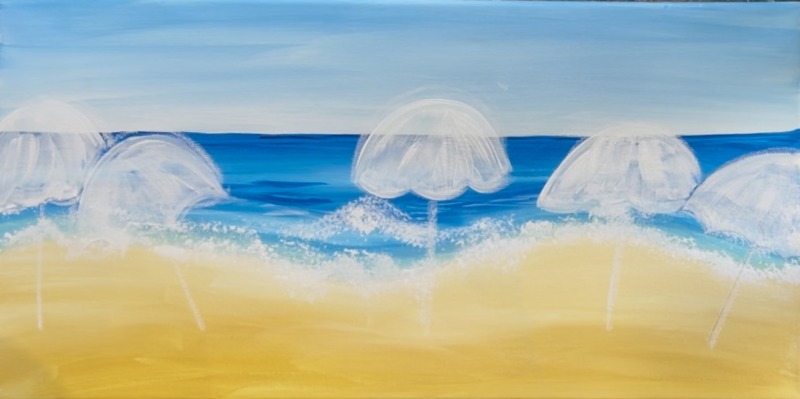
Load the brush tip into “titanium white”. Then stamp white along the edge of the ocean and overlap the edge of the ocean and the sand. The texture that the end of the bristles creates will look “spongy” like bunches of bubbles/ sea foam.
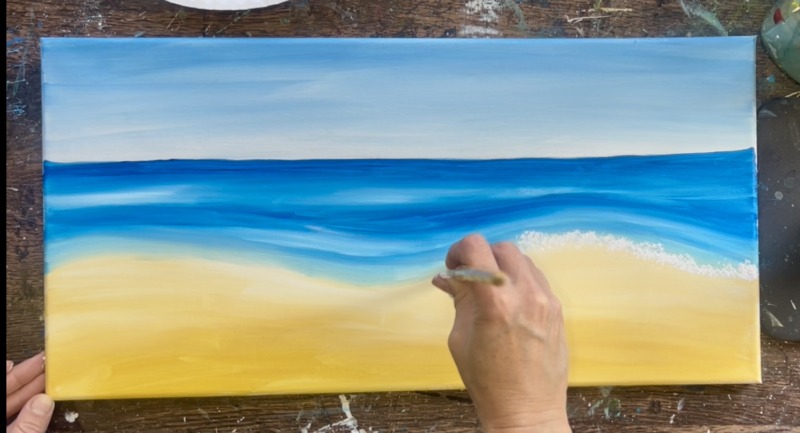
Create some “wave” formations above your shoreline (further back in the water area).
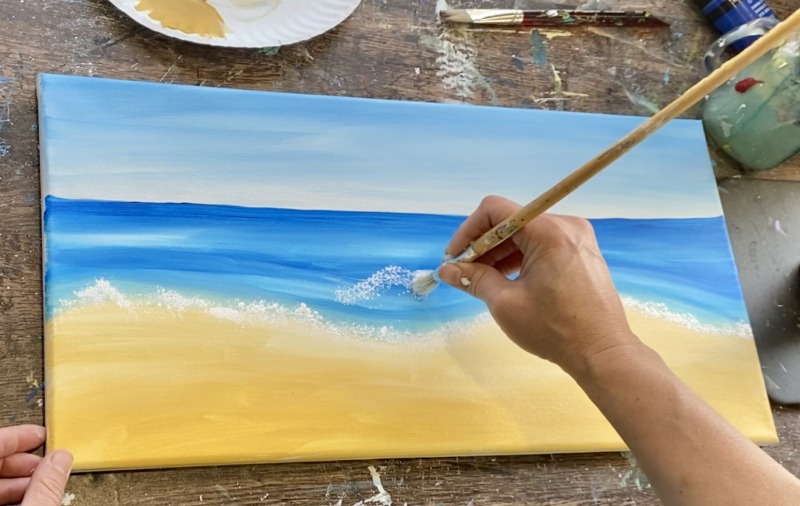
Tip: as you stamp your brush, you can vary the consistency of the white splashes. Try adding more paint or less paint to the brush to see what happens. Try doing light pressure versus hard pressure. Add variety in your ocean splashes to give it more interest!
This next step is optional! You can add more detail in the ocean by painting thin horizontal lines. Some lines light blue, some lines light blue. This step is optional because we may not notice it in the end! A lot of the background is going to be covered up or distracted by the colorful umbrellas.
Next, use the 3/8″ angle brush and titanium whit mixed with primary blue (make a lighter blue). Then paint some horizontal lines in the ocean area to create water texture.
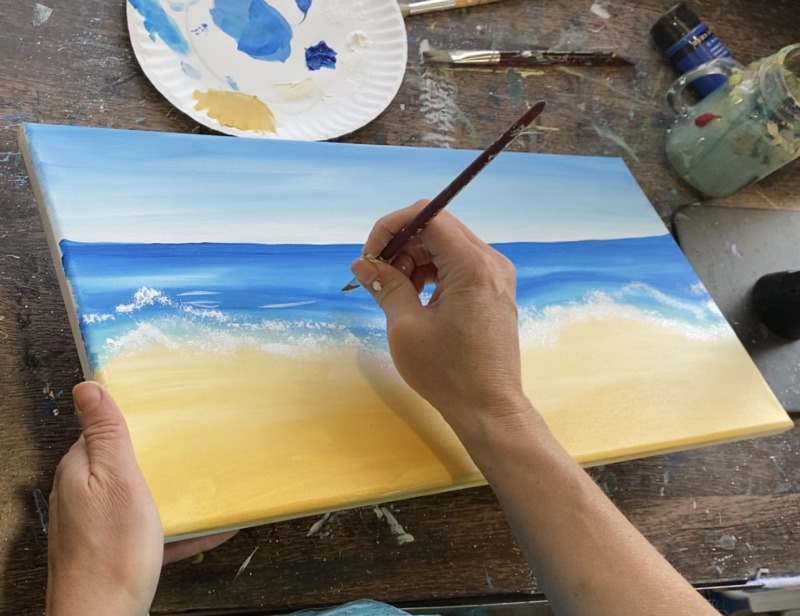
Do this with darker blue (primary blue not mixed with white).
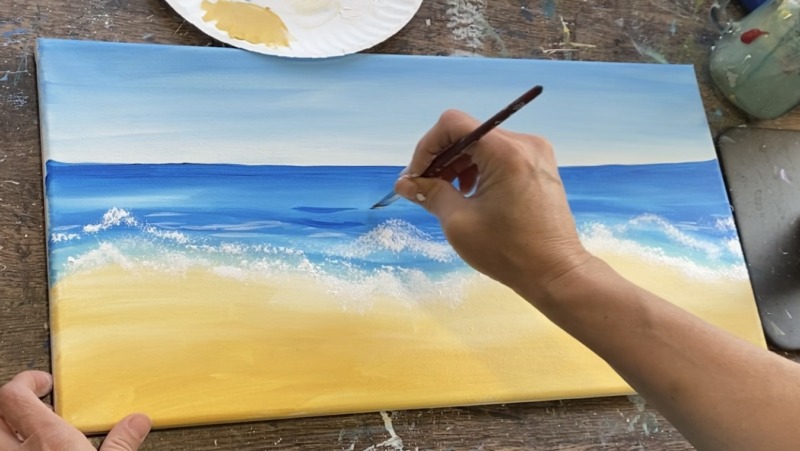
Let this dry before going onto the next step!
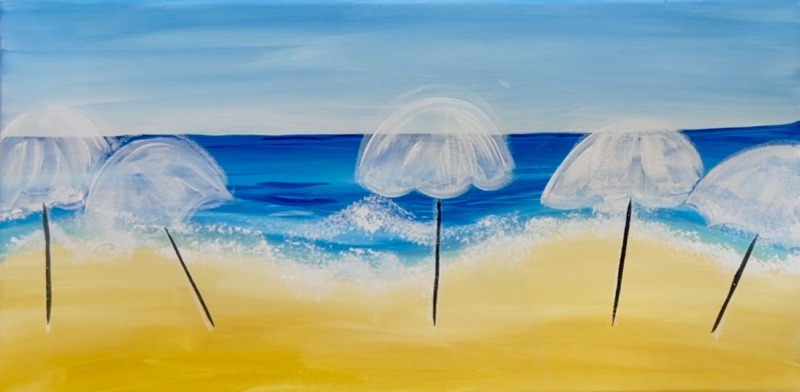
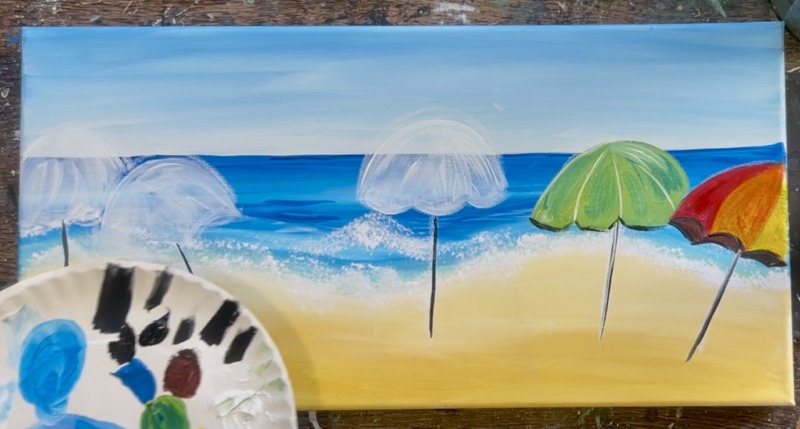
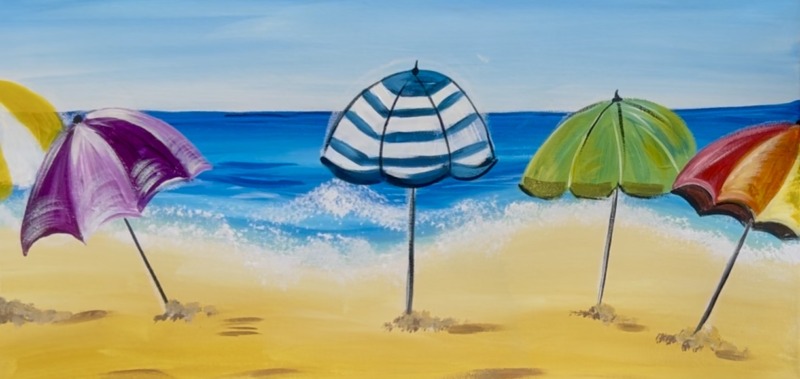
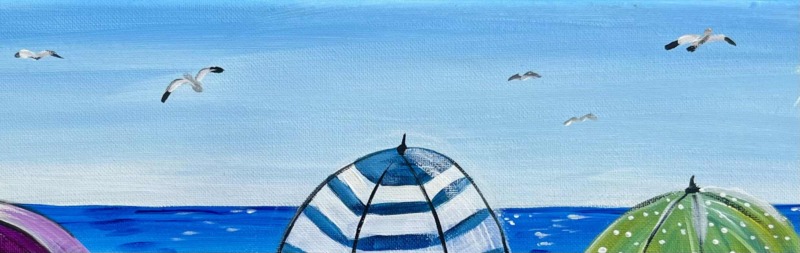
6. Draw Umbrellas
In this next step we will be drawing simple umbrellas! I recommend using a piece of chalk so you can erase as needed.
Draw your umbrella line first to establish the angle the umbrella is going. I drew five umbrellas but you can draw more or less! Each of the umbrella poles starts about the halfway part of the sand. Draw different angles for the poles (or even make them all straight up!).
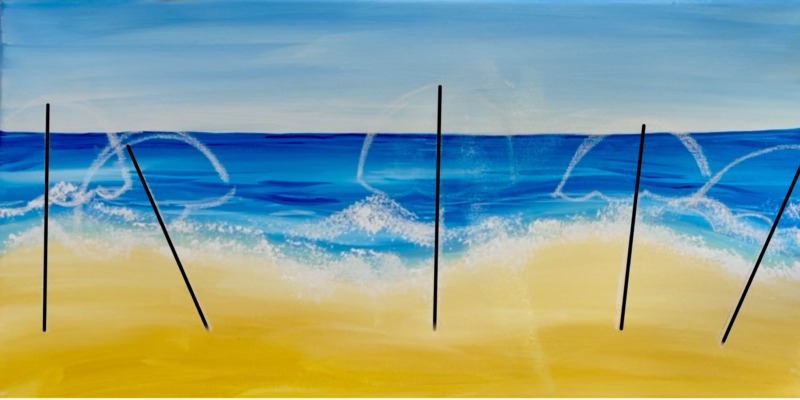
Then draw semi-circles that overlap the top part of the pole. You can change the heights and widths of these circles and make some overlap.
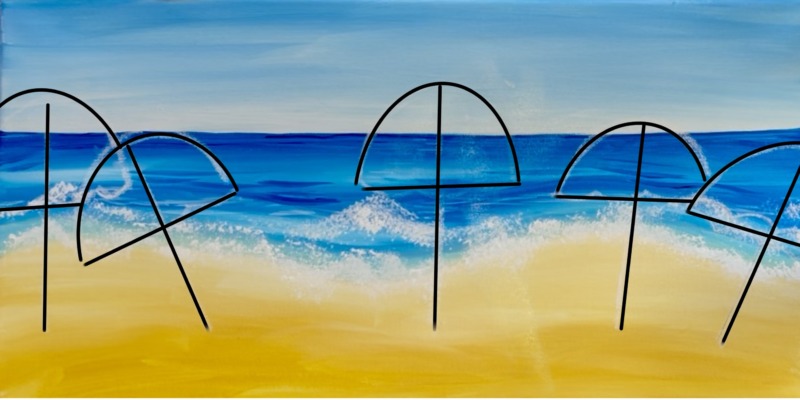
Then draw the bottom edging using the flat line as a guide.
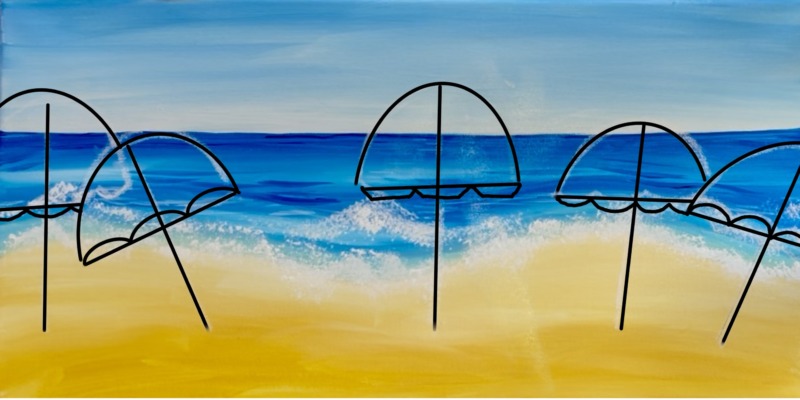
There are a few different types of umbrella edging you can do (specifically the bottom edging). Some umbrellas have a scalloped edge, some have pointed edges (curves going inwards) some have more of a boxed style edging. You could make them all the same or make each one different.
Here is my drawing below with chalk! Chalk will erase with a wet paint brush.
7. Paint Umbrellas White & Paint Handles Black
After drawing the umbrellas in, you want to paint the top part solid white! This will ensure our colors for the umbrellas show up nice and bright with none of the ocean showing through. I used a combination of the #4 round brush and the #12 bright brush to paint all the umbrellas in with “titanium white”.
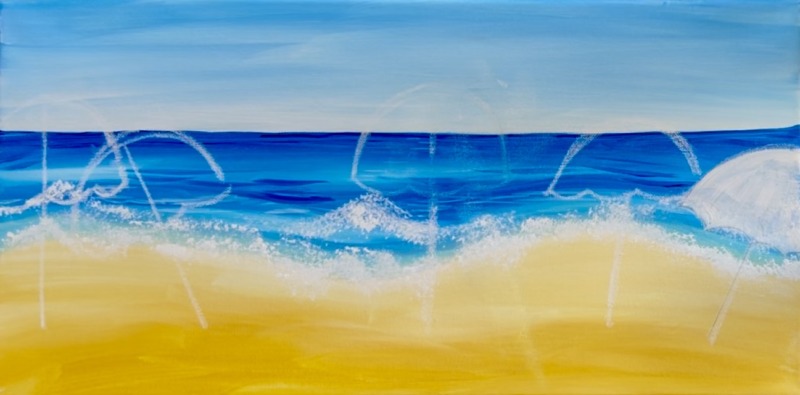
As you are painting the umbrellas in, it’s best to overlap the shape first and then fill in white with paint strokes going in the direction of the shape. It’s okay if some of the ocean color is still showing through the white.
Use the 3/8″ angle brush or the #4 round brush to paint the poles of the umbrellas. Paint your dark line from the bottom of the white shape down to the sand.
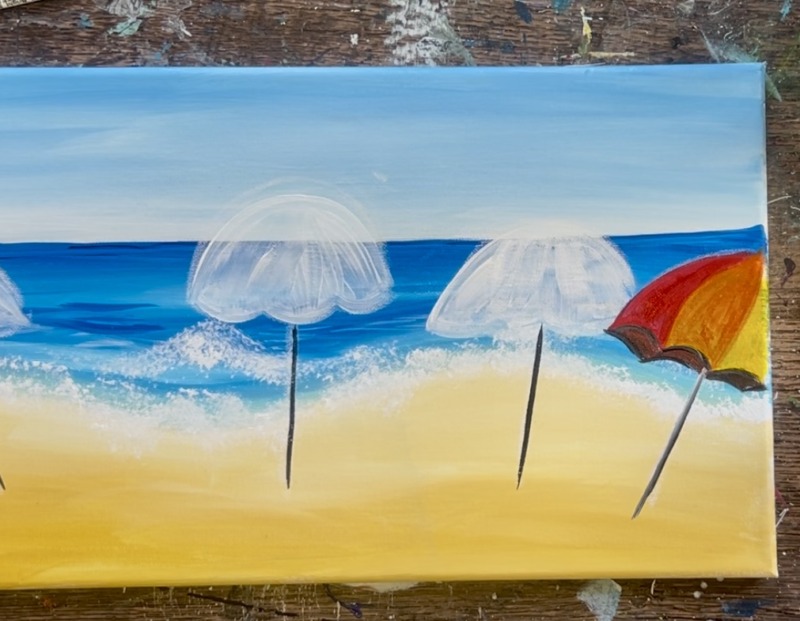
8. Paint Colors/ Designs On Umbrellas
Next is the fun part! You can use my color and design ideas or even come up with your own! Use a #4 round brush.
I started with the umbrella on the right. For the scalloped edged umbrellas, you can divide the umbrella shape into segments. Paint a curved line that goes from the point of the edge up to the top center of the umbrella.
I did “naphthol crimson” red on the far right of this umbrella. To make orange, mix “cadmium yellow medium” with red.

Then the far right segment (that is showing in the painting) is with “cadmium yellow medium”.

If you want the under side of the umbrella to show, you can paint another set of curved/pointed lines and fill it in with a dark color. I mixed “naphthol crimson” with “mars black”.
The next umbrella, I wanted it to be a solid color without a pattern so I chose light green! To make a light green, mix “primary blue” with “cadmium yellow medium hue” and add a little bit of “titanium white” into the color.
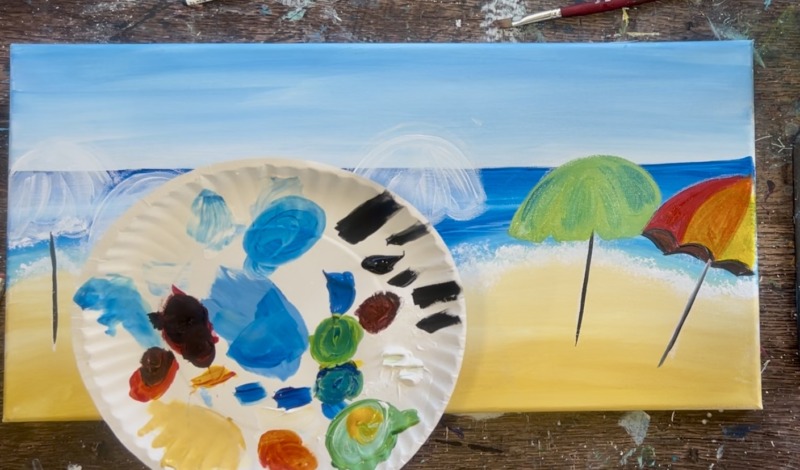
As you are painting the umbrellas, you can paint the division lines and outline some of the edging. I did this to the green one with white division lines and then used “mars black” to outline the bottom edging. You could also wait until later to do this step after your first layer of umbrellas dry.
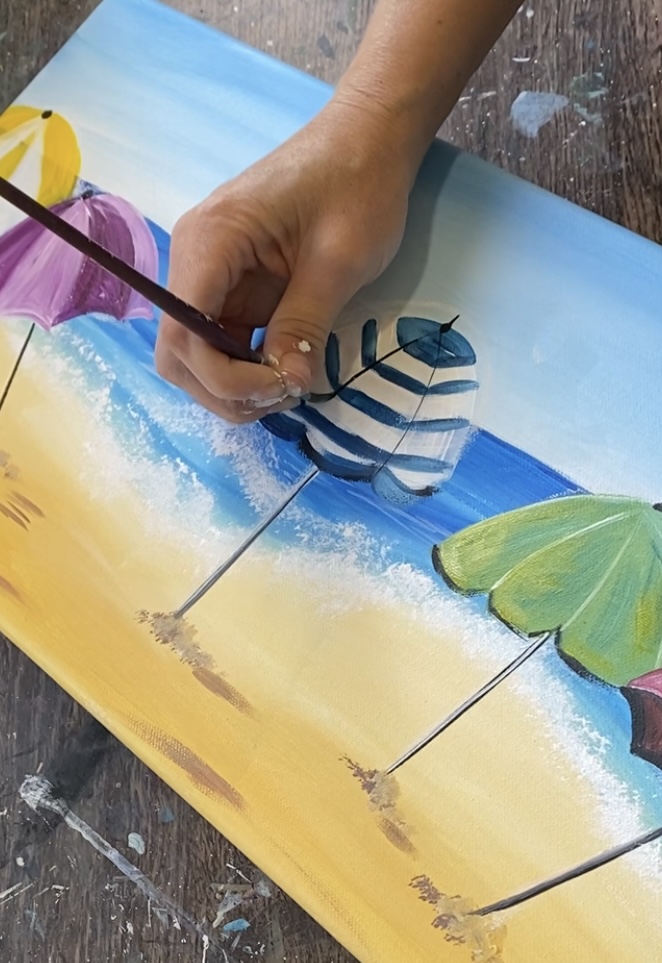
For the center one, I wanted a navy blue and white striped umbrella. To make “navy blue”, I mixed “primary blue” with a small amount of “mars black”. Start at the top and paint the top curve area of the umbrella. Then paint segmented lines going down below that top curved area. The white stripes can be painted later after the blue dries.
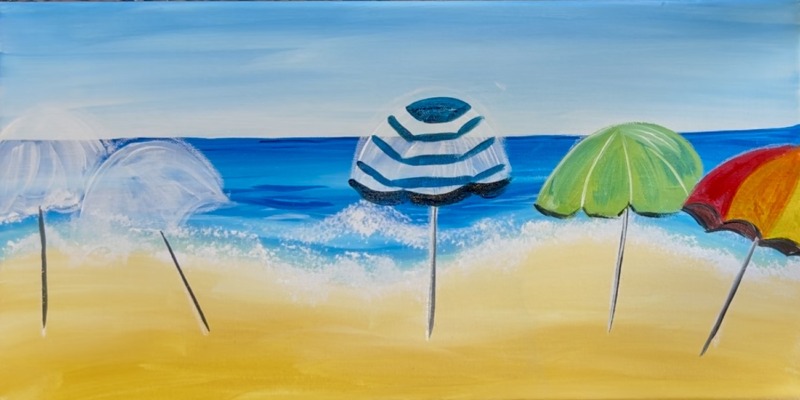
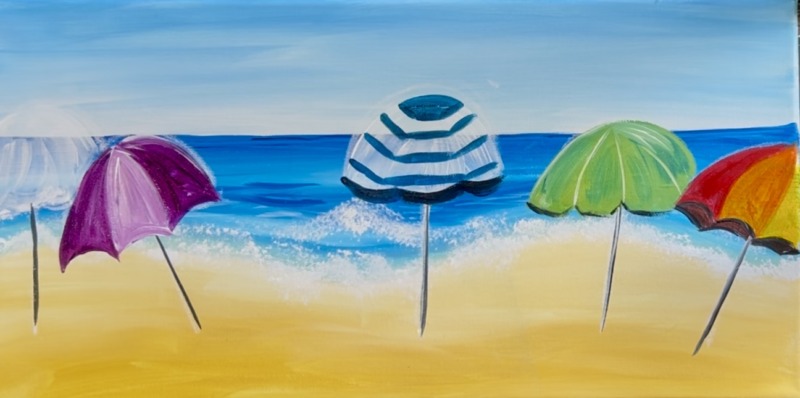
For the next umbrella, I used “deep violet” and “deep violet” mixed with “titanium white”. I did a pattern of dark purple and light purple. This umbrella is a similar style to the umbrella on the far right.
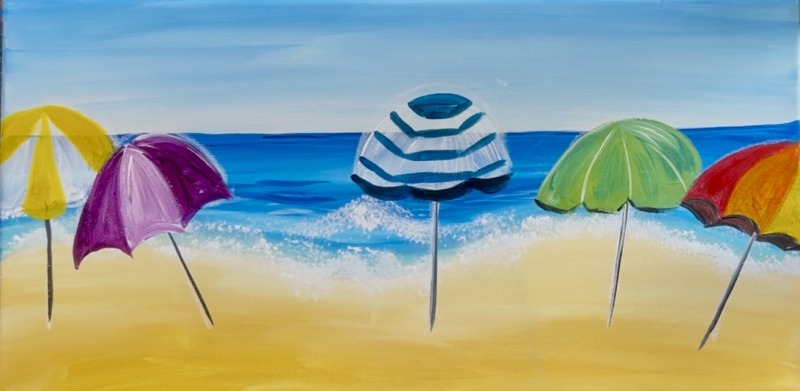
Finally, the far left umbrella was done with yellow and white segments. I used “cadmium yellow medium” for the yellow triangular areas. Then “titanium white” can be painted for the white triangular areas after the yellow dries.
9. Paint Sand Texture
Mix a brown on your paint palette by mixing “Naples yellow”, “naphthol crimson” and “primary blue”. Add a little white to it to lighten the brown up a bit! Alternatively you can use a “burnt umber” or any other brown paint and then add some white to it so it isn’t as dark.
Use the #4 round brush and paint little dots to create some sand that is gathered around the bottom of the umbrella poles. You want to make it look like it is sort of piling up at the bottom of the pole. Then paint a few random horizontal brown lines throughout your sand area.
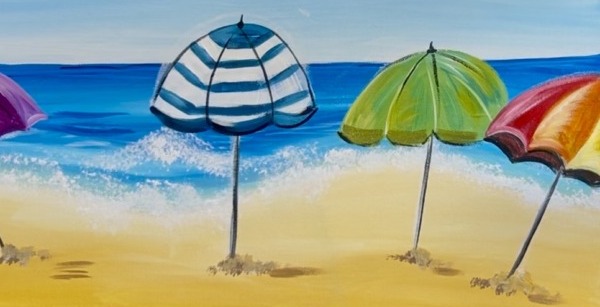
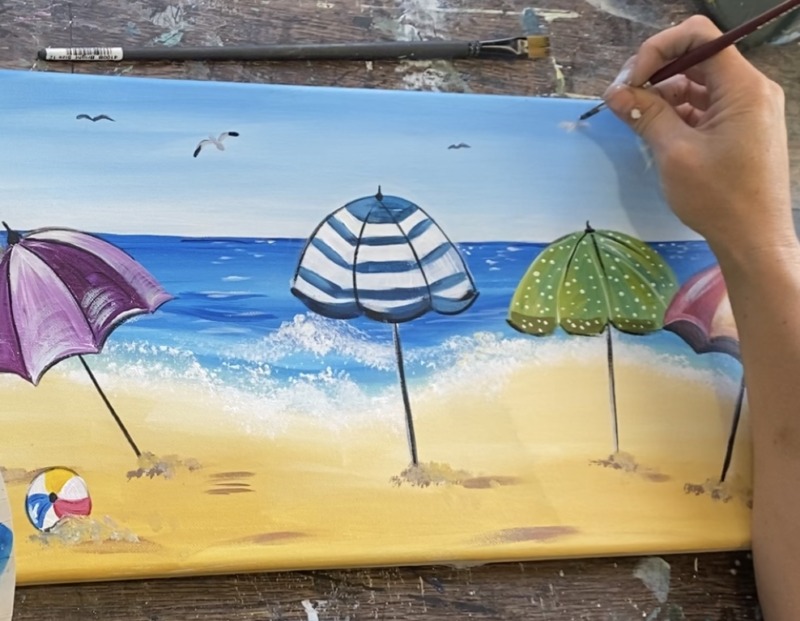
10. Detail Umbrellas With Highlights, Outlining and Tops
In this next step we will be adding more detail to our umbrellas! If any color is showing through the first layer, go ahead and add a second layer paint to the umbrellas.
Then paint the umbrella tops! These can be simple tiny circles on the top center of the umbrella curve or a little point/ tip.
Then add highlights to the umbrellas. You can do this by using the #4 round brush and adding “titanium white” to whatever color your base umbrella color is. For example: for the red highlight part of the umbrella on the right, mix red and white together. Then lightly brush your light color on one side (I chose the left side). Loosely outline the shape with your highlight color.
Do this for the orange and yellow side as well.
Add highlights to the purple umbrella in the same way you did to the rainbow umbrella.
Loosely outline the umbrella lines with “mars black” and the #4 round brush. You can also use a paint pen to help with outlining. Loosely outlining means you don’t have to outline everything, just a few lines to help some of the edging look more bold and stand out better.
You can also add a highlight to the umbrella poles! Use either the 3/8″ angle brush or #4 round to paint a white line on one side of each of the lines.
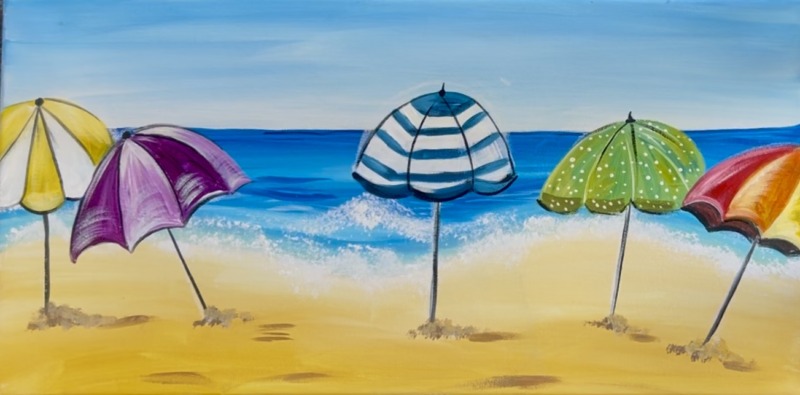
For the green umbrella, I added little white polka dots! Also, use “mars black” to loosely outline the lines and edges of the umbrella.
11. Add Beach Scene Details: Ball, Sun & Seagulls
This part is so much fun and customizable! You can add shells, starfish, a dolphin jumping out of the water, etc.
I painted a beachball on the lower left and a sun on the upper right. Use the #4 round brush to paint a white circle for the ball.
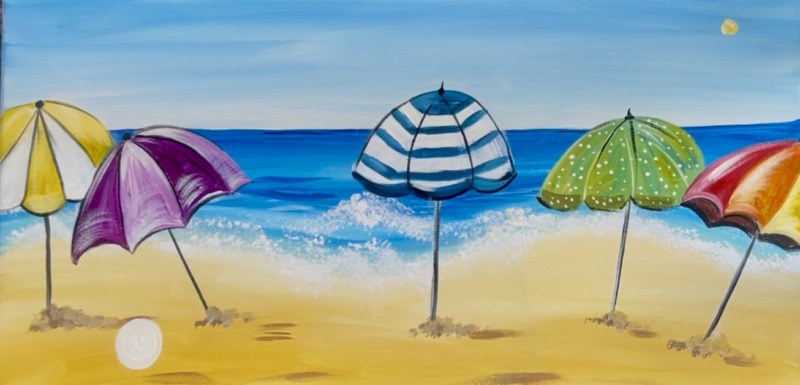
To paint the sun, start out by painting just a tiny “cadmium yellow medium” circle.
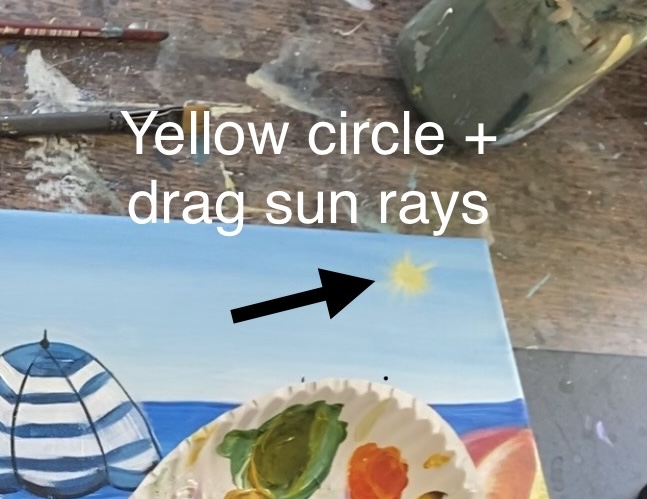
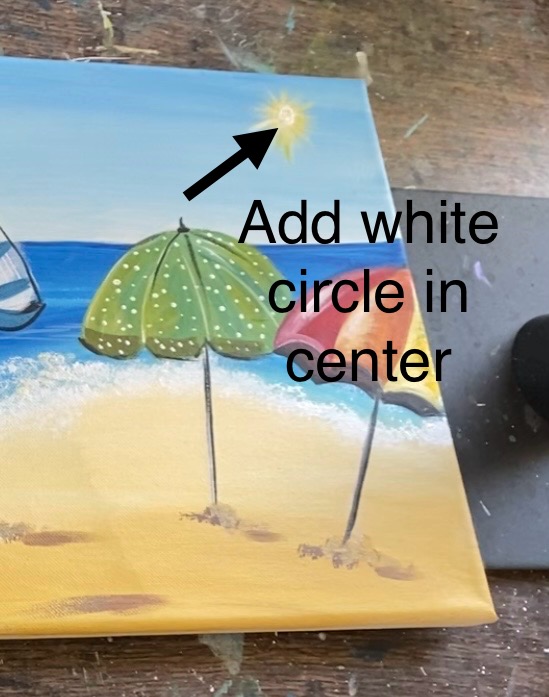
After the white from the beach ball dries, paint red, yellow and blue triangles on the center part of the circle. Then paint a little black dot in the center. Then paint dark sand on the bottom of the ball that overlaps the ball slightly.
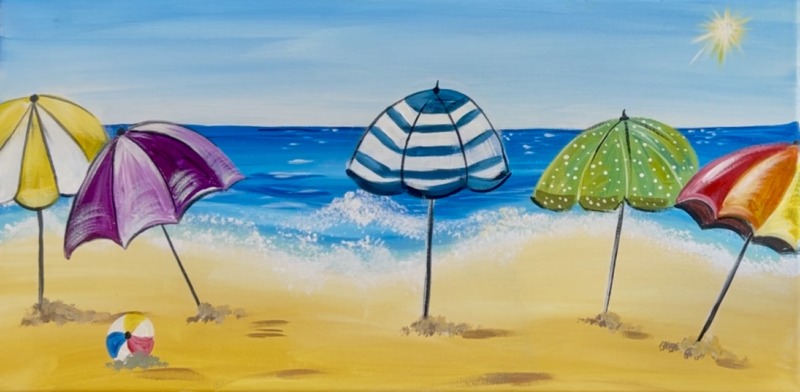
Paint seagulls in the sky! Use the #4 round brush. Make a light gray on your paint palette by mixing a small amount of black with a lot of titanium white. Paint little “M” marks in the sky. Then use mars black to paint the tips of the wings. If you want to get more detailed with the seagulls, you can paint a little body, tail and tiny circle for the head.
I like to do a variety of sizes and heights for the seagulls. Make them fly in different directions/ angles.
Some final touches for this painting could be adding more splash texture in the water and little white marks on the ocean water closer to the horizon line to resemble sparkling water from the sun reflecting.
You can also add some more color and texture in the sand area.
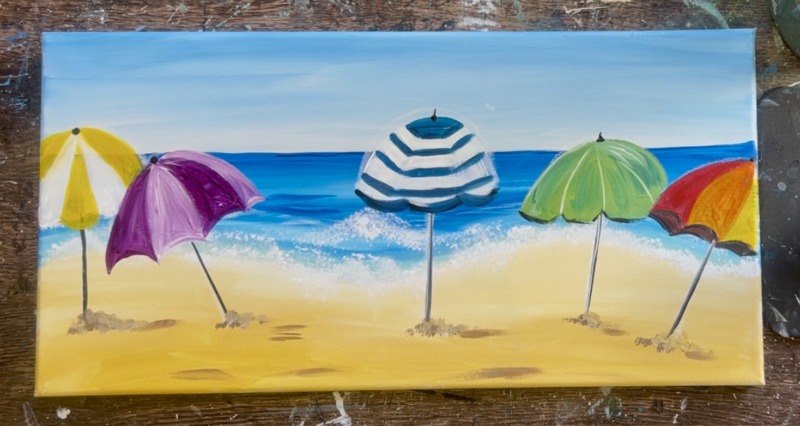
Finished!
Sign your name and show it off!

Oh Tracie!!! I am so excited to attempt this painting. I think I may have been your inspiration! I have been so busy all summer, but I am about to have a week to myself and hope to paint. I’ve watched part of the video and you are awesome!! Thank you so much for sharing your talents!!