
Would you like to save this?
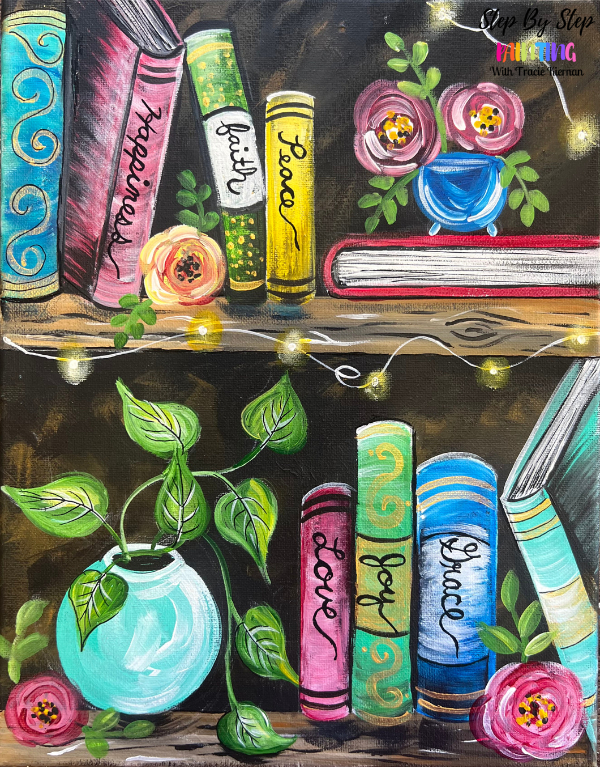
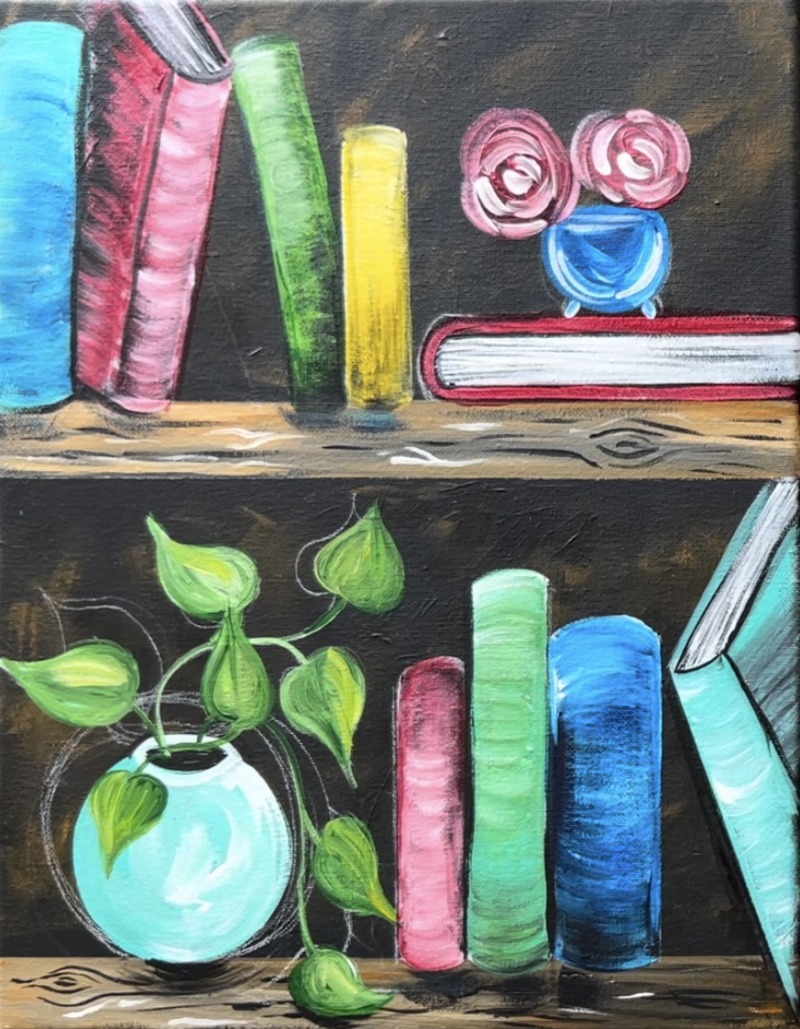
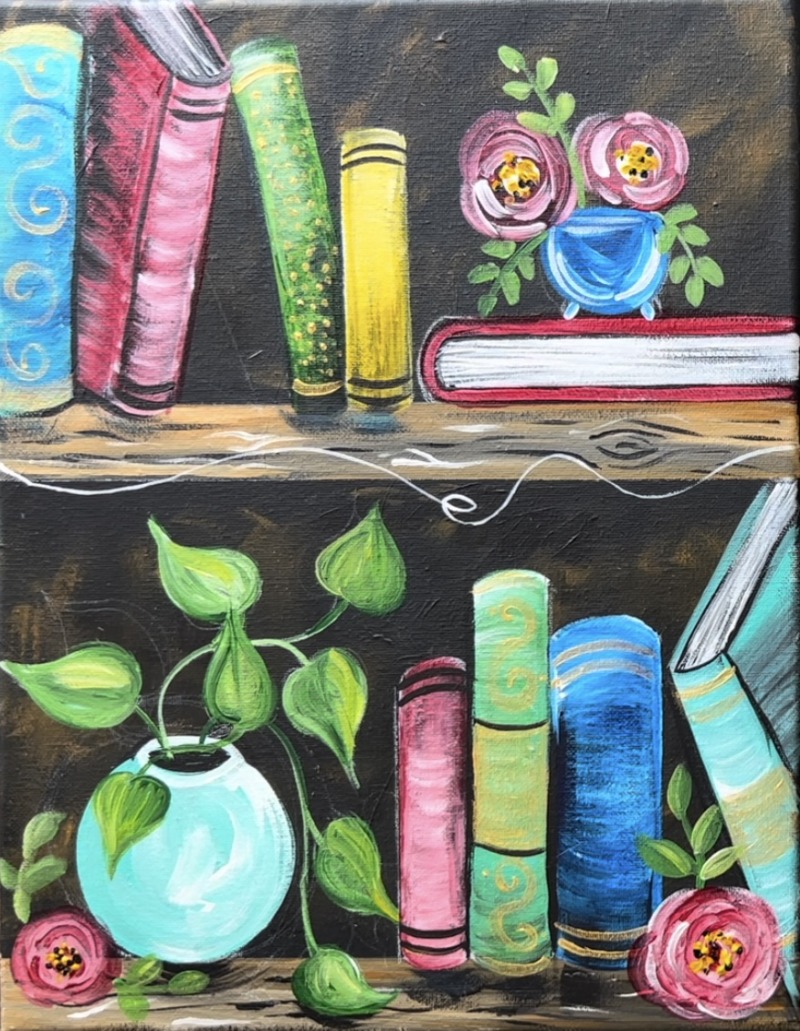
There is something magical about this painting especially if you are a book lover! We will be painting a bookshelf with multiple color books. This shelf is decorated with whimsical fairy lights, roses and a plant!
Customize the titles on the books! You can write the titles of your favorite books or you can write simple words like I did! You can also customize colors, shapes, patterns, etc.
Enjoy and happy painting!
Materials
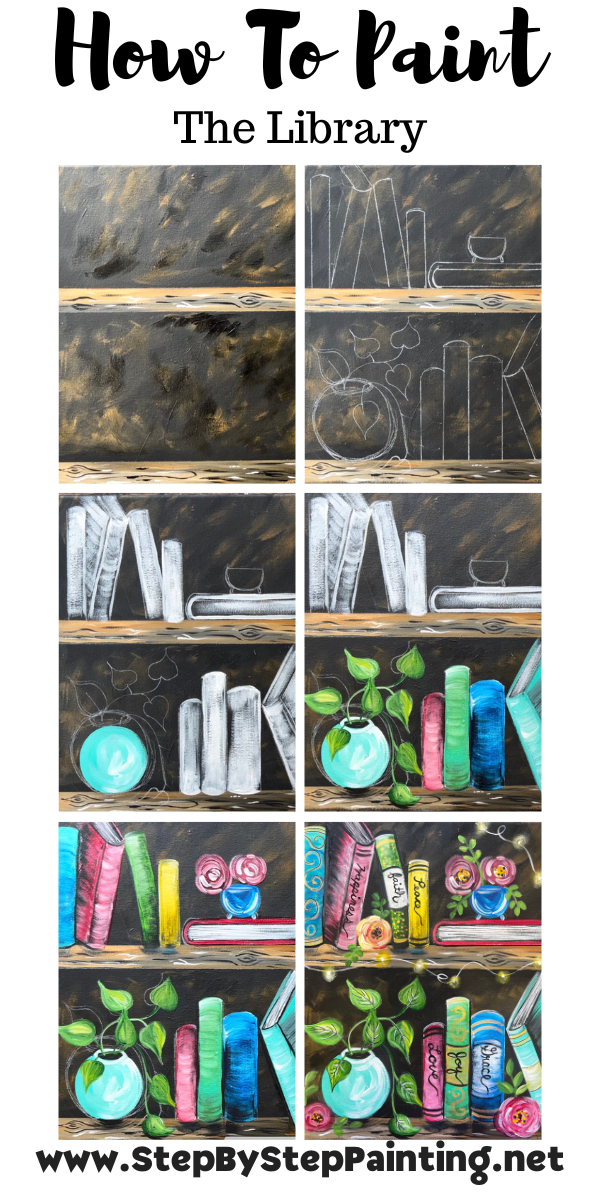
How To Paint "The Library" - Acrylic Painting Tutorial

Paint a whimsical library shelf full of books, floral decor and fairy lights.
Materials
- 11 x 14 Canvas Painted Black
- Acrylic Paint
- White Chalk Pencil
- Brushes
- Black POSCA Paint Pen Fine Tip
- Painters Tape
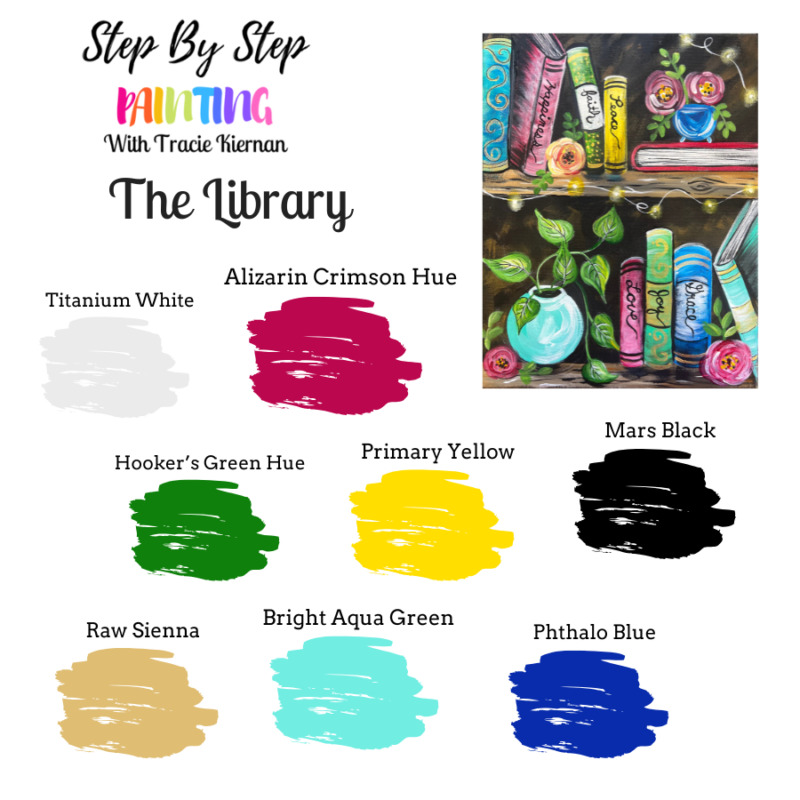
Colors
- Mars Black
- Titanium White
- Alizaren Crimson Hue Permanent
- Primary Yellow
- Hooker's Green Hue Permanent
- Bright Aqua Green
- Phthalo Blue
- Raw Sienna
Brushes
- 8 Round
- 12 Bright
- 4 Round
How To Download This Tutorial:
Available in my PDF shop, you can purchase this as a download for $5. Tutorial includes: PDF instructions, traceables in different canvas sizes and video download. Find out more here!
Color Palette
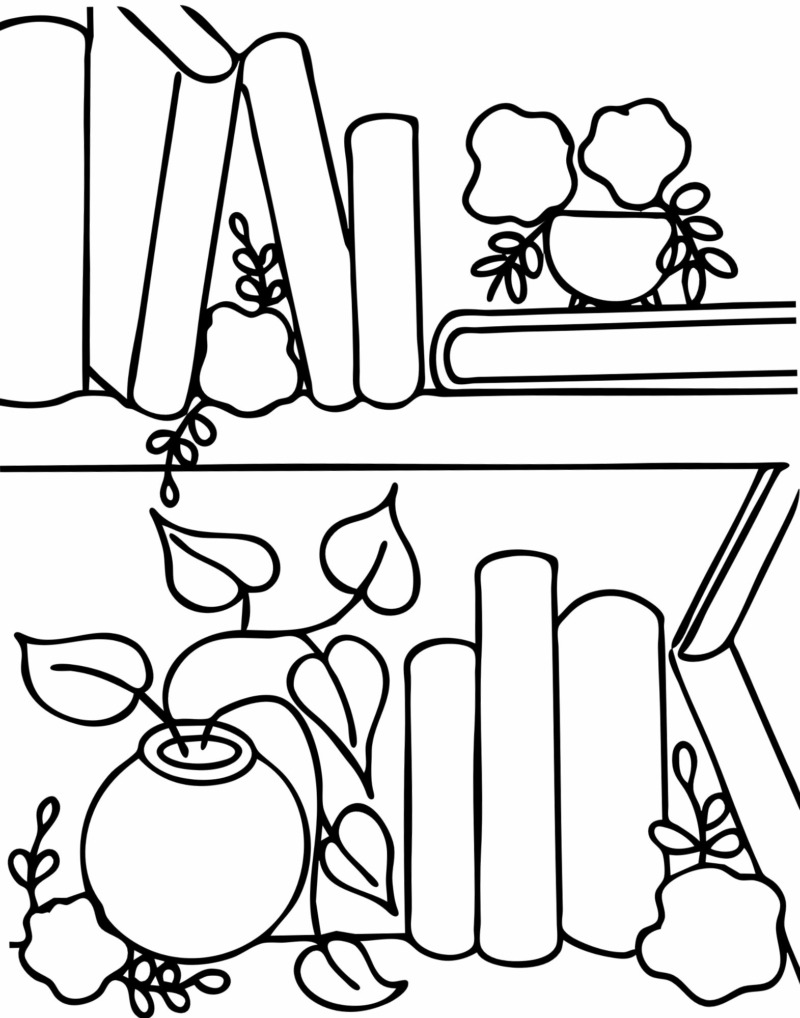
Traceable
Directions At A Glance
Video
Step By Step Instructions
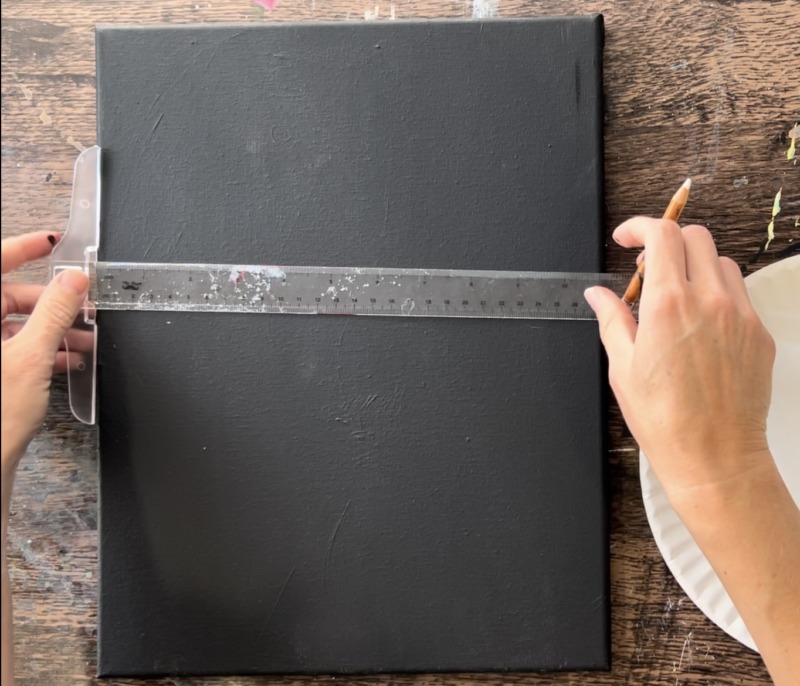
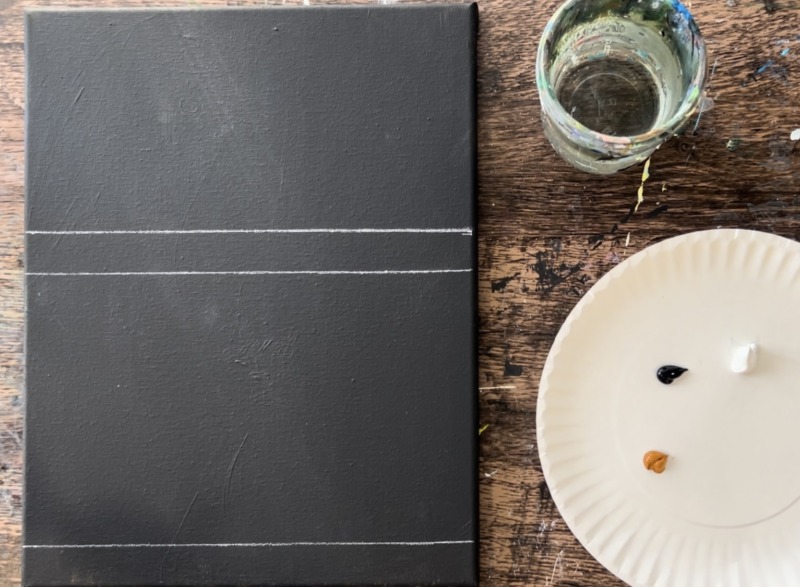
1. Draw Shelves
Start with a blank black canvas. You can purchase a pre-painted canvas or paint a blank (or mess-up painting) with one layer of black paint.
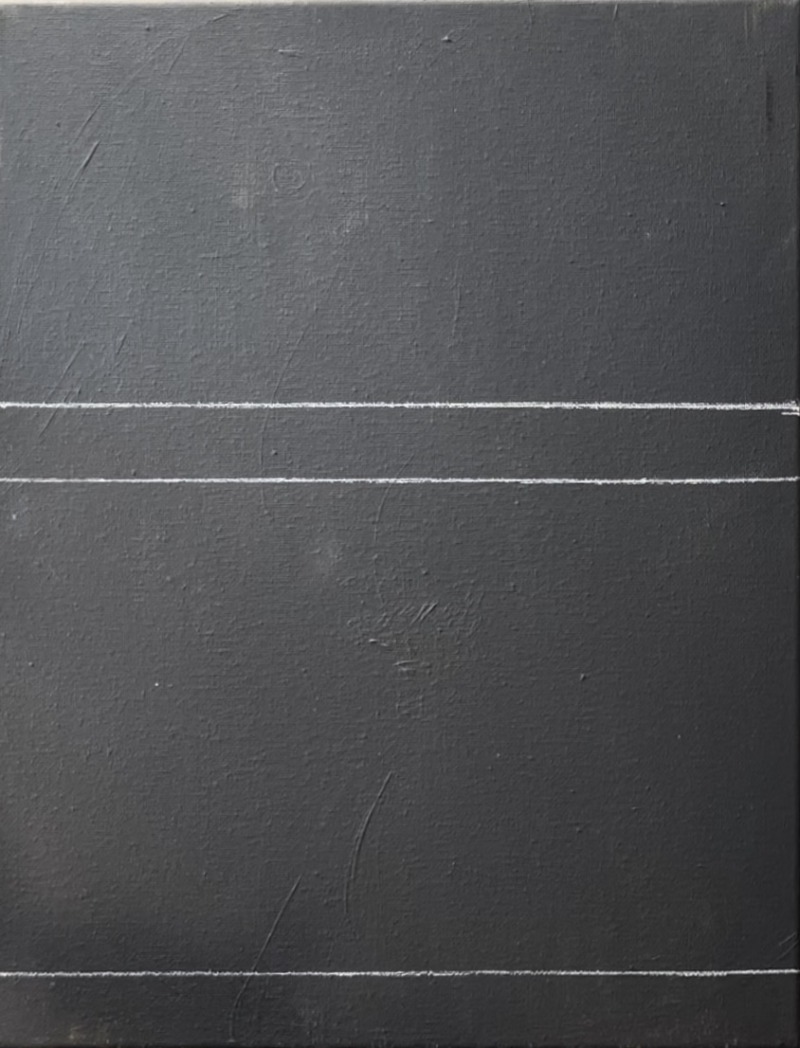
Use a ruler to measure 7.5″ from the bottom of the canvas. Draw a straight horizontal line with a white chalk pencil.
Make this top shelf approximately 1″ wide. Draw a second horizontal line. Then draw a third horizontal line for the bottom shelf. This bottom shelf is about 1″ from the bottom of the canvas.
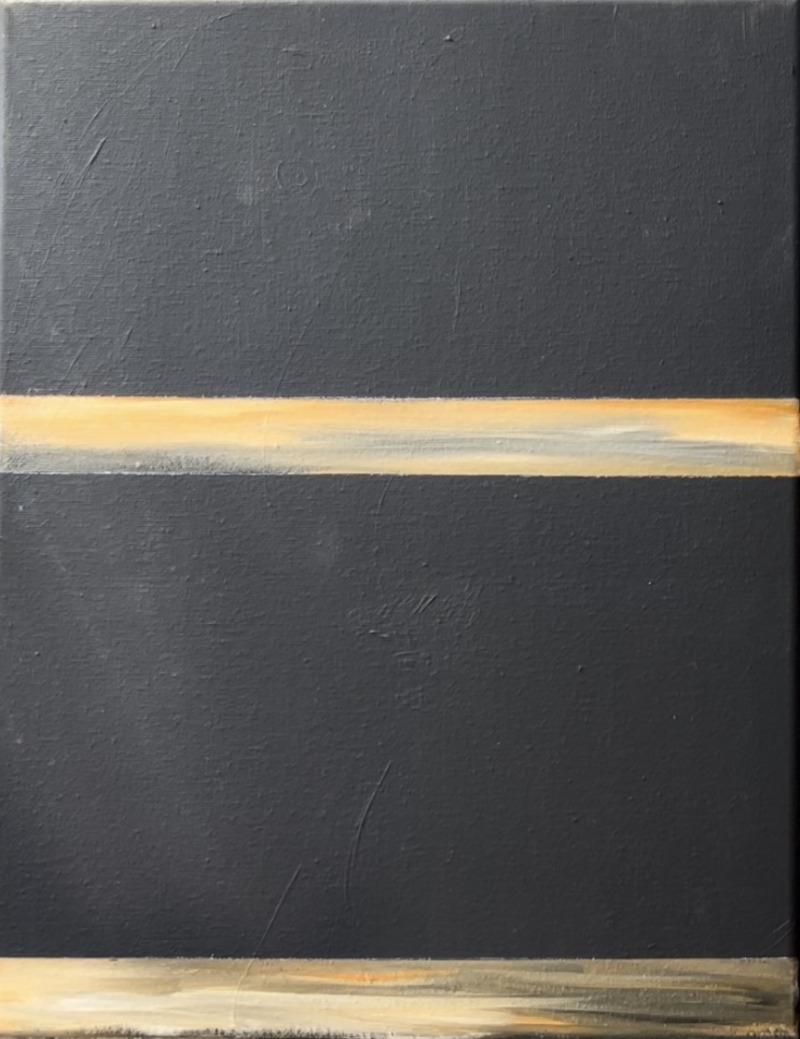
2. Paint Shelves
Load your paint palette with the colors: raw Sienna, mars black and titanium white.
Use the #12 bright brush. Triple load it into all three of the colors (but only use a tiny bit of black). Paint horizontal paint strokes and fill the bottom shelf with this light brown color.
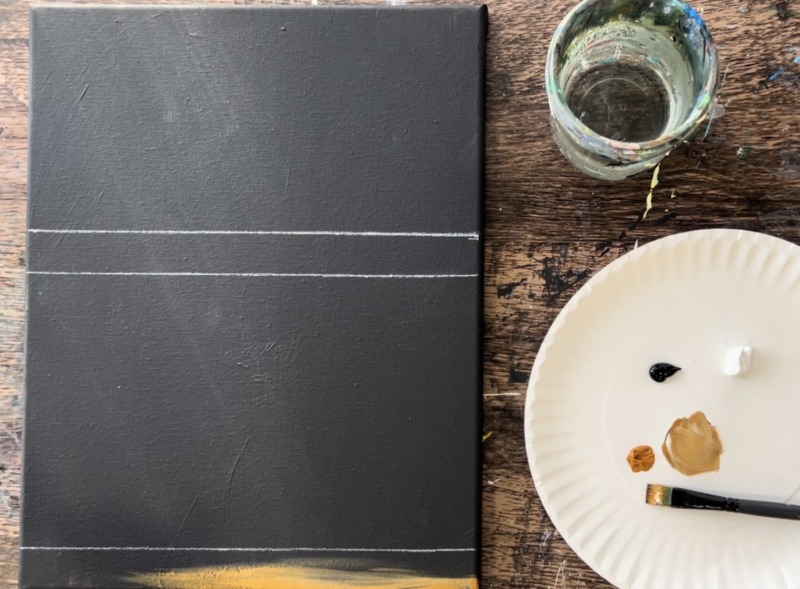
You want the light brown to blend gently with the black and white to create variations of color in the wood. Adding more white will brighten the color if you need it to show up better on the dark background.
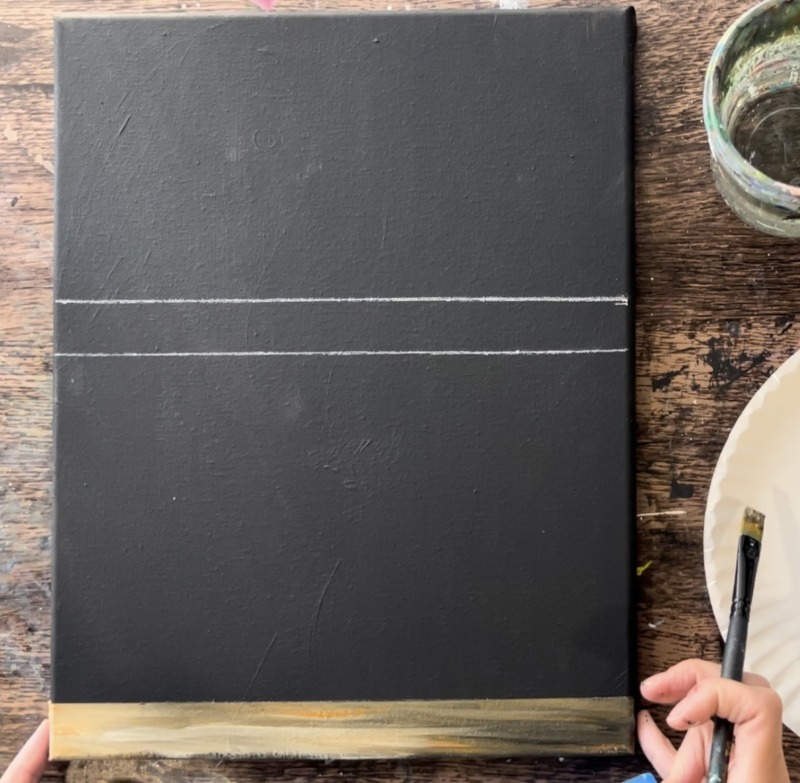
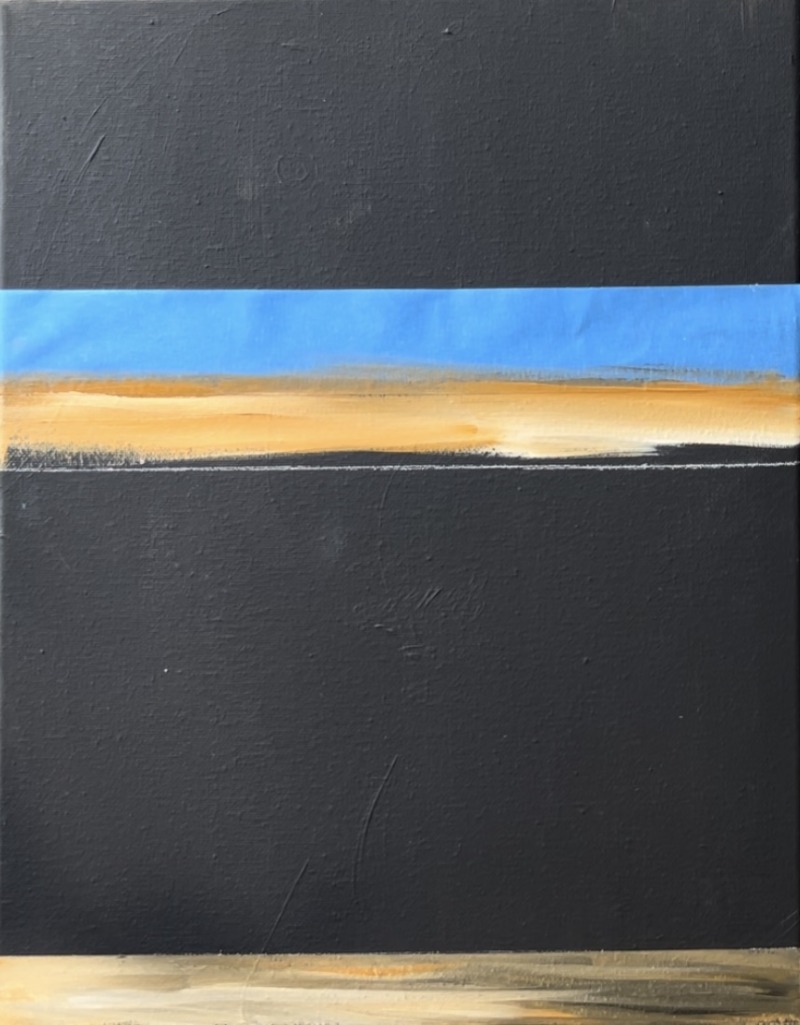
You can use a piece of painters tape to help make your edging of the shelves straight. Simply place the painters tape on the edge of the shelf and paint. Lift off the tape gently when finished.
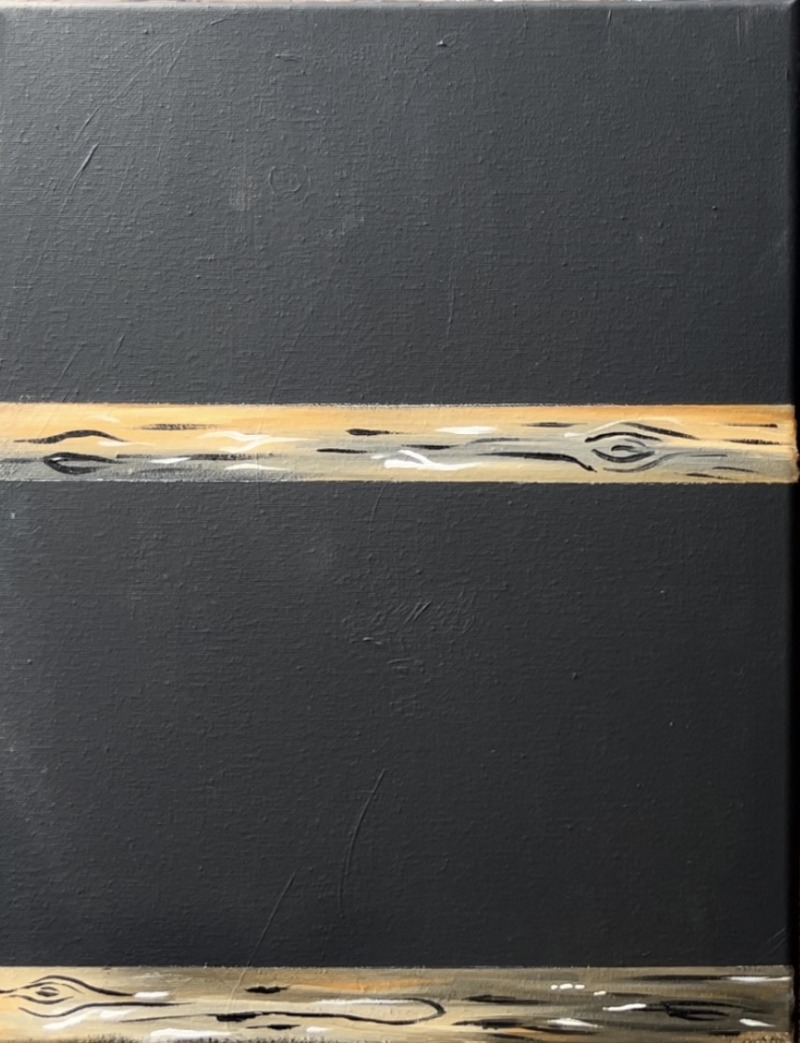
Next, use the #8 long round brush to paint knots and grain lines on the wood. Load the brush into mars black and paint little curved/ contour lines and horizontal lines.
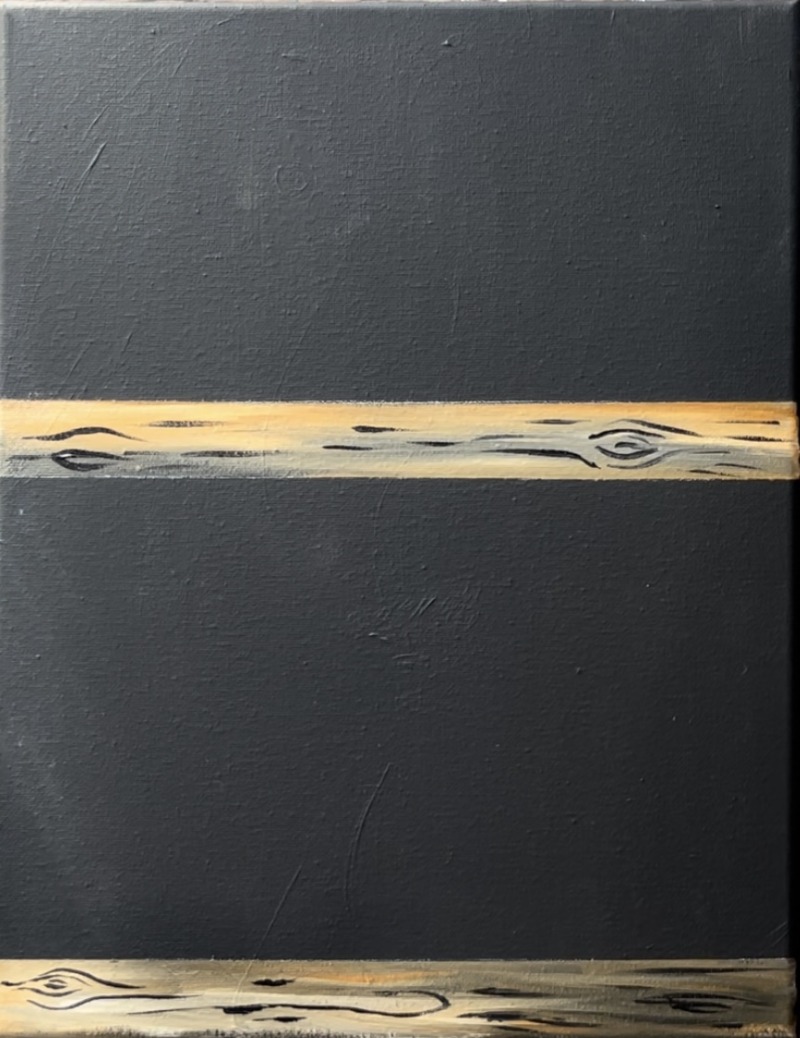
Do this to both the top and bottom shelves. Then load the brush into just titanium white. Make a few white marks on the wood for more wood grain texture (but not as many lines as the black).
3. Paint Shelf Walls (optional)
Use a #12 bright brush for this step. we are going to add dark texture on the back of the shelf. This adds some interest into the background without making it look too busy.
Double load the #12 bright brush in both mars black and raw Sienna (equal parts). “Flip-Flop” the brush to create this texture. You want to create different angle paint strokes all over the back wall of the shelves while still keeping things very dark (don’t add white and don’t make it too bright).
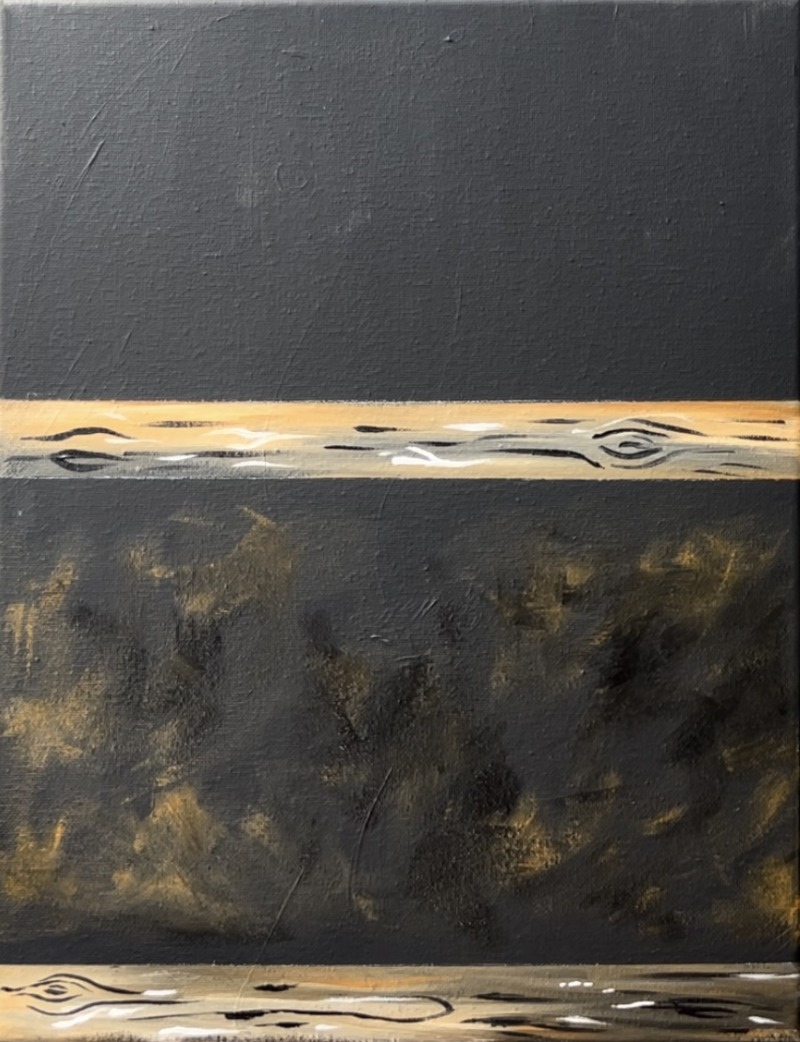
Do this to both of the walls. The picture below looks a little brighter because of the glair from the camera. It should be relatively dark still.

Let this dry before going onto the next step.
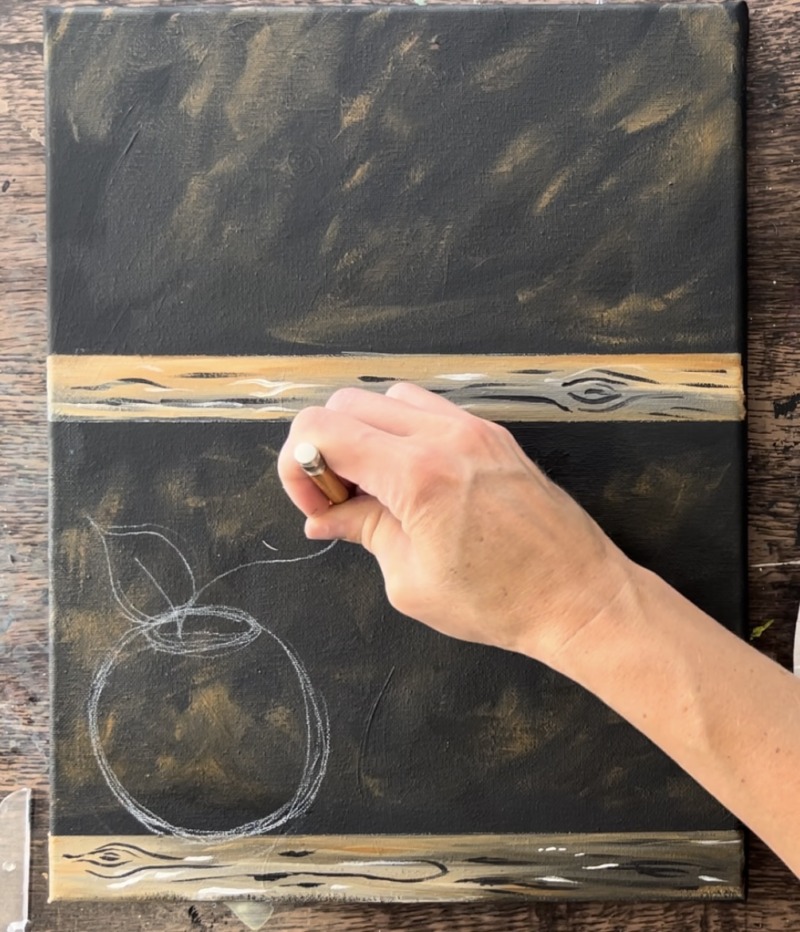
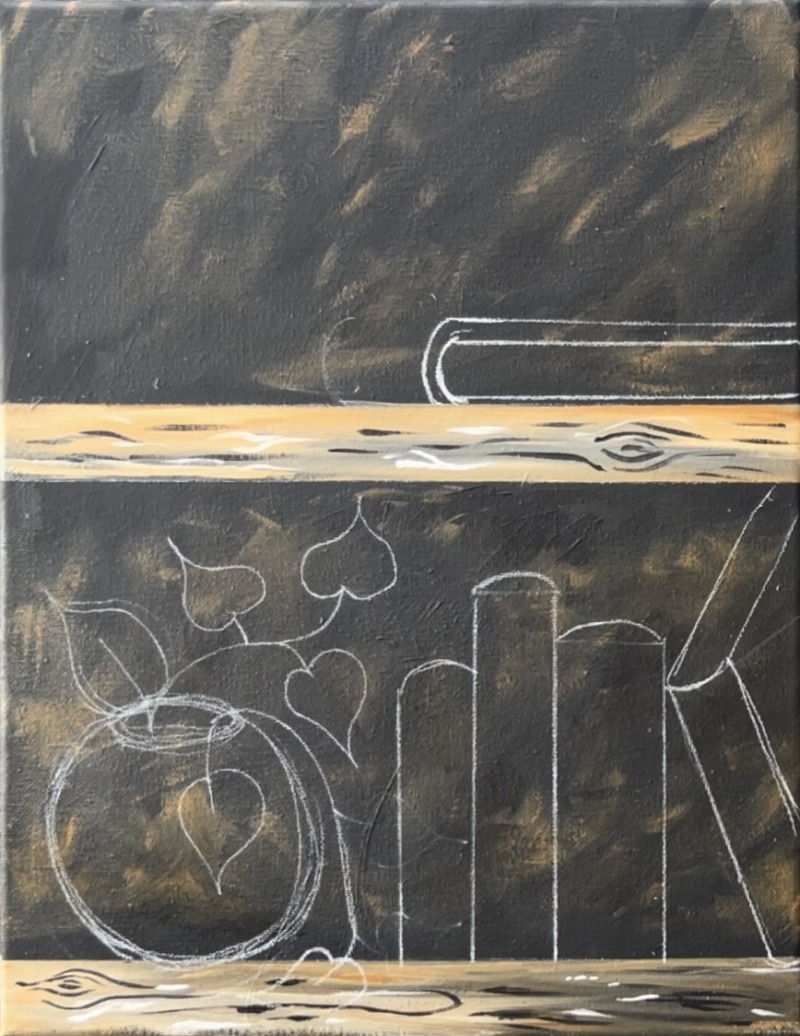
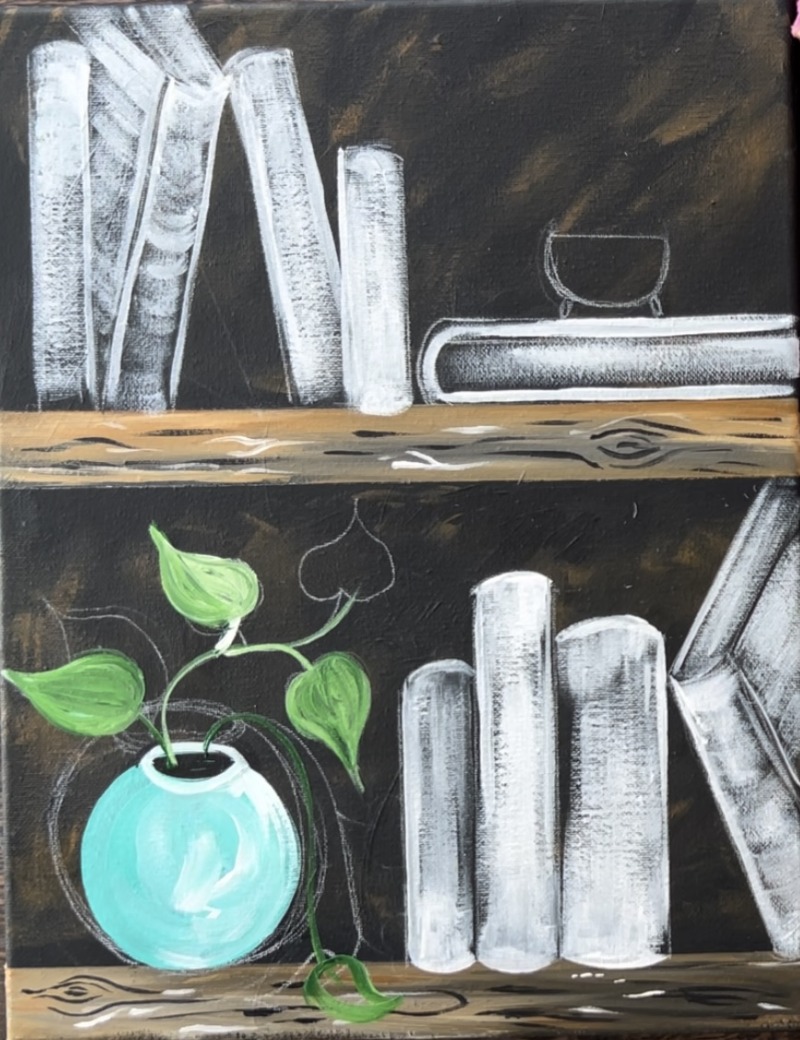
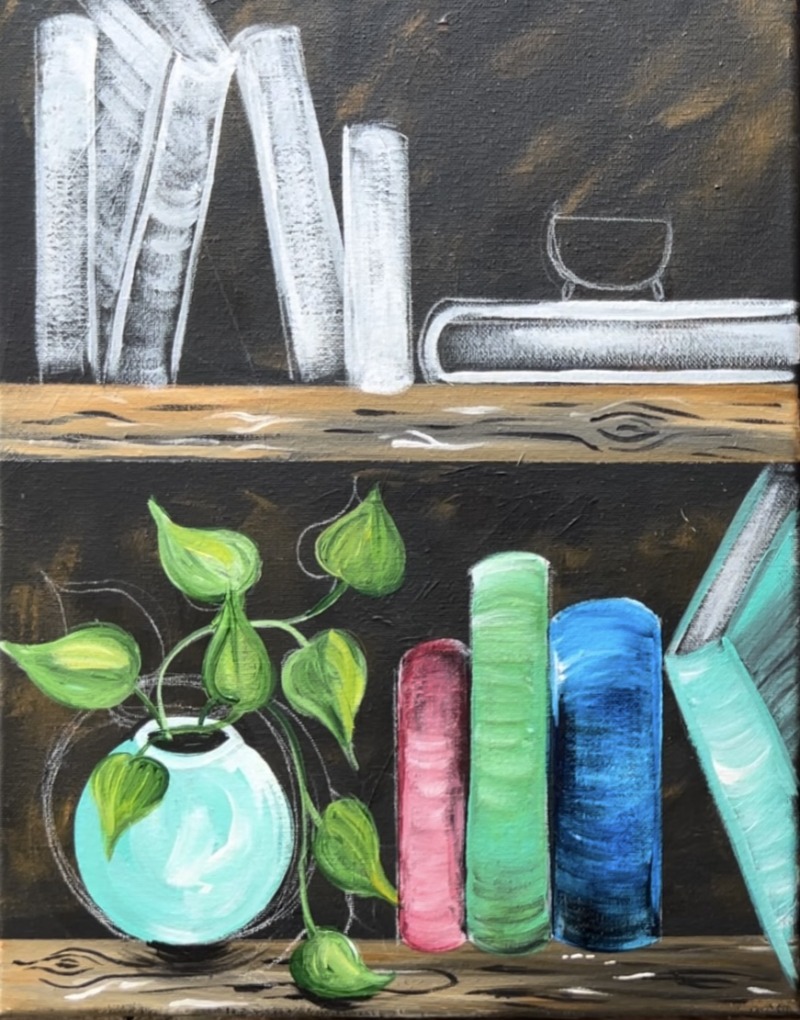
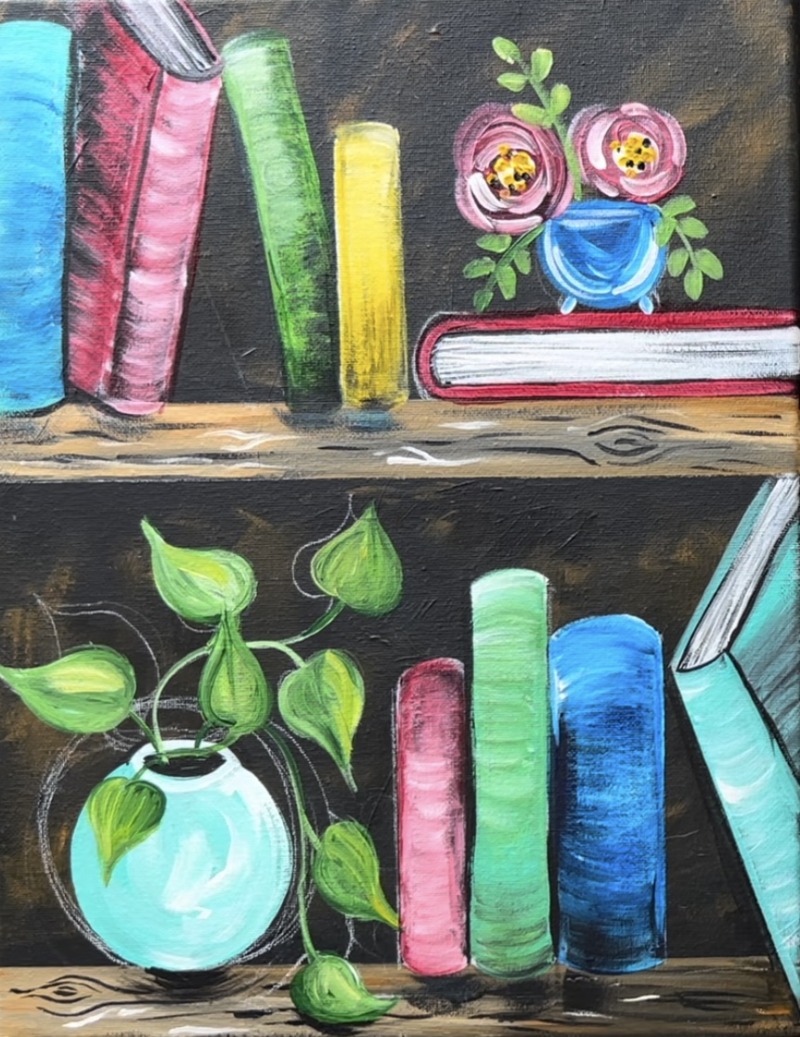
4. Draw Plant & Books
Use a white chalk pencil to draw the plant and books.
I started with the plant. Draw a circle shape to form the shape of the vase. Then draw a small oval on the top of the vase. Draw a leaf coming out of the top of the vase.
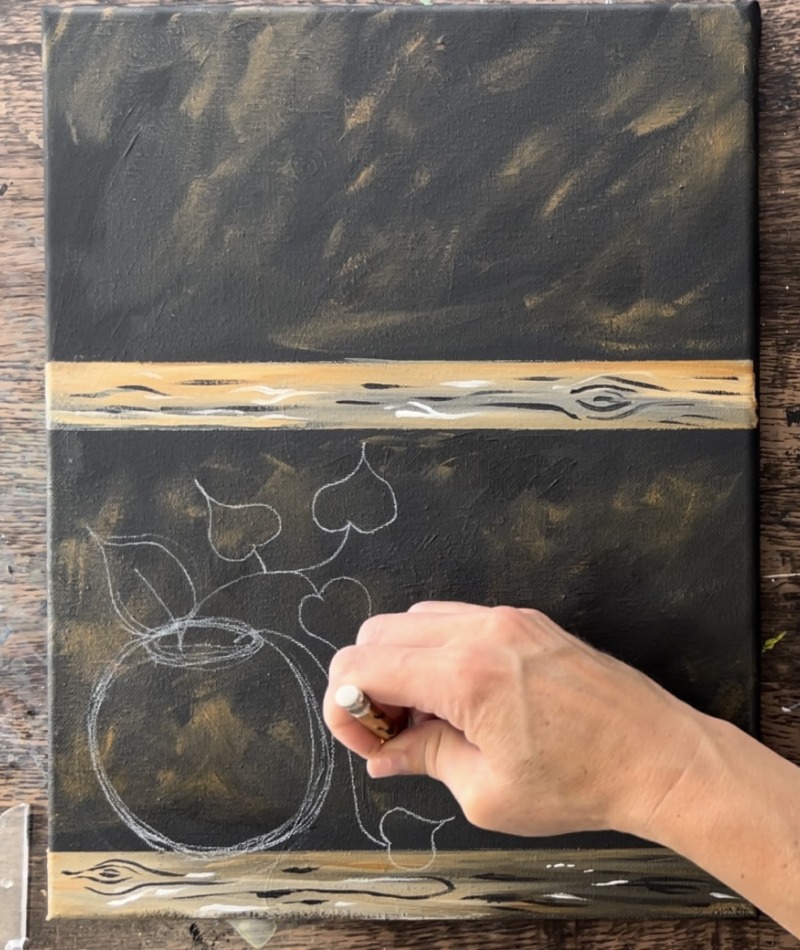
Then draw a long, wavy line going upwards out of the vase. Each individual leaf is like a heart shape with the stem attached to the center of the top of the heart. Draw another vine going out of the pot and curving down and hugging the top of the shelf. Draw another heart shaped leaf.
To draw the books, I recommend using a ruler to get the edges of the book to be straight. The top of this rectangle shape will have a curve.
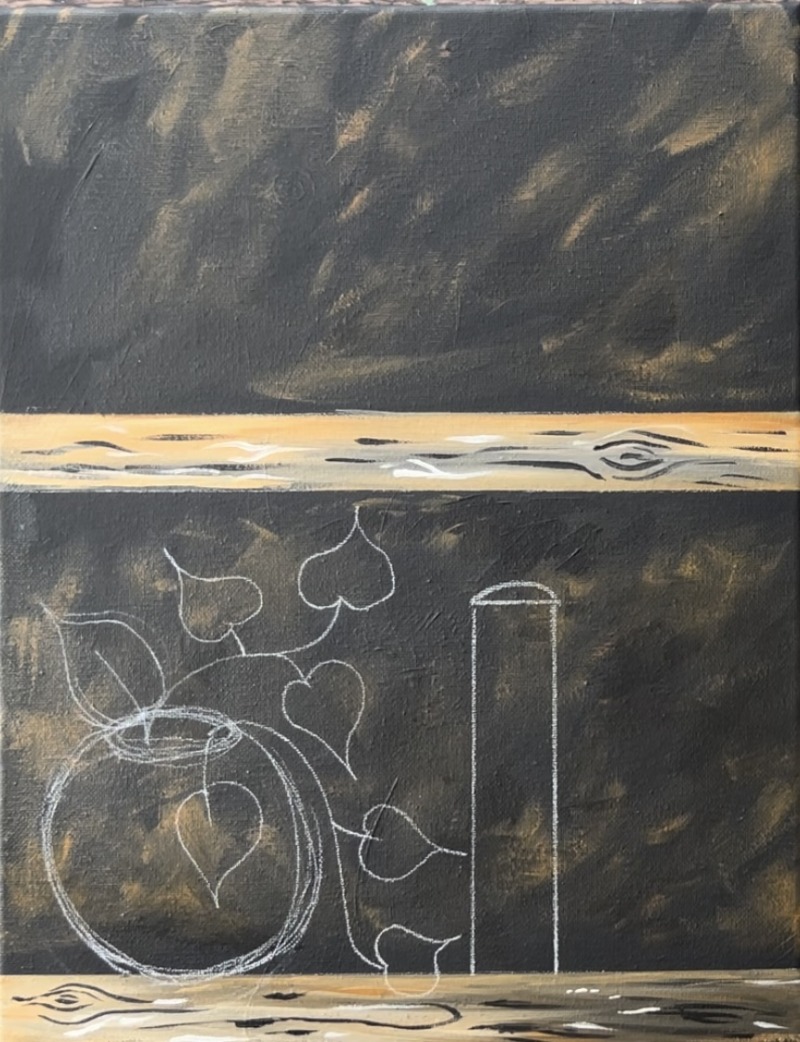
You are welcome to change these books to go in different directions and sizes.
Draw a second book that is slightly shorter and wider than the first book. Each book starts out as a rectangle but then draw a little curved shape/ semi circle on top of the rectangle.
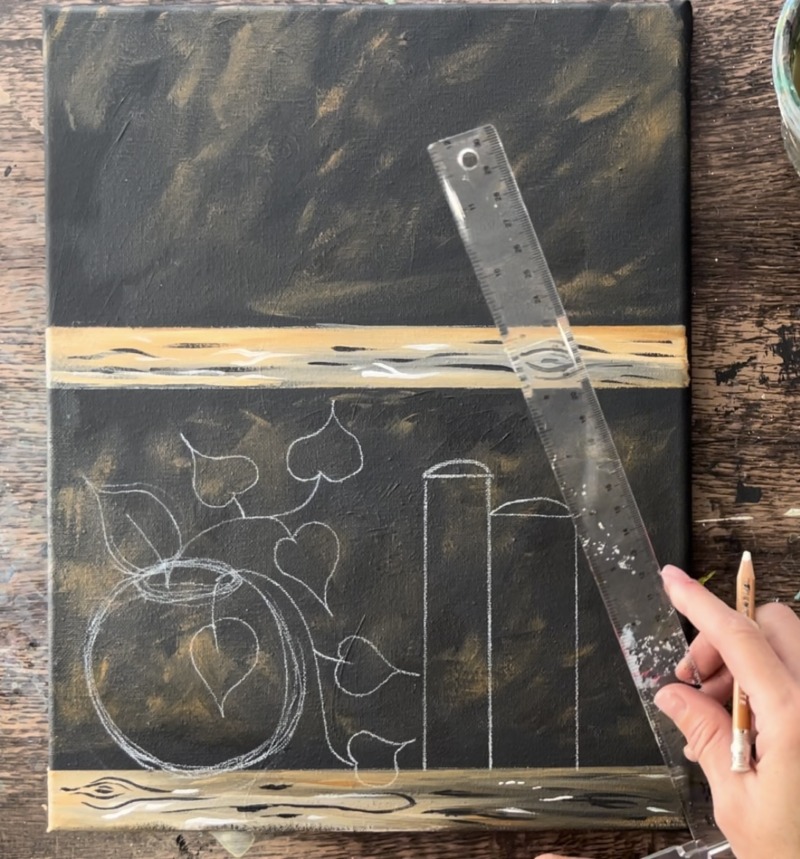
For the angled book (where we see the pages), you want the top curve to point downwards. Draw the cover/ back cover of the book as two parallel diagonal lines.
Then draw a book lying flat on the shelf. For this book, draw the front and back cover as two very thin rectangles and a curved shape on the right for the spine of the book. This flat book takes up about half of the top bookshelf.
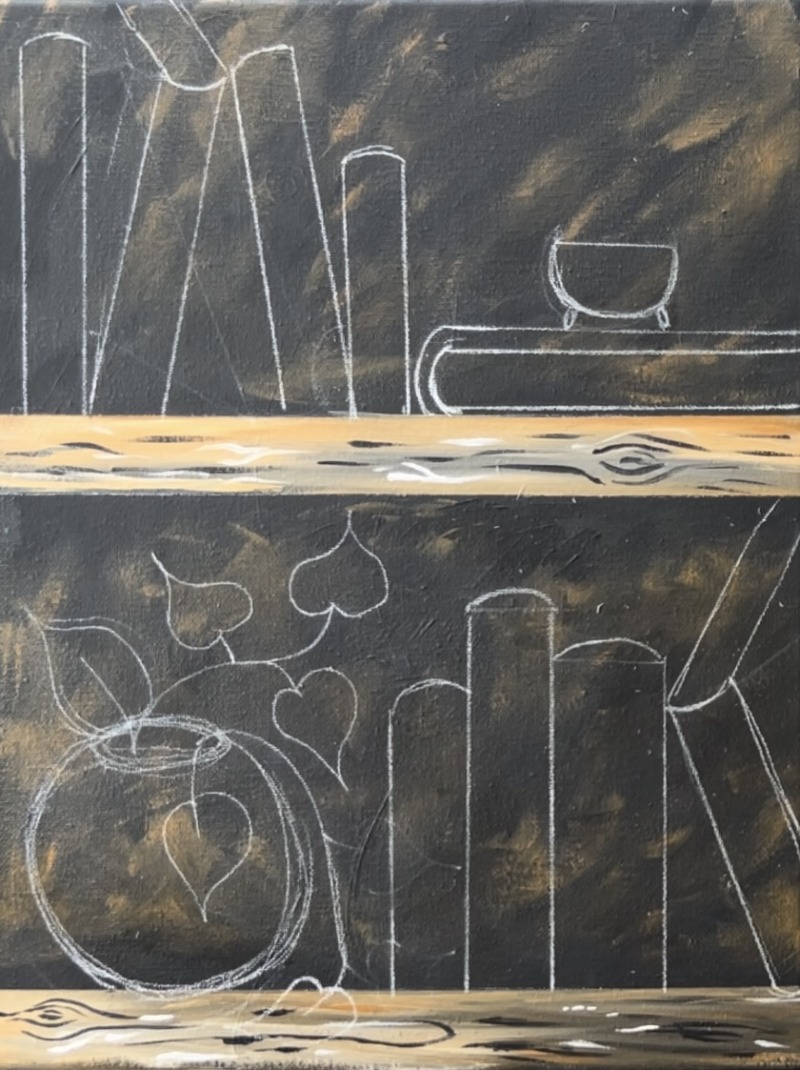
Draw a little flower pot on top of the flat book. This is just a semi-circle shape with two little ovals on the bottom for the feet.
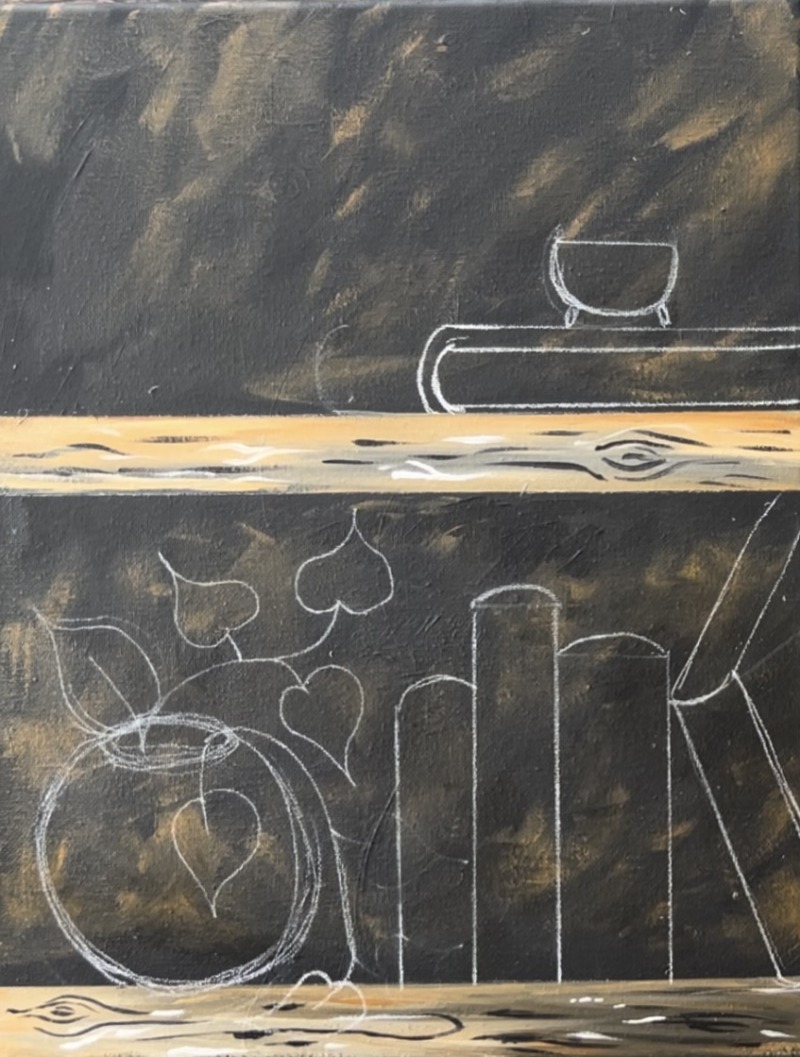
Draw another set of books using the ruler. Do various heights and angle some of the books.
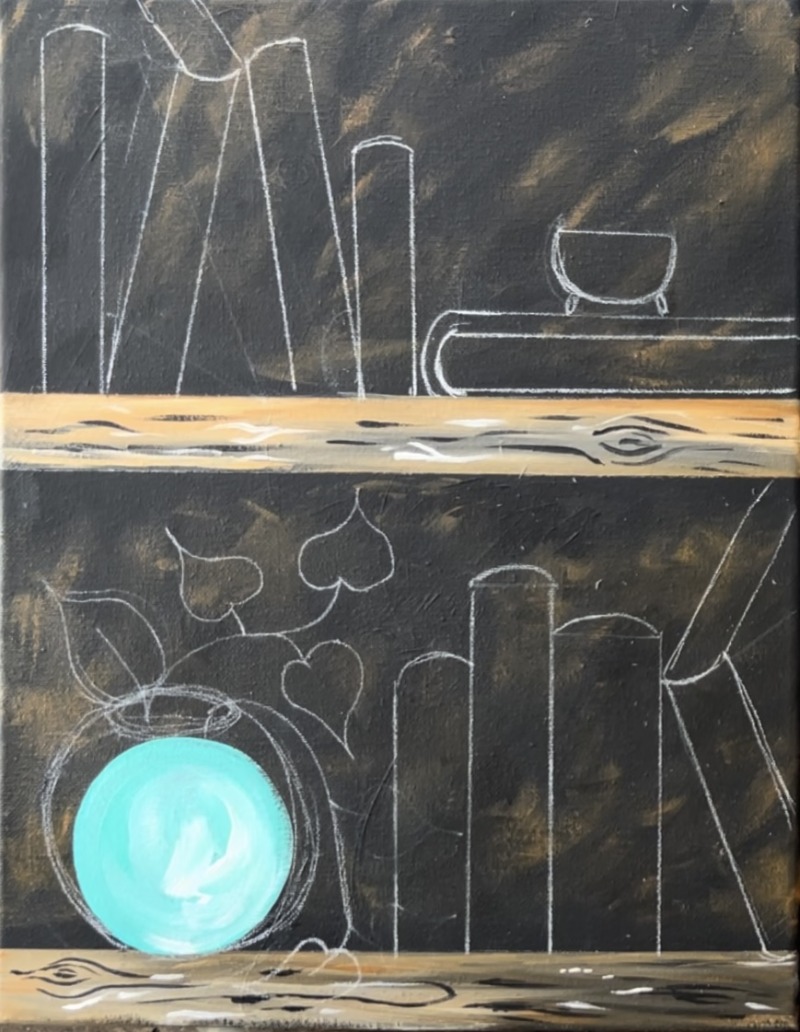
5. Paint Plant Pot & Book White Layer
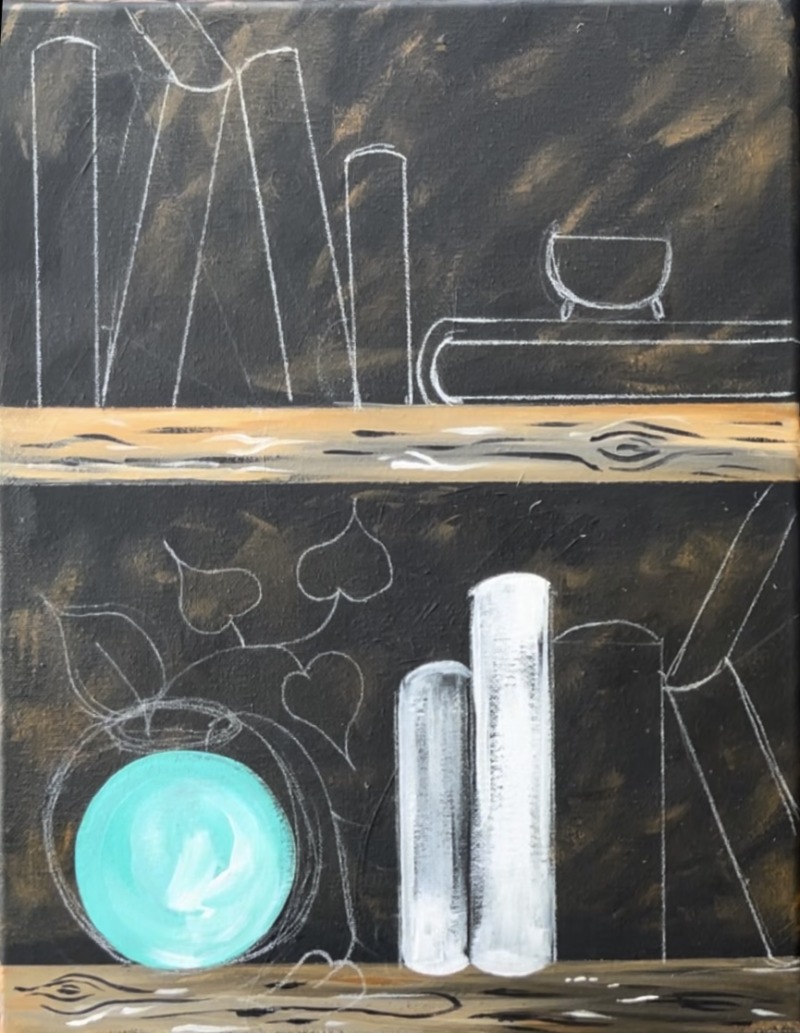
Load your paint palette with “bright aqua green” and “titanium white”. Use the #12 bright brush and double load it into both colors. Paint the circle pot and gently blend the white and aqua together so that there are still streaks of white on there that aren’t blended all the way.
Next we are going to paint the first layer for the books. This will be done with just “titanium white” and using the “dry brush” technique. That means we are going to paint the book shapes but not fill them in completely solid. We want some of our dark background to still show through. To get this technique, don’t over load your brush with too much white. You only want a small amount of paint on your brush.
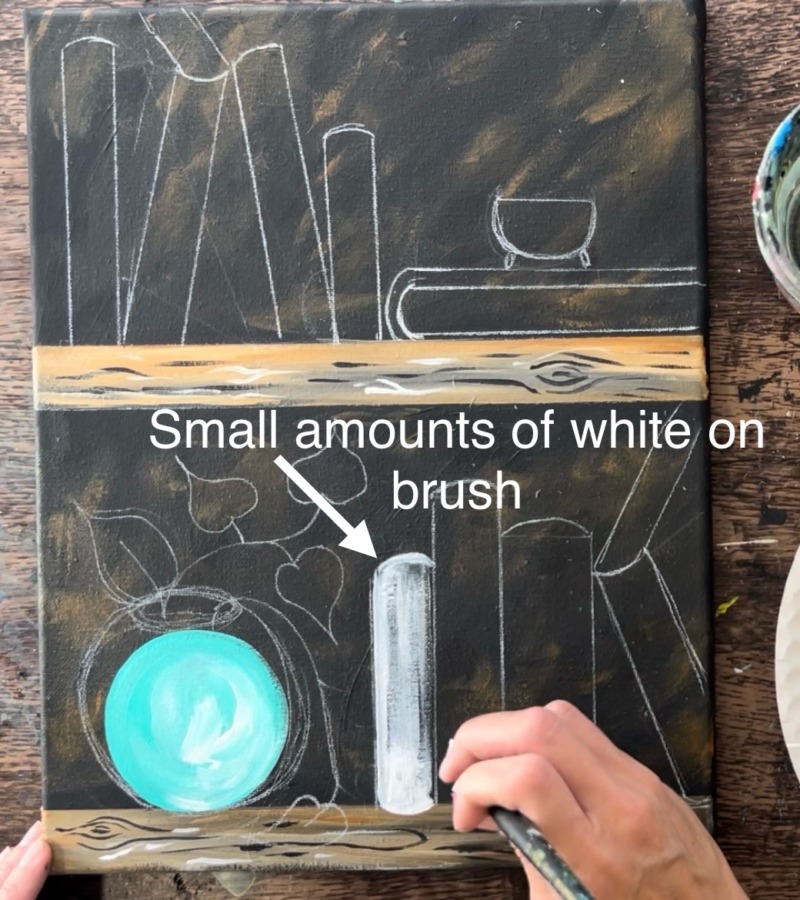
Start with the book just to the right of the pot. Paint the spine. You can use the edge of your brush to paint the sides. And then use the full width of the bristles to paint curved paint strokes for the spine shape. This gives the book a little form.
As you paint each book, leave a little black on the edges where the books are touching. Leave the edges of the book where the pages meet the cover (on the slanted book). Leaving black edging unpainted helps to preserve the shape of your drawings so that parts of the book (pages, cover, etc.) still stand out.
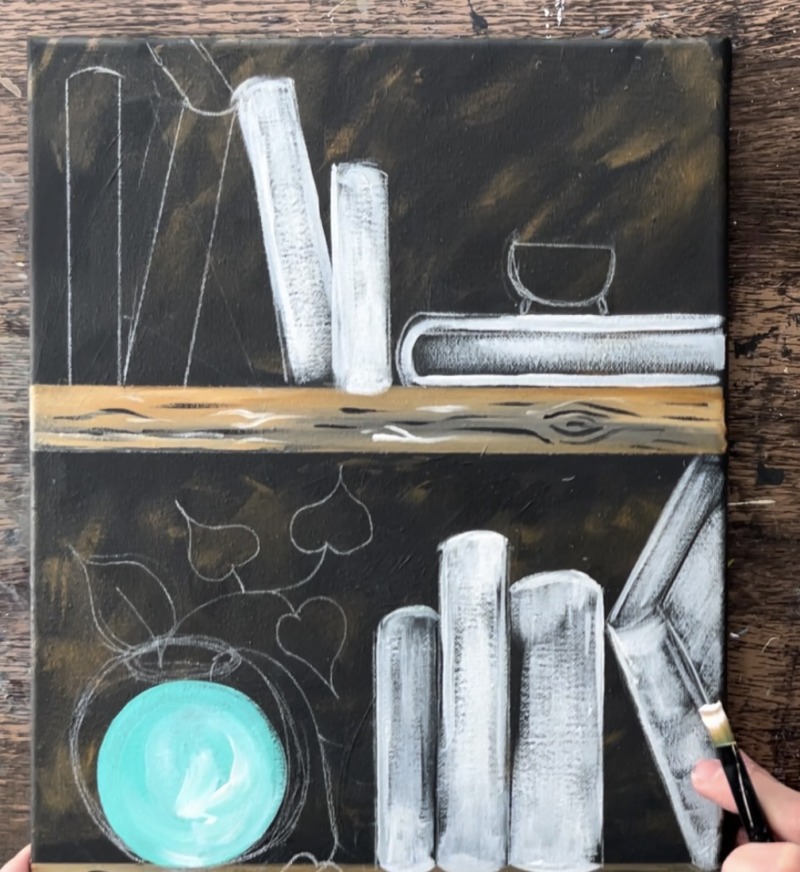
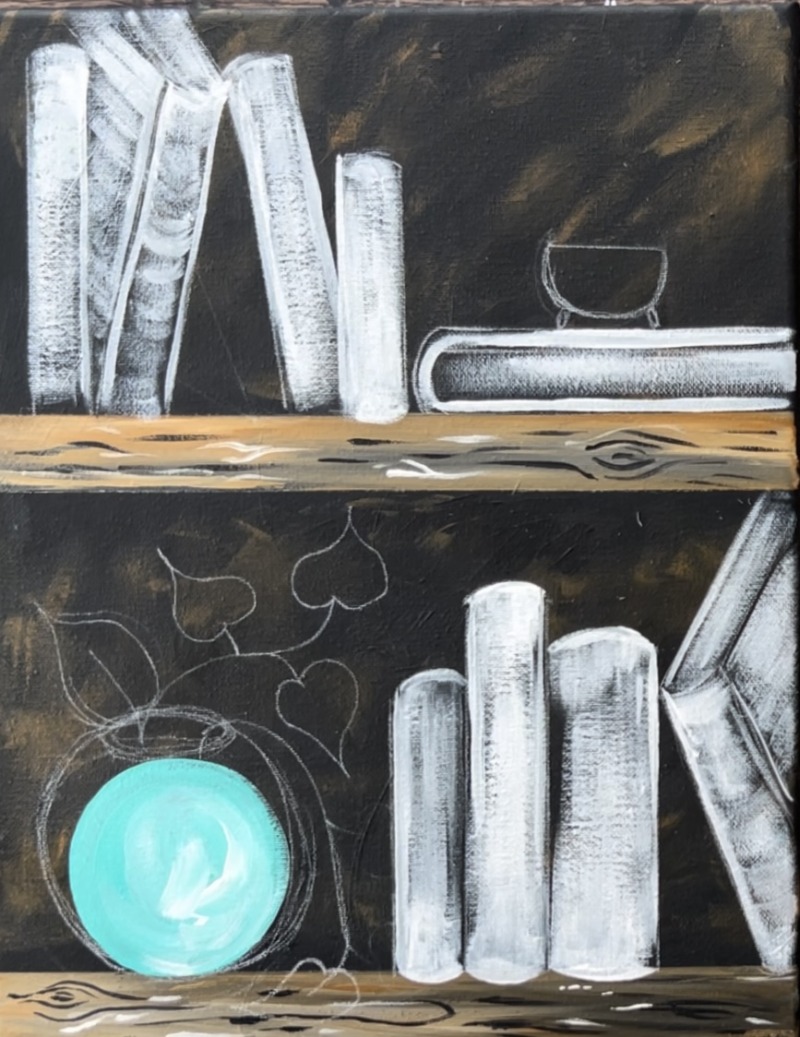
Fill all of the books with this white “dry brush” layer. Let it dry before adding color to them.
6. Paint Plant
Use the #8 round brush. Load your palette with “hooker’s green”, “titanium white” and “primary yellow”.
Double load the #8 round brush in both green and white. The white will help the green to show up better. Paint the stems and the leaves. For the leaves, it is helpful to outline the shape of the leaf first and then fill it in with the green and the white. You can blend the green and white together to create different variations in your green.
After painting all the leaves. Go back with “primary yellow” and paint a few paint strokes on yellow on one side of each of the leaves. This add a pretty pop of color and shine on the leaves.
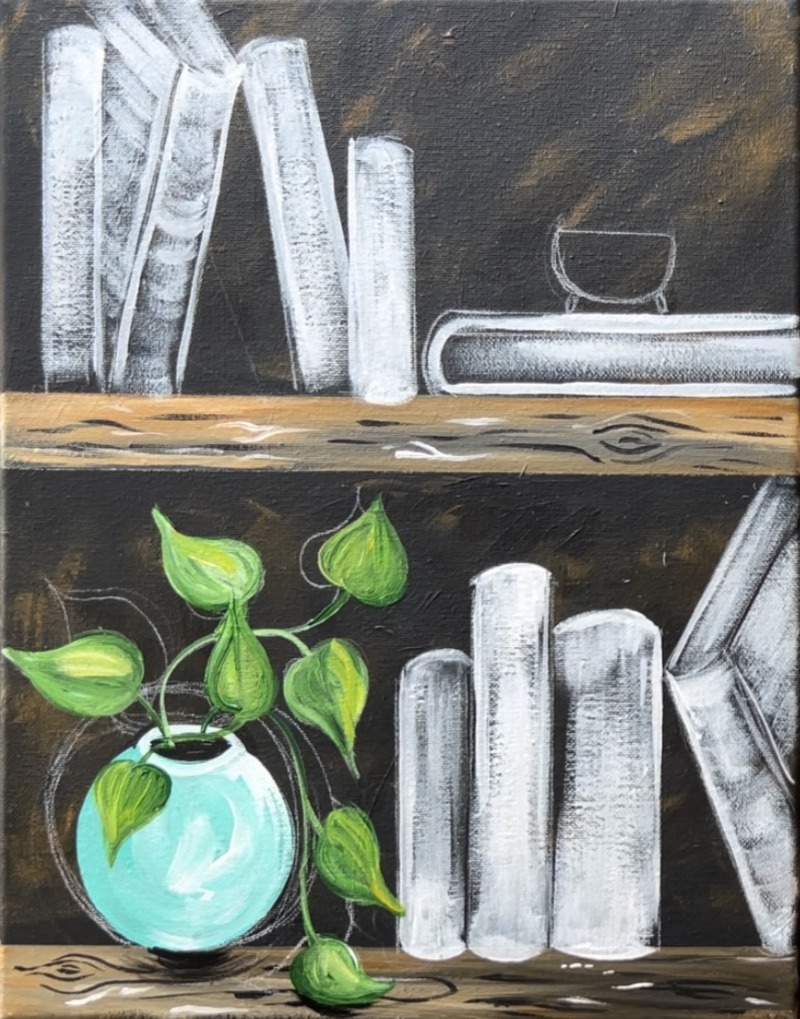
Rinse your brush and load it into “mars black”. Paint black shadow under the vase and leave. Do this very lightly and paint left and right paints strokes to form the shadow.
7. Paint Books
Make sure the first layer of white for the books is dry. Load your palette with the color you will be painting the books.
I started with “alizarin crimson hue” for the book to the right of the plant. Use the #12 bright brush to paint the spine of the book. Blend a little bit of white into the color to create some highlight/ brightness in the center part of the book spine. You’ll also want to paint the spine with paint strokes that go in curved directions. This will give the book more “form”.
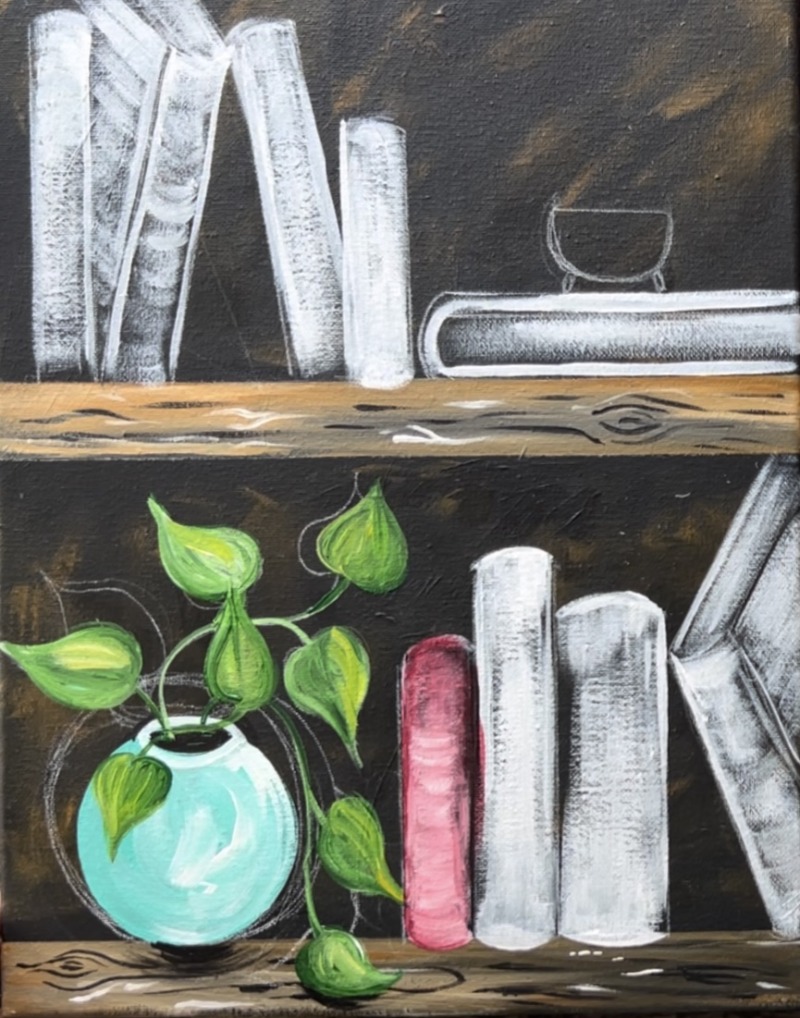
Paint each book using this technique. Change the colors up for each of the books. For the green book to the right of the “alizarin” book, I mixed “bright aqua green” with “hooker’s green hue”. The next book was painted with “phthalo blue”. The book on the far right is “aqua green”. You are welcome to mix colors and make new colors with the ones on your palette!
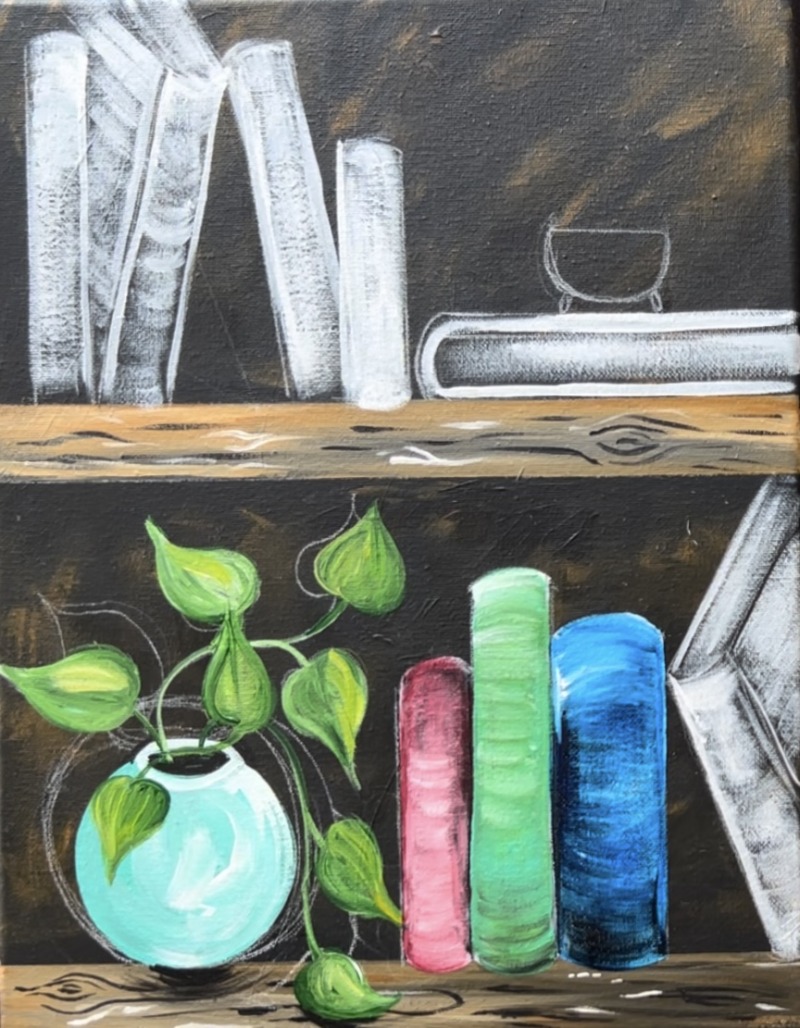
Create some “shadow” by dry brushing “mars black” on the edges of the books. Only add a small amount of black and lightly paint the shadowing. Do this shadowing towards the bottom of the books and the sides where the books touch each other. Add a little shadow on the right side of the aqua book where the book cover is.
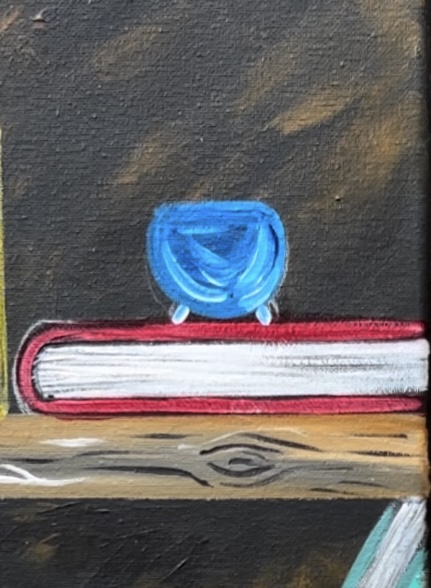
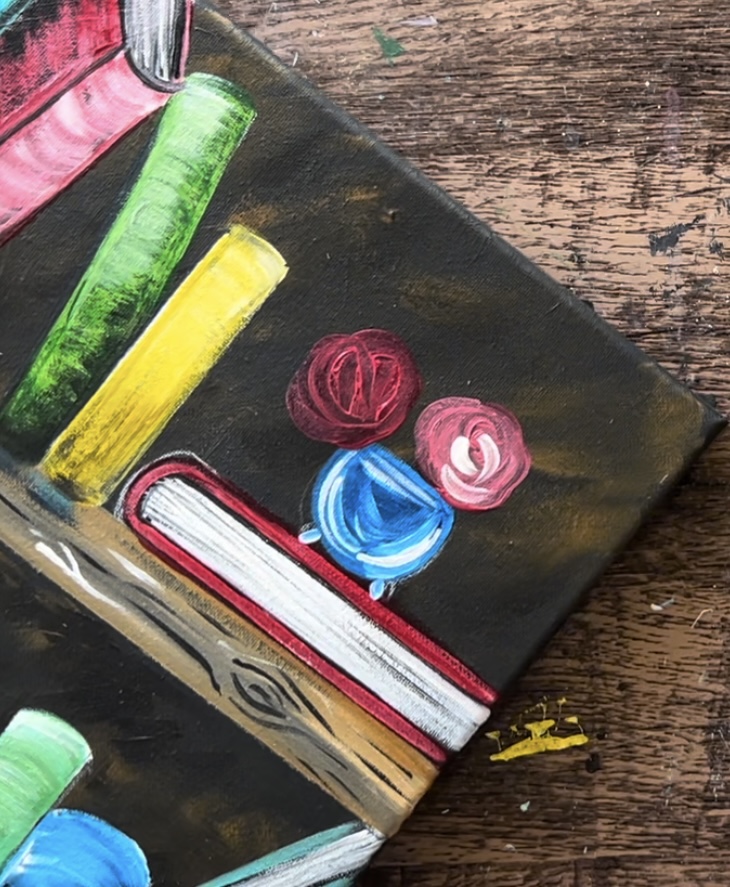
Paint the books on the top of the shelf. For the book that is lying on its side, use a #4 round brush and paint it alizarin crimson hue. Paint the pages of the book with “titanium white”. Then use the #8 long round brush and “mars black” to lightly outline the inner outline of the pages and the cover of the book. Paint a few horizontal lines with the black to create page texture.
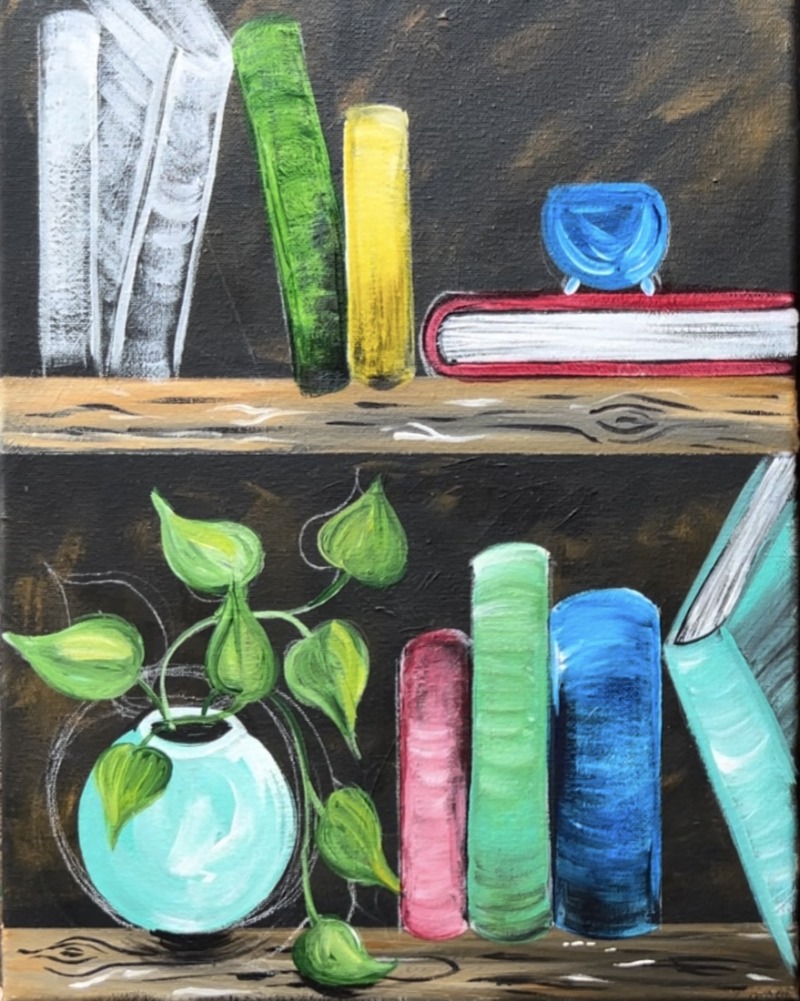
Paint the little vase on the top of the book with “phthalo blue” mixed with a small amount of titanium white. Blend the white into the blue so the blue shows up brightly against the dark background.
Paint the yellow book with “primary yellow”. Add a little dry brush on the bottom for shadowing. Paint the green book with “hooker’s green hue”. Mix a little bit of white towards the top of the book and dry brush black towards the bottom. For the next book to the left of the green, paint that one with “alizarin crimson”. Lightly outline the edges of the book with “mars black” paint. Paint the pages with titanium white and paint a few black diagonal lines for the page texture. Add some shadowing on the side of the book on the back book cover. Finally, for the book on the far right, paint with “bright aqua green” mixed with “phthalo blue”.
8. Paint Flowers
Use the #4 round brush to paint these “decorative roses”. Use the color “alizarin crimson hue”. Mix a little bit of “titanium white” into that color to lighten it. Then use your round brush to paint a circular shape that has edges on the circle that are slightly “wavy”.
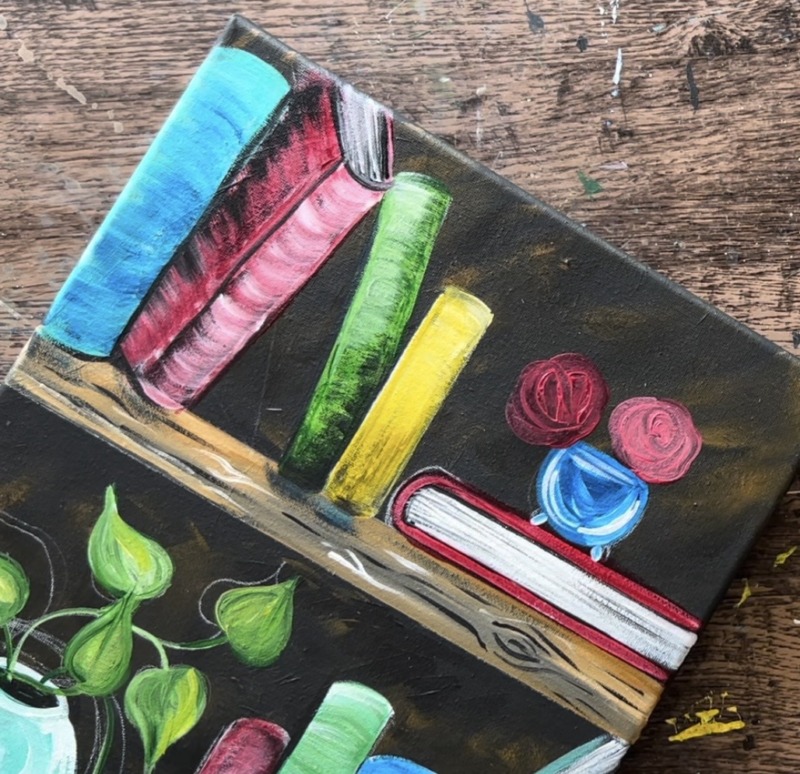
After painting the first circle shape, load your round brush into “titanium white” without rinsing the brush. Start in the middle of the circle. Paint little “curved strokes” at the center and then stagger more curved strokes outwards. This lighter color will show up as the ends of the rose petals.
Repeat this for each of the roses.
Then paint a spray of leaves extending out from the rose. Mix “titanium white” withe “hooker’s green hue” to make a light green. Use the #4 round brush (or 8 round) to paint a stem that curves downwards. Then paint little oval leaf shapes on each side of the stem.
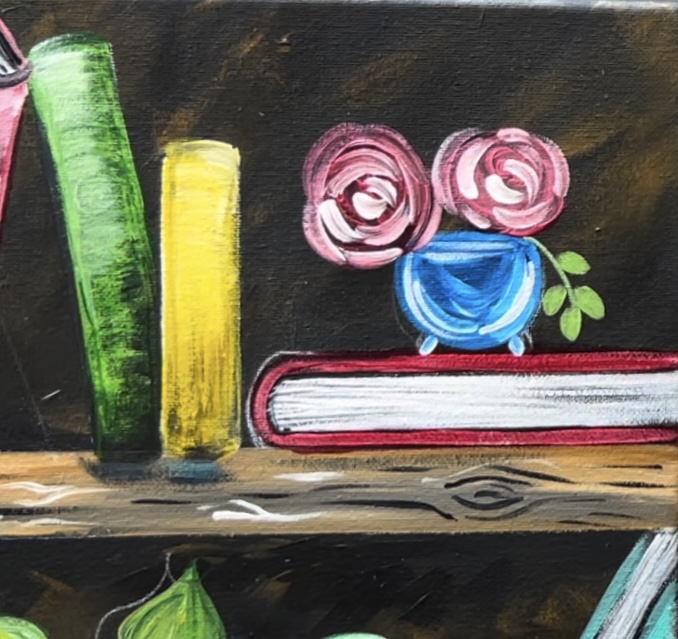
I painted three leaf sprays. Then use the #4 round brush to paint little yellow dots and little black dots in the center of both of the roses.
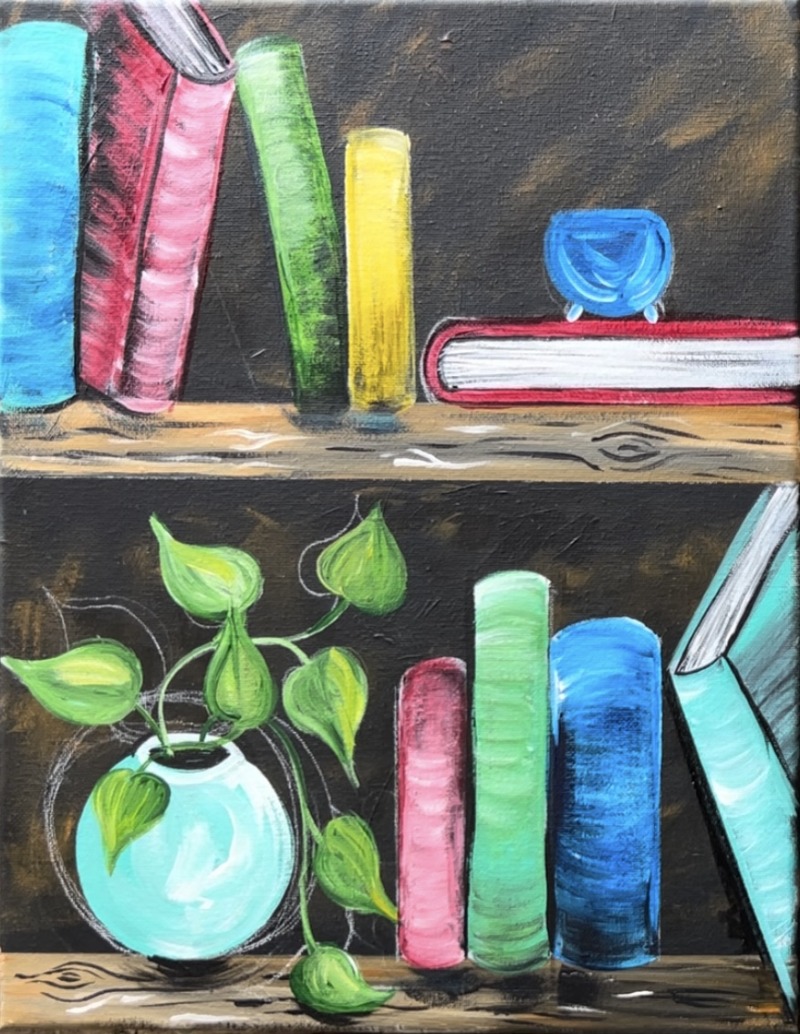
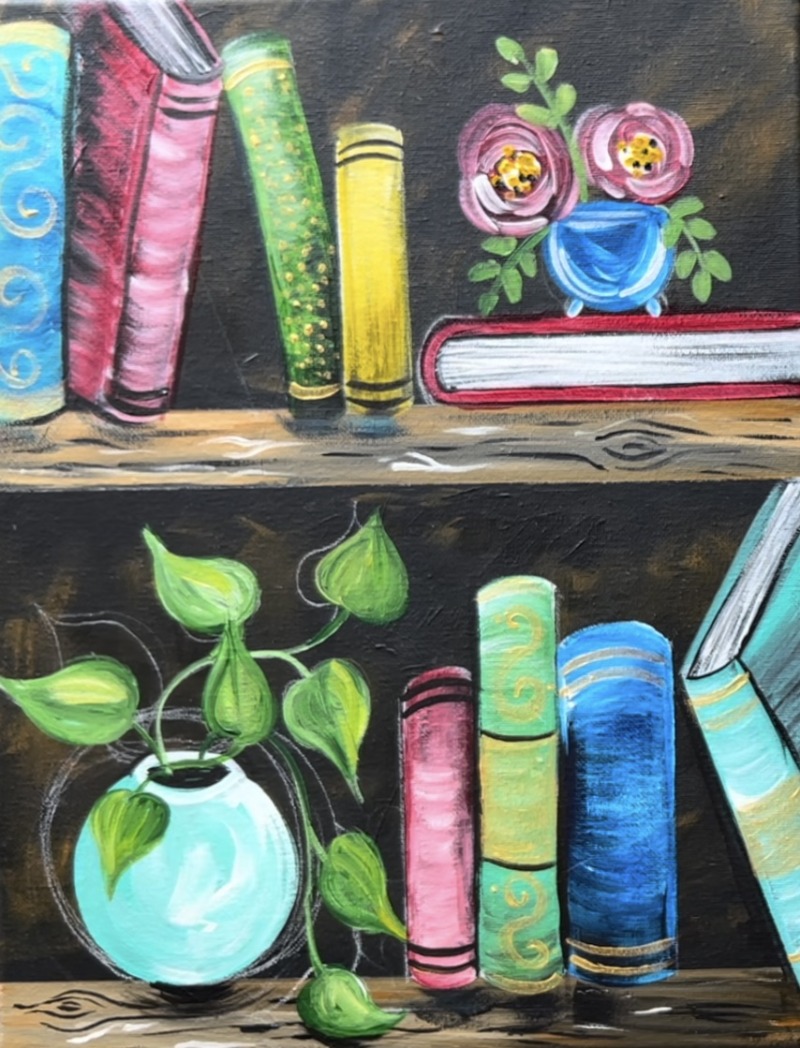
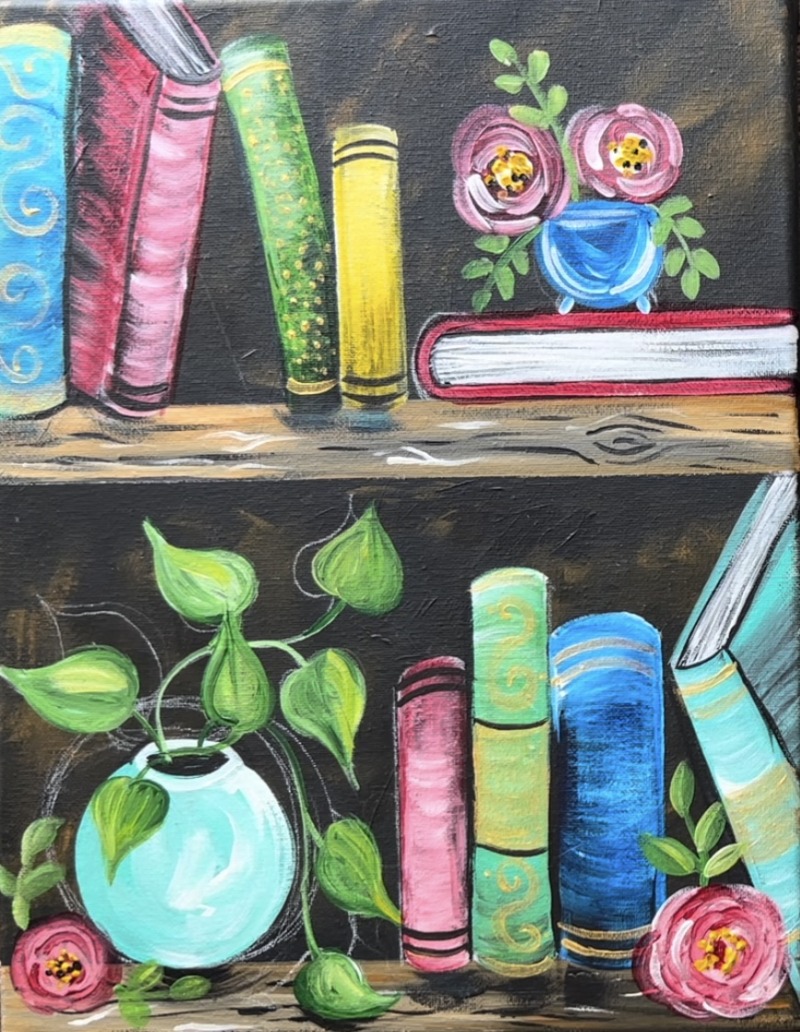
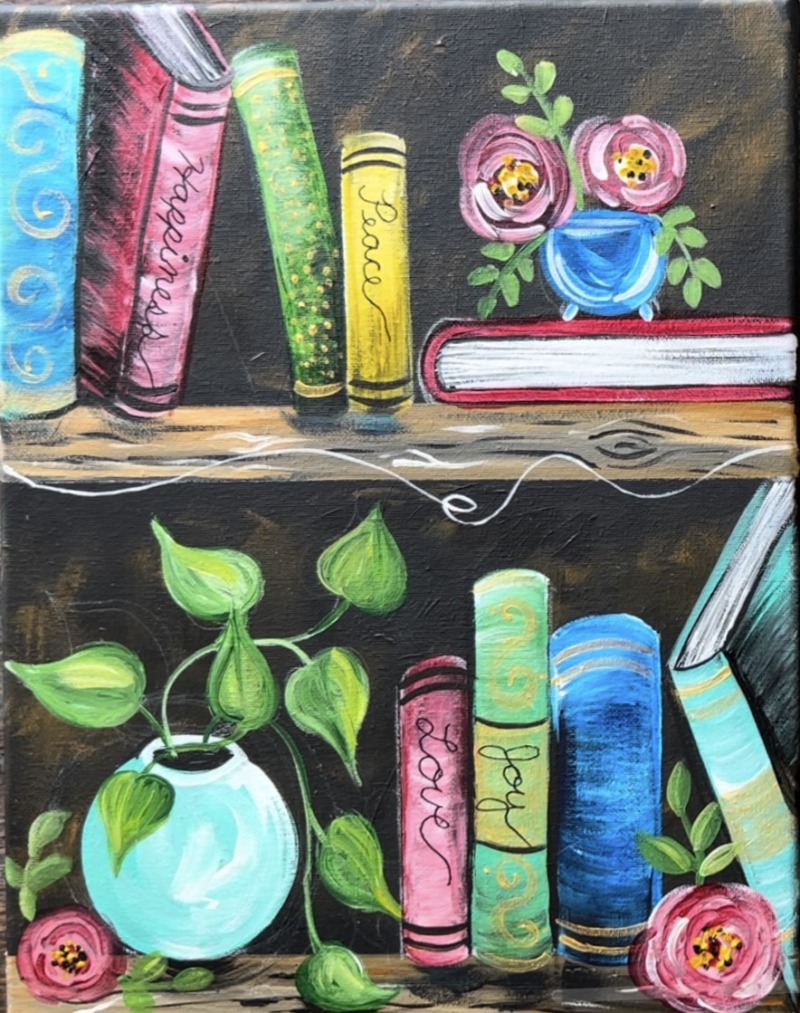
9. Decorate Books
Use a combination of gold and black paint (and other colors if you want) to paint decorative patterns on the books. Make sure you leave room in the middle of the book spines for the titles that will be written in a later step. You can do double lines on the top and bottom of the spines, paint spirals and paint little dots.
Then paint another set of roses (if you want) on the bottom of the shelf. I did one on the left and one overlapping books on the right.
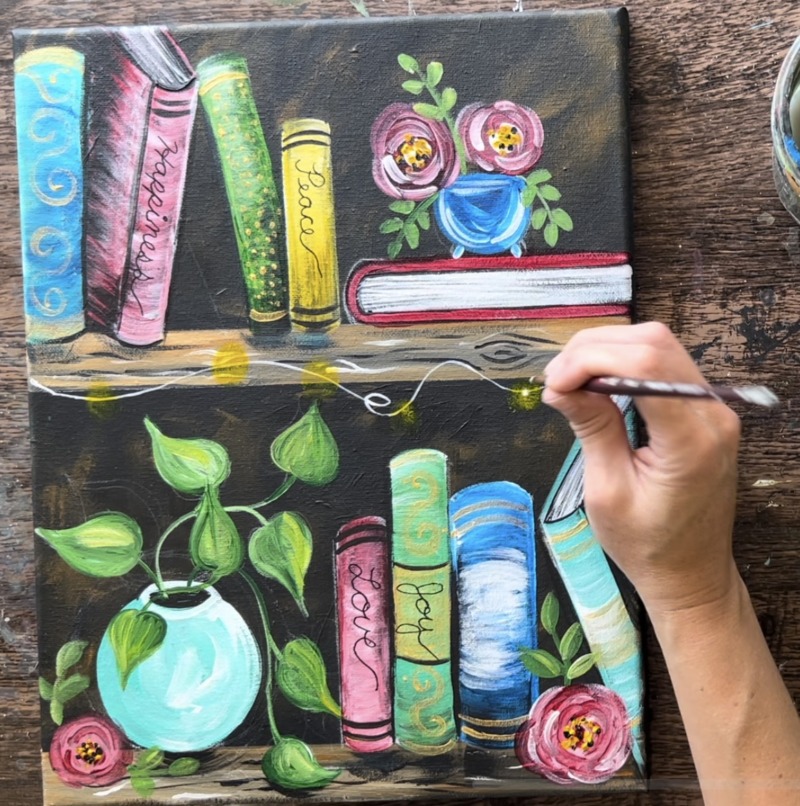
10. Paint String For Lights
Use either a white paint pen or the #8 long round brush and white to paint the wire for the fairy string lights. Paint a very thin and wavy line that maybe does a loop. I painted this line on the bottom edge of the top shelf.
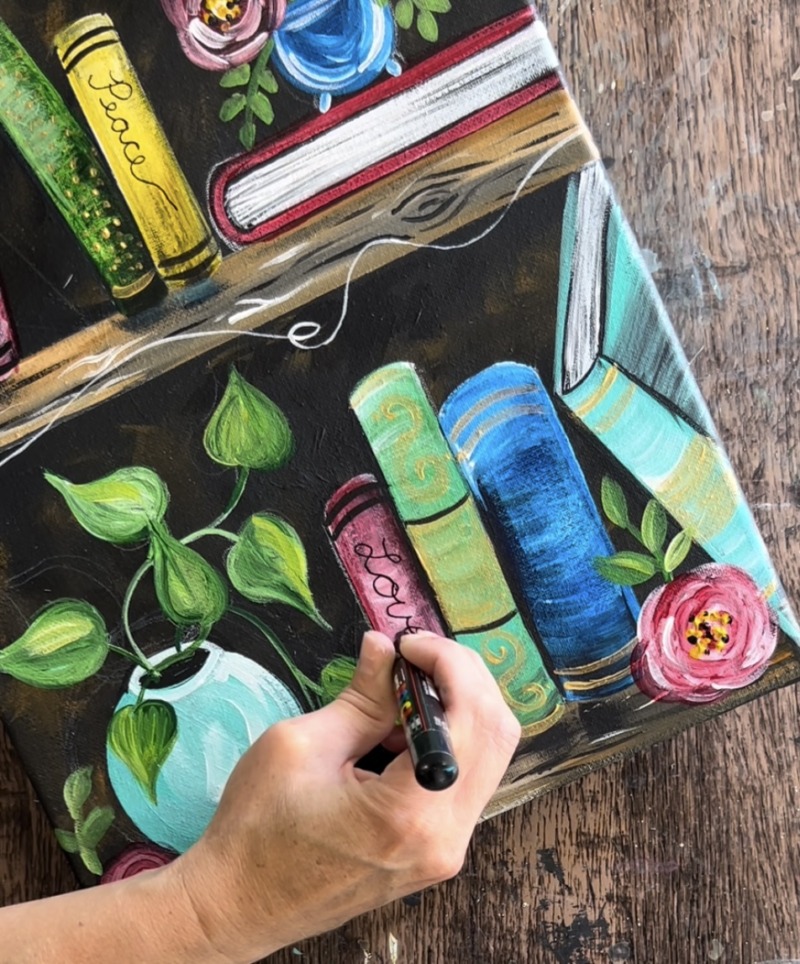
11. Write Book Titles/ Custom Words & Quotes
Use a black paint pen to write titles on the books. I choose to do words “Love”, “Peace”, “Joy”, etc. I use a fine tip POSCA paint pen. You could also do this with a black sharpie!
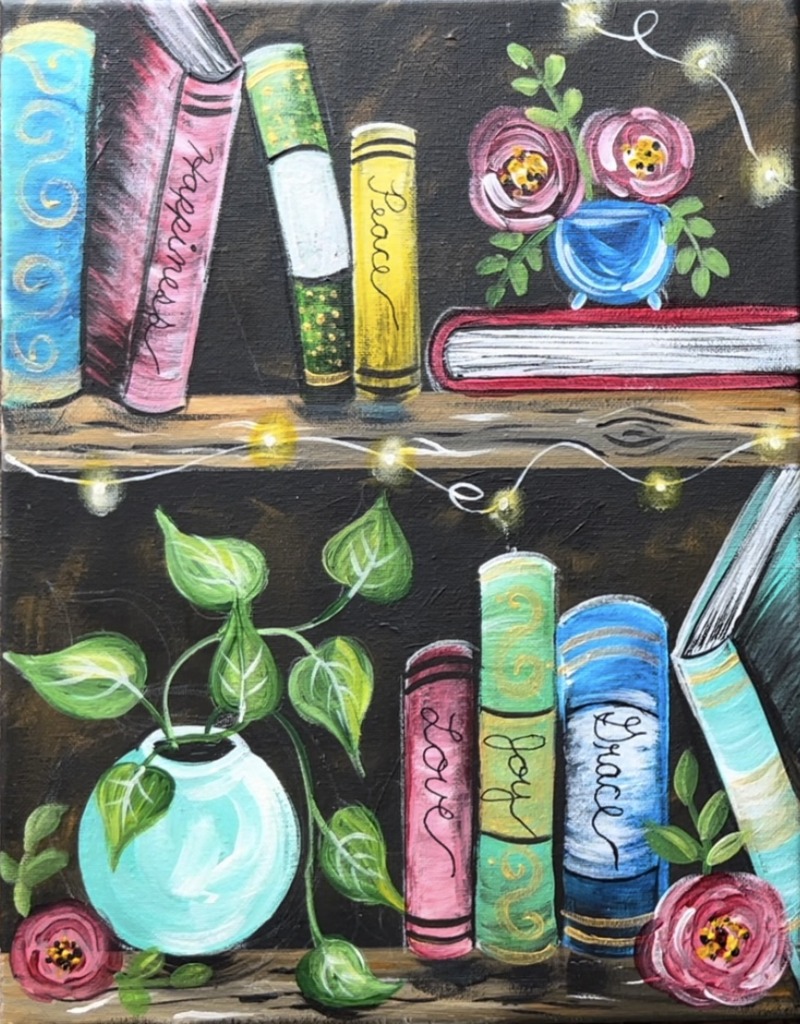
12. Paint Lights & Final Touches
Paint the blurry lights on the string by painting a small yellow circle for each of the lights. I like to use my index finger and smear yellow circles so they show up very translucent. Then take the round brush and paint yellow mixed with white dots in the center of each of the circles. Paint a final white dot in the very center to make the light look like it’s glowing.
Some other final touch-ups include: another stand of fairy lights in the upper right corner. I also painted a white area on the upper green book and lower blue book so that I could write more titles.
If you want to paint vein lines on the leaves, you can use the long 8 round brush and titanium white to paint a line down the middle of the leaf and small diagonal lines extending outwards.
Use the paint pen to add a few outline details as needed. You can paint lines for page texture on two of the books where we can see the pages. You can also paint black vein lines on the leaves. These are done with a very fine tip paint pen. Additionally, I made the title writing slightly thicker by going back over the letters again. I also added one more rose on the top of the shelf. This was done by mixing the alizarin with yellow to make more of an orange color.