
Would you like to save this?
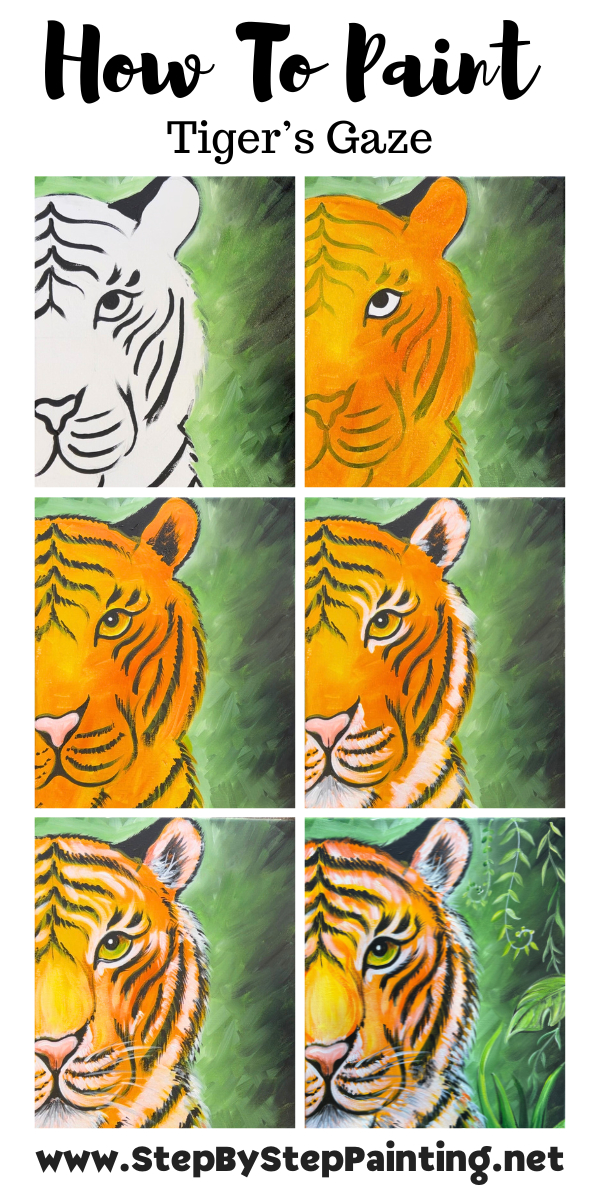
Learn how to paint a majestic tiger with beautiful green jungle background! This acrylic tutorial will show you how to draw and paint a tiger with an optional template tracer.
Enjoy and happy painting!
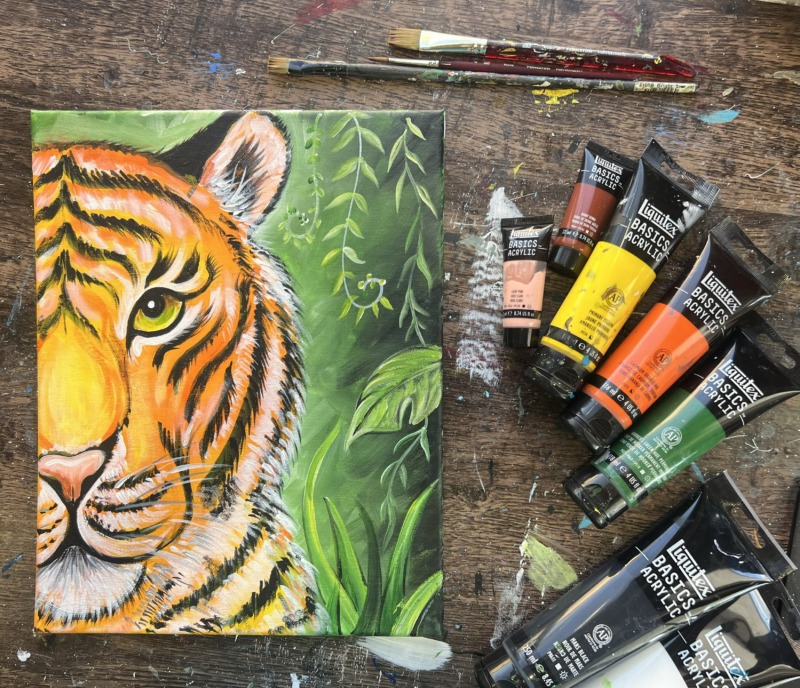
Materials Needed
How To Paint A Tiger

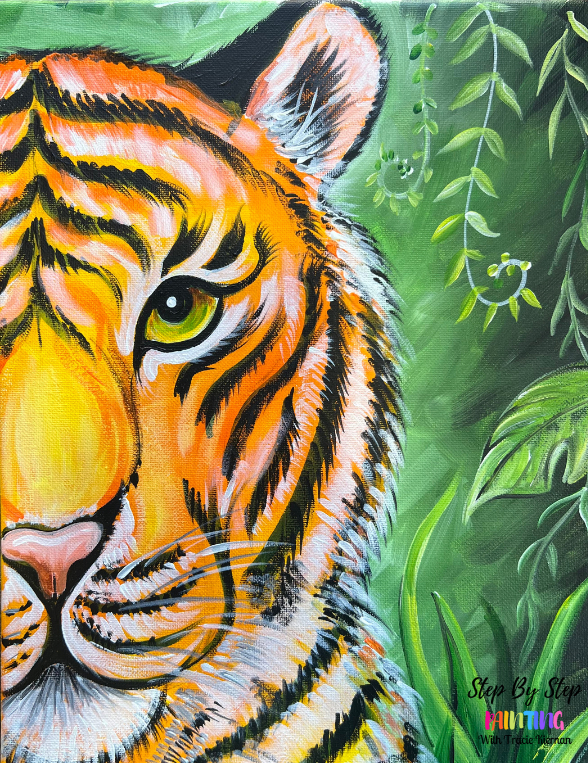
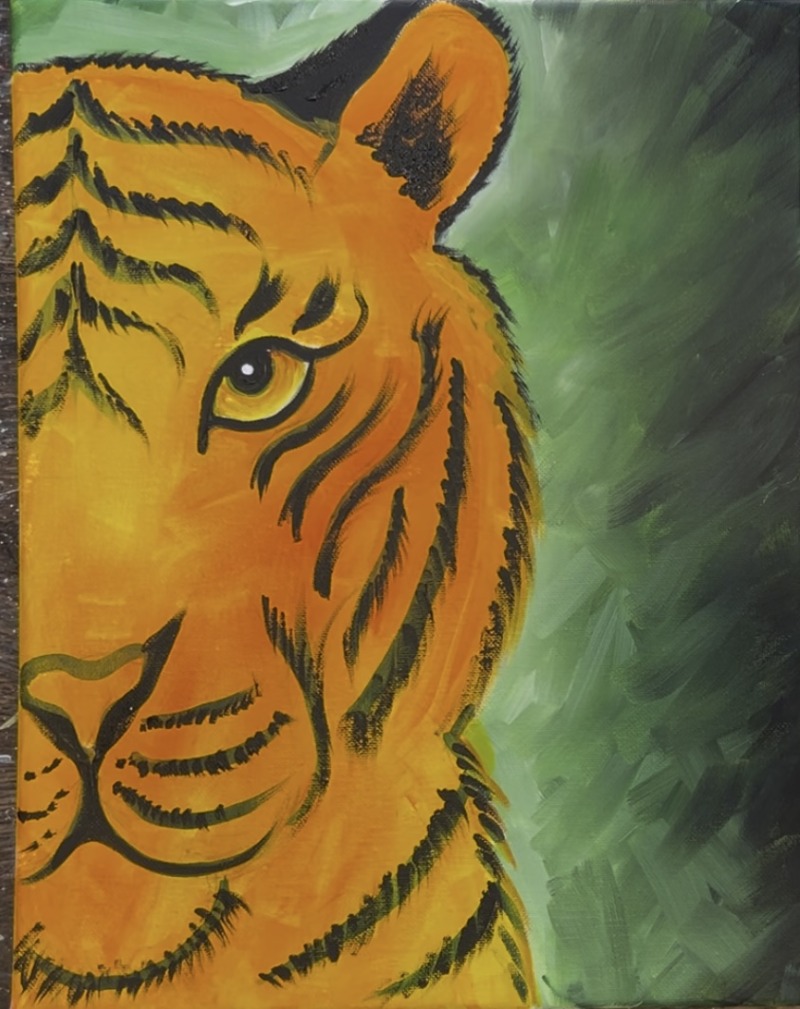
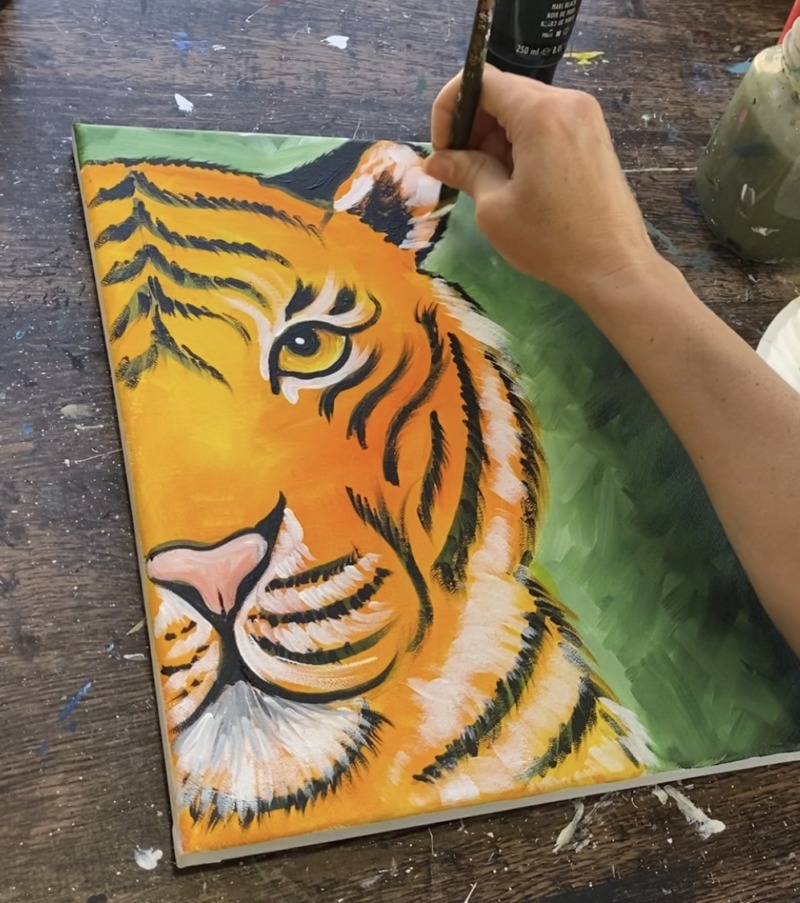
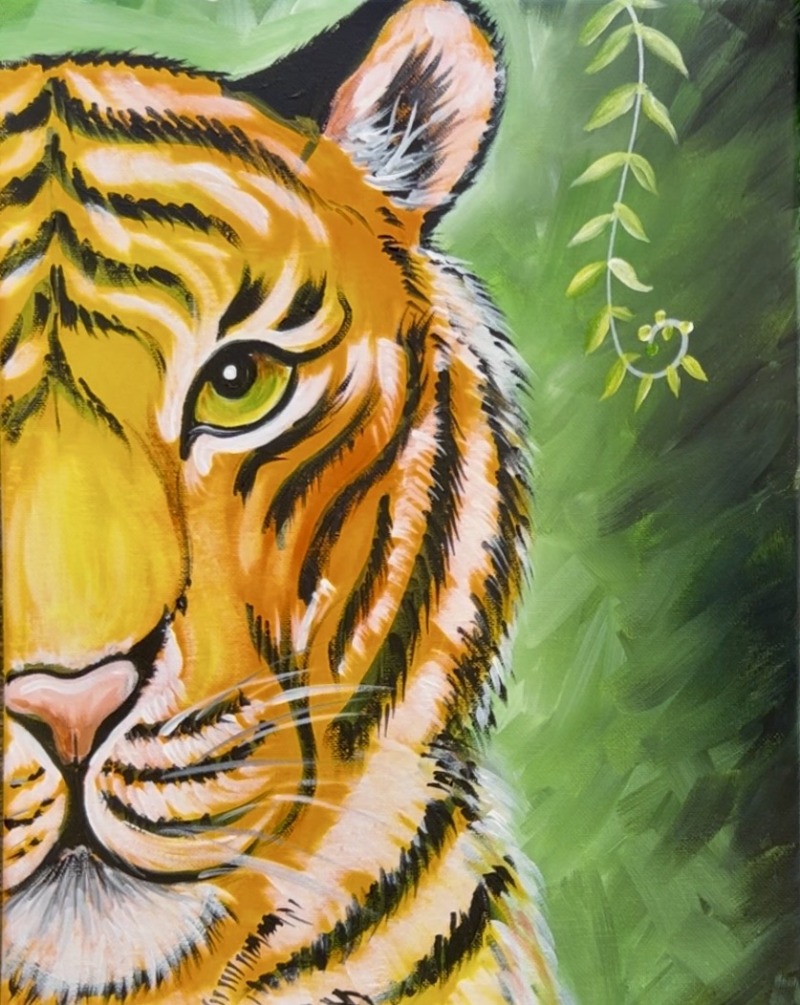
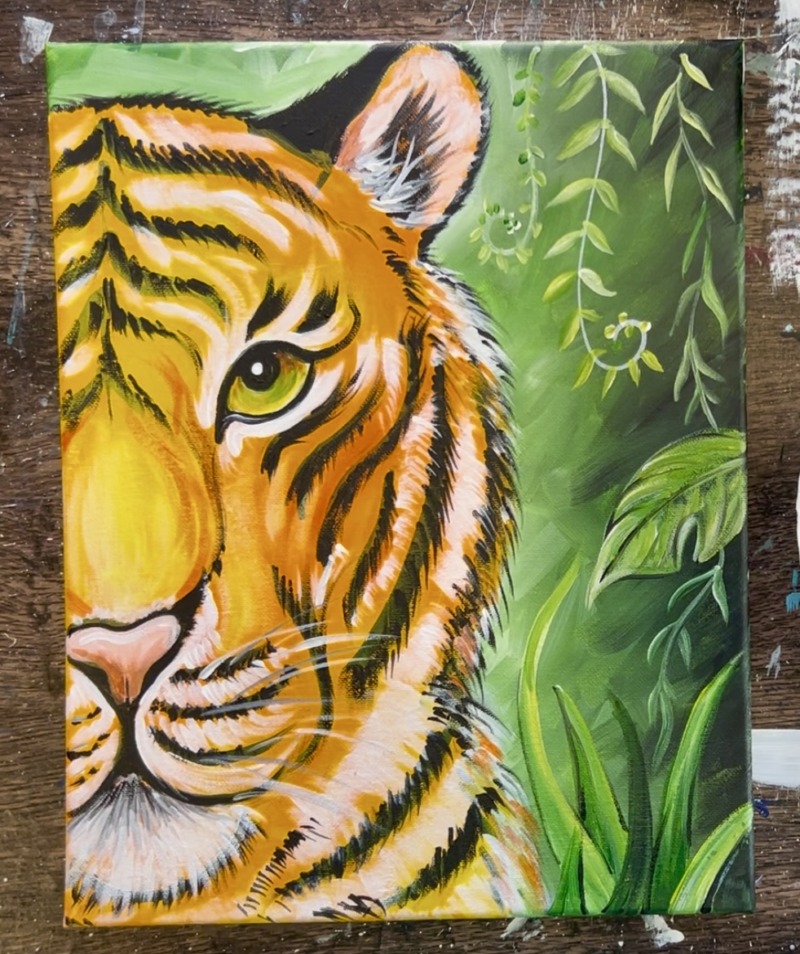
Paint a tiger acrylic painting.
Materials
- 11 x 14 Canvas (or any size)
- Pencil & Eraser
- Ruler (helpful but not required)
- Acrylic Paint (see colors)
- Brushes (see sizes)
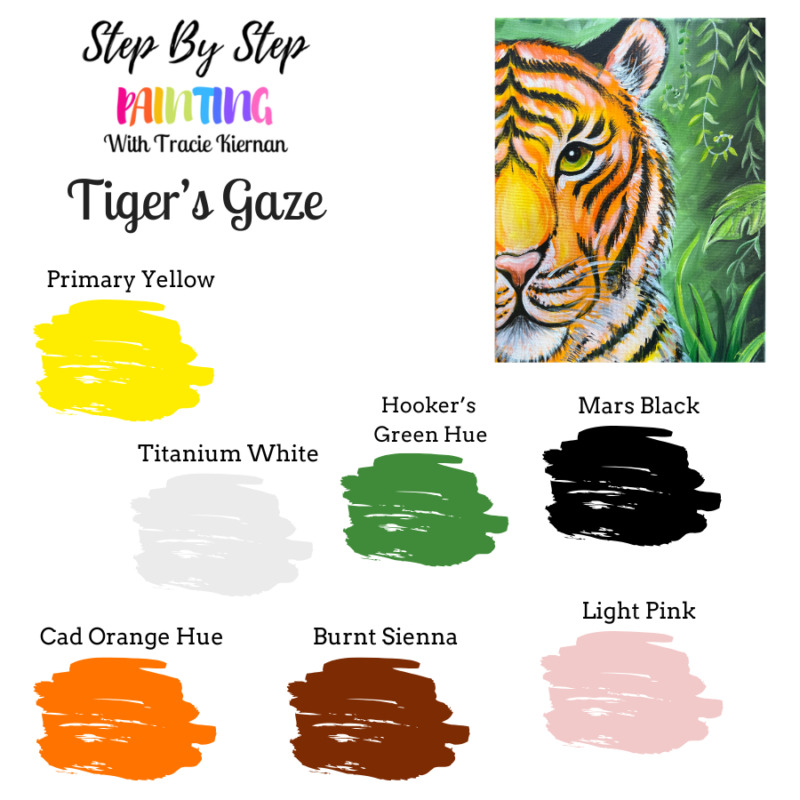
Colors (Liquitex BASICS Acrylics)
- Titanium White
- Mars Black
- Cadmium Orange Hue
- Primary Yellow
- Hooker's Green Hue
- Burnt Sienna
- Light Pink
Brush Sizes
- 4 Round
- 12 Bright
- 3/4 Flat

Color Palette
If you are using craft paints such as Apple Barrel, you can look at the chart below to help you match colors. Colors aren’t always a complete match when switching brands, however, you can get close and still create a beautiful painting!
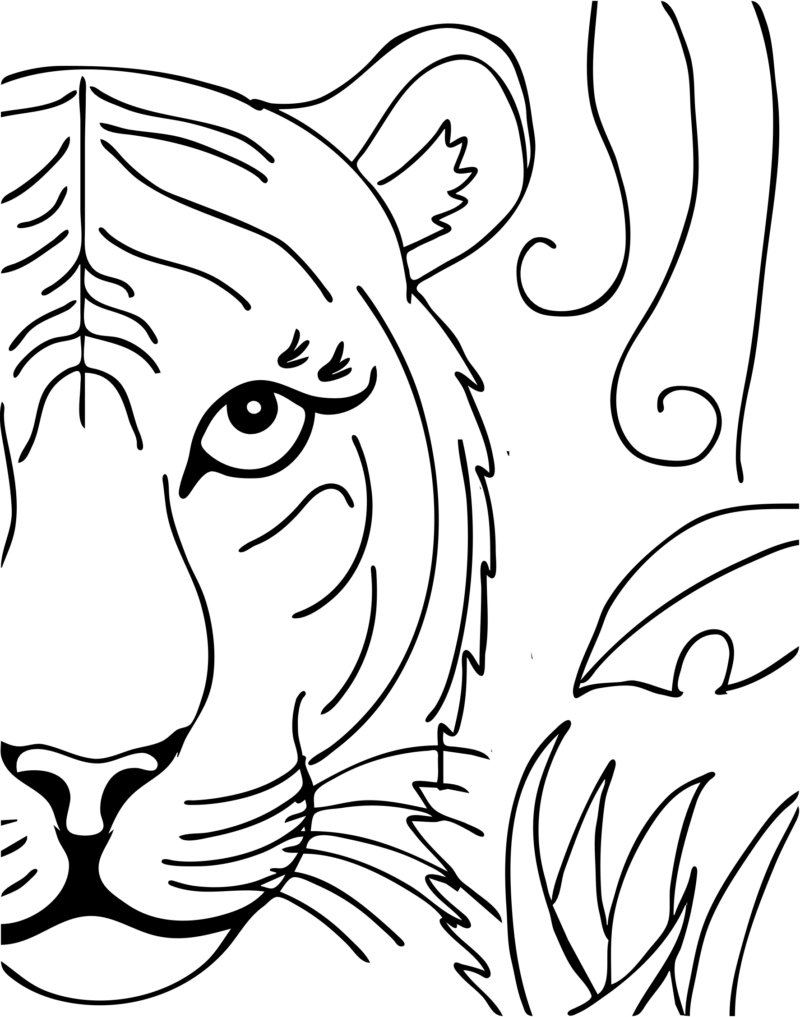
Optional Traceable
I will show you how to draw the tiger shape by shape in the instructions! The drawing is actually pretty easy, however, you are also welcome to use this to trace onto your canvas and follow the same steps after the drawing portion. The traceable is slightly different from the original painting (because I draw the tiger in the directions).
*Use this one if you need a bigger margin for printing purposes. Use the 2 sheets if you want to save paper.
Directions At A Glance
Video
Tips for drawing this tiger:

For the drawing portion, we are going to break the tiger down into simple shapes and lines! For example, the nose area of the face looks like an upside down heart, the head is a round shape and the nose is a triangle. When drawing animals, it’s also helpful to draw a “+” in the center of the circle to help divide up the face and find the placement of the eye.
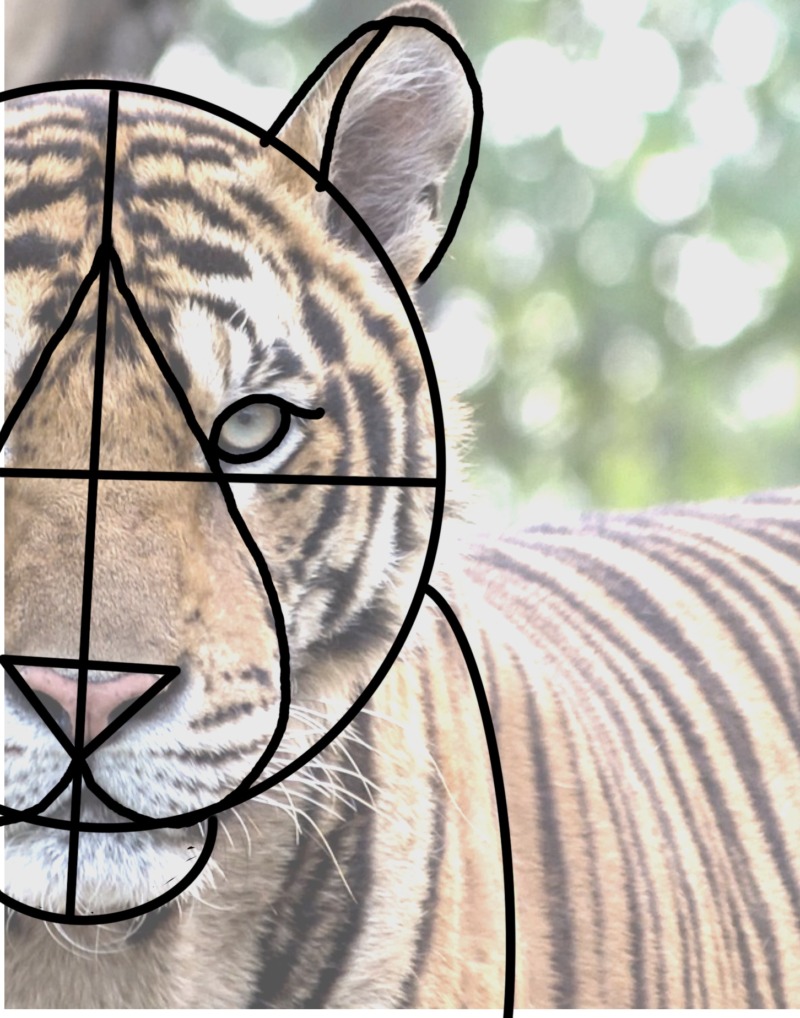
We are going to take this tiger reference photo but really simplify it!
Step By Step Instructions
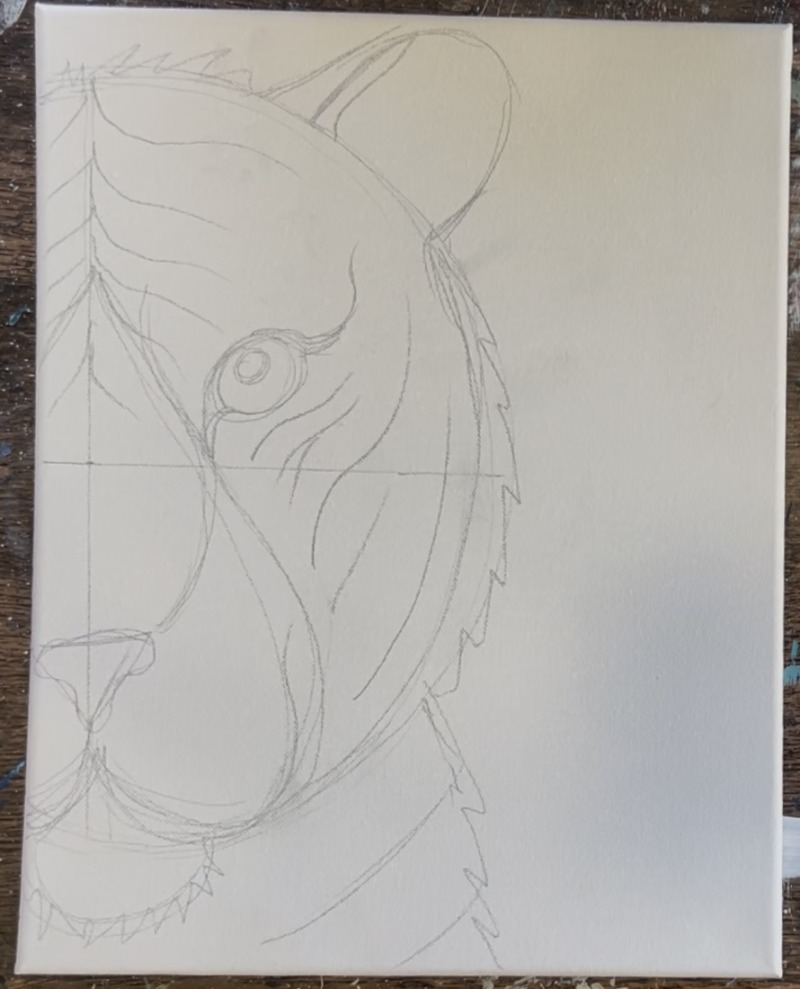
1. Draw The Tiger’s Head
If using the traceable, transfer the tiger design to the canvas and skip ahead to step two.
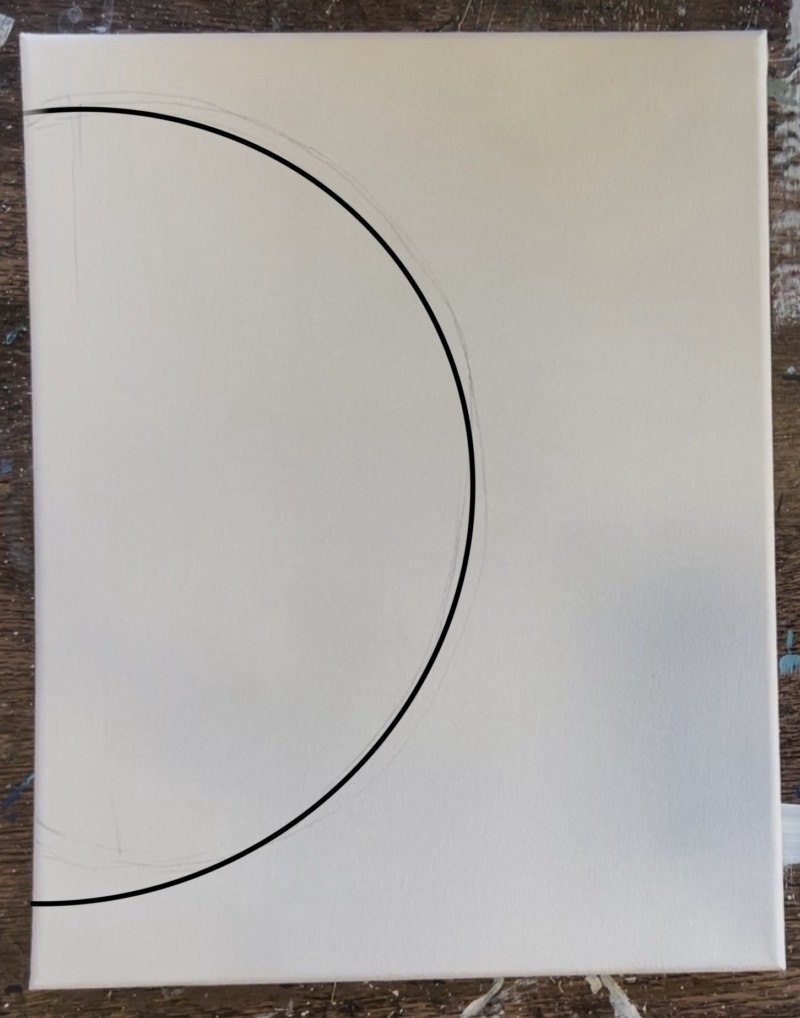
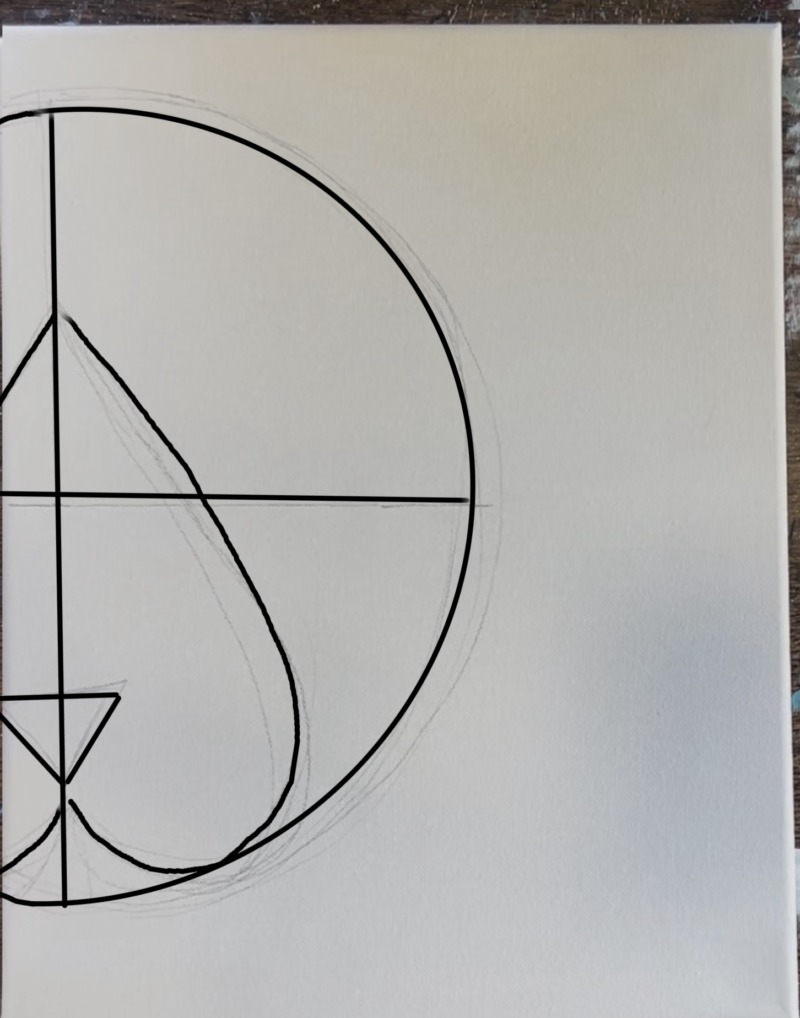
Lines are darkened so you can see them better. Draw this lightly with a pencil onto your canvas. Start by drawing a very large circle. This circle is a little more than half of the circle. There is about an inch of space on the top and bottom edge of the canvas. Diameter of this circle is about 12″.
Then draw a plus sign in the center of the circle. Note the center of this circle is visible on the canvas. Use a t-square ruler to help you draw this plus sign to ensure the lines are straight.

Then draw an elongated upside down heart shape. The two curved lines on the bottom create the mouth of the tiger.
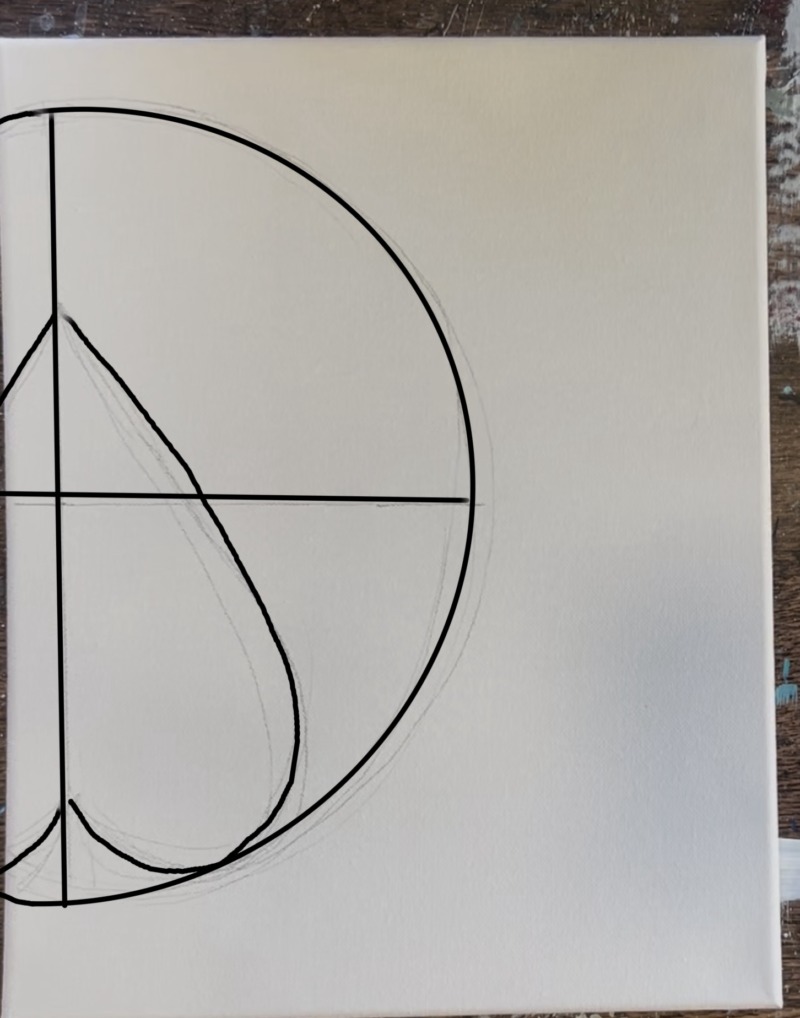
Draw an upside down triangle with the point downwards for the nose of the tiger. Notice how most is visible on the canvas and some of it goes off the canvas on the left.
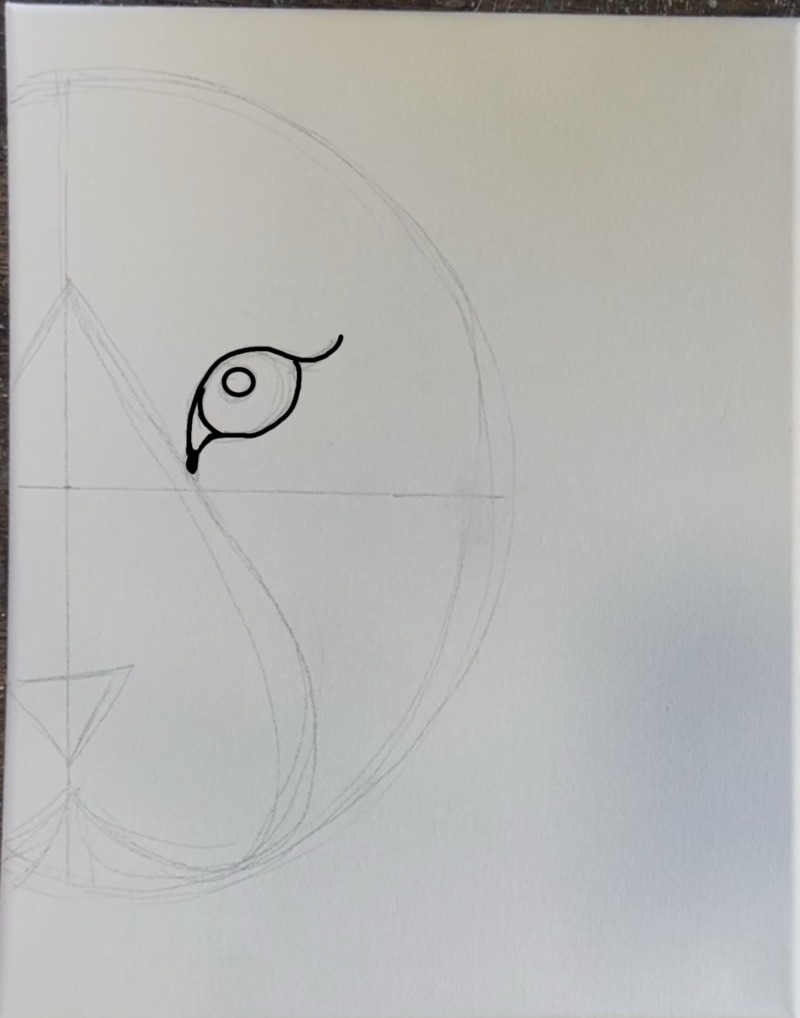
Start the eye shape in the upper right quadrant and just slightly lower and not center.
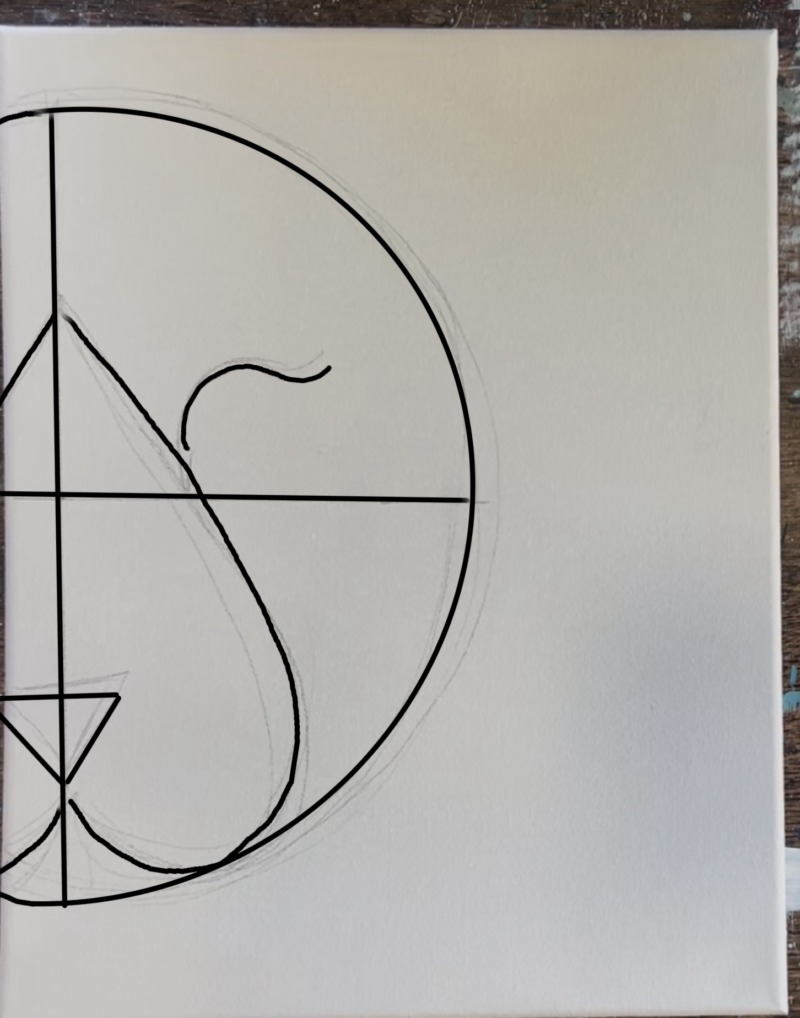
Draw this eye shape after sketching the initial top curved line. Draw a bottom curved line and a circle embedded inside it. Draw a smaller circle for the highlight of the tiger’s eye.
Draw a curved line that connects the nose and eye. This will help later when we paint the bridge of the nose. Also, draw a curved line under the mouth for the tiger’s chin.
Then draw the ear. The tiger’s ear is a curved shape and we see a little of its side ear on the left which forms a narrow triangular shape.

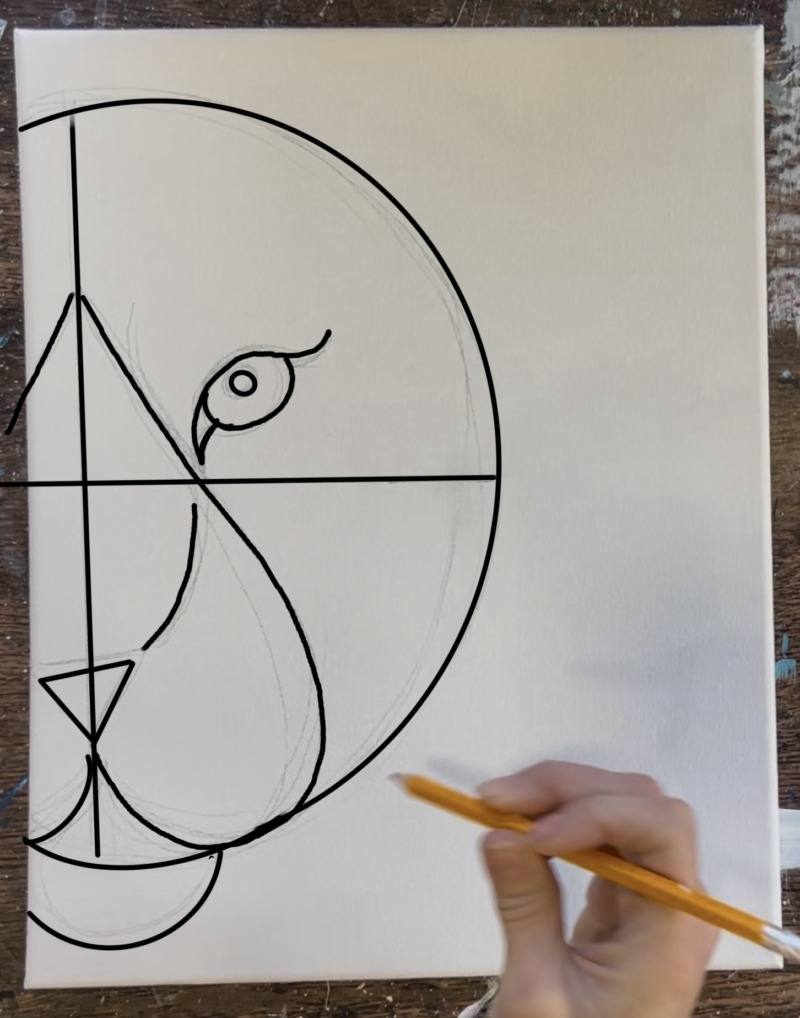
Then start drawing some of the fur texture edging on the right.
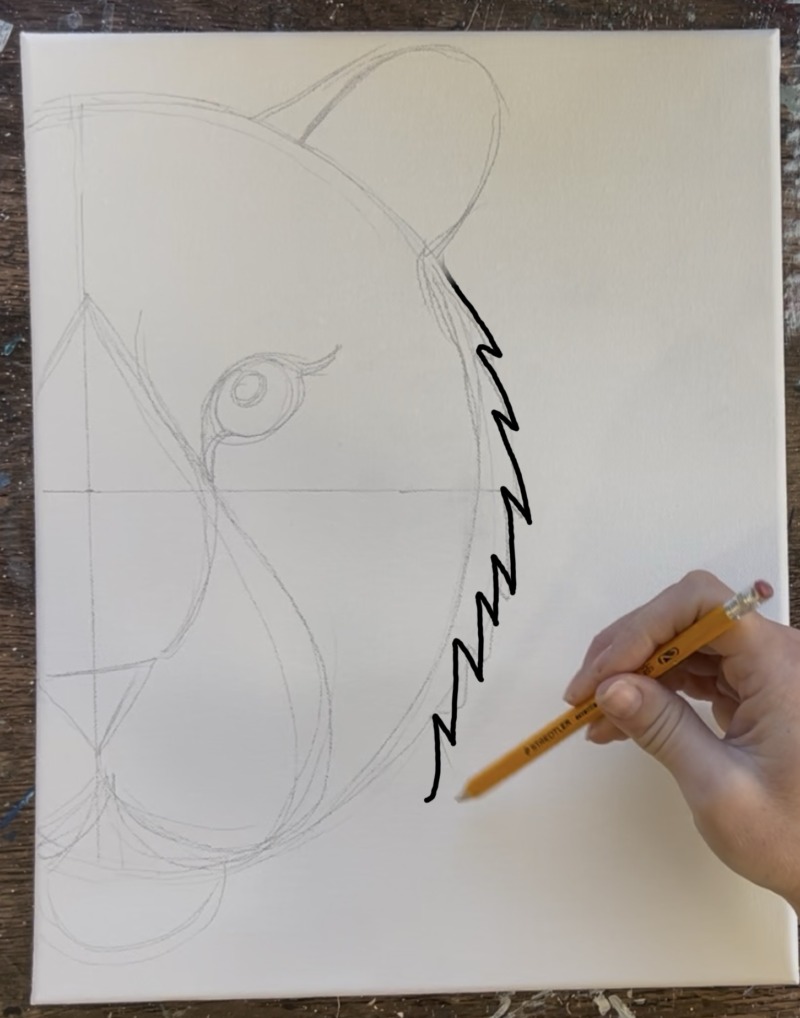
Draw zig-zag line fur texture on the top of the head and under the chin.

Drawing the stripe lines is an important step because we will be outlining these in black paint in the next step! Start by drawing the lines that are under the eye and to the right side of the tiger’s face. Notice how the lines curve in the direction of the shape of the face. Smaller stripes are under the eye. Longer lines are on the side of the face.
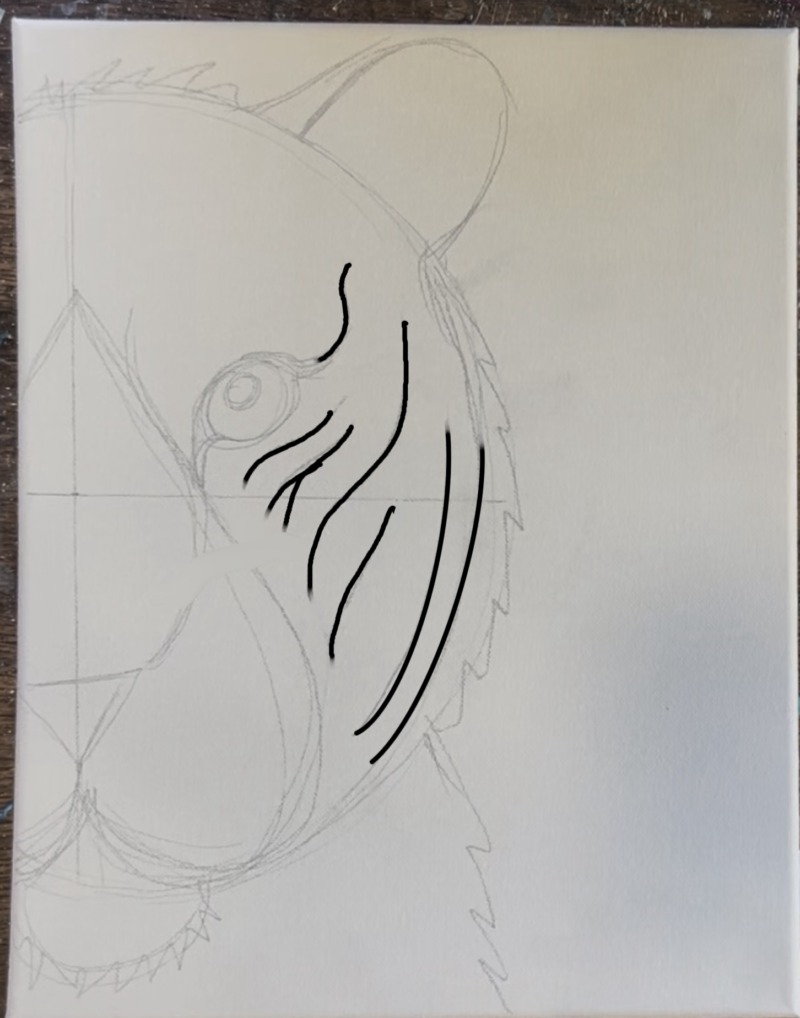
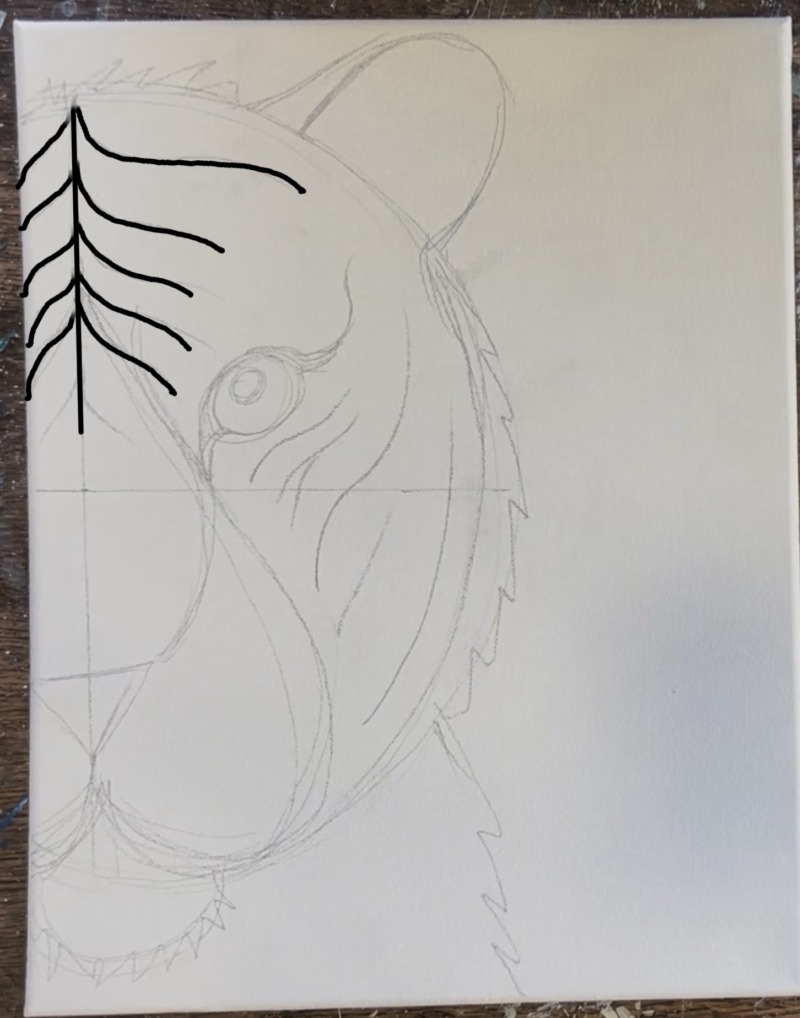
Draw the tiger stripes that are on the forehead of the tiger. Draw a vertical line (this is the line from the plus sign we drew earlier). This line is the center point of these forehead stripes. Then draw long curved lines that start at the top and get smaller towards the eye. These lines are symmetrical on each side of the middle line but go off the edge of the canvas on the left.
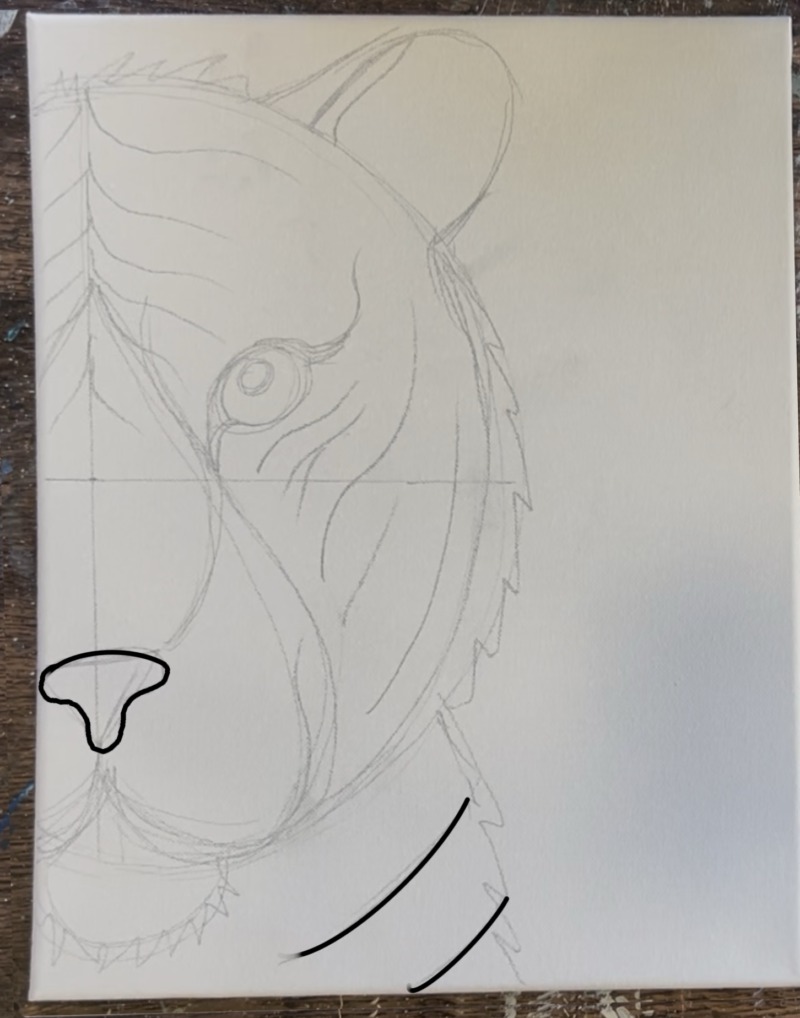
Then turn your triangle nose shape into more of a curvy nose shape. It’s like a letter “T” but with curved corners. Draw a few long stripes in the chest area that are curving.
Below is what my sketch looks like (without the darkened lines). It’s okay if your drawing looks very sketchy! We will be able to erase lines we won’t be using later.
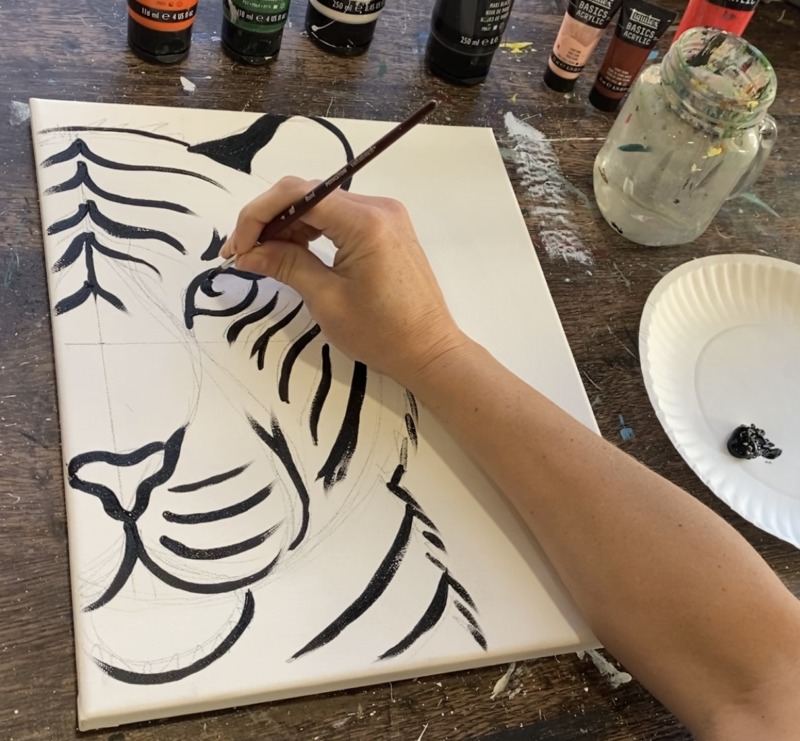
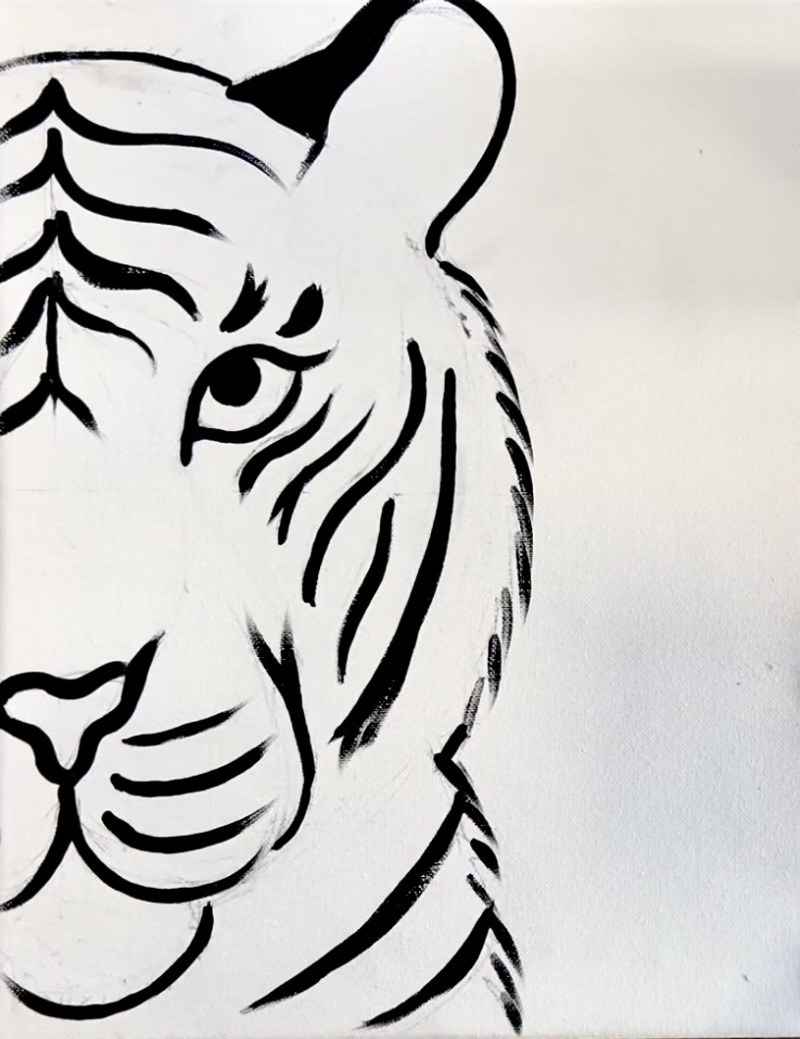
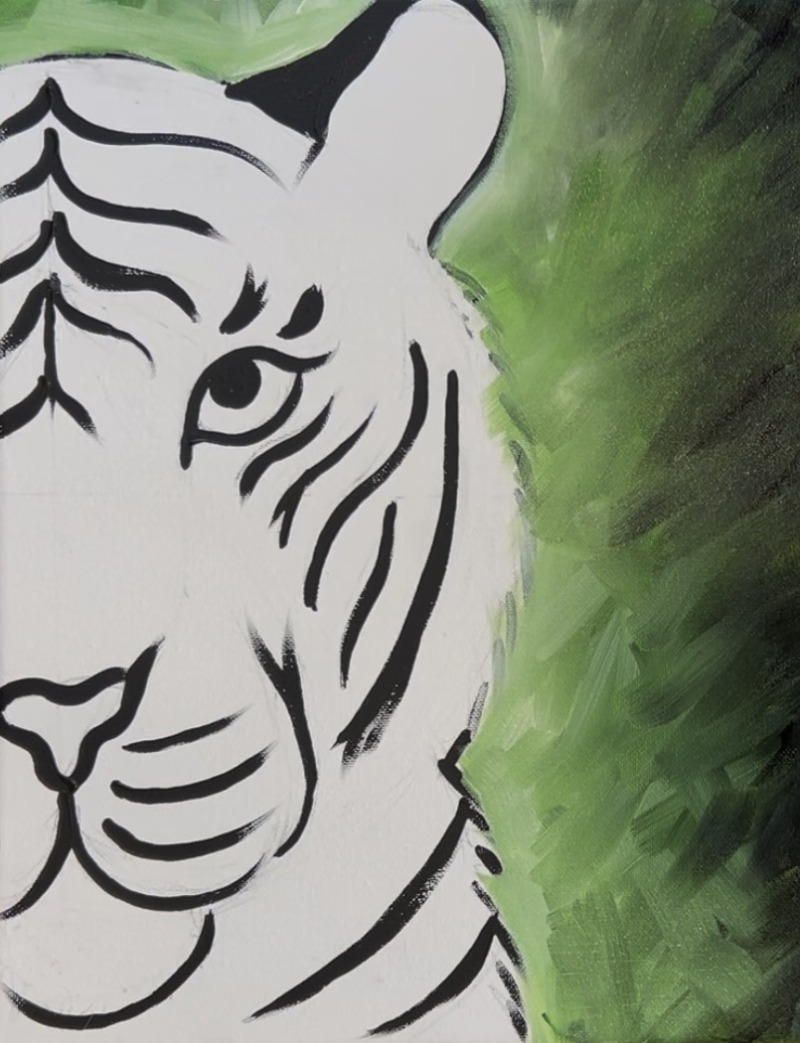
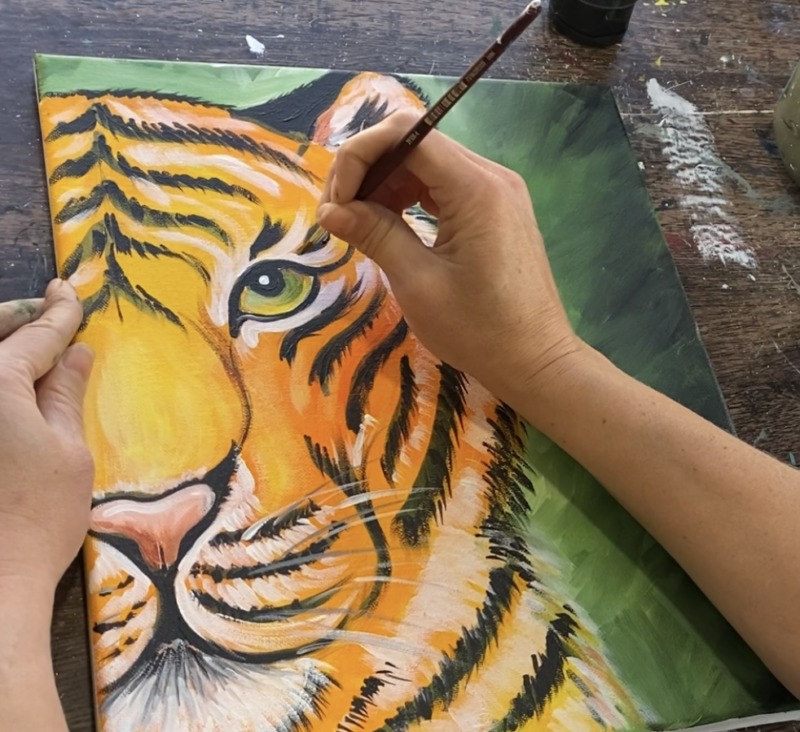
2. Paint Stripes, Eye & Basic Shapes Black
Use a #4 round brush and mars black. Slightly loosen the black with a little bit of water so that it will be easier to paint all of these lines and shapes. Start by outlining the eye of the tiger.
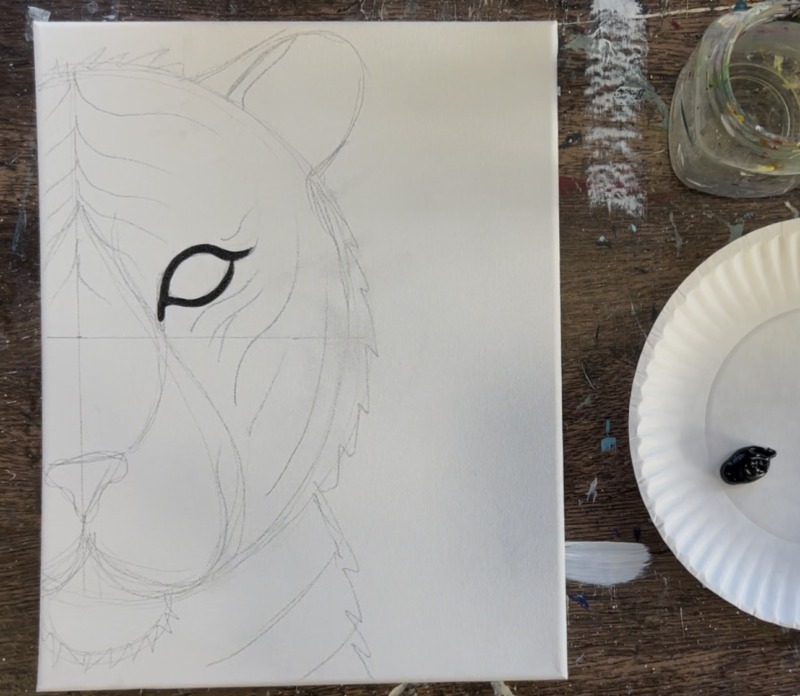
Next, paint the stripes around the tiger’s eye. Paint small curved stripe marks above the eye and paint the stripe below it. Basically, you are going to be outlining everything you drew with pencil (besides your guidelines).
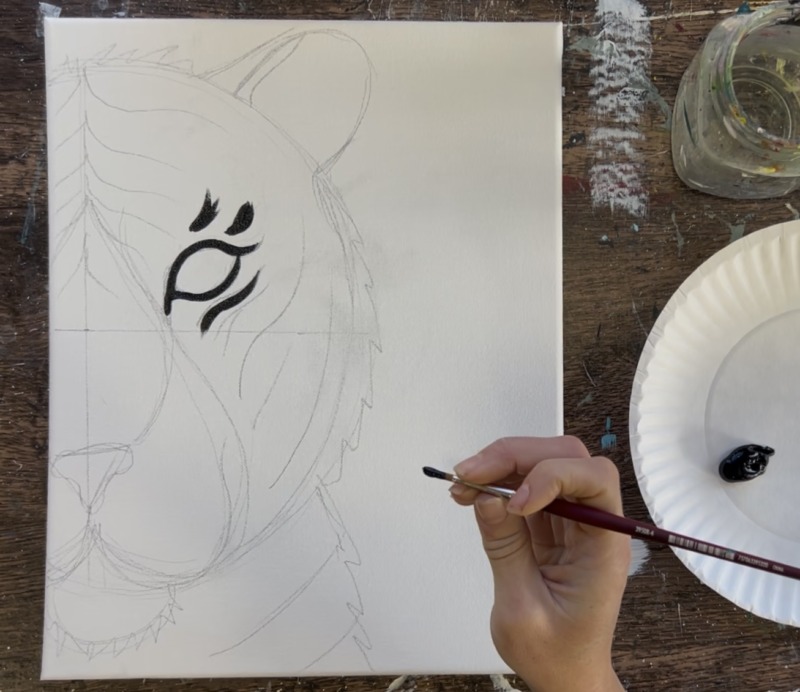
Paint the curved stripes on the top of the tiger’s head. Use that vertical middle line as your midpoint for these lines.
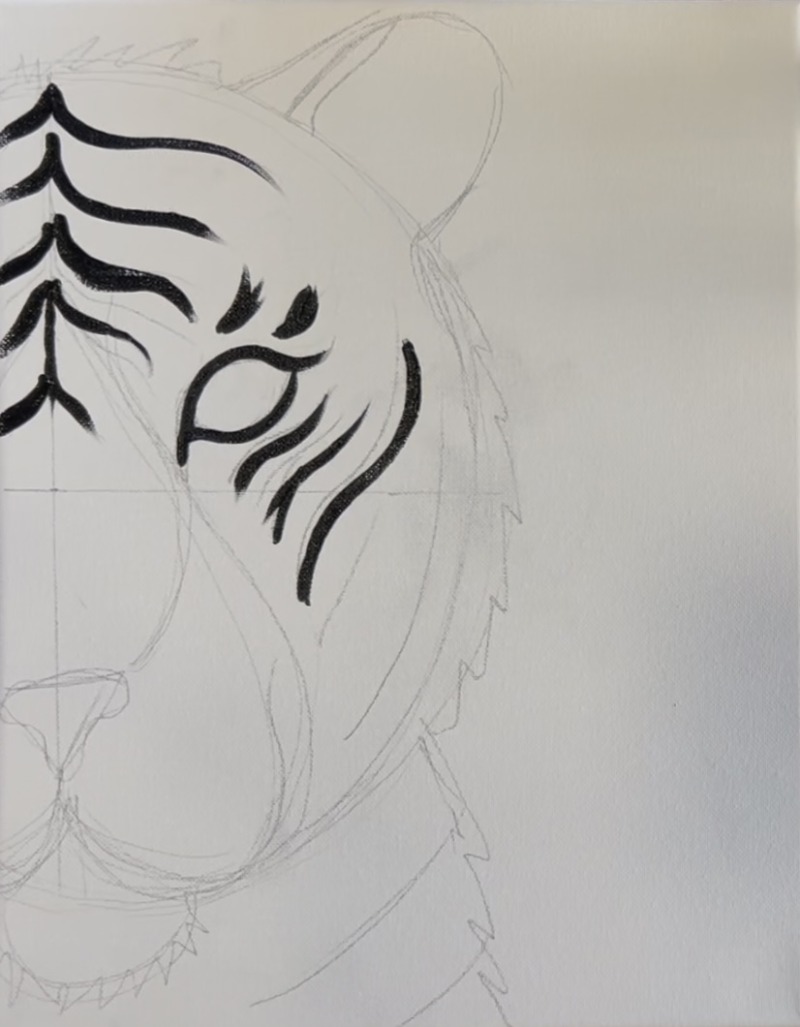
Loosely outline the tiger’s mouth and chin. Paint over the whisker stripe lines to the right and left of the nose.
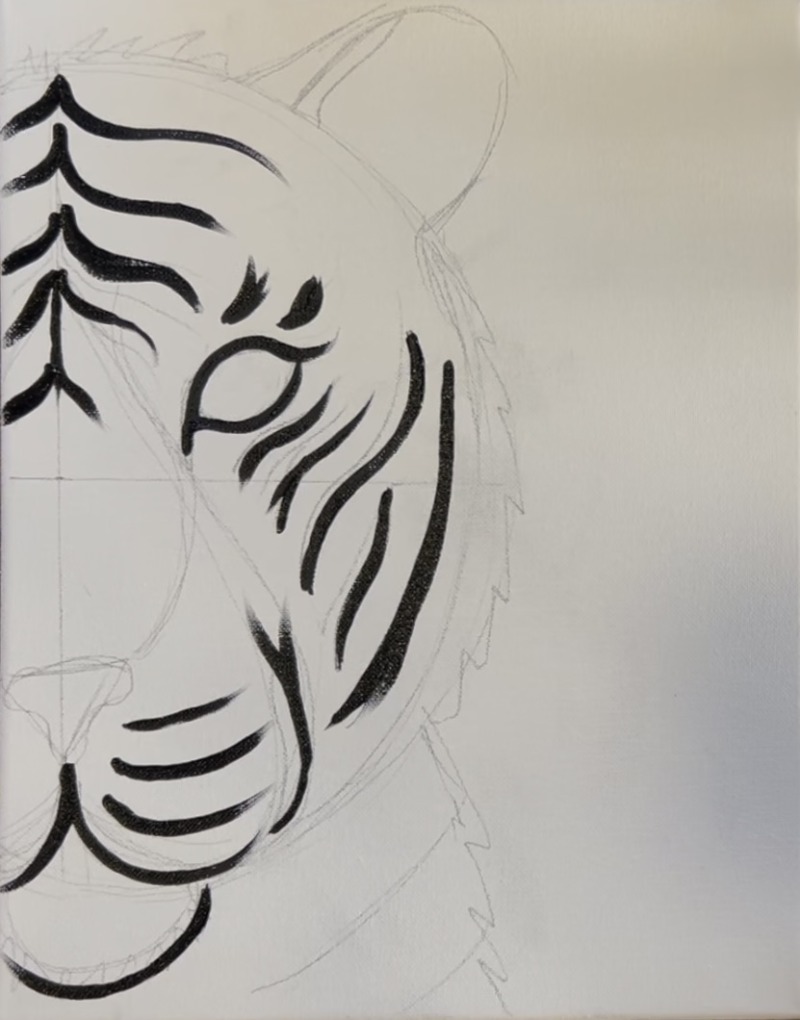
Paint the pupil inside of the eye a solid black circle.
Paint the ear and fill in the left side of the ear solid black. Paint “texture lines” on the edging of the tiger’s face. These are little curved marks that go downwards. Paint the right side of the tiger’s chest with these little fur texture lines as well. Outline the nose and paint a little diagonal mark with the black that goes upwards on the right side of the nose.
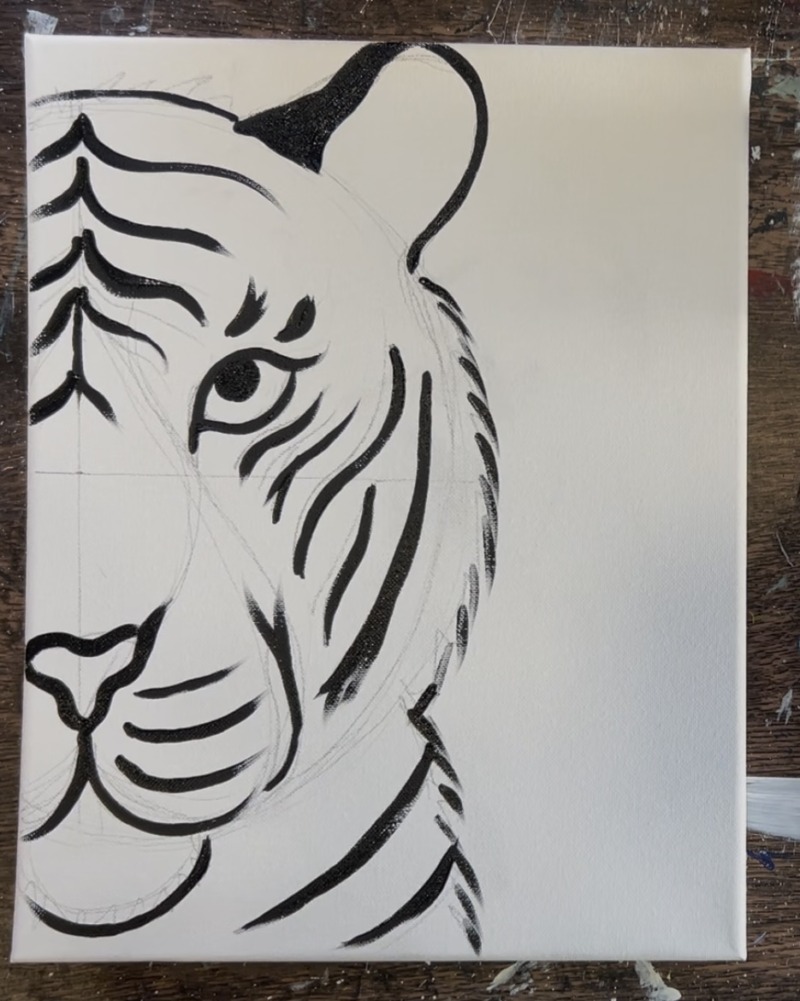
Let this dry or use a blow dryer to dry the entire painting. Then erase any leftover pencil marks. Be very careful when you do erase because you don’t want to smudge any paint that might still be wet.
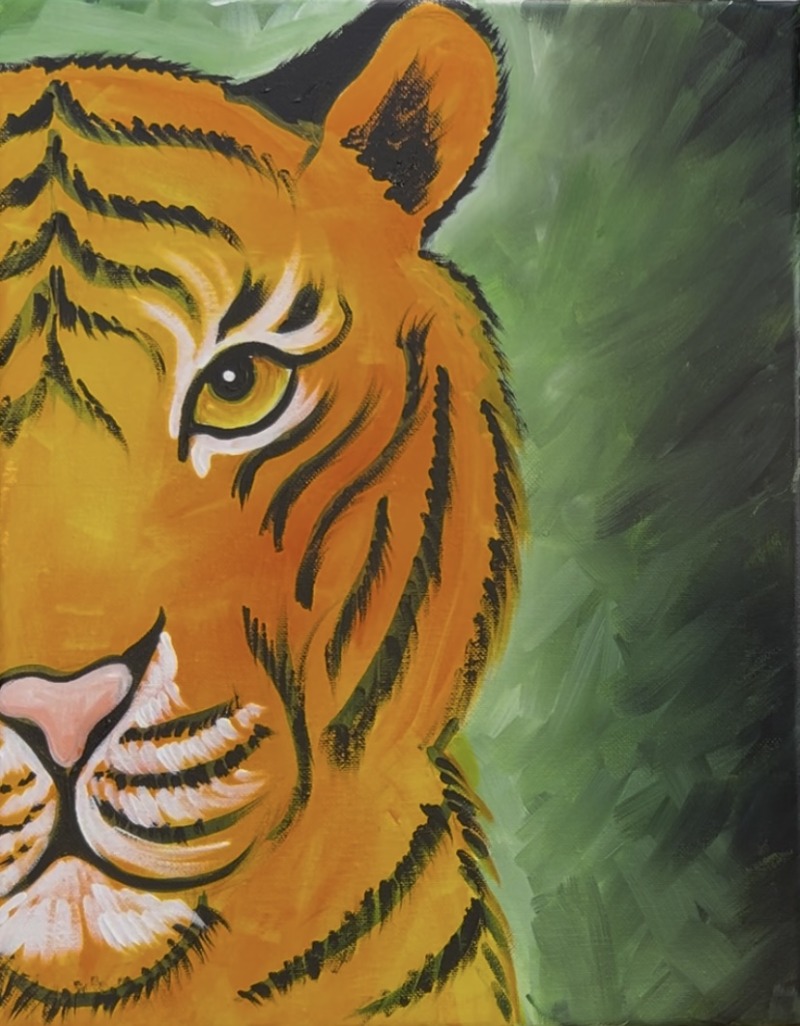
3. Paint Background Around Tiger
Load your paint palette with the colors: mars black, hooker’s green hue and titanium white. Use a 3/4″ flat wash brush and load it into the hooker’s green hue. Paint short, choppy paint strokes close to the edge of the canvas but don’t bring the color all the way to the tiger just yet.

Load the brush in a tiny bit of black (without rinsing the brush). Then gently blend the black into the green. We want the far edges of the canvas to be very dark and then lighter green to be just around the tiger. This helps to create a glow around the tiger.
Wipe the brush. Then blend titanium white into the green in the areas just around the tiger. Continue to paint angle, choppy brush strokes and blend the color right on the canvas.
You do not need to wait for this to dry before going onto the next step.
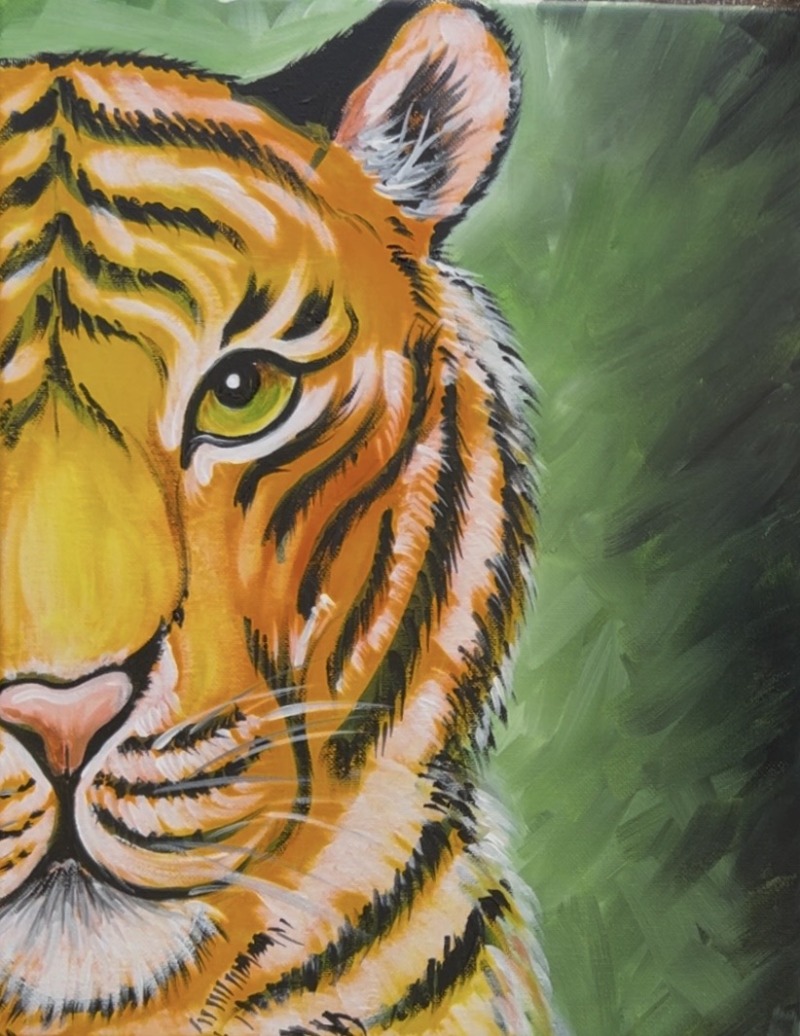
4. Paint entire tiger head with orange and yellow (paint over stripes and around eye)
Load your palette with the colors: cadmium orange hue and primary yellow. Use a clean and rinsed 3/4 wash brush. Double load the brush in both the orange and the yellow.
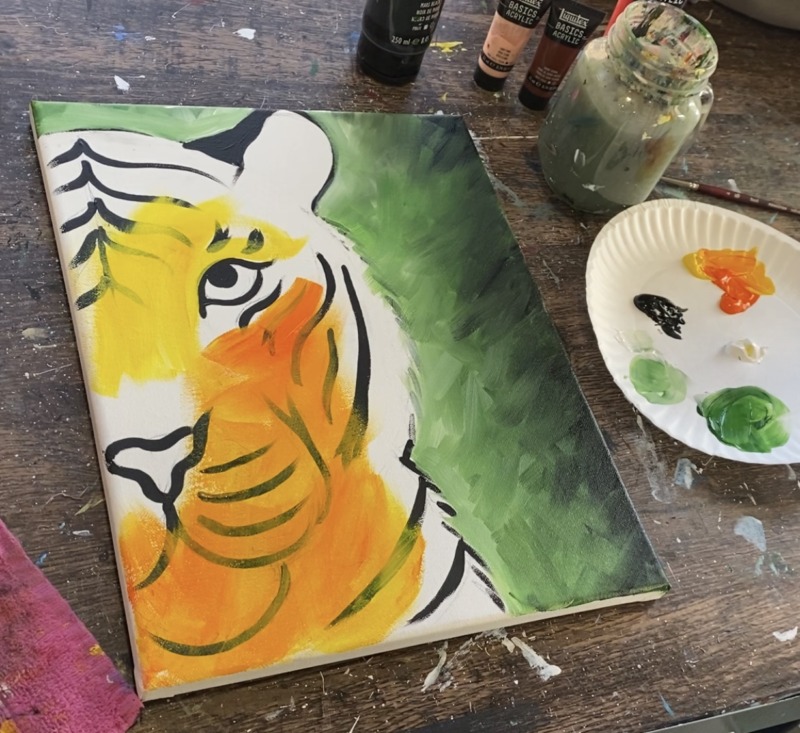
Fill the entire tiger in with this orange and yellow blending the colors onto the canvas. Yes, we are covering the stripes too! But we can still see them through this layer of color. Paint everything on the tiger’s face with the exception of the eye. It doesn’t matter the direction of the paint strokes for this step. The intention is to only fill the tiger with color.
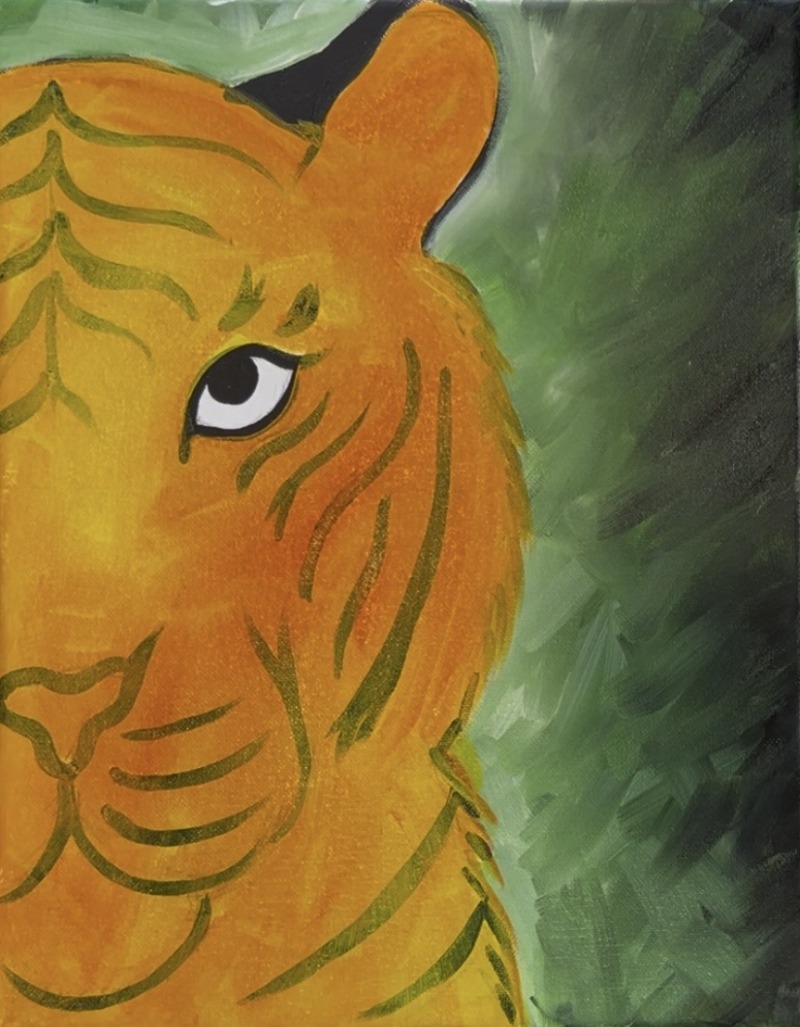
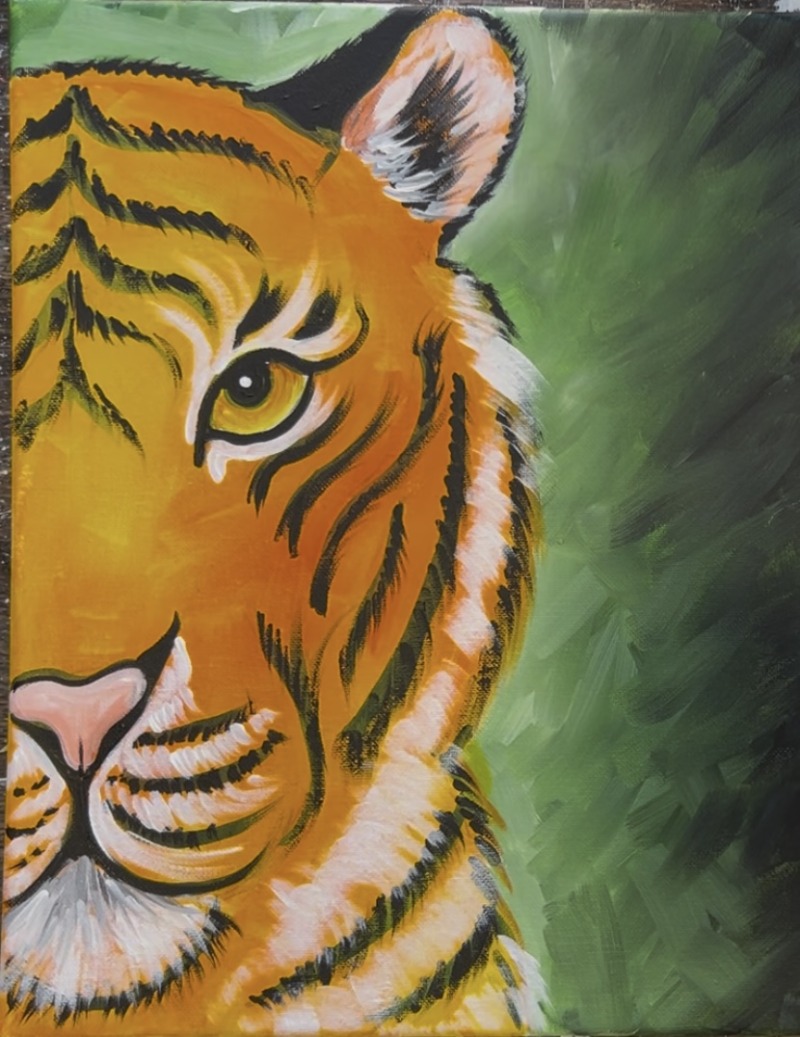
5. Paint eye
Use the #4 round brush and primary yellow. Paint the entire inner part of the eye a solid coat of yellow paint.
Then, without rinsing the brush, add a small amount of “burnt Sienna” onto the brush. Blend this burnt Sienna into the yellow only at the top of the eye. The top of the eye is slightly darker and it blends to a much lighter yellow on the bottom. Tip: wipe the brush off completely and use the brush dry to help you blend the colors.
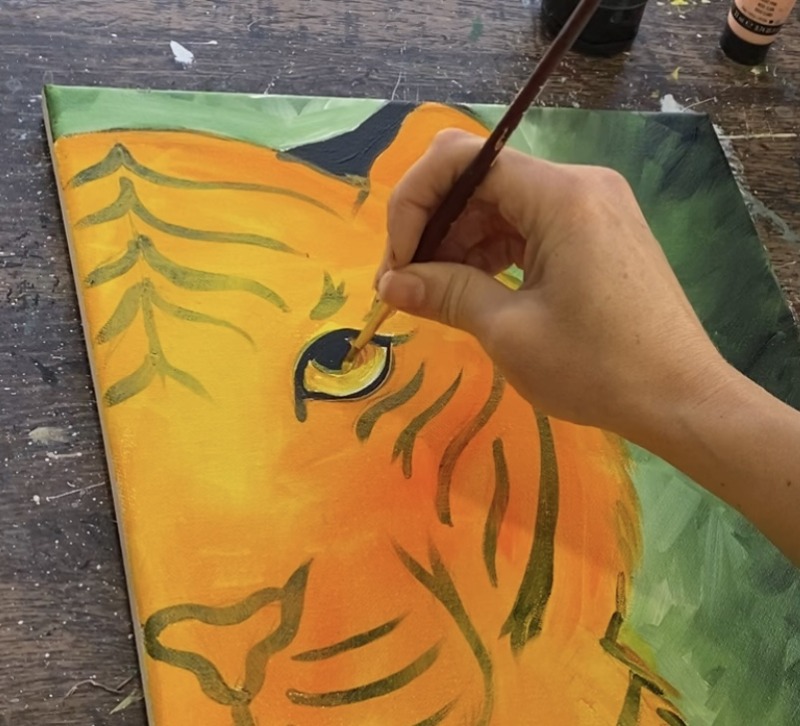
Then paint a little white dot in the center of the pupil of the eye.

6. Paint stripes
Use a #4 round brush and mars black to go back over your stripes. This time, you will be painting them in more of a “fur texture” styles. Instead of outlining the lines, paint little dash marks along the line. It’s almost like you are painting sketch lines.

Do this along all of the stripes. Most of these fur lines go vertical but some go a little more diagonal. The direction of the fur line is depending on the direction of the stripe and where it is on the face.
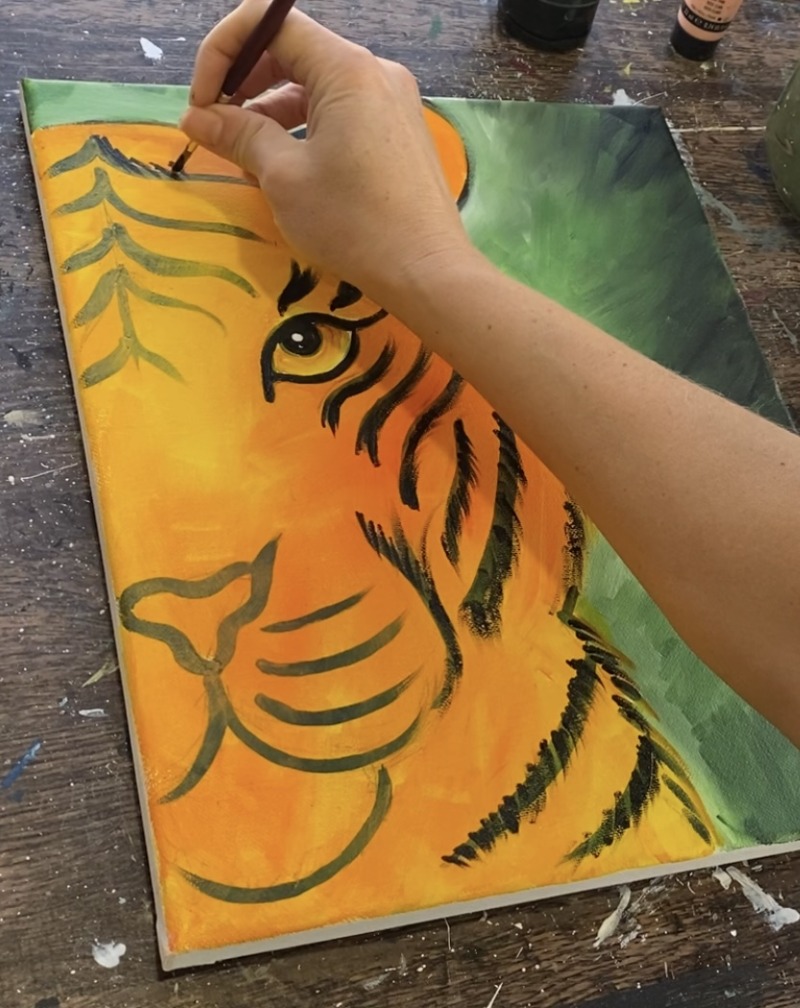
Paint the lines on the tiger’s mouth/ whisker areas. These are little vertical/ stipple dotted lies. Paint fur lines on the tiger’s chin. These are also little diagonal lines.
Paint the inner dark part of the tiger’s ear. This is a triangular “blotchy” area that is dark and shadowy.
7. Paint nose
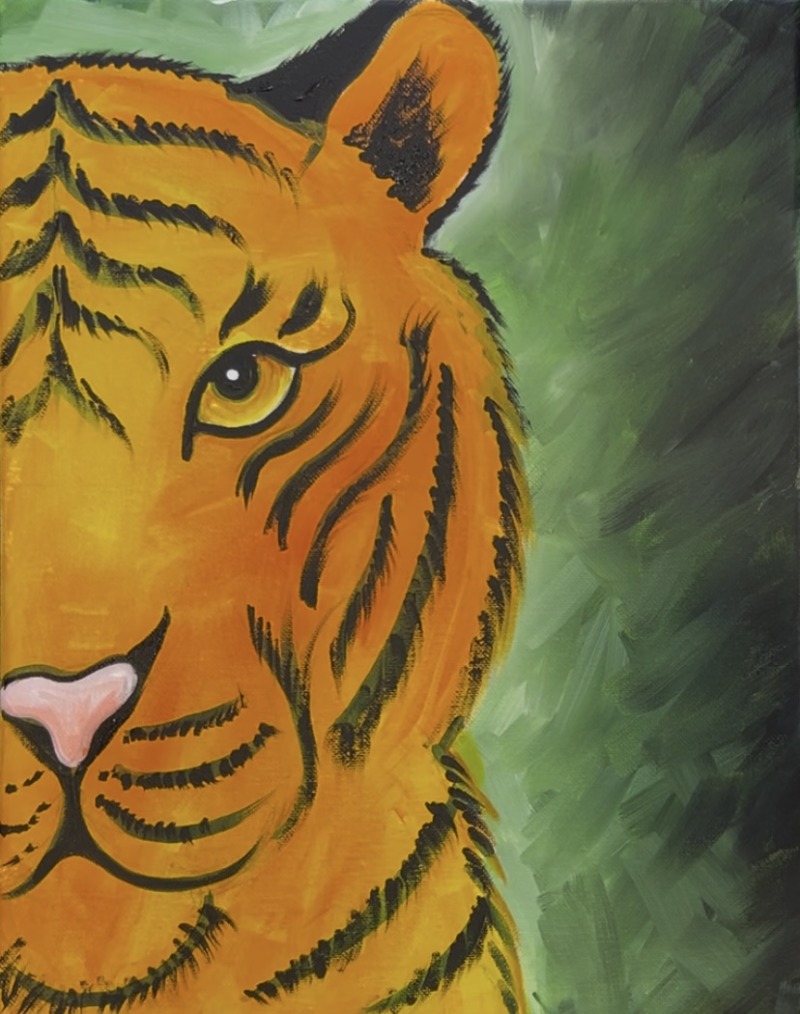
Use the #4 round brush. Mix equal amounts of the colors “light pink” and “titanium white”. Fill in the nose shape.

Optional: to add some shading, blend the color “cadmium orange hue” on the bottom of the nose and blend that color “wet on wet” up into the light pink color of the nose. Add a little extra white at the very top of the nose and blend it in.
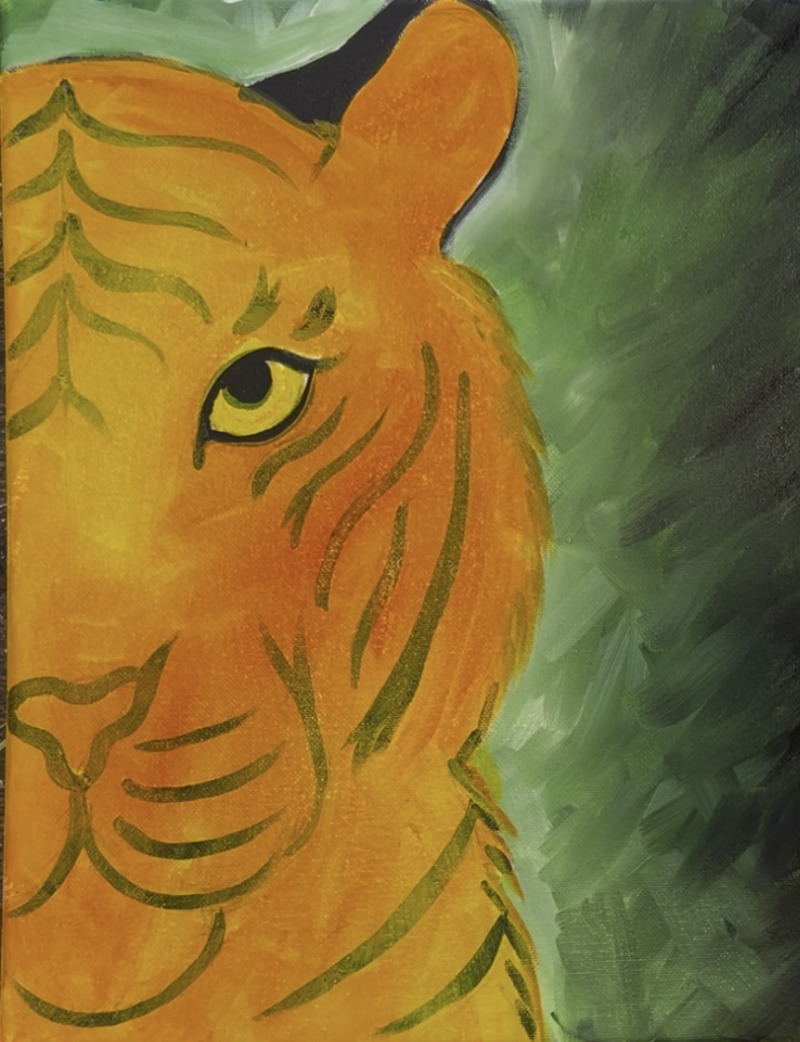
8. Paint white markings
Tiger’s have white markings in addition to their black stripes and orange fur color. We will be filling in the white markings in this next step.
Use a clean #4 round brush and “titanium white”. Outline the outer area around the eye.
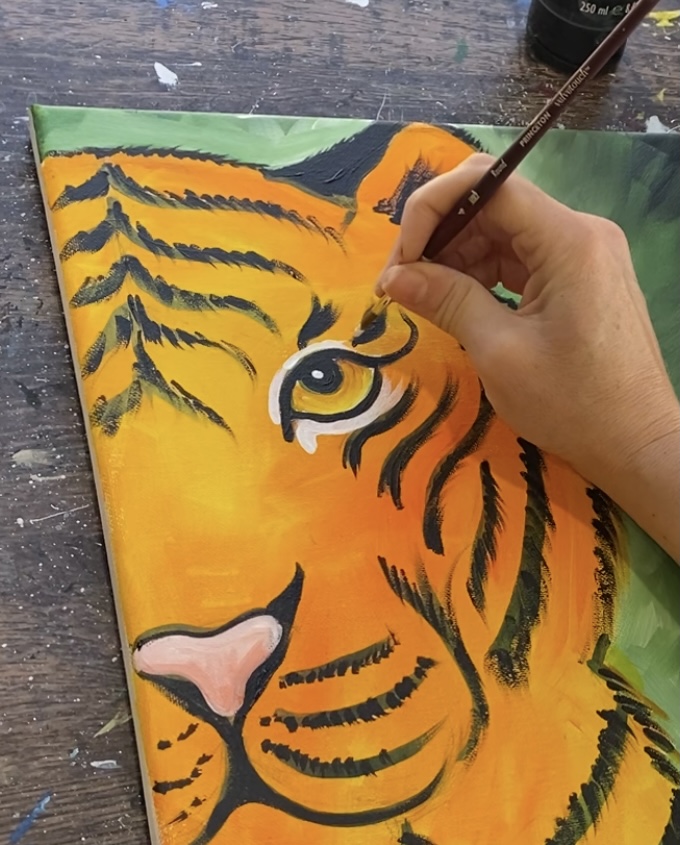
The entire eye is outlined with white. Paint white stripes that go upwards and between the two black stripe markings. As you paint these white stripe paint strokes, apply this very lightly and not thick. Make the ends of your strokes kind of fade off to achieve a fur texture.
Paint the area around the nose and mouth stripes. These little white markings are pointing downwards and are short, thin paint strokes. As you are painting this in, leave orange showing through and between your strokes.
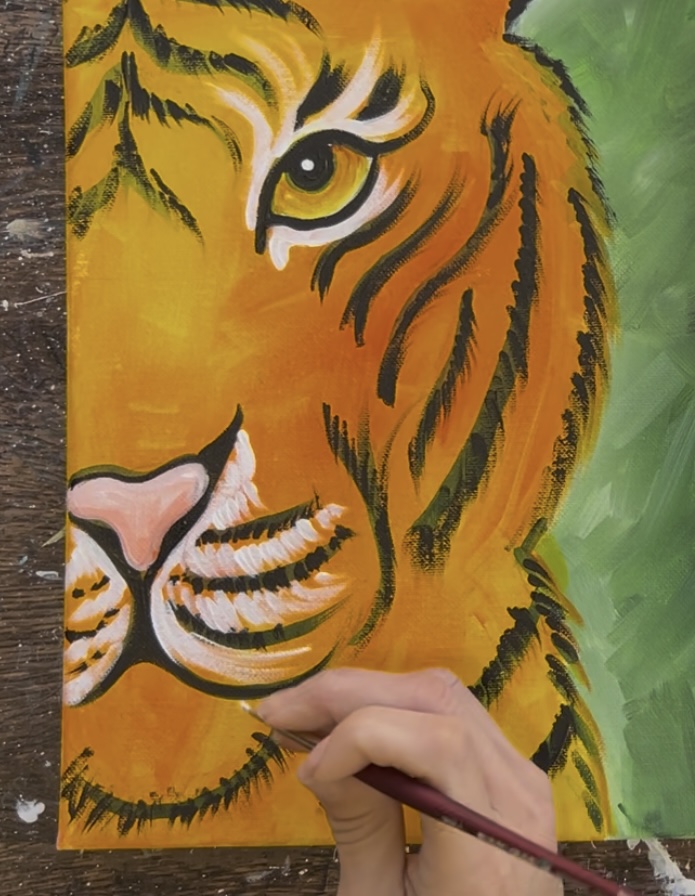
Paint the chin of the tiger. Start at the top (just below the mouth) and paint strokes going downwards and outwards at an angle.
Fill the chin area in. Then add “mars black” to your white paint to make a gray color. Paint more of these gray brush stroke below the mouth.
Now switch to the #12 bright brush (1/2″ flat brush). Load the end tip of the brush into “titanium white”. These paint strokes are going to be larger and you will use the full width of your brush and drag it outwards.
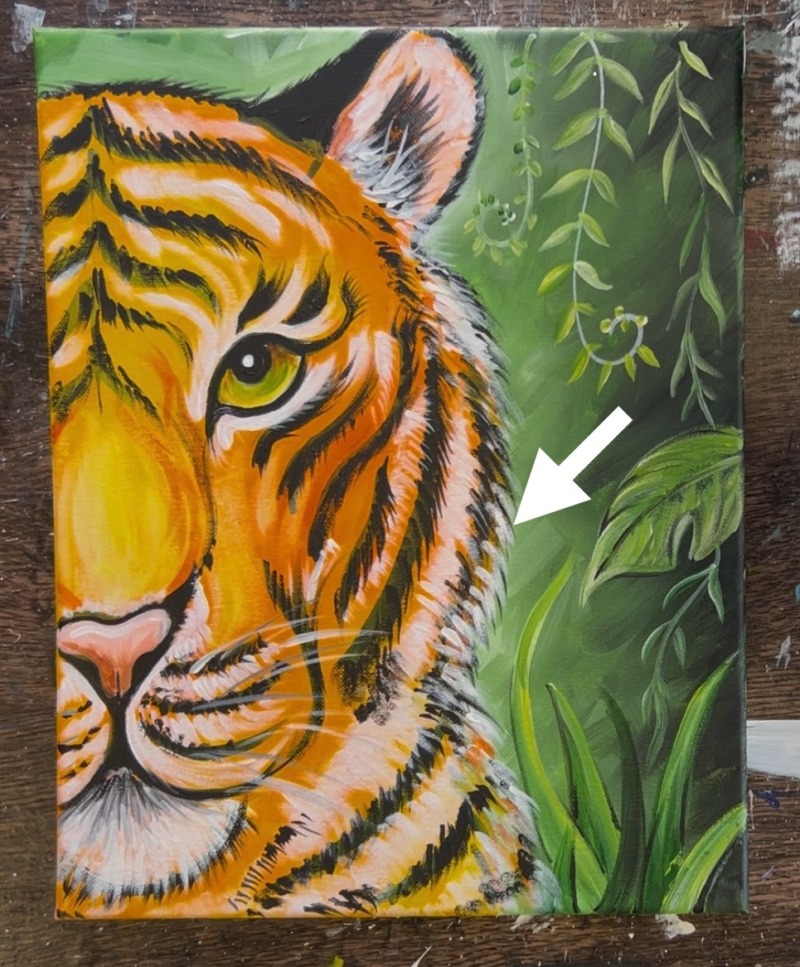
Paint these outwards brush strokes along the right side of the tiger’s face. It’s okay if you overlap black stripes and/or overlap parts of the background. Paint the inner part of the ear around the black shadowy area. Leave a lot of the orange still showing (don’t cover all of your orange layer).
Use the round brush and “titanium white” to paint some fur marks that overlap parts of the shadowy area.
Lightly paint white between the black stripes on the top of the head.
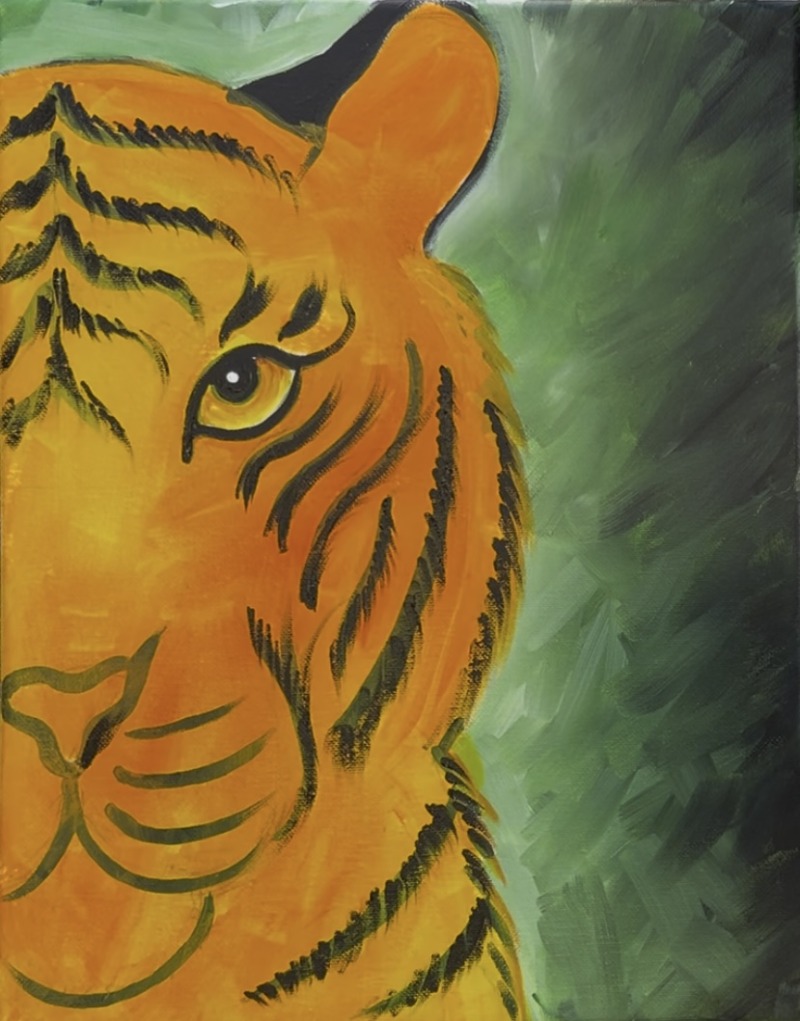
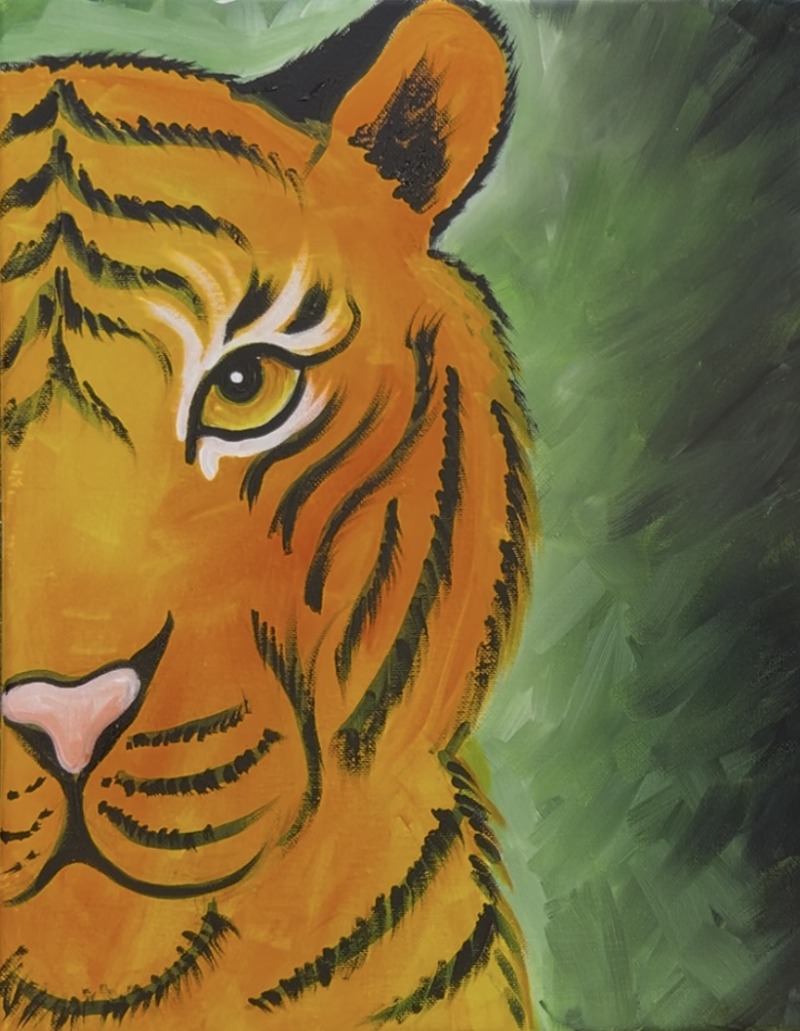
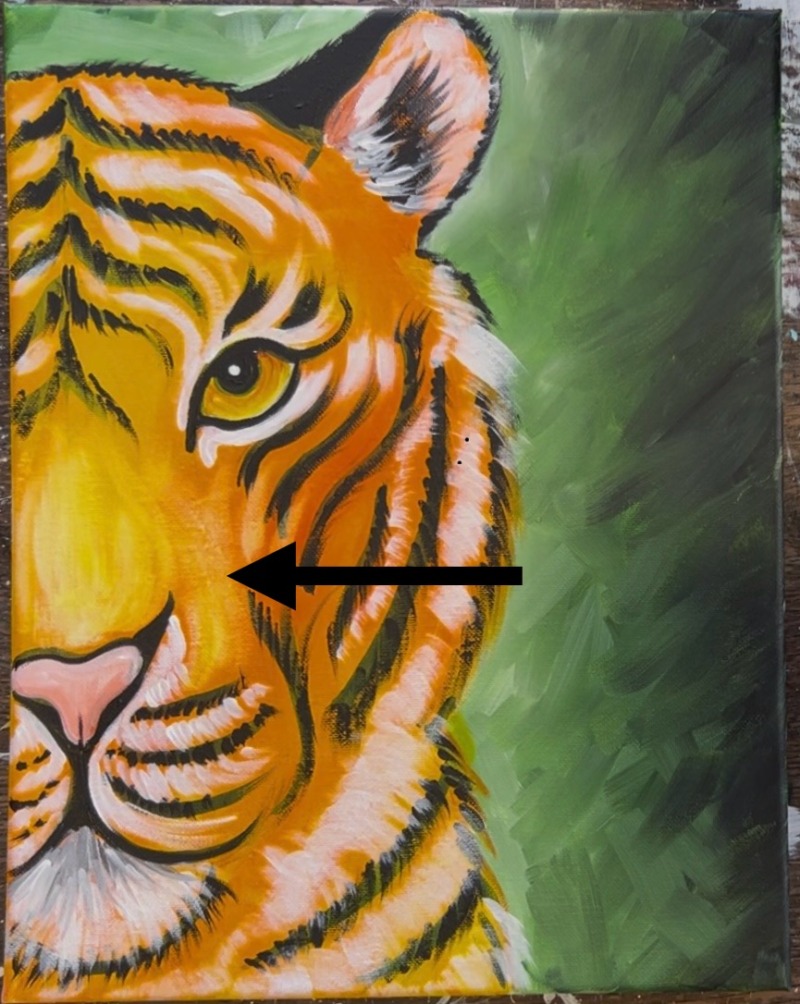
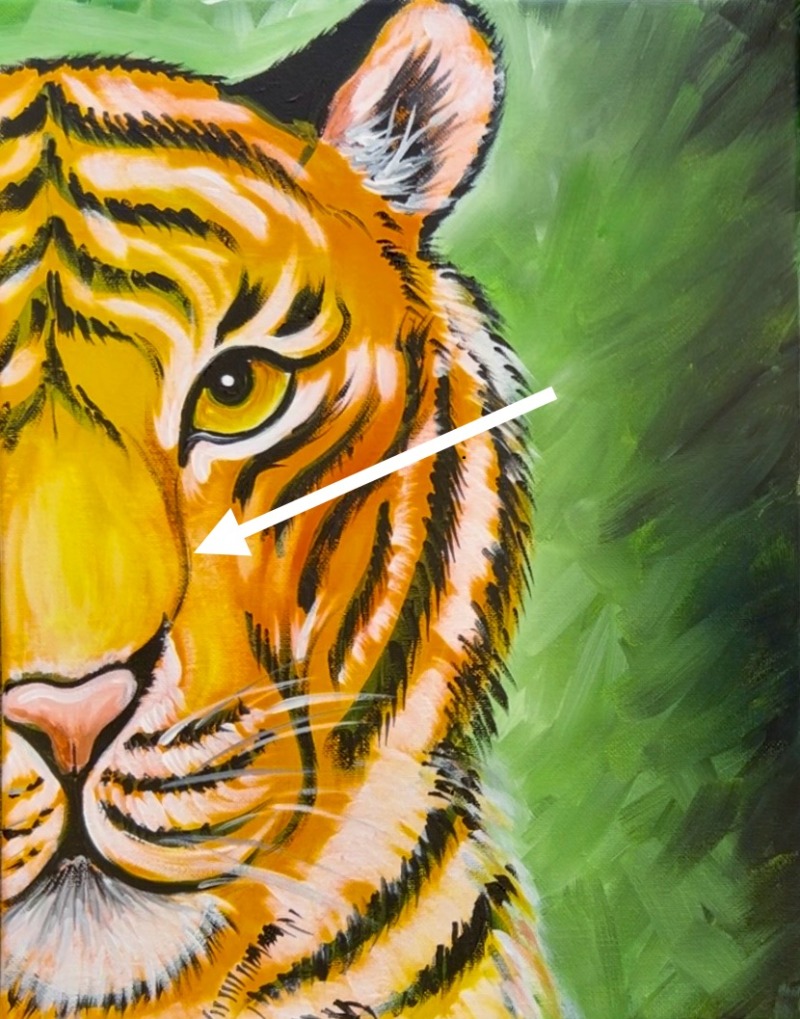
9. Paint bridge of nose
Next, mix a light orange/ yellow-orange color (lighter than your first base orange color you painted the tiger). Mix white with yellow to make a really bright yellow then mix a little orange into that.
Paint the bridge of the nose. Paint these paint strokes using the 12 bright brush and stroke upwards.

This lighter color will make the nose stand out better because it will look brighter than the background orange color.
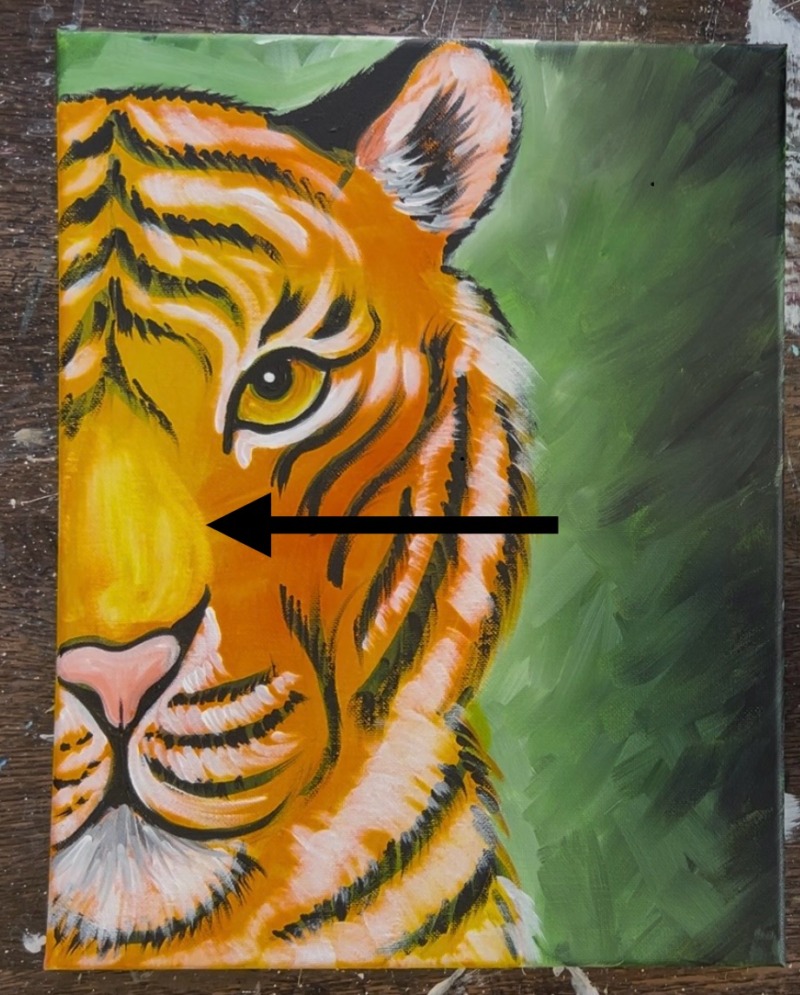
Additionally, I added a little bit of this lighter color just to the right of the nose bridge.
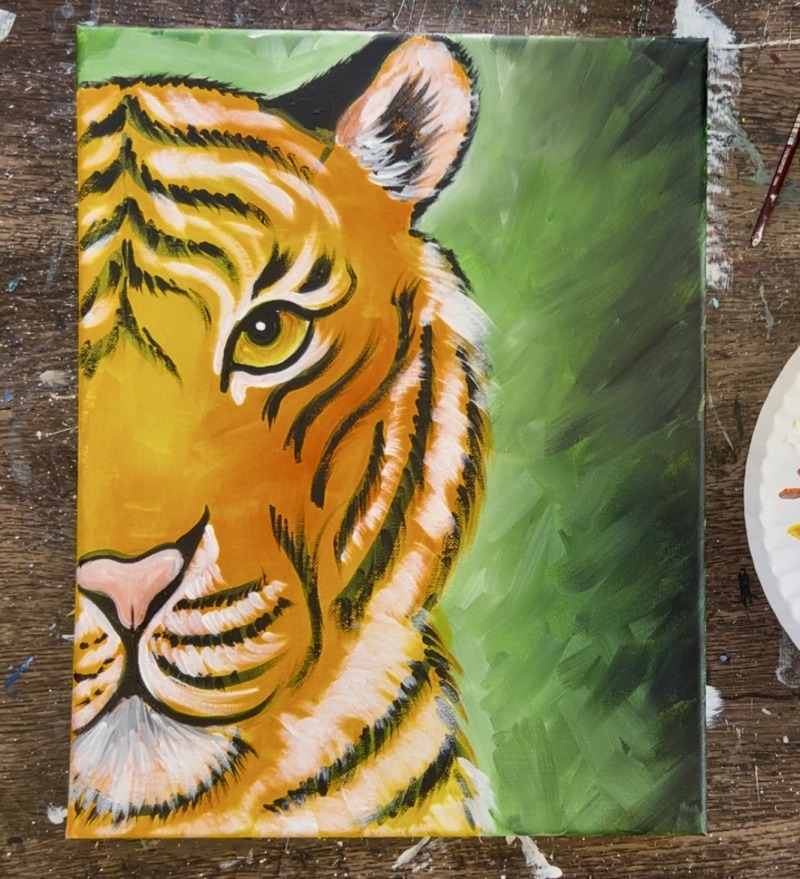
10. Paint whiskers
Use a #4 round brush (or a liner brush if you have one). You can also use a white paint pen for this step! Paint the whiskers as very thin lines that go outwards from the mouth stripes and overlap the right side of the tiger’s head. It helps to water these whisker lines down to a very thin consistency so you can get a thin, smooth line. Also, if you pinch the ends of the bristles, you can ensure the brush has a nice point to it.
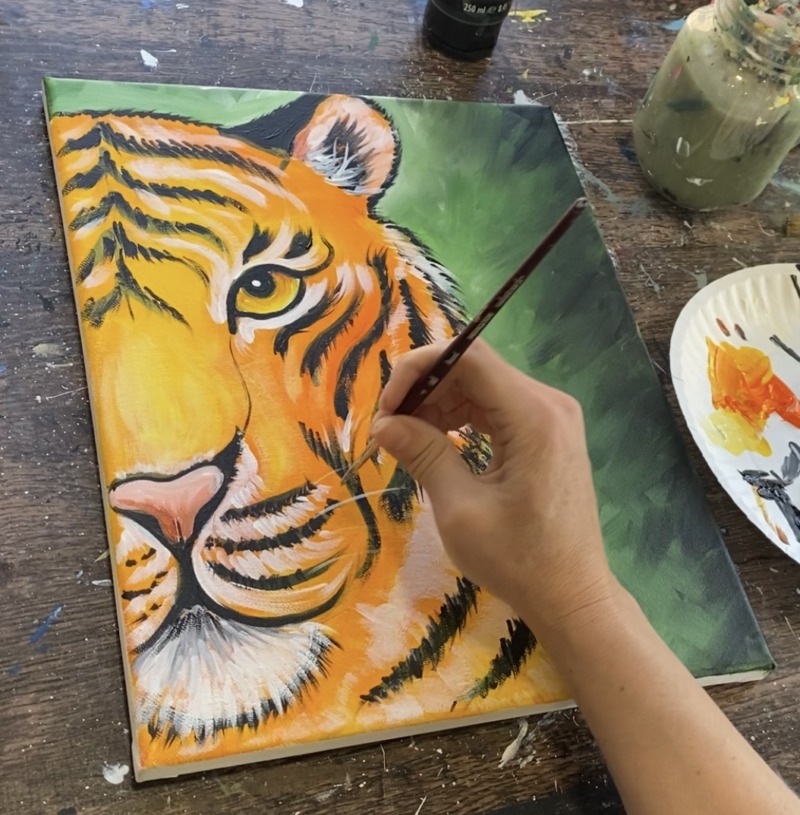
Some of the whiskers are painted gray to help them show up better. Mix black into your white and loosen that color with water. Paint a mixture of white and gray whiskers.
11. Paint line for bridge of nose (optional)
This step is optional! It does help to define the nose bridge better but you don’t have to do this if you are okay with how your tiger looks! This line is initially painted with a thin black watered down line. It connects the nose and the lower left corner of the eye. Then mix orange and black together (make a very dark orange) and lightly brush this line to make it slightly thicker. Notice the line curves to form the shape of the bridge of the nose.
12. Paint green on eye (optional)
This gives the eye a little bit of contrast and goes well with the green background! Lightly brush on “hooker’s green hue” with the #4 round brush. It needs to be translucent and not completely opaque. You may want to try watering it down slightly.
Paint over your yellow of the eye. If needed, blend a little burnt Sienna back into the eye at the top.
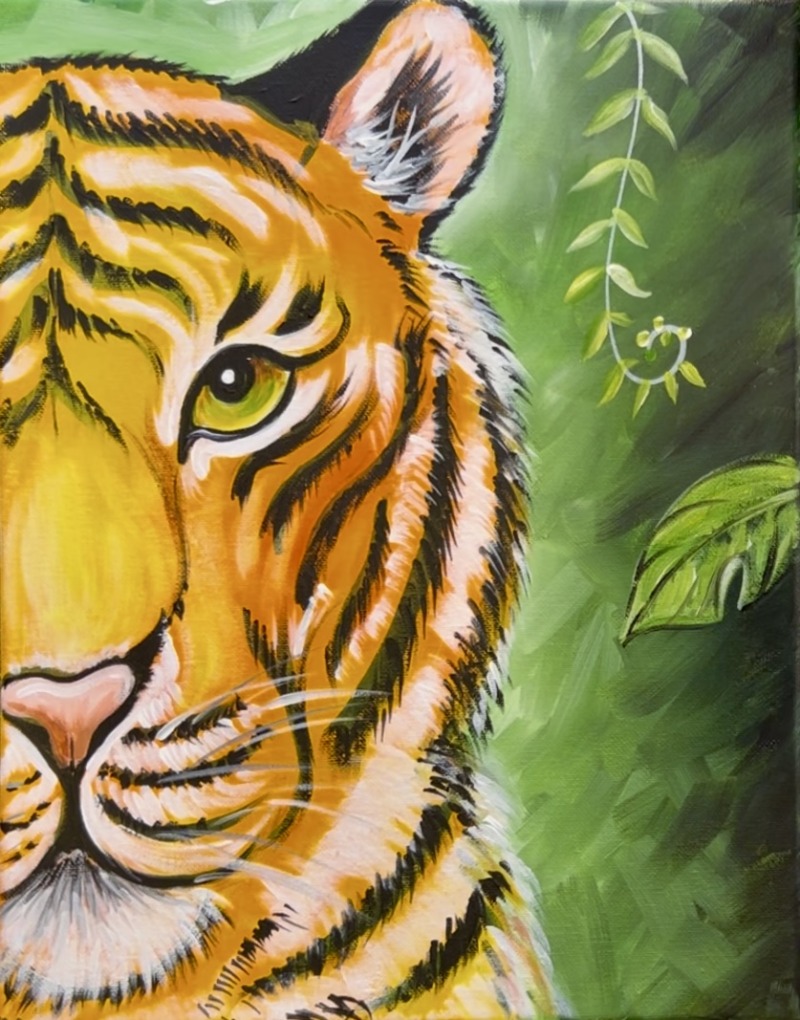
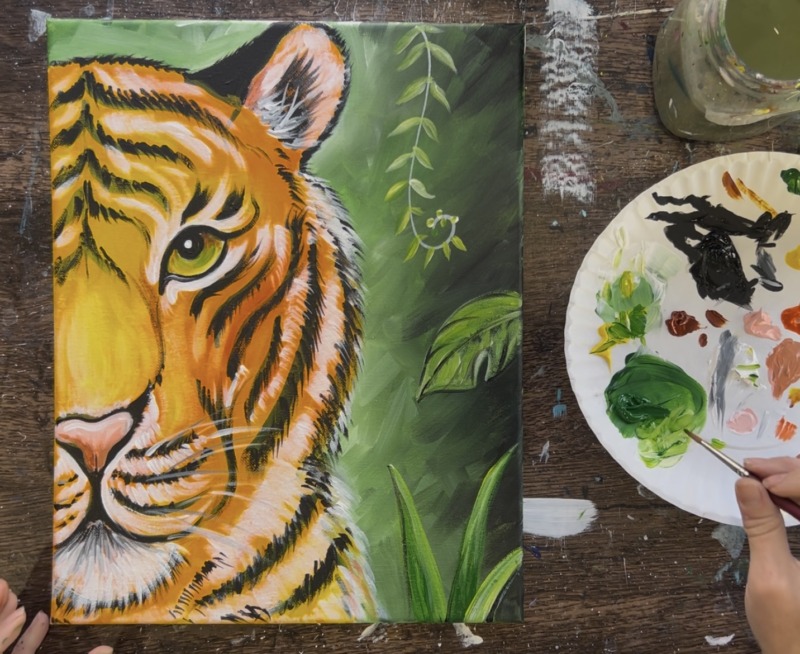
13. Paint jungle plants in background
This next step is fun and you can customize what plants you put back there! You can also leave the background without plants if you like the simple look of the green background.
Use the #4 round brush. Mix white with green. You want to make sure your green in the plants is going to be much lighter than the background so that it shows up! So mix a lot of white into your green.
For the fern, paint a ling, spiral line.
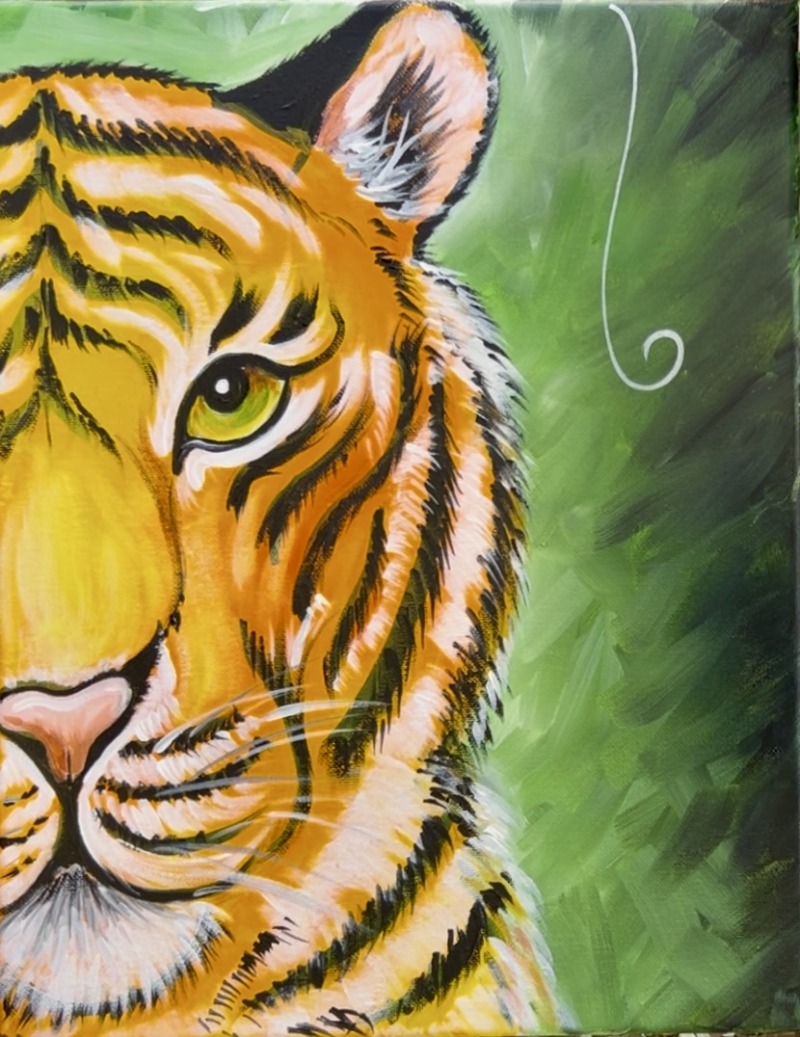
Then paint small pointed leaves on each side of the vine. Mix a little yellow into your green to make these leaves look a little more light yellow green! The yellow also helps the plant to stand out against the green background.
Paint thin, long elongated leaves on each side of the vine. The part of the vine that curls can have just little rounded leaves.
Then paint a larger rounded leaf on the middle right of the canvas. I find it helpful to outline the shape of the leaf first and then fill it in. Since this is a darker area, make sure to mix white and yellow into the green so that it shows up.
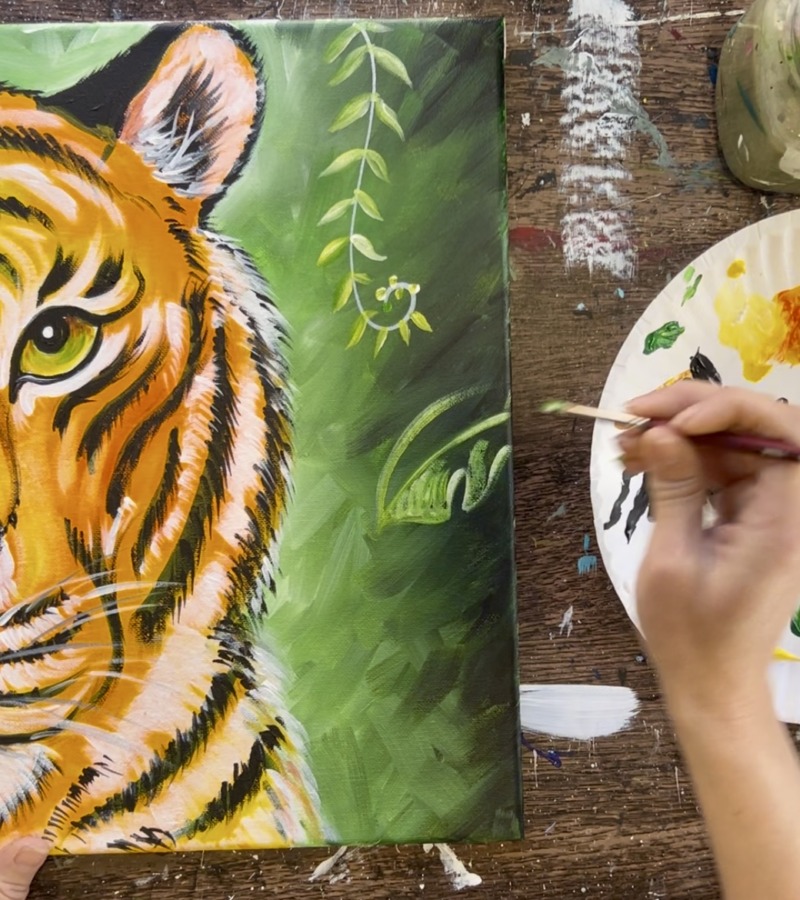
You can also use a little bit of black to outline the leaf edges.
For the bottom edge, I did thick pointed grass blades with different shades and tints of green. Mix black and white into your green to make different colors! Use the round brush to paint triangular pointed grass blades going upwards and angled in different directions.

Next, I did another fern/ vine style plant hanging down on the right side. This was also done with green and yellow mixed with white paint to get the color to show up on the dark background.
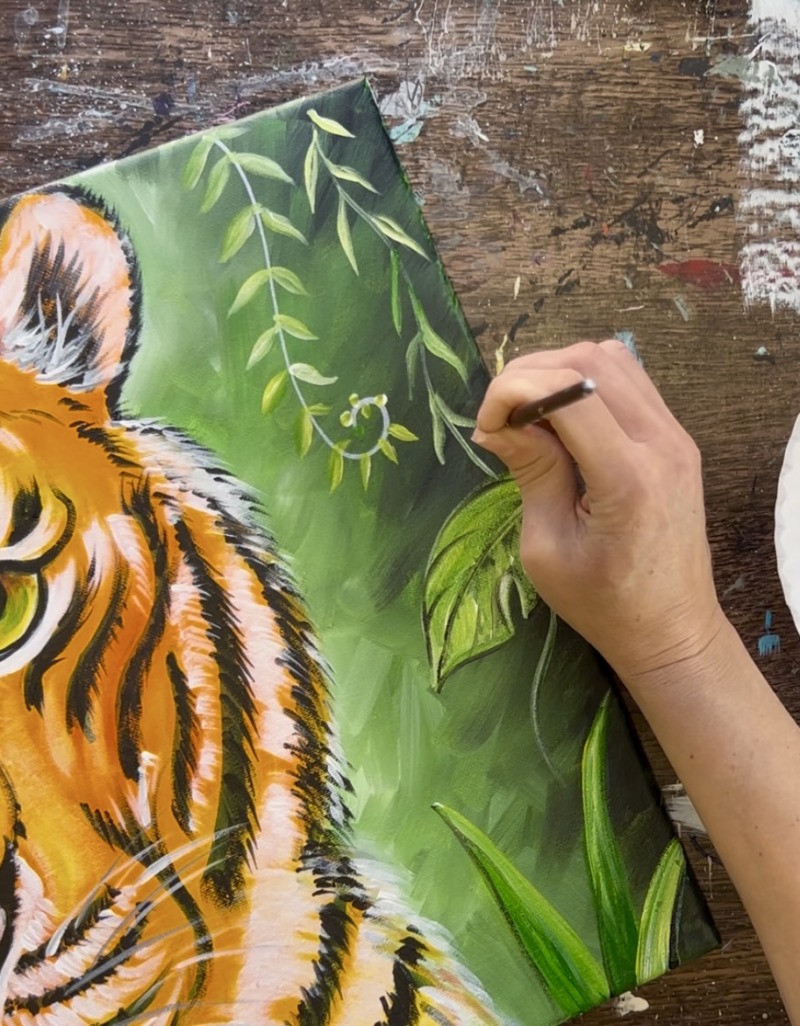
Keep adding more plants into your background! I did a third small fern with rounded small leaves. I also added more grass blades and loosely outlined them with some black.
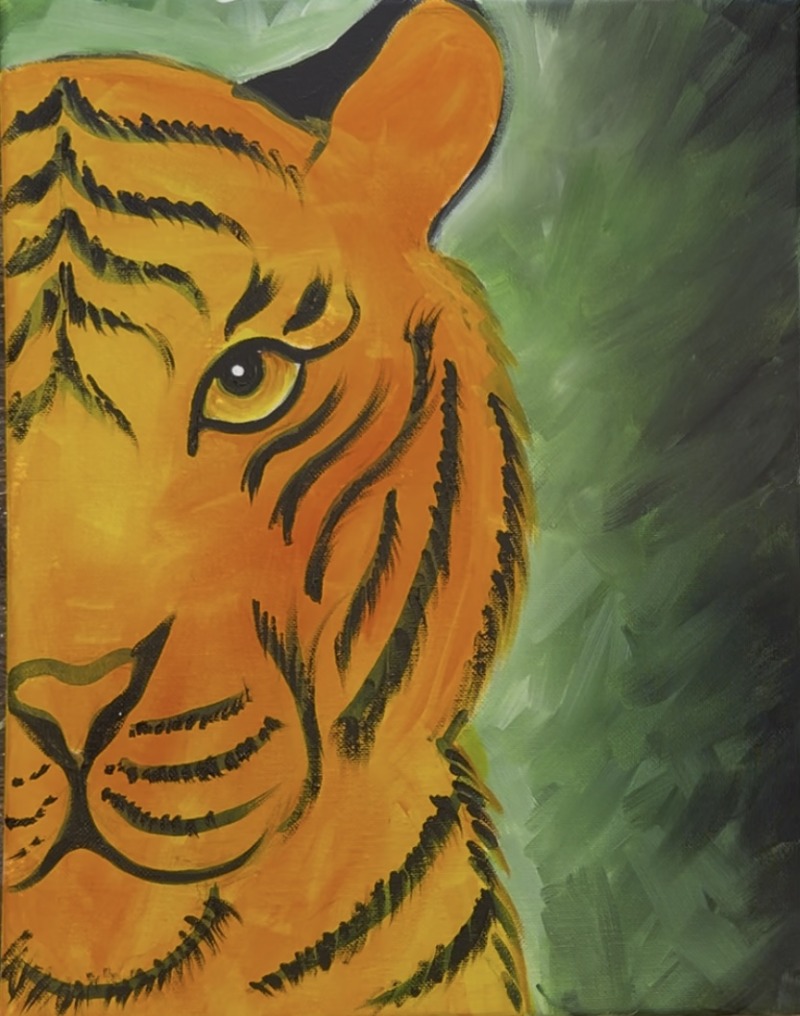
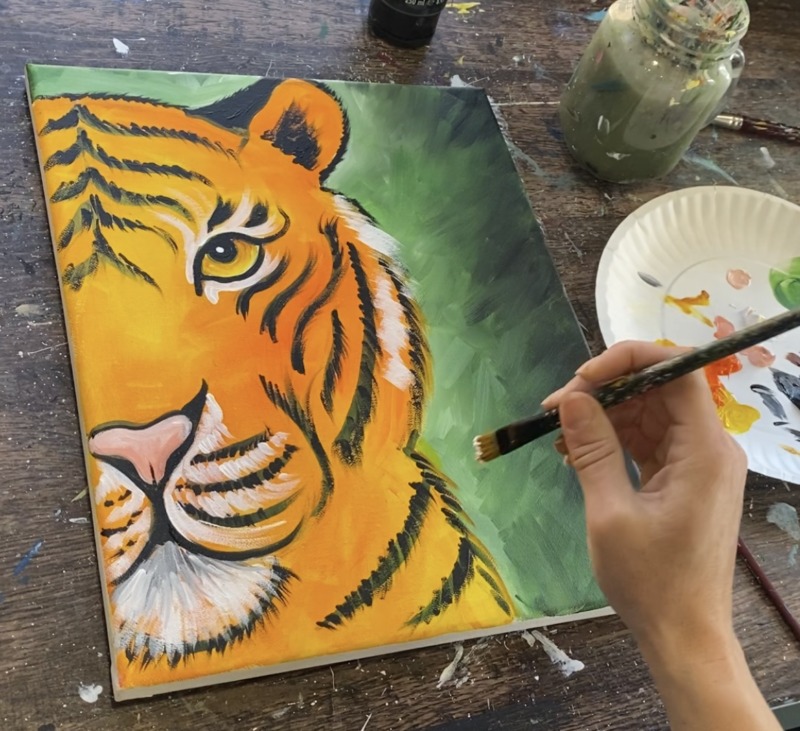
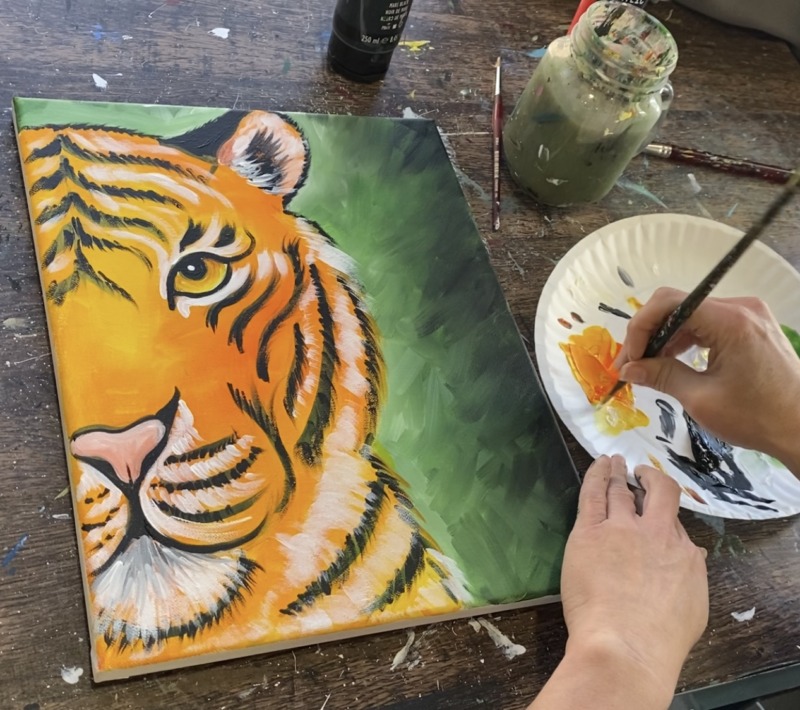
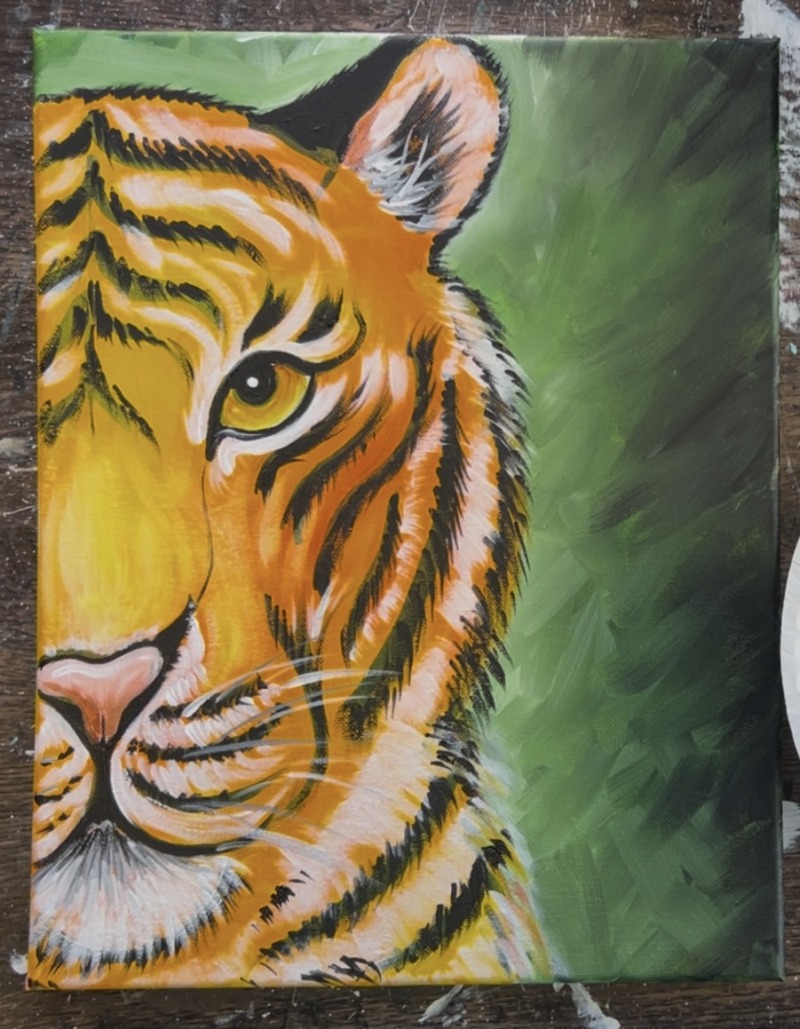
14. Final touchups (optional)
Go back and add more fur texture! Go back over black strokes and add more fur texture for darker contrast. You can also go back and add more white marking layers. Your first white marking layers likely darken when they dry so adding another coat of white will brighten the white markings.
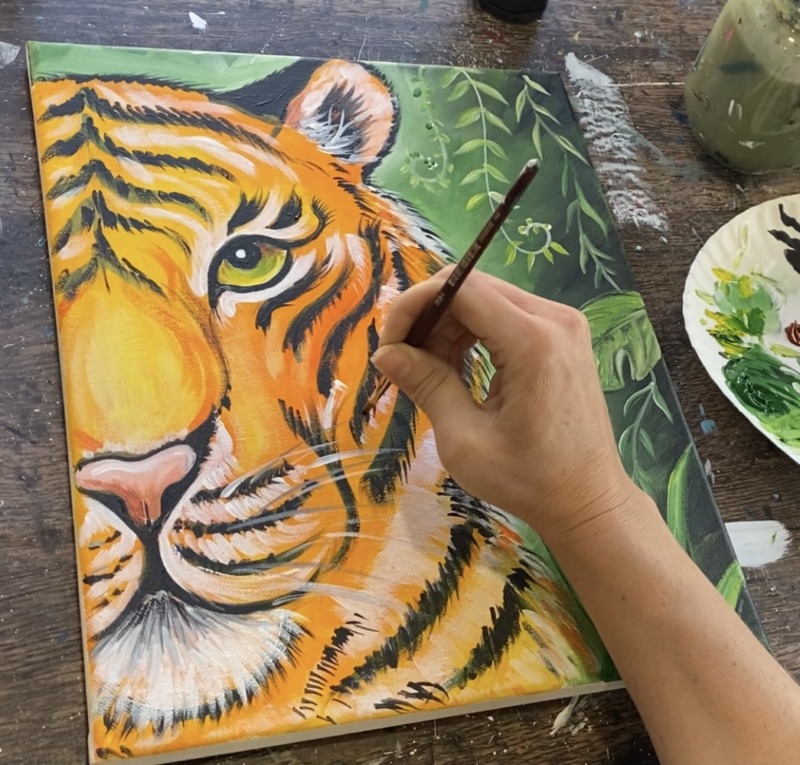
Add fur texture on the right edging of the tiger’s face.
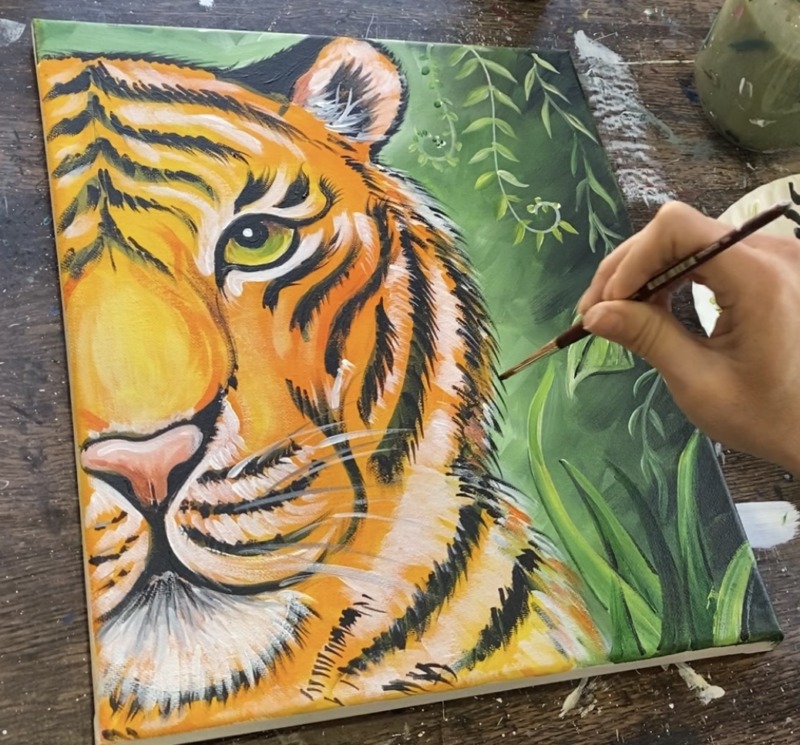
Also, adding more white fur texture along the right side of the tiger’s face and slightly overlapping the background really brightens up the edging of the tiger.
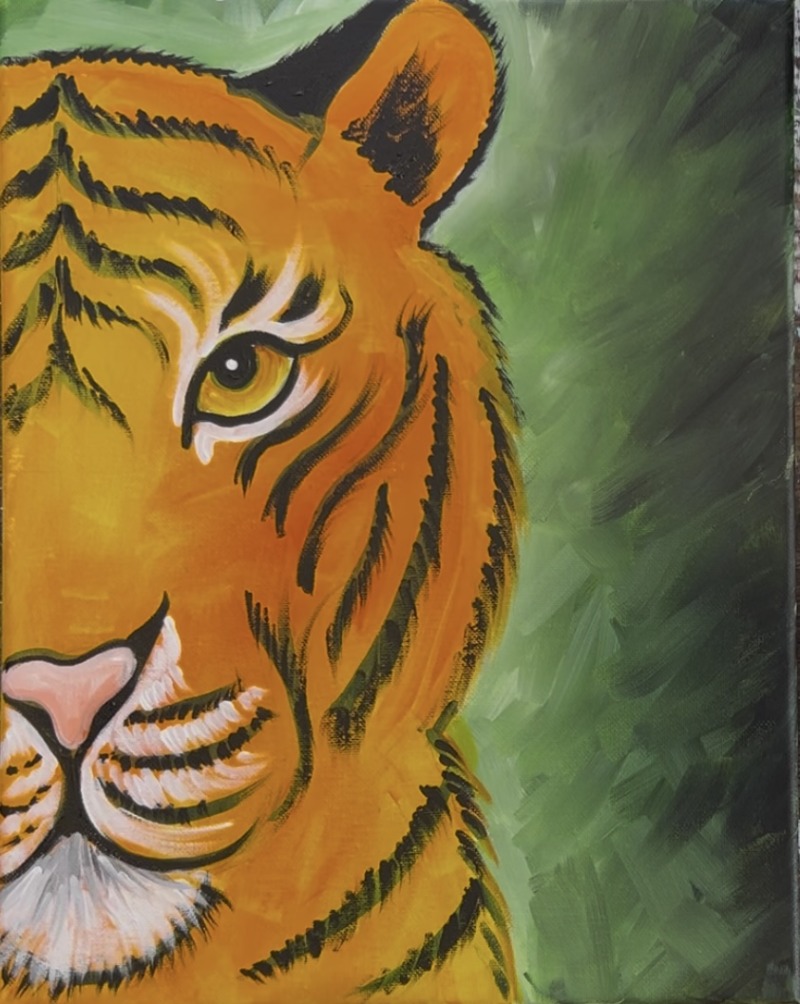
Finished!