Would you like to save this?
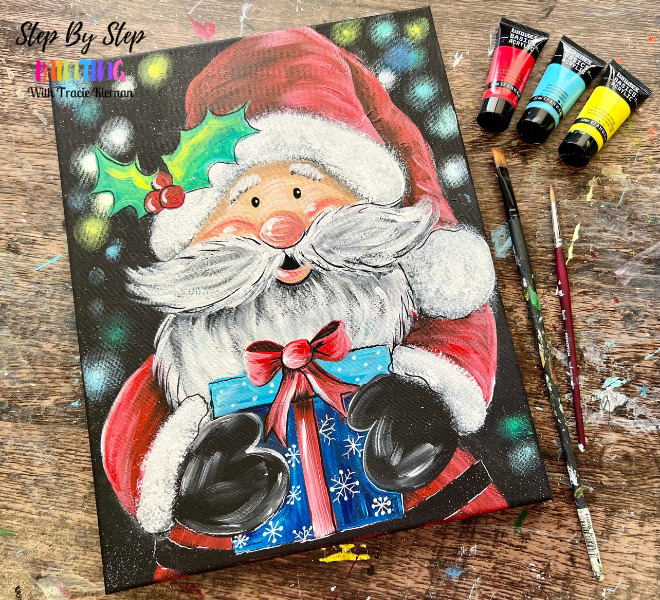
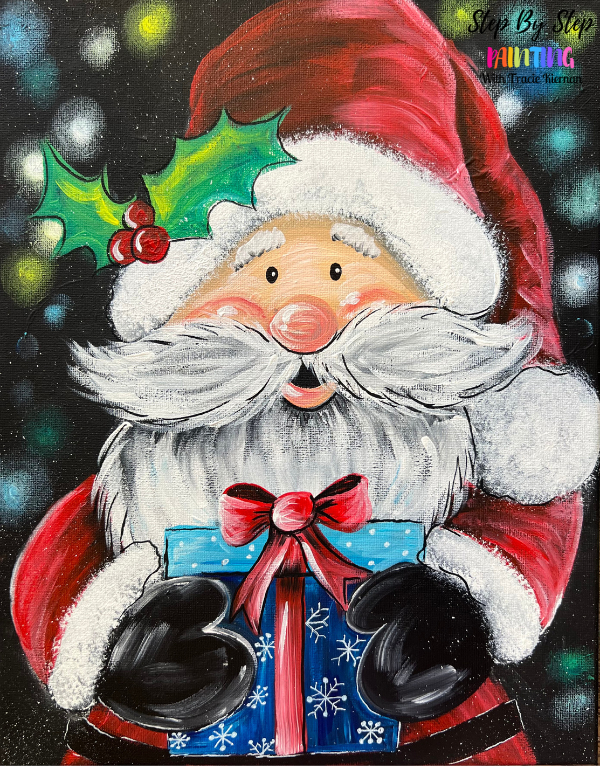
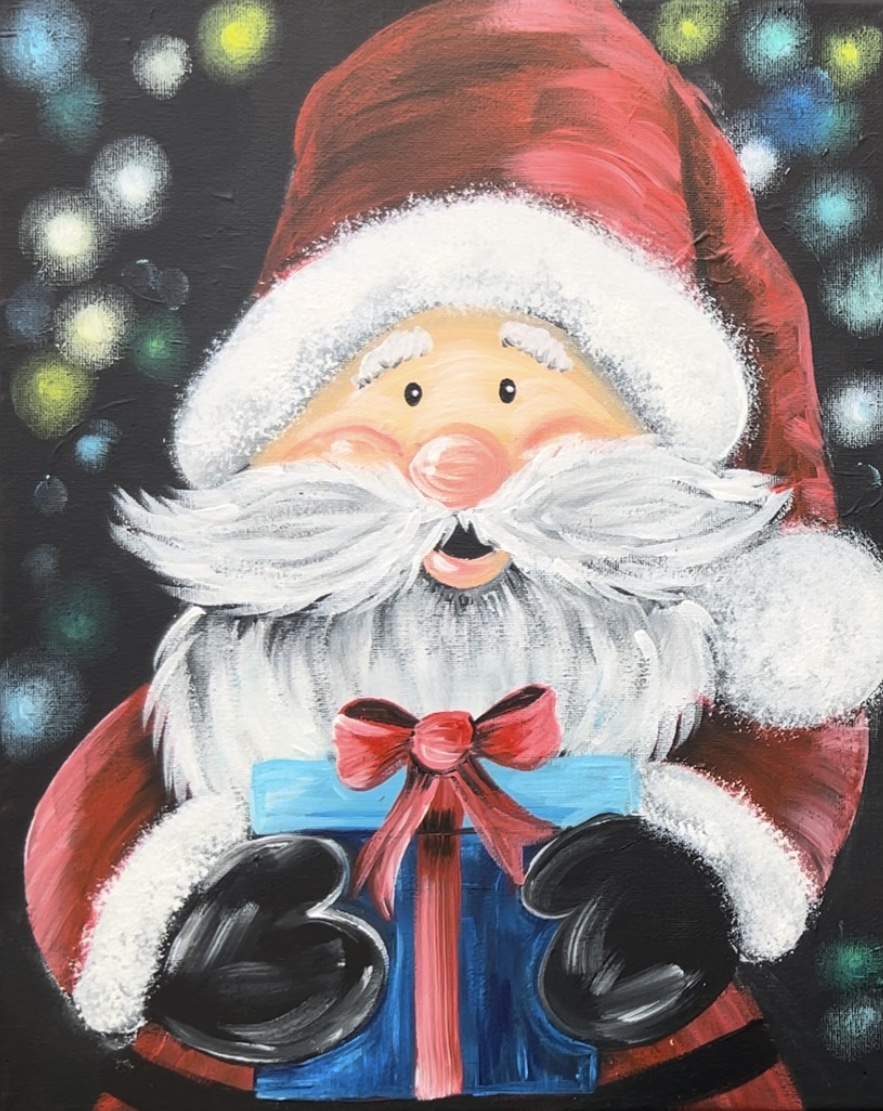
Sparkling Christmas magic captured in vibrant hues. Santa’s ready to fill your heart with Christmas cheer! ✨
This acrylic painting tutorial is demonstrated on an 11 x 14 canvas that is pre-painted black. You can use a “mess up painting”, a blank white canvas or even purchase pre-painted black canvases. I typically use “Apple Barrel Matte Black” paint to paint my canvases because the color will dry in a matte/ non shiny finish. Then the Liquitex BASICS paints that I use will dry in a satin finish resulting in more depth for the painting!
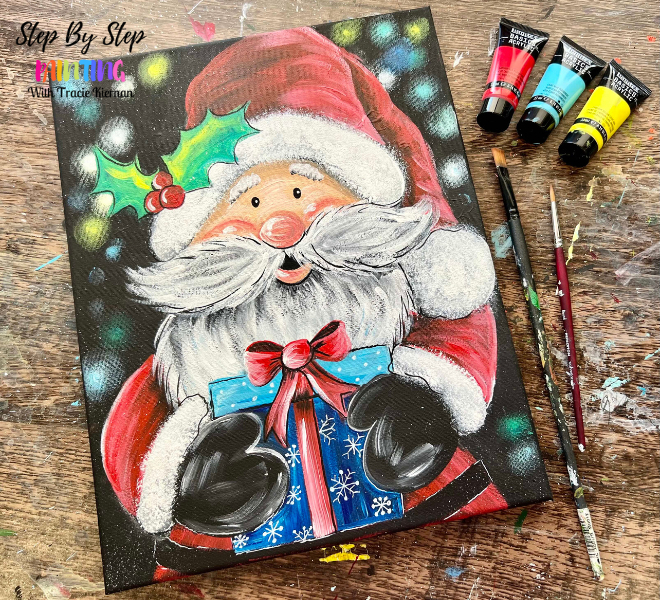
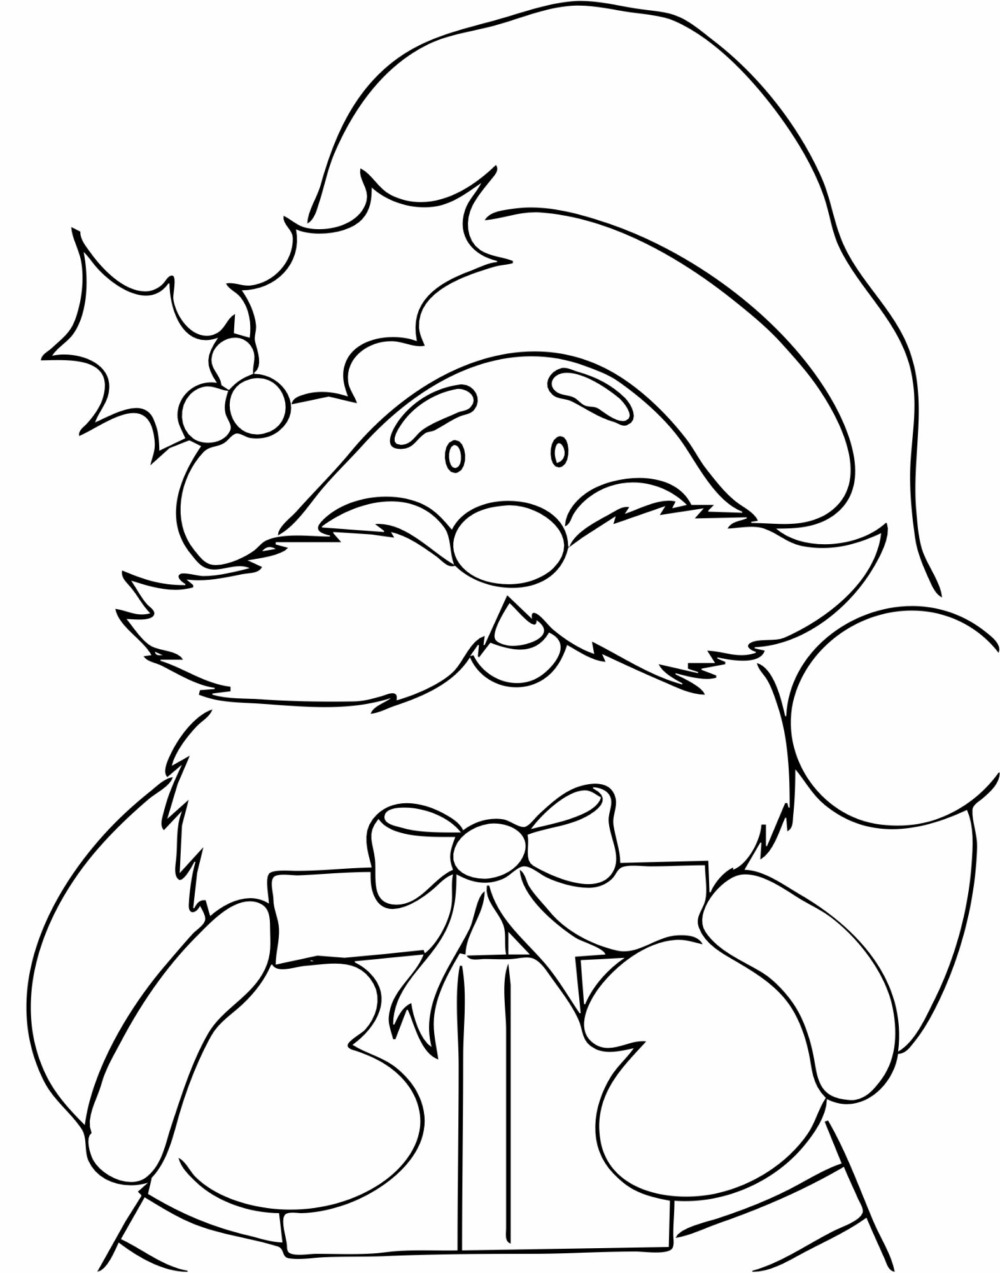
“Jolly Santa” has a traceable! It’s optional because I will show you how to draw him with a piece of chalk. However, you can skip the drawing portion and use the tracer. I recommend you transfer this with white graphite paper. That way the lines will show up against the dark background.
I love the fun colorful blurry lights in this painting! That technique is created simply by using your index finger and smearing little paint dots in the background. Then, to top it off, we will splatter little white specks over the design to add extra fun and sparkle to the entire painting.
Enjoy and happy painting!
Materials Needed
Jolly Santa Acrylic Painting

Learn how to paint a Santa holding a present on a black canvas background.
Materials
- 11 x 14 Canvas Pre-Painted Black
- Acrylic Paint
- Brushes
- White Chalk
- T-Square Ruler
- Black POSCA Paint Pen (optional)
- White POSCA Paint Pen (optional)
- Toothbrush (optional)
- Black Paint To Paint A Canvas Black (I use Apple Barrel)
Brushes
- 12 Bright
- 4 Round
- Round Bristle Brush (if doing texture on Santa hat)
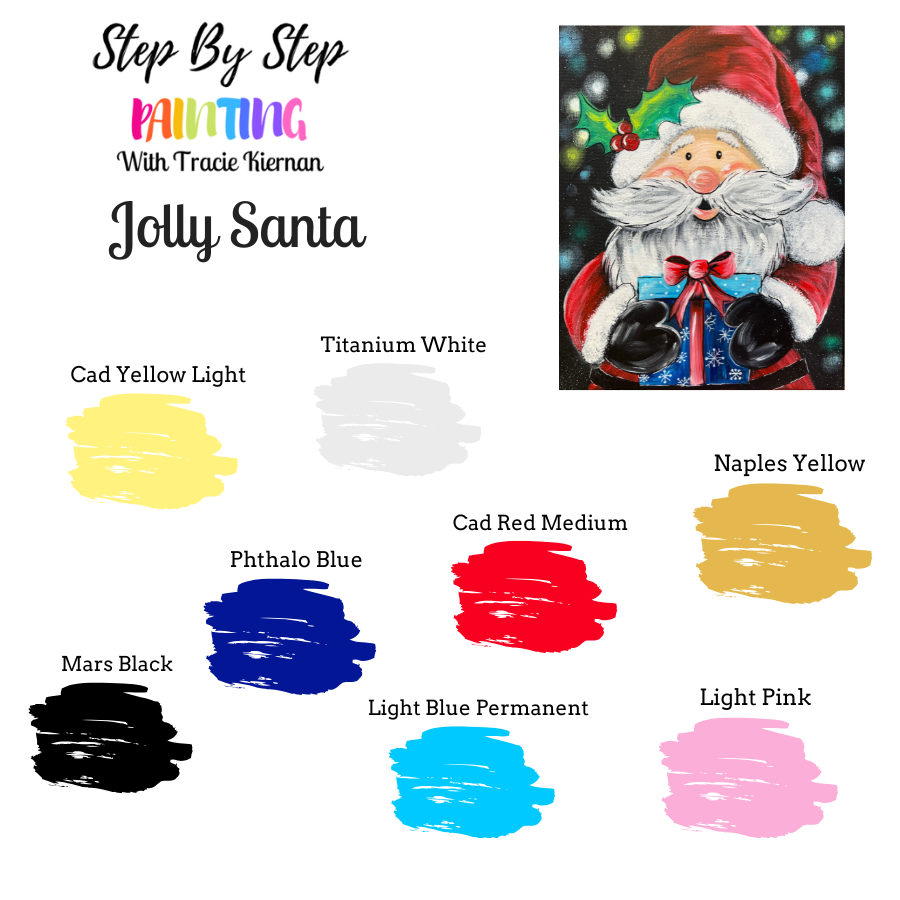
Colors
- Titanium White
- Mars Black
- Cadmium Red Medium Hue
- Cadmium Yellow Light Hue
- Light Blue Permanent
- Phthalo Blue
- Naples Yellow
- Light Pink
Color Palette
Optional Traceable
I recommend using white transfer paper for this to show up on a black canvas.
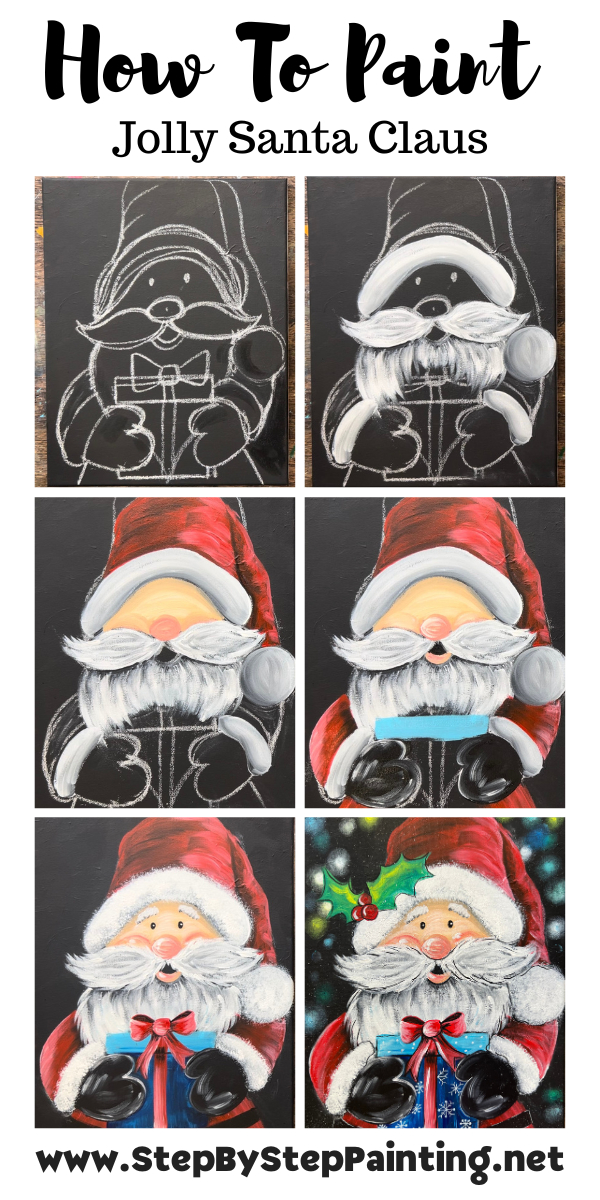
Directions At A Glance
Video
Step By Step Instructions
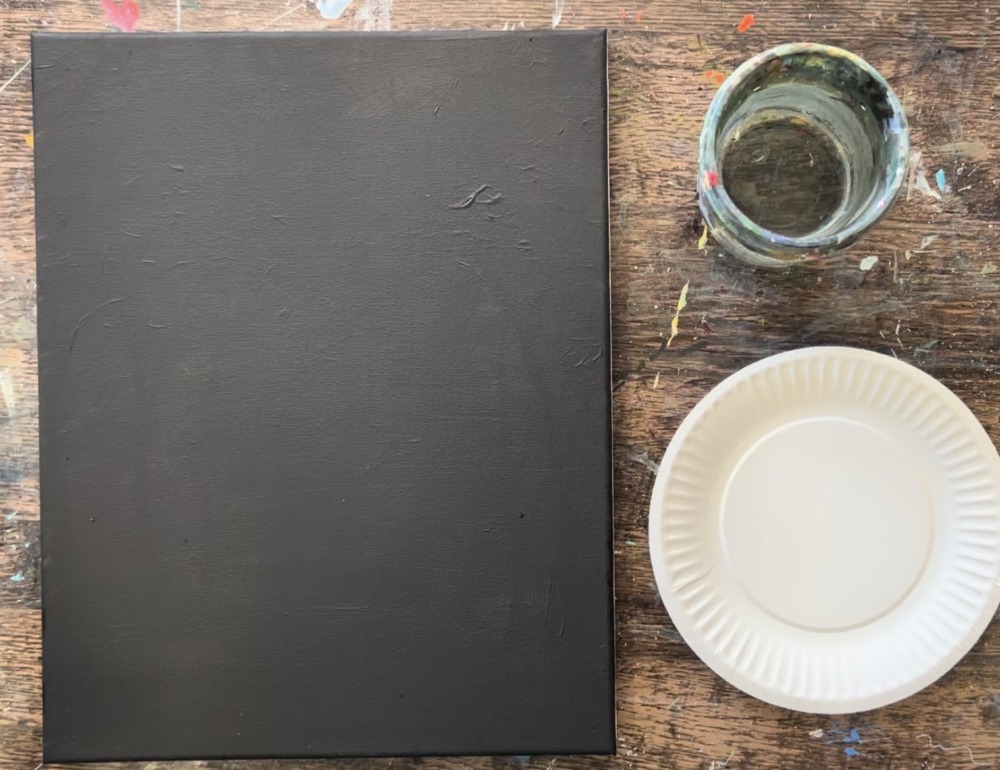
1. Paint a canvas black
You can use a “mess up” painting or a blank white canvas! You can also purchase canvases that are pre-painted with black paint. I like to paint over “mess up” paintings to repurpose the canvas! I use “Apple Barrel” matte black paint and apply it over the canvas using a 3/4 flat brush. One coat is all you need to cover the canvas! Wait for this to dry before going onto the next step.
2. Draw Santa With Chalk
Use a piece of chalk to draw Santa! Alternatively, you can use the tracer and “white graphite paper” to transfer the design and skip this drawing portion.
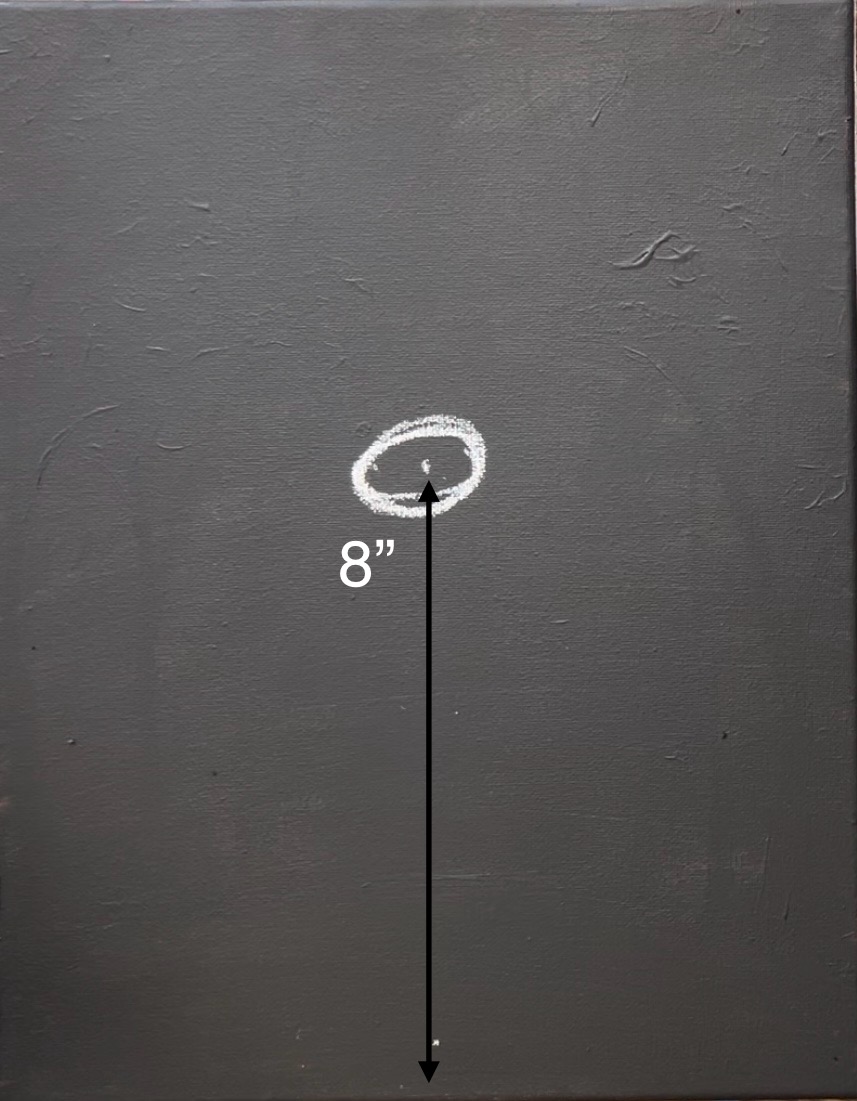
If you are drawing this, start by measuring 8″ from the bottom edge of the canvas. This will be where the center of Santa’s nose will be. Draw a small oval, about 1.5″ wide.
After drawing the nose, draw the mustache. Draw two equal shapes on each side of the nose. Then draw two curved lines underneath the mustache for Santa’s bottom lips.
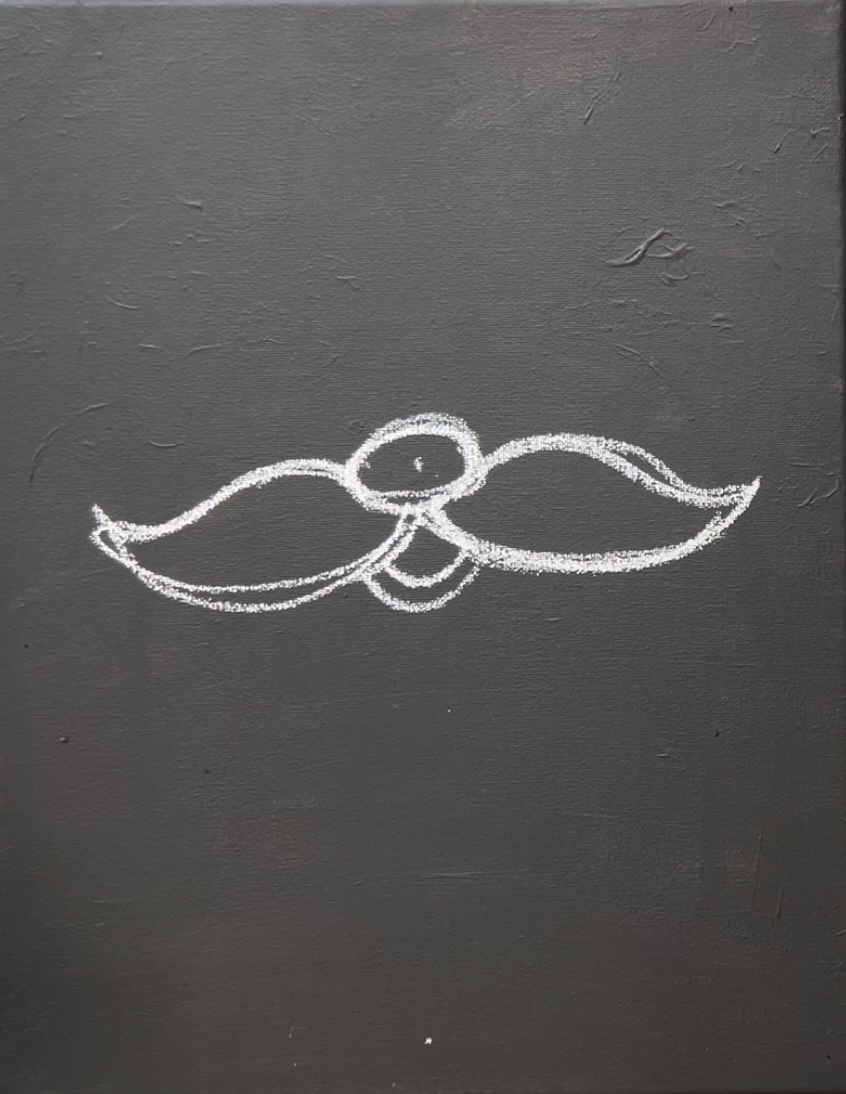
Next, draw an arc shape that starts on the far left end of the mustache and ends on the far right end of the other side of the mustache. The height in the center above the nose is about 2.5″.
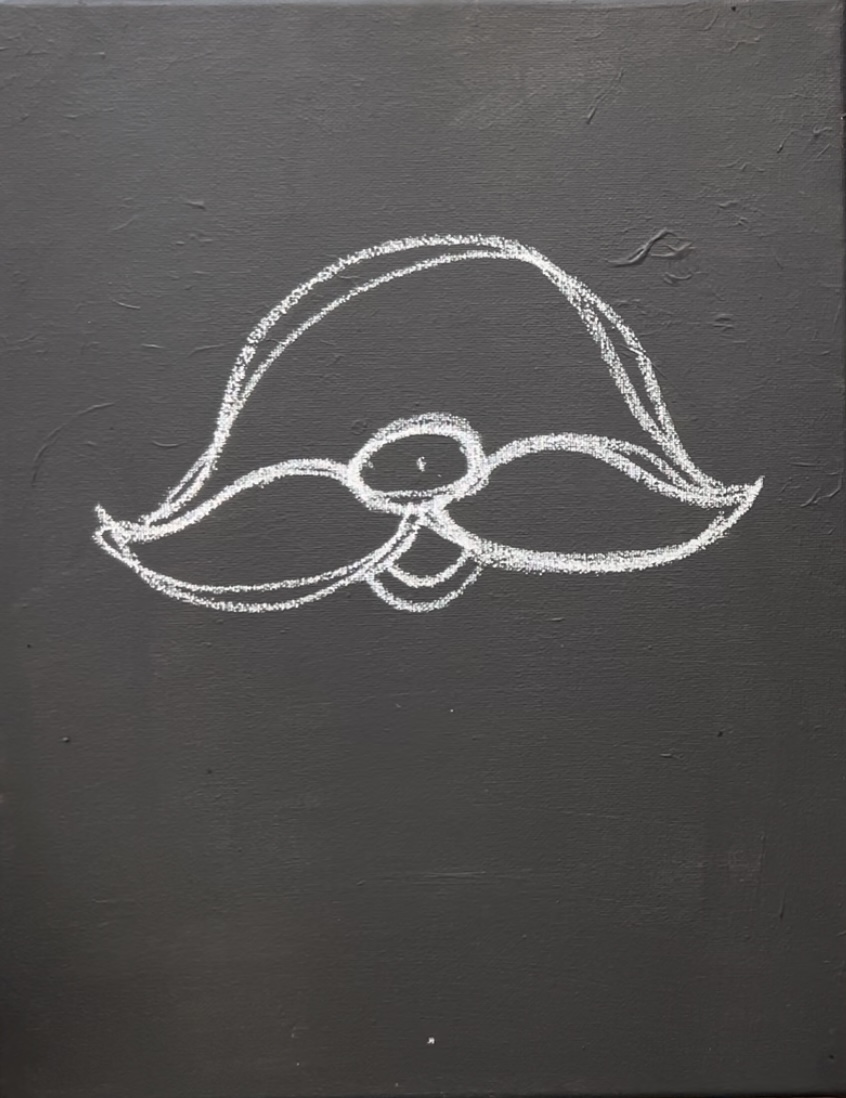
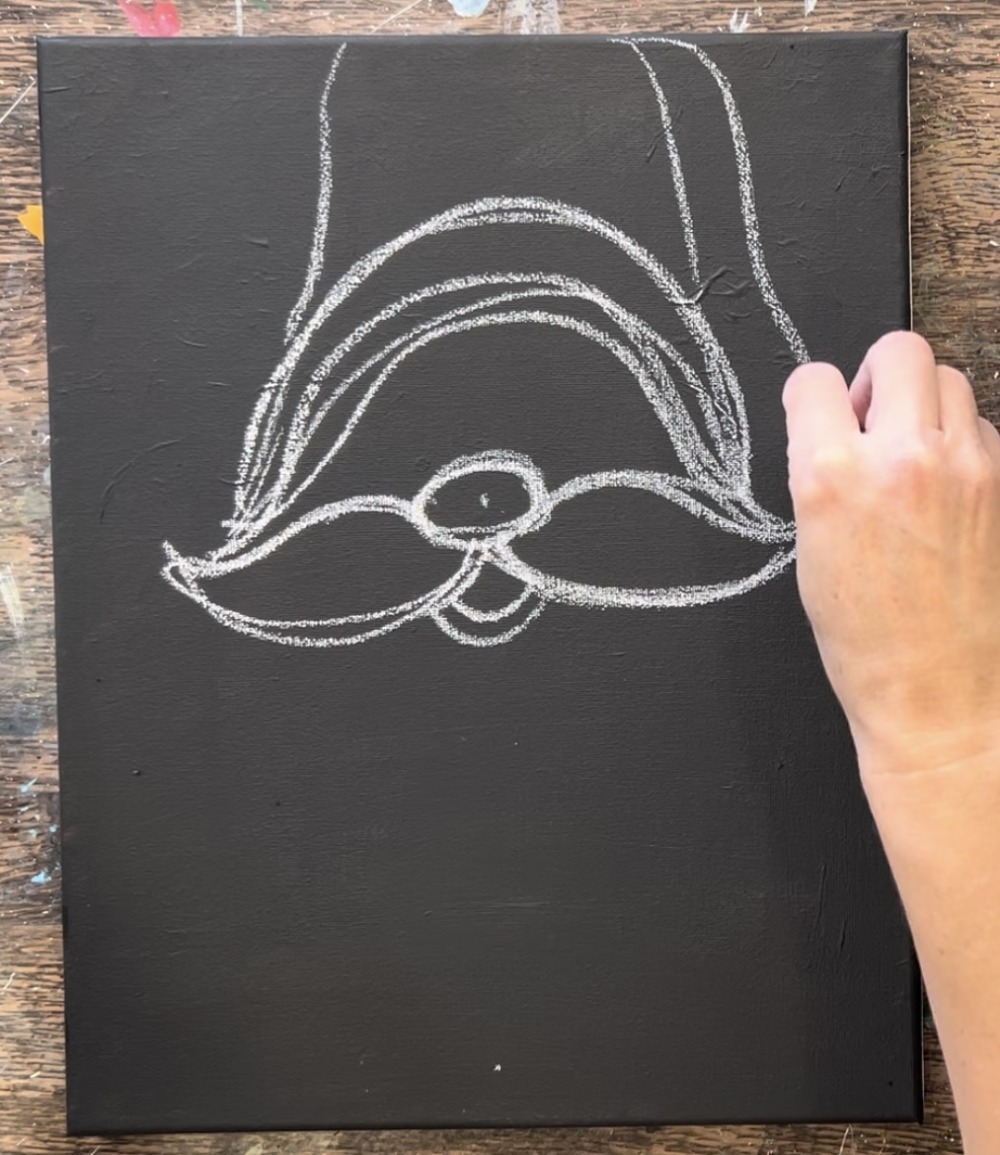
Draw Santa’s hat next! Draw another curve arch shape above the head for the bottom of Santa’s hat. Then draw the hat and go off the top edge of the canvas. Then the hat folds down on the right.
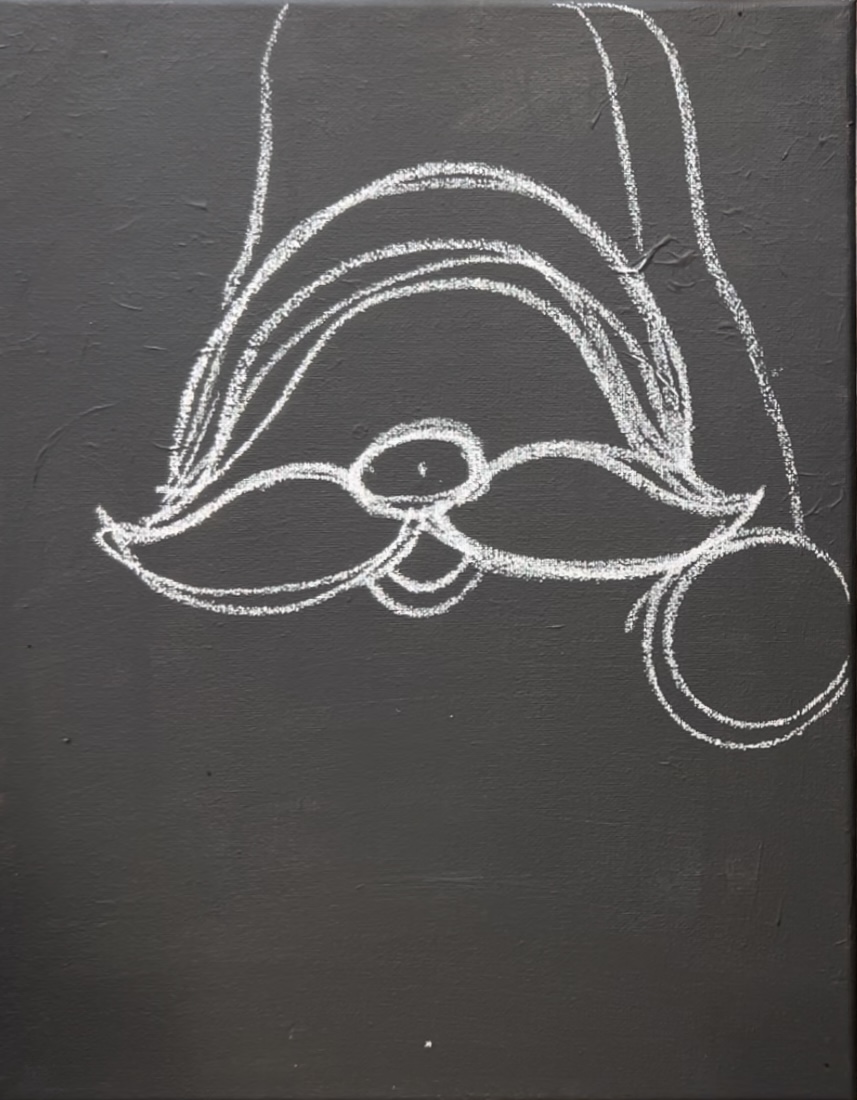
Draw a circle on the end of Santa’s hat. This circle is just under the right side of the mustache.
Draw Santa’s beard as a large curve and pointed in the middle. I went all the way down to the bottom edge of the canvas. Note: there will be a present covering a lot of this beard later but it still helps to draw the whole thing.
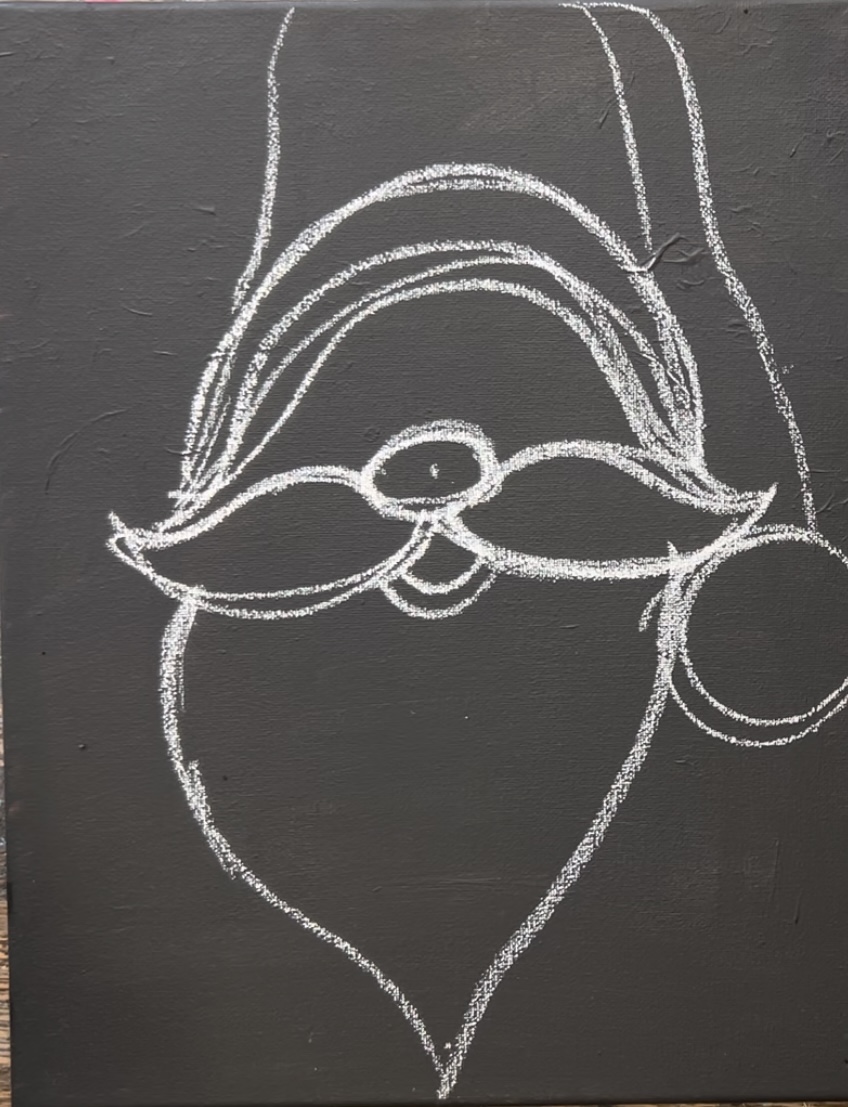
Draw Santa’s two shoulders. These are curved lines on each side of the beard that go down to form the sides of his arms.
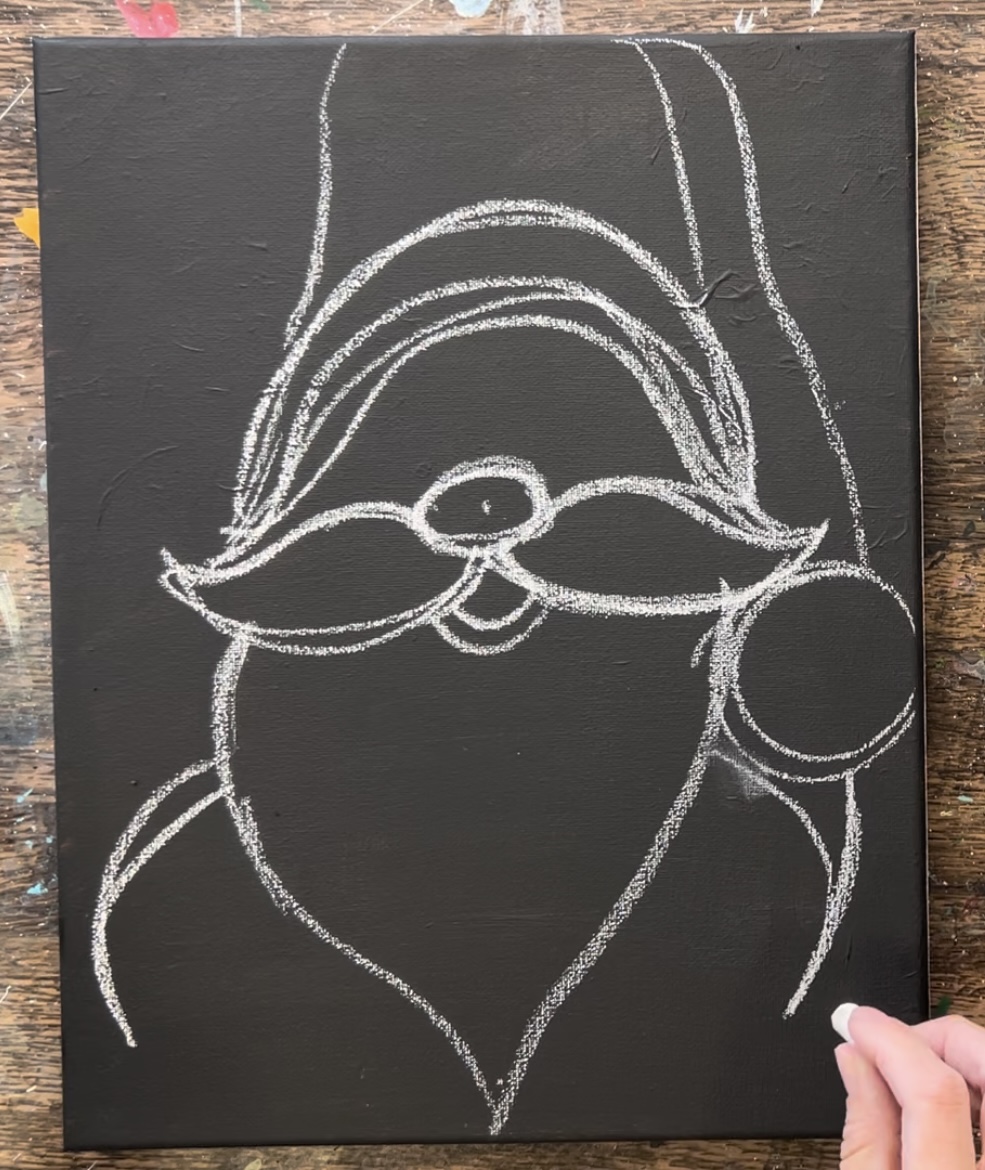
Then draw Santa’s gloves. These are two simple mitten shapes with a thumb and big curve. Draw the sleeve lining on the bottom of both of his gloves.
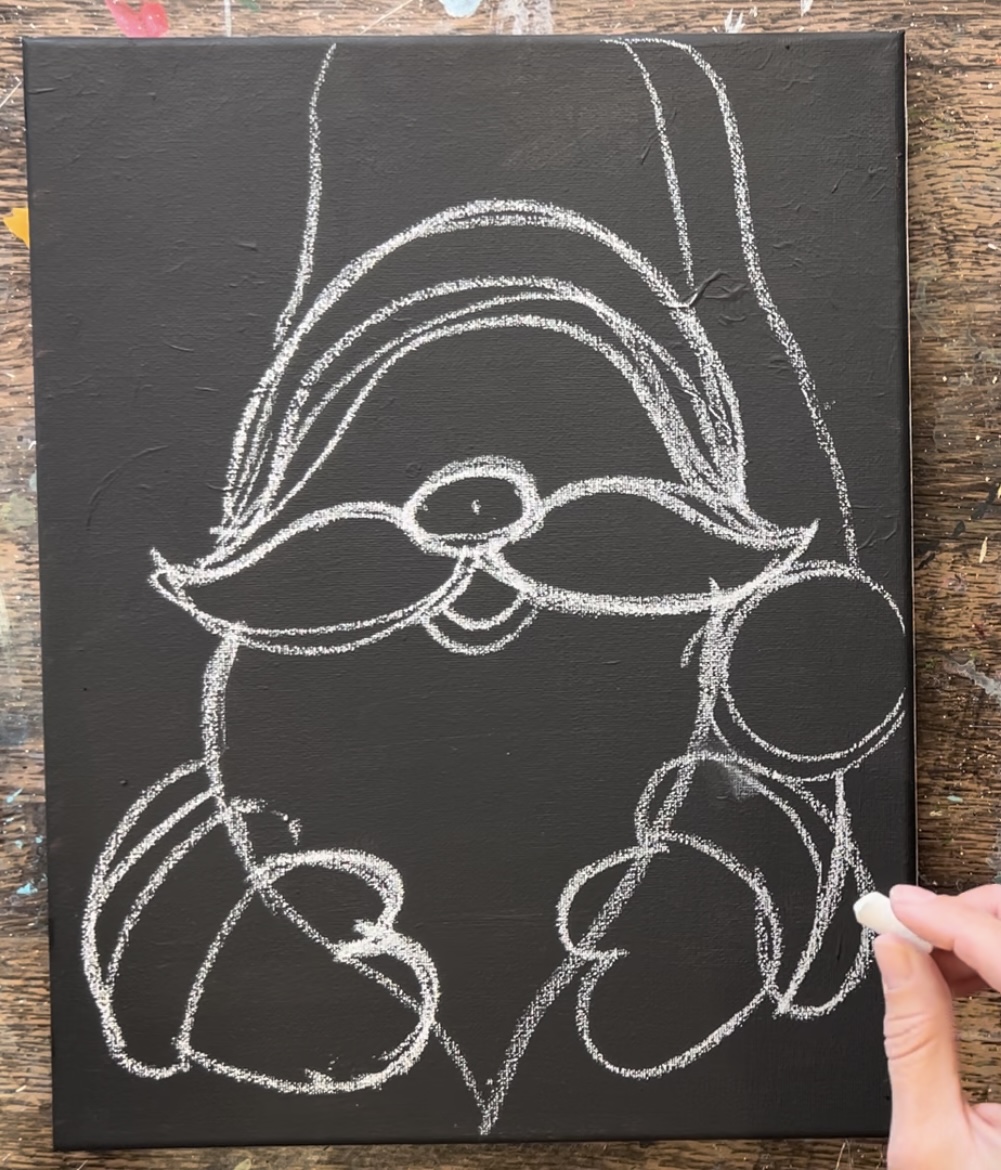
Then draw two diagonal lines for the rest of his coat. These lines go to the bottom edge of the canvas.
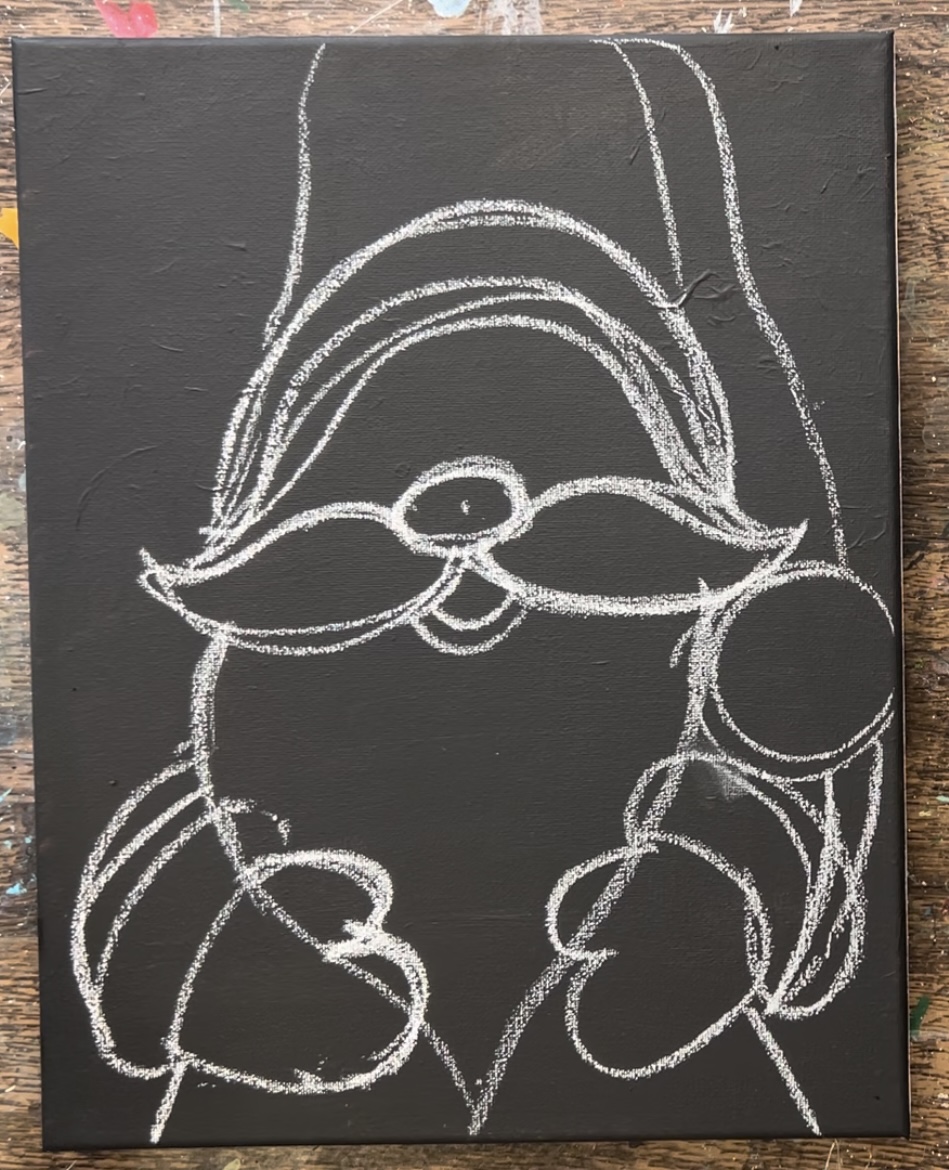
Then draw the present that Santa is holding. Draw a large rectangle shape that rests just above Santa’s thumbs.
Then draw a box shape. We can see the bottom of the box below his gloves.
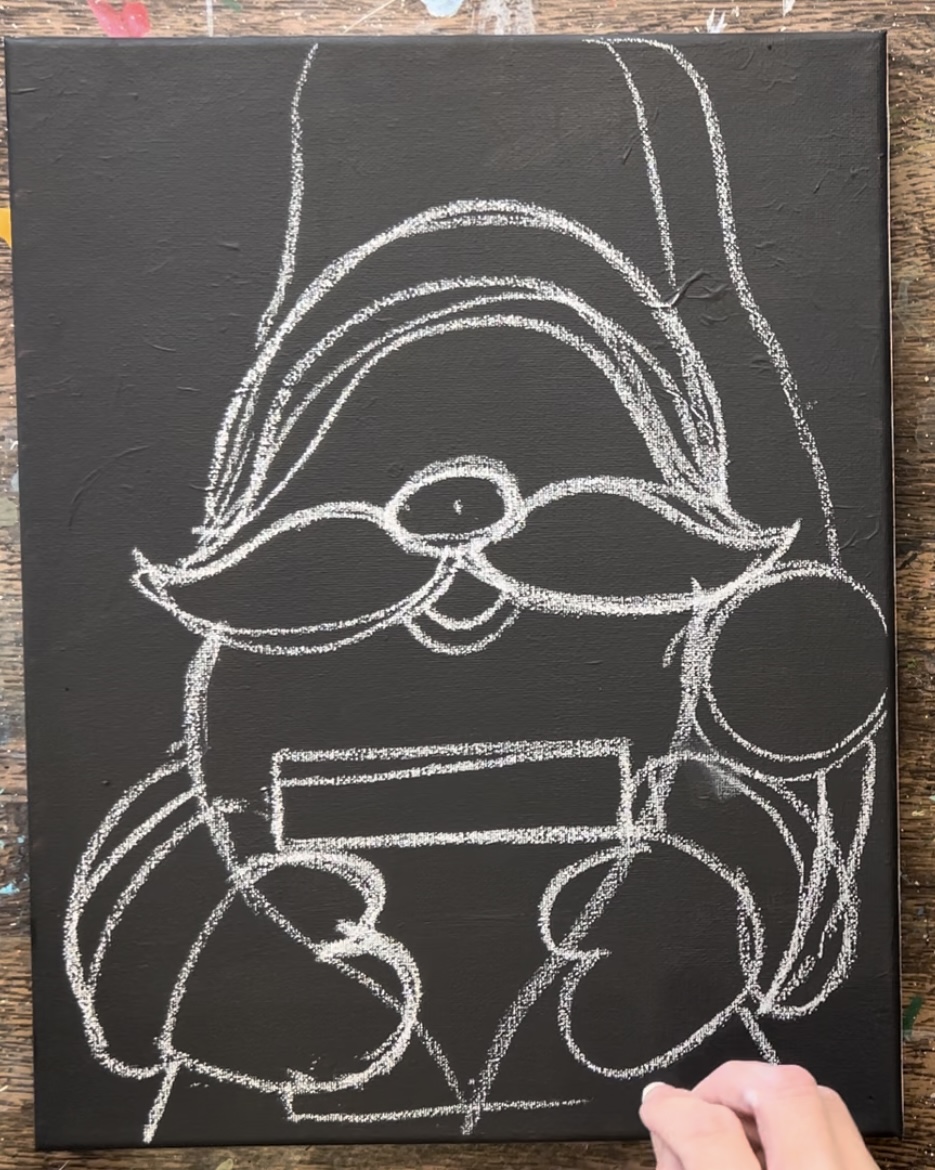
Then draw the ribbon and bow.
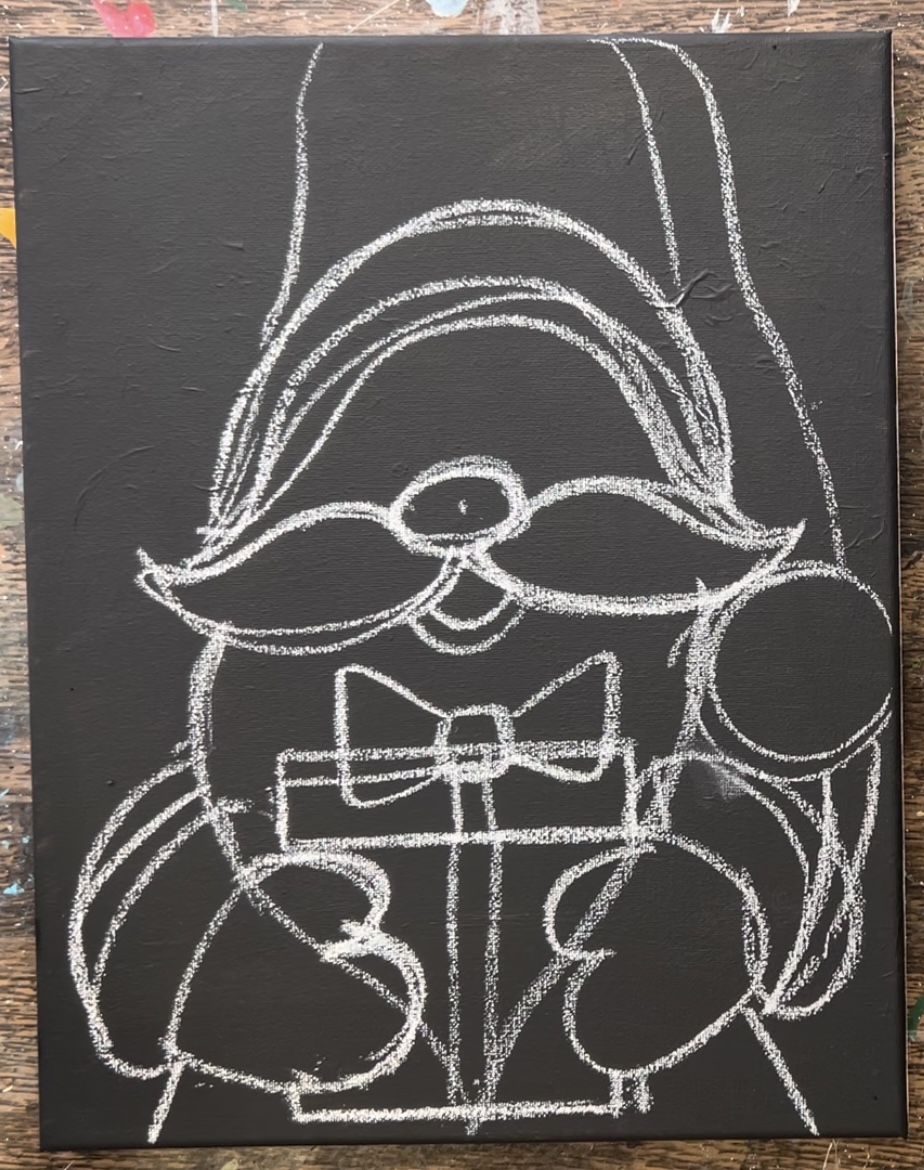
Draw two oval shapes for his eyes. Then, if needed, use a clean wet paint brush to erase any unnecessary lines.
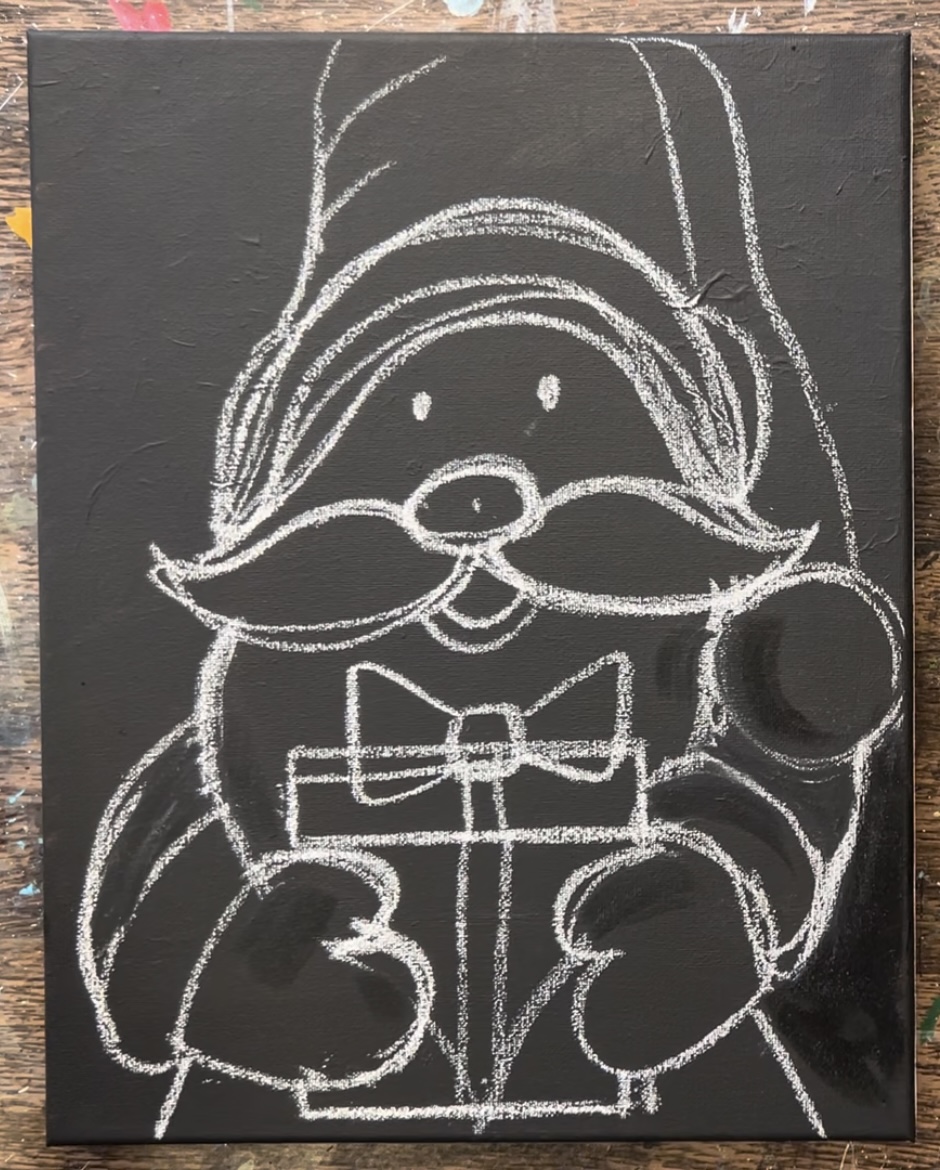
3. Paint Mustache and Beard
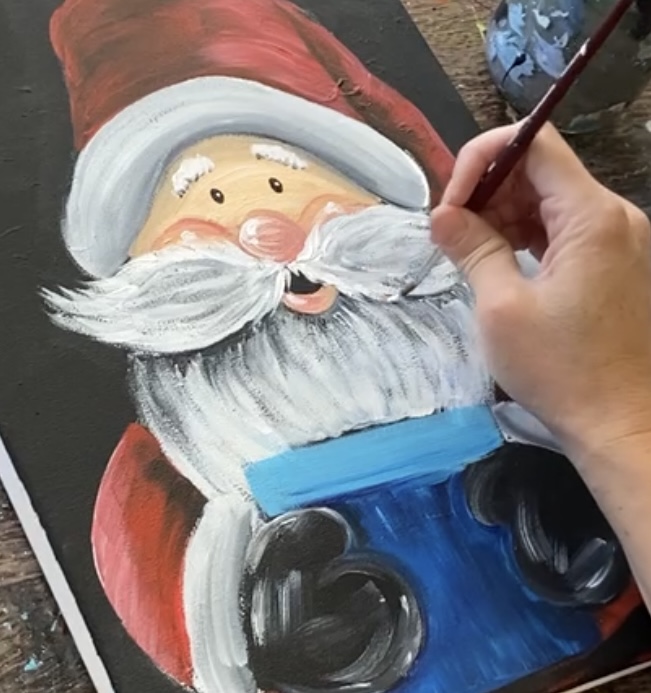
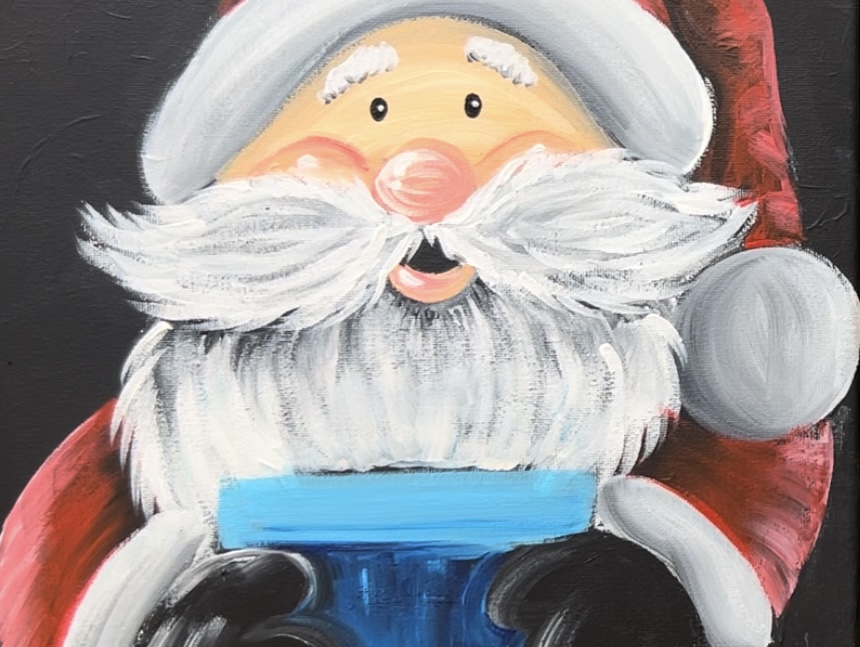
Use a #4 round brush and titanium white to paint the mustache. Paint the mustache using curved paint strokes that go in the direction of the shape. Leave some of the black from the background still showing through. This helps to create texture in the mustache.
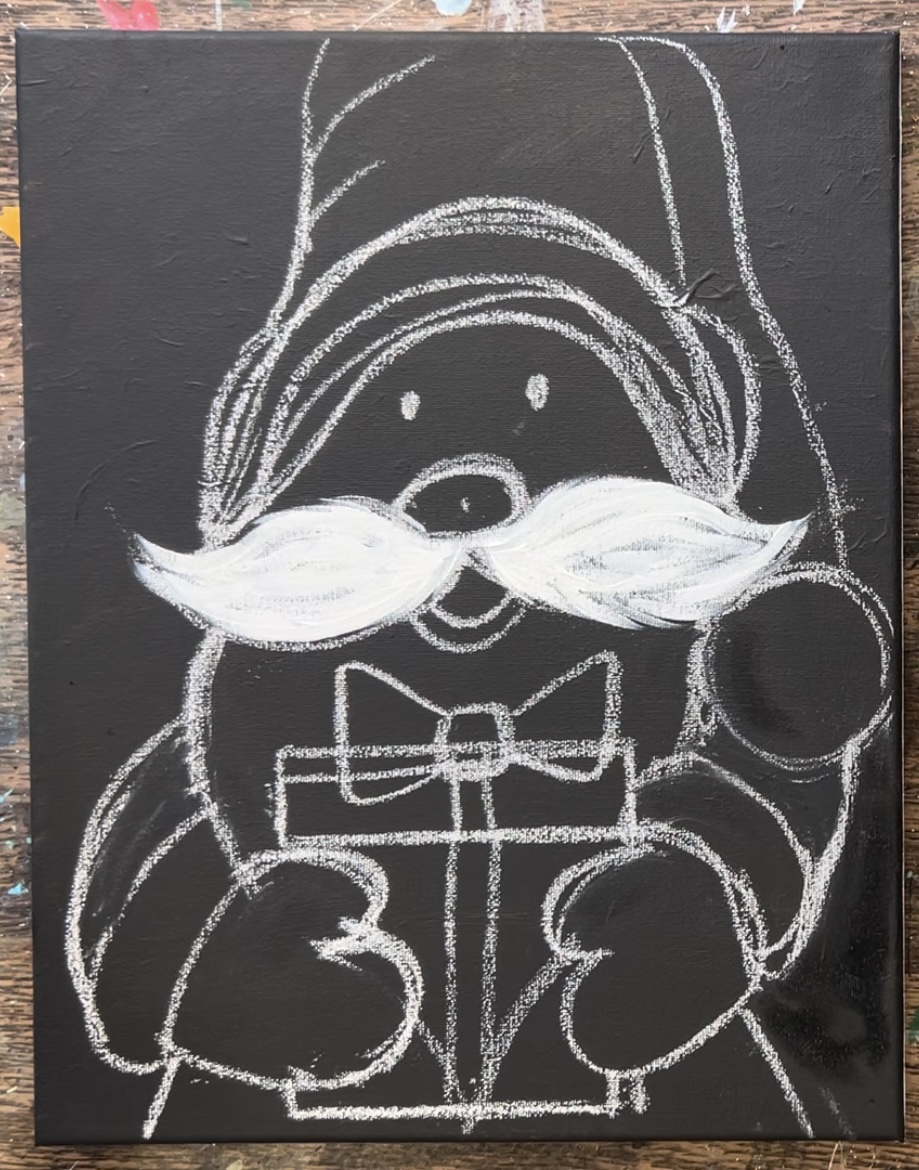
Then paint Santa’s beard. Paint curved white paint strokes that go in a downwards direction. Change the direction of the curve depending on which side of the beard you are painting. Leave a little “slither” of black showing just under the mustache. I tried to paint around the bow and the present.
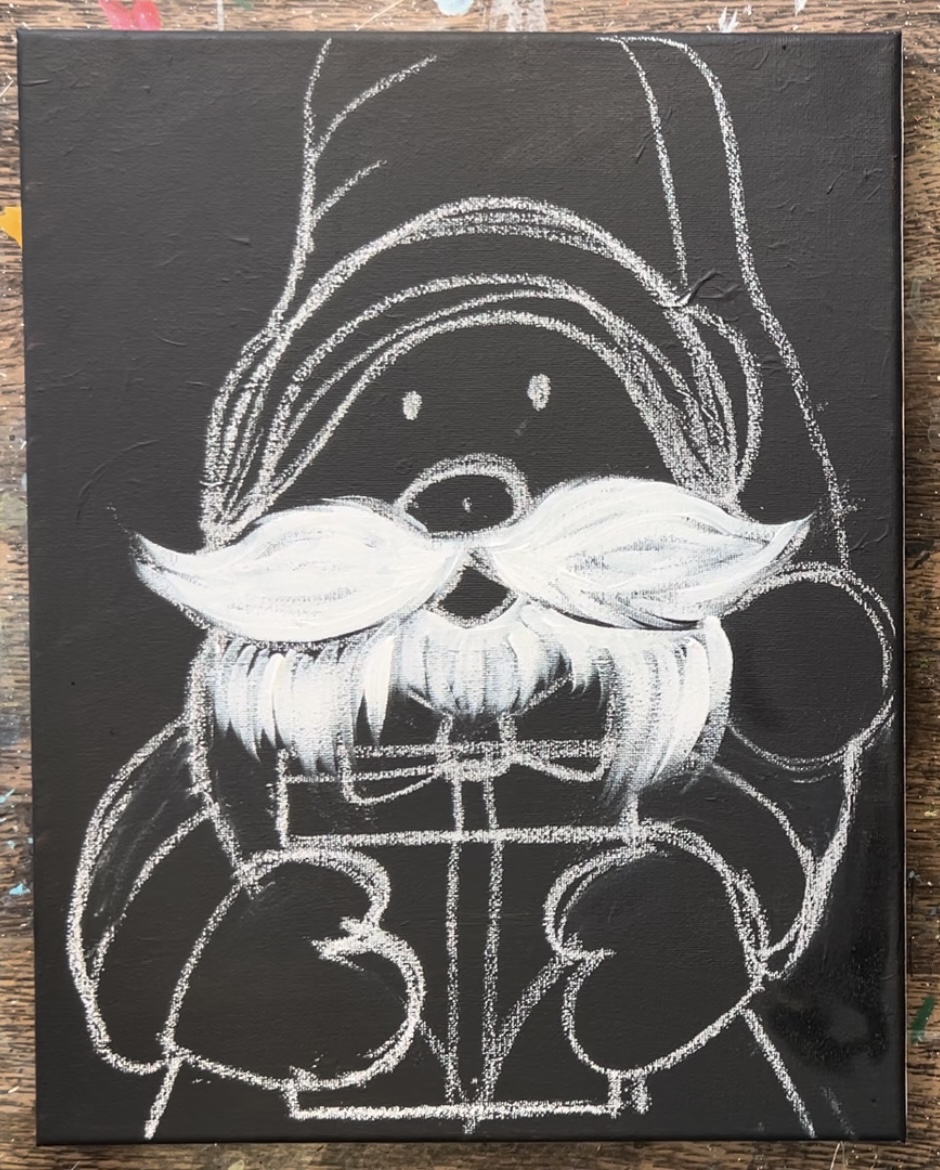
Optional: load your paint palette with “mars black” paint. Then add a little black to your brush (without rinsing the white) and gently paint some shadowy color beard paint strokes under the mustache. This area would be a little darker. Blend it in with the white.
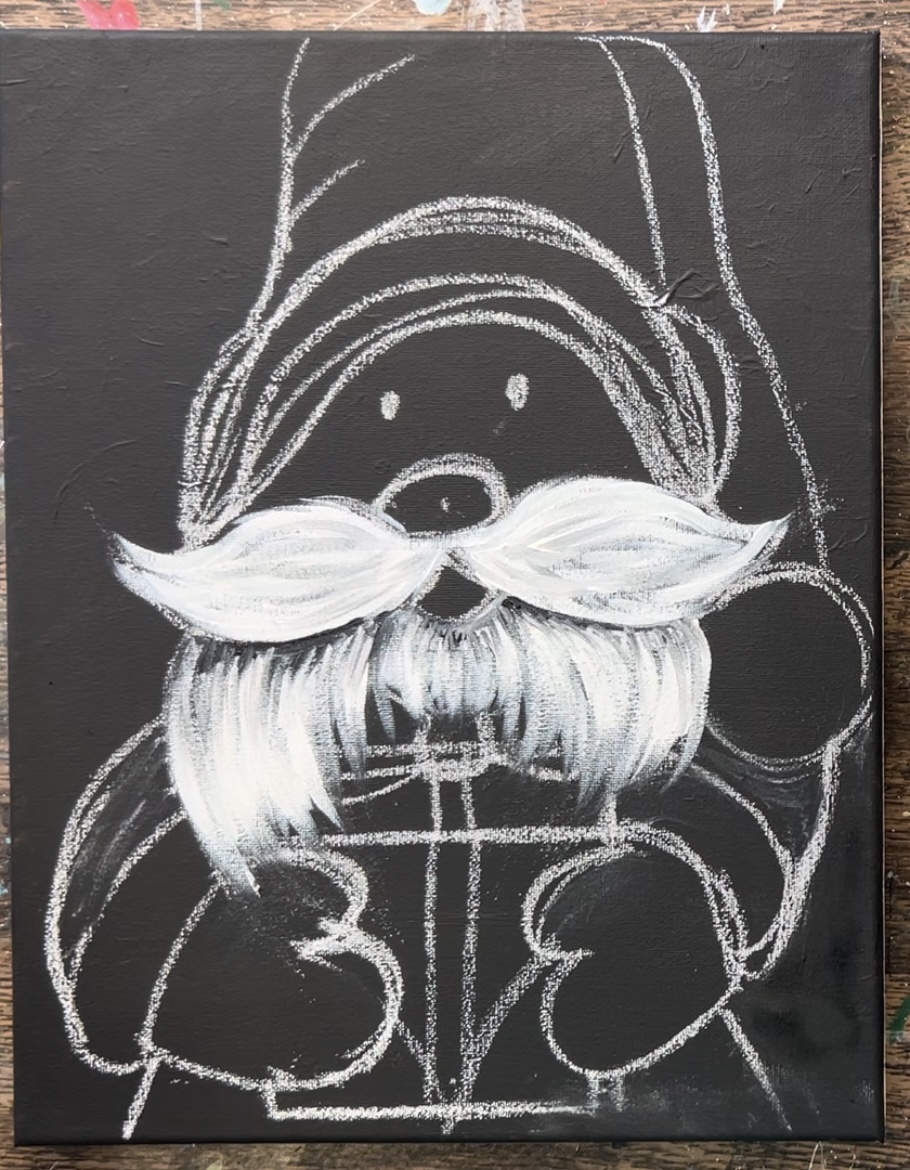
4. Paint ball and lining on hat & sleeves
Use the #12 bright brush to paint the ball of Santa’s hat. Then, before this white dries, blend a little bit of black on the left side of the circle so that it becomes shadowy on the left side.
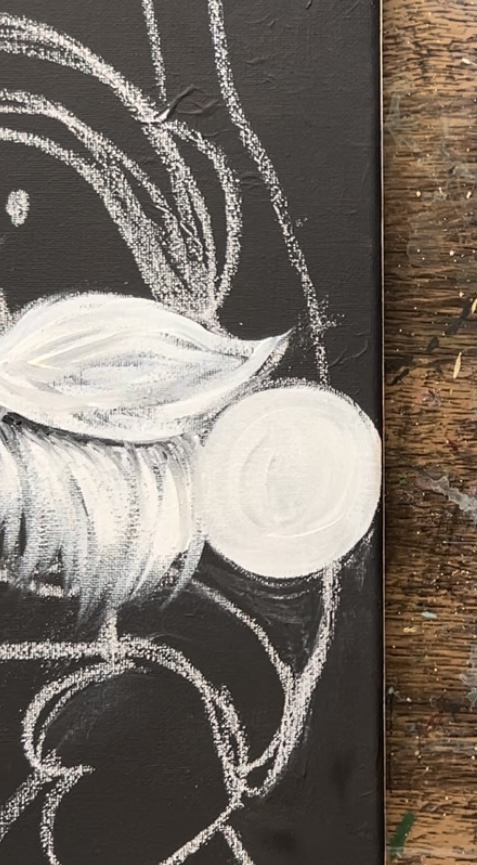
Tip: when adding the black to your brush for the shading, add only a tiny dot of black to the corner of the brush. You don’t want too much black or it will turn too dark. You also want to do this while the white is still wet so that it can blend on the canvas.
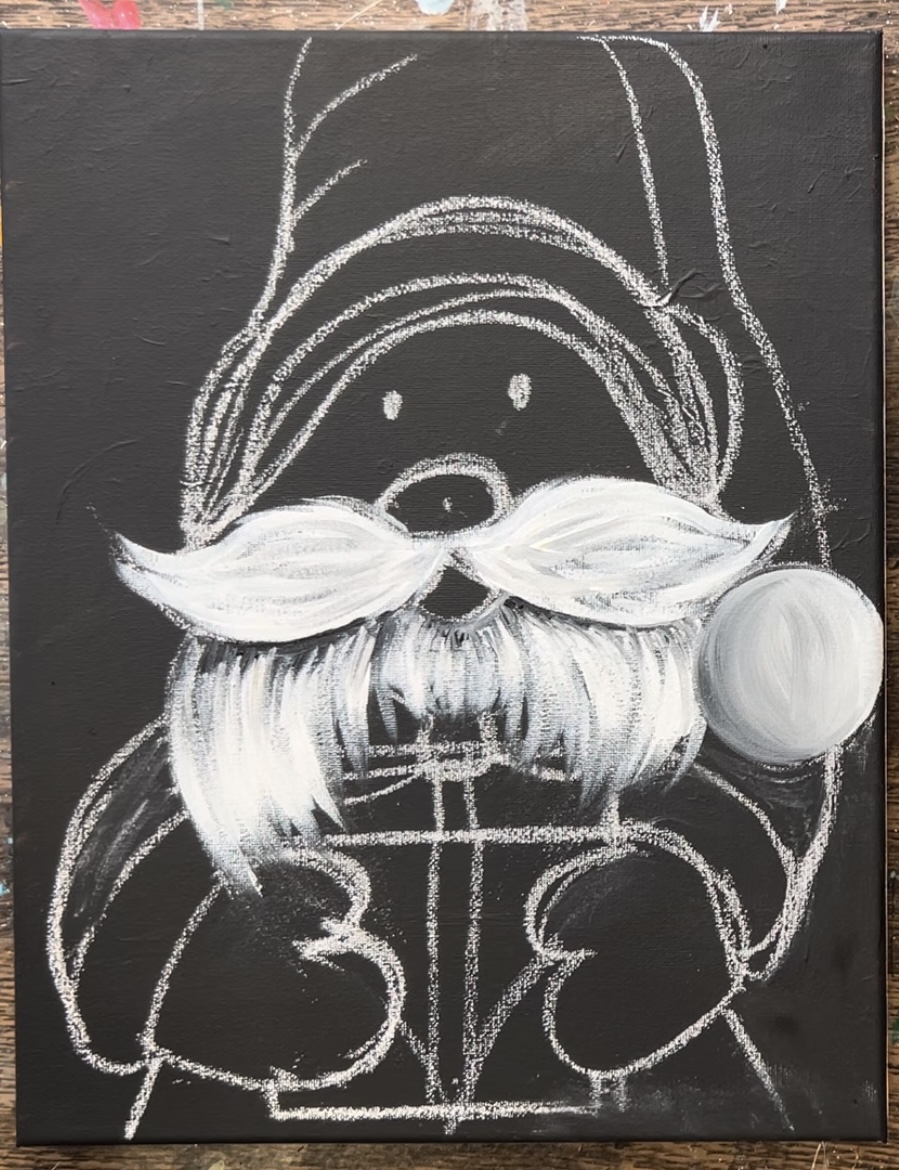
Do this same thing to the bottom white lining of Santa’s hat. First paint it solid white. Then blend a tiny bit of black on the bottom so that it is shaded on the bottom.
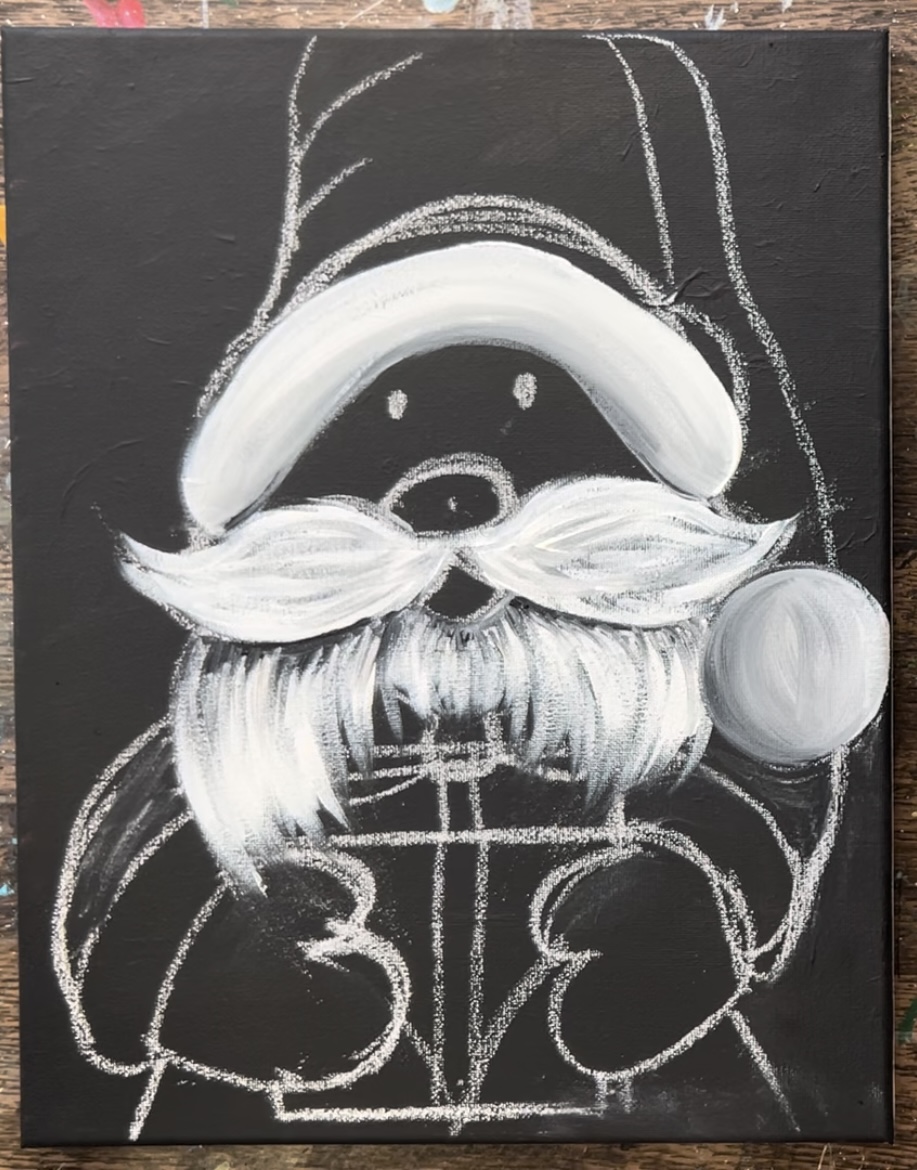
Paint the edges of Santa’s sleeves next using the same technique.
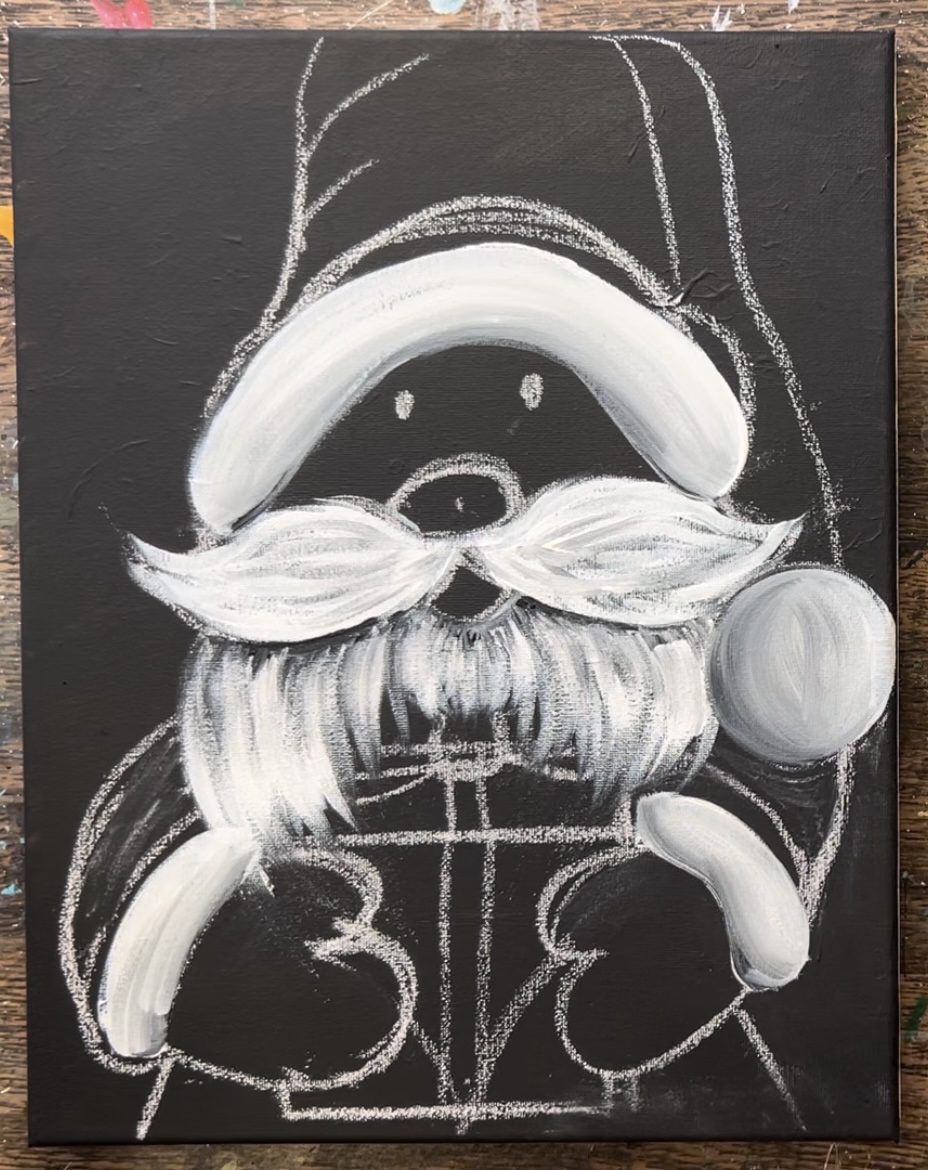
5. Paint red on hat
Use the color “cadmium red medium hue” and the #12 bright brush (cleaned and rinsed off) to paint the hat. Start by outlining the shape of the hat and then fill it in using curved paint strokes.
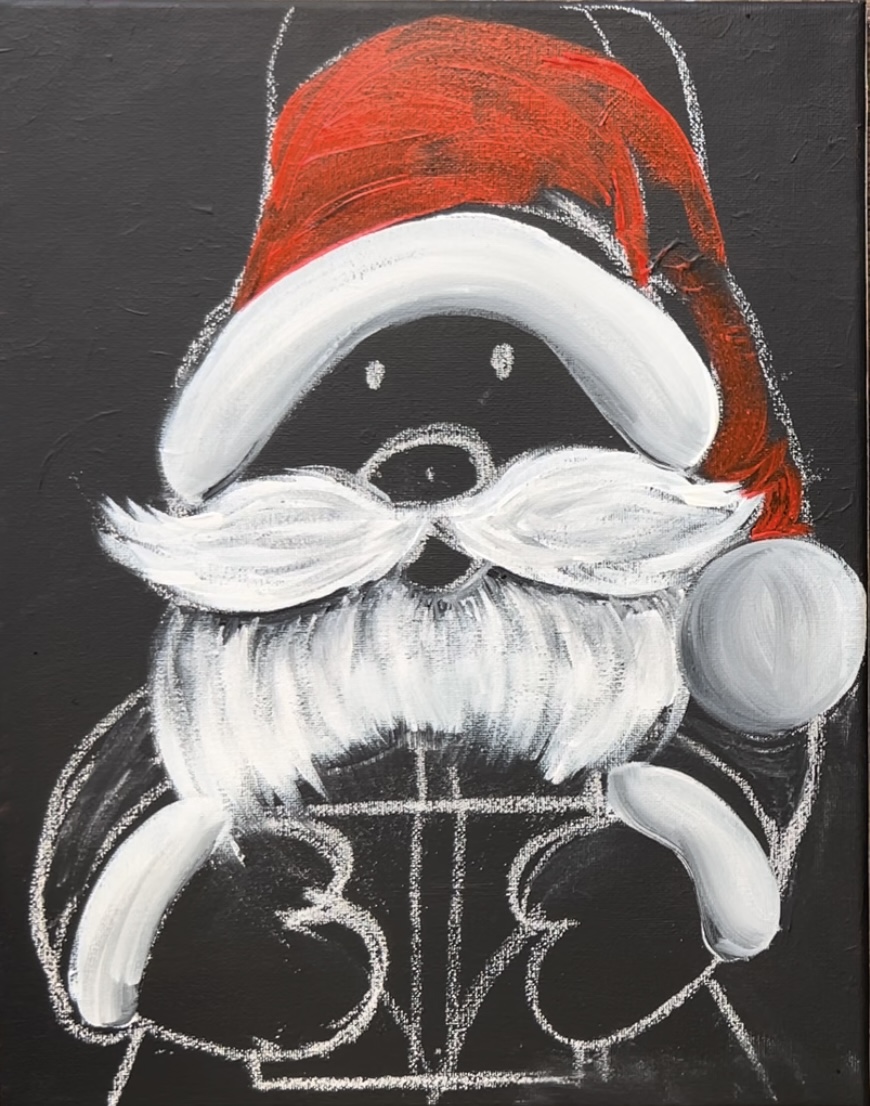
Then add highlight and shadowing to the hat. For the shadowing, add a little dot of black to your brush while the red is still on it. Then paint this dark red color on the left side of the hat. Do a dark line where the hat folds over then add more dark shading next to it.
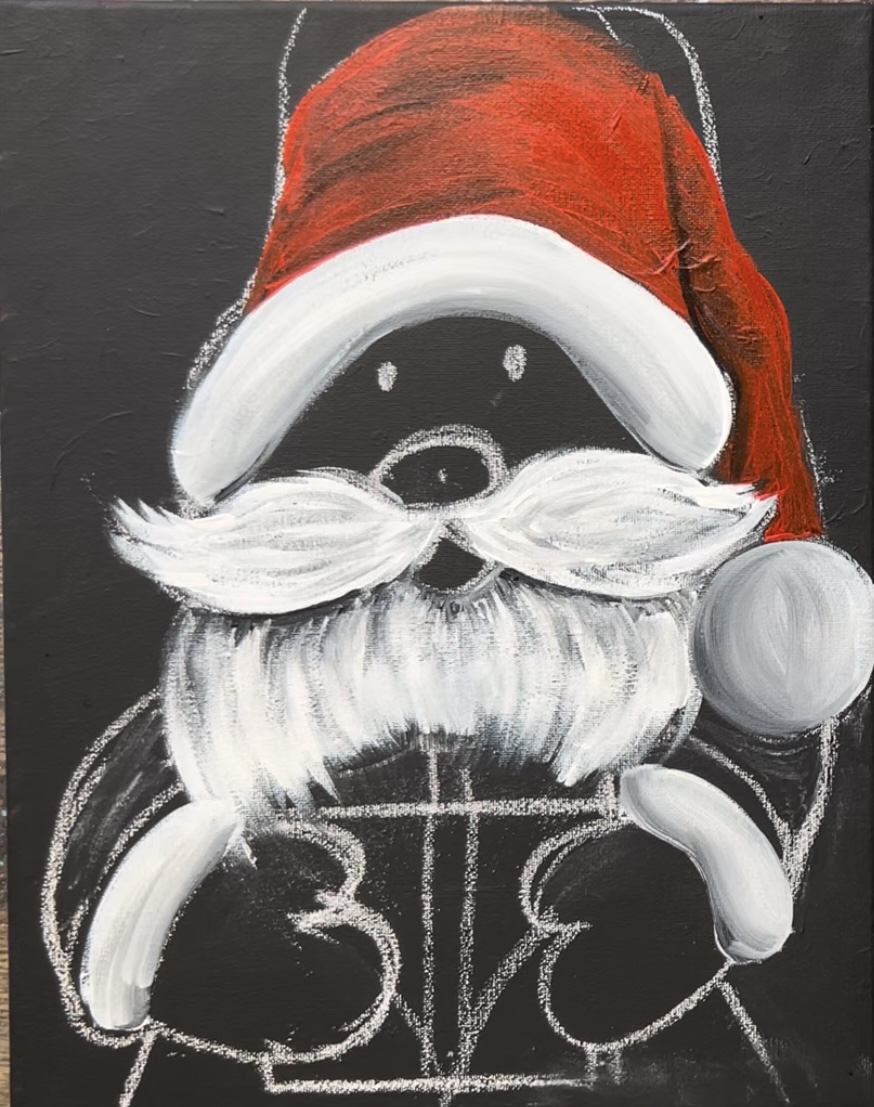
Then add your highlights. Rinse the brush completely. Then mix red and white together on your palette. You will make a lighter tint of red that you can add to the right side of the hat. Blend it into the middle of the hat.
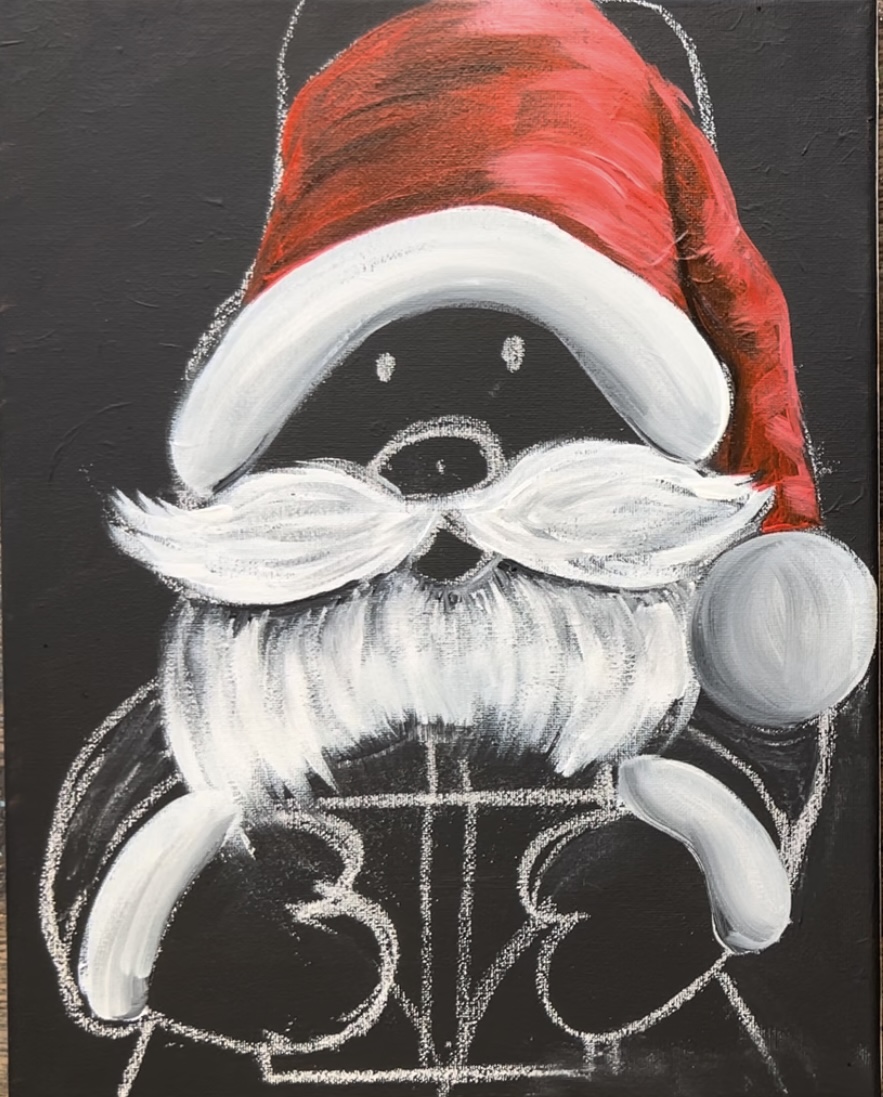
6. Paint face
To make this color, I mixed equal amounts “naples yellow” and “light pink” together. Use the #4 round brush to paint the face (you can paint over the eyes). Paint around the nose.
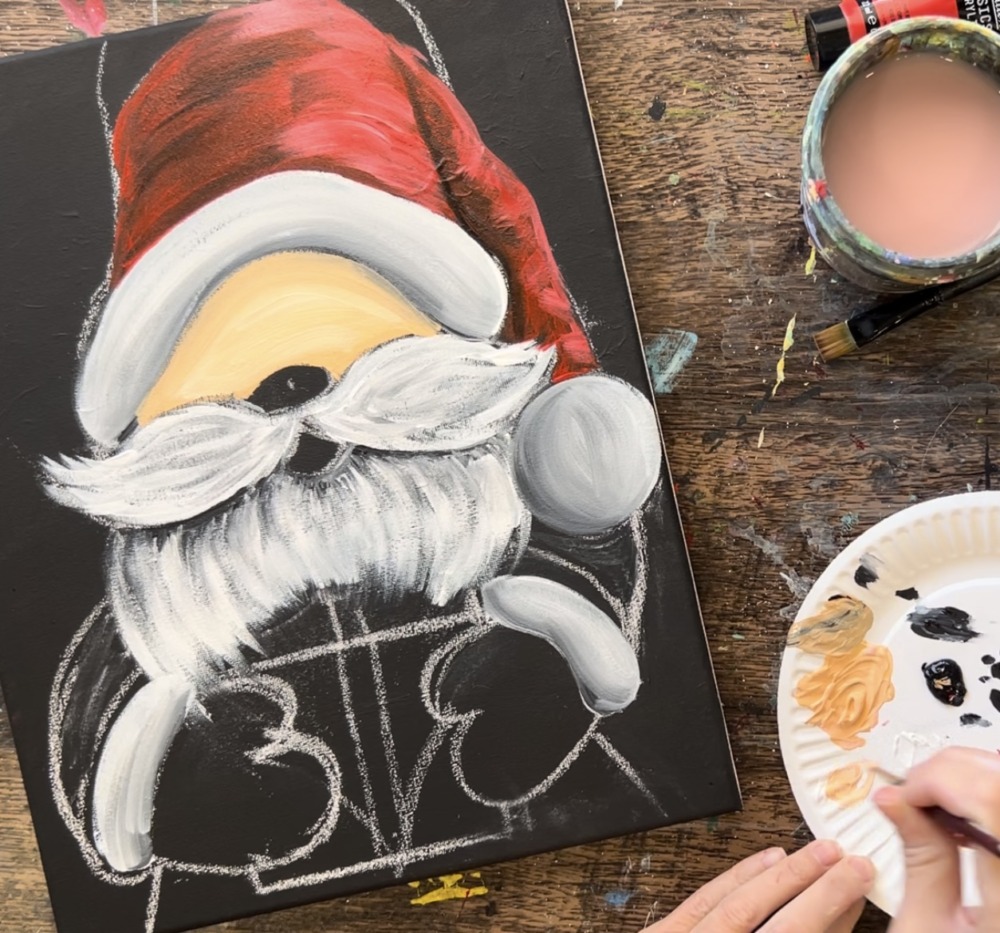
Then mix a “rosy color” on your palette. Take your “peach color” that you used for the face. Then mix a little red into it. This will make it more of a “rosy color”. Paint the nose with this color.
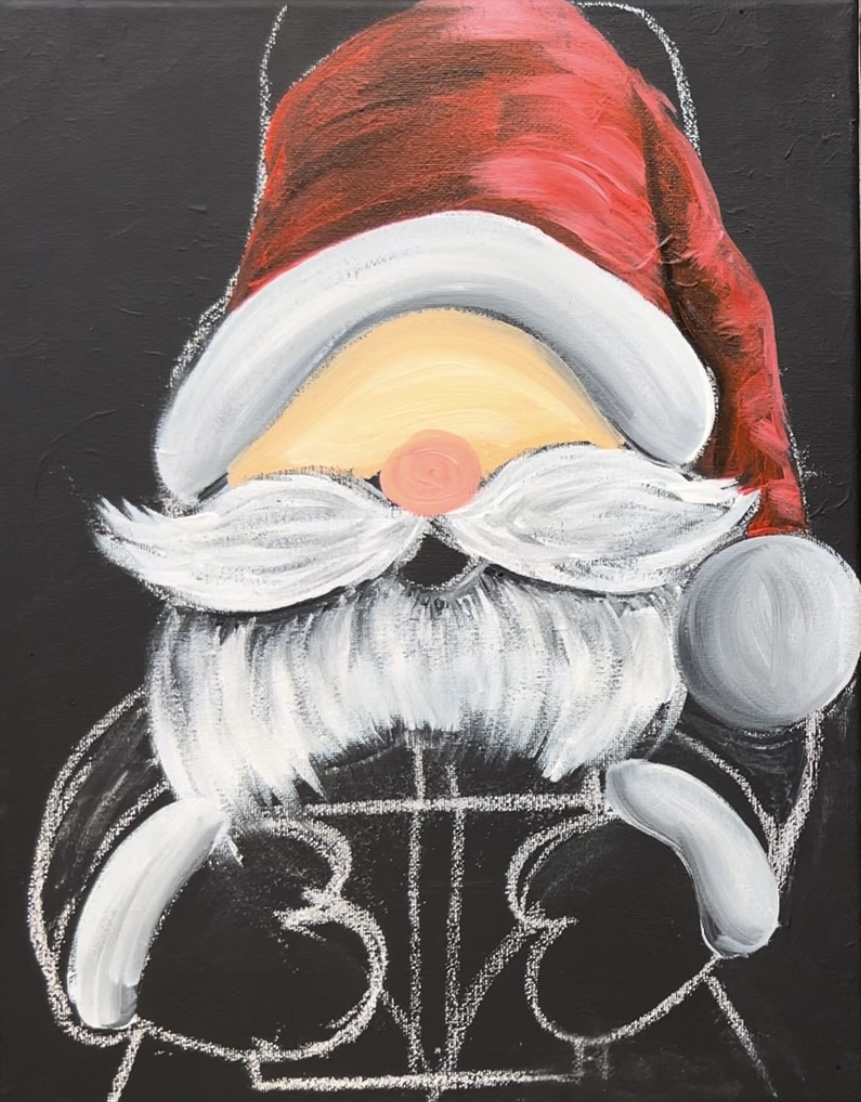
Then paint the cheeks. For Santa’s cheeks, I took the “peach color” and added just a small amount of red into it (less than the nose). This will make a slightly rosy color but not as intense as the nose. Paint two curved “bumps” on each side of the nose above Santa’s mustache.
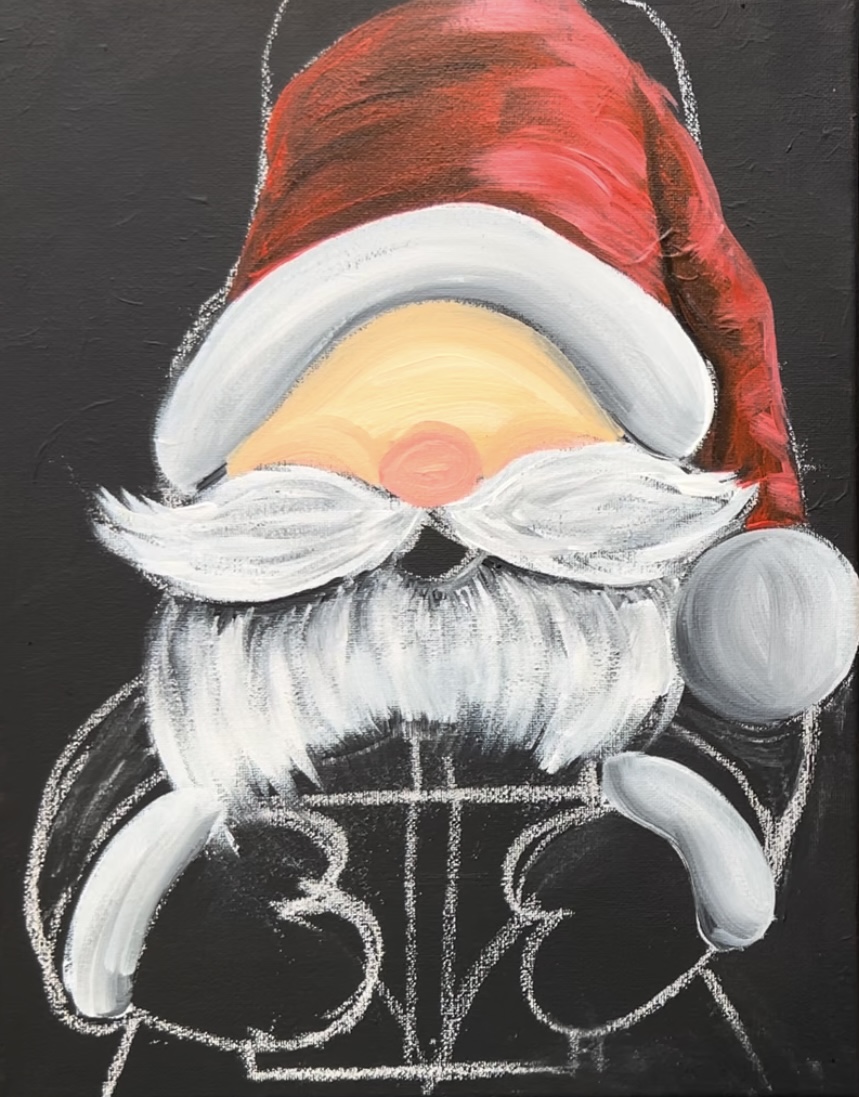
7. Paint sleeves & coat
Use the #12 bright brush and “cadmium red medium hue” to paint Santa’s sleeves.
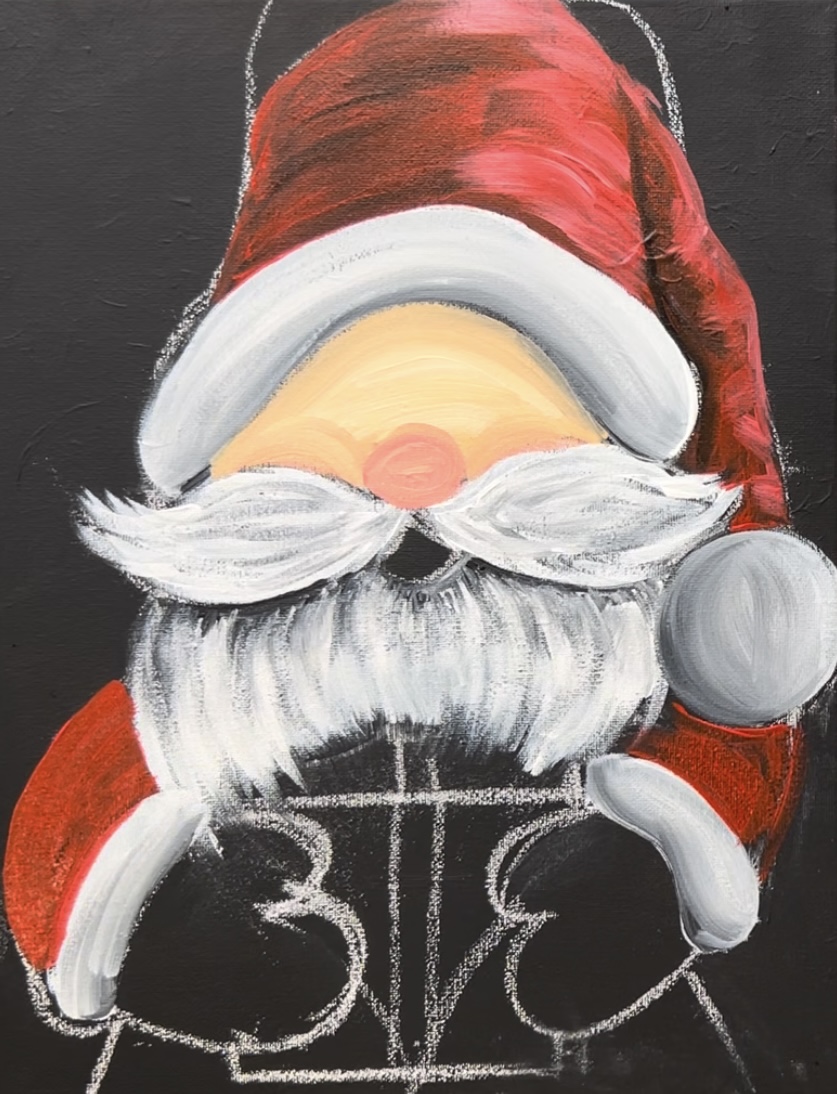
Then add shading on the sides of the sleeves towards the beard. Add just a small amount of black to your brush and blend it into the red.
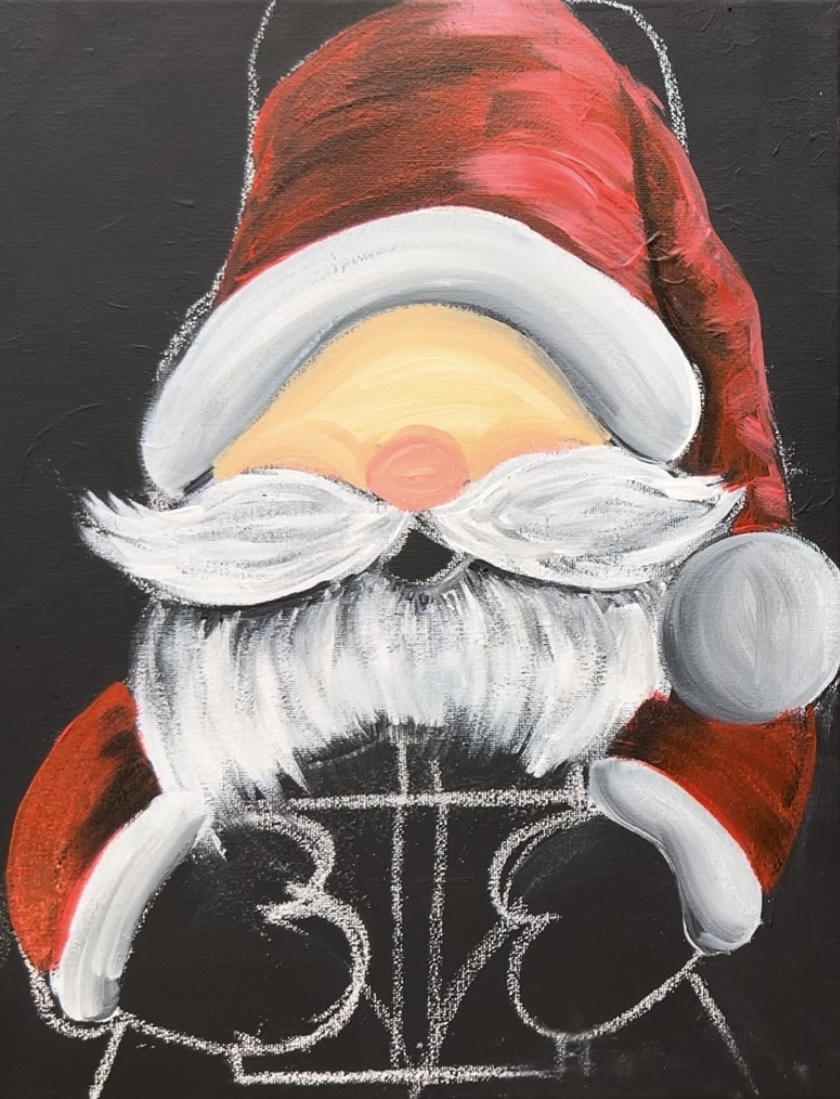
Then rinse the brush. Mix red and white together to create your “red tint” that will be used to highlight the sleeves. Paint this highlight color on the outer edges of the sleeves and blend it into the rest of the sleeve.
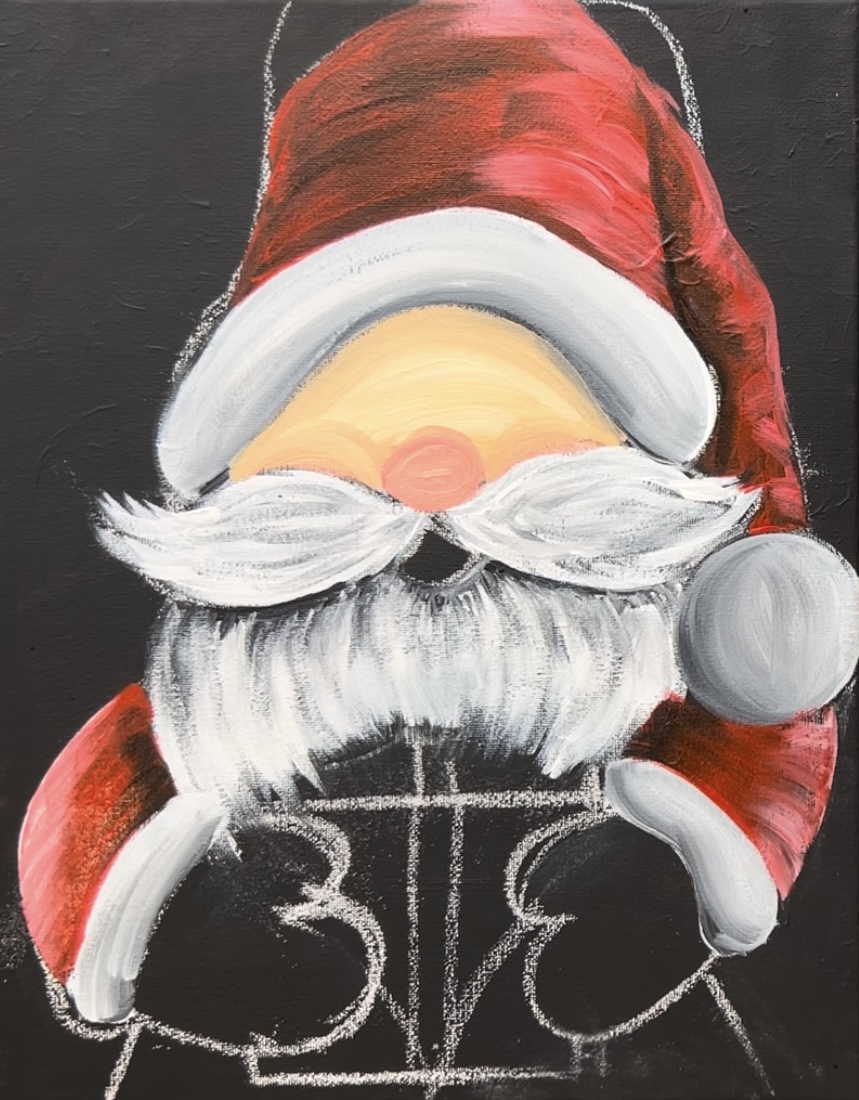
Then paint Santa’s coat. This will just be solid red and it is that area behind the present and his gloves.
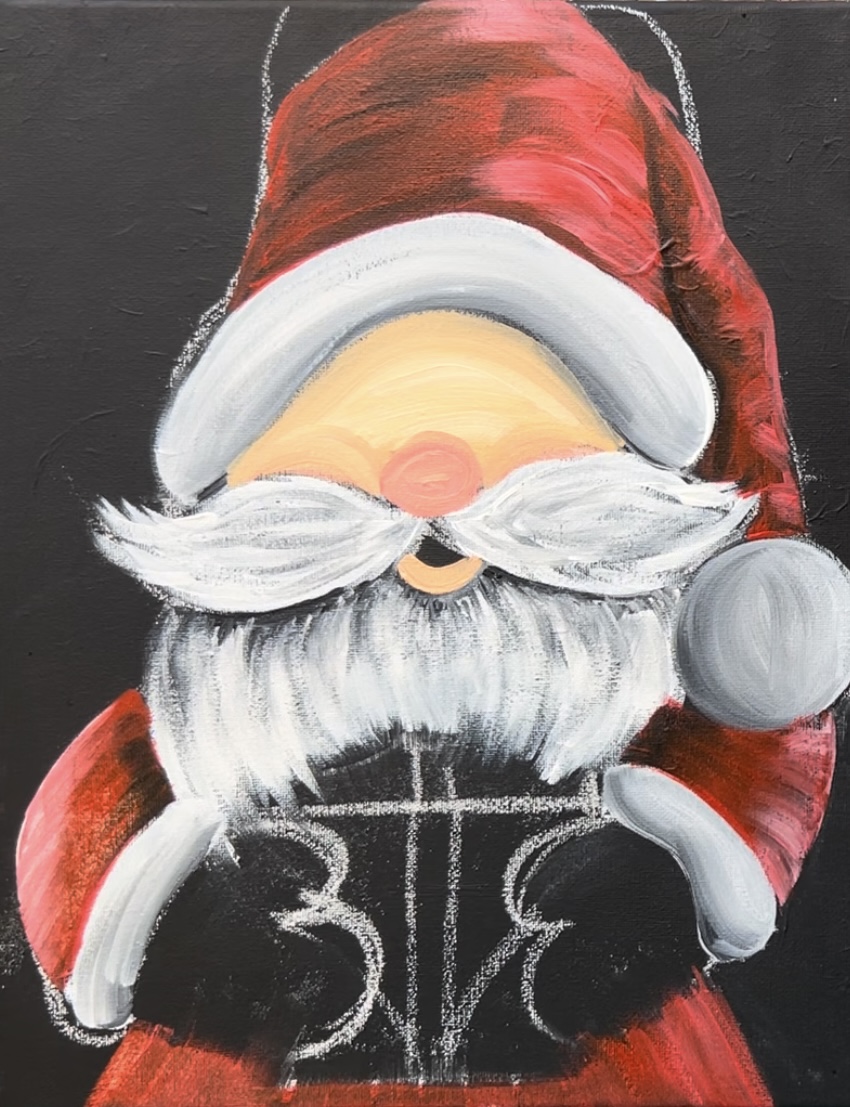
8. Paint gloves
Use a #12 bright brush to paint the gloves a solid coat of mars black paint.
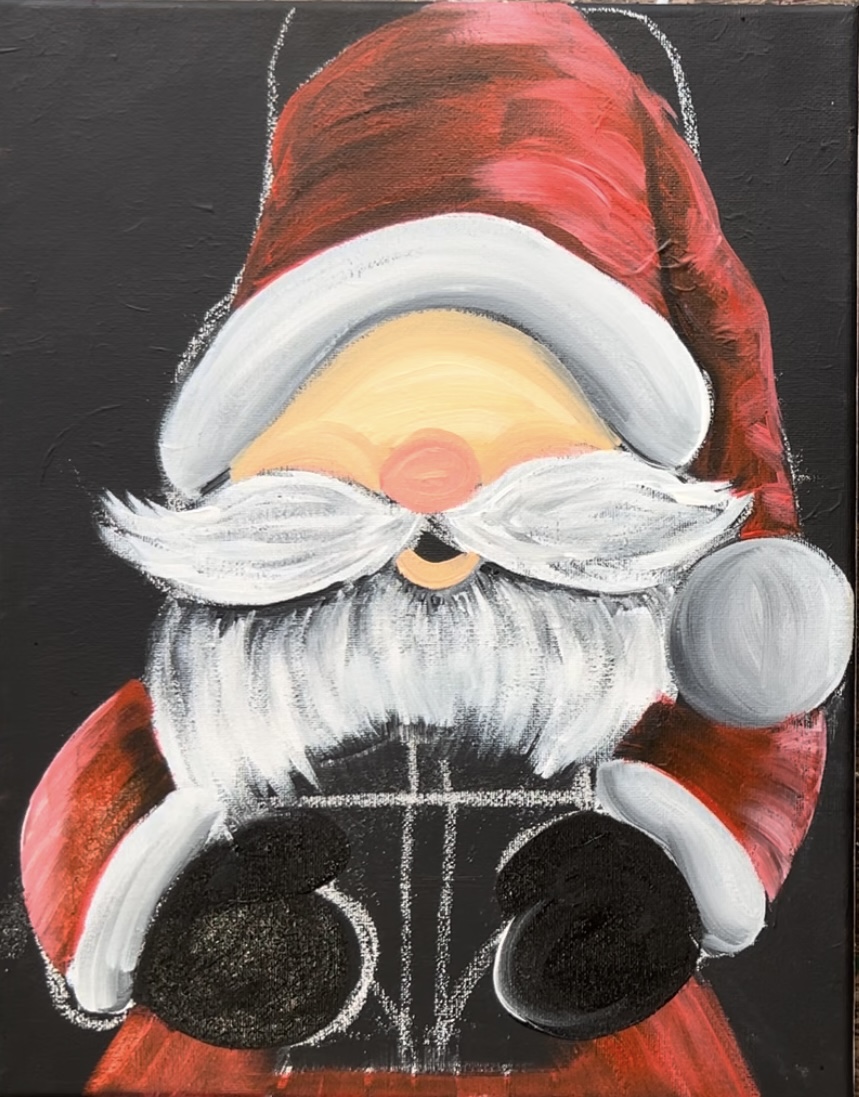
Before this black dries, add a small amount of white to your brush. Then paint white angle paint strokes using the full width of the brush. This will highlight the glove and give it an “expressive look”. This also allows the dark of his gloves to stand out better since we are painting them “black on black”. You can also slightly outline the edges of the gloves with white.
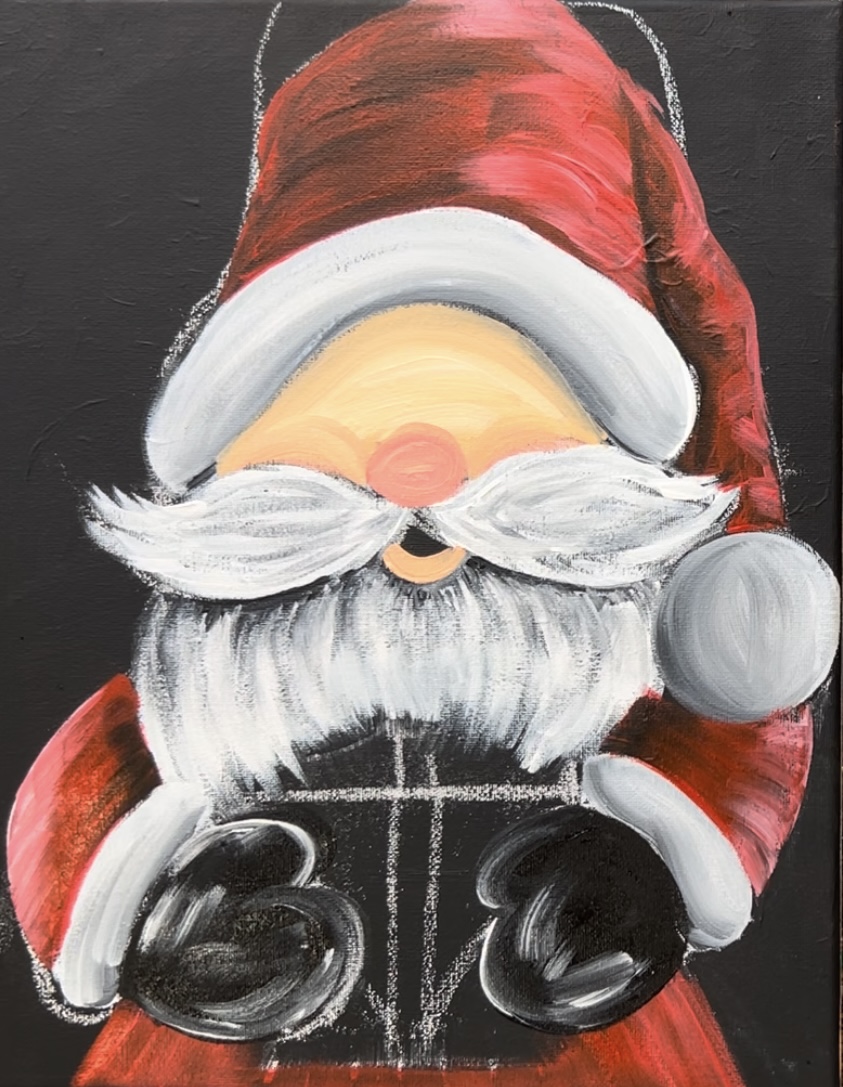
9. Paint nose & mouth detail
Use the #4 round brush to paint the bottom of Santa’s lip. Use the “peach color” and add a little red into it to make it a little “rosy”. Then paint his lip. Also, add some “highlight” to his nose. Use just “white” on your #4 round brush and paint little curved marks on the left side of his nose.
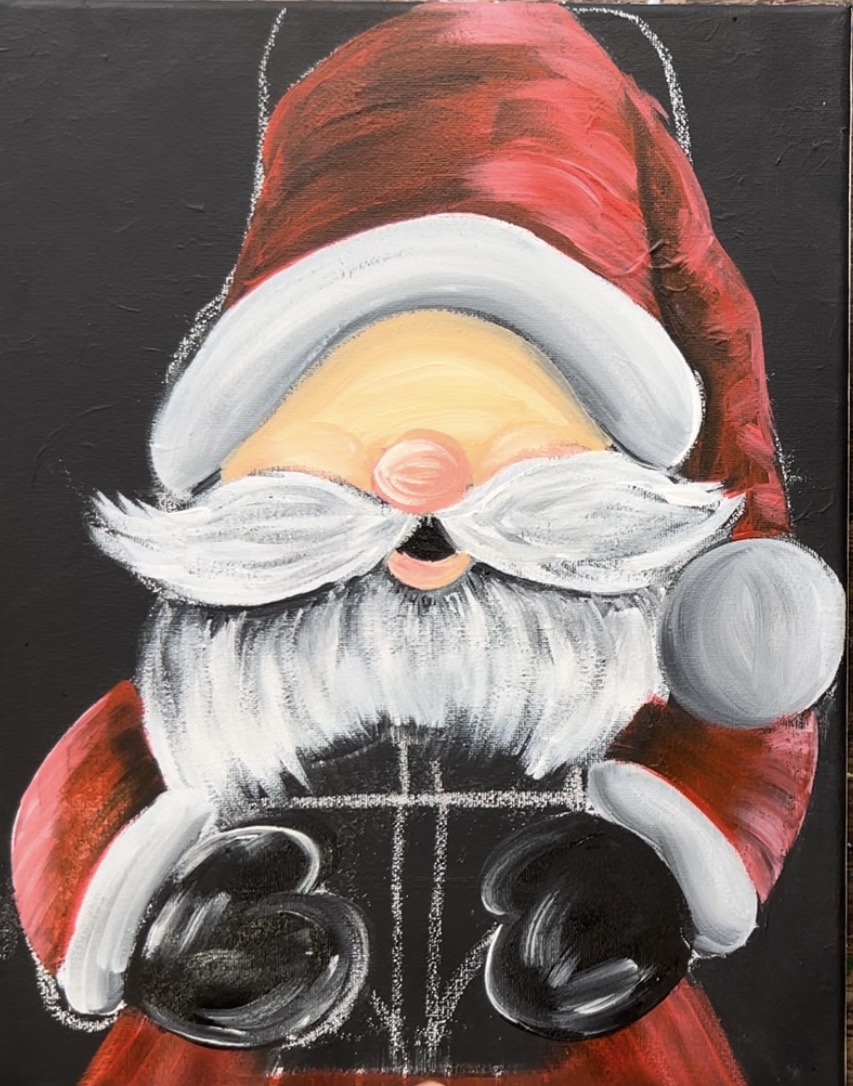
10. Paint present (first layer)
Use the #12 bright brush and “light blue permanent” to paint the top lid part of the present.
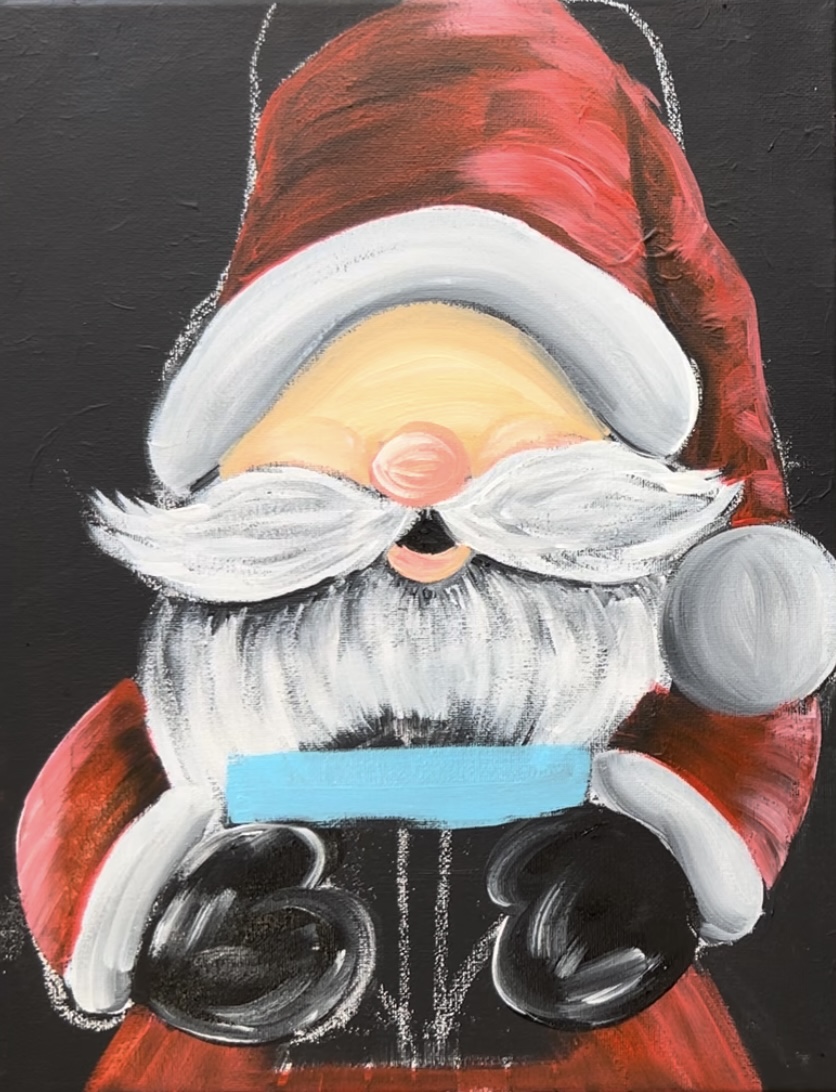
Then paint the bottom box part with “phthalo blue”. When transitioning to this dark blue, I did not rinse the light blue off my brush. I allowed that light blue to blend in with the dark blue to create some “color variation”.
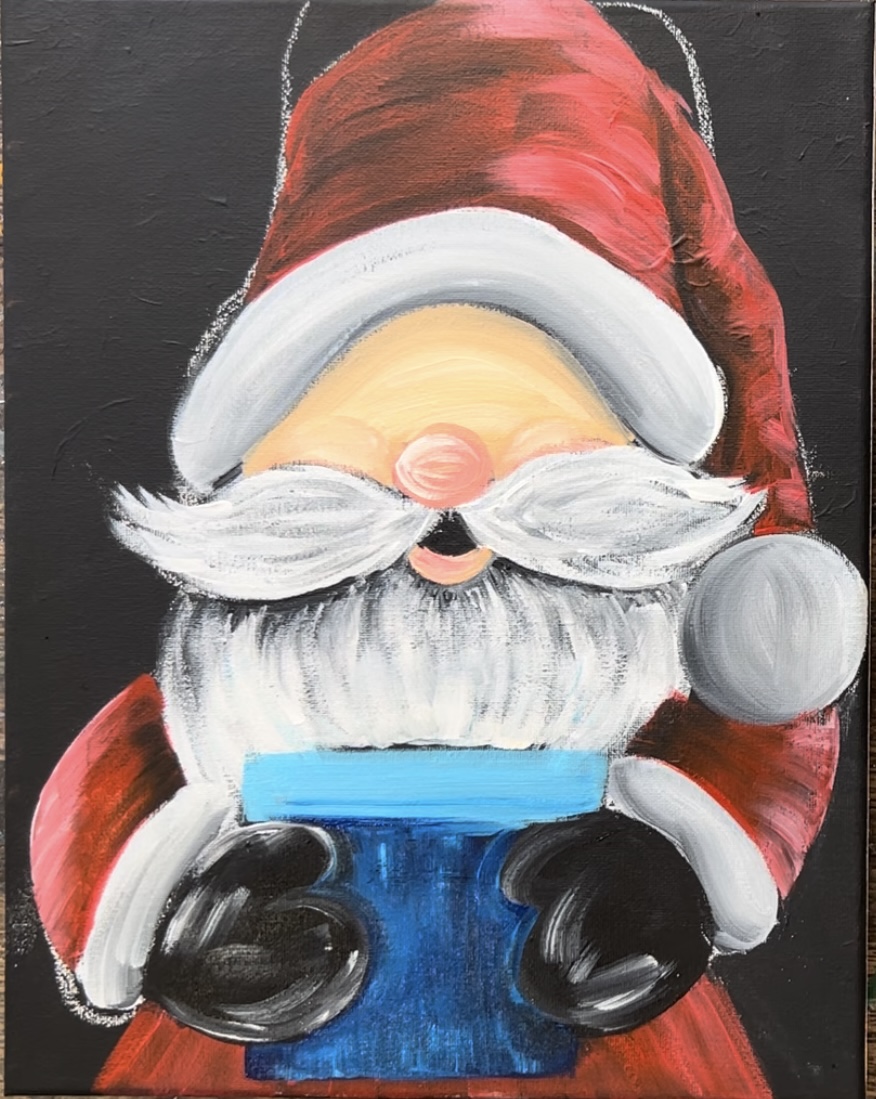
11. Paint belt
Use the #12 bright brush and “mars black” to paint the belt. Use the full width of the brush to paint a curved line on the bottom of the canvas. This goes behind the present.
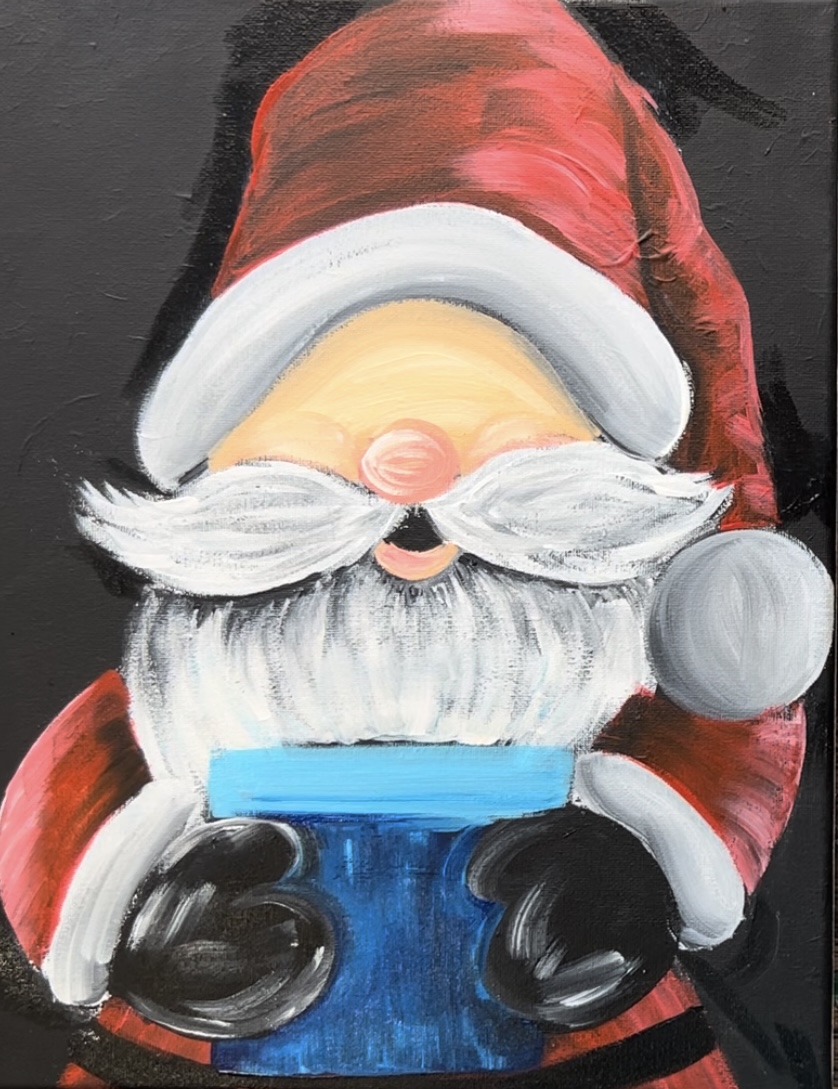
12. Paint eyes and eyebrows
Use a #4 round brush (or a black paint pen) and the color “mars black” to paint two oval shapes for the eyes.

Then paint two eyebrows going in a diagonal direction above the eyes. Use the white paint to do two bushy rectangular shapes.
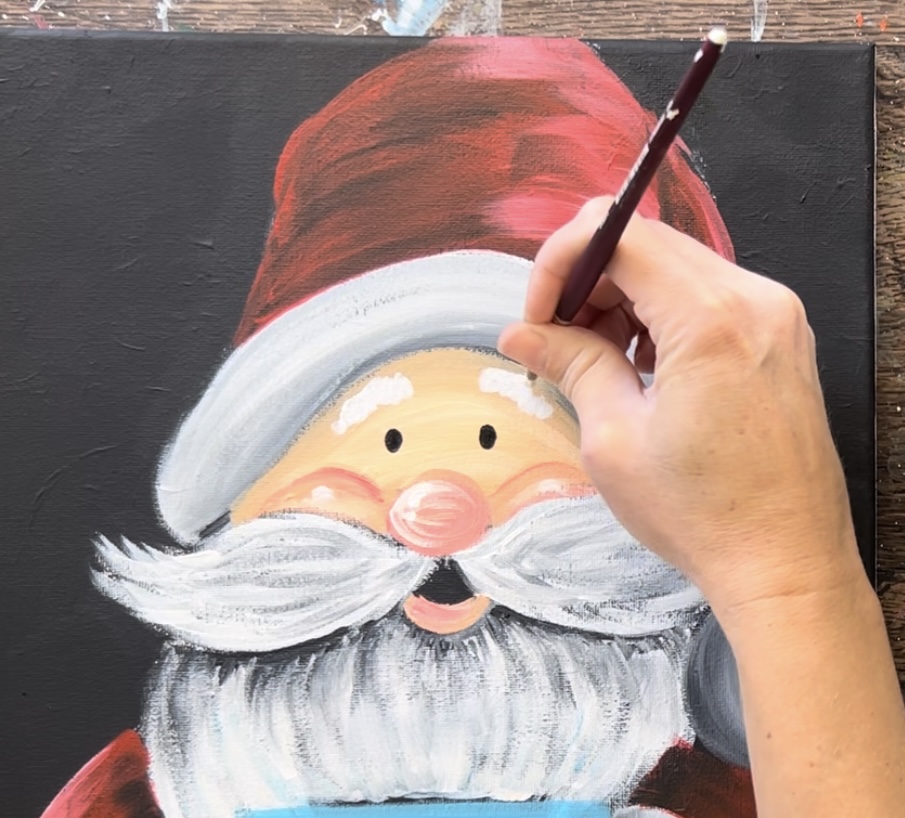
Next, add a little bit of black on the bottom of the eyebrows for shadowing. Then paint a little white dot on the top right of each of the eyes for a highlight.
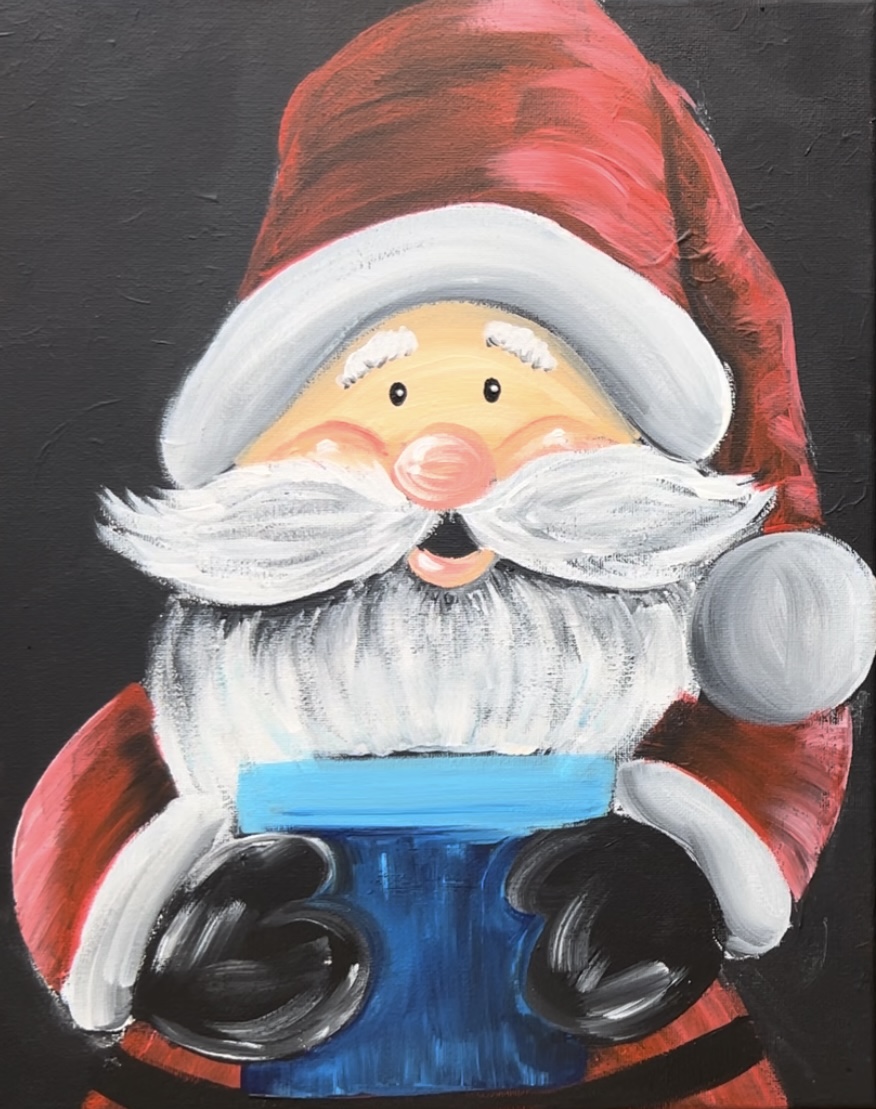
13. Add more hair texture to mustache and beard (optional)
Use the #4 round brush and titanium white to paint textured hair strokes on the edges of the mustache and beard.
14. Texture hat & sleeve cuffs
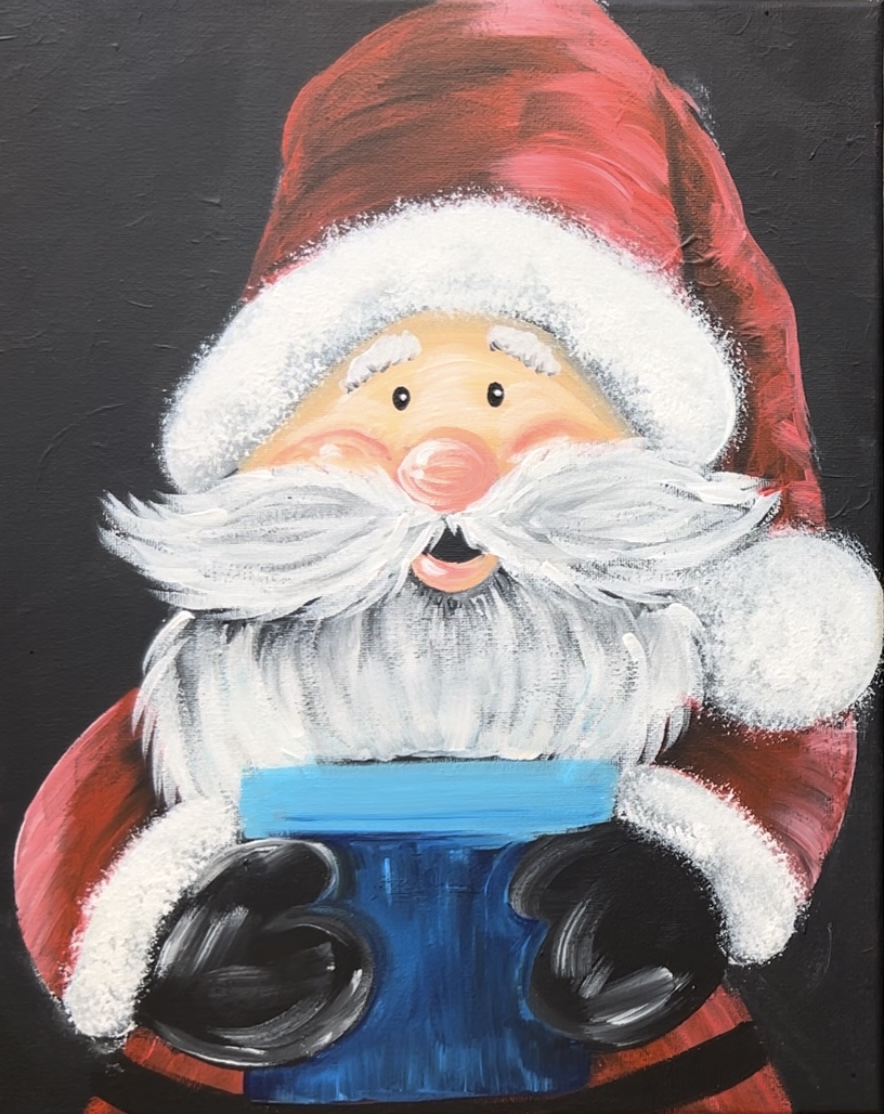
Use a round bristle brush to create this texture. Load the end of the bristles into titanium white and then “stamp” this texture on the bottom lining of Santa’s hat, the ball of Santa’s hat and on the lining of his sleeves.
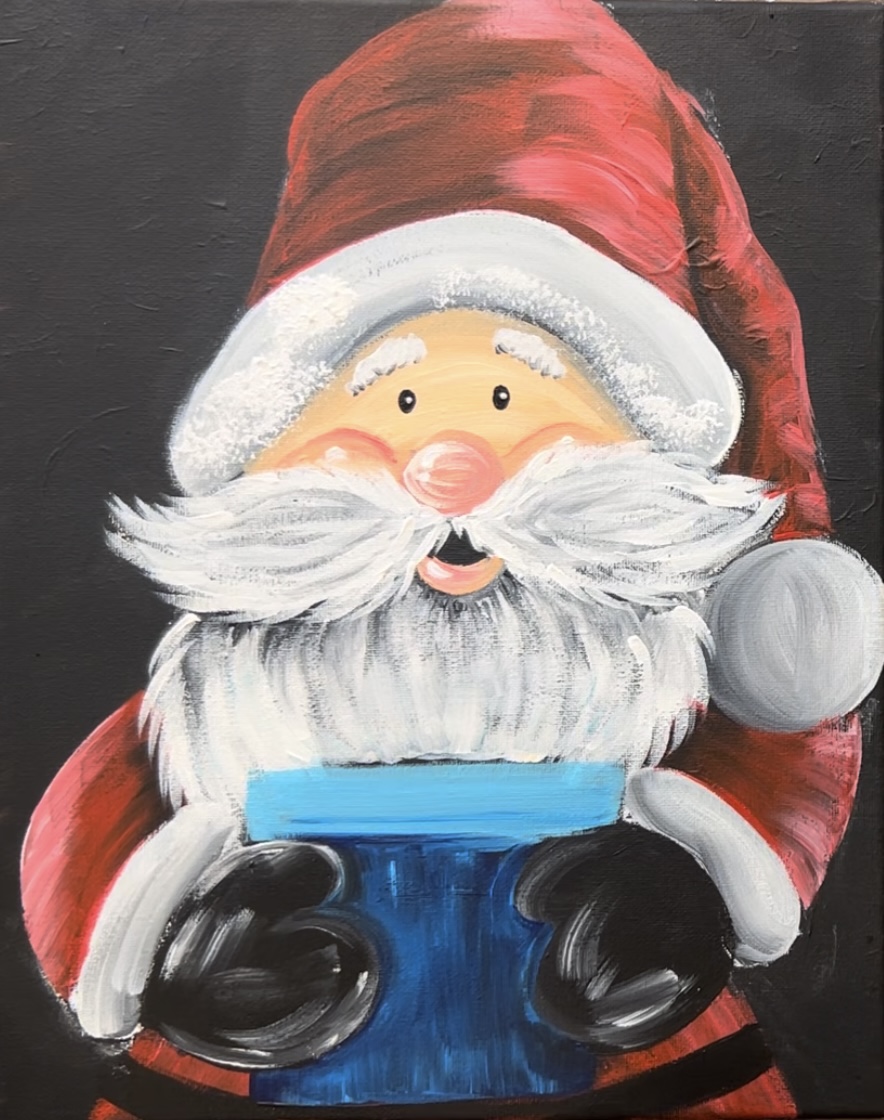
Don’t cover all of your first layer because you want some of that darker shadow layer we painted earlier to show through. Also, go outside the lines of it so that the texture gives it a “fuzzy look”.
15. Paint ribbon on present
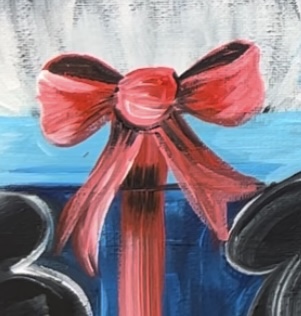
Use a #4 round brush and red to paint the bow. Paint a square shape for the center of the bow and round the corners. Then paint two triangular end shapes with rounded corners.
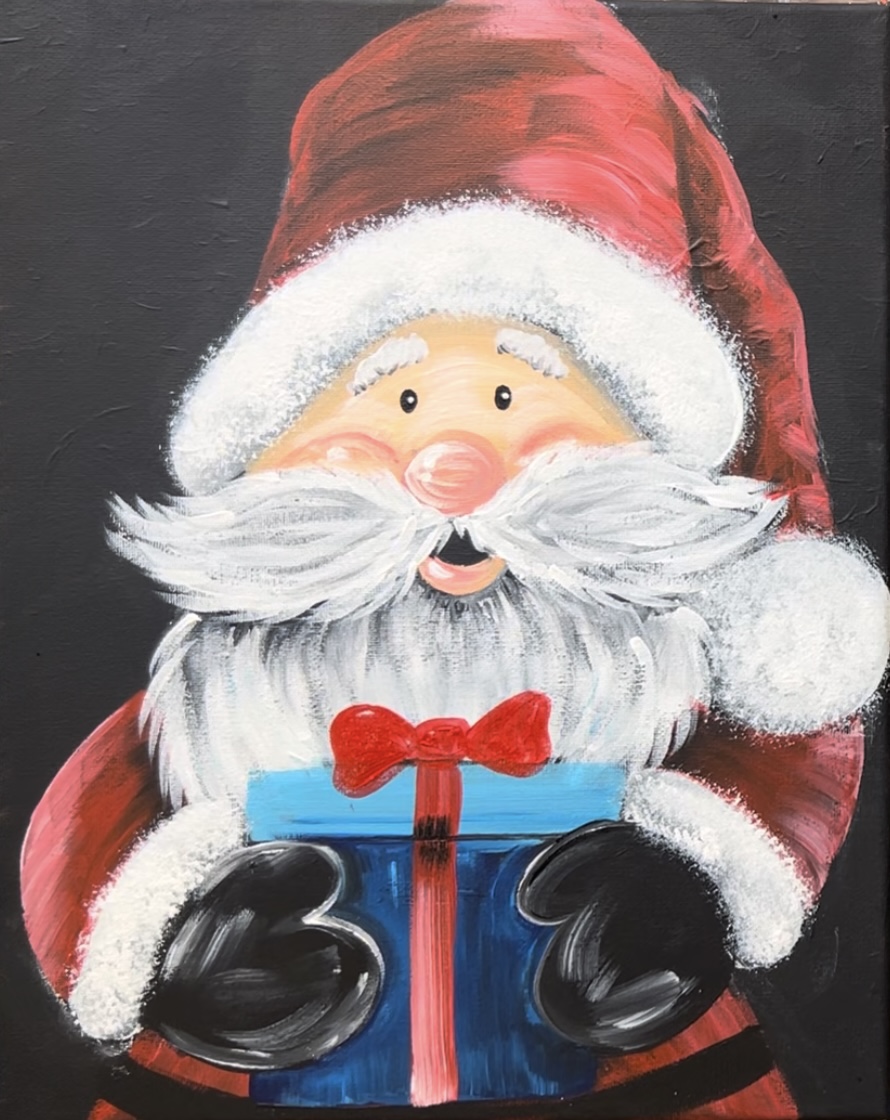
Use “mars black” to paint the top inner portion of the bows.
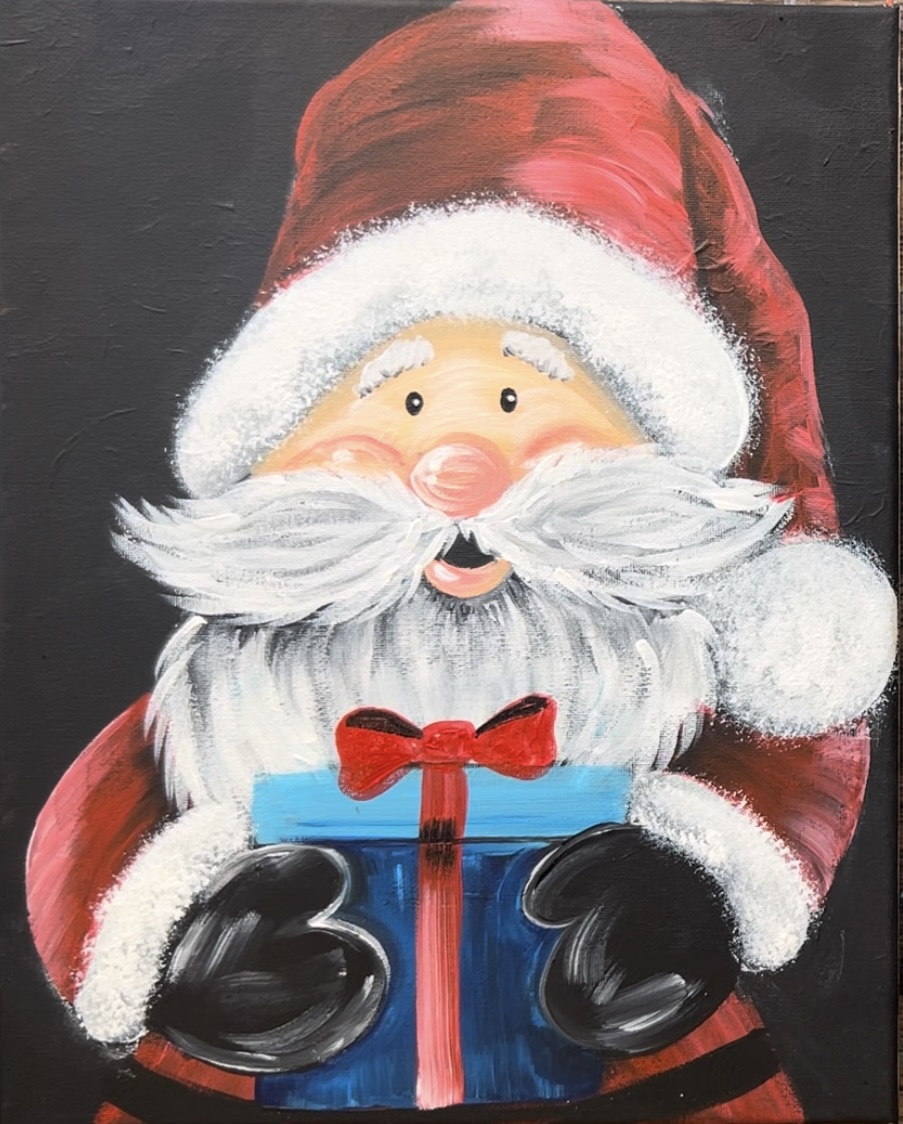
Then paint the tails of the bows using red.
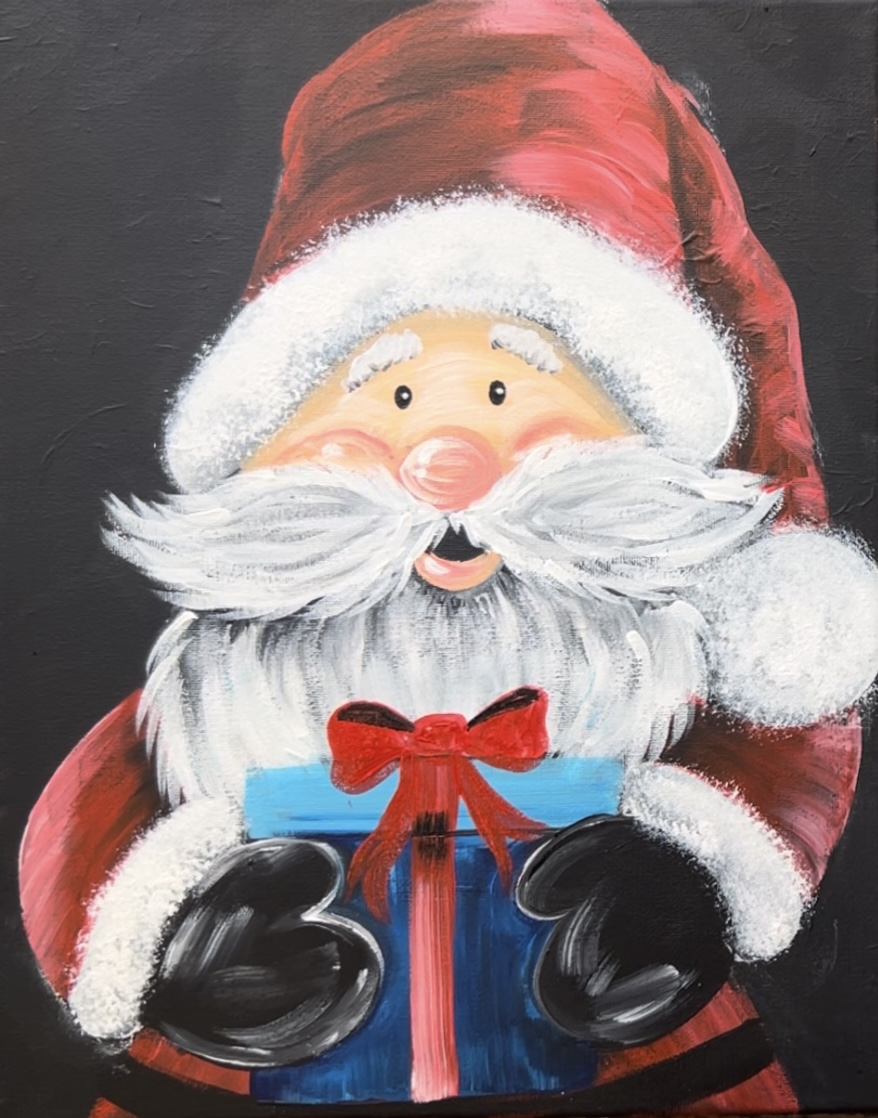
Mix red and white together to highlight the bow. Paint highlights on the right side of the bow and on the bottom of the center of the bow. Blend it into the rest of the red. Add shadowing on the inner parts of the bow and upper parts of the bow tie. Do this with a tiny bit of black mixed in with the red.
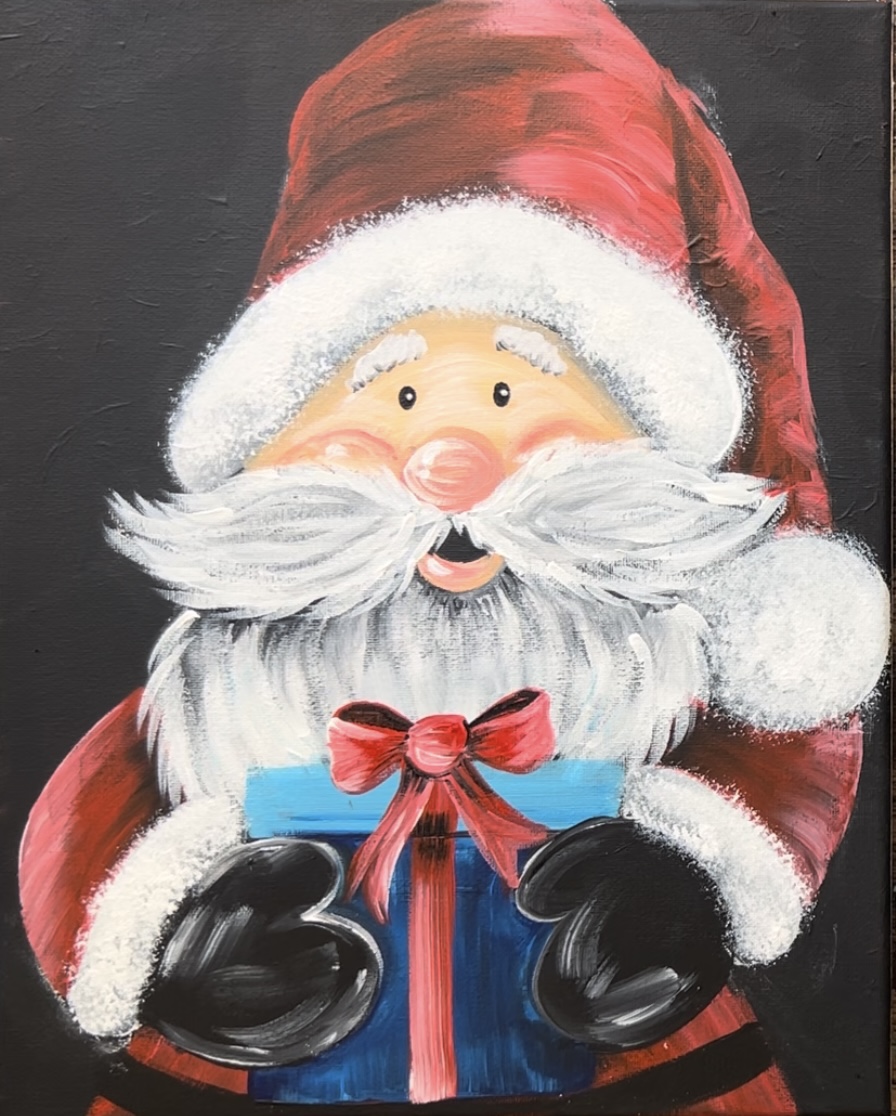
16. Paint bokeh/ blurry lights
To do the colorful blurry lights in the background, I used my index finger! Load your index finger with only a small amount of “cadmium yellow light” paint (like a dot of paint). Then press onto the canvas and smear it outwards to create a blurry circle. For brighter circles, mix a little white into the yellow color. You want to create circles that are close together or even partially overlapping.
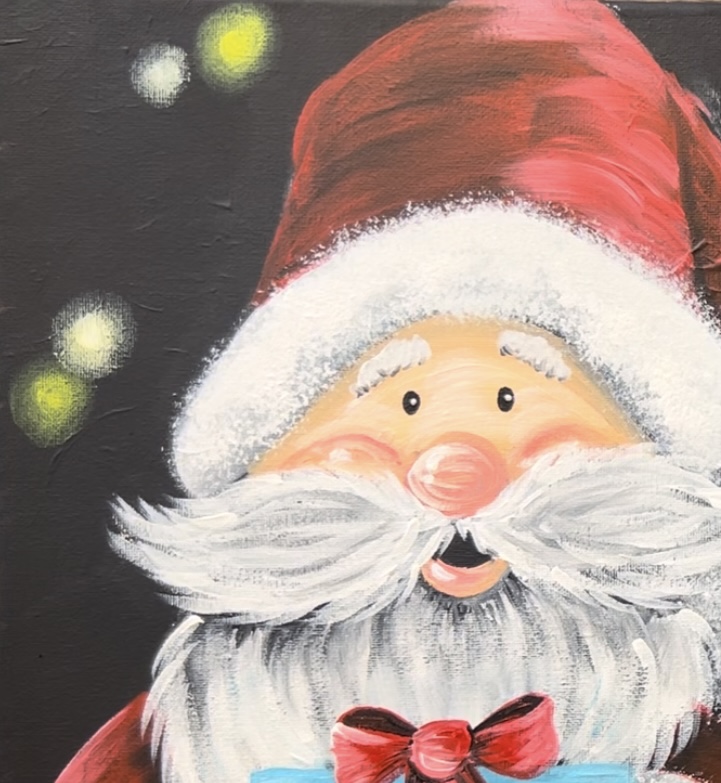
For colorful circles, try using some of the blue on your paint palette or even mixing yellow and blue together to create green circles.
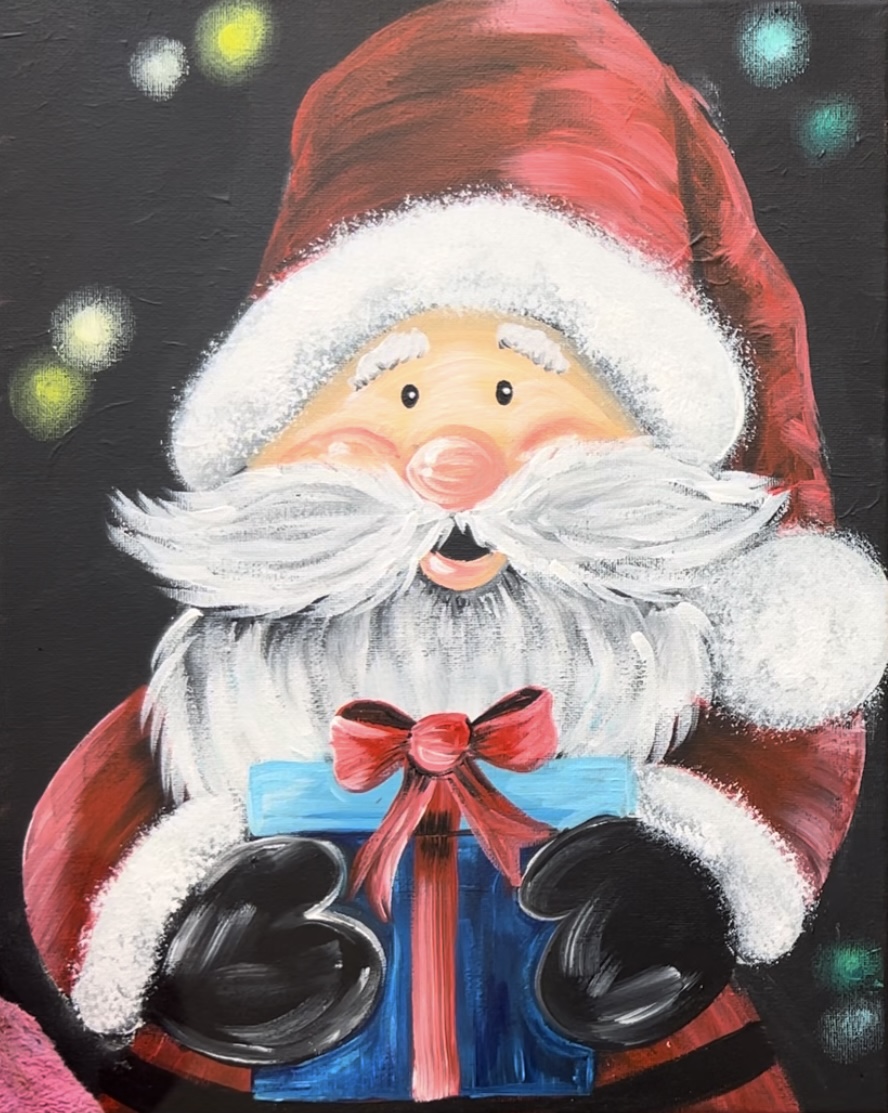
I did a combination of yellow, white, blue and green circles all throughout the background. Some are larger, some are smaller. Some are slightly overlapping. Some are even dimmer. To create the really “dim” lights, you only need a small amount of paint on your finger and make a very thin mark on the canvas. The more paint, the brighter and larger it will be!
17. Paint holly
Mix “light blue permanent” with “cadmium yellow light”. Use the #4 round brush to draw out the shape of the holly leaves. Then fill it in with green.
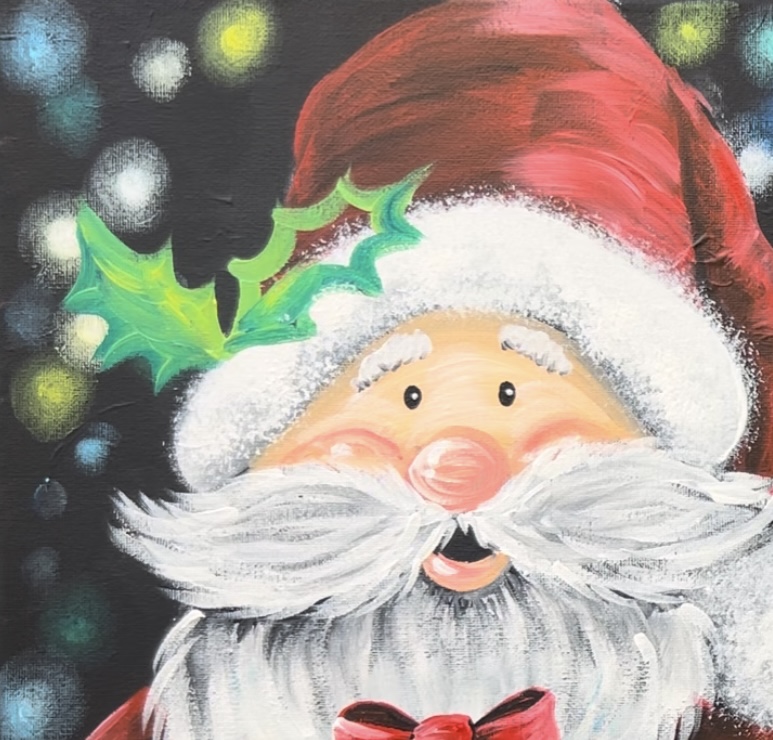
Wait for this to dry then paint three red berries in the center.
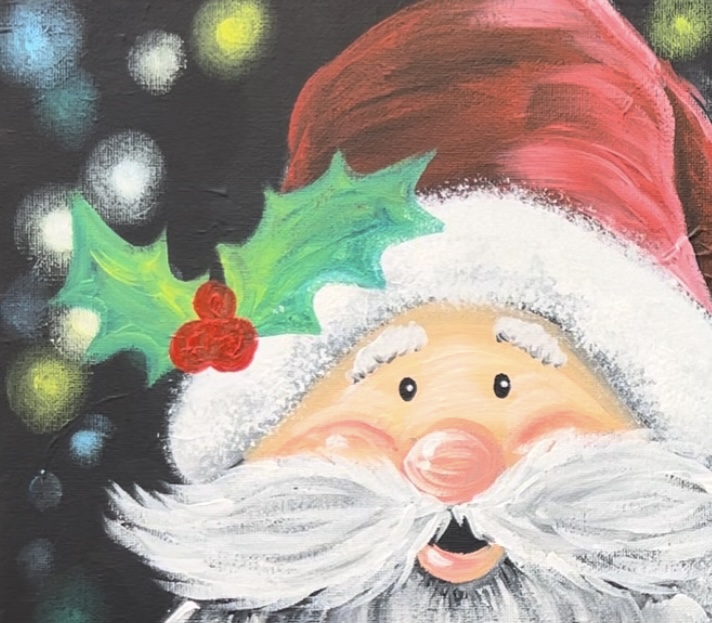
18. Detail present wrapping
Use a white paint pen to draw out snowflake pattern on the present. Alternatively, you can use a round brush and white paint to paint patterns.
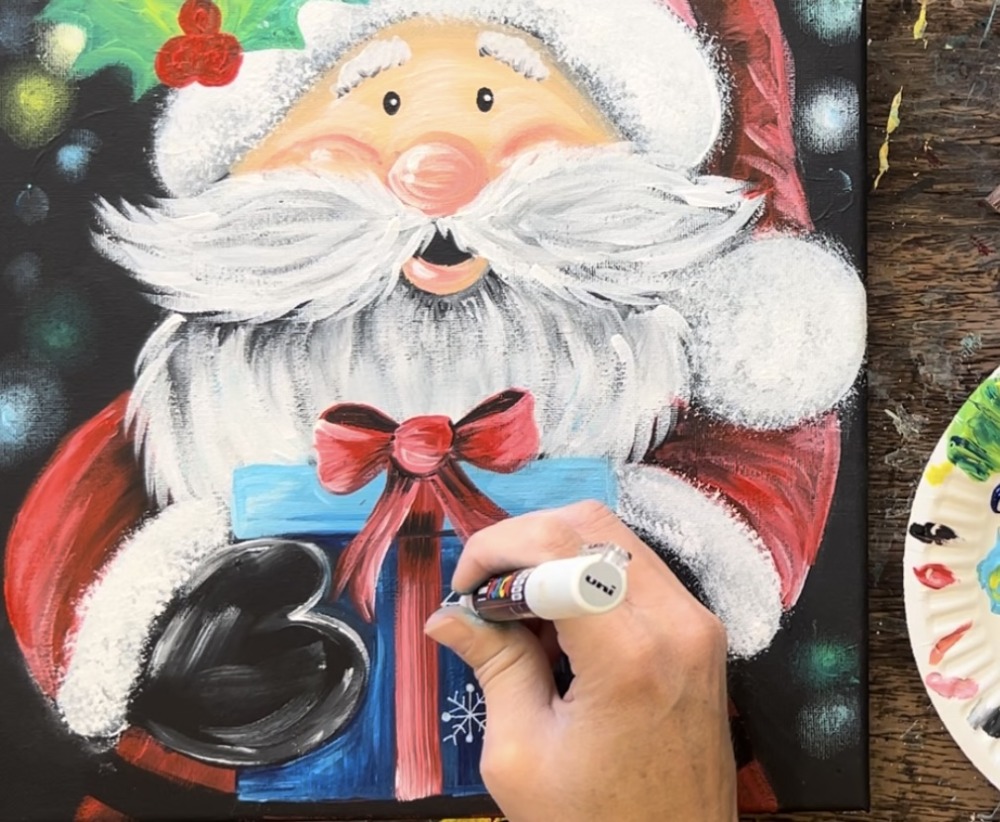
I did snowflakes on the dark blue area of the present and white dots on the top lid area.
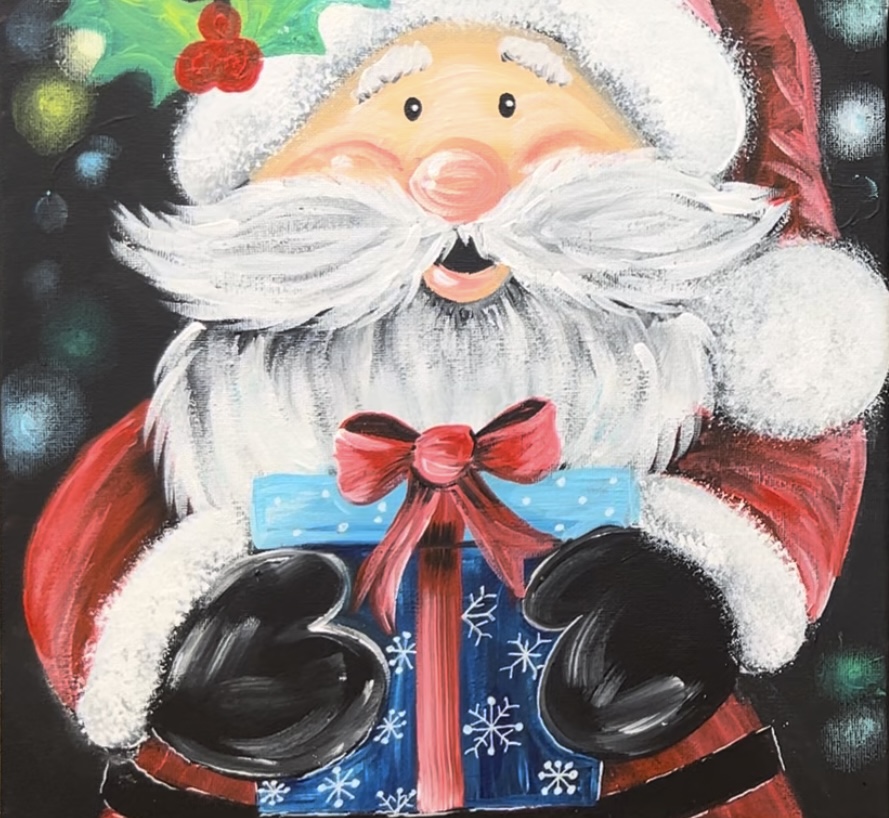
19. Loose outlining (optional)
Using a black paint pen to outline parts of Santa could be helpful to get parts to stand out. I recommend loose and sketch like outlines. I did this on the mustache, hat lining and ball of hat.
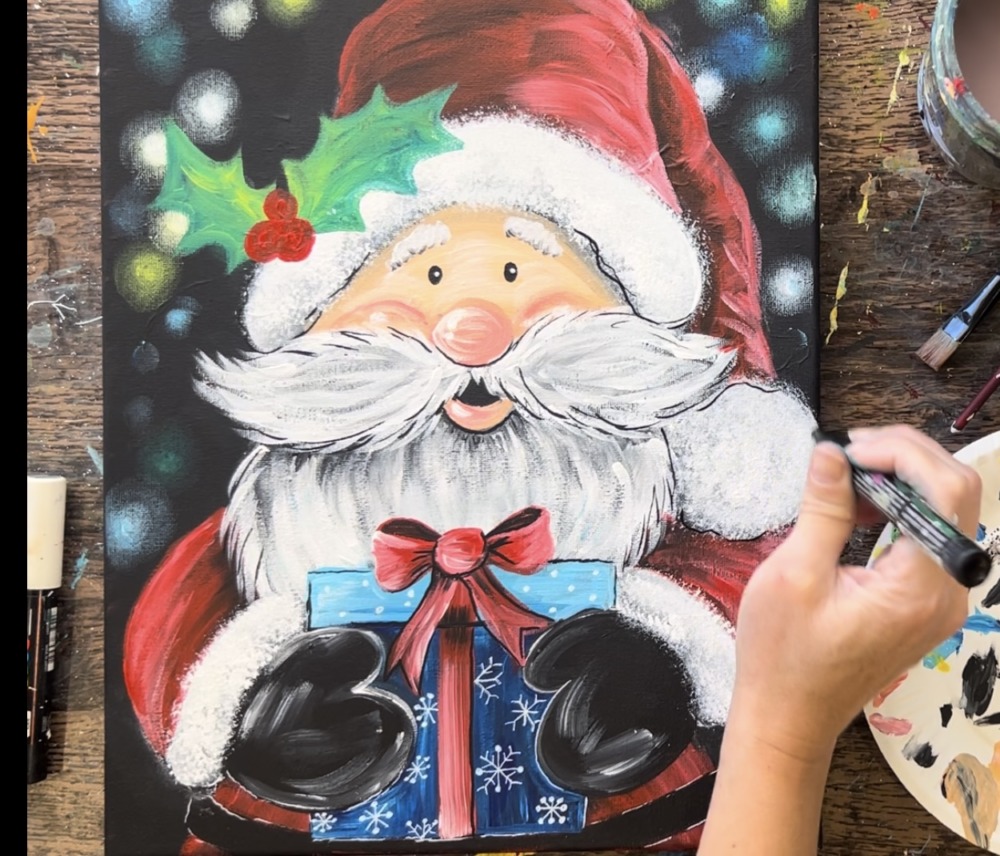
You can also use the white paint pen to loosely outline Santa’s gloves, his belt and the present.
I also outlined the holly leaves.
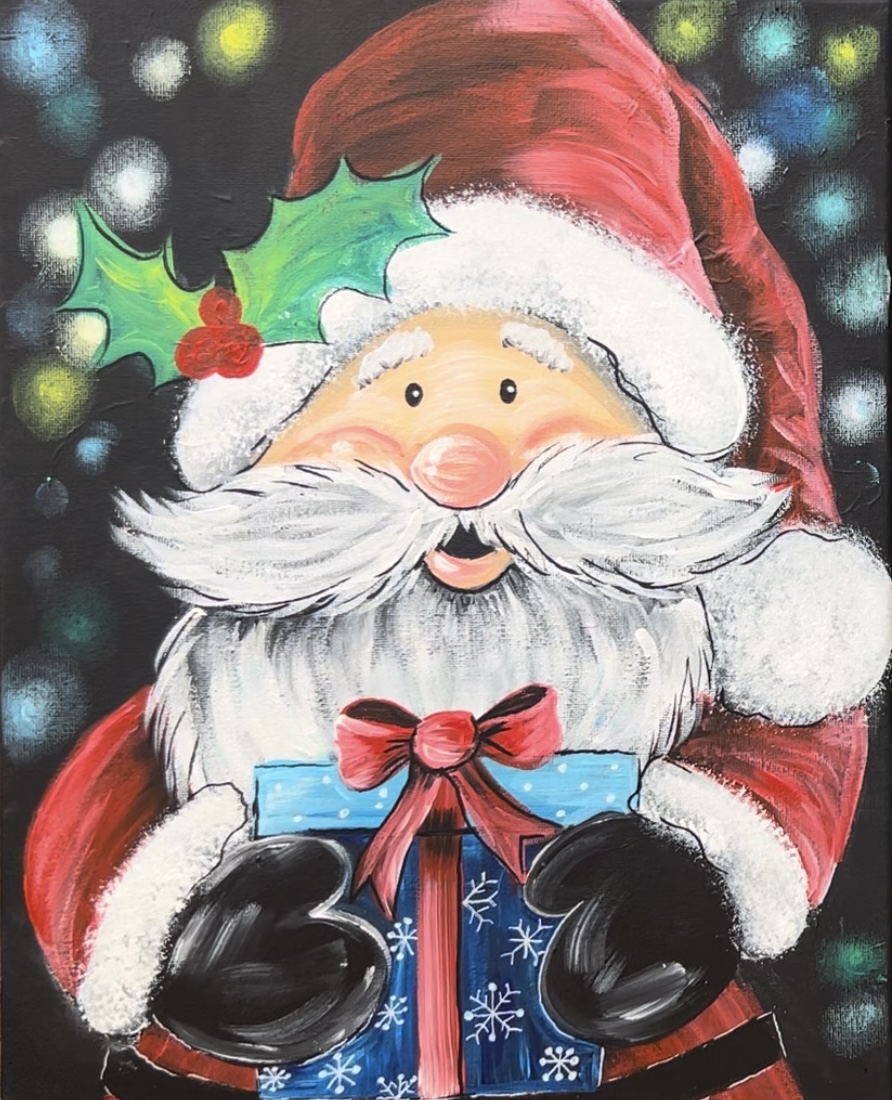
20. Highlight Holly
Use titanium white and the round brush to highlight the red berries on the holly.
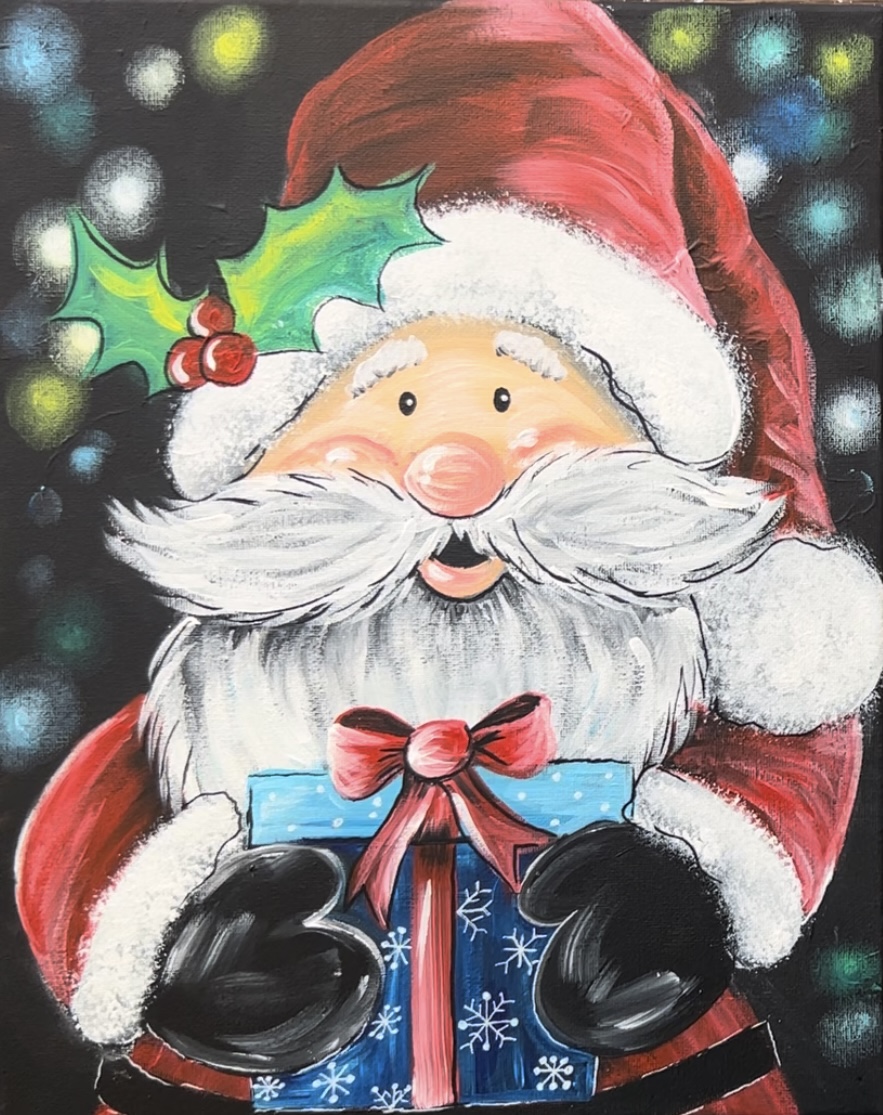
21. Splatter white specks
As a final touch for this painting, I splattered white paint specks all over with a toothbrush. You want to create a “fine mist” with this white. It will show up on dark areas and make your painting look a little “sparkly”.
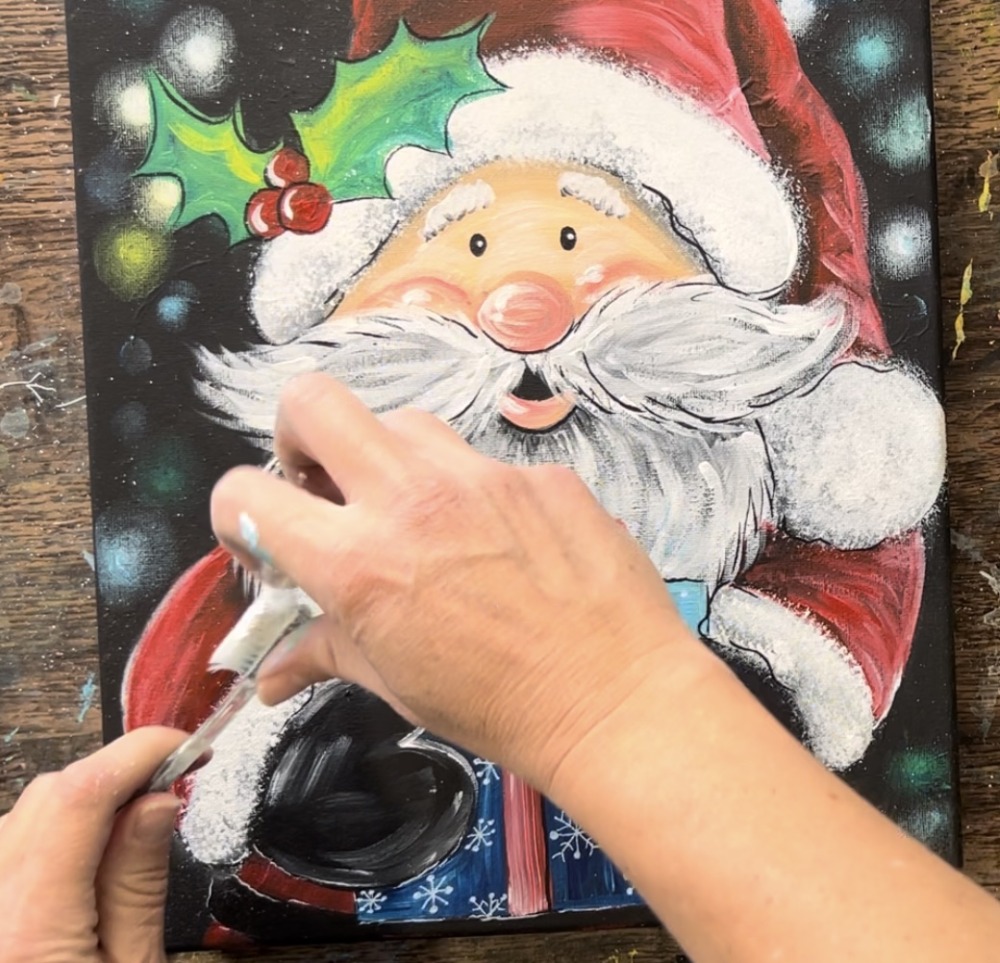
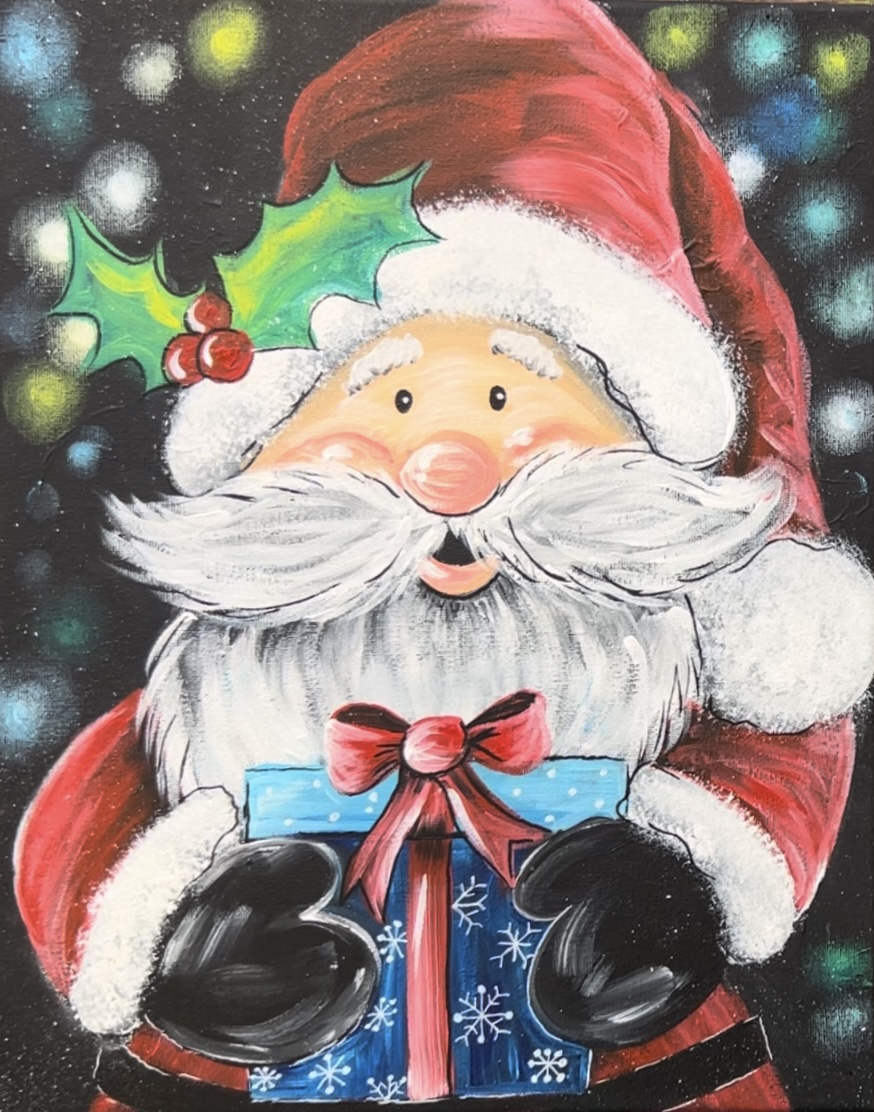
Finished!
That’s it! Sign your name and show it off!
