

Would you like to save this?
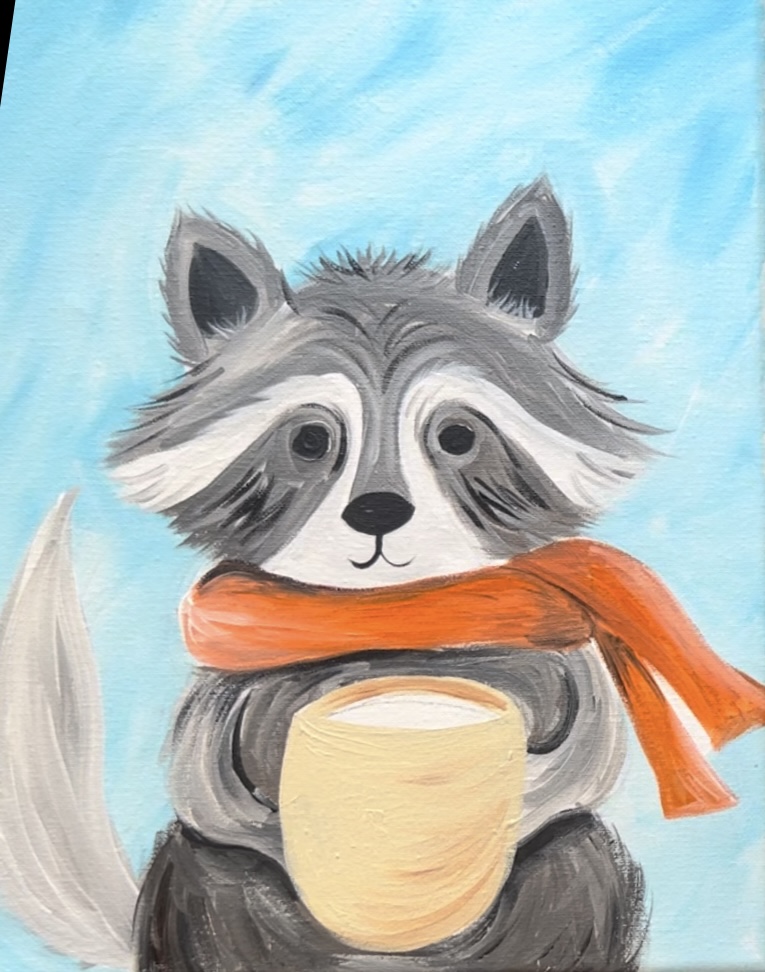
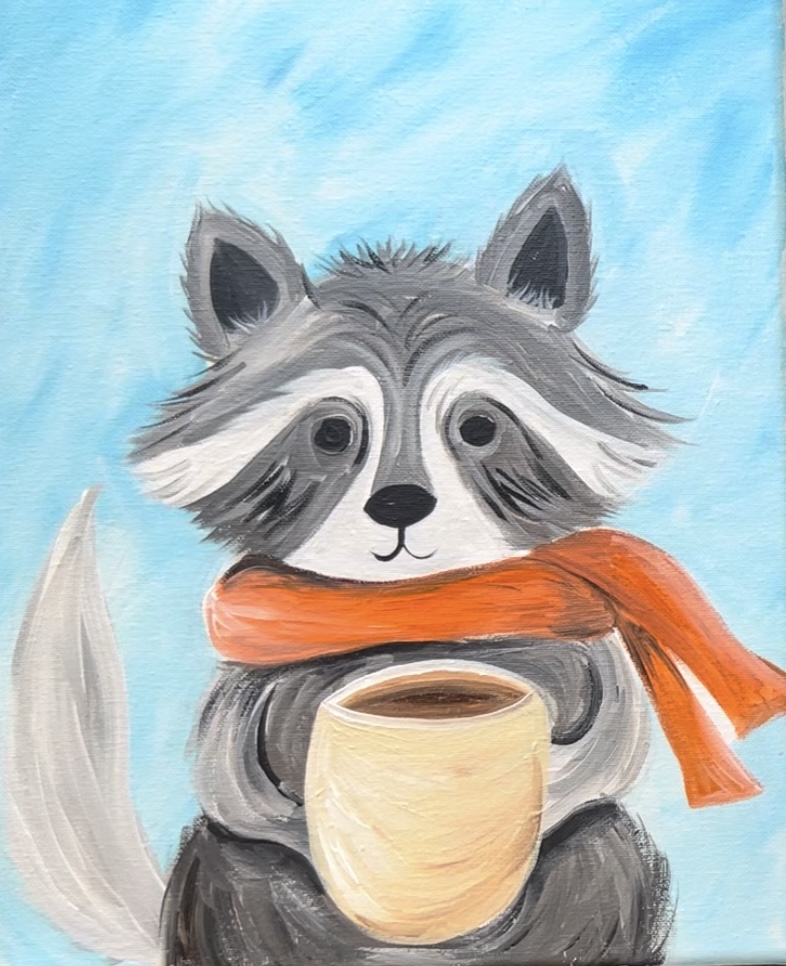
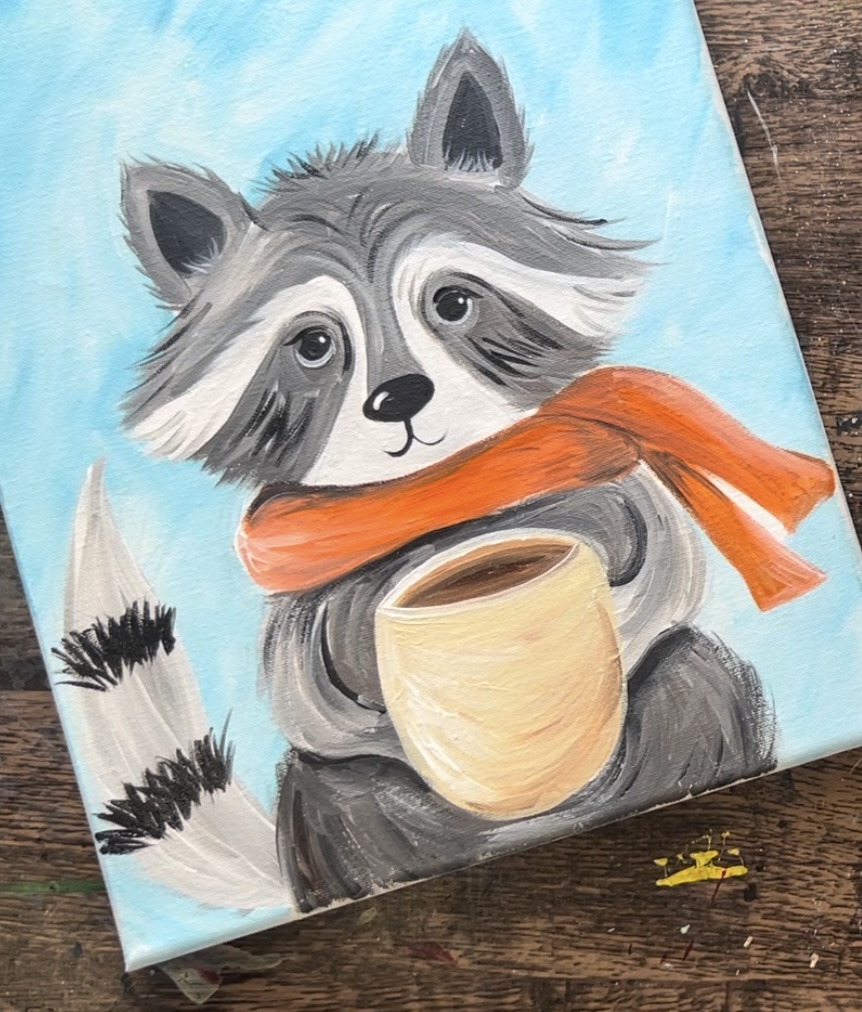
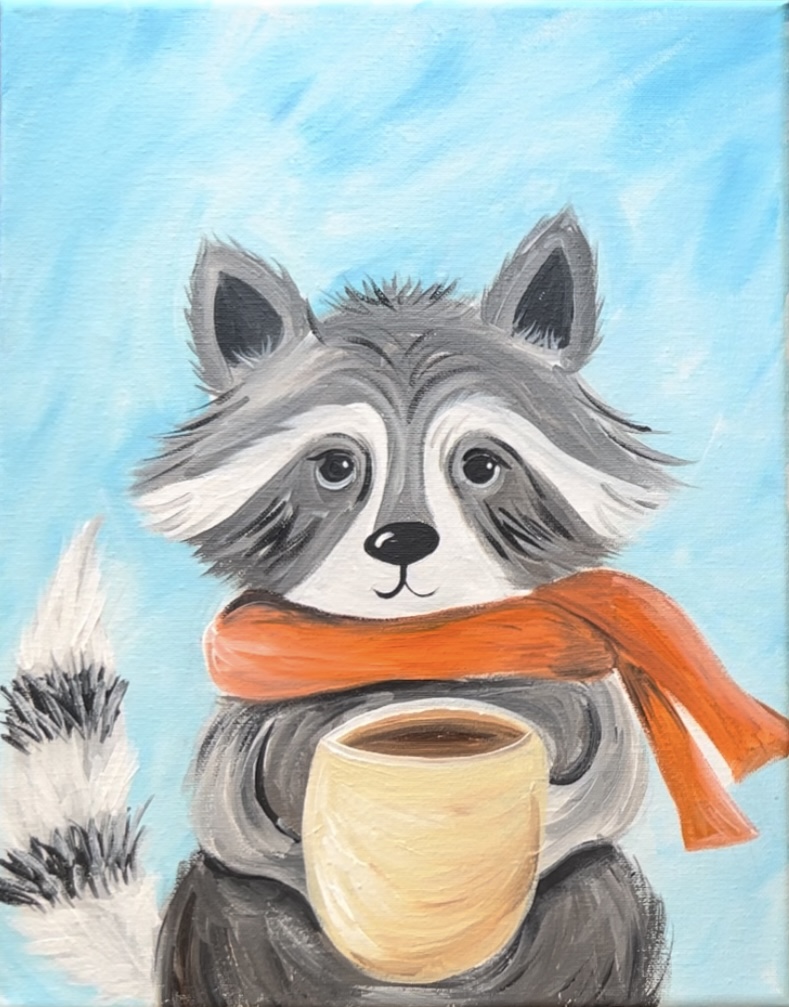
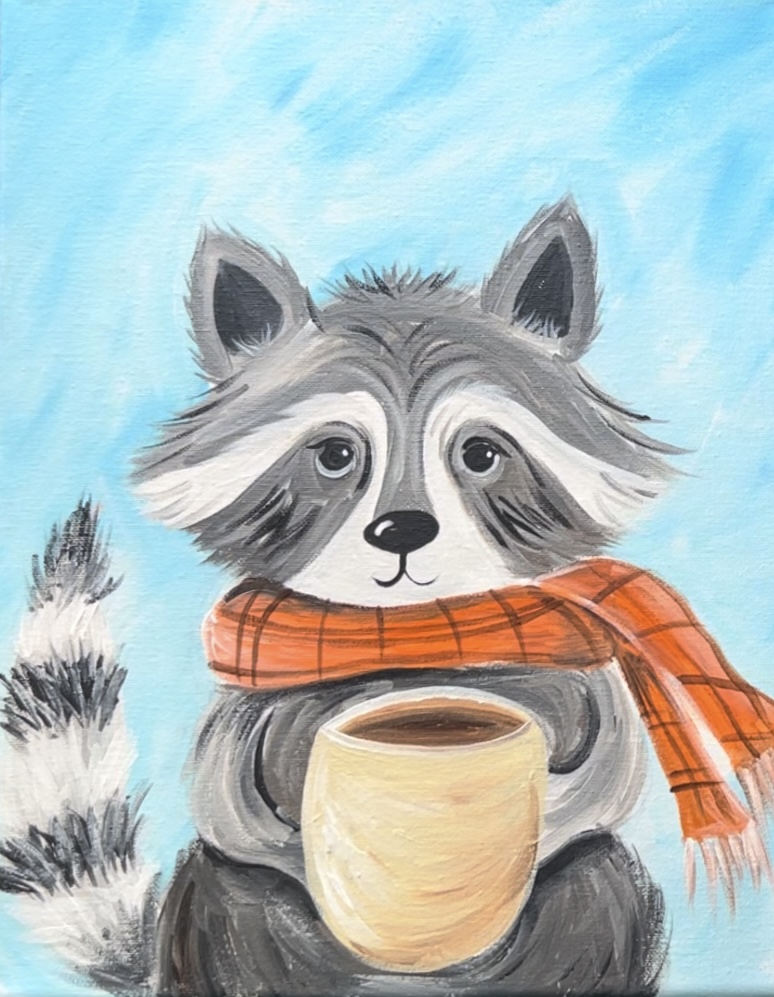
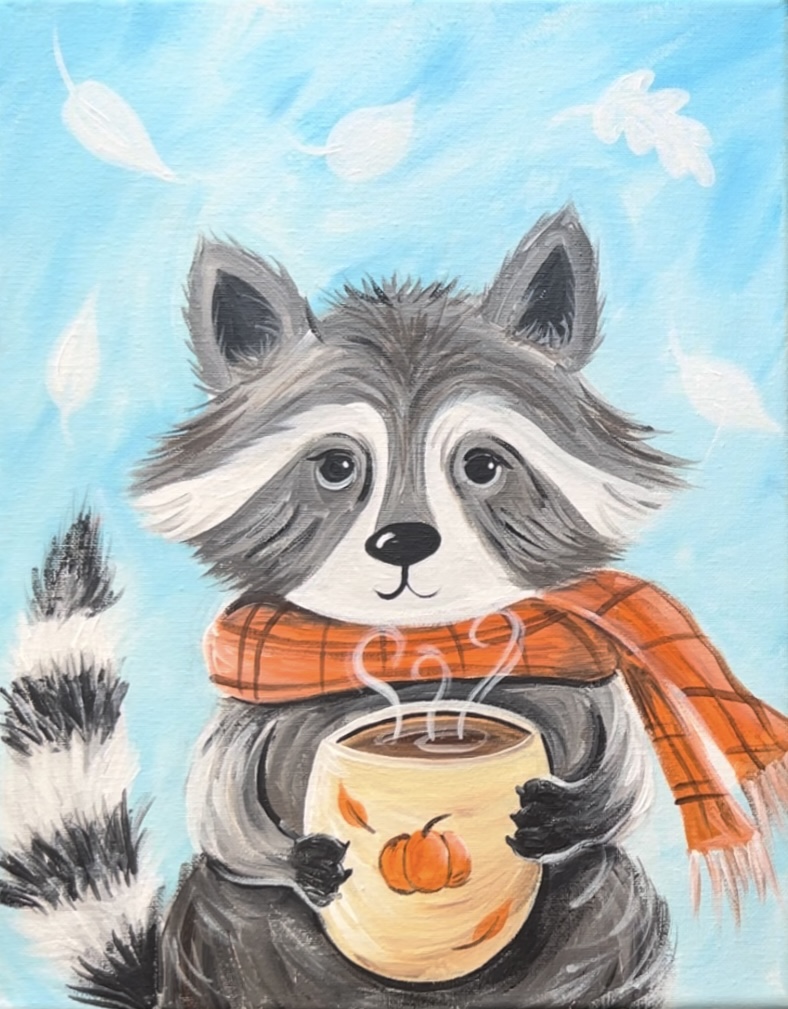
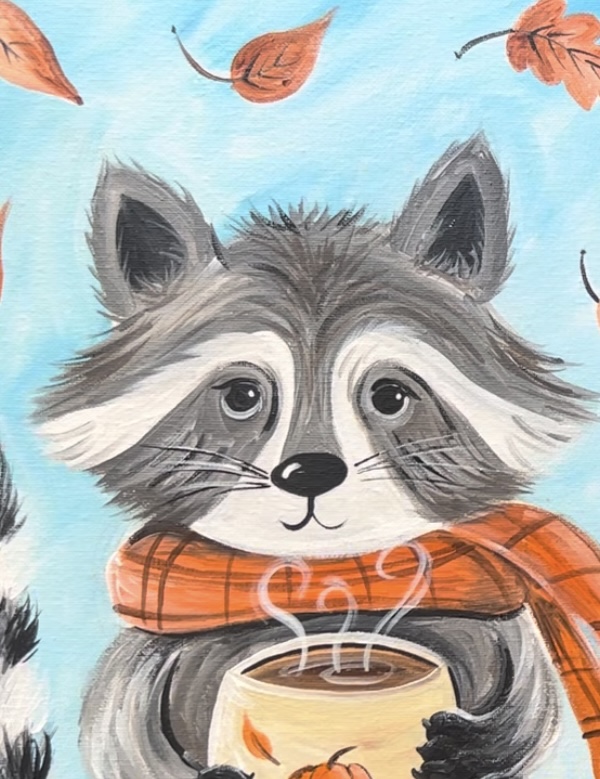
Cozy autumn vibes! This little raccoon is sipping on some warm pumpkin spice goodness.
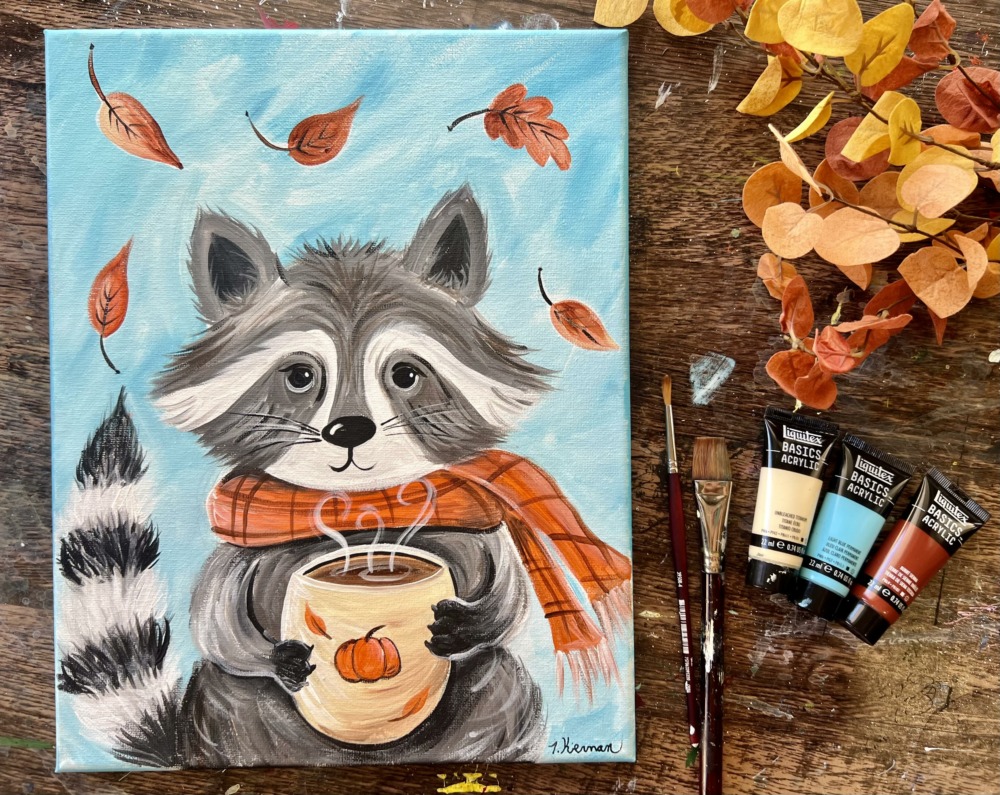
In this tutorial, we will be painting this cute raccoon! There is a drawing portion and an optional traceable template.
Enjoy and happy painting!
Materials
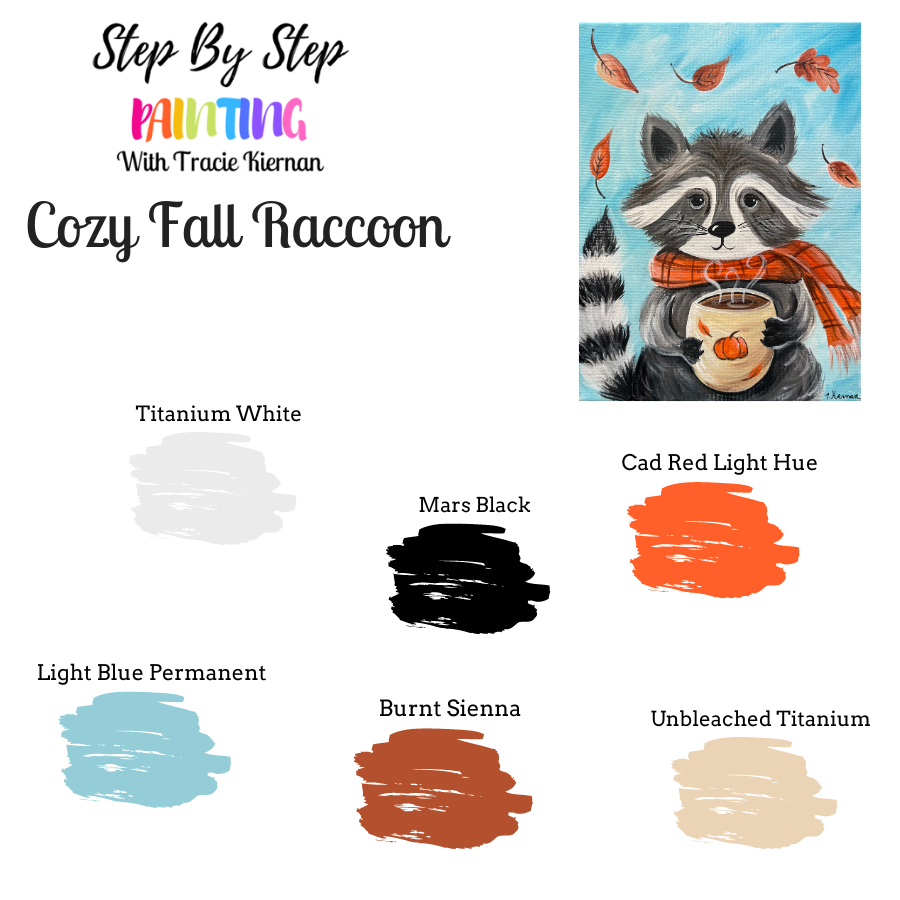
Cozy Fall Raccoon - Acrylic Painting Tutorial
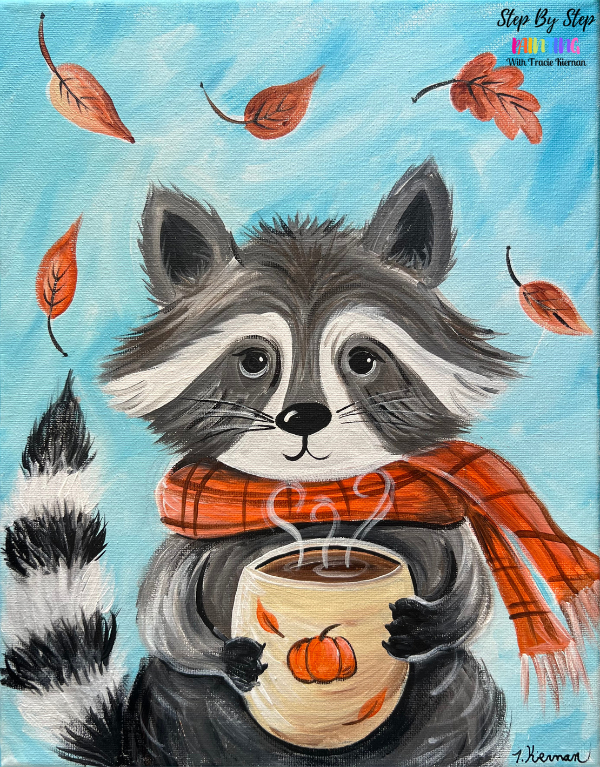
Learn how to paint this whimsical painting of a raccoon in a cozy moment, holding a cup of coffee.
Materials
- 11 x 14 Canvas
- Acrylic Paint (I use Liquitex BASICS)
- Pencil
- Brushes
Colors
- Titanium White
- Mars Black
- Unbleach Titanium
- Burnt Sienna
- Light Blue Permanent
- Cadmium Orange Hue
Brushes
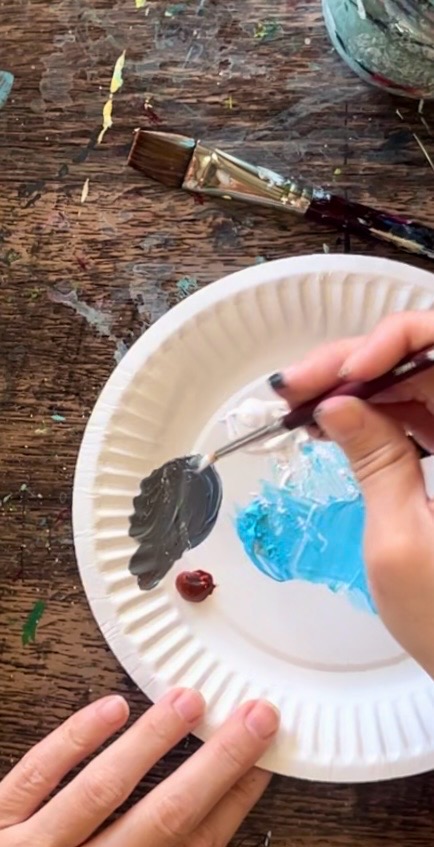
Color Palette
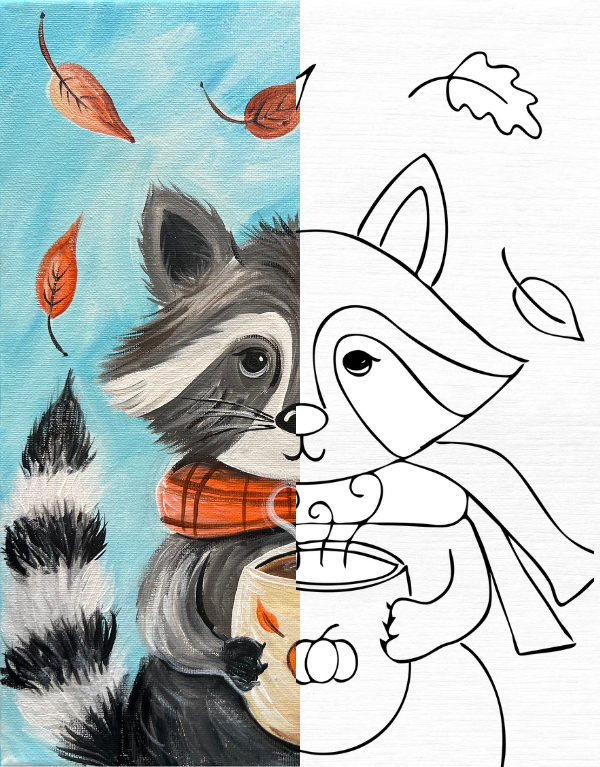
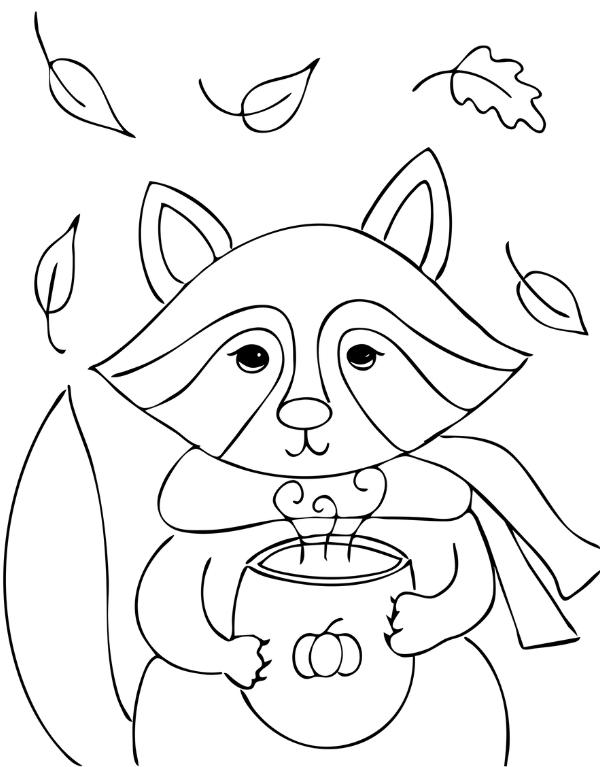
Traceable (optional)
In the video, I will be showing you how to draw the raccoon! However, if you prefer to skip the drawing part, you are welcome to use this traceable. Transfer this to your blank white canvas using graphite paper.
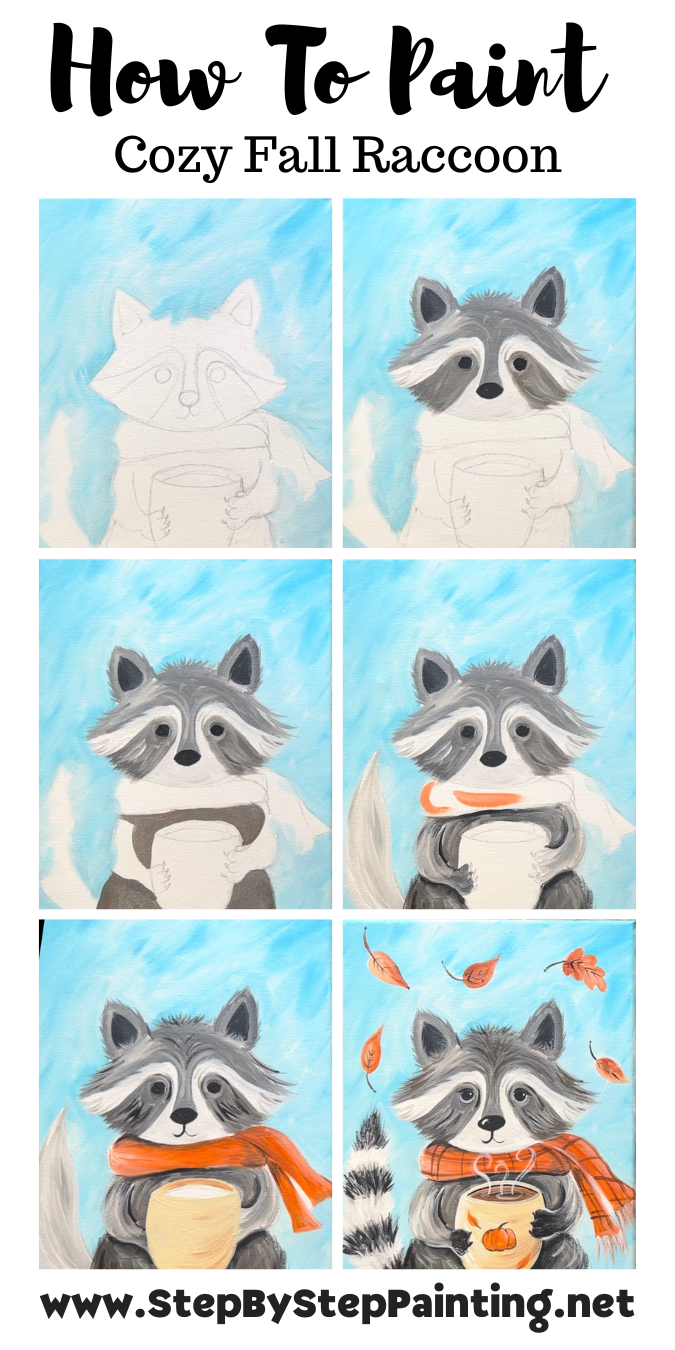
Directions At A Glance
Video
Step By Step Instructions
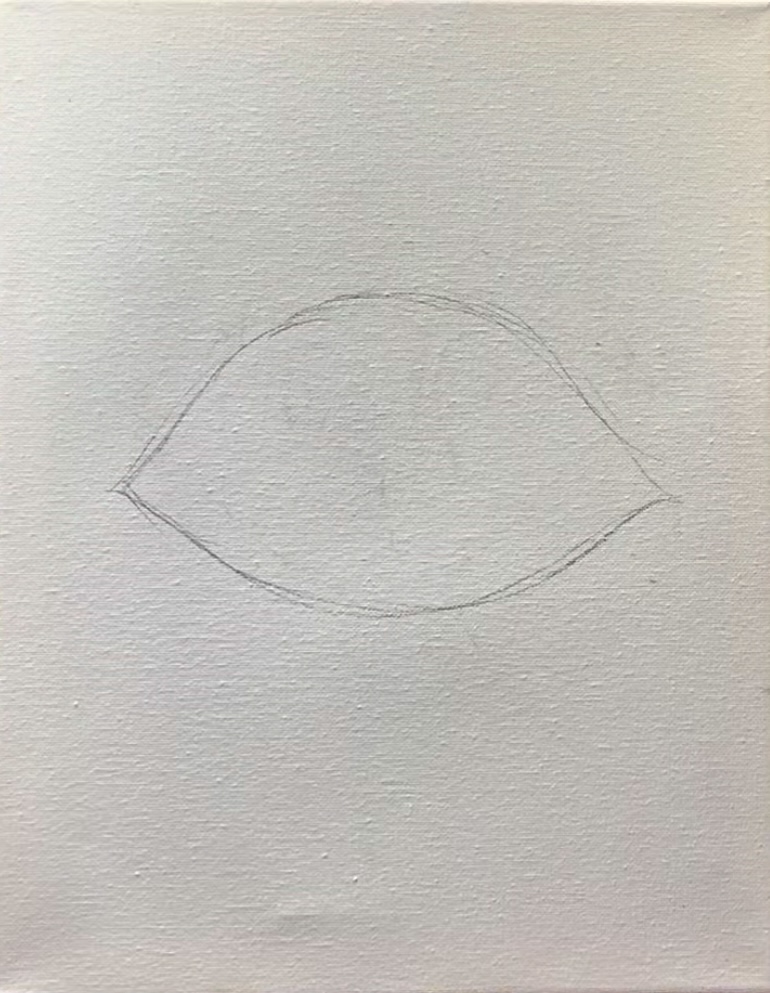
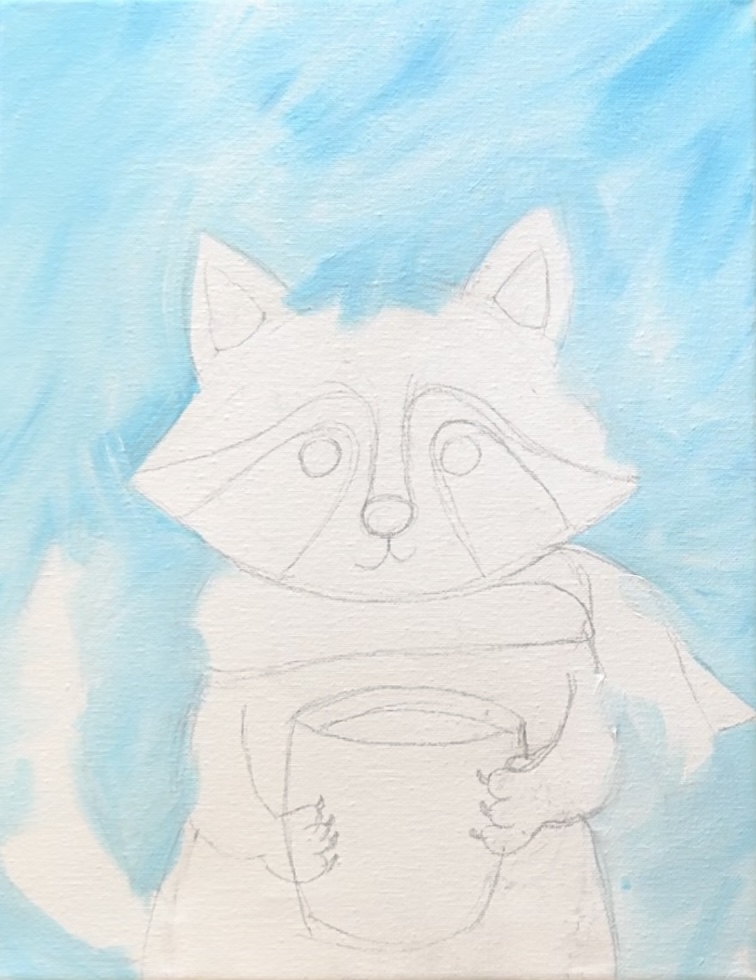
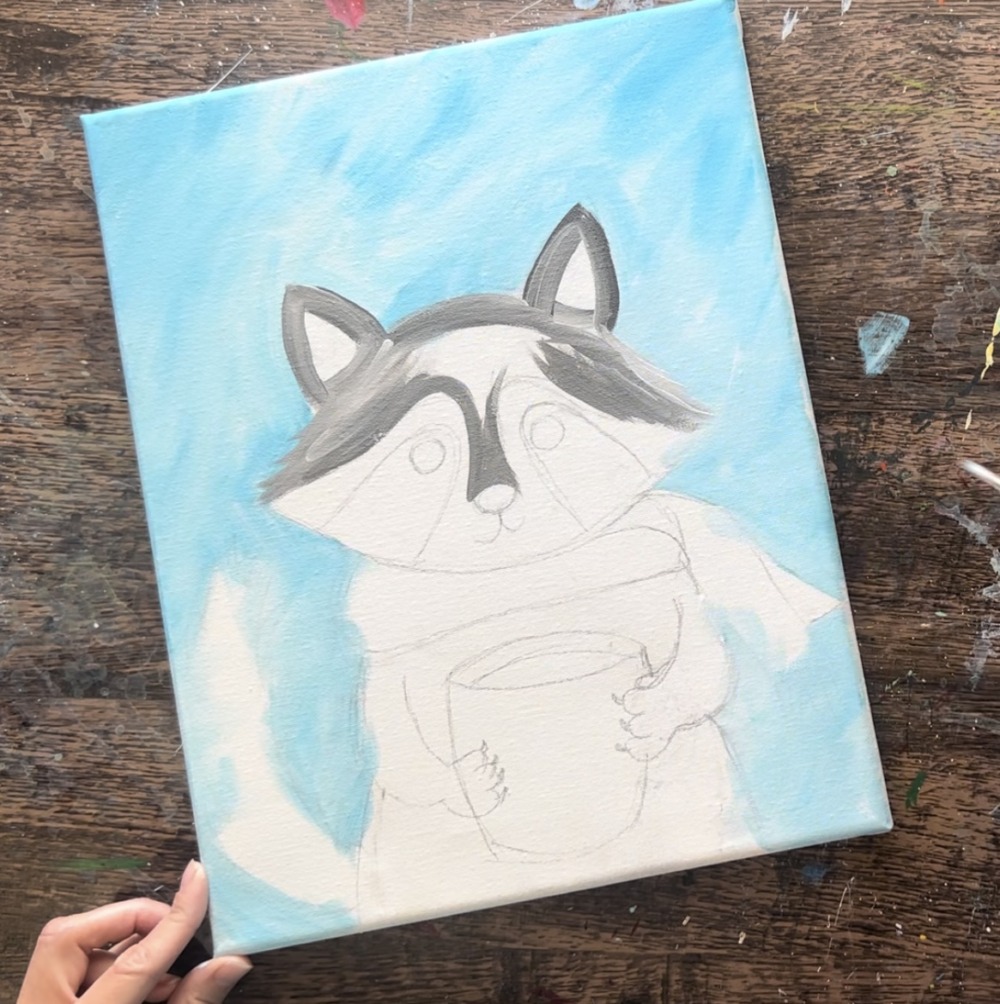
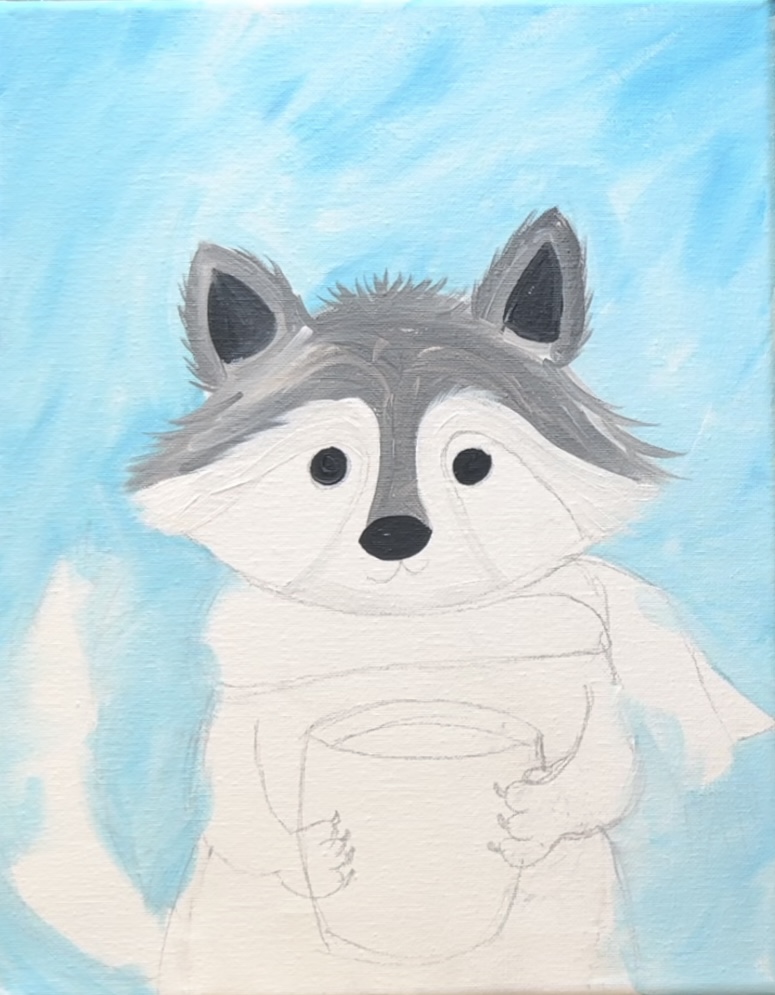
1. Draw Raccoon
If you are using the traceable template, use graphite paper to transfer the raccoon to your canvas. I sized the printout to fit on an 11 x 14 canvas! You’ll need to tape the two papers together to get it to fit.
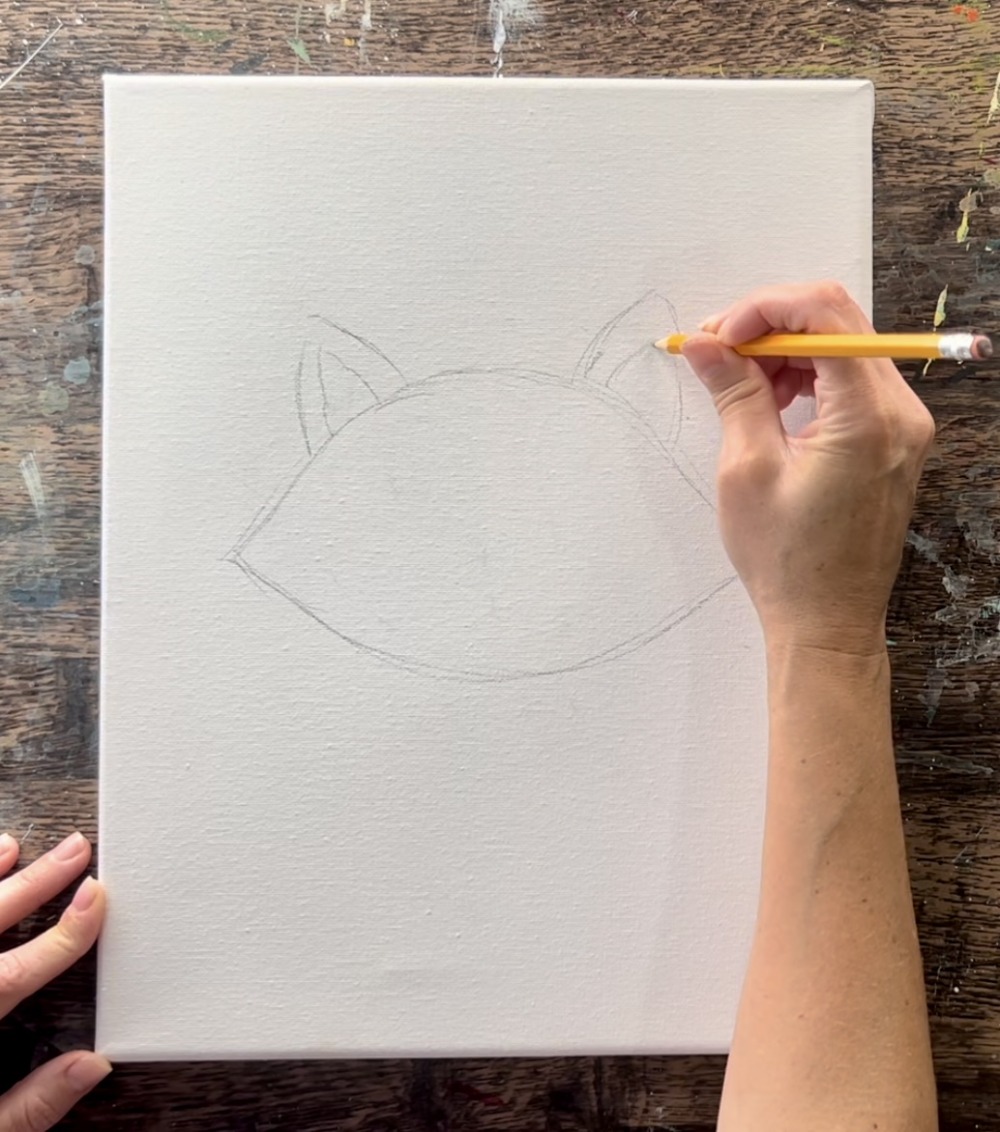
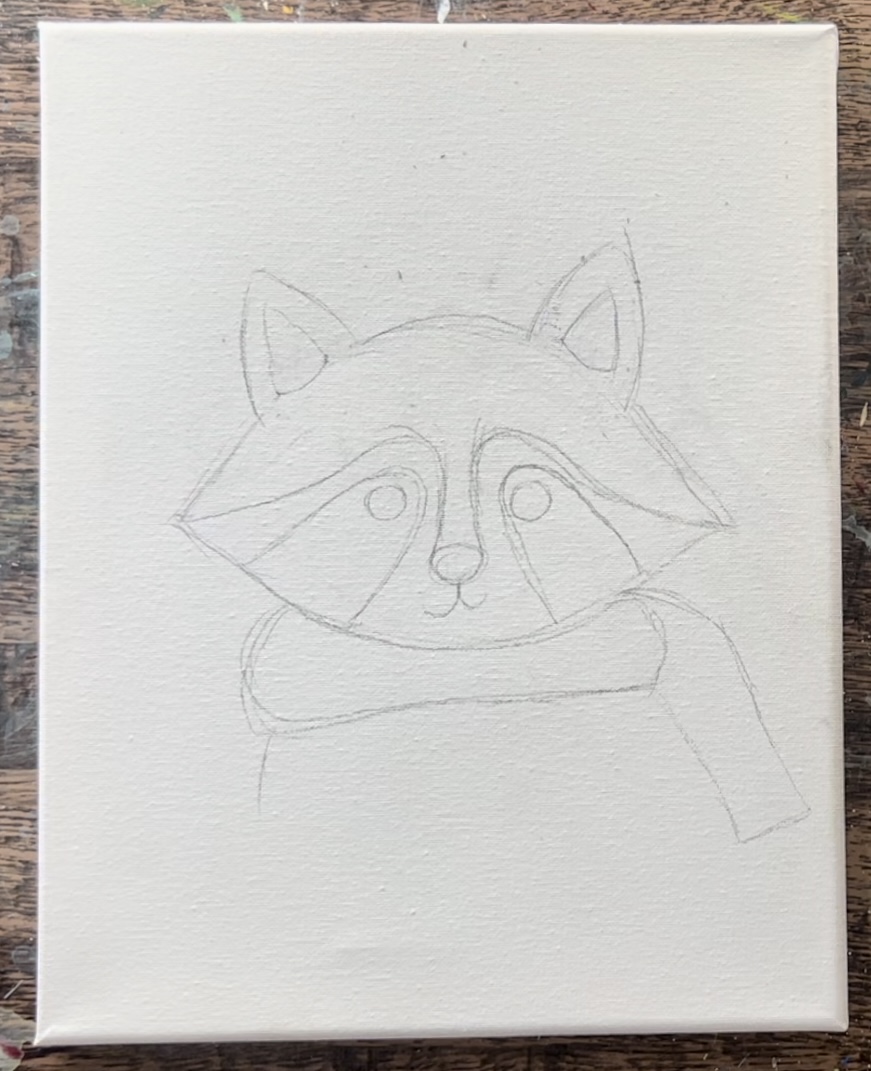
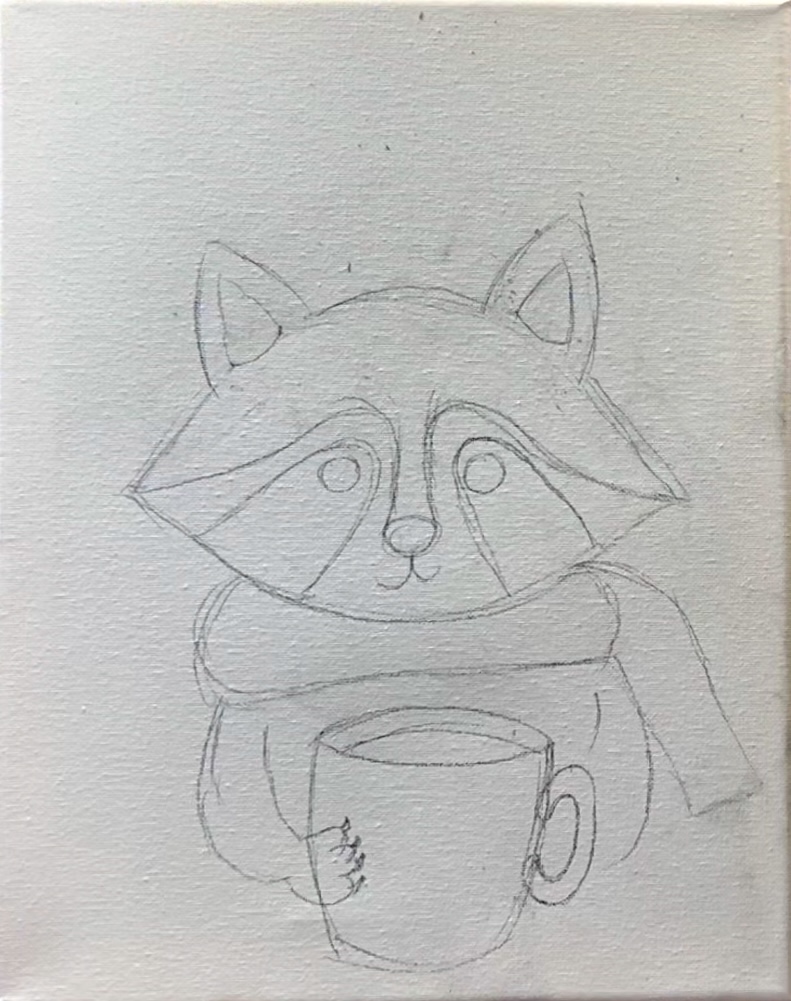
To draw this raccoon…
- Use a pencil to lightly sketch a large eye/ almond shape. This is slightly above the center of the canvas. The width of this “almond shape” is about 7.5″ wide and about 4.5″ tall from the center.
2. Draw the ears next. Our raccoon is going to look like a cartoon cat for now! Draw two triangular shapes about 2.5″ apart. Draw the inner ears as two more triangular shapes.
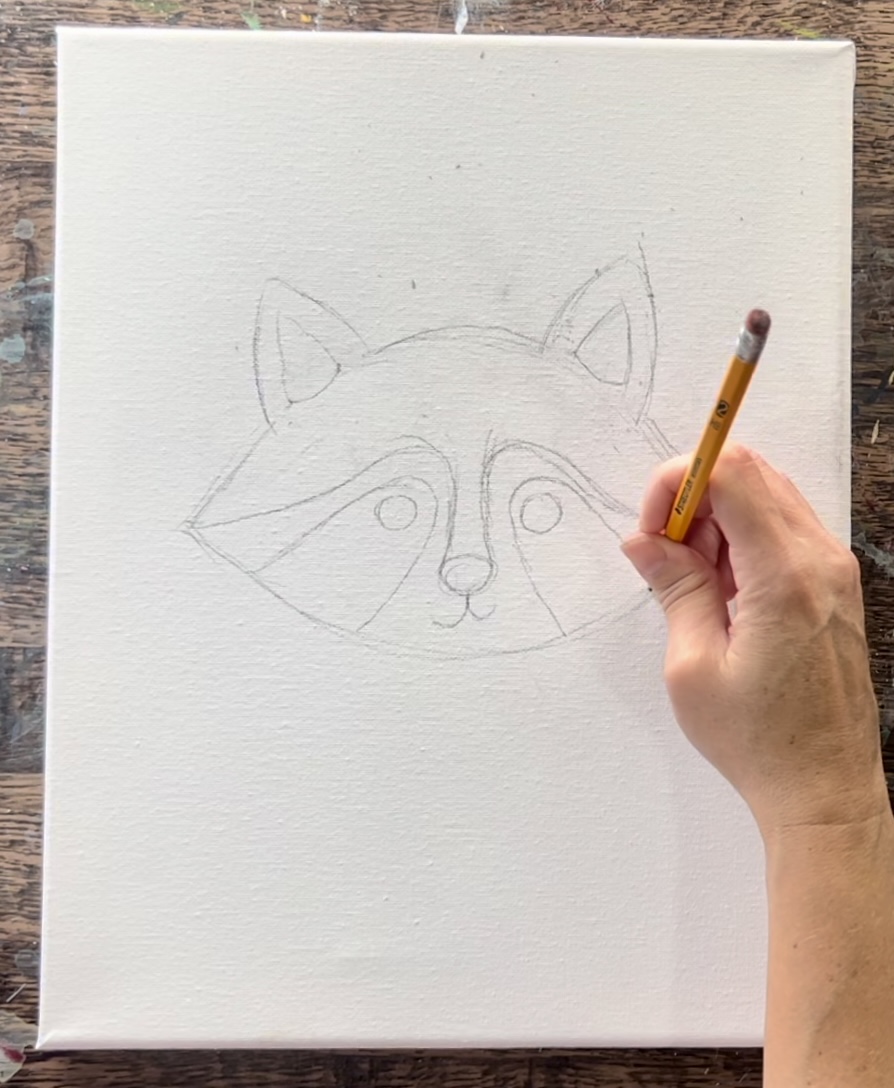
3. Draw an oval shape nose towards the bottom of the head. Then draw a mouth.

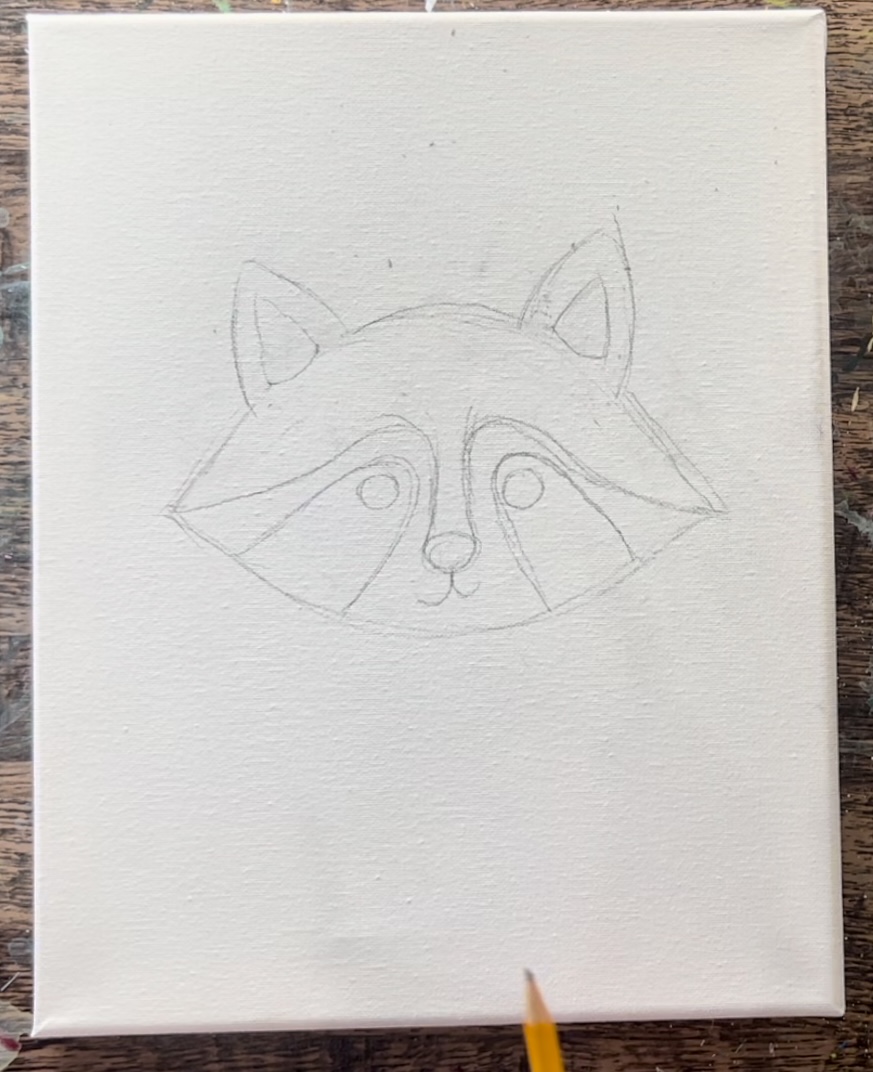
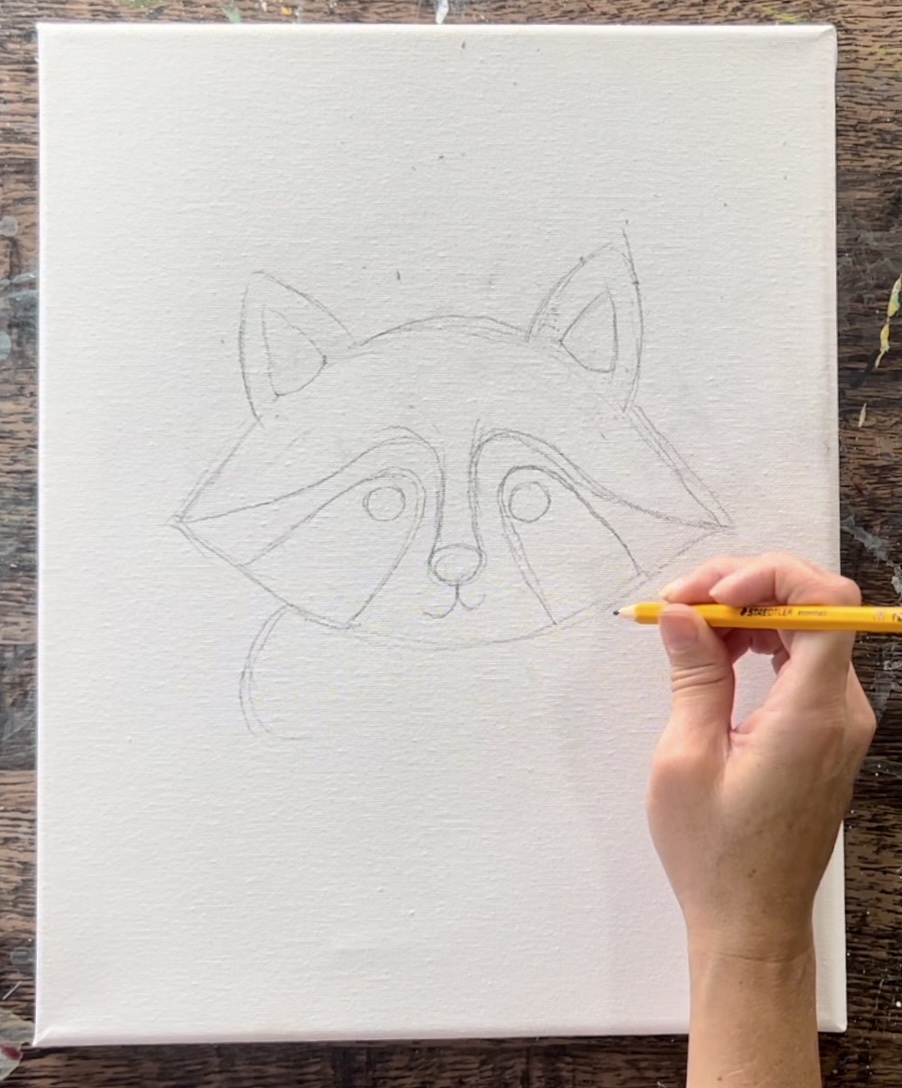
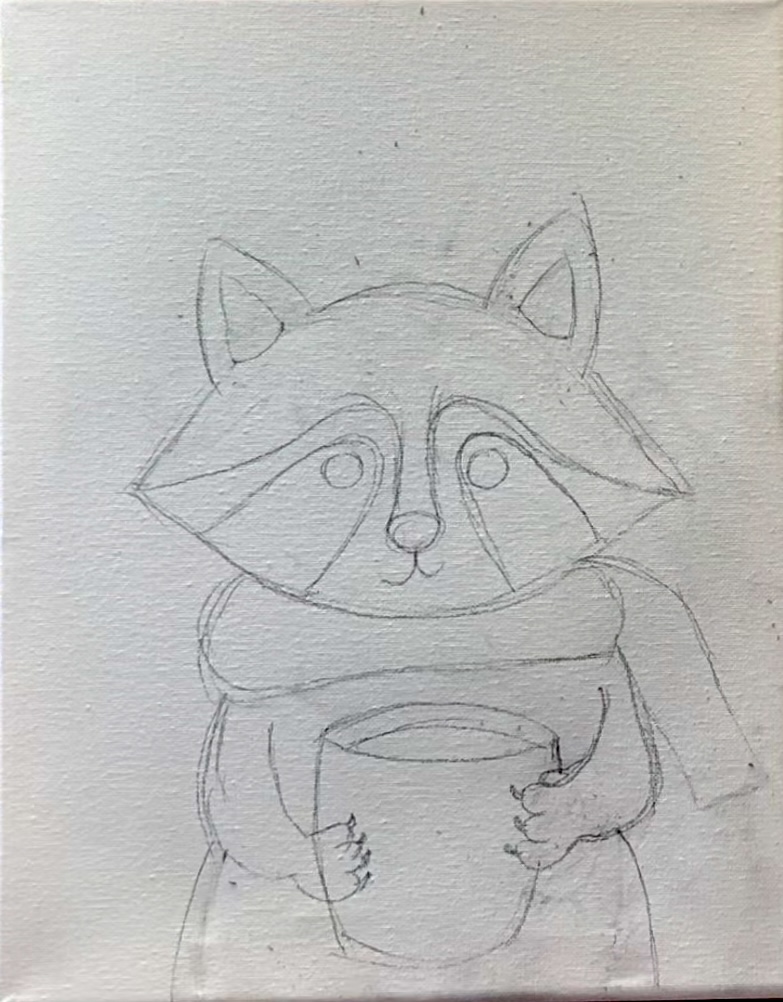
4. Next we are going to divide up the color sections of the head. Start by drawing two vertical lines up from the nose. These lines curve upwards and then to each side of the head and reach the left and right points.

5. Next, draw two curved lines that go diagonally and around the two circle shapes for the eyes.
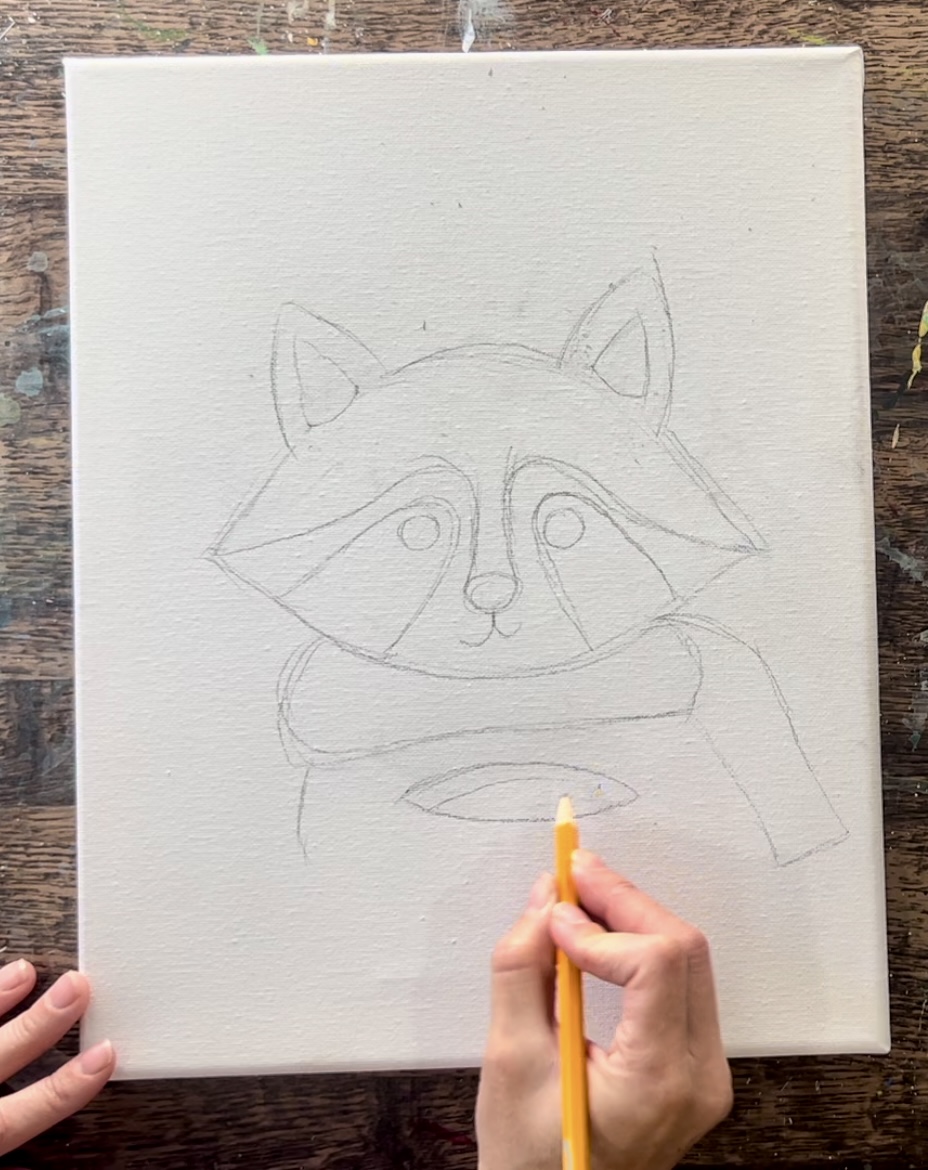
6. Draw the scarf next. Start by drawing a curved line to establish the width and height of the scarf.
It goes across and under the head of the raccoon. Then draw the “tie” pieces of the scarf so they are hanging down at an angle on the right.
7. Draw the opening for the mug next! I found drawing the mug first before drawing the arms makes it easier to figure out the placement of the arms. The mug opening is a narrow oval/ pointed shape.
Draw a curved line on the interior of the mug. Then draw two side lines for the exterior shape of the mug.
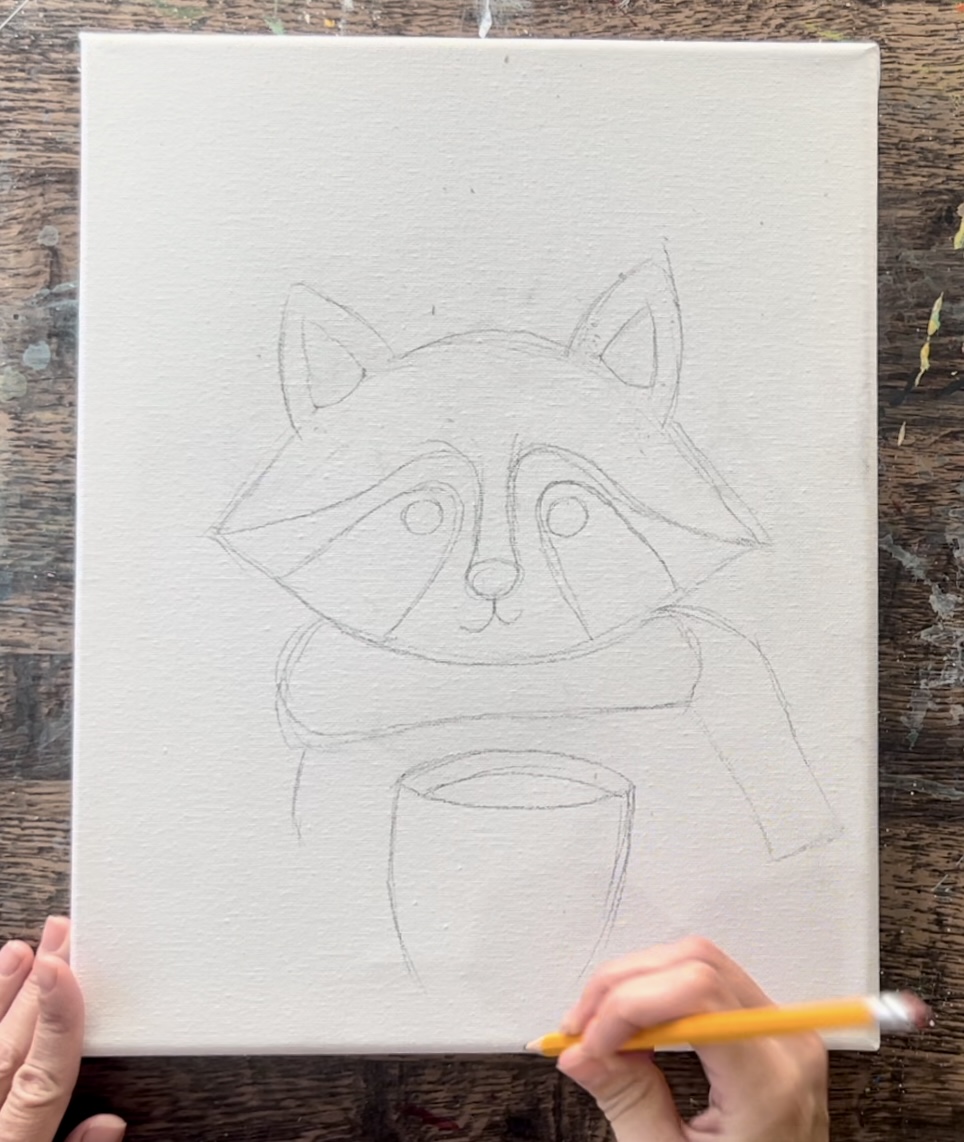
The bottom of the mug is a curved line. I drew a handle for the mug. However, I did end up erasing this later to make it easier to draw the hands of the raccoon. You can decide whether you want to draw this or not.
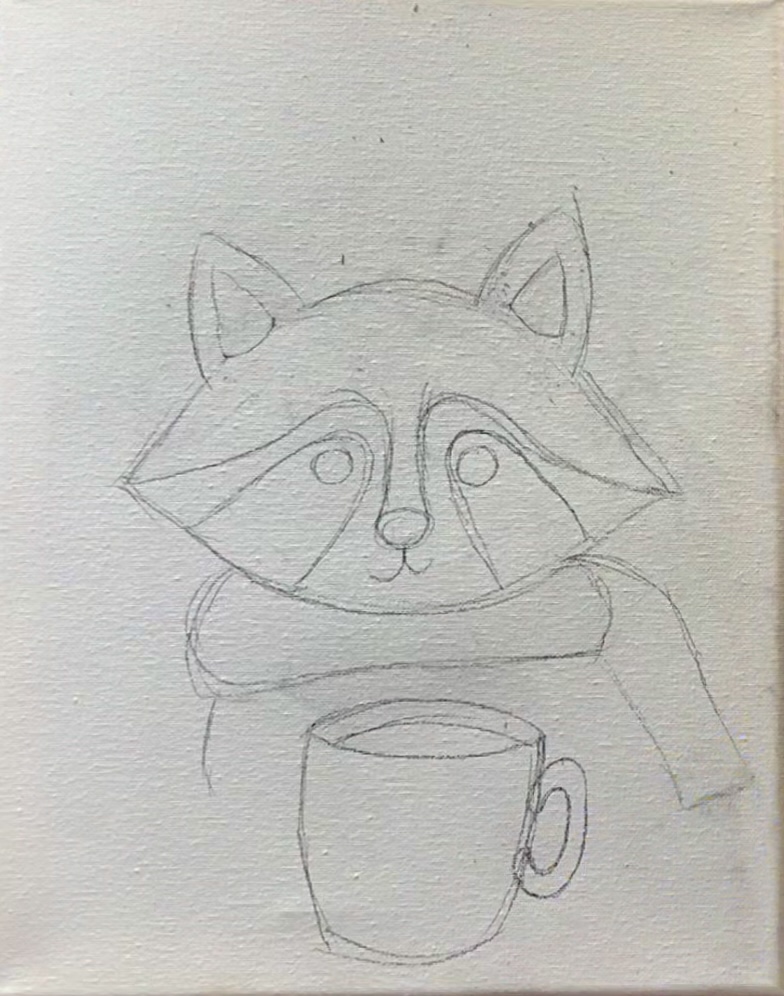
8. Draw the hands of the raccoon. You can draw these as a very basic cartoon-like hand with little triangles for the claws.
Draw another hand on the right. Note: this is when I erased the mug handle.
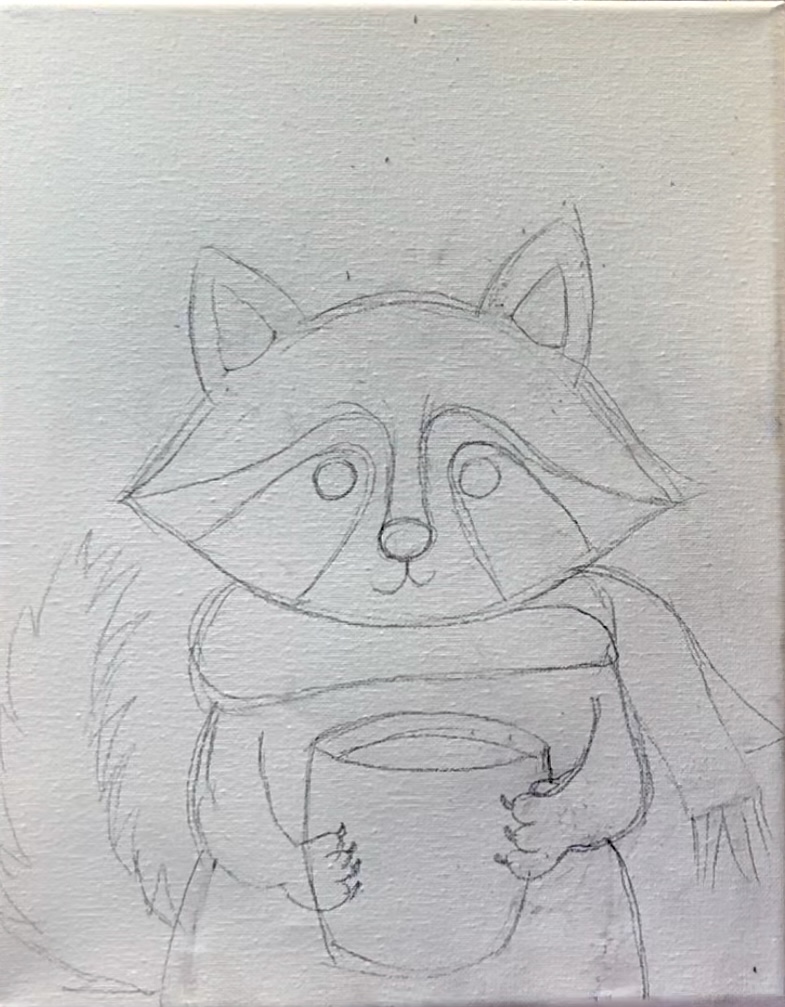
9. Then Draw the tail. You can either draw this as a simple shape with straight lines or do what I did and draw texture zig-zag lines for the edging of the tail.
2. Paint Background
Load your paint palette with “light blue permanent” and “titanium white”. Use the 3/4″ flat wash brush to paint all of the negative space around the raccoon.
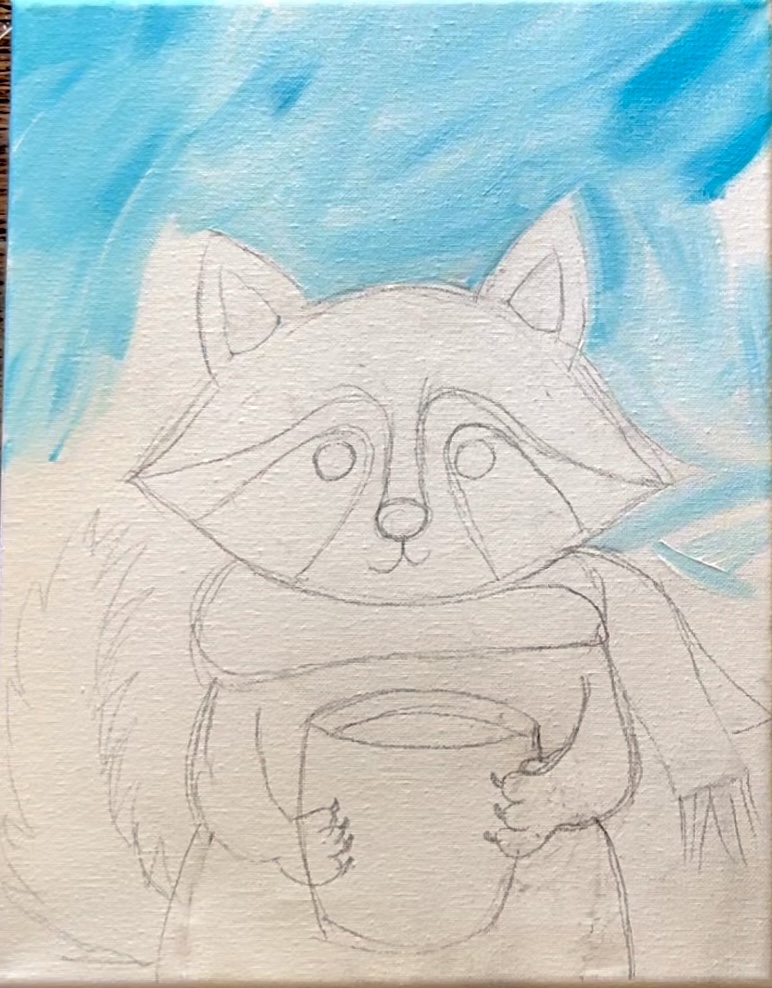
Use the end of the bristles to help you outline the edges of the raccoon. Then use the full width of the brush to fill the rest of the area in. Paint angled paint strokes that blend blue and white together to create different variations of color. It’s okay if you paint over parts of the raccoon as long as you don’t loose the overall shape/ drawing of it.
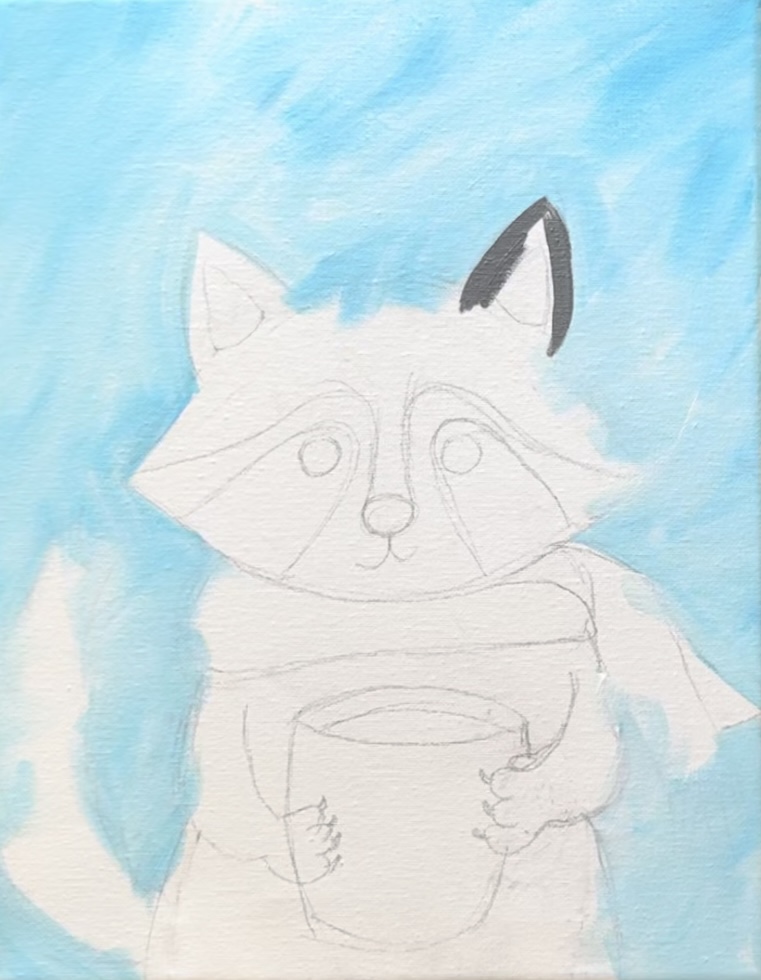
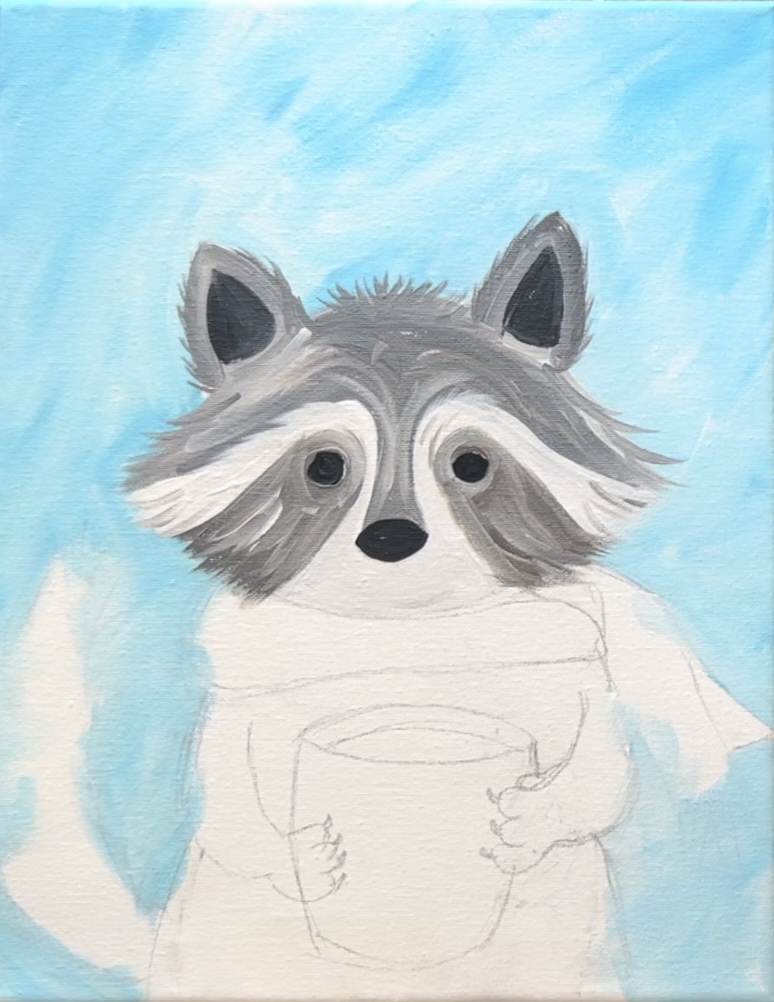
3. Paint Ears & Top Of Head
Mix a dark brown-gray color on your palette. Mix equal parts: titanium white, mars black and burnt Sienna. Use the #4 round brush.
Start by painting the ears. Paint around the inner ear shape.
Paint the top of the head and sides of the head. Add a little bit of white into the dark gray and vary the color so that it blends gently to create color variations.
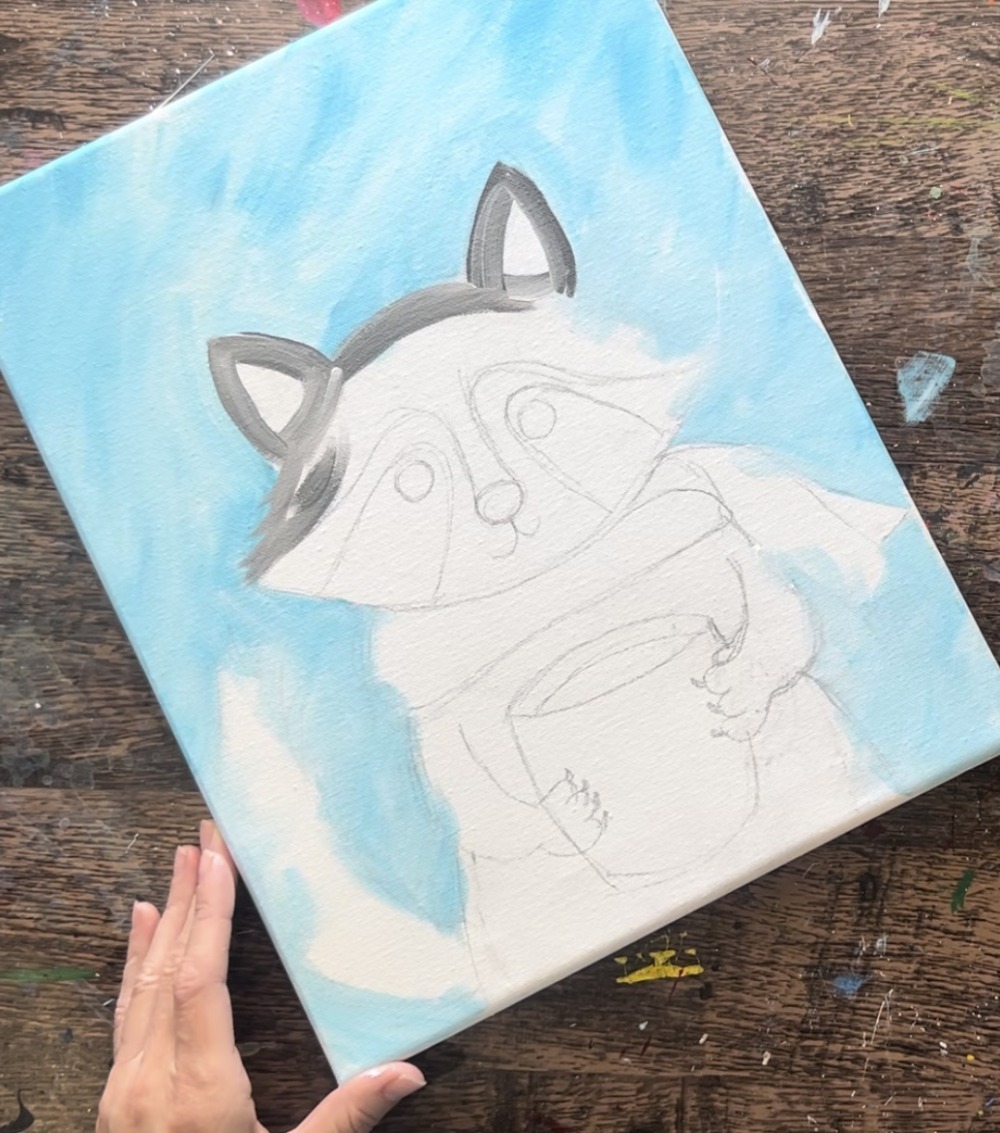
Paint the area above the nose.
To do some of the edging of the fur, drag some of the paint strokes outwards to overlap some of the sky. This creates fur texture on the edges.
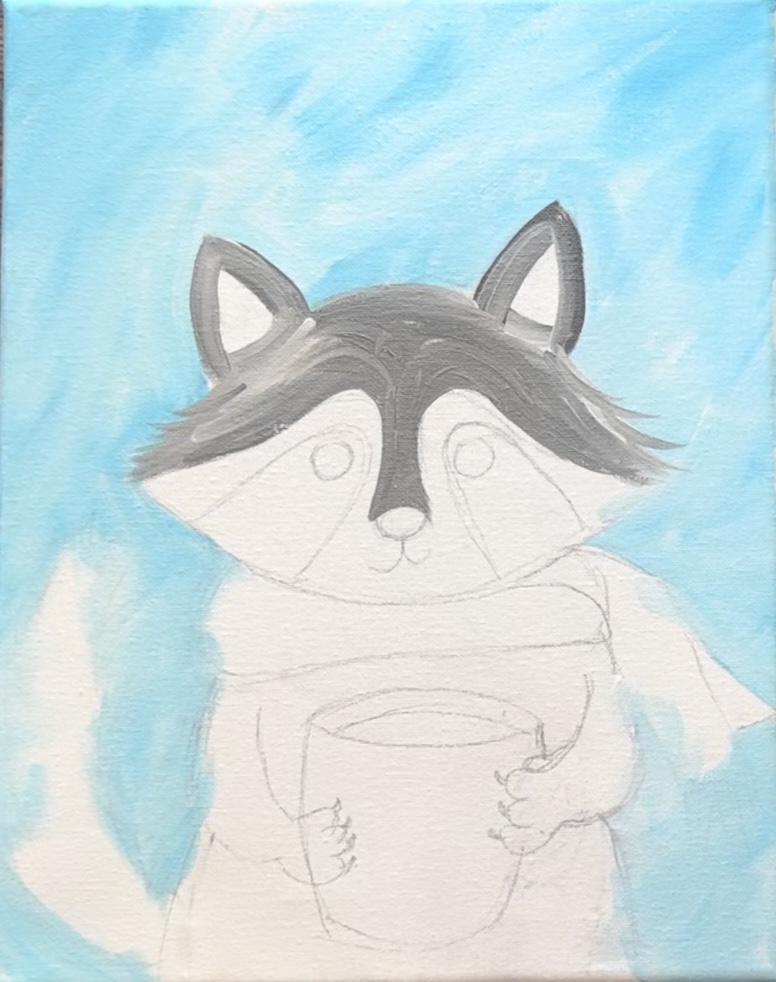
Add texture pieces on the top of the head and on the edges of the ears.
Paint the interior of the ears. Without rinsing the brush, add black onto your brush. Then paint the inner ear shapes.
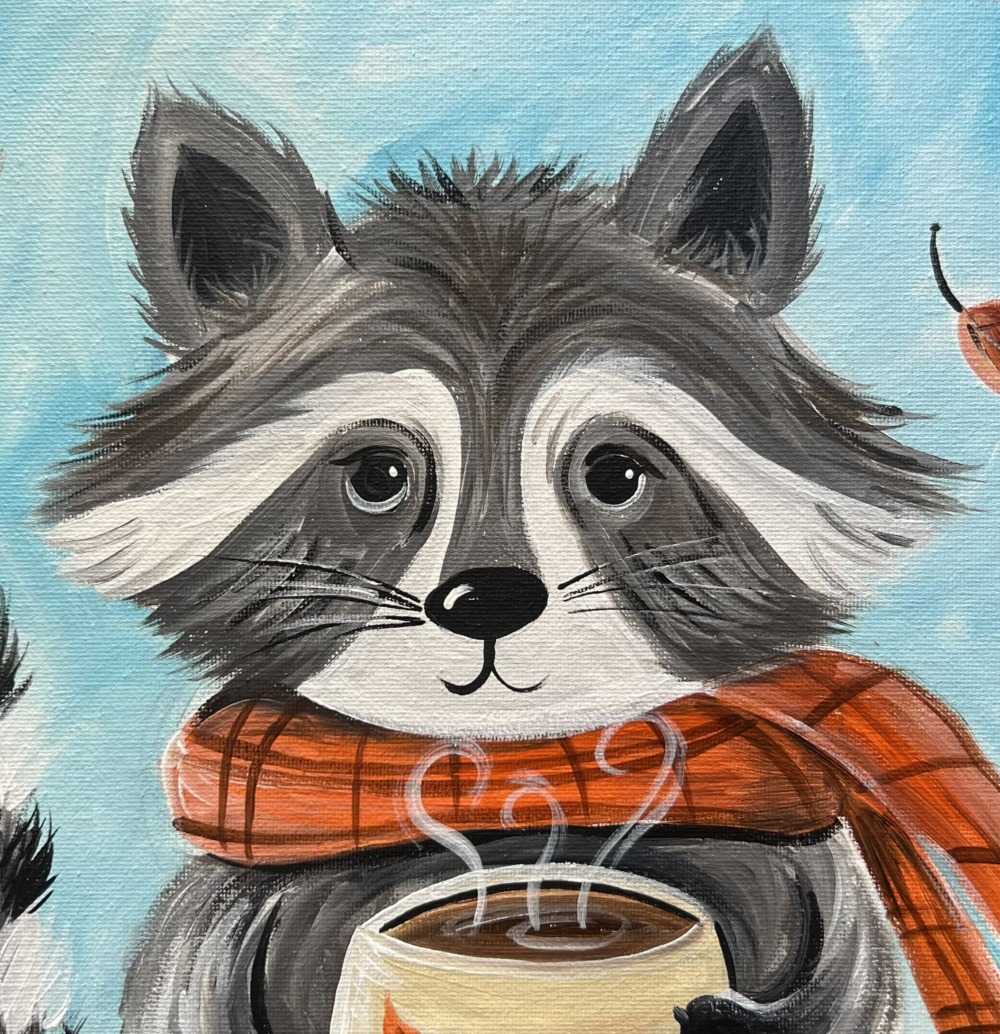
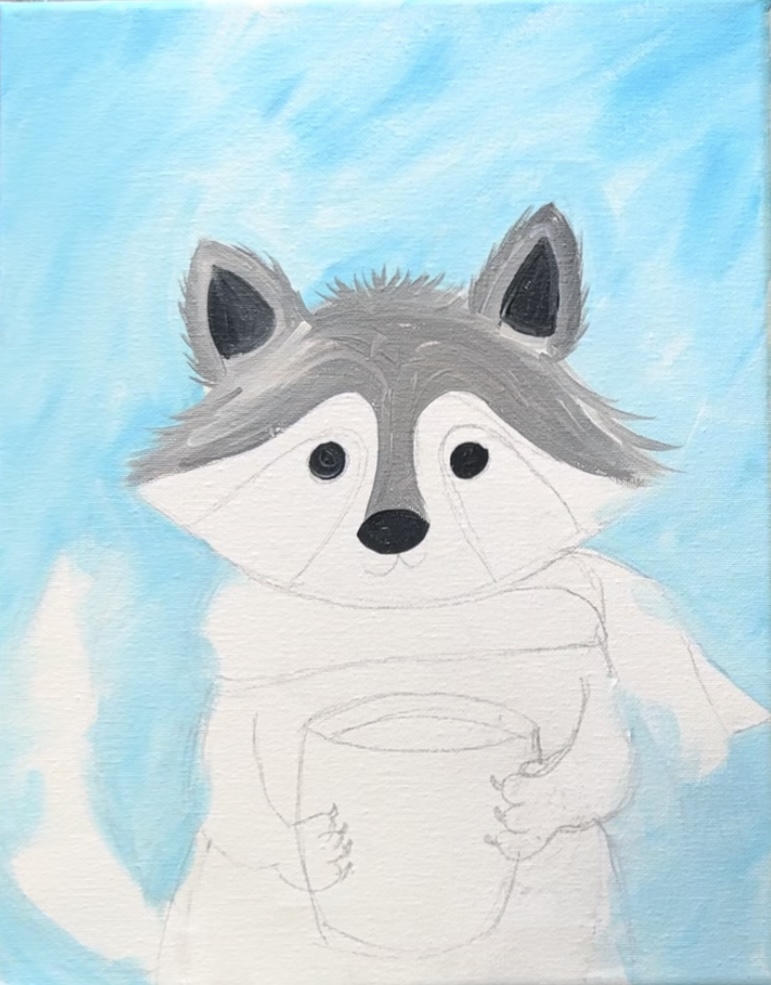
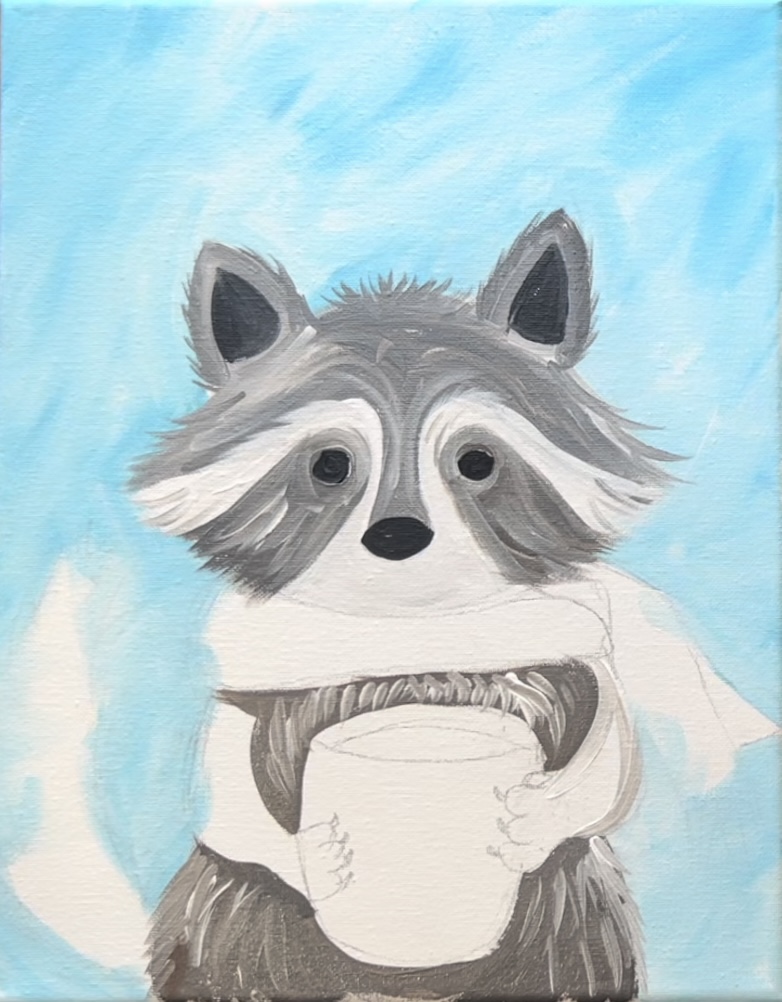
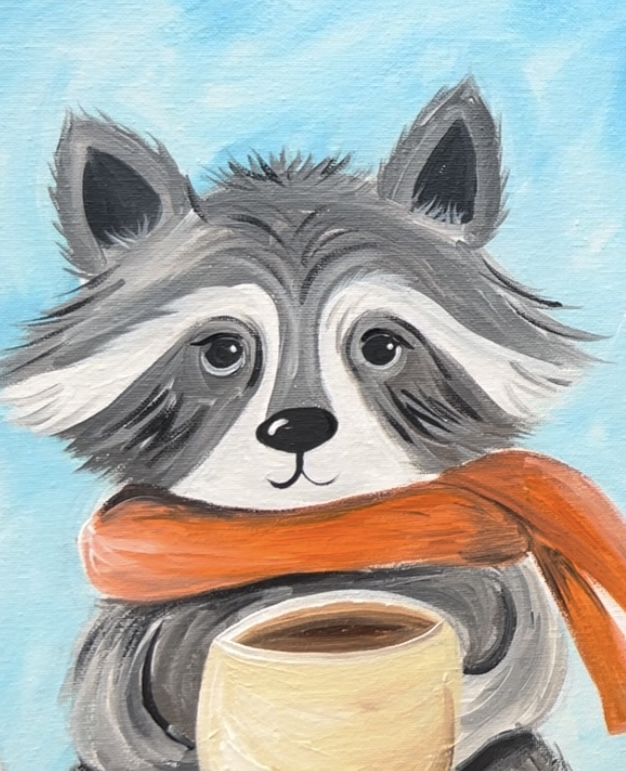
4. Paint Eyes & Nose
Paint the two eye circles black and paint an oval for the nose.
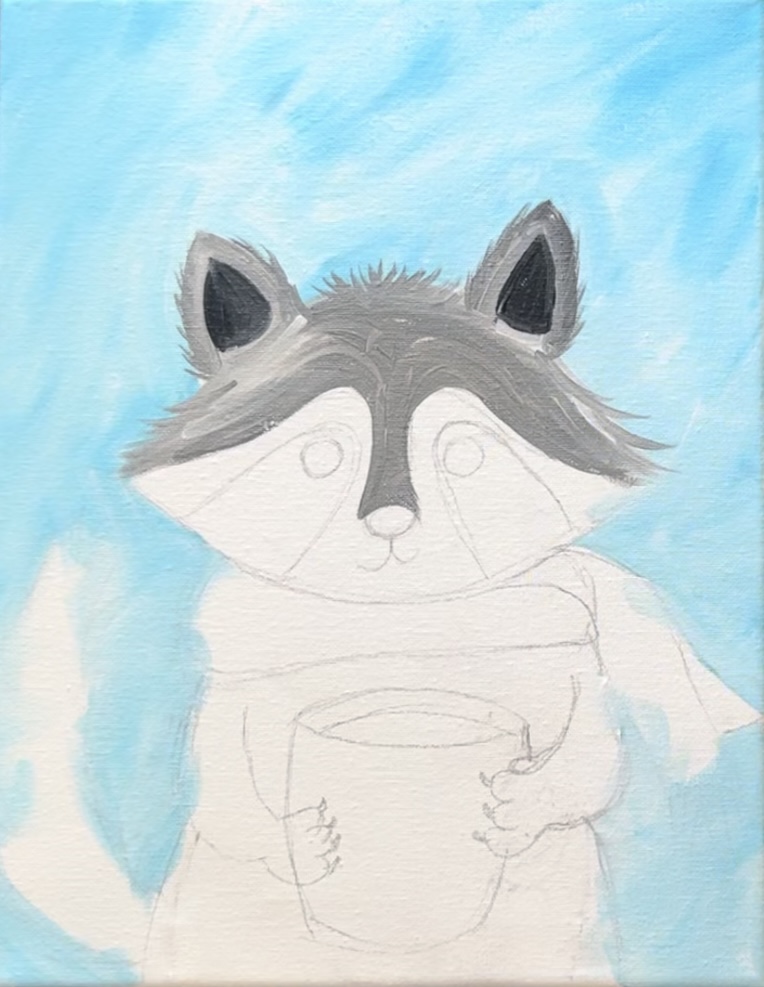
5. Paint White Area Above Eyes
Rinse the brush. Then paint the area below the dark gray area (but above the eye area) a very light gray color. To achieve this light gray color, add just a tiny bit of black into the white to make it a very light gray. You can paint over the mouth drawing as well. We can go back and redo this later.
6. Paint Dark Area Around Eyes
Use the dark color to paint the area around the eyes. To get that “fur texture” into the dark gray, us a lighter color to paint texture over the darker gray.
7. Paint Body
For the first layer of this, paint it a solid dark gray-brown color. This is the first color we used when painting the ears and top of the head (brown, black and white).
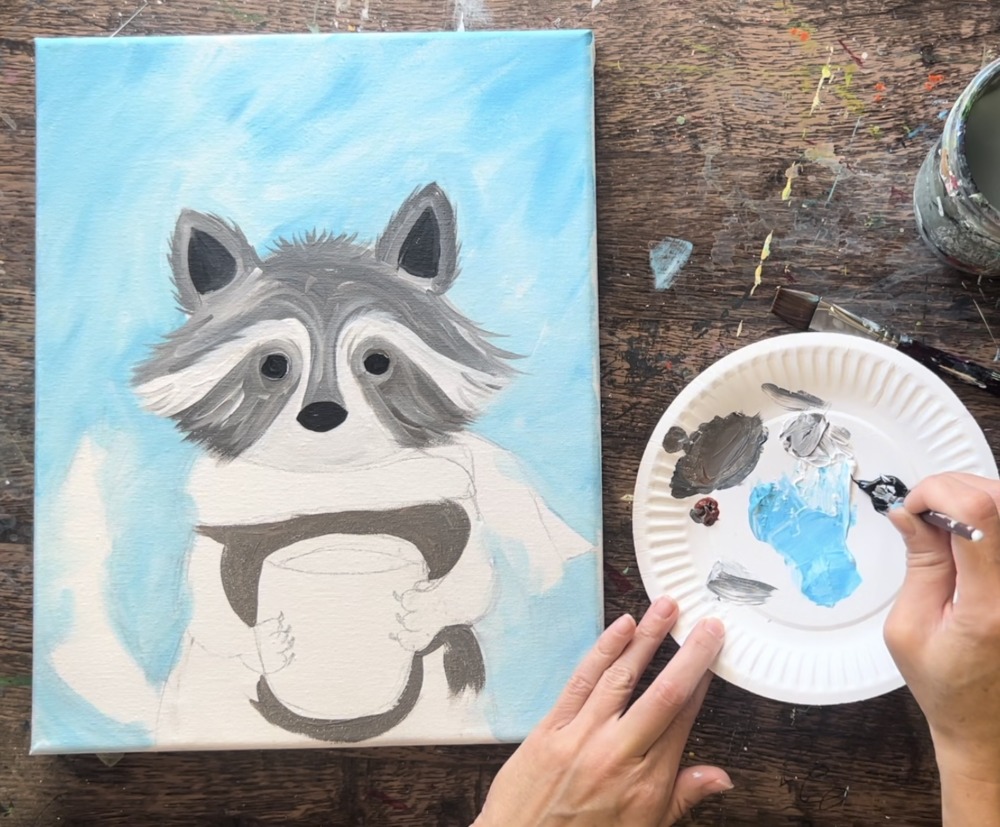
Use the round brush to paint around the mug. Paint around the arms as well.
Add a little bit of lighter gray to your bush. Then paint some texture strokes over this dark gray. This will look messy for now! You can also skip adding texture in this area and just leave it solid.
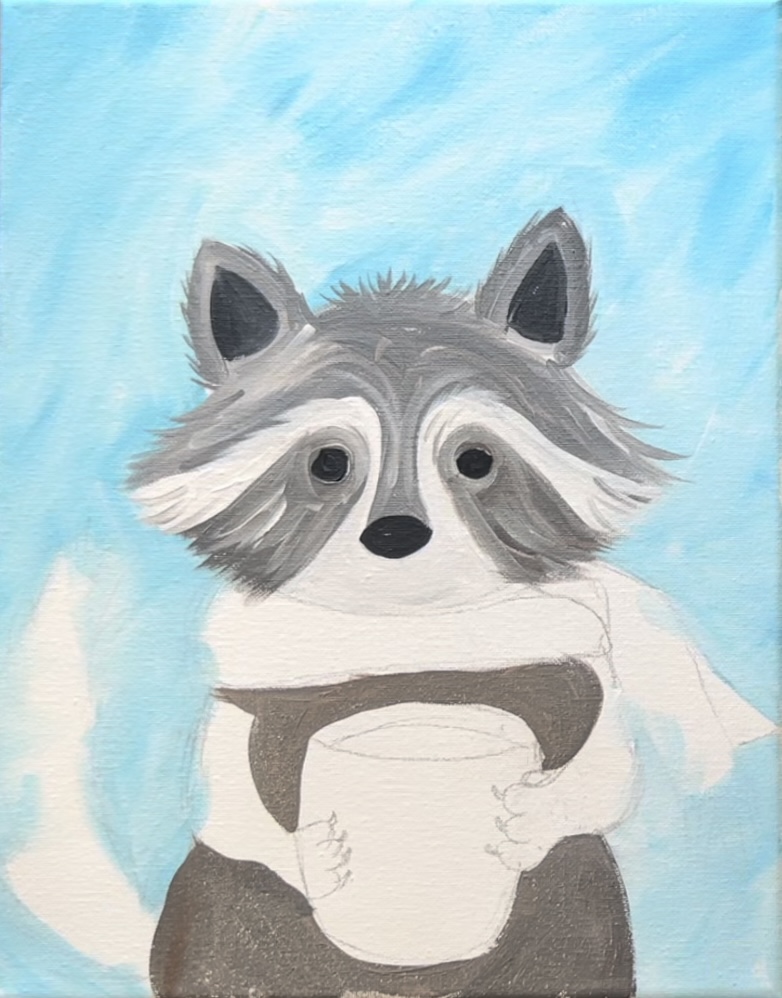
8. Paint Arms & Tail First Layer
When you paint the arms, you want a different color gray. I did the arms with a lighter gray. Paint your paint strokes to curved and go in the direction of the arms. When you curve your paint strokes, it helps the arms stand out. Paint the hands as well. However, we will be painting over the hands at a later step when we paint the mug.
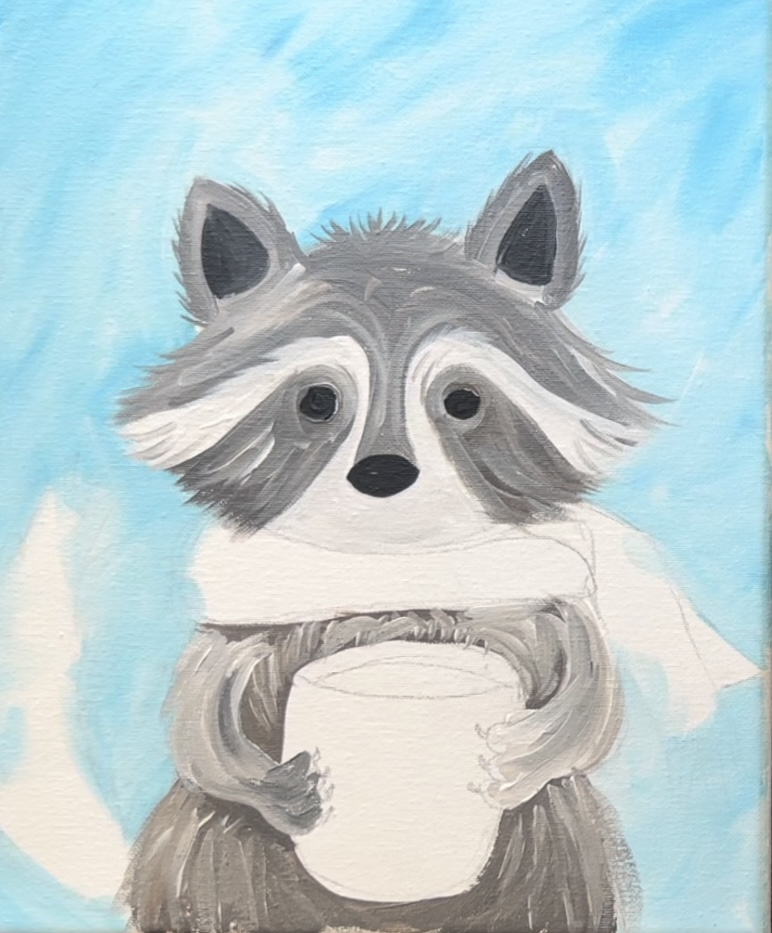
Add a little black to your brush and loosely outline the outer parts of the arm so they stand out. Add a little darker gray for shadowing under the mug, under the arms and under the scarf.
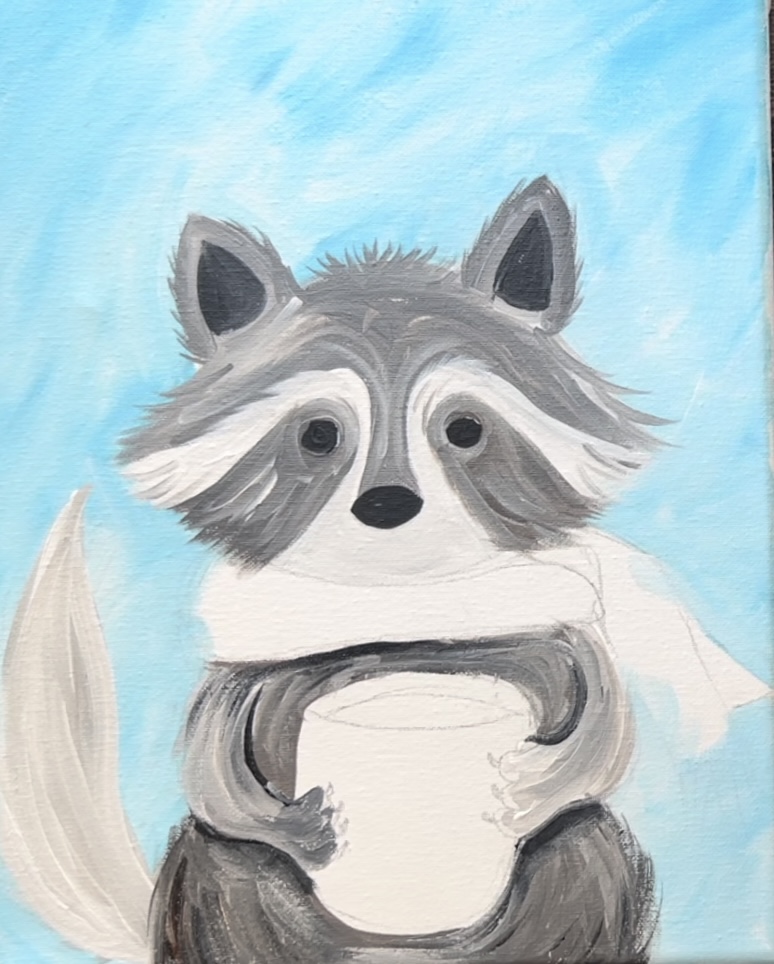
When you paint the tail, paint it a lighter gray color. I opted to paint this first layer for the tail as a solid shape without the texture on the sides. We will add stripes and texture later.
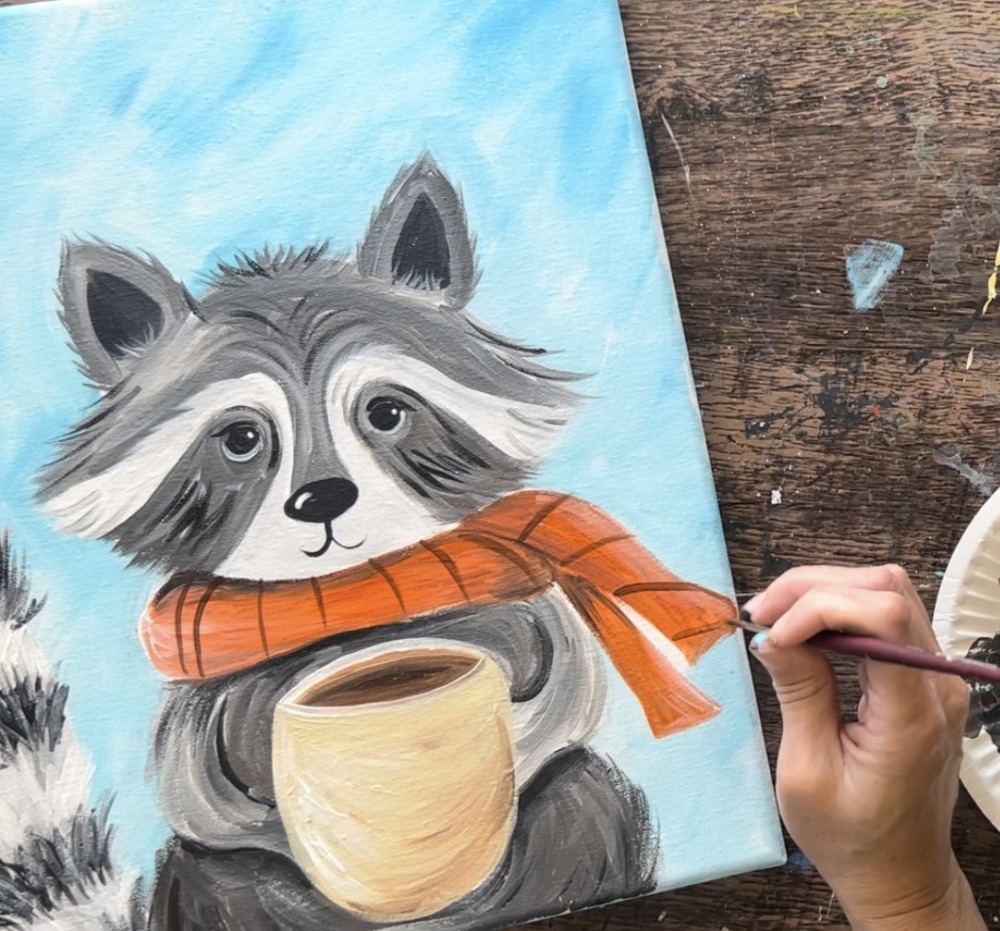
9. Paint Scarf
Load your paint palette with “cadmium orange hue”. You can also change the color of this scarf!
Start with a clean #4 round brush. Mix a little white and brown into the orange. Then paint the first layer of the scarf. Outline the shape and then fill it in.
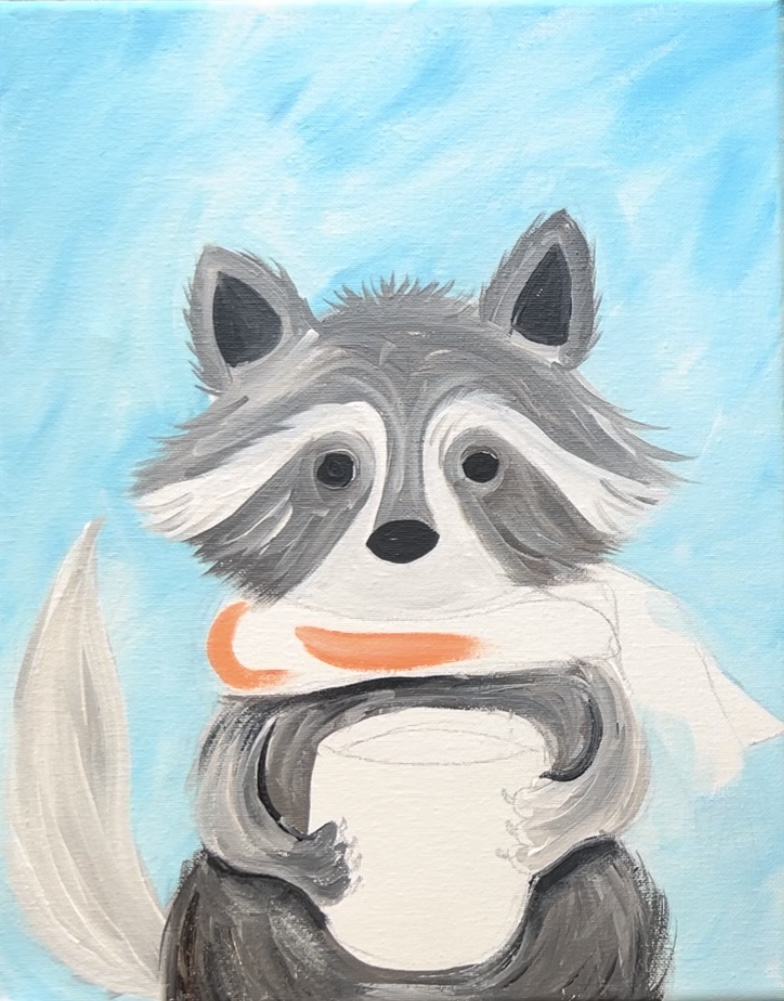
For the part that folds over, add a little brown to the brush and blend it in with more orange. This makes this part look slightly darker.
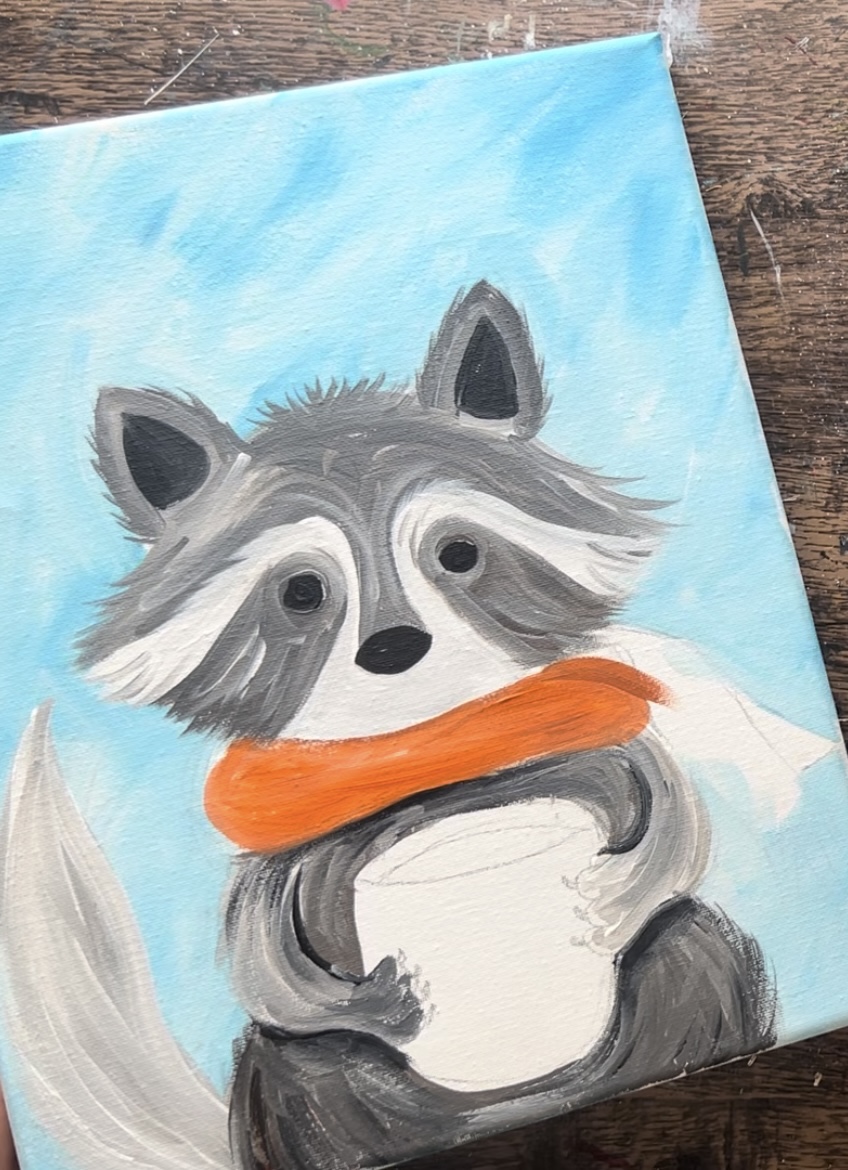
I painted two scarf pieces.
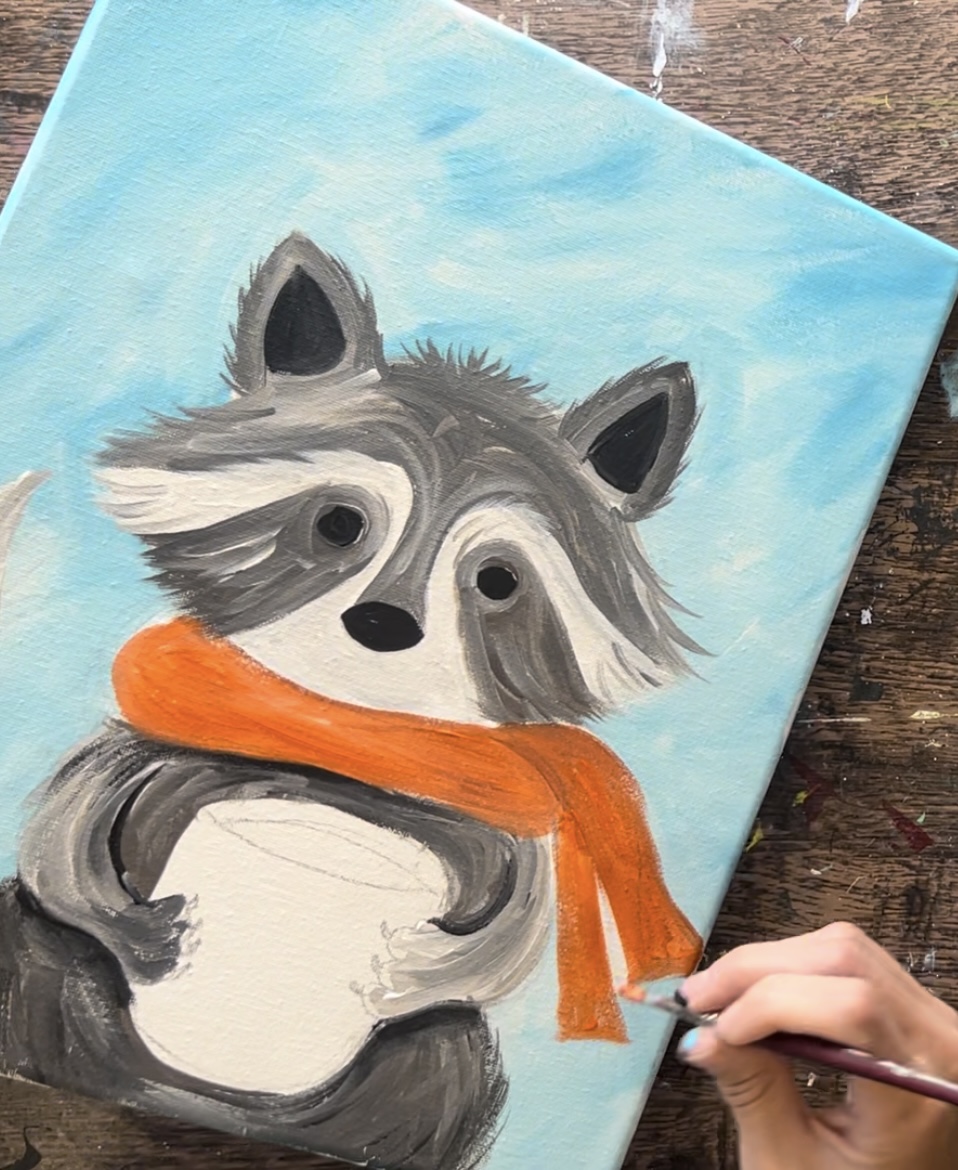
Use “mars black” to paint shadowing on the scarf specifically on the upper left under the raccoon’s head. Paint shadowing on the parts that fold over as well. Use the orange to help blend the black in. You only need small amounts of black to create this shadowing.
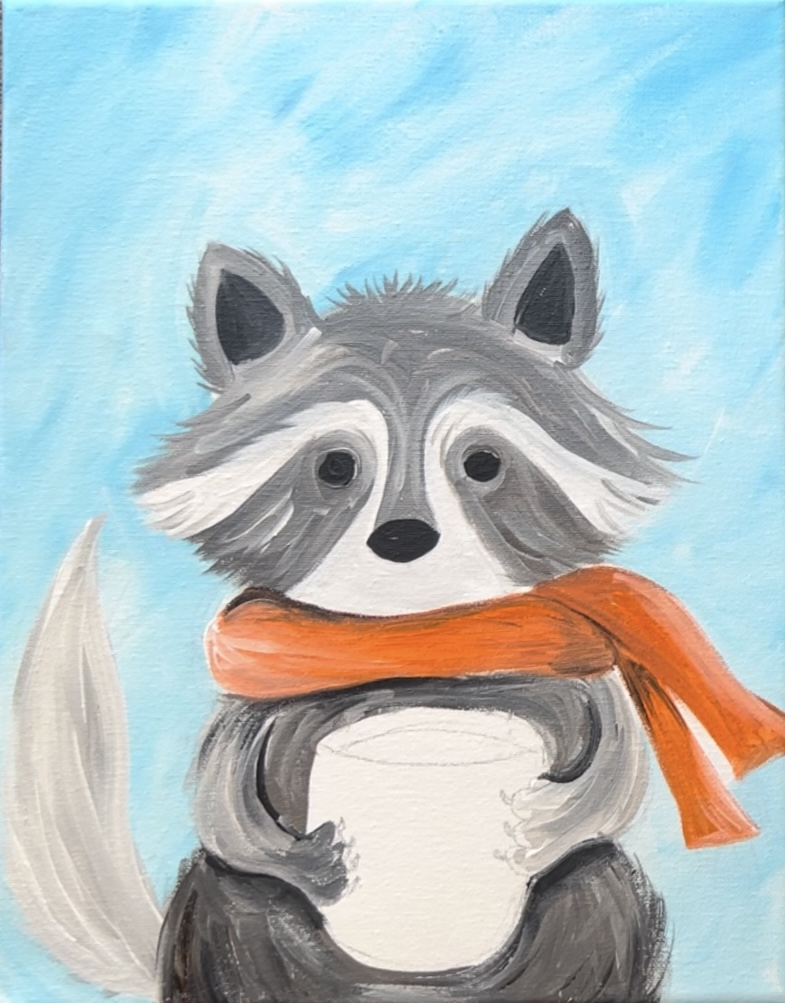
10. Paint Mouth
Use mars black to paint a mouth. You can also add little black fur texture lines over the dark gray parts of the raccoon.

11. Paint Mug
You can change the color of this mug!
Load your paint palette with “unbleached titanium”. Use the #4 round brush to paint the mug. Paint your paint strokes so they go in a curved direction. This will give the mug “form”.
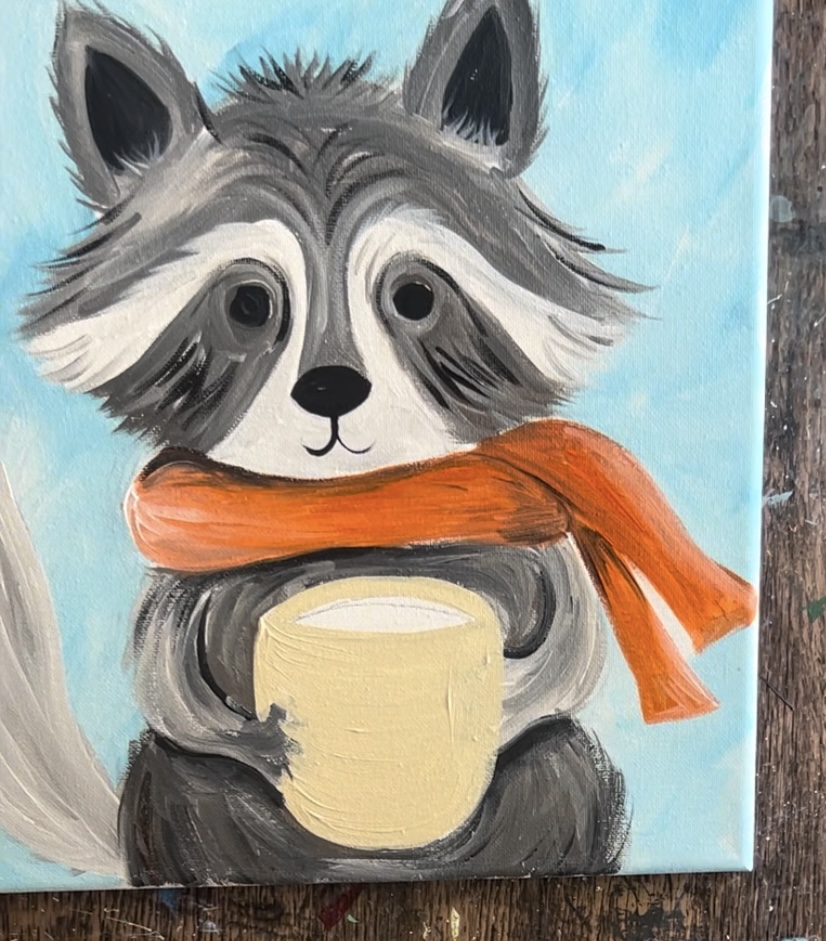
Then, without rinsing the brush, add a little “burnt Sienna” to the end of the bristles. Blend the little bit of brown on the bottom right of the mug and also on the back rim.
Add a little bit of “titanium white” highlighting to the mug on the left. Then paint the inside “coffee” or “hot cocoa” with “burnt Sienna” mixed with a little “mars blacK”.
12. Paint Detail On Eyes
Tip: this requires a steady hand and very thin lines! You can use a tinier round brush, a paint pen or even a toothpick for better control of these small lines.
Use a clean #4 round brush and titanium white. Paint a curved outline on the inner bottom half of each of the eyes.
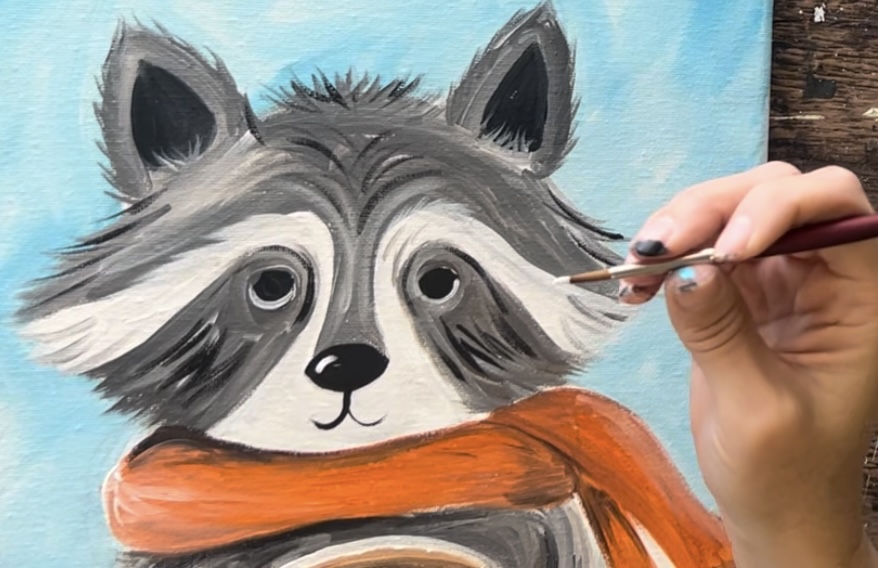
Then paint one white highlight dot on the upper right of each of the eyes. Use “mars black” to paint one “eye lash” on each of the eyes.
Also, paint a white highlight mark on the nose.
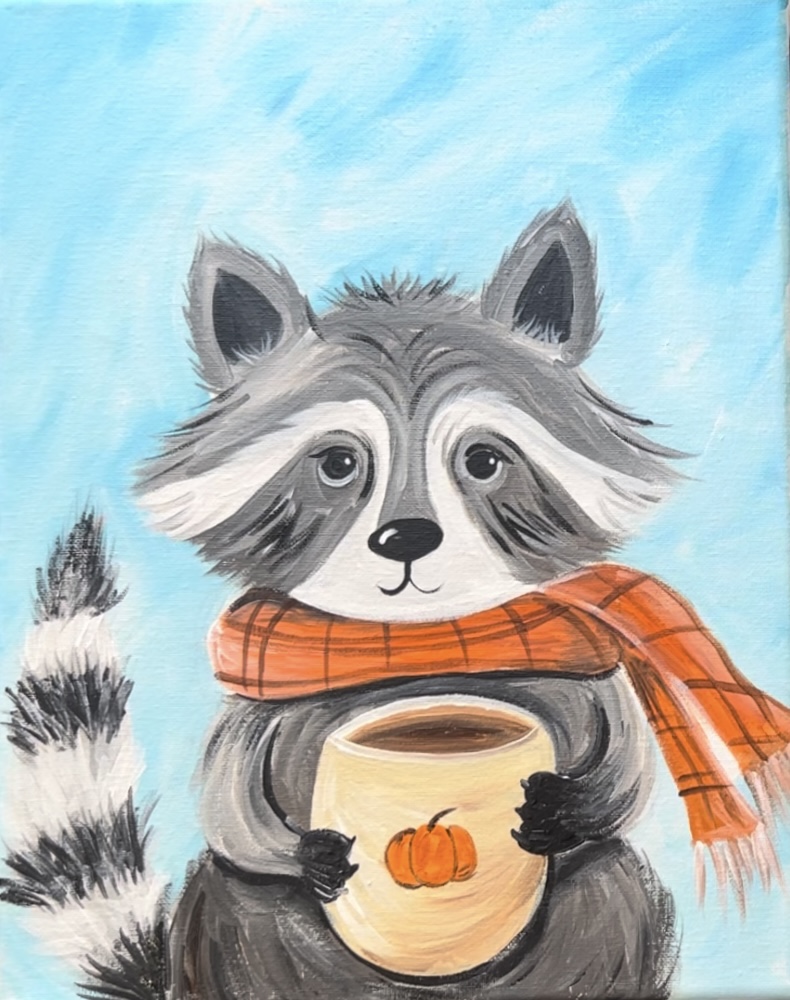
13. Paint Detail On Tail
Next paint the stripes on the raccoon’s tail! Use a #4 round brush and “mars black”. Paint little fur-like paint strokes that go up from the bottom of the stripe to the top. Paint these little “vertical marks” across to form each stripe.
I did two stripes for now (two more are added later).
Then do the white stripes in between. To do this, rinse the brush and use “titanium white”. If needed, add a little bit of black to the white so it’s more of a light gray. Do the same type of “fur texture” paint stroke.
Then do a stripe on the end tip of the tail and at the base of the tail with black. Note: I added a little white over the black stripes to make them more of a dark gray to match the dark gray of the rest of the raccoon. You can, however, leave them as black.
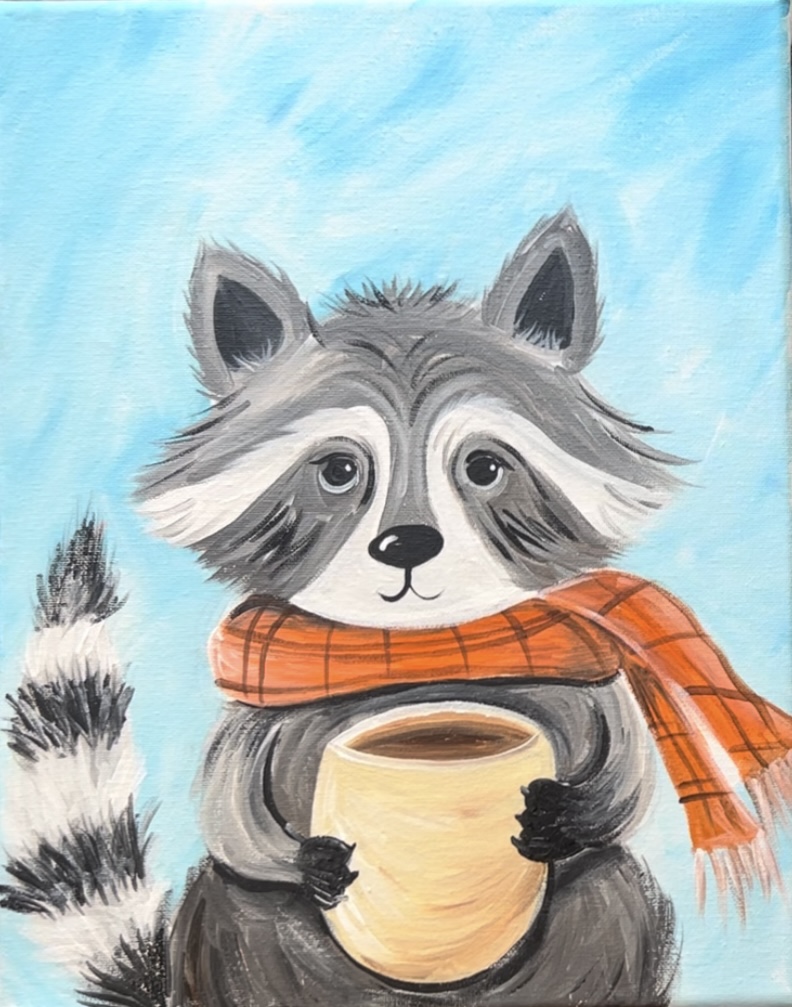
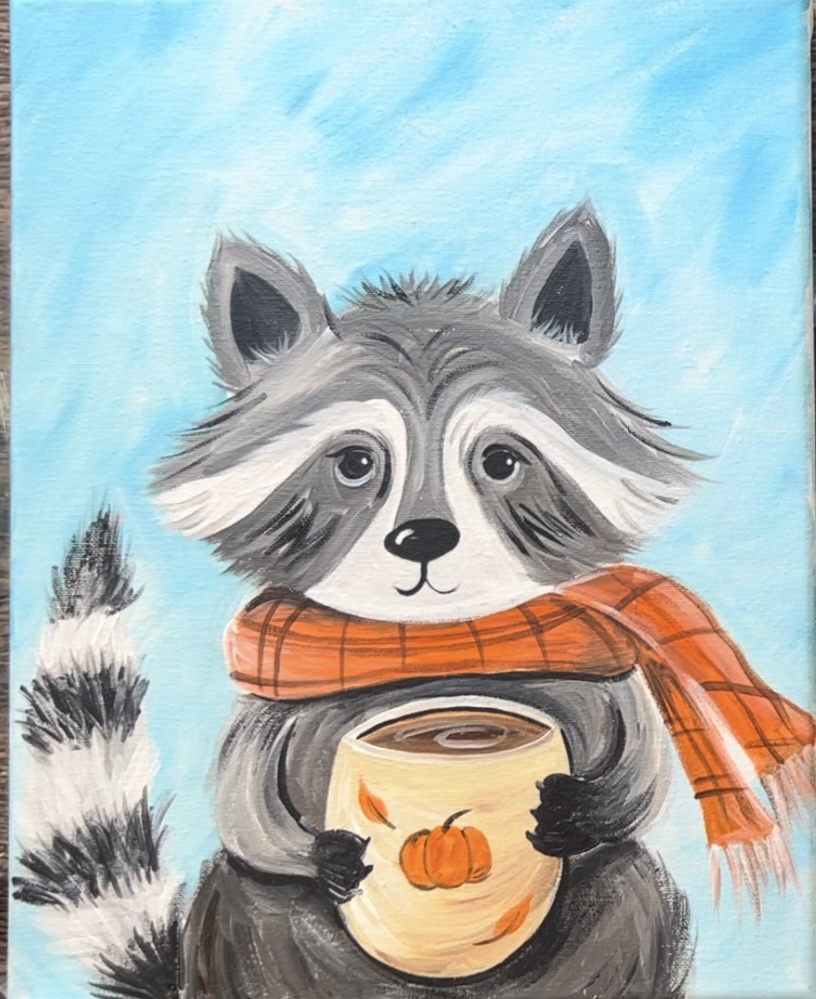
14. Paint Pattern On Scarf
Paint brown vertical stripes along the scarf piece that wraps around the raccoon’s neck. Paint horizontal stripes on the pieces that fold over.
Then paint horizontal stripes to create a simple plaid design. Paint little pieces of string hanging down on the edging of the scarf. I used a combination of brown, white and orange for this.
15. Paint Detail On Hands
Now that the mug is dry, we can go back and repaint the hands! Use mars black and paint two simple and small hands with little bumps for the fingers.
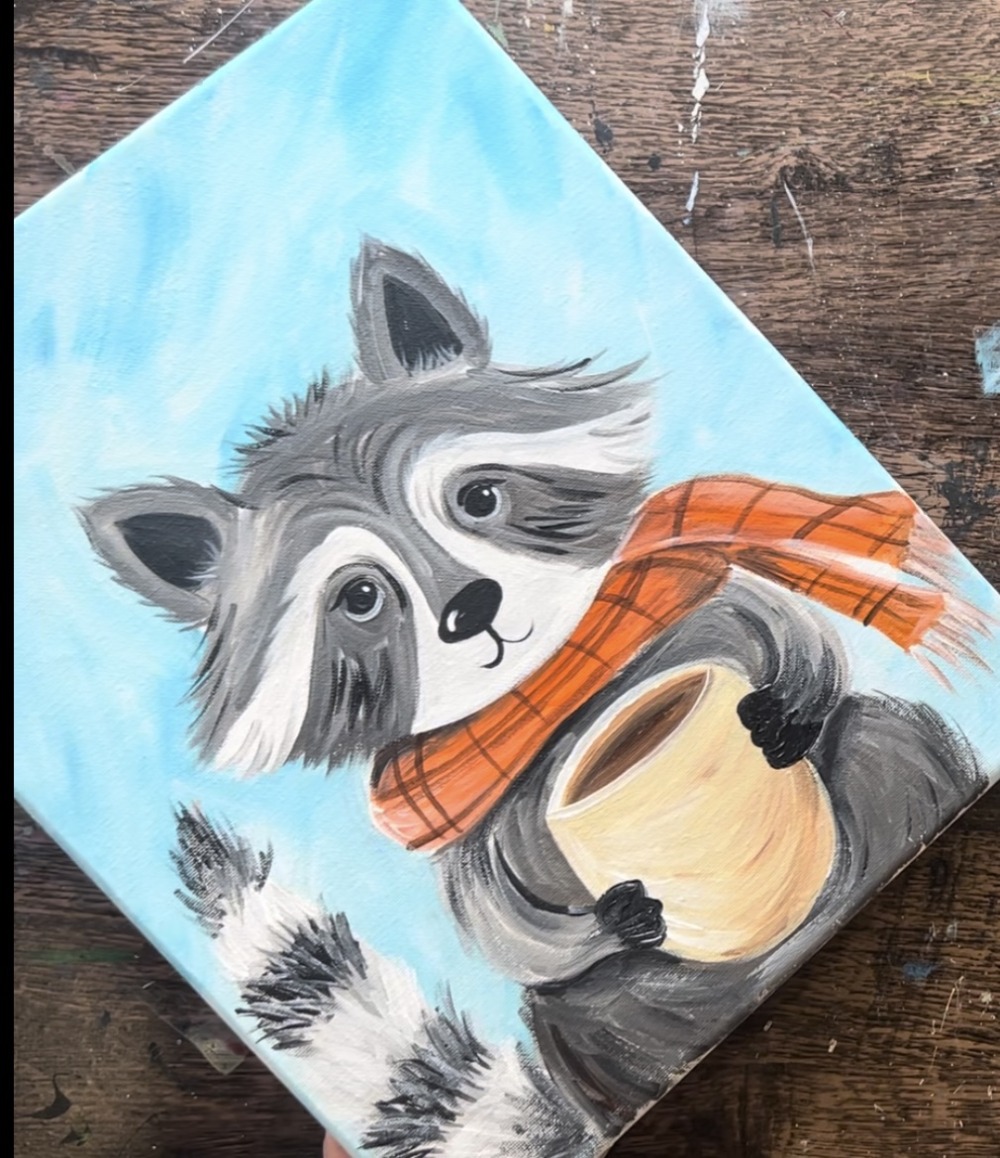
Then you can paint little triangular claws on the ends of the hands.
16. Paint Details On Mug
I painted a pumpkin on the mug! Use the #4 round brush and “cad orange hue” to paint a very simple pumpkin design.
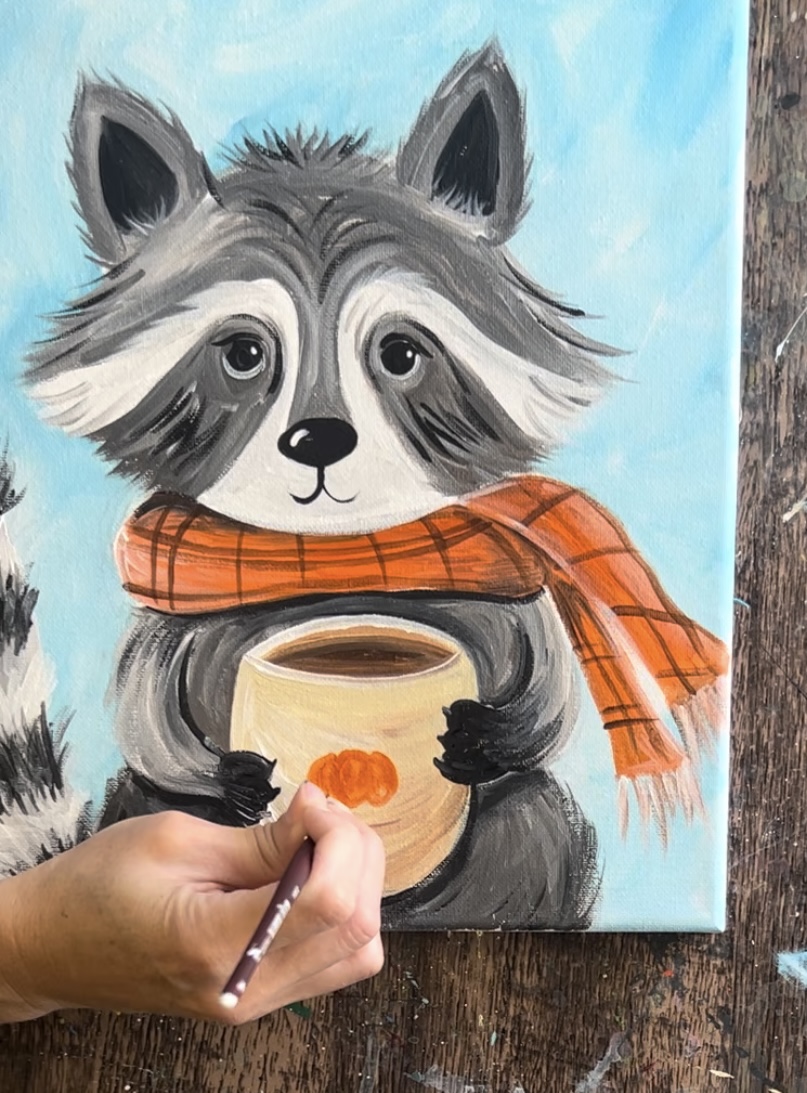
Then paint a black stem and loosely outline the shape of the pumpkin.
Paint two little orange fall leaves on the front of the mug as well!
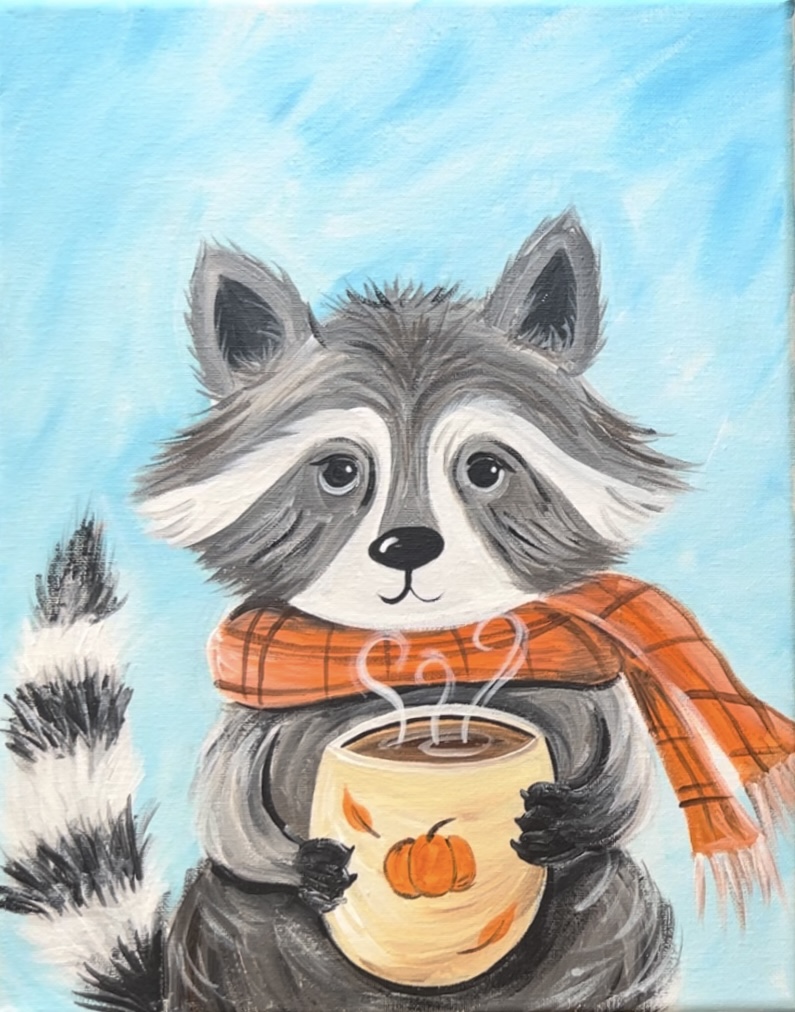
Use titanium white to paint a little spiral on the coffee brown area. Then paint little white spirals for steam coming from the mug.
17. Paint Leaves
Use titanium white to paint shapes of fall leaves in the sky! I did one oak leaf and the others were basic rounded/pointed leaves. It’s best to paint these white first so the color will show up bright against the background.
After the white dries, paint the leaves with various colors of orange, beige, brown and white. Mix the colors on the canvas as you are painting the leaves.
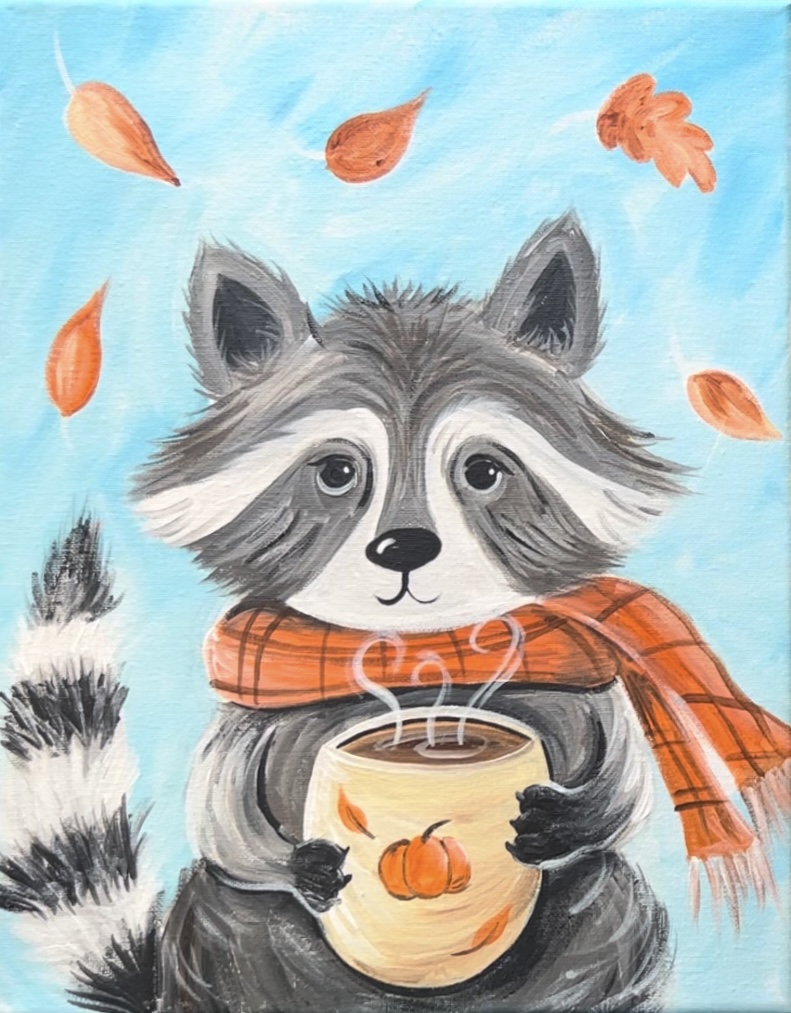
Paint the stems with black and/or brown. Paint the little vein lines on the leaves after the leaf color dries. This requires a very thin line and steady hand! Alternatively you can use a paint pen.
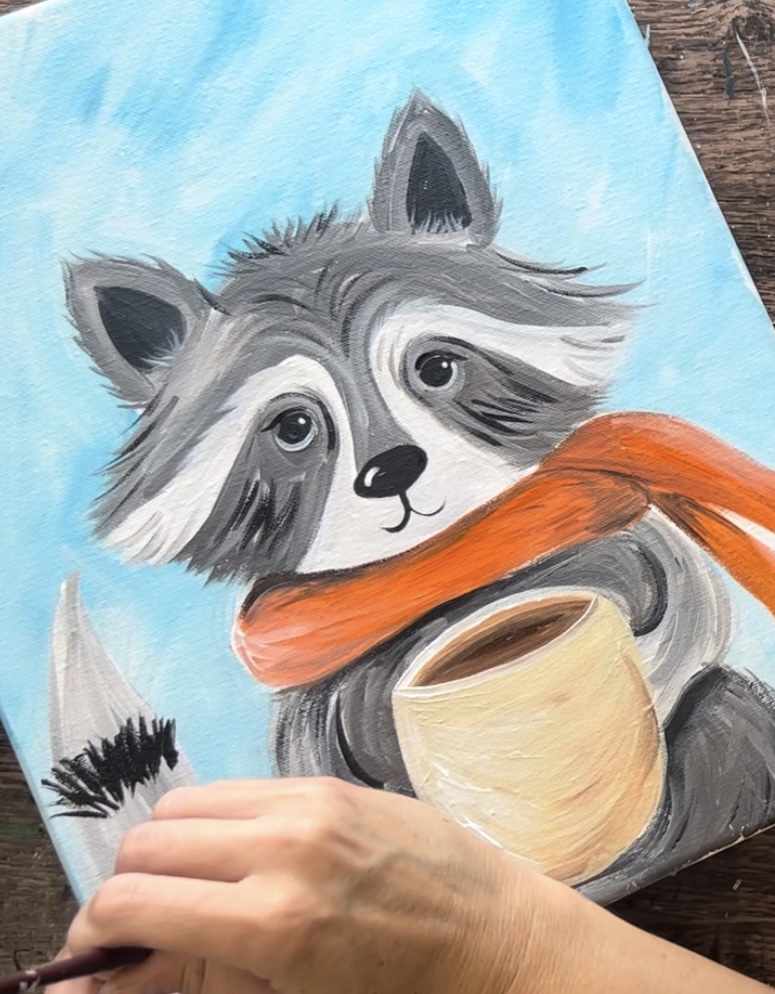
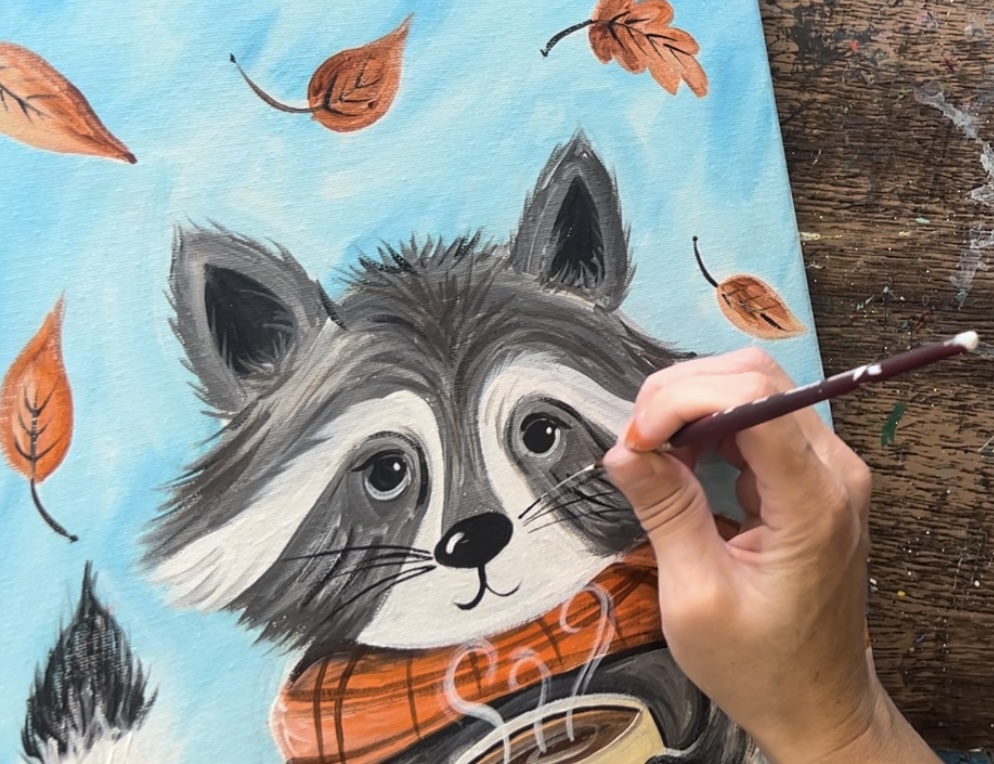
18. Paint Whiskers
As a final step, paint the whiskers on the raccoon! I use the #4 round brush. To get those thin lines, hold the brush very lightly and use only the very end of the bristles. It also helps to loosen the paint with some water to get it to an “ink” consistency.
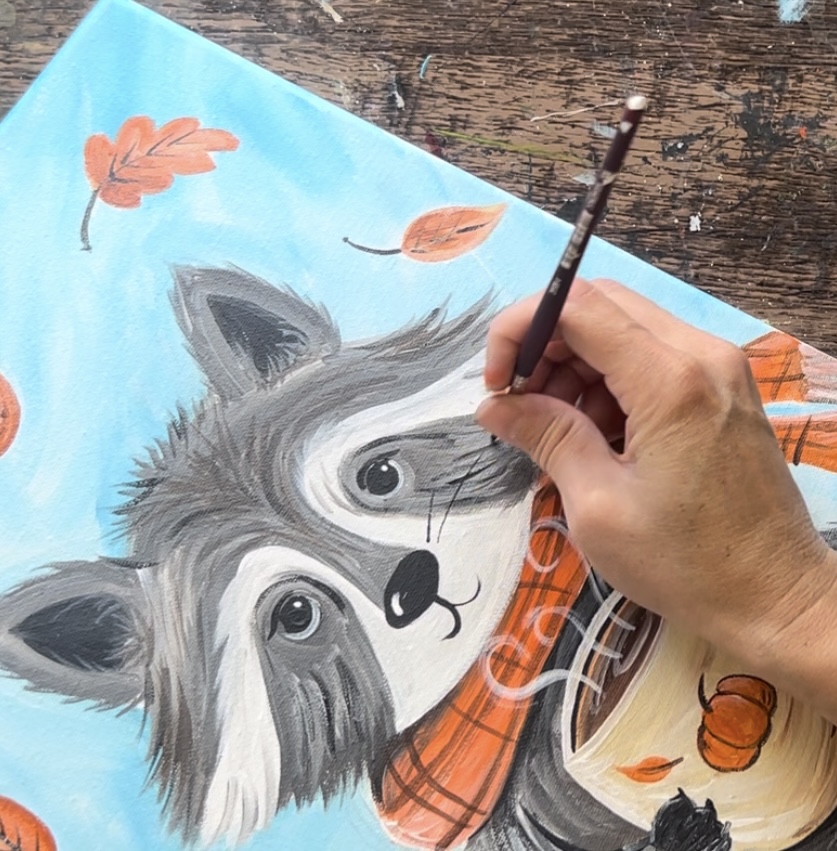
Start by painting 3-4 black whiskers on each side of the nose. Start from the nose area and quickly but lightly paint your thin paint stroke outwards to form the whisker line.
After painting the black whiskers, go back and add a few white whiskers.
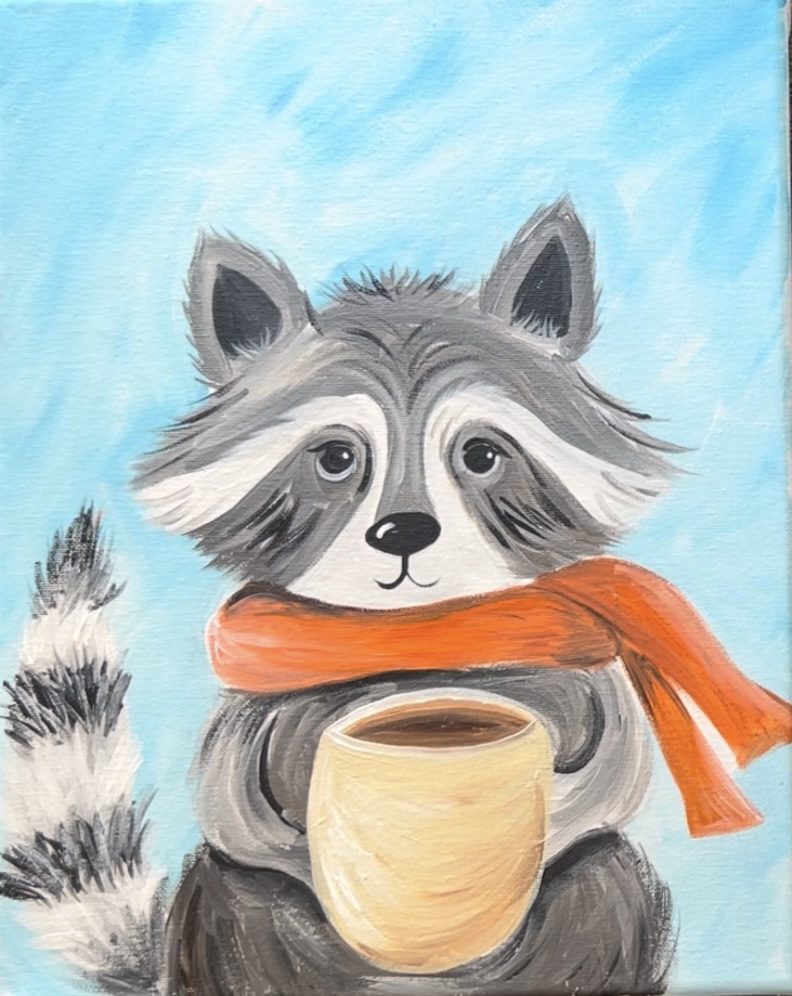
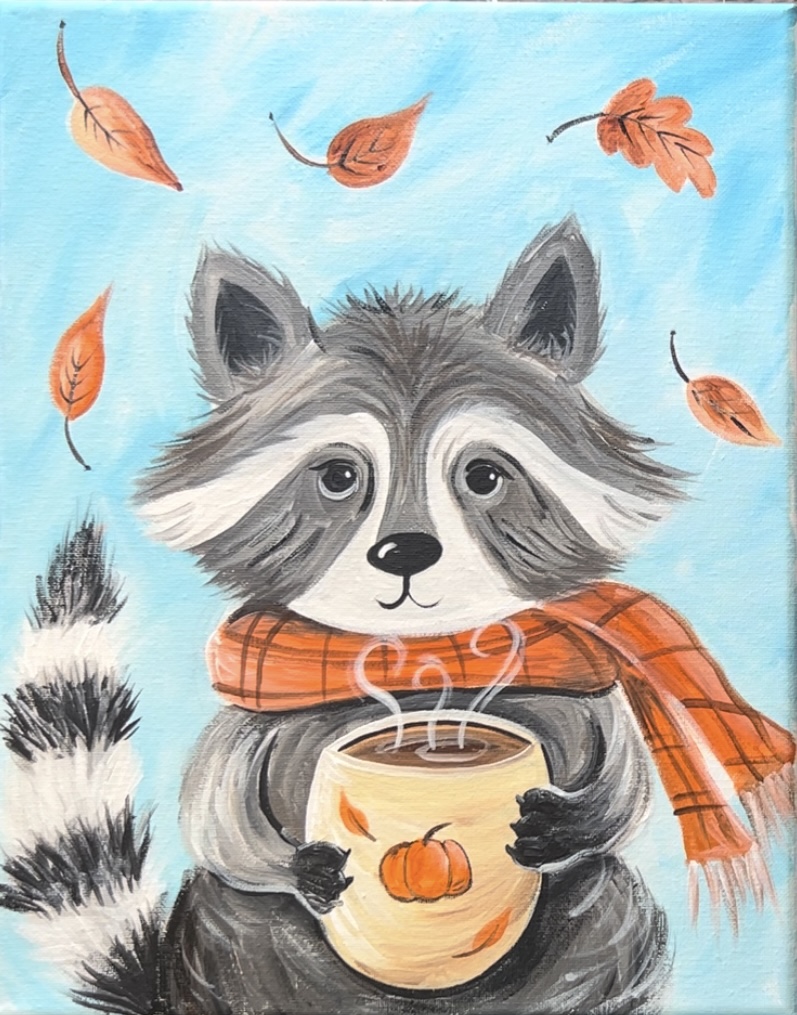
Finished!
Sign your name and show it off!
It took me 3-1/2 hours, but turned out fantastic! Best thing I’ve ever painted!
I can’t wait to try more.
I’m so happy you painted this and enjoyed it Ann!