Would you like to save this?
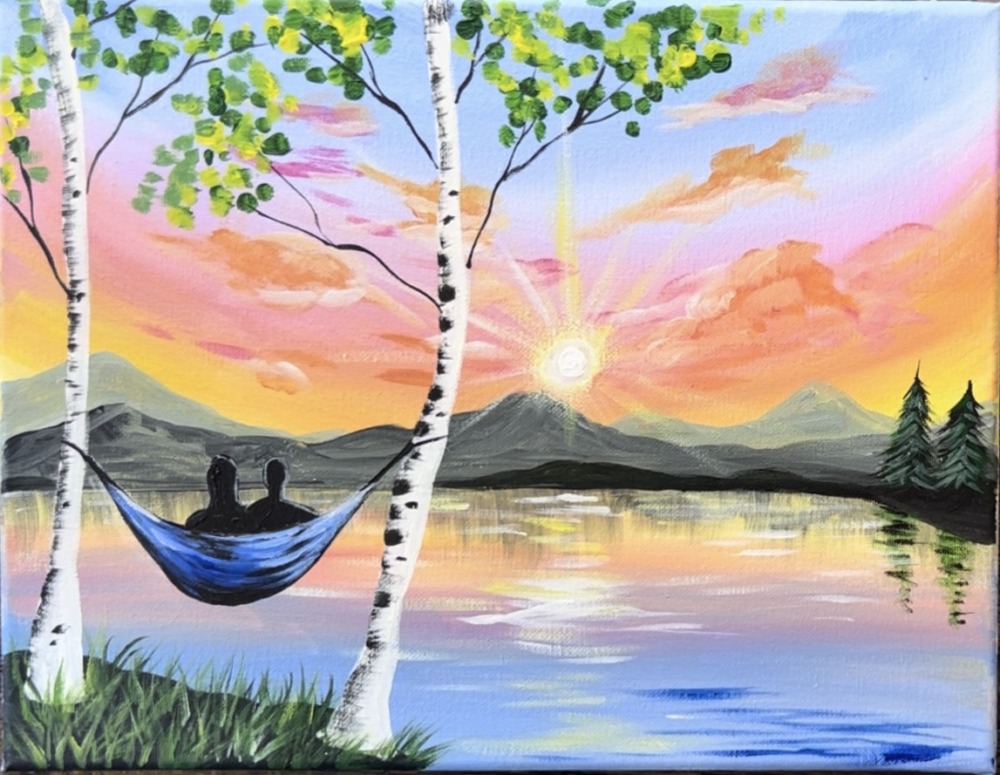
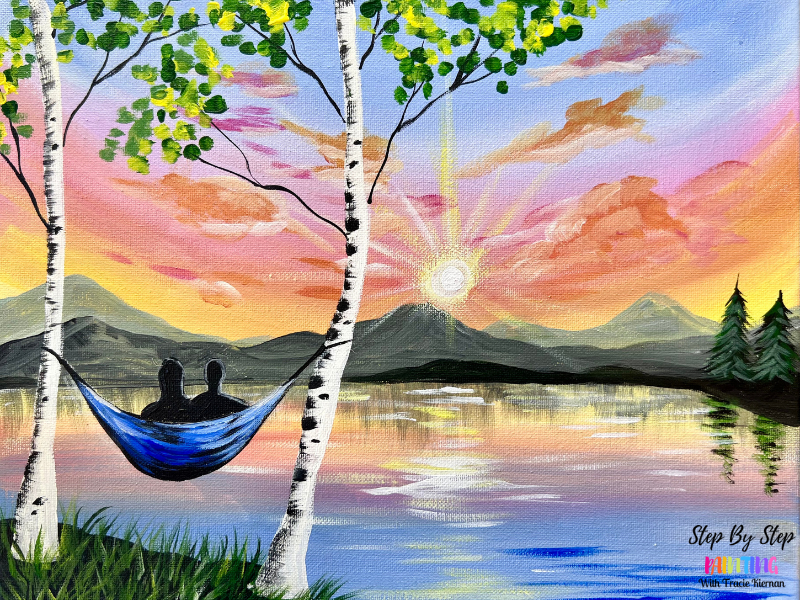
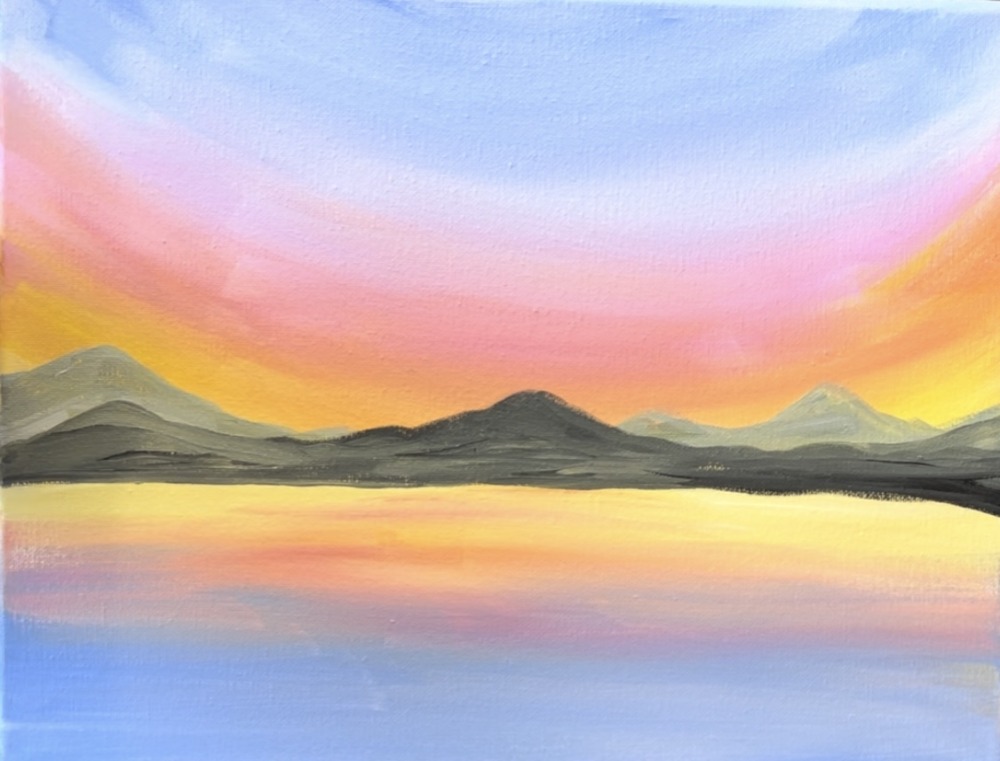
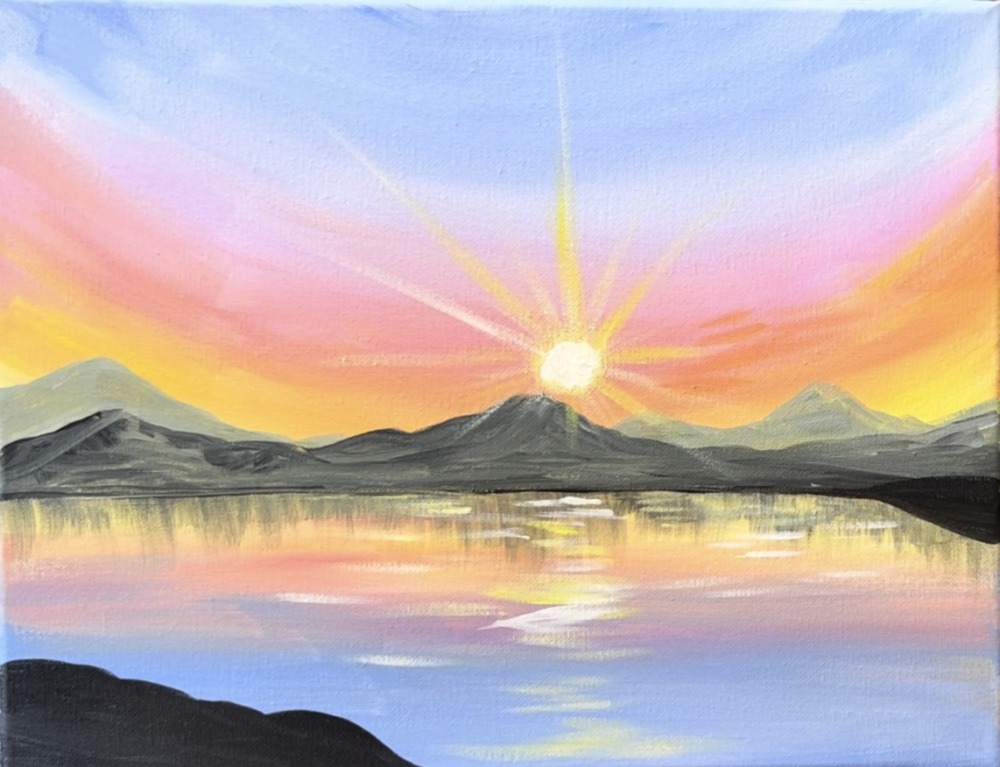
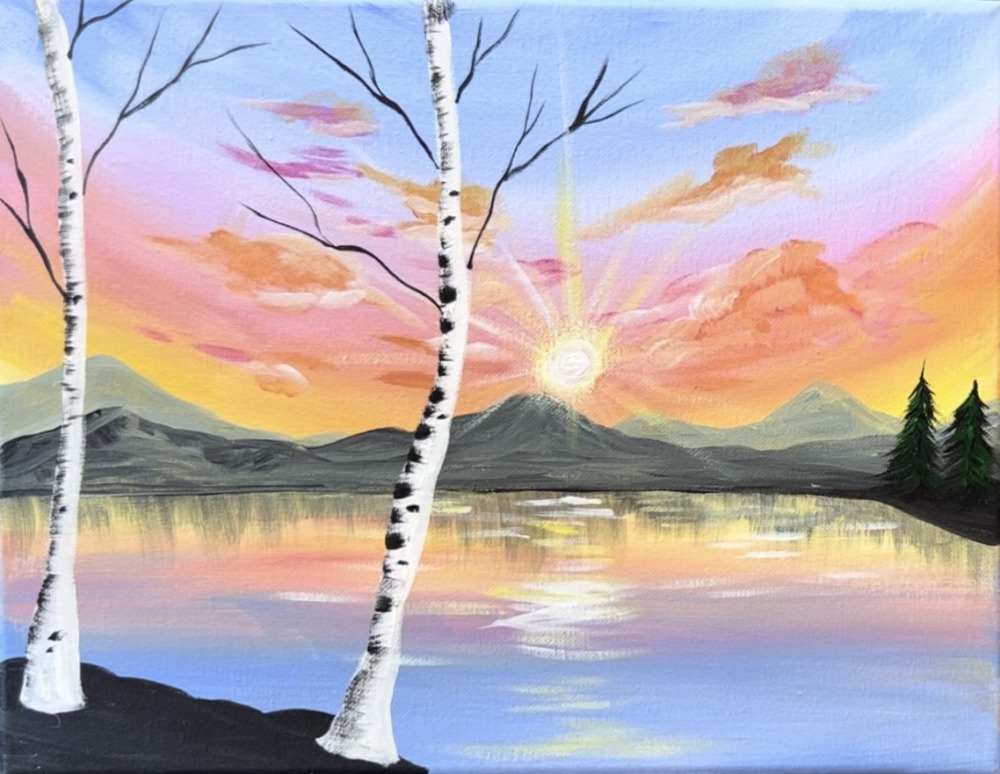
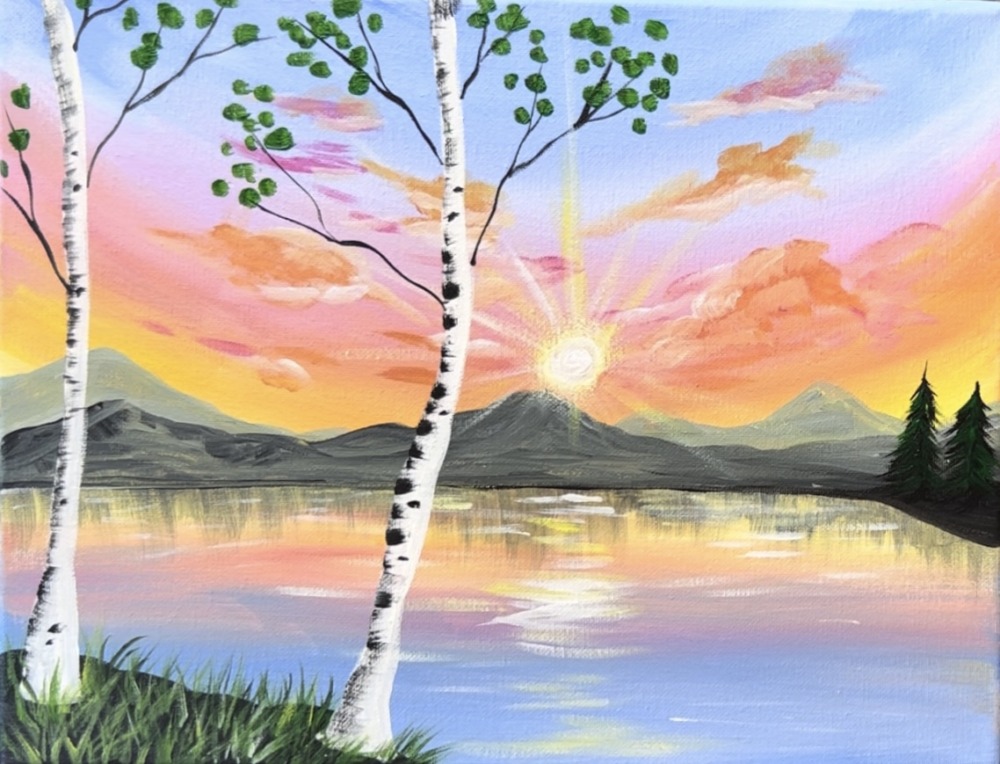
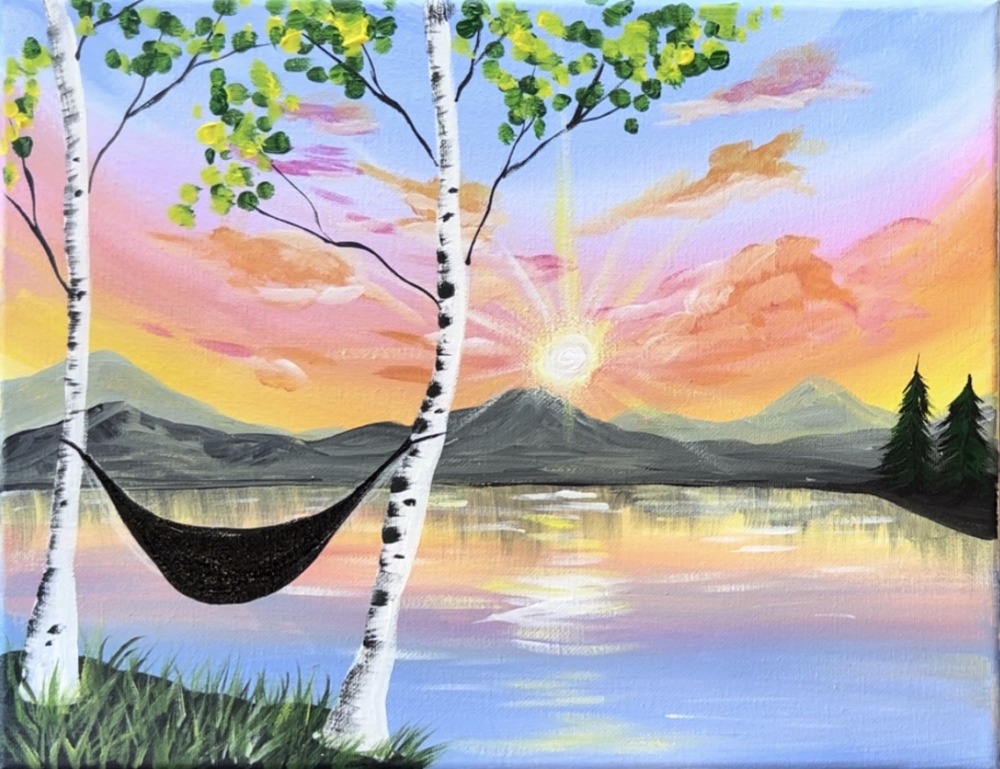
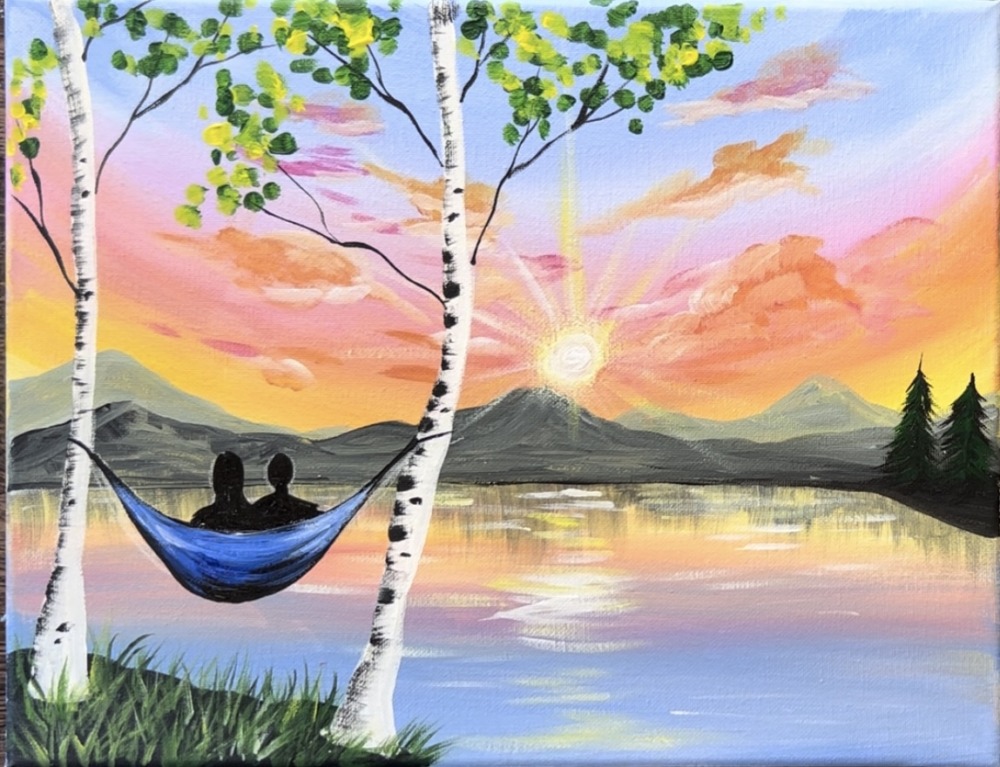
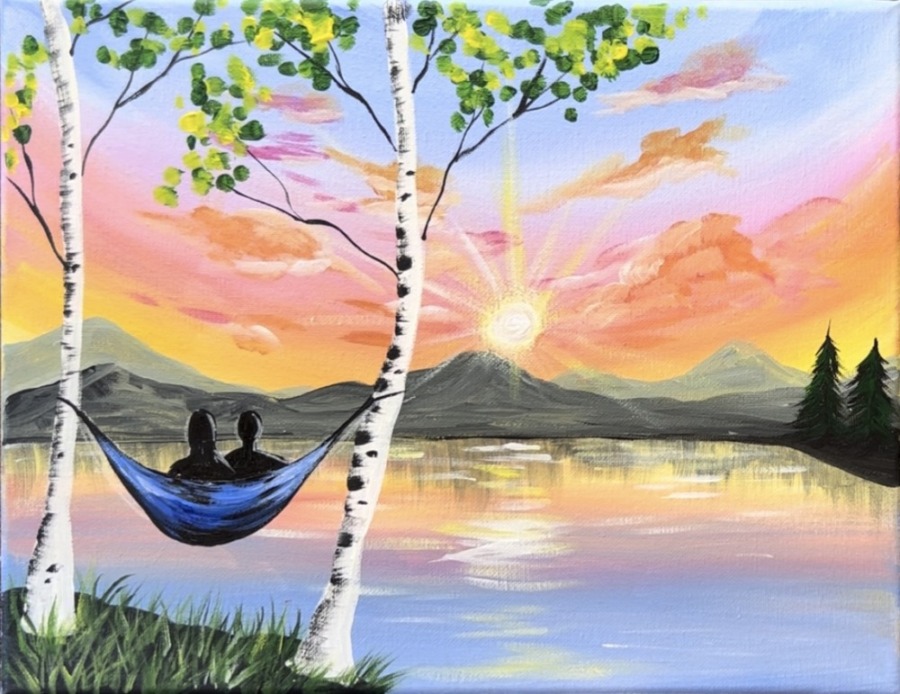
Learn how to paint a vibrant sunset over a lake. A couple views the sunset from a hammock tied between two aspen trees.
This painting is an intermediate level painting. However, you can simplify it by not doing the sun rays and clouds. You can also omit the hammock/ couple.
Enjoy and happy painting!
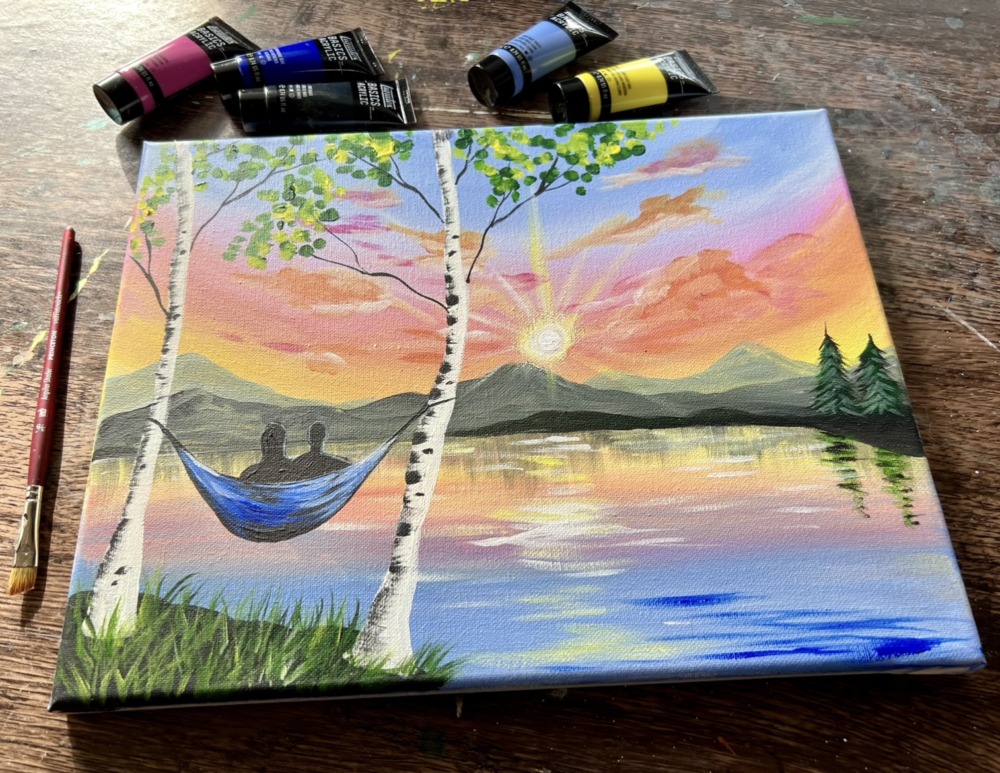
Materials Needed
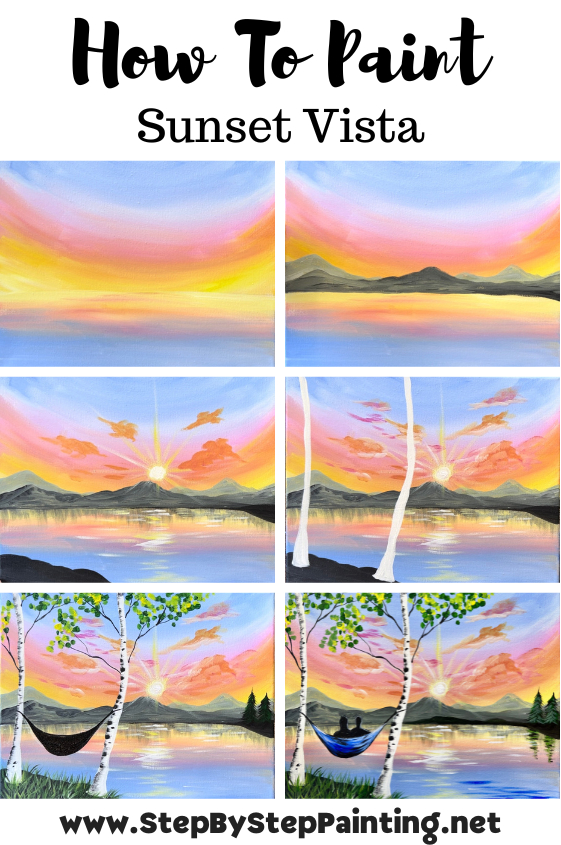
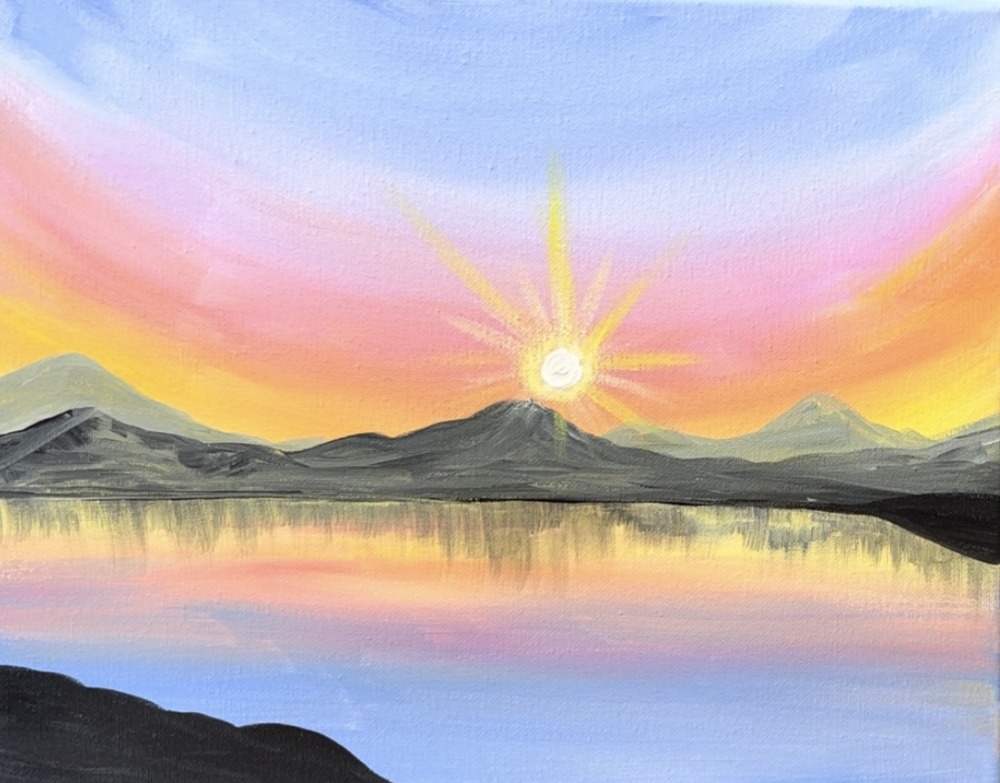
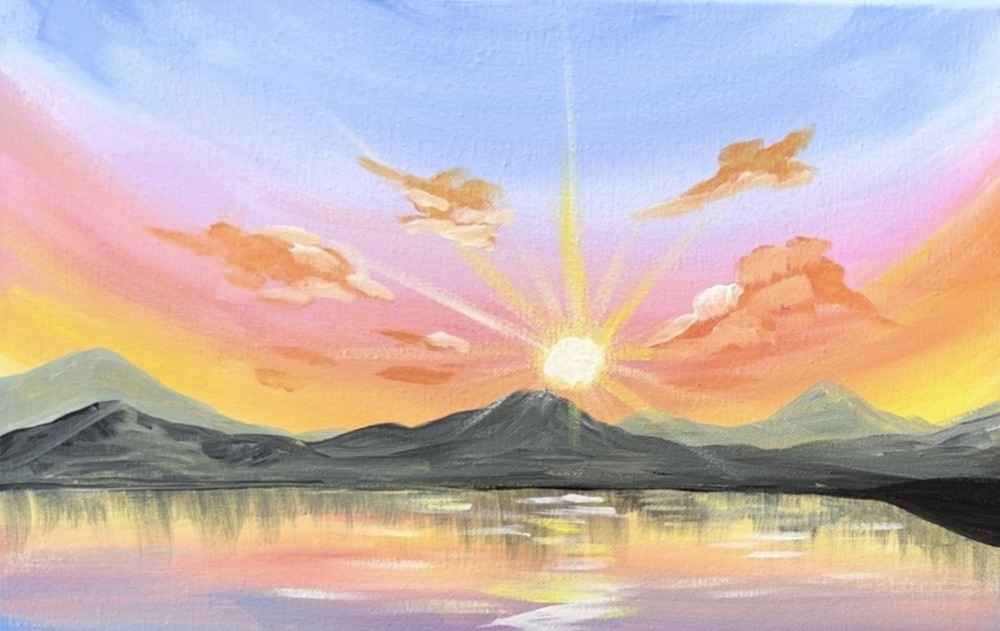
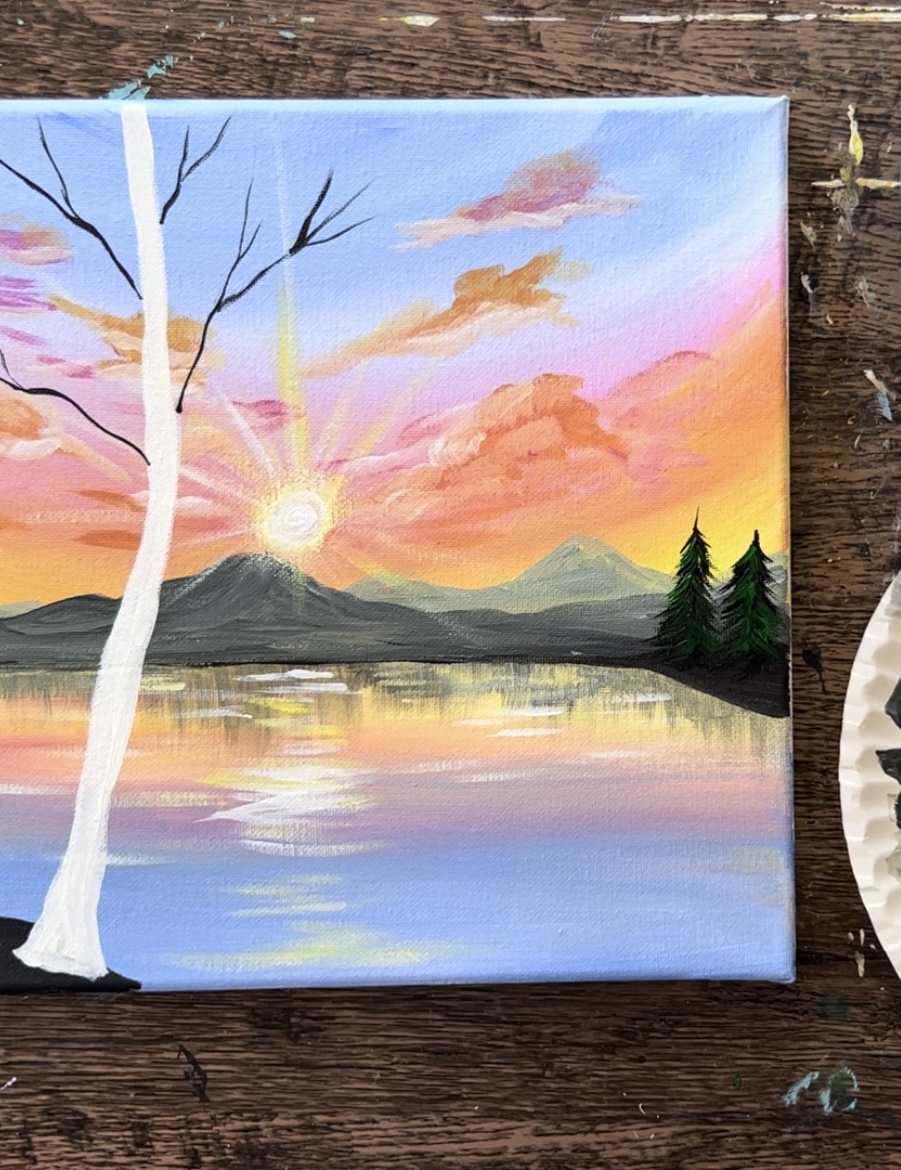
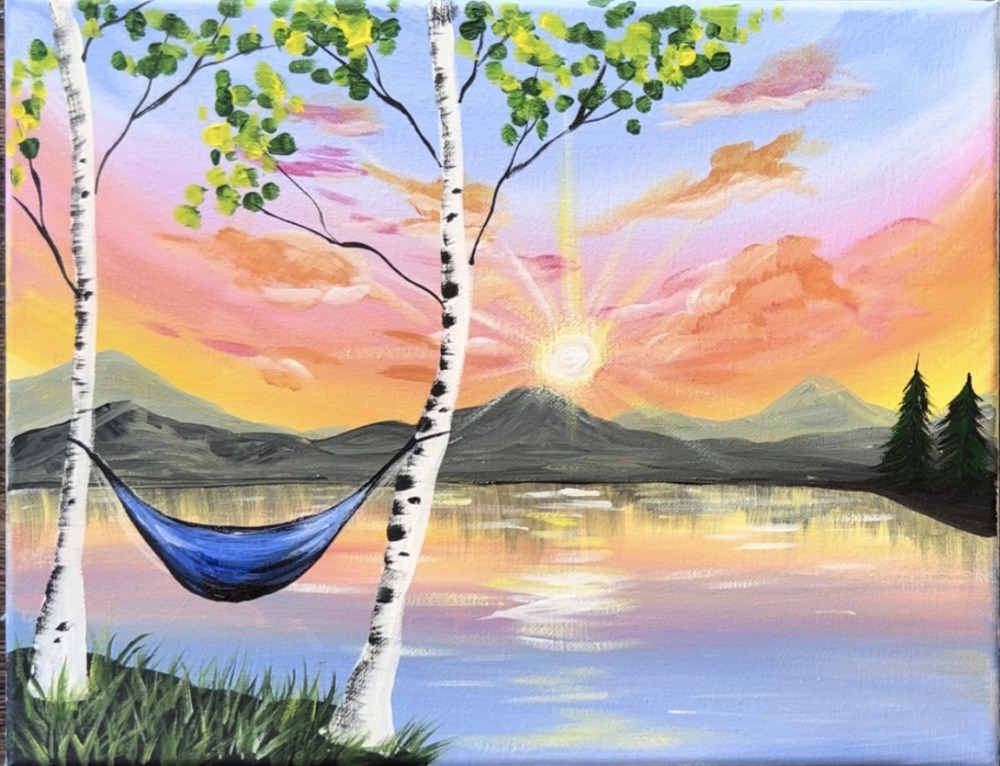
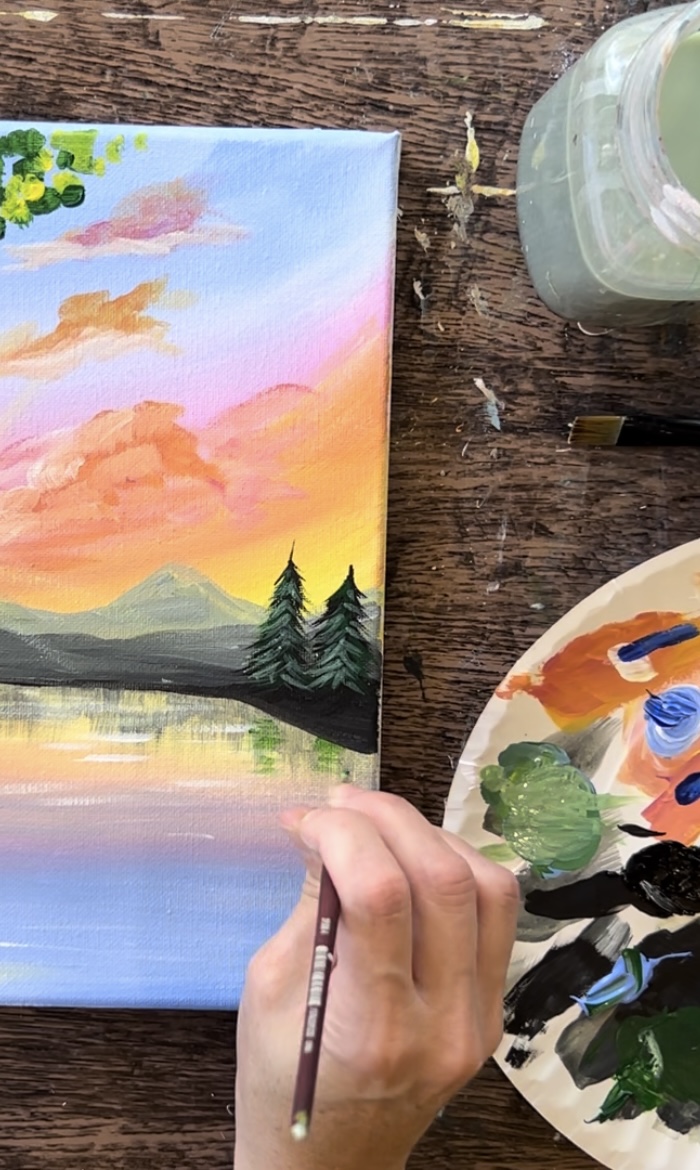
Sunset Vista - Acrylic Painting Tutorial
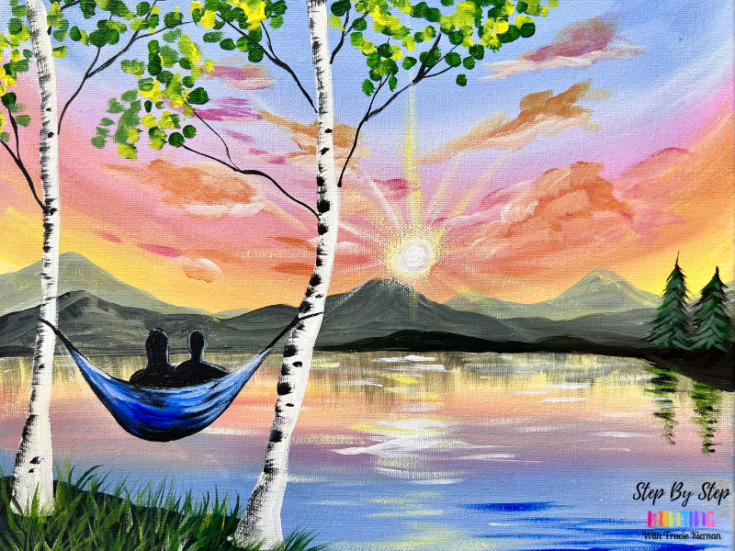
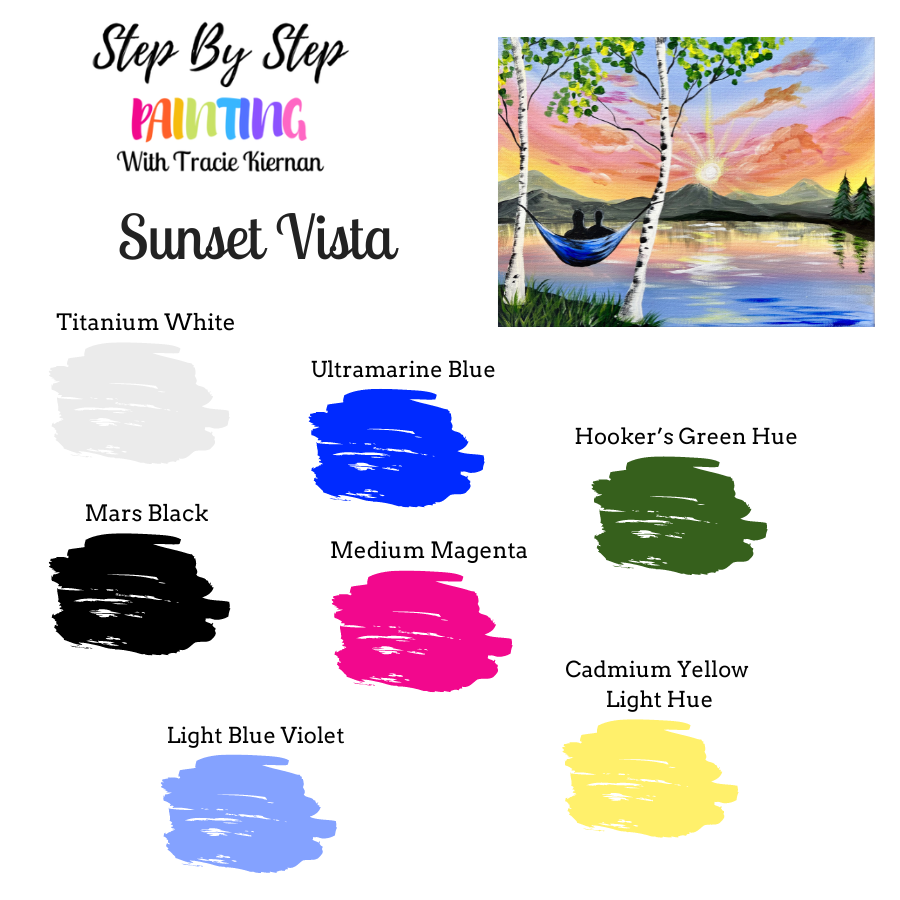
A brilliant sunset over a serene lake with a couple sitting on a hammock between two aspen trees.
Color Palette
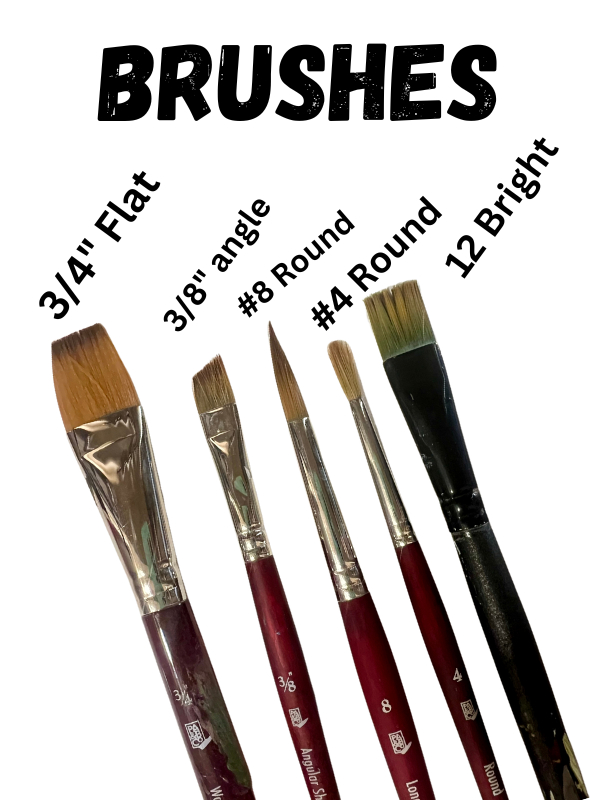
Brushes
Directions At A Glance
Video
Step By Step Instructions
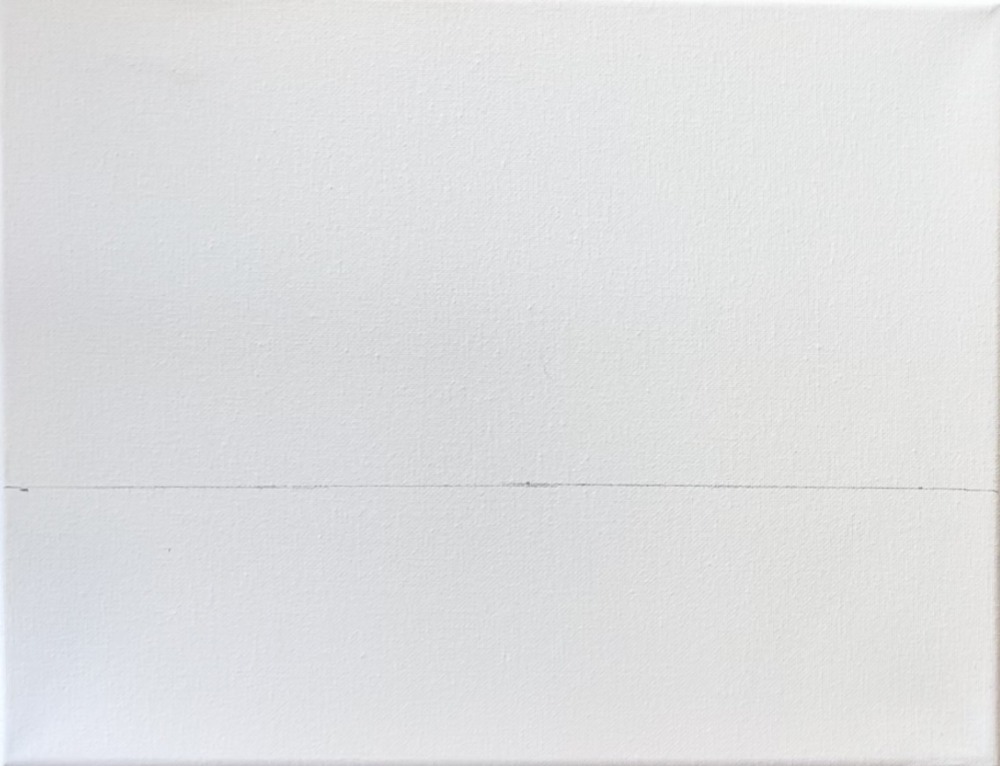
1. Draw Horizon Line
Position your canvas horizontally. Then use a ruler to draw a line at 4″ from the bottom of the canvas. If you are using a different size canvas, this horizon line is roughly a little more than a third of the way up from the bottom of the canvas.
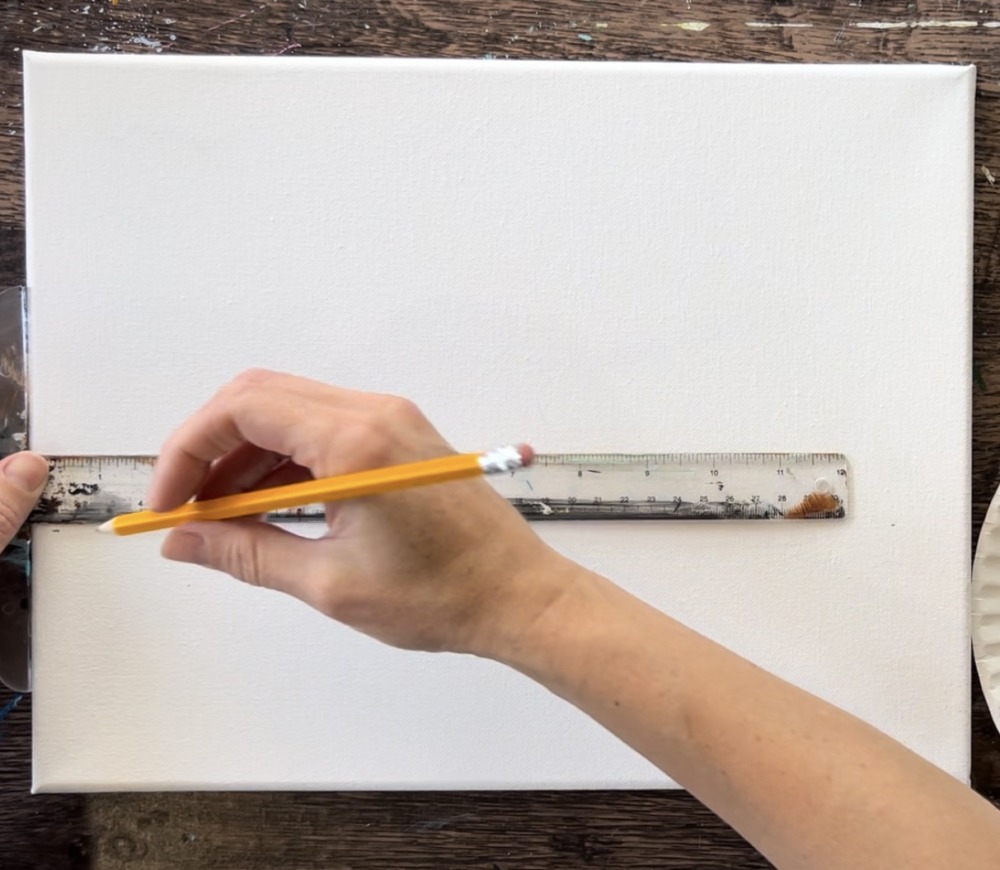
Use a regular pencil to draw this line lightly.
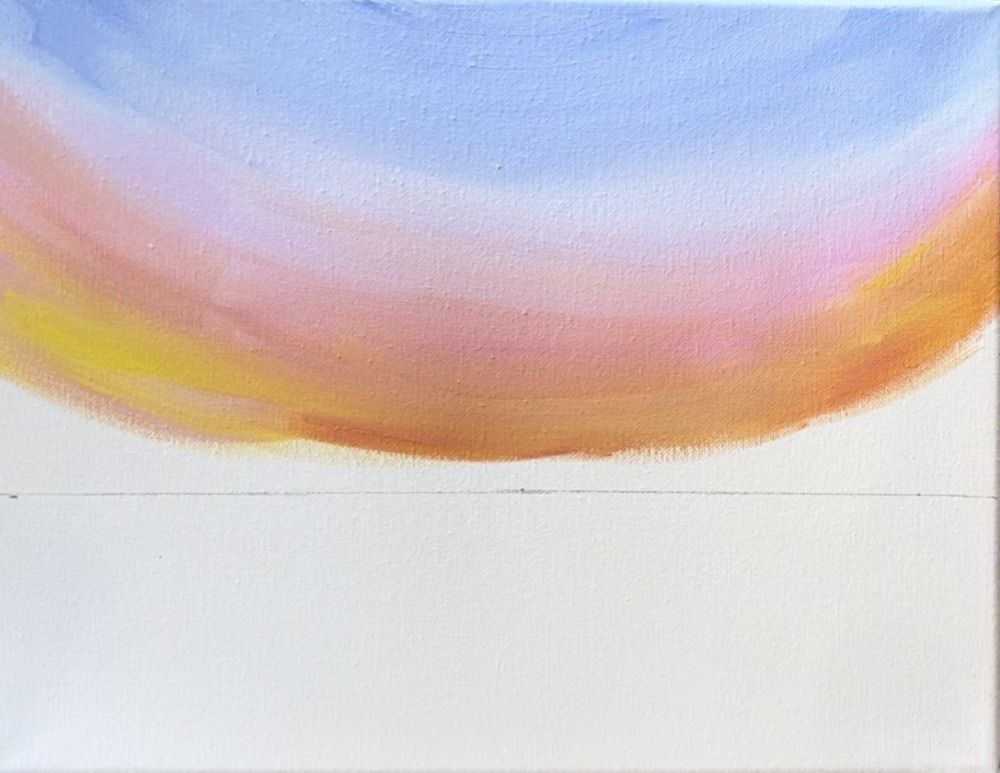
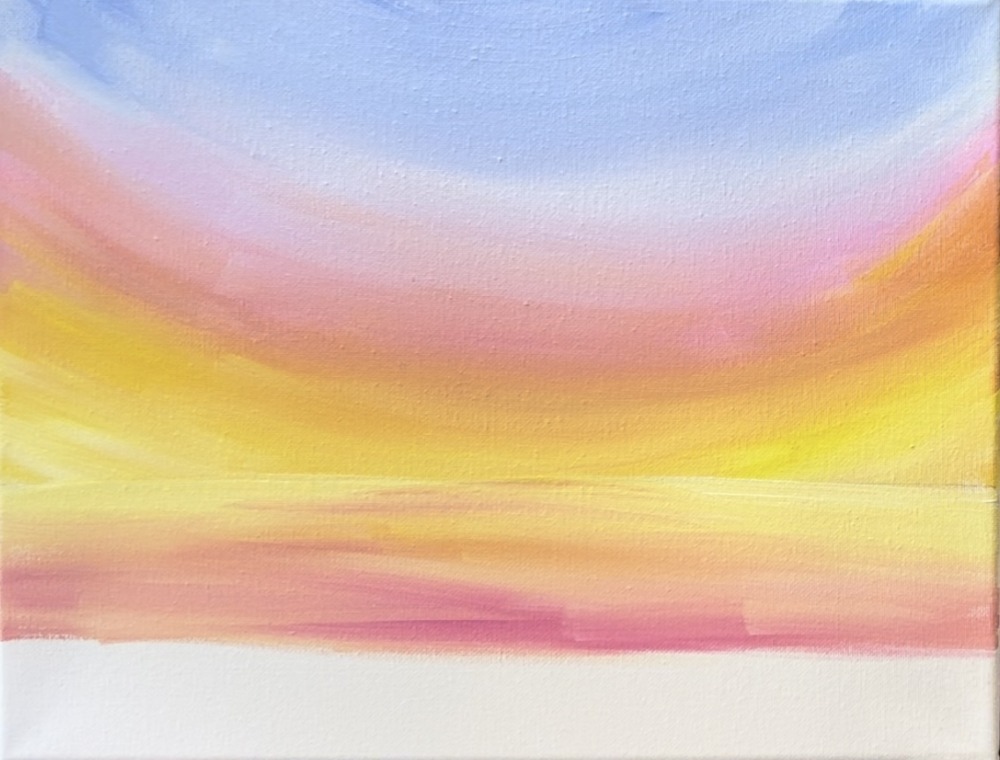
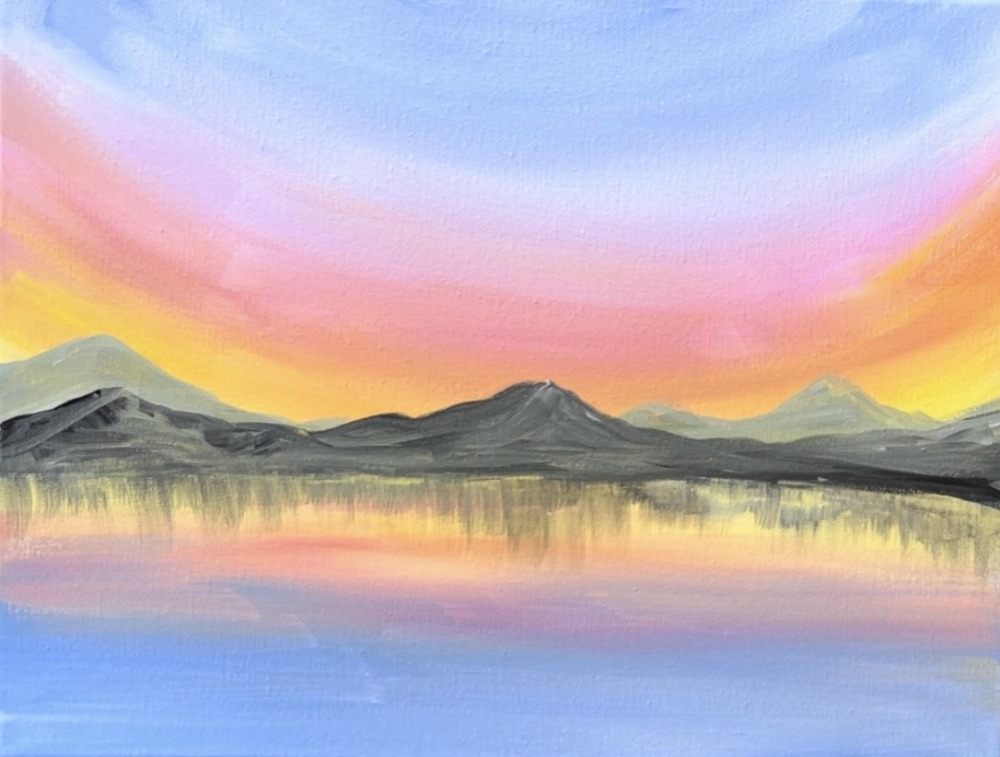
2. Paint Sky
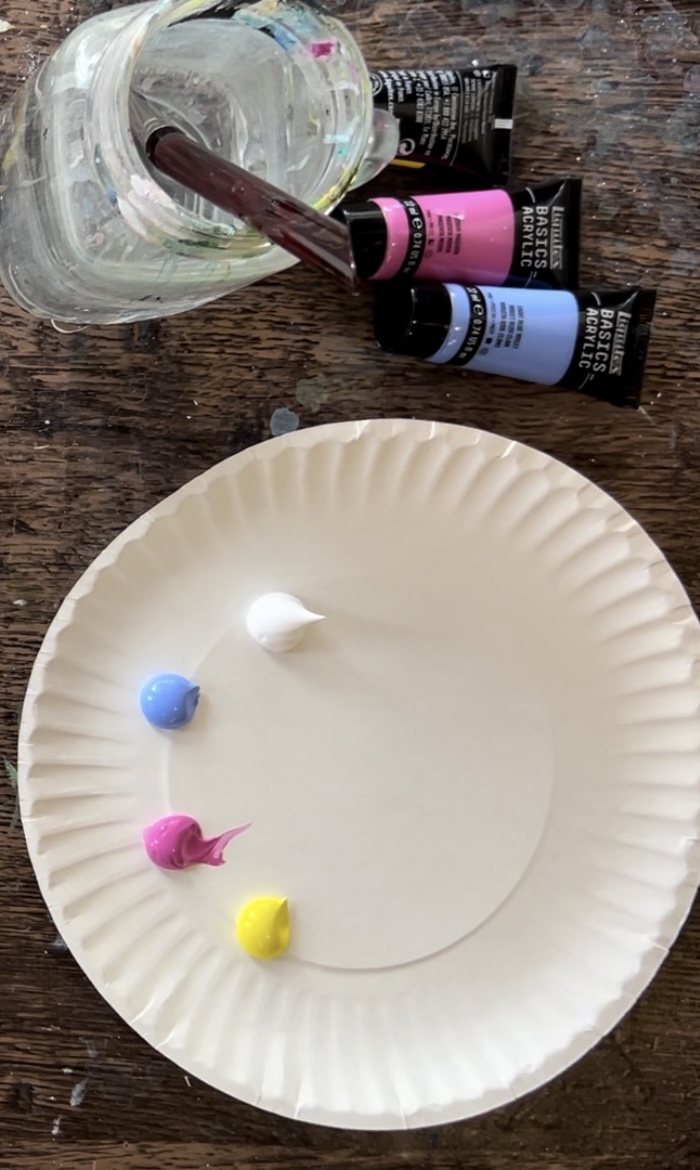
Load your paint palette with the colors: titanium white, light blue violet, medium magenta and cadmium yellow light hue. This combination of color will be used to paint the vibrant sunset!
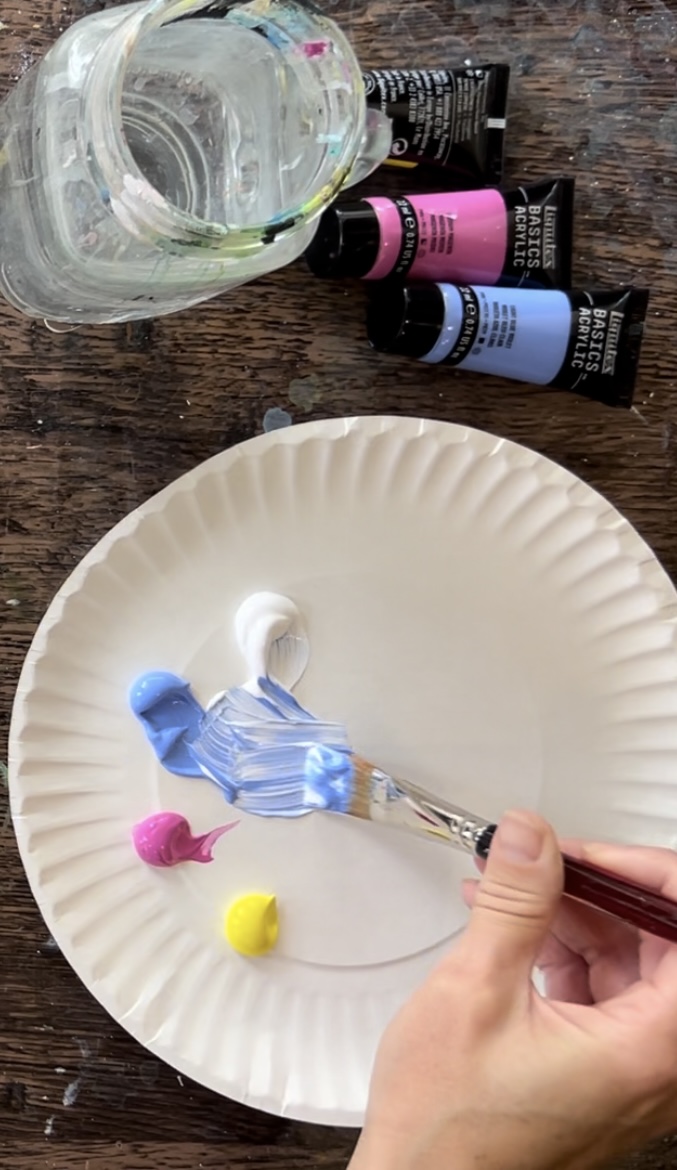
Use your 3/4″ flat wash brush to mix titanium white (about 2 parts) with light blue violet (about 1 part). This will make a light blue color!
Start at the top center of your canvas. Paint an inverted ac. Your paint strokes will go in this downward curve direction for most of the sky area.
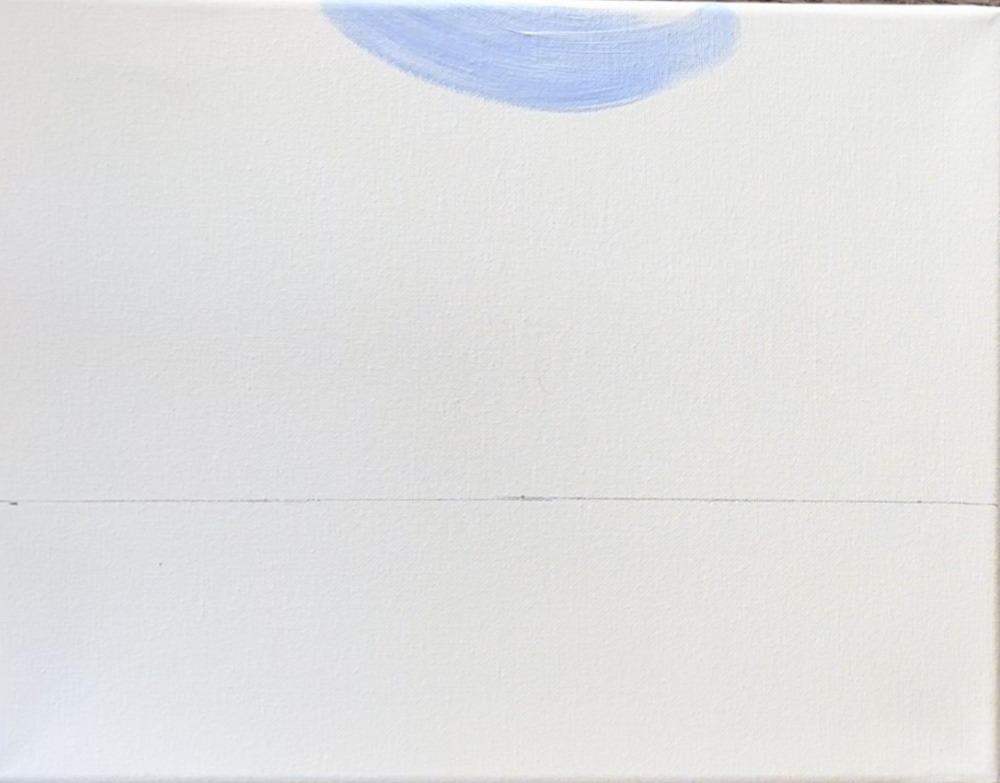
Go down a few inches with this light blue color and stop.
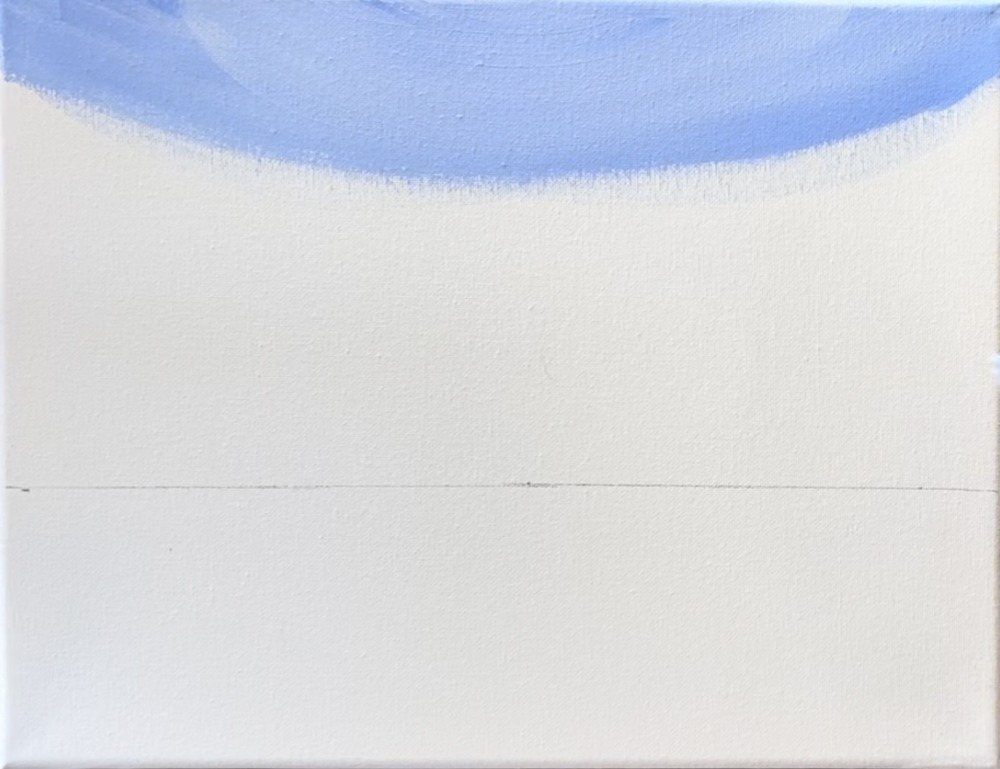
Wipe the brush off. Then load it into a small amount of titanium white. Blend titanium white below your light blue color. Your sky will become a soft, light blue.

Rinse the light blue off the brush.
Mix a “light bubblegum pink” on your paint palette by mixing about equal parts white and medium magenta.
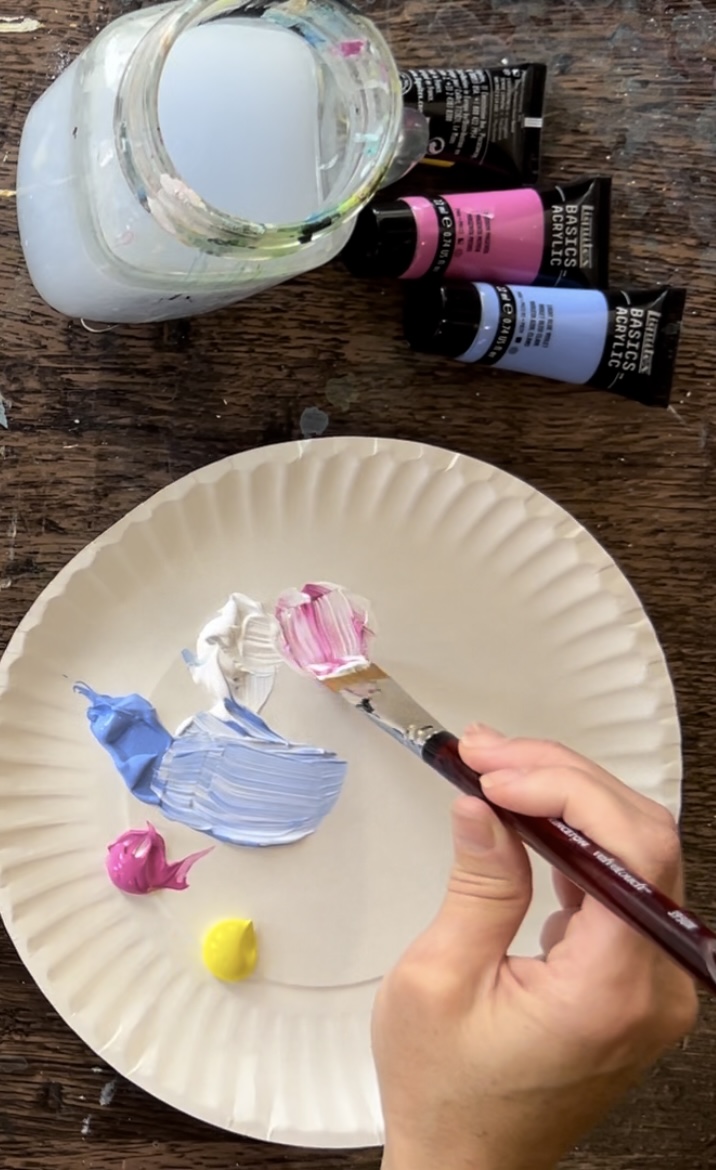
Blend this light pink color below your light blue color. Paint over your “transition zone” multiple times to get this to blend. Go down to almost the horizon line (there should be at least an inch gap below the lowest point of your pink.
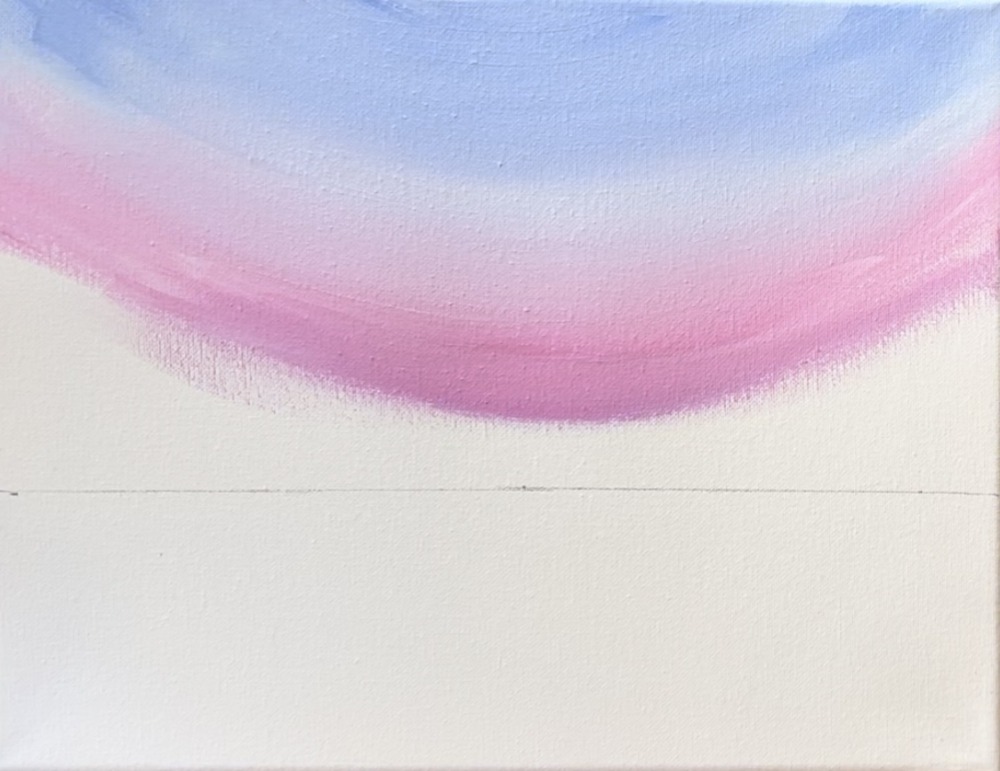
Then rinse the brush off. Mix a light orange color on your paint palette by mixing cadmium yellow light with medium magenta.
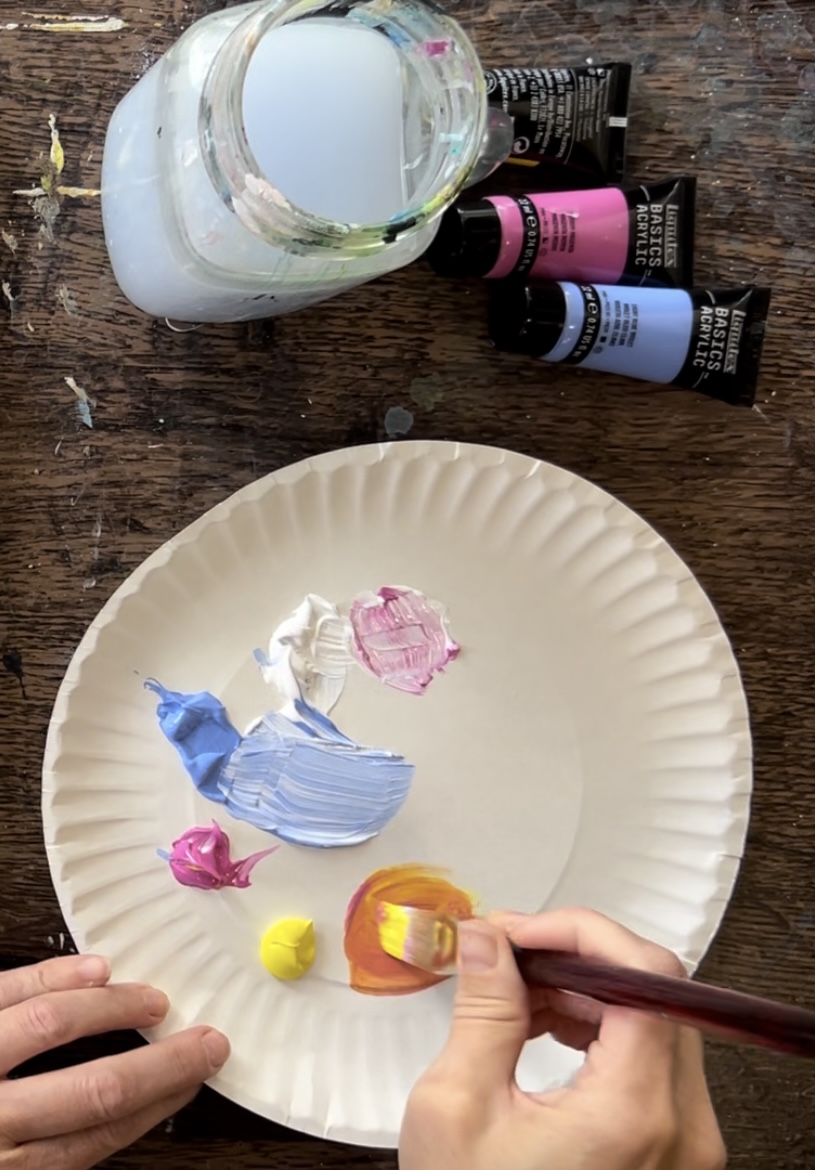
Then blend your orange color below your pink color of the sky. Note that your orange may get a little “muddy” from bits of blue that may end up blending with it in the sky and that is okay! Also, your colors do not need to blend all the way. They can look “streaky” with different variations of color. This will add to the effect of the sunset!
Rinse your brush again. Then mix “cadmium yellow light hue” with “titanium white” to make a bright yellow color. Paint the very bottom just above the horizon line. At this point, you will be painting more “left and right” strokes instead of curved paint strokes. Your bottom area of the sky will become bright yellow and may also blend a little with the orange. By adding this bright yellow on the bottom of the sky, it allows your sunset to be very vibrant on the bottom where the sun is setting.
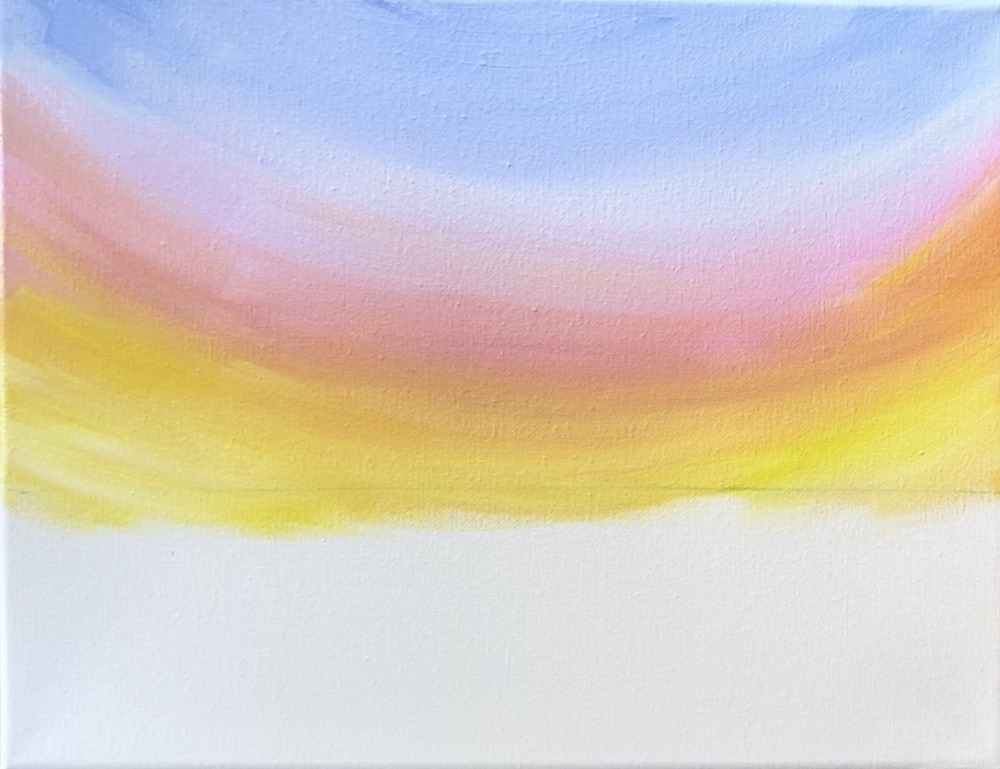
You do not need to wait for the sky to dry before going onto the next step.
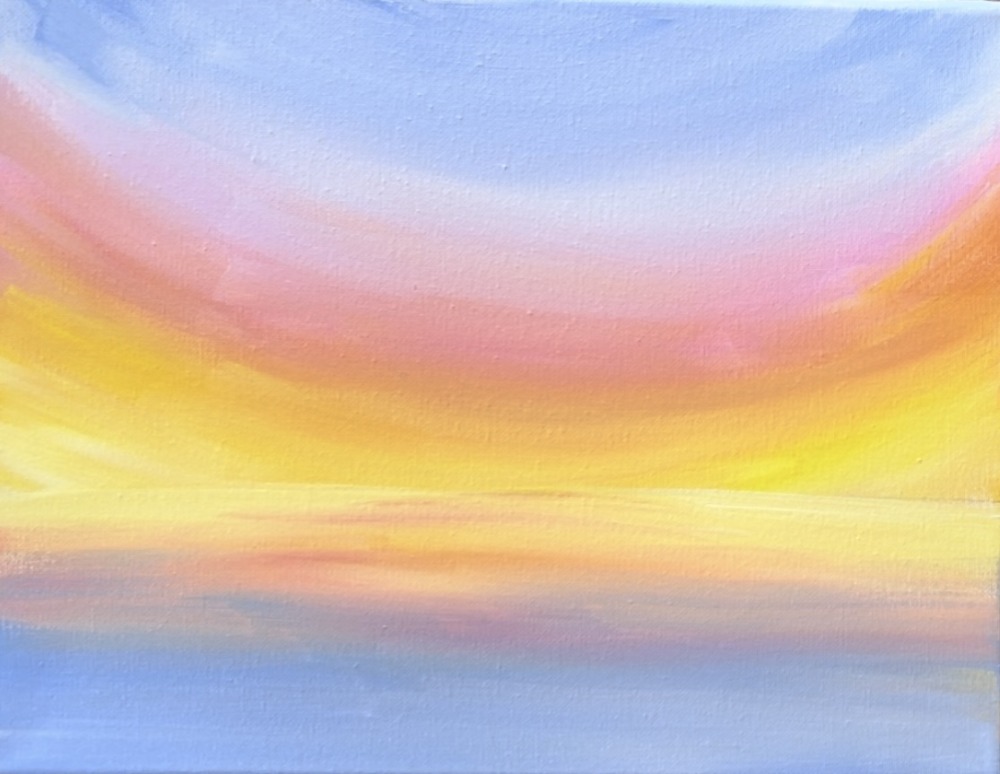
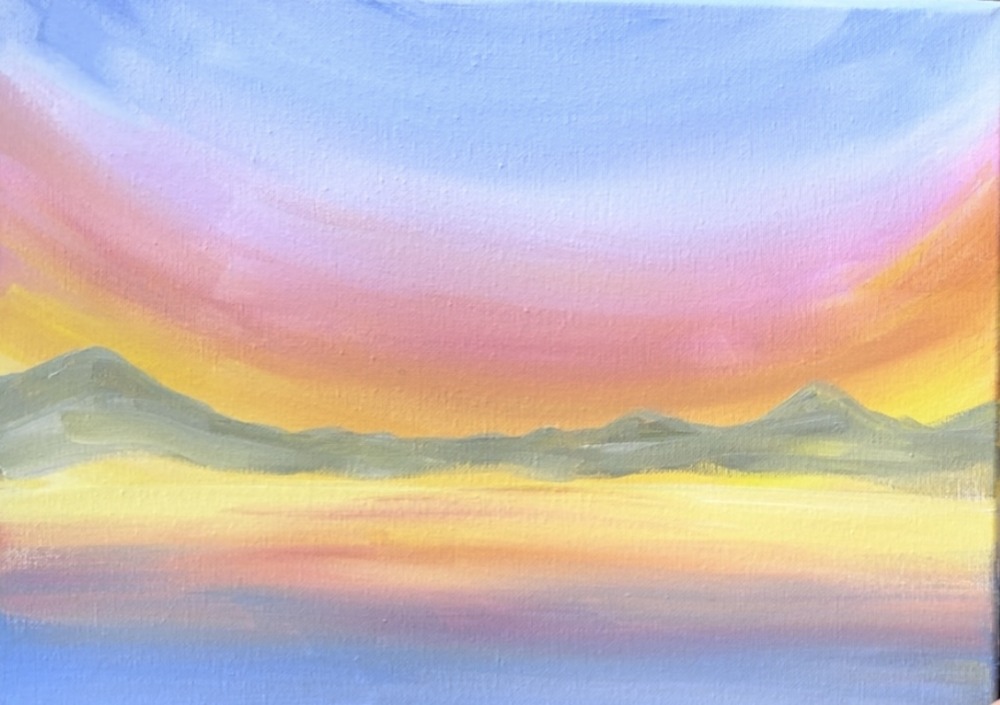
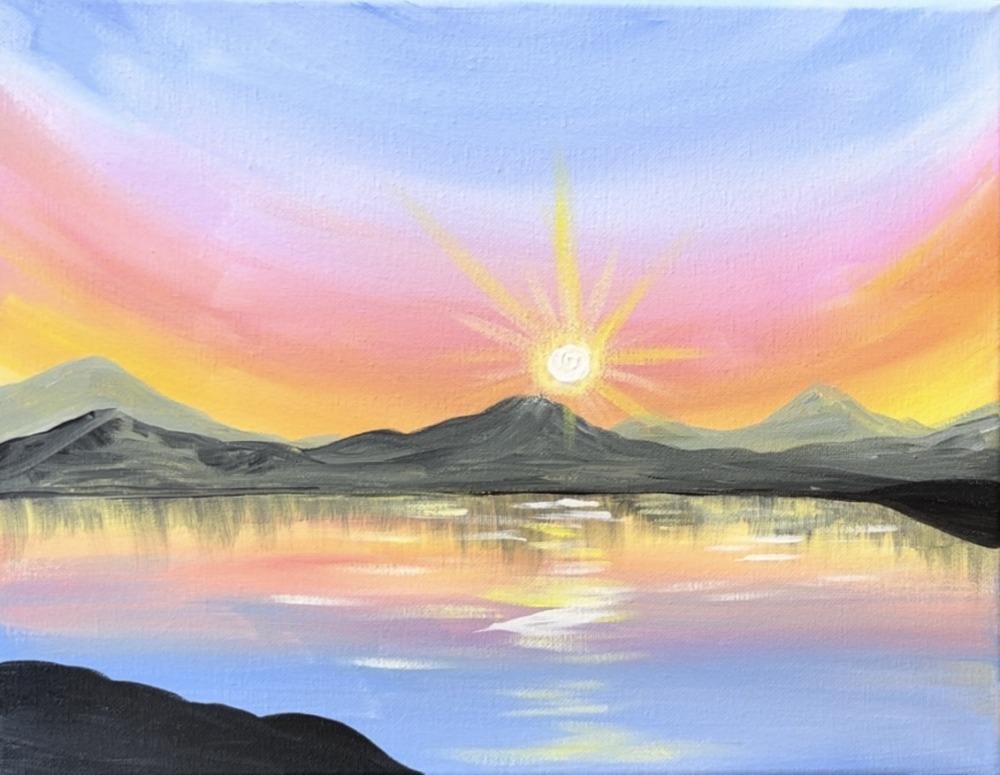
3. Paint Water
Rinse your brush. Next load it into “cadmium yellow light” mixed with “titanium white” (about equal parts). Paint left and right paint strokes under your horizon line. Create about 1″ area of very light yellow. Use the end of the brush to really define the horizontal line that divides land and sky.
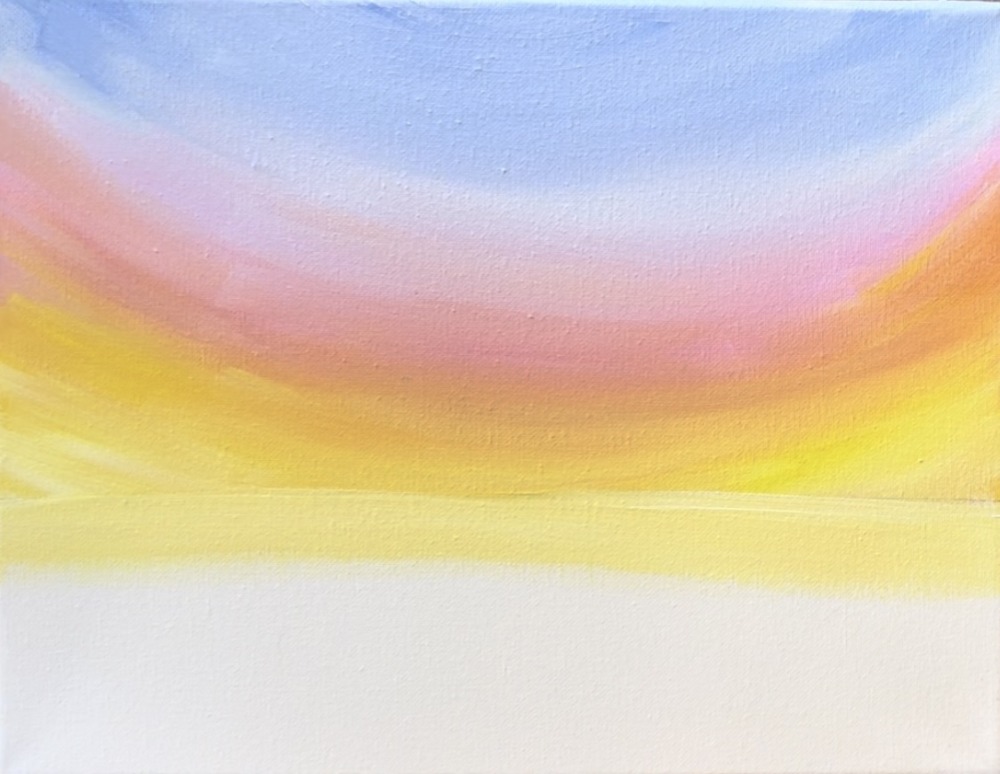
Then gently blend orange below the light yellow. We are creating a mirrored reflection of the colors of the sky into the lake water area.
Blend your orange gently up into the light yellow color. Then add a little bit of “medium magenta” to the brush and blend it into the orange. Leave about an inch of space on the bottom of the canvas for the blue in the water.
Rinse the 3/4 flat brush. Then load it into “light blue violet” and “titanium white”. Paint the rest of the water with left and right light blue paint strokes. Blend it with the pink.
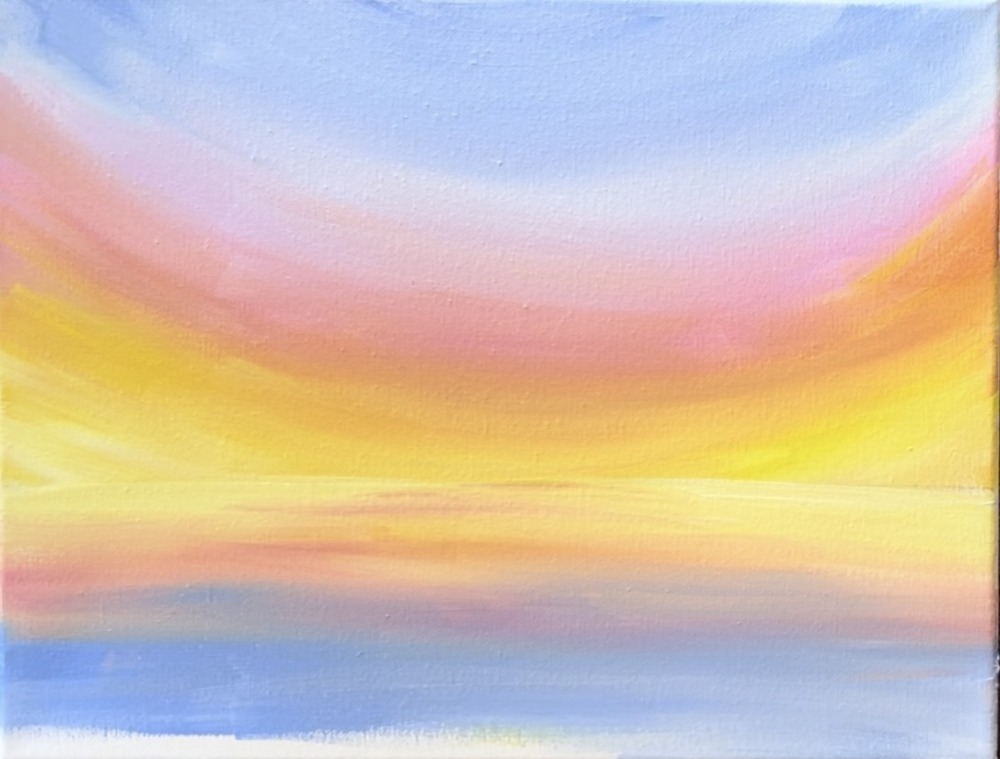
If some of the blue does blend with the orange/ yellow, that is okay!
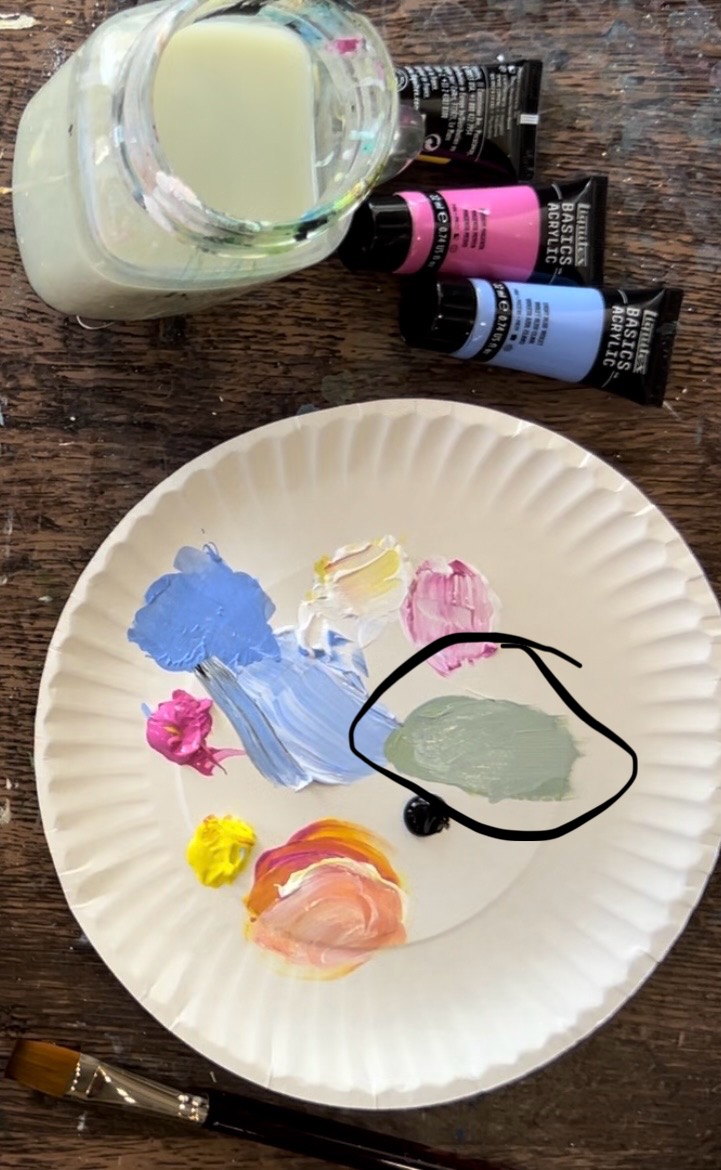
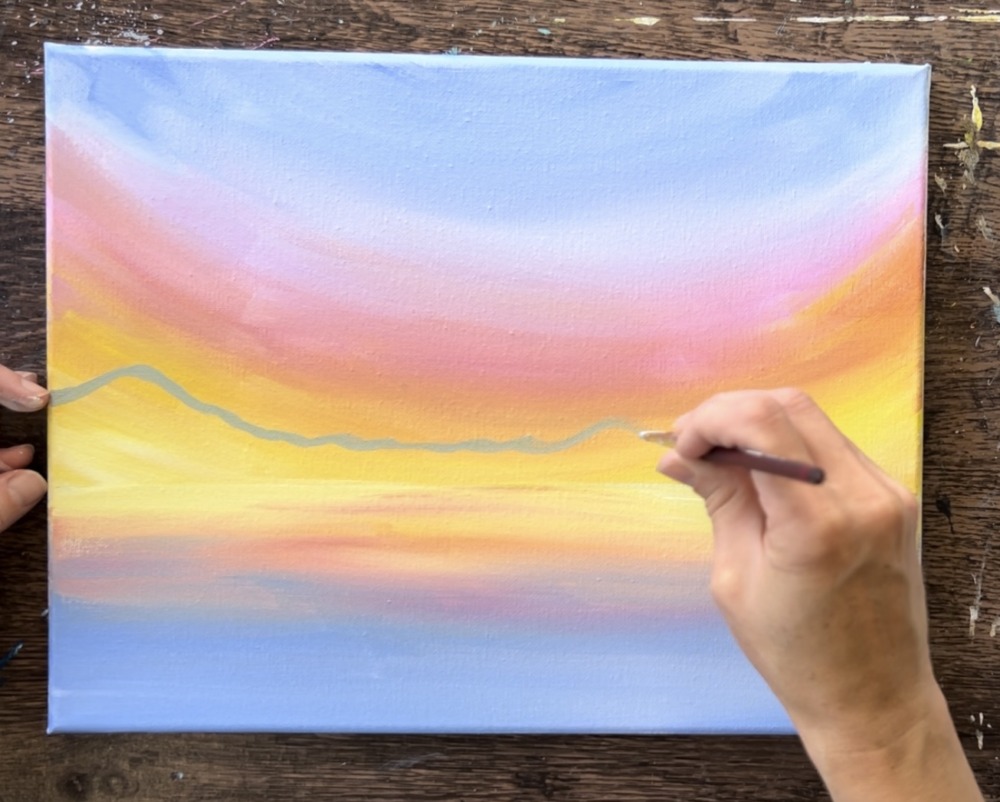
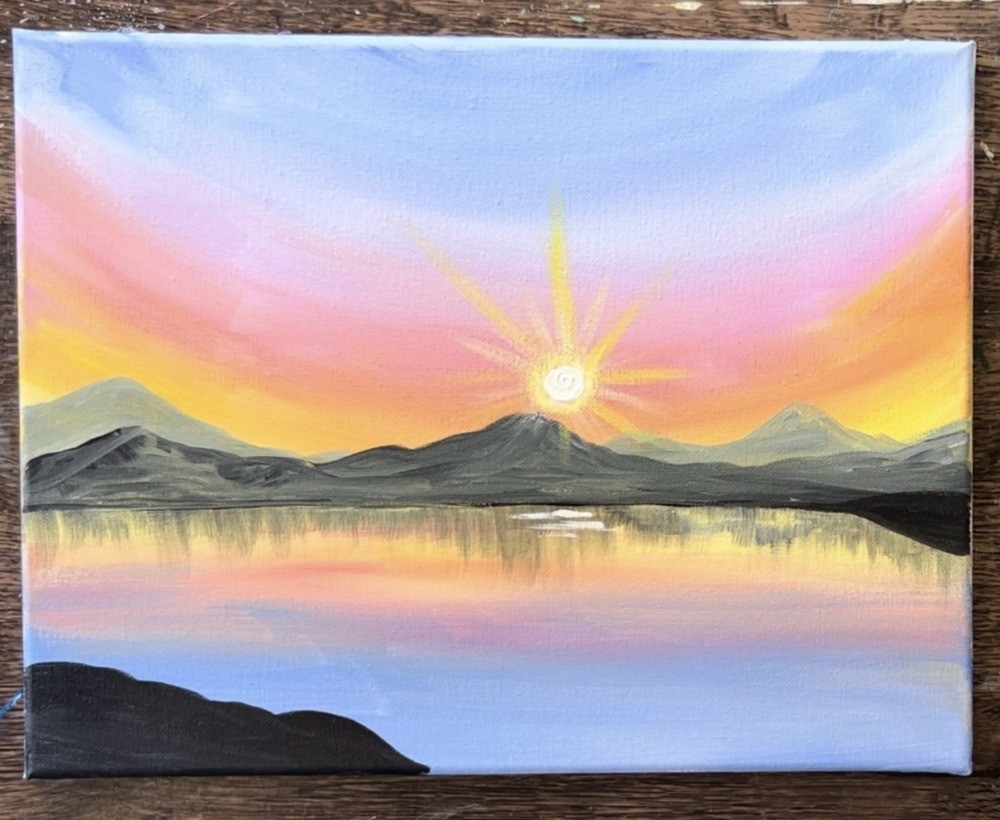
4. Paint Mountains
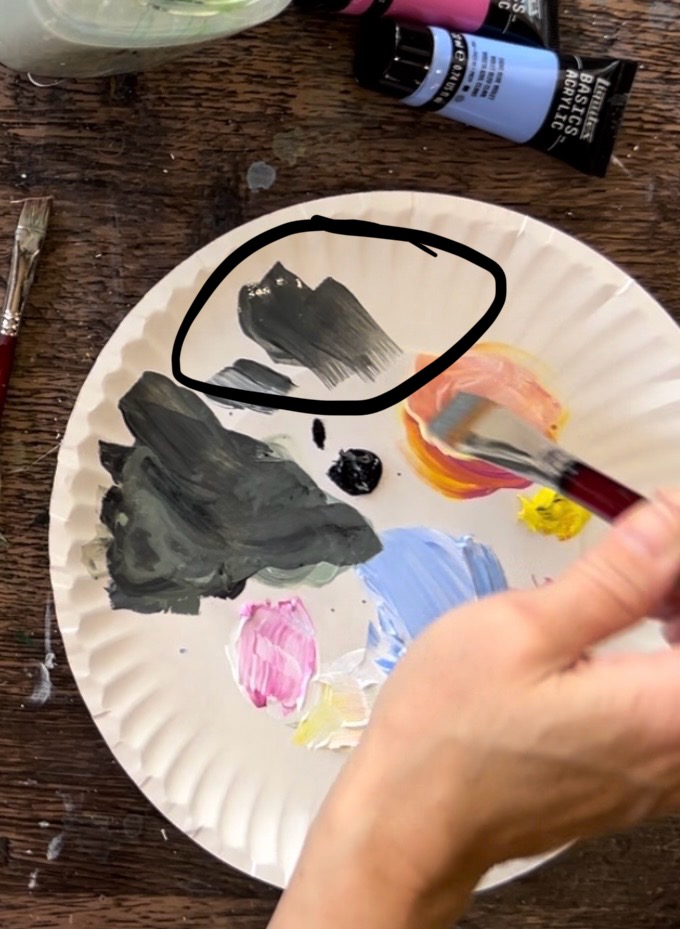
Use a 3/8″ angle brush. On your palette mix a light yellow-gray color. You want this to be a light color because these mountains are in the distance and further away mountains appear lighter.
To make this color, mix: 4 parts white, 1 part black, 1 part yellow and 1 part light blue violet.
Use the end of the 3/8″ angle brush to paint the outline of the mountain range. This line starts on the far left edge of the canvas above the horizon line (about 1.5″) and then goes up and dips down. Create a variety of peaks in the mountain.
Then fill the mountain in solid with this light yellow-gray color.
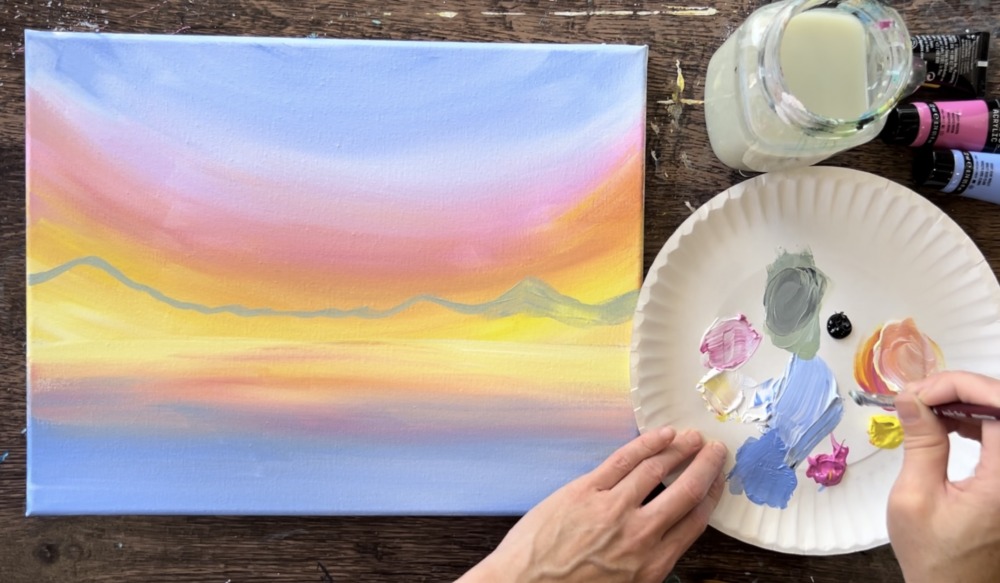
Fill the mountain and drag your paint strokes down in the direction of the shape of the mountain.
Then wipe the brush. On your palette, add a little more black into the gray you just used to make it darker. Paint a second mountain range in front of the back range. Some of the peaks go higher, some lower.
Fill this closer mountain range in with this dark gray color and go all the way to the horizon line.
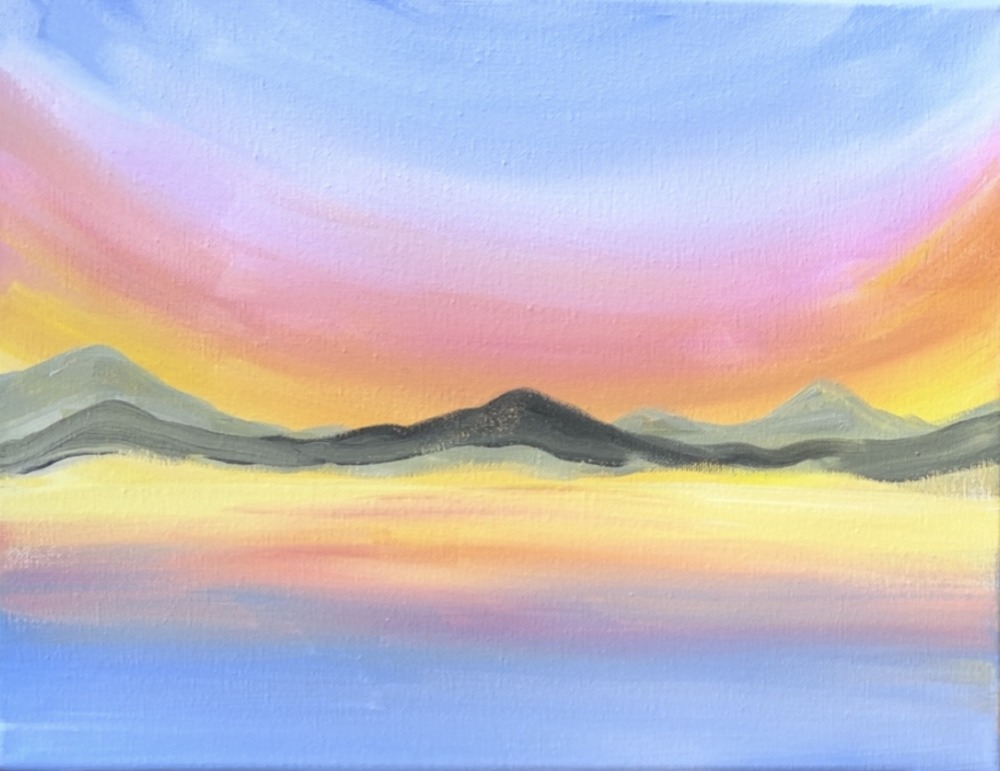
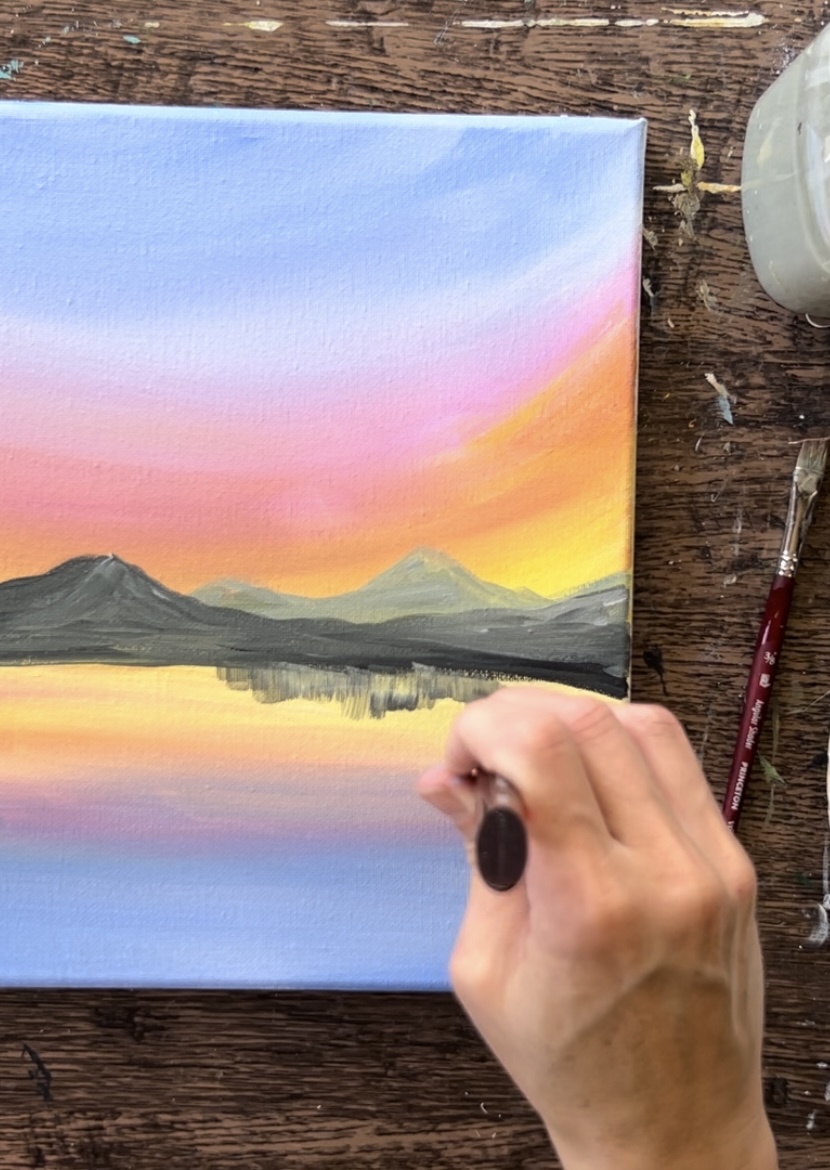
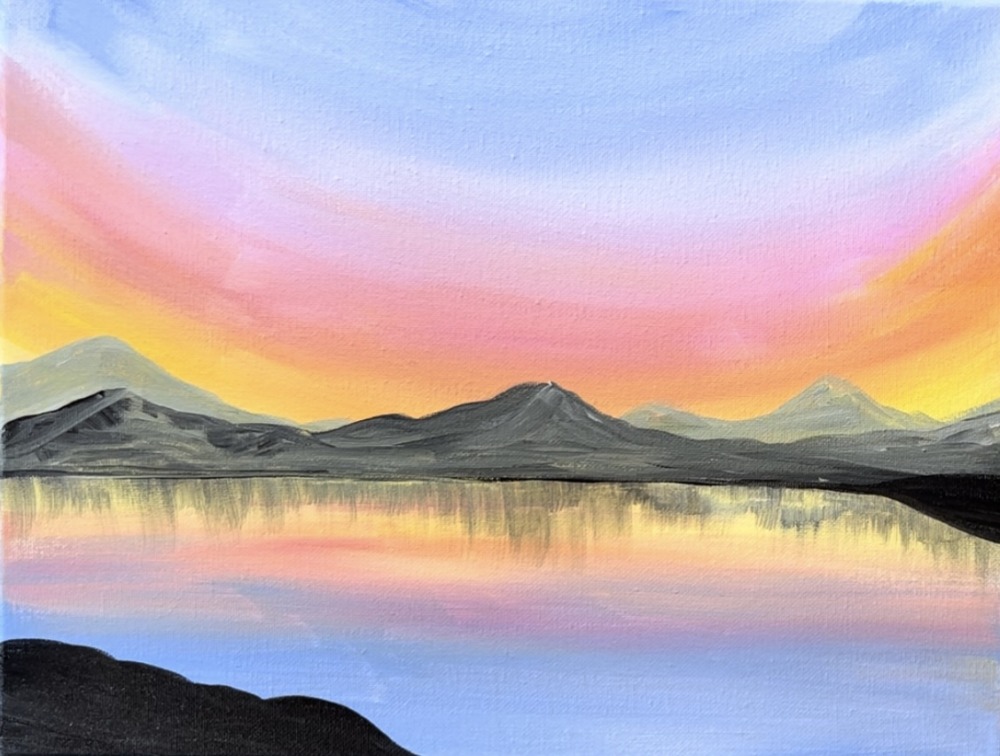
5. Paint Mountain Reflection (optional)
Use a 3/4″ flat wash to paint the reflection of the mountain. To do this, you want to use the same dark gray and make it into a watercolor consistency but paint it “dry brush style”. In other words, add a bunch of water into the gray and then wipe the brush off after loading it.
Drag the full width of the brush down in a vertical direction and then let go of the brush so it “fades out”. This layer should be very thin and translucent so a lot of that first yellow layer on the water still shows through.
Tip: if it’s too dark or “runny”, wipe the brush off some more and then drag the dry brush to “smear” the paint a little bit more.
Do this all the way across the mountains. Note that the reflection doesn’t go down very far into the water area.
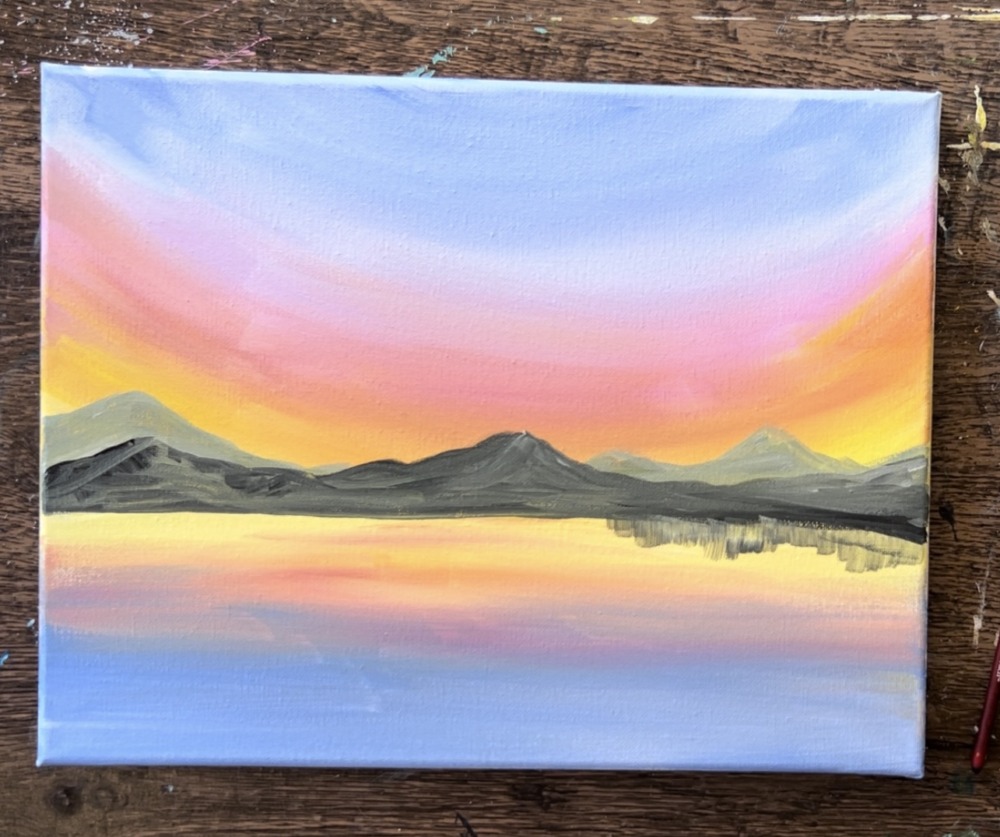
6. Paint Land Areas
Use a 3/4″ flat brush to paint the land in the lower left of the canvas. Define the area first and then fill it in solid black. It should have a slightly wavy edge and only be about an inch high on the right. The land extends to almost the center of the canvas on the bottom right.
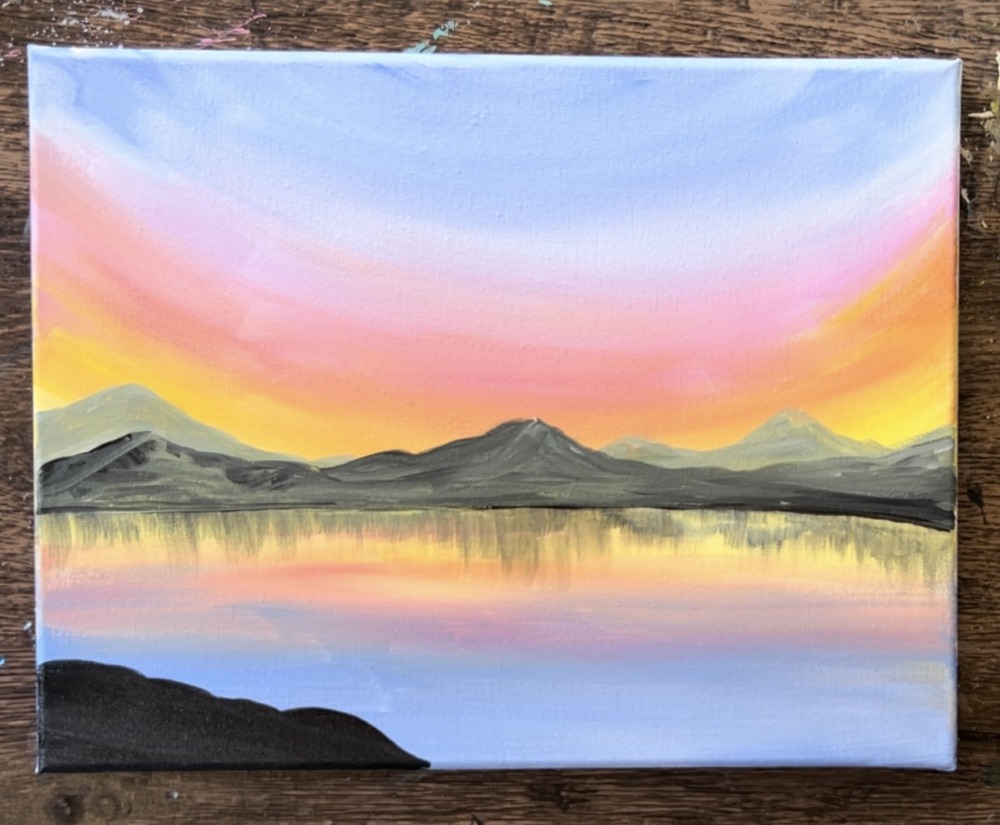
Then, on the upper right of the lake, paint a diagonal land area that dips down. This is where the two pine trees will be later.
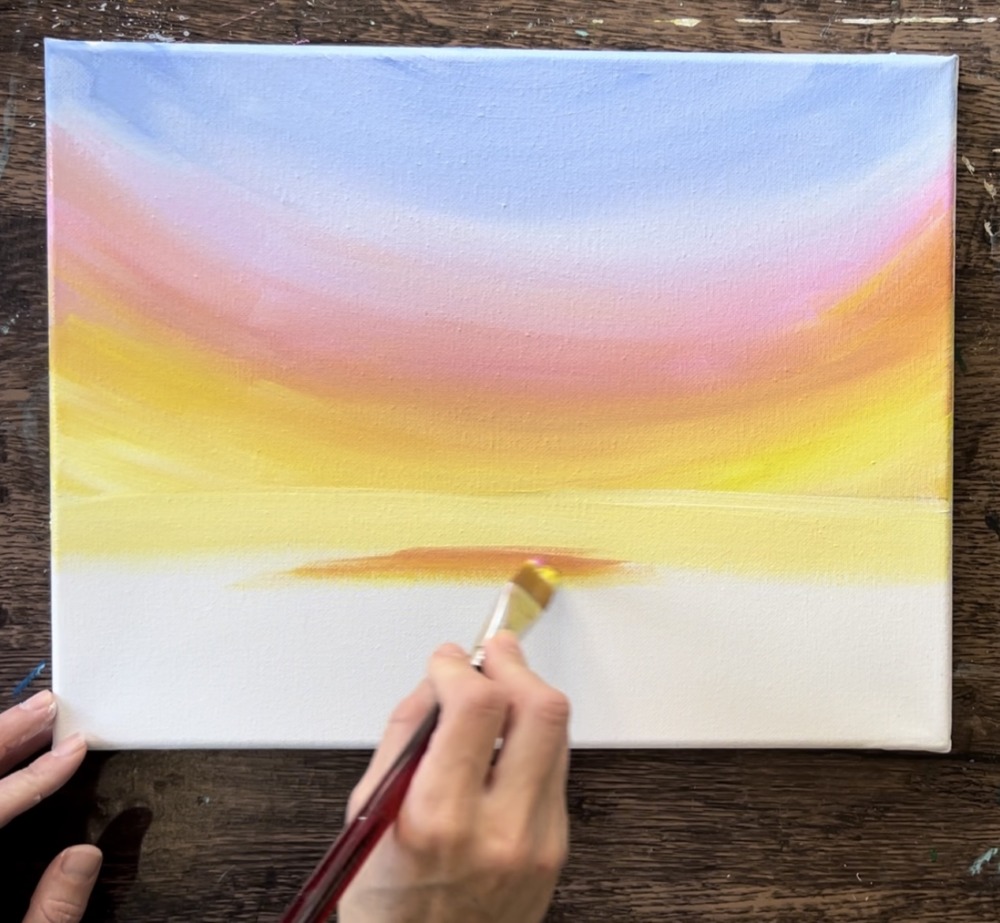
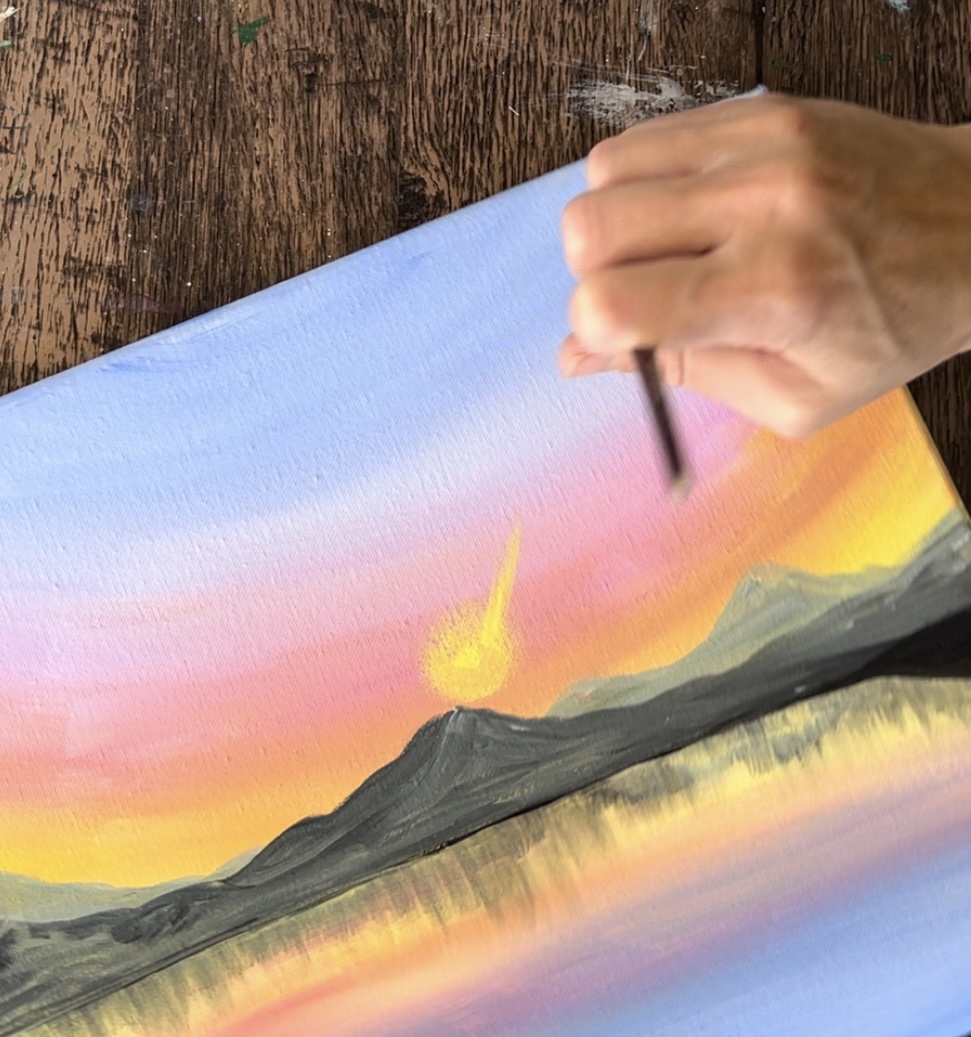
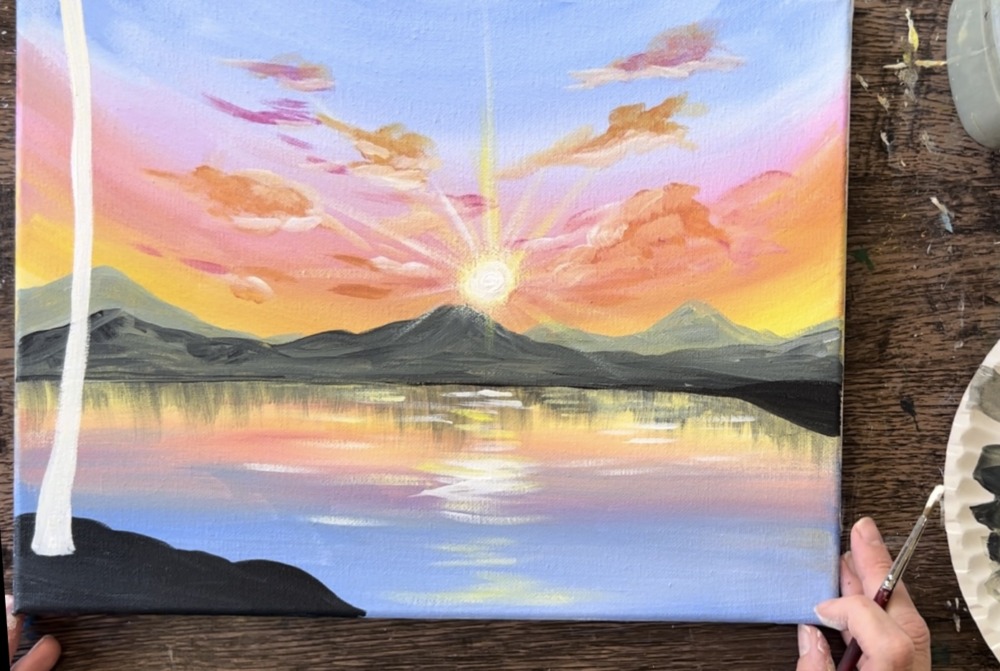
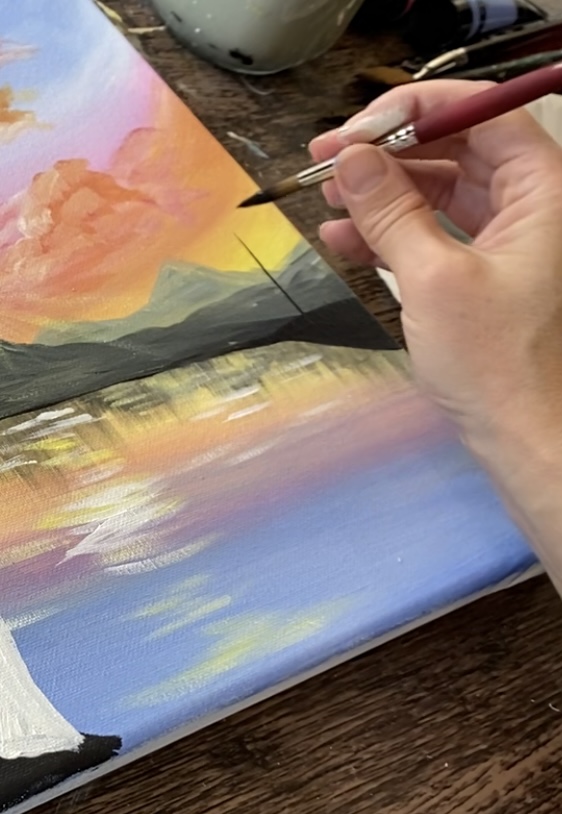
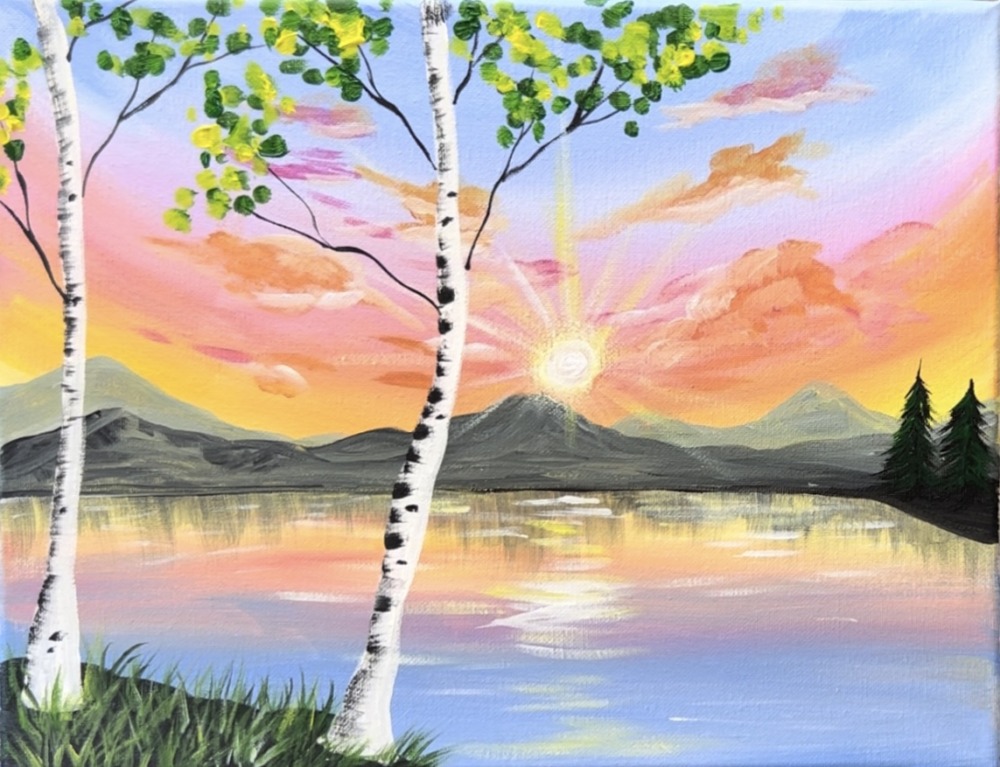
7. Paint Sun
Use a #4 round brush to paint the sun. Mix “cadmium yellow light” with “titanium white” (about equal amounts). Then paint a small yellow circle. Note: this circle is not exactly center, it’s a little off center to the right.
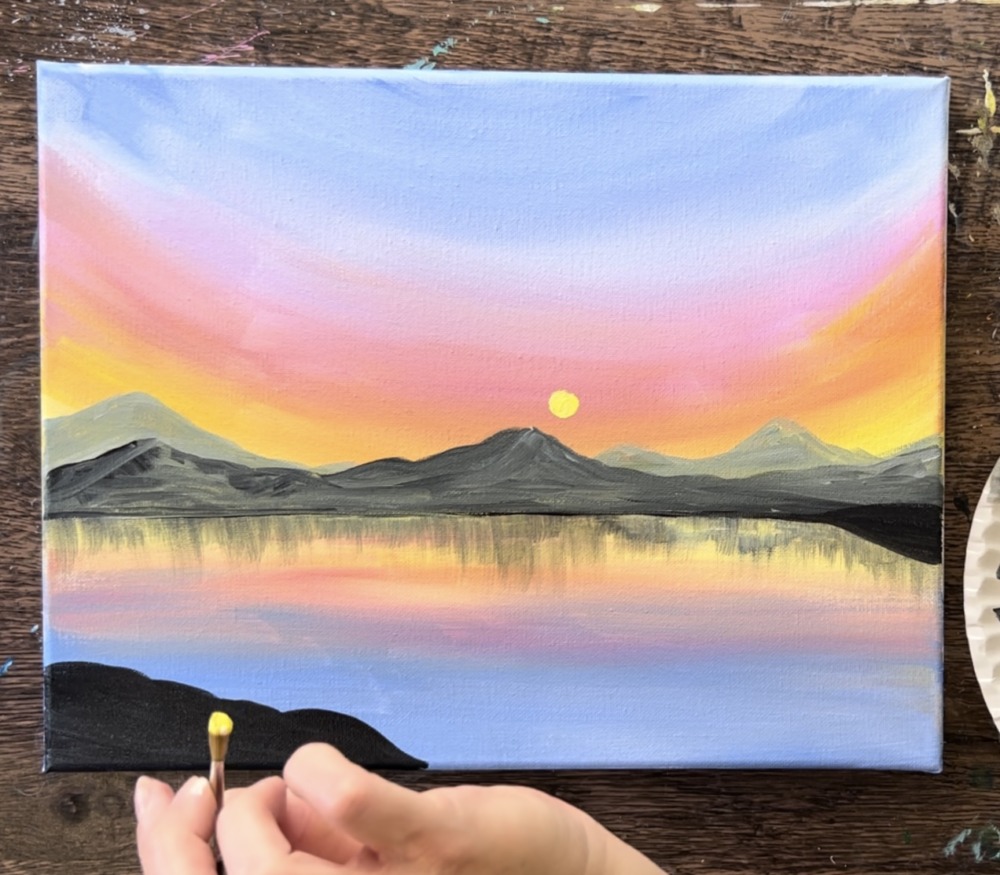
Then use your finger to “smear” the circle into a larger blurry circle.

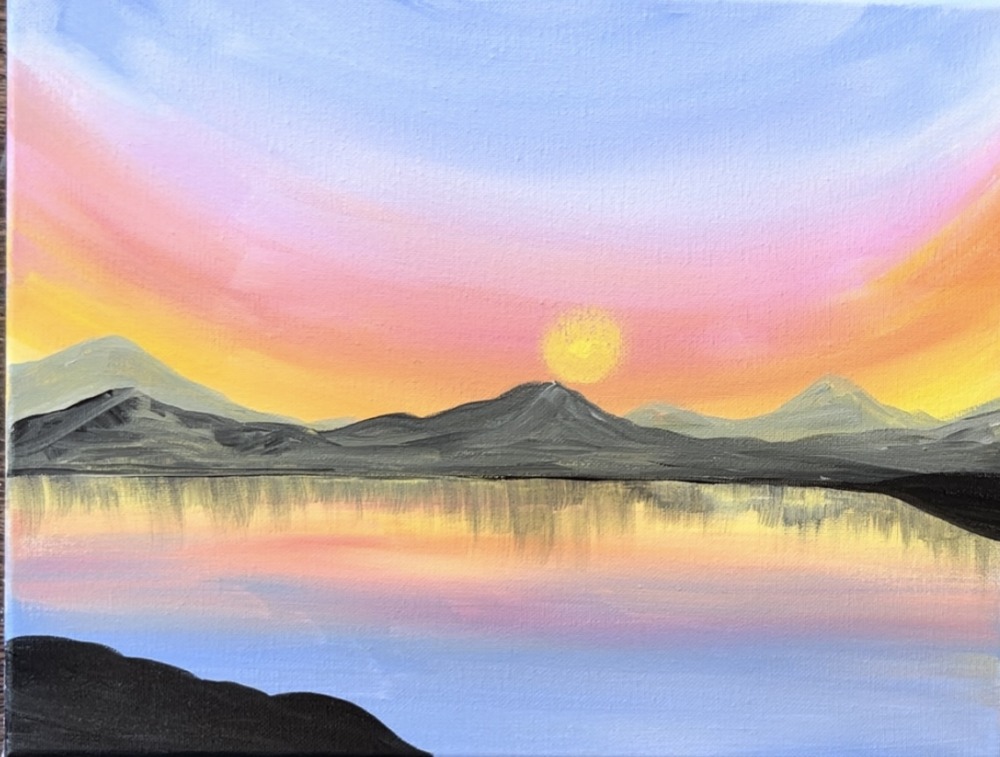
Then paint the rays. Use the #4 round brush and load only a small amount of light yellow (same color you used to paint the sun). Drag each ray outwards to make a point that extends out a few inches from the sun. These paint strokes should be “dry brush” and not thick or opaque at all. In order to achieve that “shear” look in the ray, you need to make sure your layer of paint will show the colors below it.
I did 8 rays going around the circle. You can vary the length and intensity of each of the rays. You can also overlap parts of the mountains with the rays.
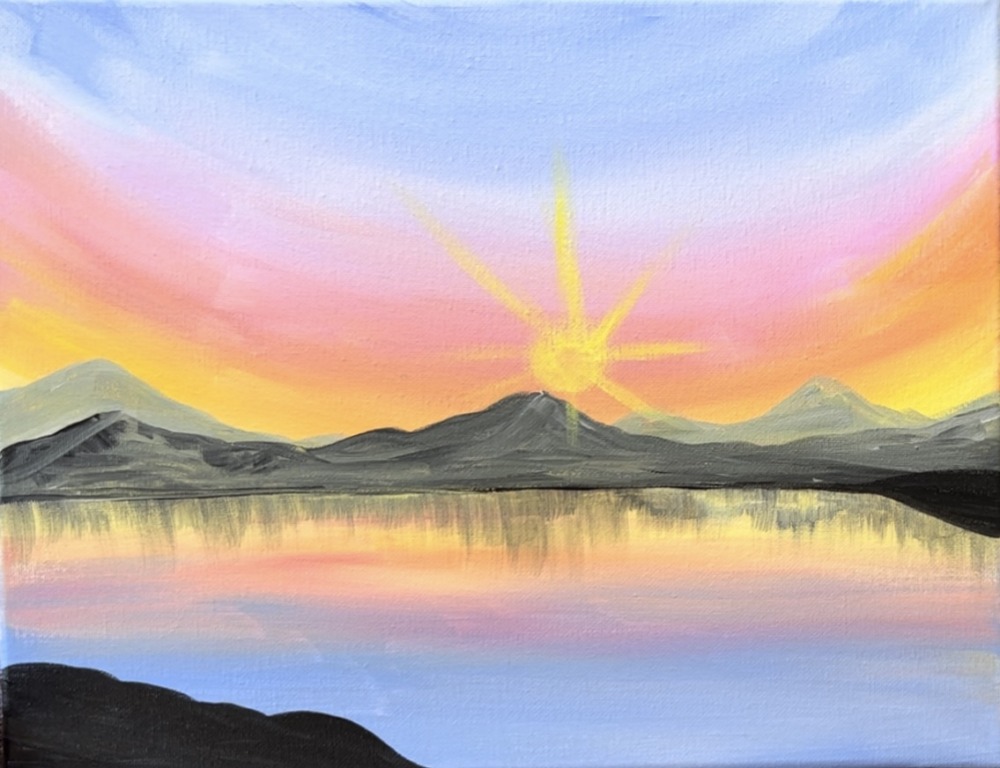
Next, paint another little white circle over the sun and smear it. It will create a brighter center on your sun.
Then paint another set of rays using this lighter color. Drag the rays outwards just like you did in the previous step. I made this second set shorter than the first set of rays so it sort of made a pattern of long and short.

Finally, repaint the sun for the third time using just titanium white. When you paint the sun white it will create a very bright glowing effect!
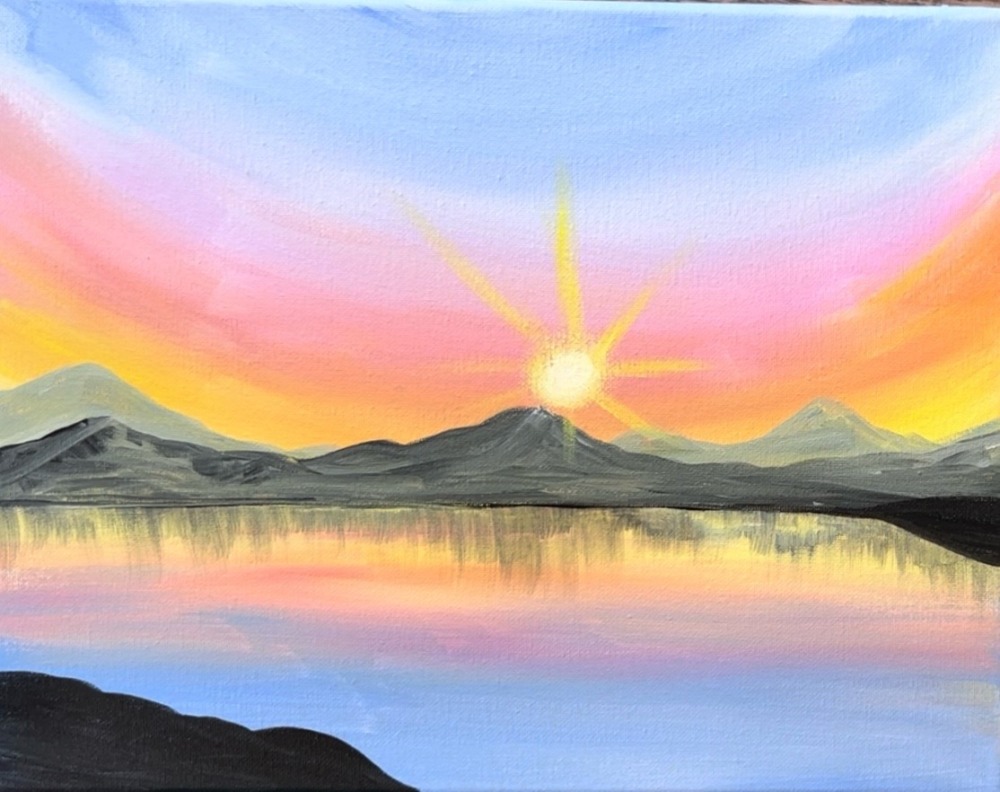
8. Paint Sun Reflection On Water
Use a #4 round brush to paint reflections in the water. Crate a column of reflection underneath the sun. Start just below the mountain and paint very thin white lines that are very close together. As you paint down the water area, make your strokes slightly bigger and further apart.
Use a variation of the white and the “cad yellow light”.
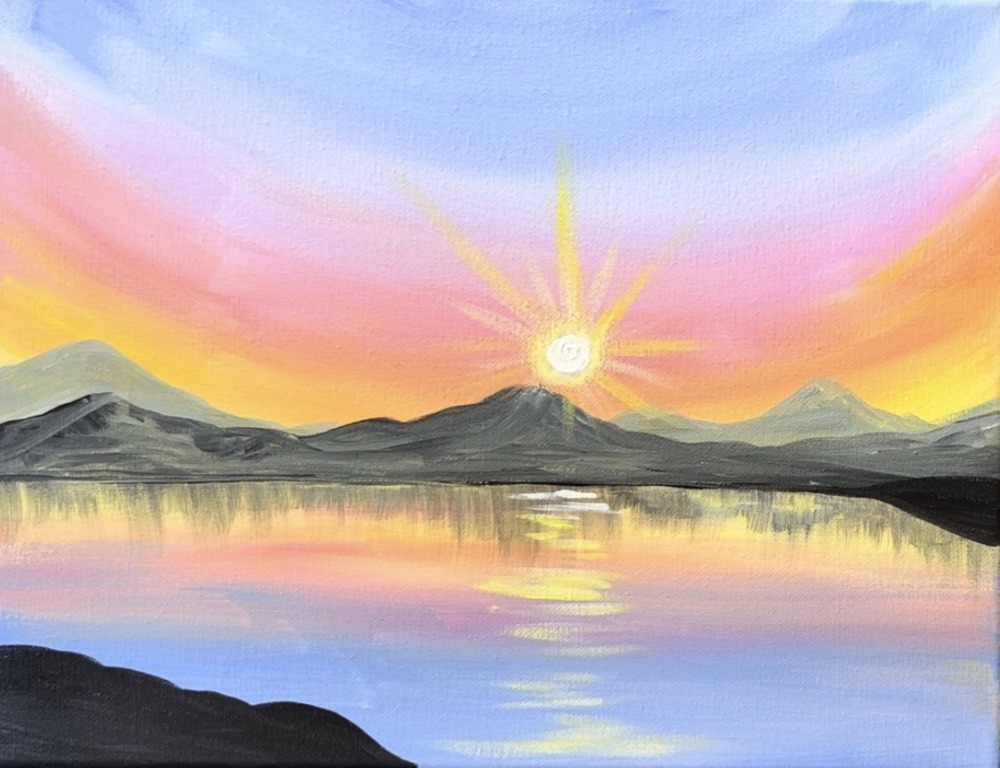
Then paint a few more reflection lines all throughout the lake area but don’t paint too many! Most of the reflection should be evident in the column area below the sun.
Optional: I extended a few of the sun rays to be much longer. To do this, use the #4 round brush and dry brush titanium white paint.
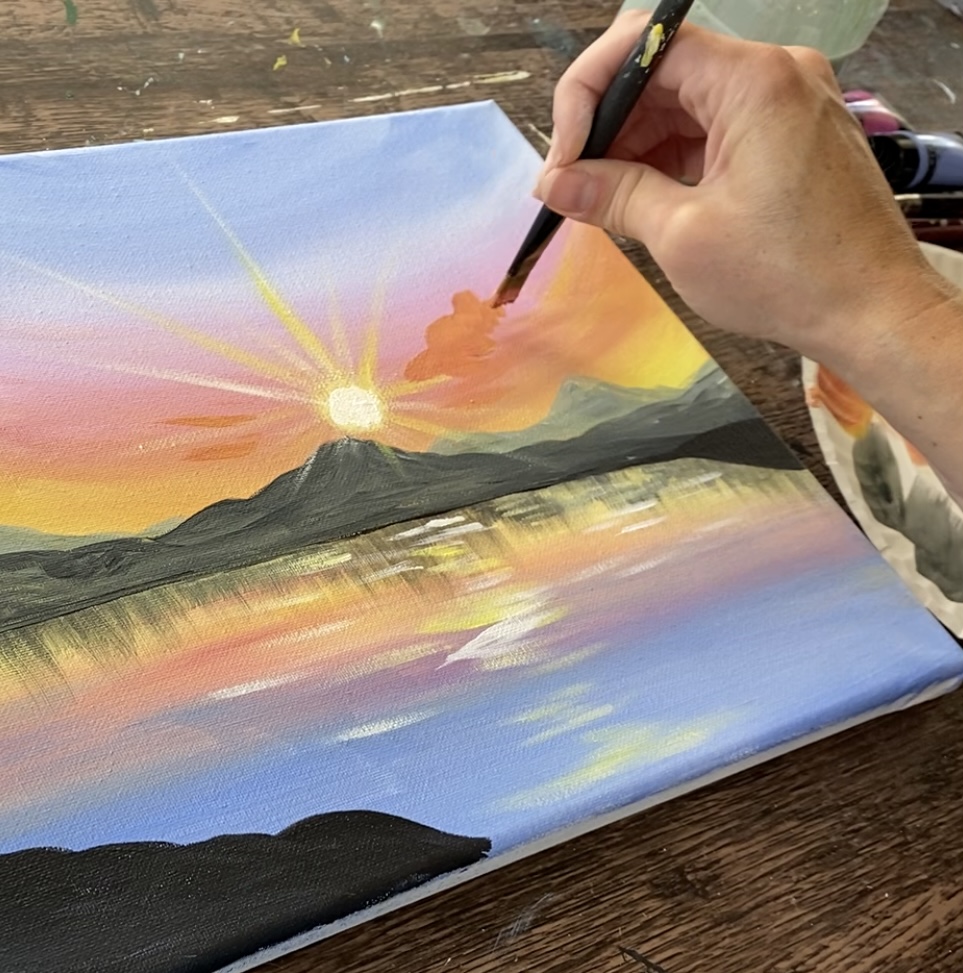
9. Paint Clouds (optional)
I like to use a #12 bright brush to paint clouds! You can also do this with a round brush or whatever brush you feel most comfortable painting clouds with.
Start by mixing an orange on your palette (same orange you used in the sky).

Load the brush into the orange but wipe some of the paint off. We will be painting this clouds with a very thin layer of paint and we don’t want a lot of paint on the brush!
Paint the shapes of the clouds. Keep in mind the direction of the curved strokes we painted in the sky. We want our clouds to kind of go in that direction too. I started by painting a cumulous shape cloud on the right of the sun.
Use the end of the brush and paint rounded strokes to form the shape of the cloud.
Paint another smaller cloud above it.
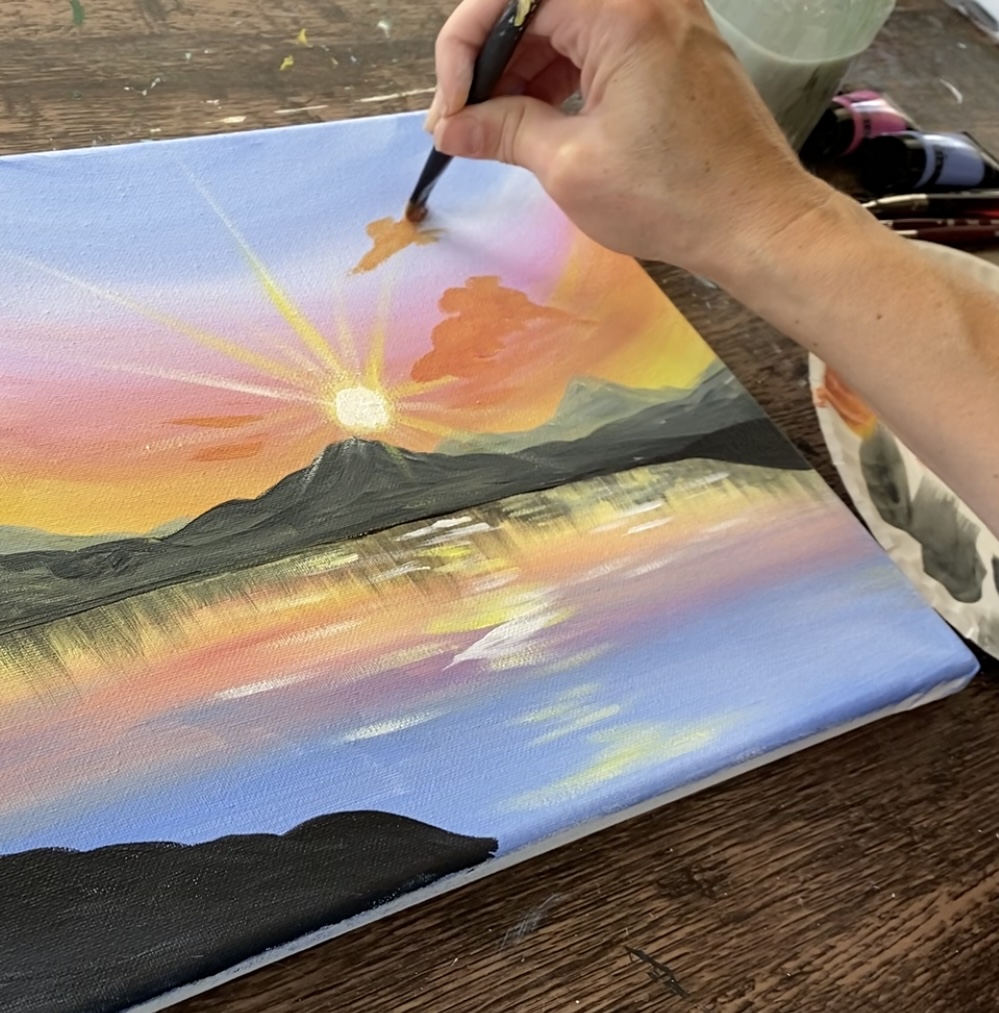
Then paint another set of orange clouds on the left side of the sun.
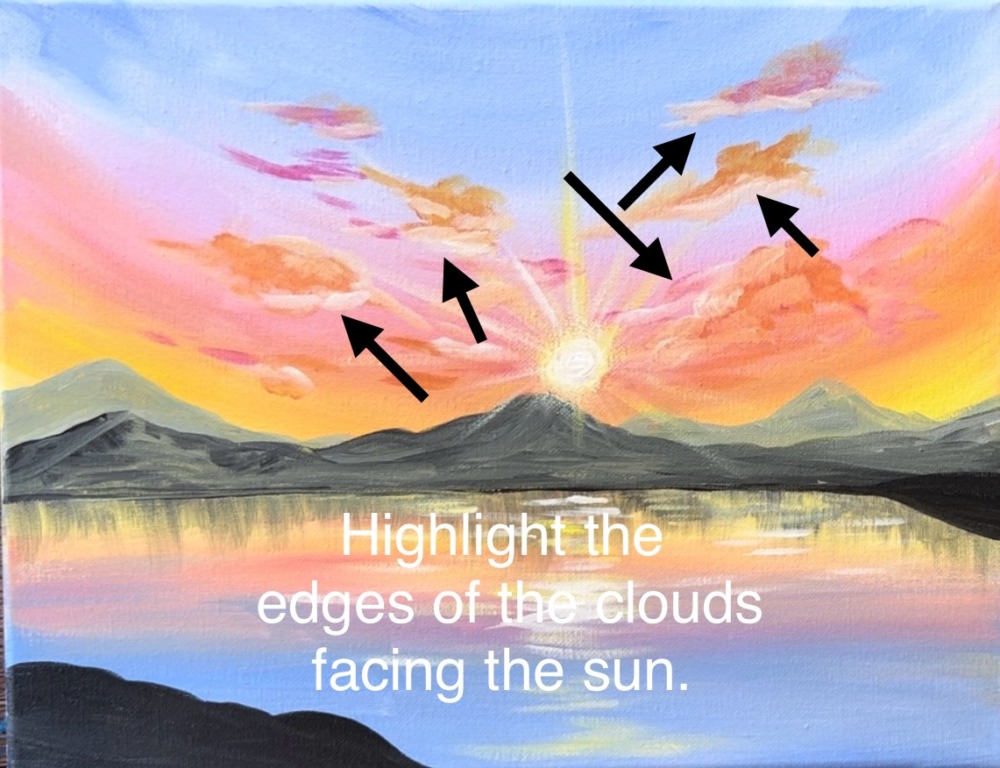
Next, highlight the clouds. To do this, wipe the orange off the brush but do not rinse. Load a small amount of “titanium white” on the end of the bristles. Then wipe some of the paint off so there’s not a lot of paint on the brush.
Highlight the clouds but painting just the side of the cloud that is closest to the sun. Paint short, rounded paint strokes just on the edges.

Do this on each of the clouds.
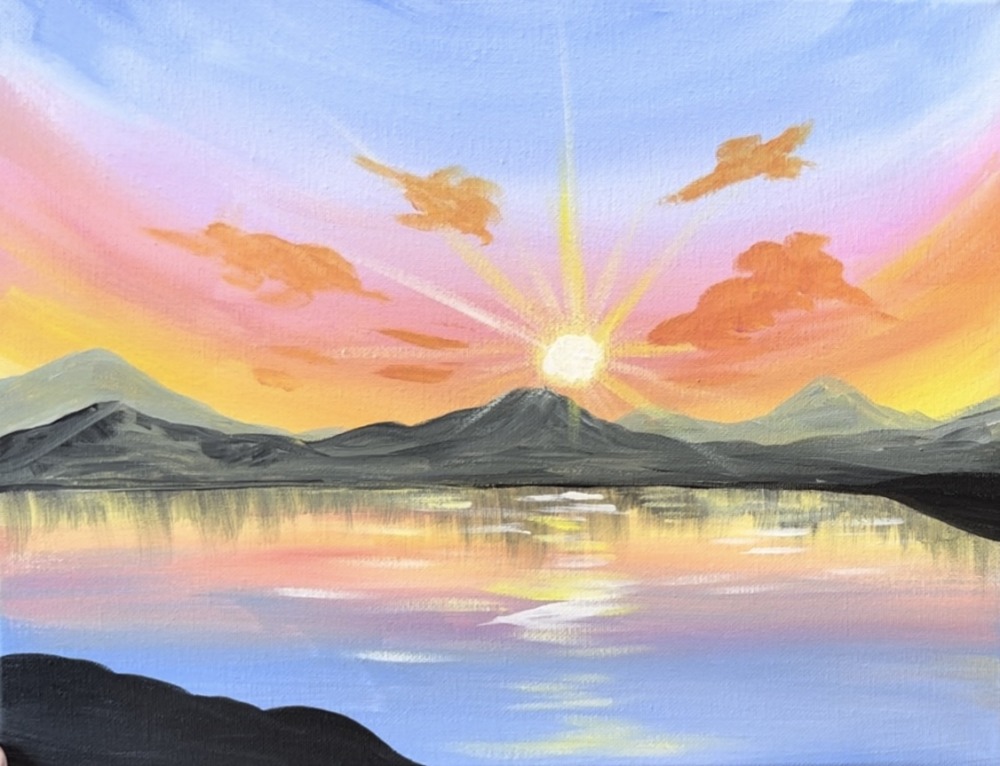
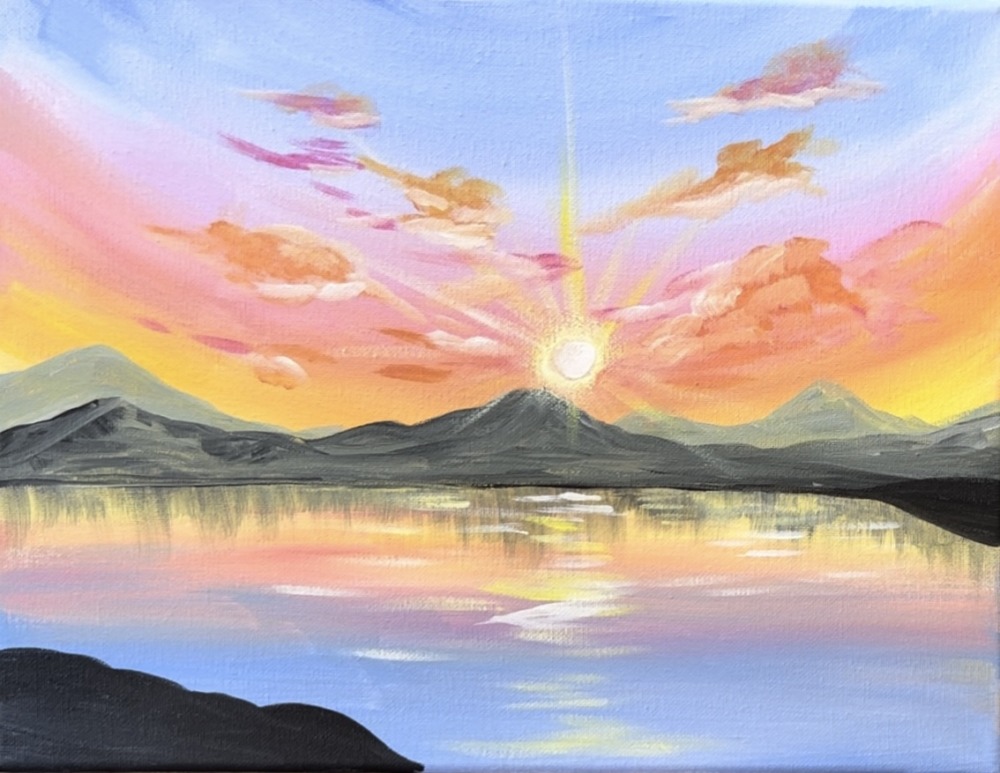
Rinse the brush and then load it into “medium magenta”. Paint some higher clouds with the magenta. Make these clouds also go in a curved direction with the sunset background.
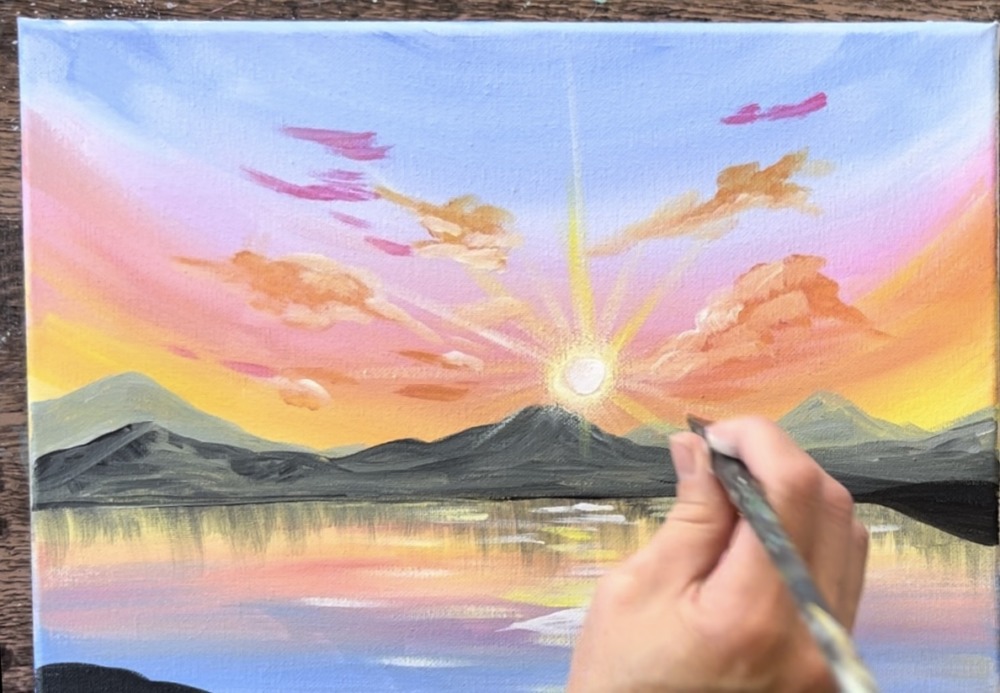
Then go back and highlight the parts of the pink clouds that are facing the sun. Do this with titanium white and using the same technique you used for the orange clouds.
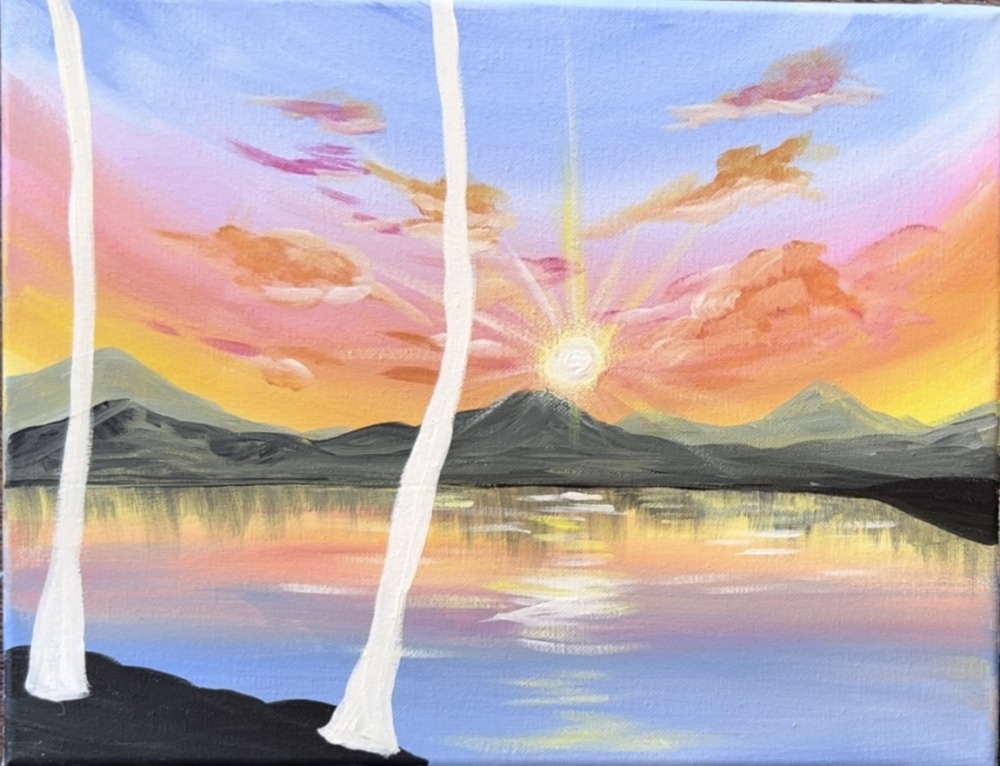
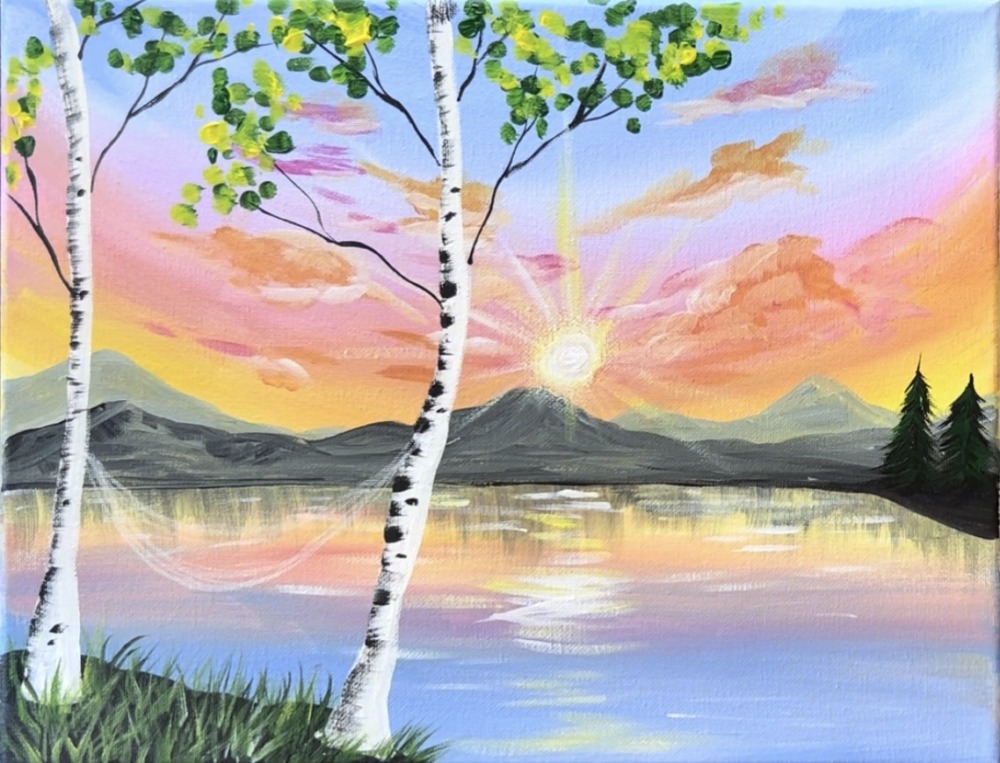
10. Paint Aspen Trees & Pine Trees
Tip: you can use a chalk pencil or regular pencil to draw these trees first to help with the placement.
Use a #4 round brush and titanium white to paint the trunks of each of the trees. Start on the far left. Paint a trunk that starts out thick and white but then goes narrow. The tree bends slightly to the right and then goes off the edge of the canvas.
Paint the second tree trunk so that it is at least 3.5″ to the right of the left tree trunk. Start the trunk wide and then let it go narrow. Let the tree bend slightly to the right and then off the edge of the canvas.
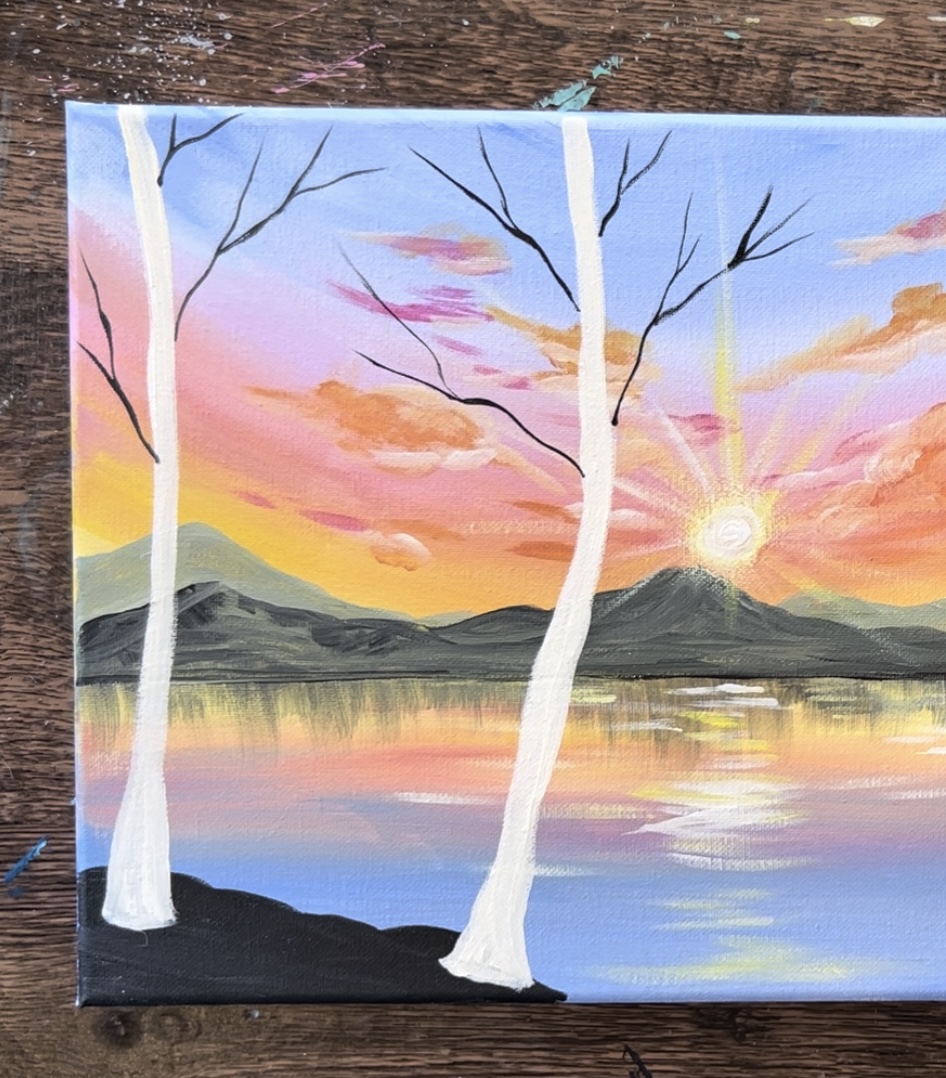
Use the #8 round brush and “mars black” to paint the branches of the trees. I selected the “#8 round brush” because the point of it is thin and this allows a very thin line.
Add a little water to “mars black” paint. Then paint branches on the top half of each of the trees.
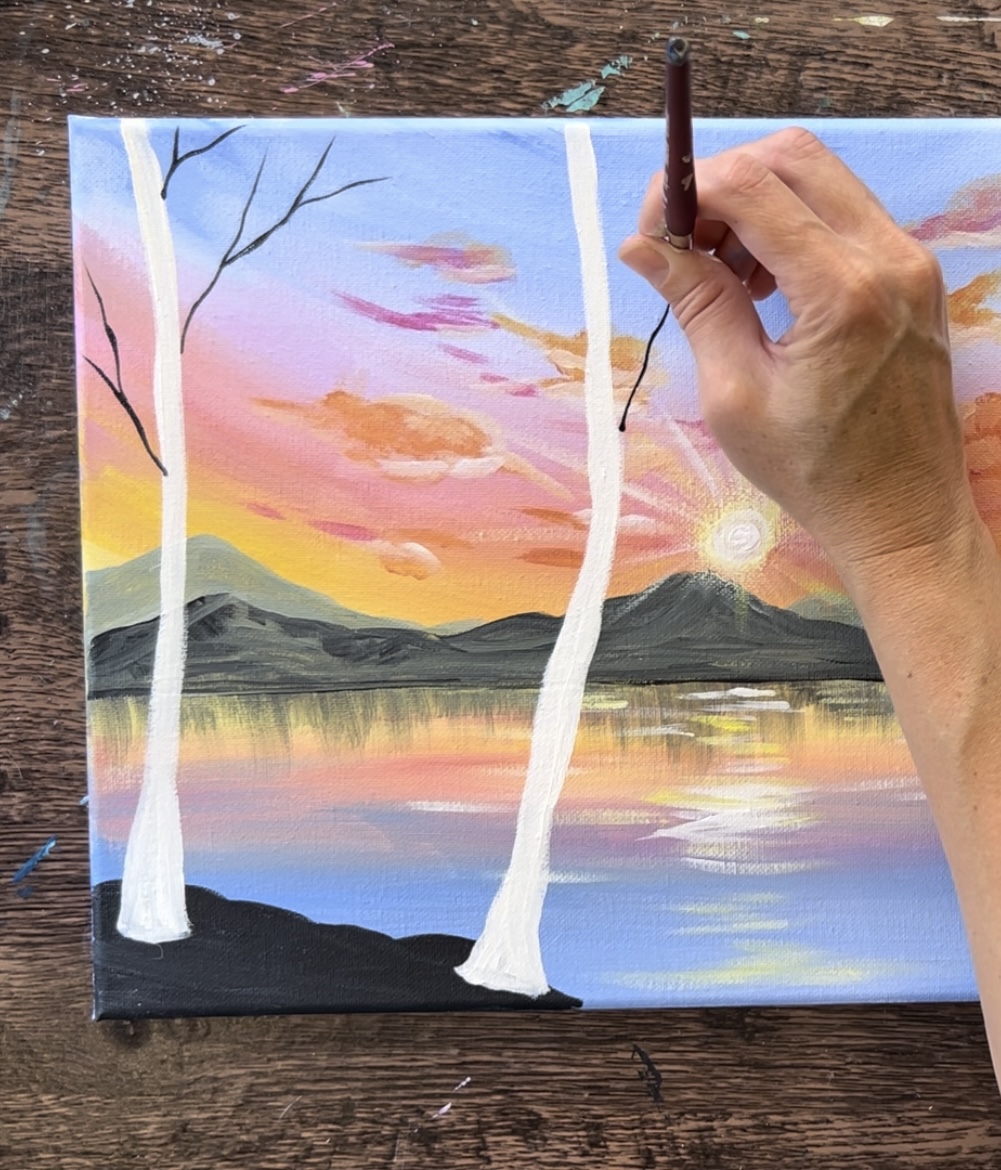
Next, paint two pine trees on the right. Use the #8 round brush and mars black. Start by painting a vertical line.
Then paint the branches from the top of the line to the bottom. Do this by stroking lines downwards in a curved direction.
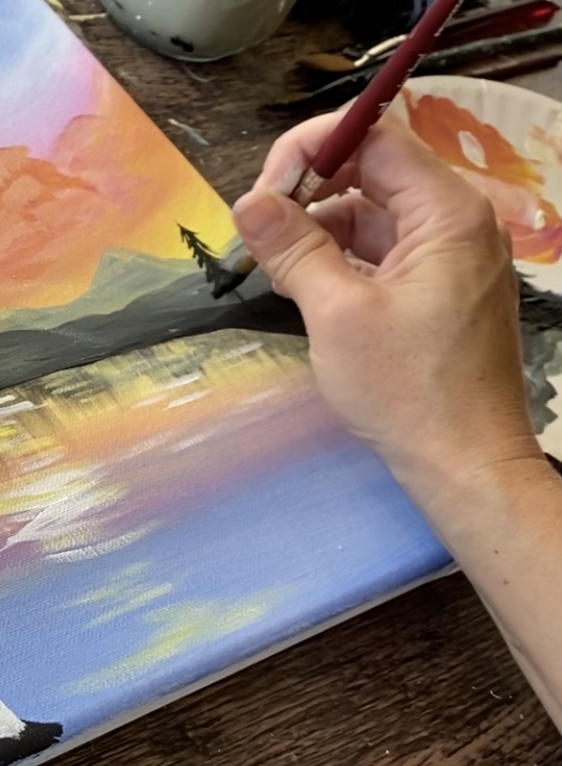
Repeat this technique to create two pine trees.

Then add a layer of “hooker’s green hue” on the tree. This will still show up dark but it gives the trees a little more depth.
Next, paint markings on the aspen trees. Use the edge of the #12 bright brush. Load it into a small amount of “mars black” paint. Then wipe off some of the paint off the brush. Drag the brush from left to right to create “dry brush” paint strokes just on the left side of the tree.
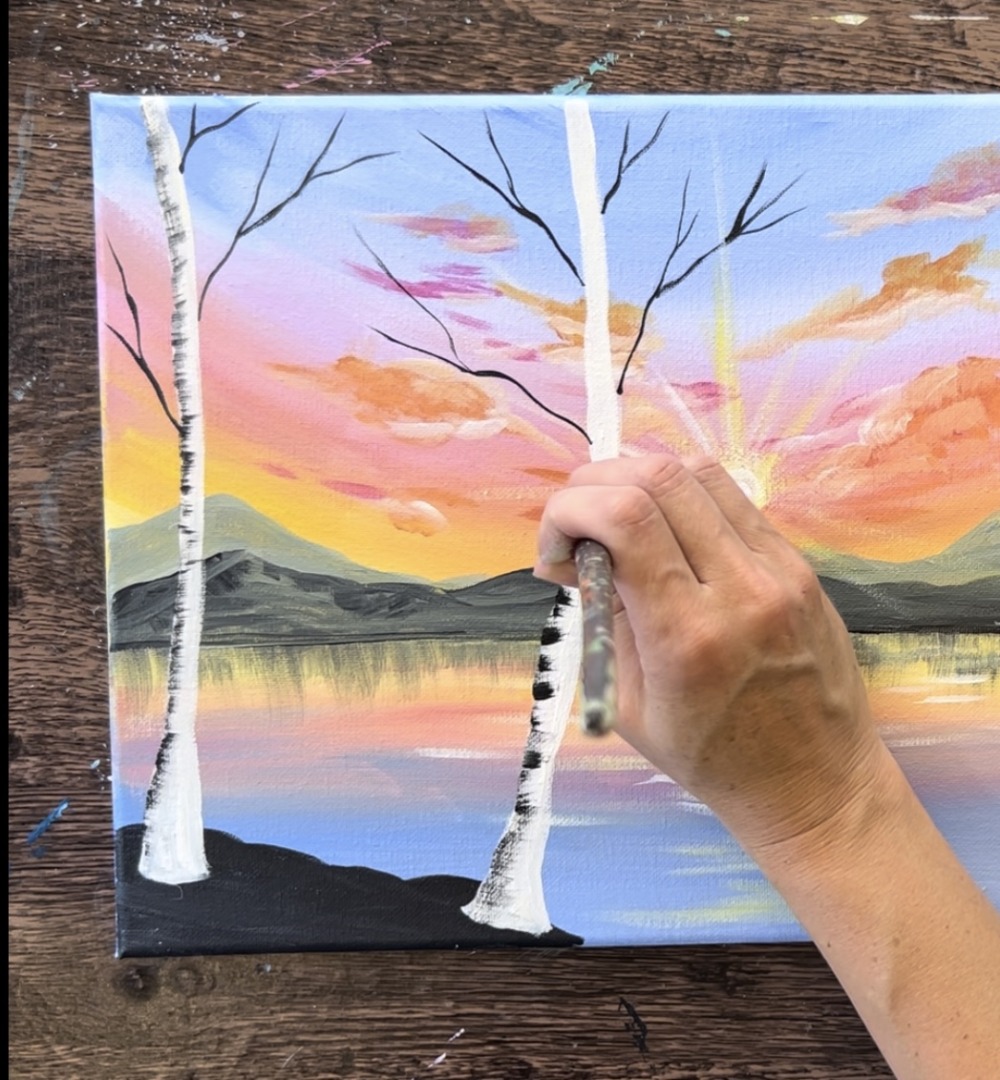
Do this on both of the trees. You can also go back with a round brush to paint some individual marks on the middle parts of some of the trees.
11. Paint Grass
Use the #8 round brush to paint grass blade strokes. Mix mars black and hooker’s green hue together to make a very dark green. Then use the very end of the #8 round brush (for the fine tip) to paint the grass lines.
Rinse the brush. Then load it into “hooker’s green hue” and “titanium white”. Paint more grass blades that show up as a lighter green. You can also add little bits of yellow into it.
12. Paint Leaves
Use the #4 round brush and “hooker’s green hue” to paint little green circles. These marks are made simply by “stamping” or “blotting” your paint brush.
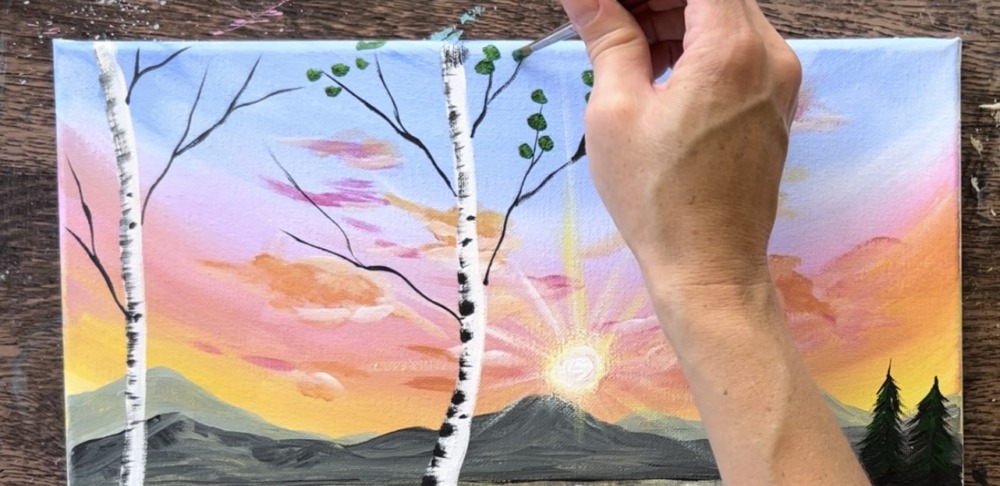
After a layer of green circles, load your brush in a small amount of yellow. Continue to paint more green circles leaves.
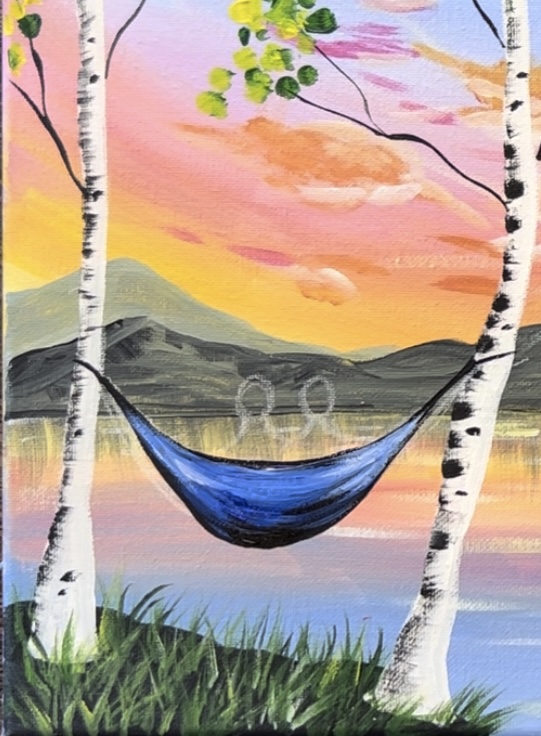
13. Draw And Paint Hammock
Use a white chalk pencil (or regular pencil) to draw the hammock. This is a crescent shape that attaches to each of the edges of the trees.
Use either of the round brushes to paint the hammock “mars black”. Outline the shape of the hammock first and then fill it in solid black.
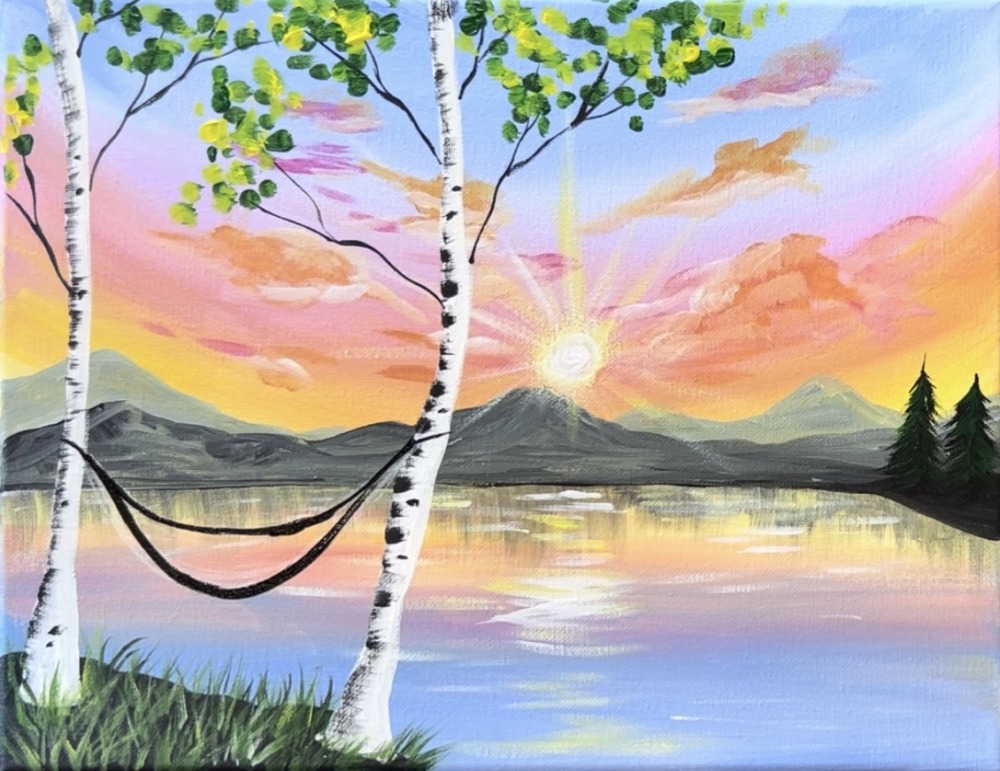
Wait for the black hammock to dry.
Load your paint palette with “ultramarine blue”. Use the #4 round brush to paint the hammock with the blue. Mix a little bit of white into the blue to allow it to show up lighter against the dark background of the hammock. Leave the outer edges of the hammock black.
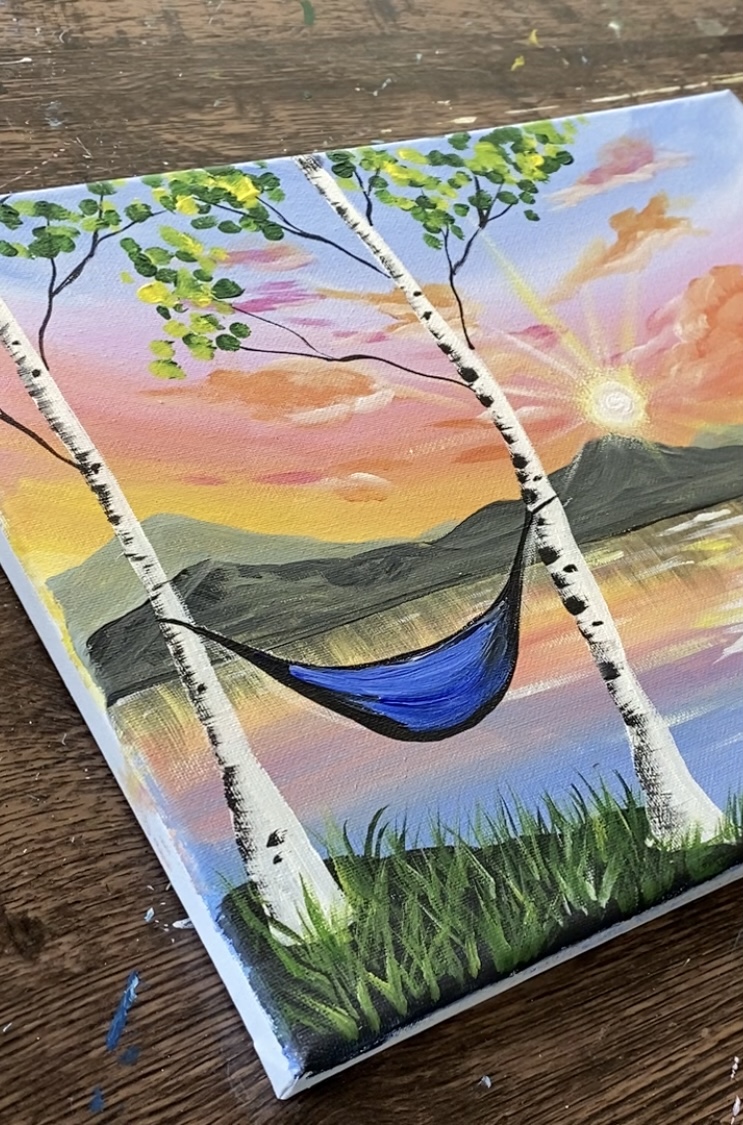
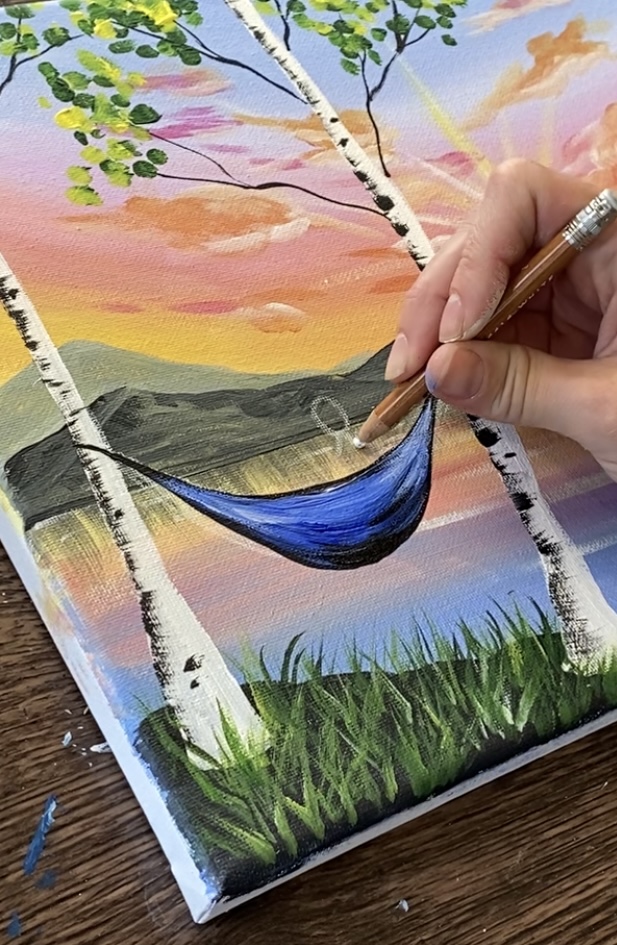
Add little bits of black towards the bottom of the hammock for shadowing. Then add little bits of white on the left and right side of the hammock for highlight.
14. Paint Silhouette Couple
Use a white chalk pencil to draw the two people in the hammock. Draw two ovals for the heads. Then draw the shoulders as two slightly diagonal lines that extend down to the top edge of the hammock.
The shoulders of the couple kind of “mesh” together.
Next, use the #4 round brush to paint the silhouettes in. Silhouettes are very forgiving! Take your time and fill the figures in slowly.
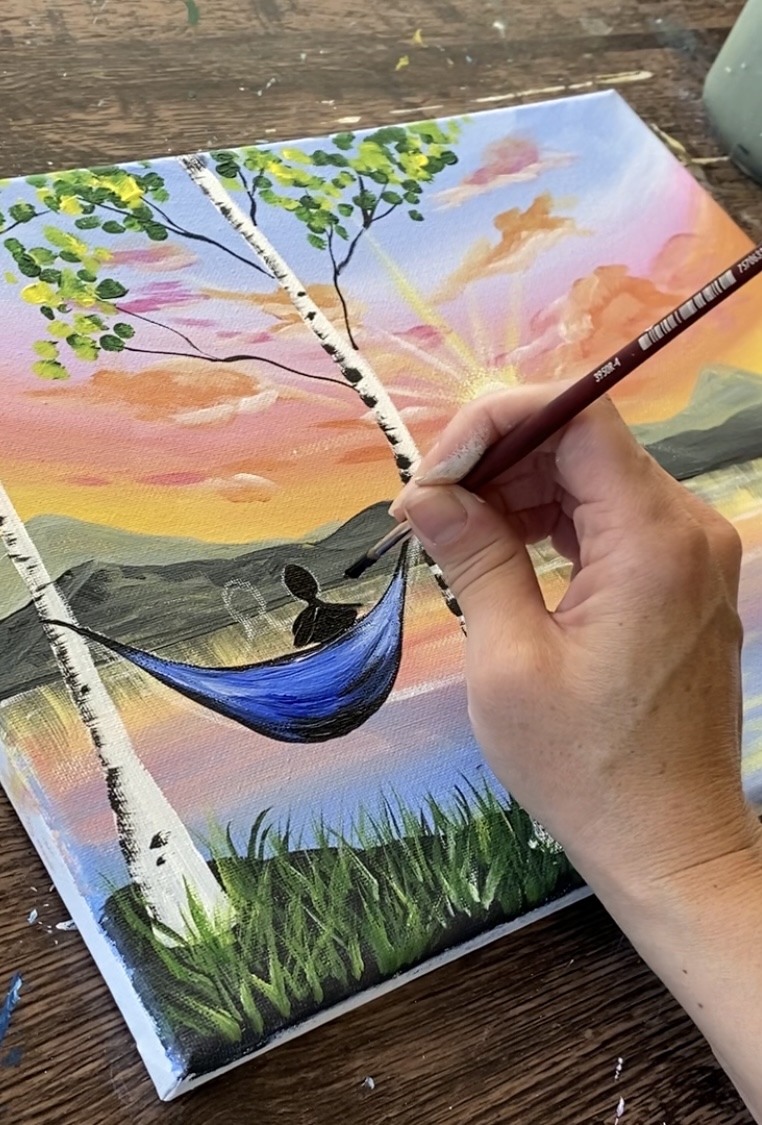
I made the person on the left look like she has hair so we don’t really see her neck.
This next step is optional. I like to do “back lighting” for my silhouettes. This makes them look not as flat looking. Use “titanium white” to very lightly outline the right sides of the figures. This is very light/ dry brush style.
15. Final Touch Ups (optional)
Paint reflection in the water under the pine trees. Use “hooker’s green hue” and the #4 round brush to loosely paint lines below the two trees. Create a shape that sort of mirrors the shape of the trees.
Add a little bit of mars black to the reflection as well.
Then I extended the land area (the black land) that the two pine trees are on. I extended this along the base of the lake.
Another touch up includes painting a little bit of “ultramarine” on the bottom right of the water area. Do very loose water lines.