Would you like to save this?
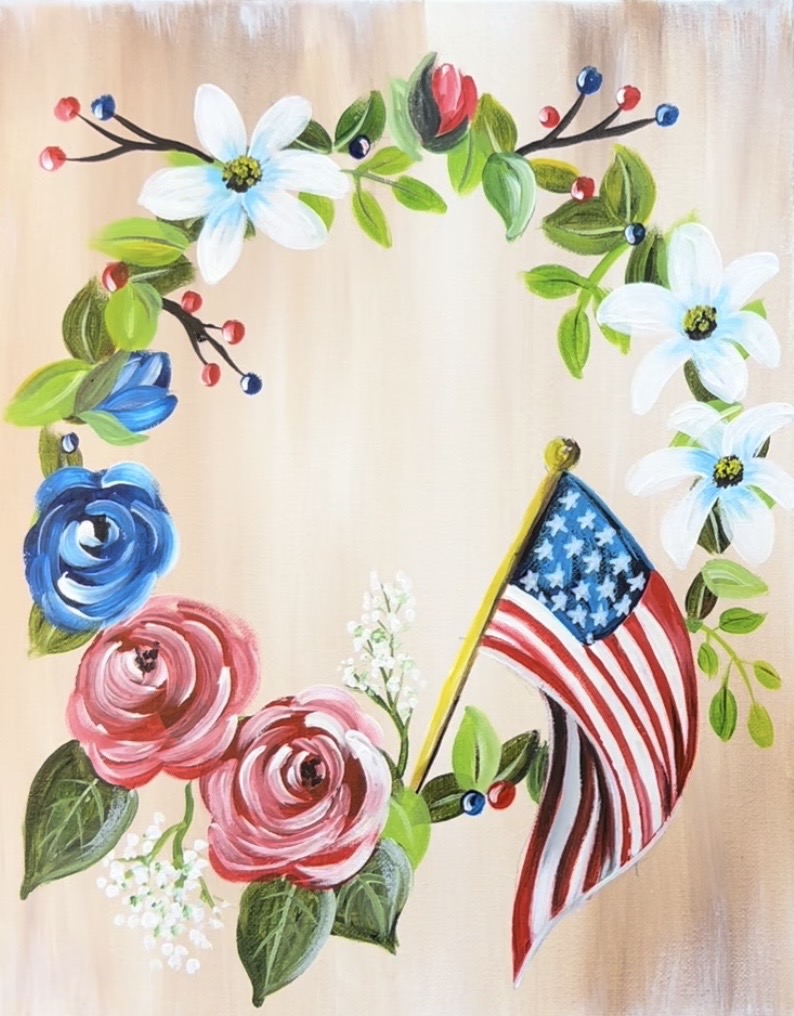
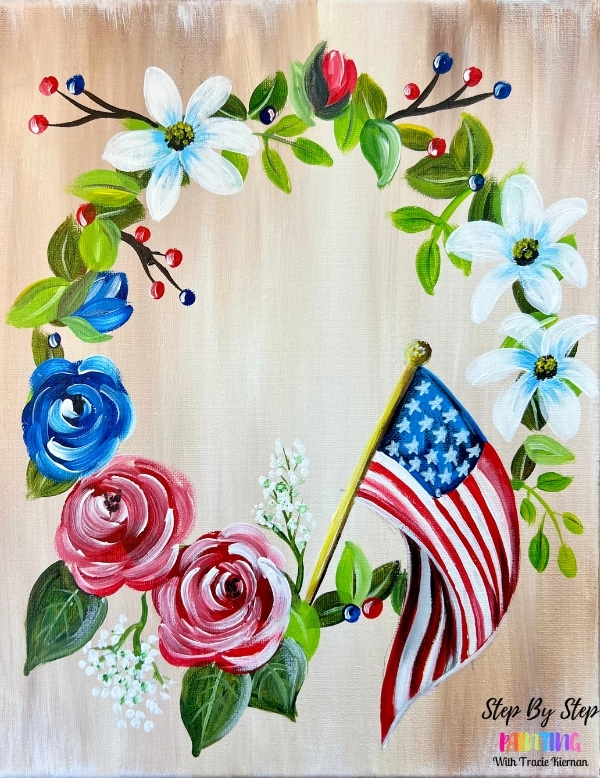
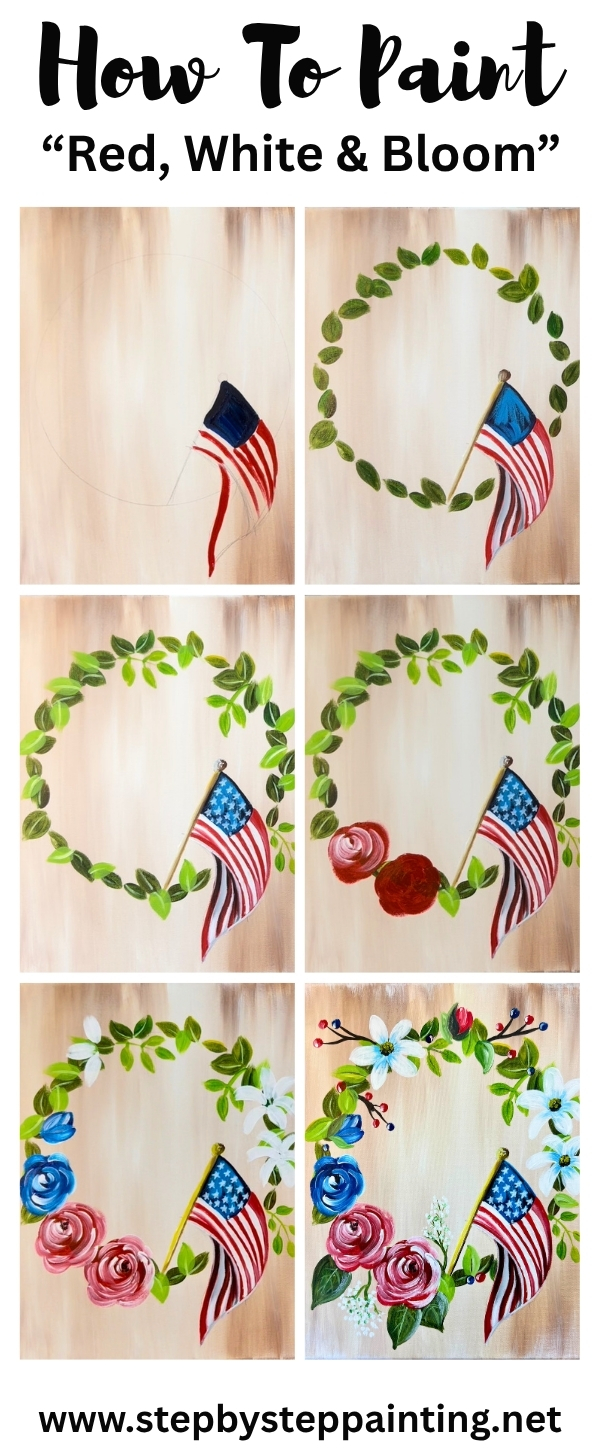
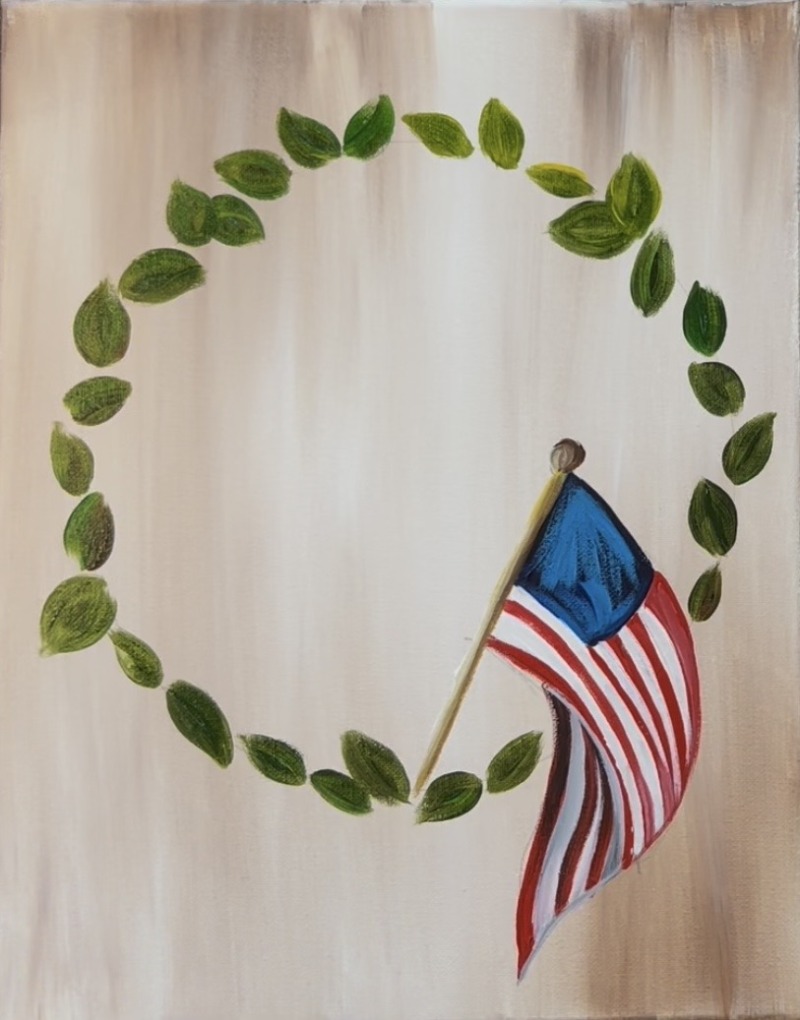
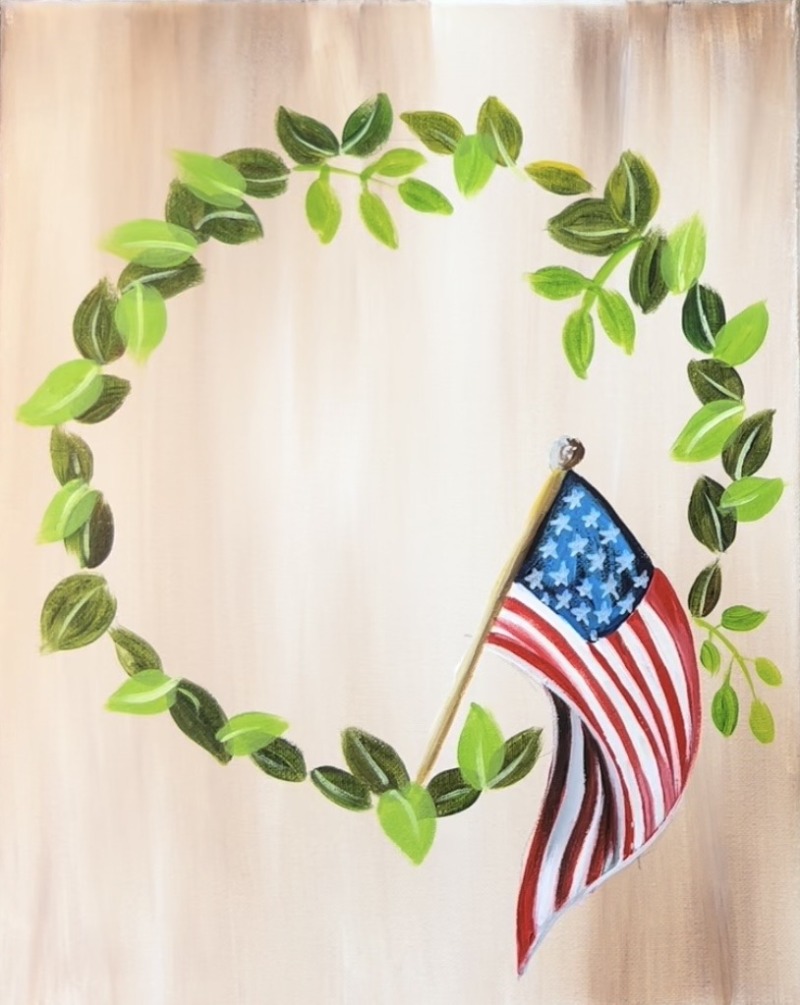
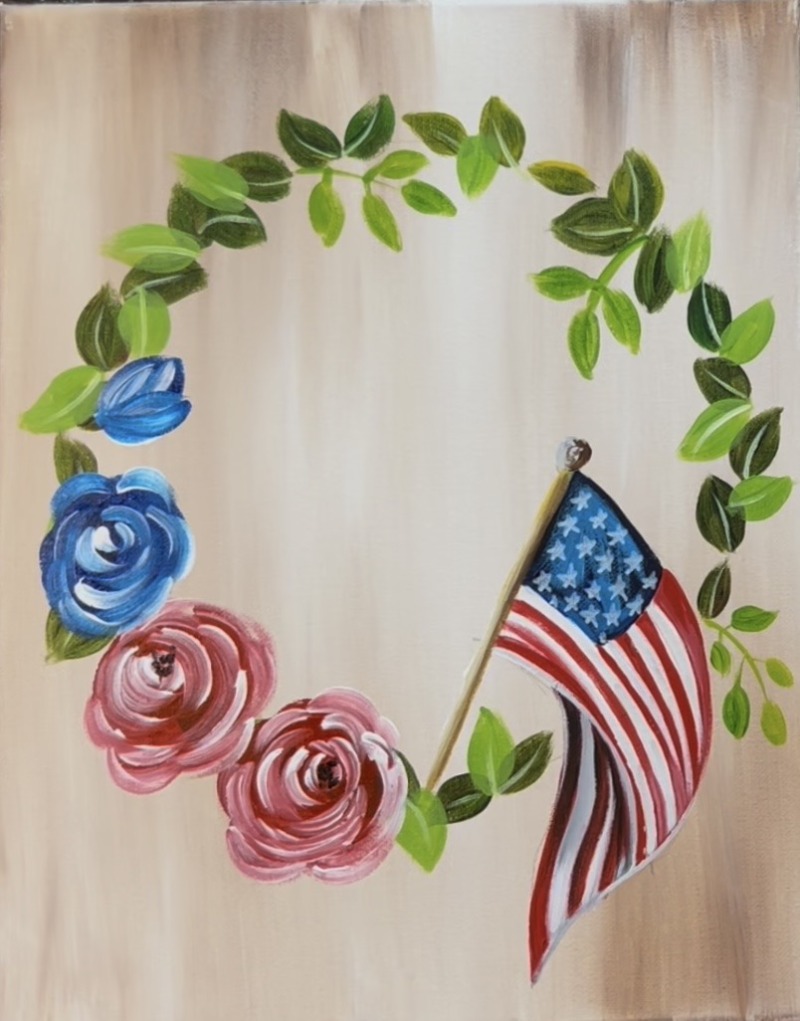
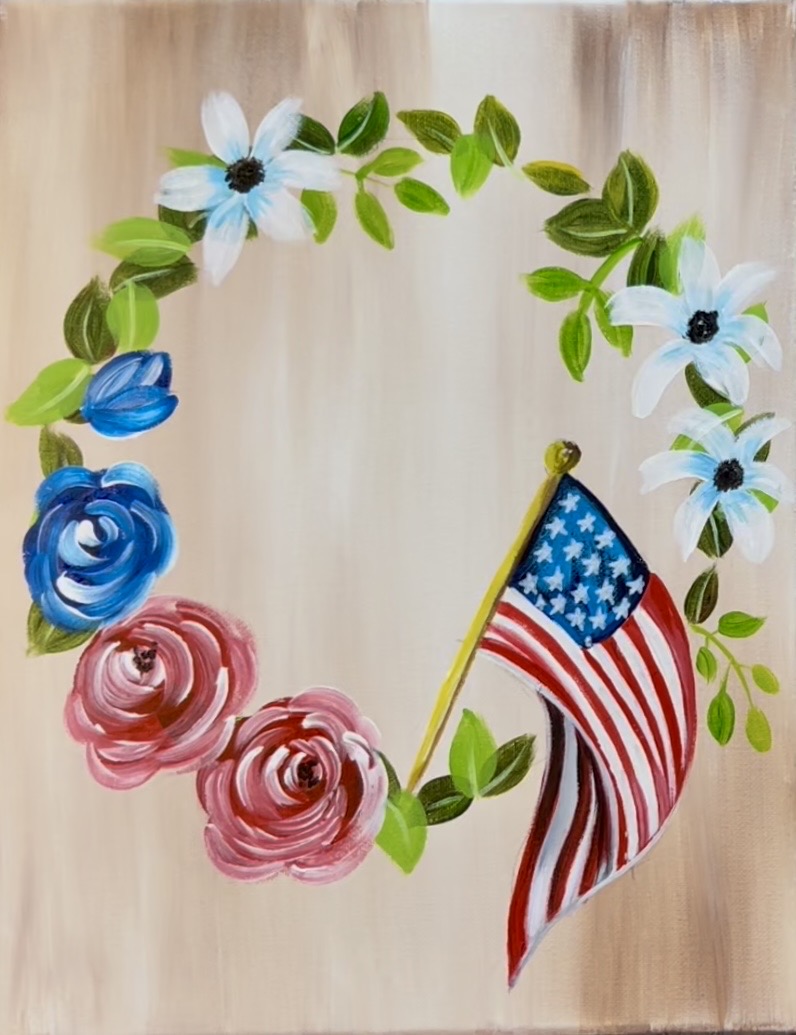
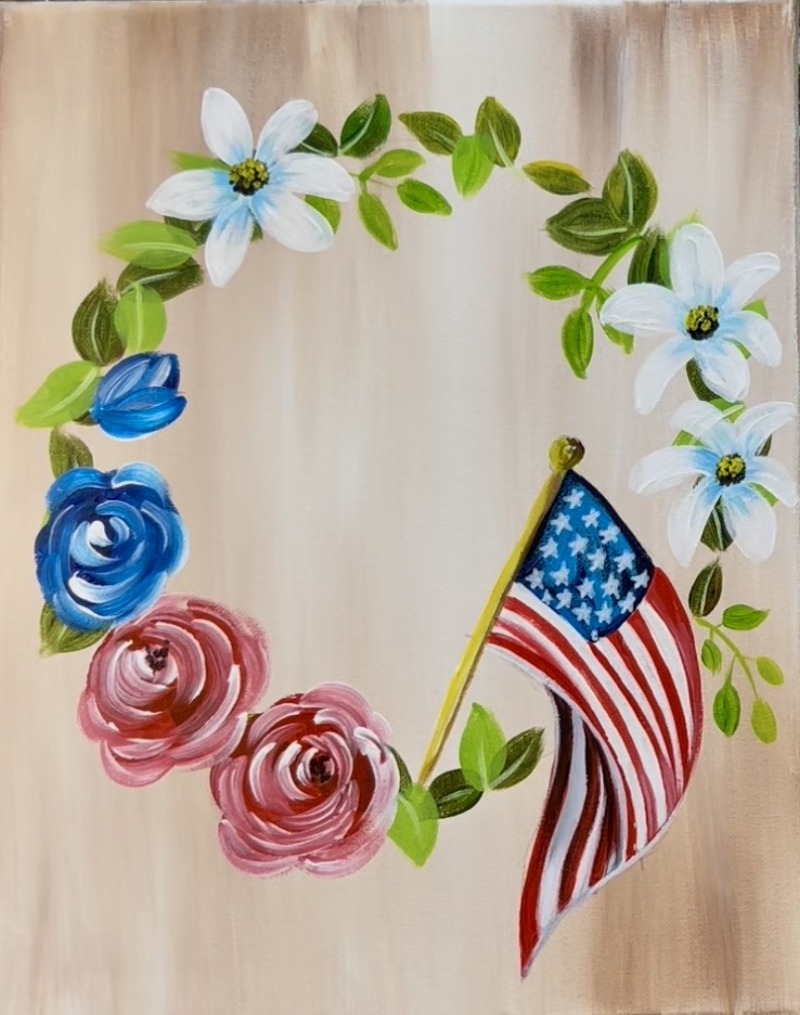
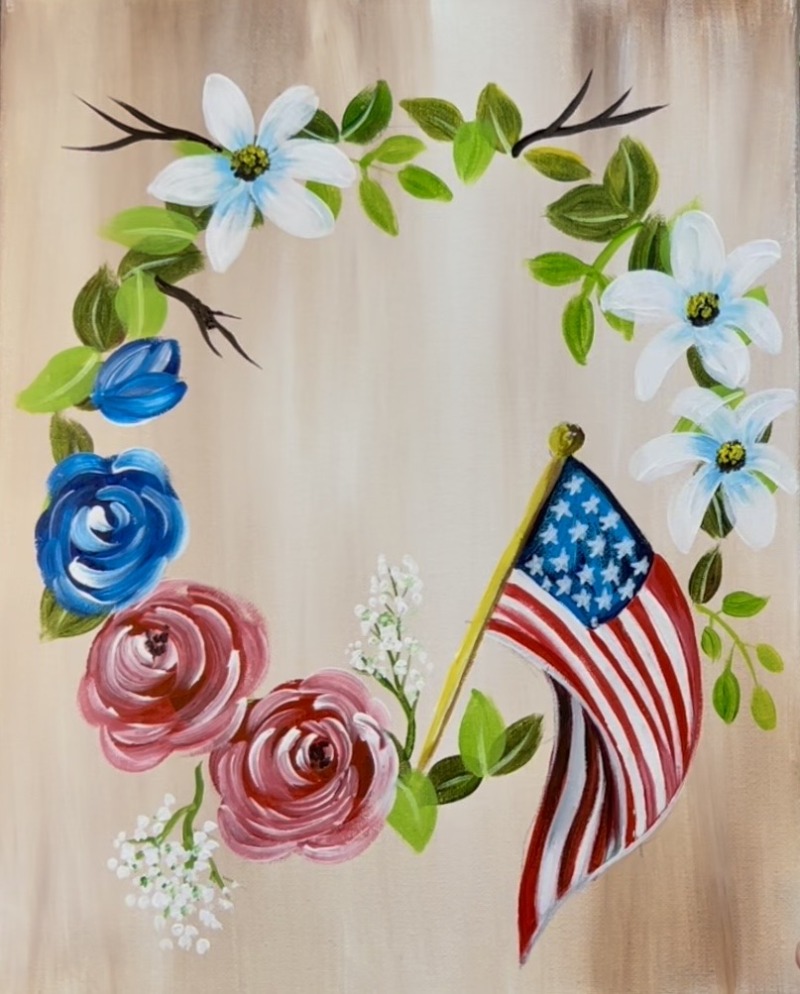
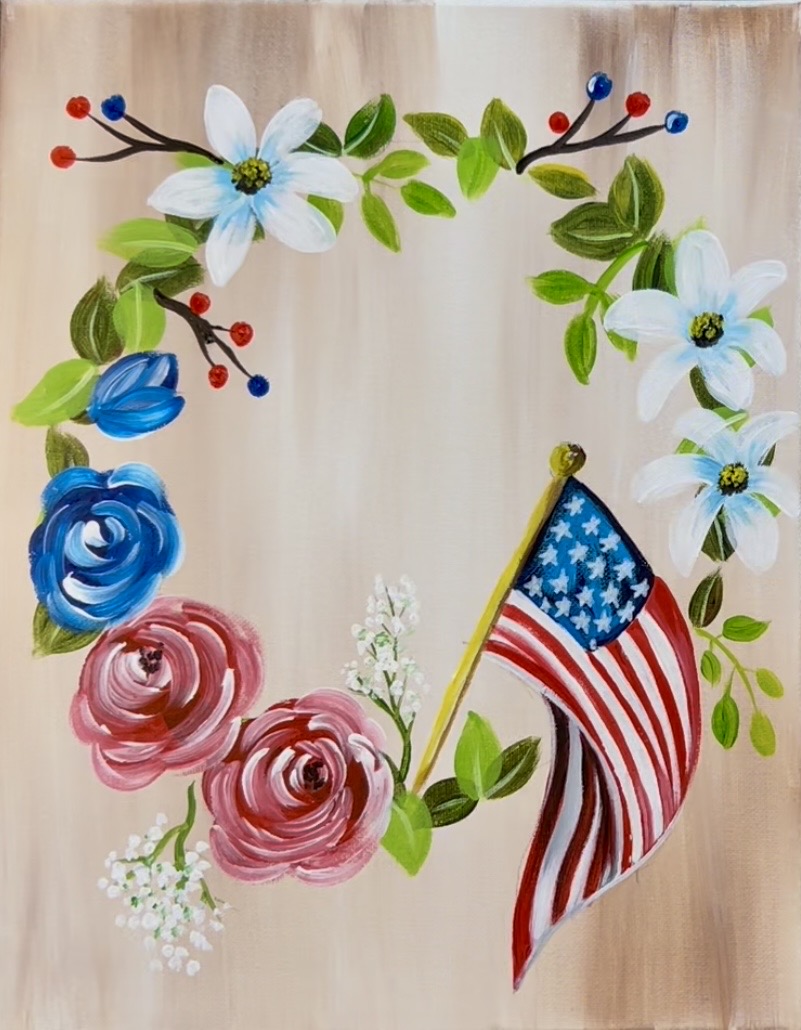
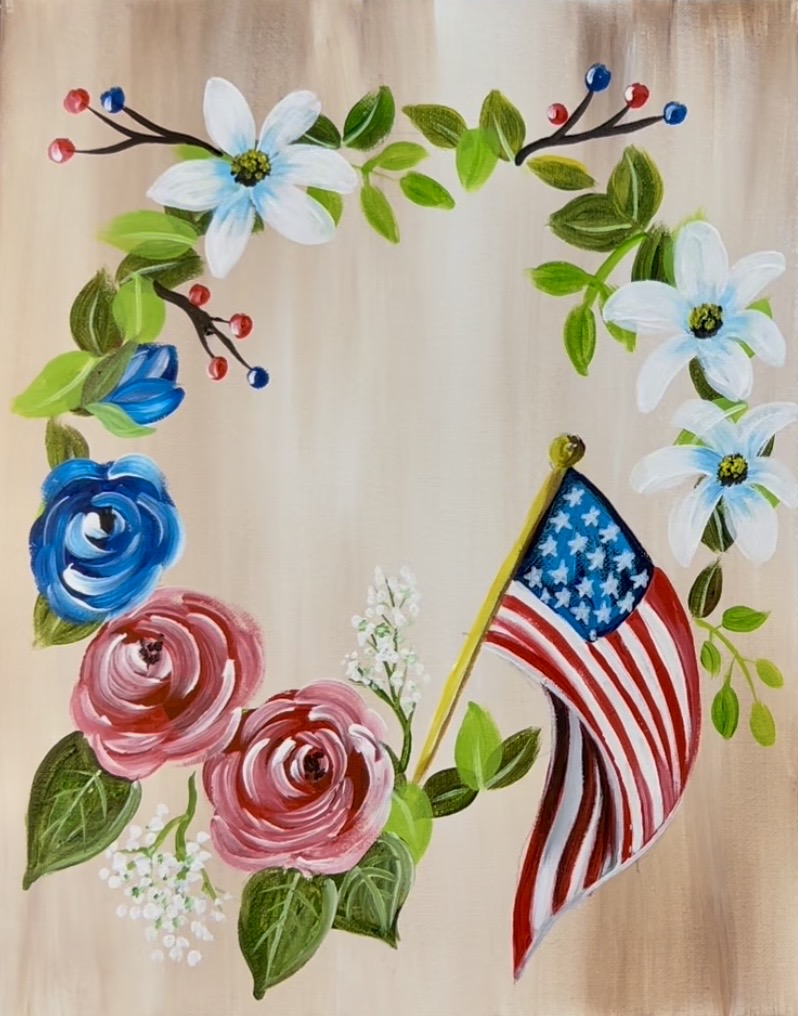
This is an easy and simple patriotic acrylic painting tutorial. Learn how to paint a floral wreath with red, white and blue accents including a detailed American flag. Add an optional quote in the middle of the wreath or leave it blank and simple!
This painting does not use a traceable, however, you will be tracing a large circle such as a paper plate to get the shape of the circle. Also, a white POSCA paint pen is helpful for the stars on the flag!
Enjoy and happy painting!
Materials:
- 11 x 14 Canvas (or any size you want to paint on)
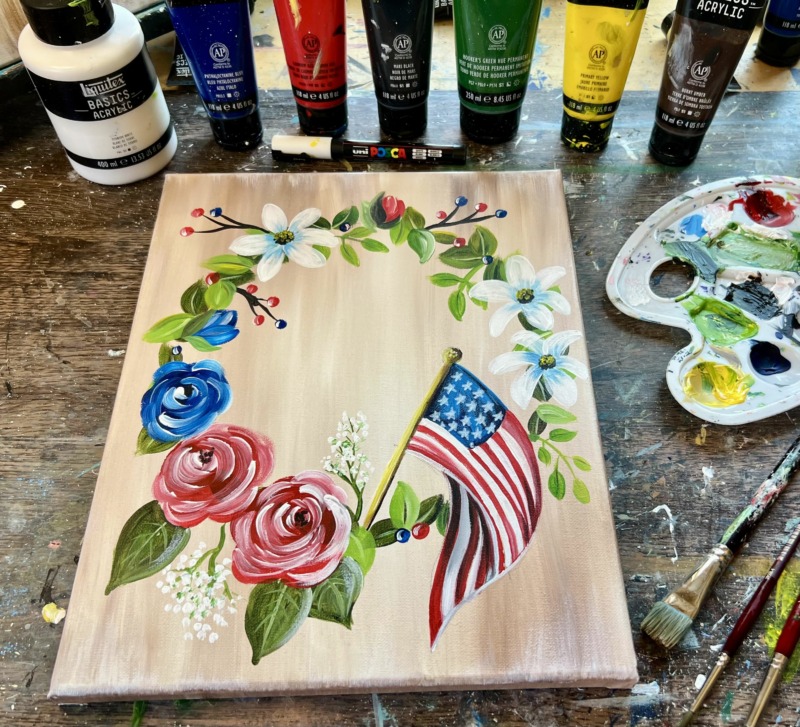
- Acrylic Paint
- Brushes
- 8″-9″ paper place circle for tracing
- Pencil
- White POSCA Paint Pen
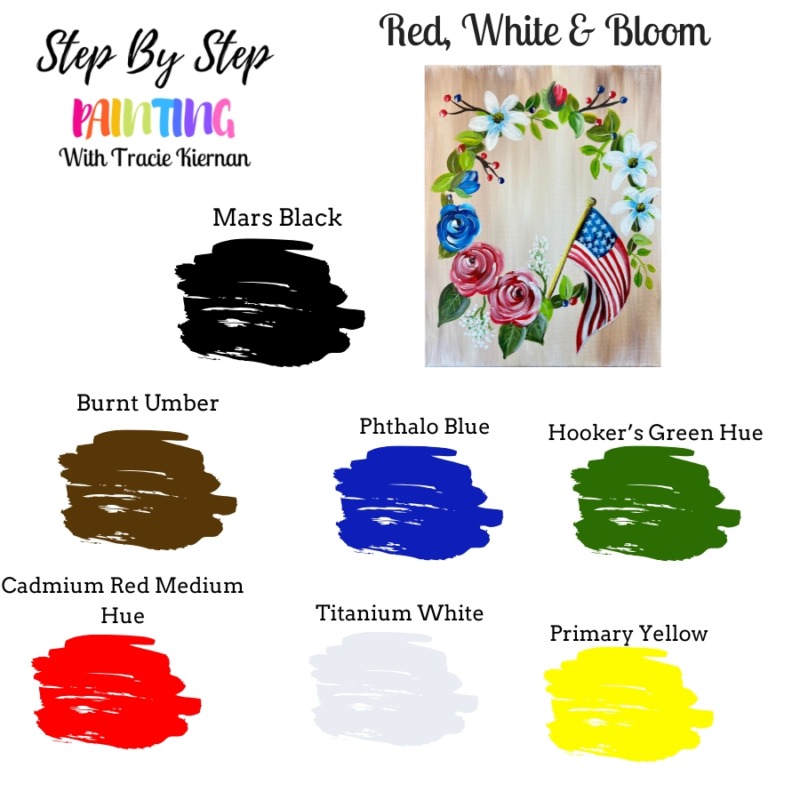
Colors:
- Cadmium Red Medium Hue
- Primary Yellow
- Hooker’s Green Hue
- Phthalo Blue
- Mars Black
- Titanium White
- Burnt Umber
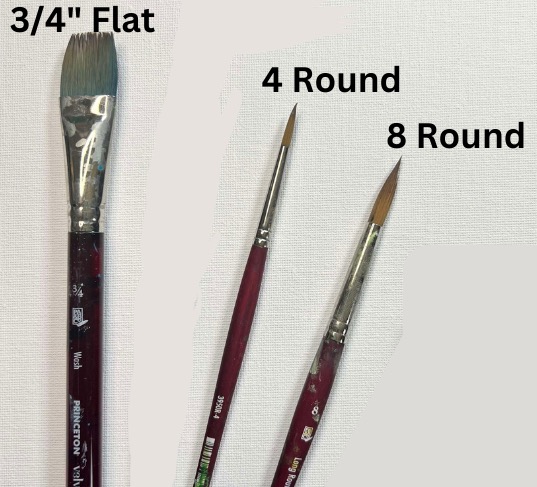
Brushes:
- 3/4″ flat
- #8 long round (or tiny detail brush)
- #4 round
Directions At A Glance:
Step By Step Instructions
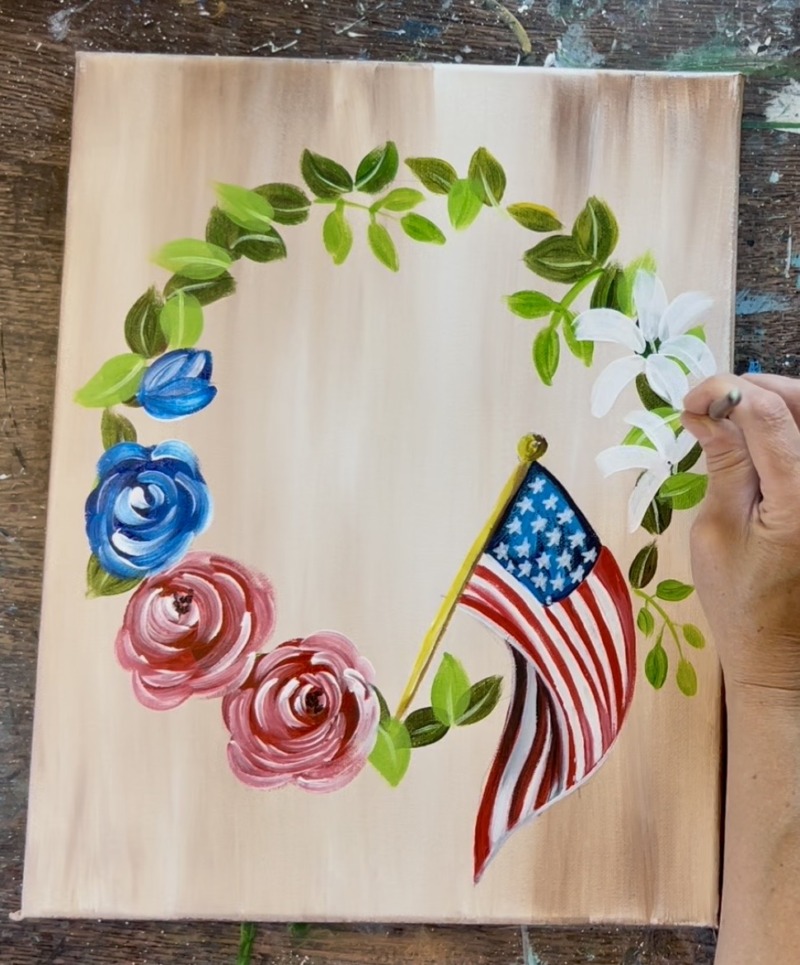
1. Paint Background
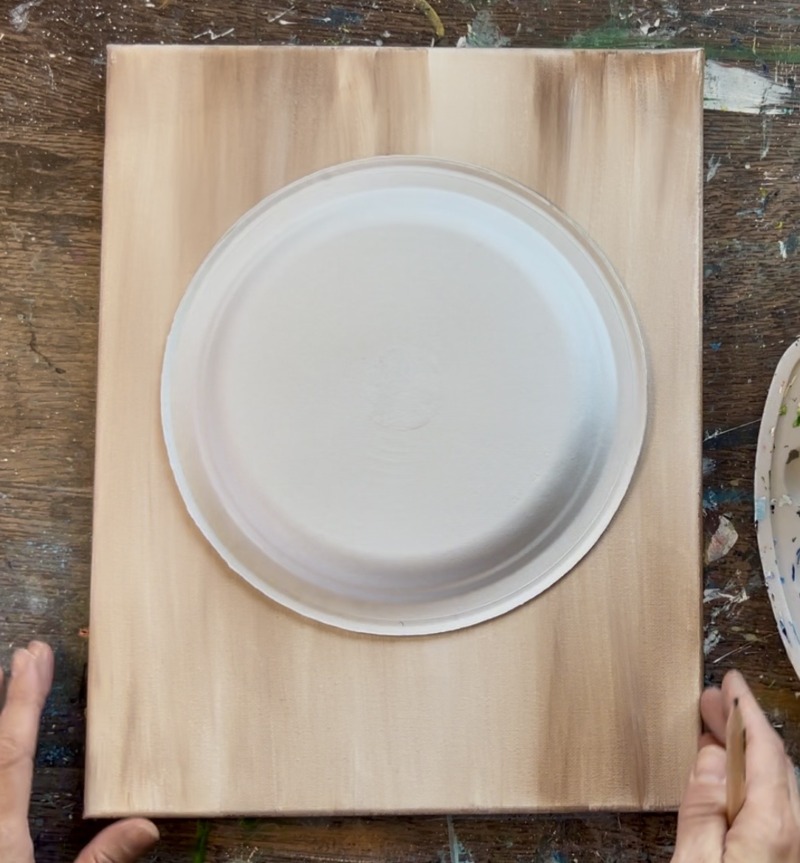
Load your paint palette with the two colors: “burnt umber” and “titanium white”. Double load your 3/4″ flat wash brush into white and just a little dot of brown on the corner of the brush. Paint vertical paint strokes to fill the entire canvas.
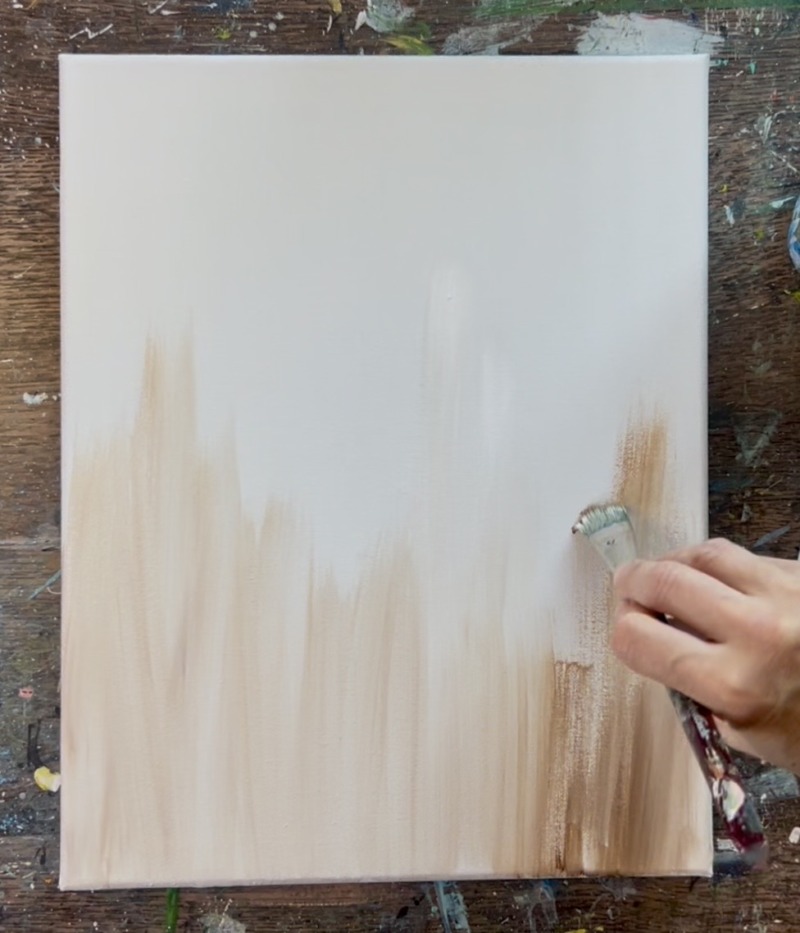
Fill the canvas with all light brown streaks of paint that are slightly dark in some areas and light in others. Blend a little extra white in the middle of the canvas to help with the contrast of the wreath. Make sure not to make the background too dark! Also, try not to blend the color all the way/ leave a lot of different variations of brown and white.
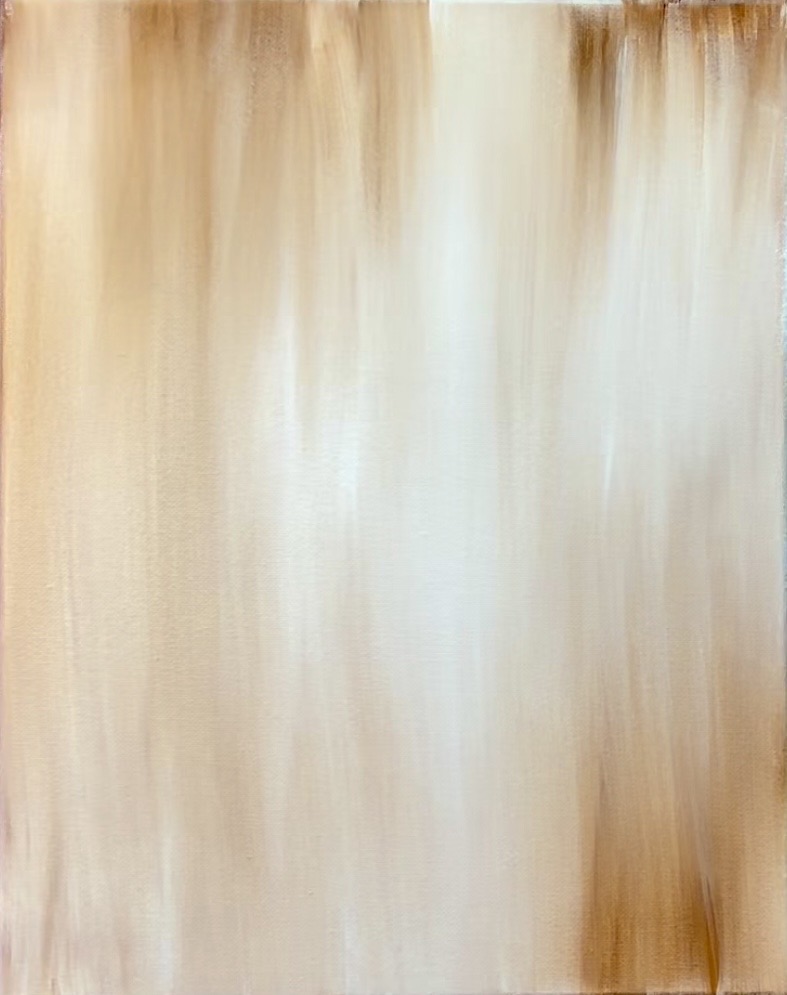
Wait for this to dry before going onto the next step.
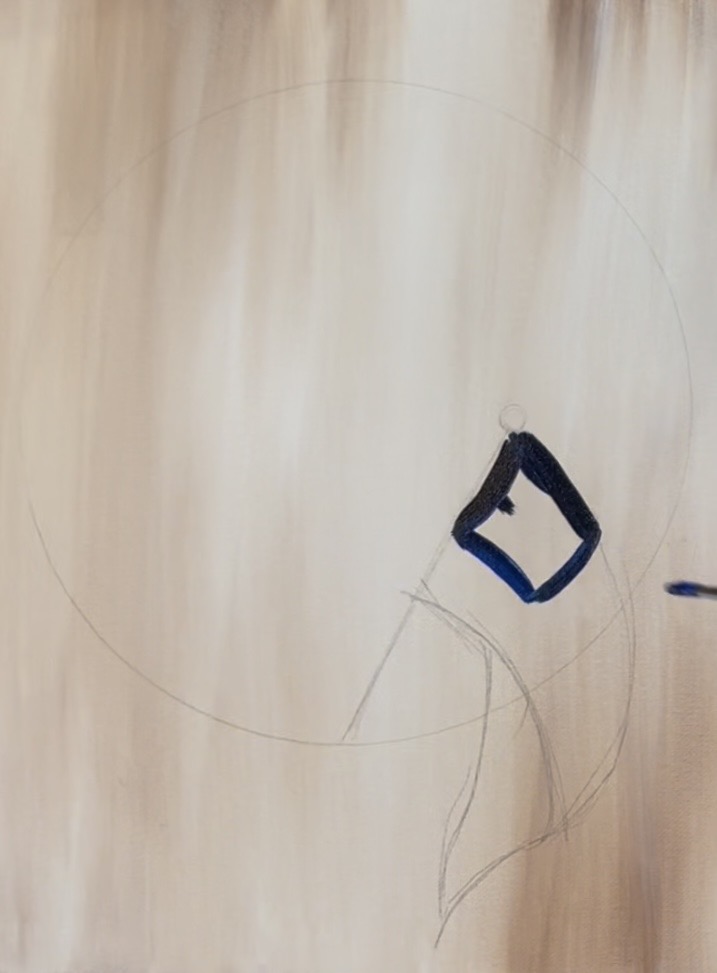
2. Trace Circle & Draw Flag
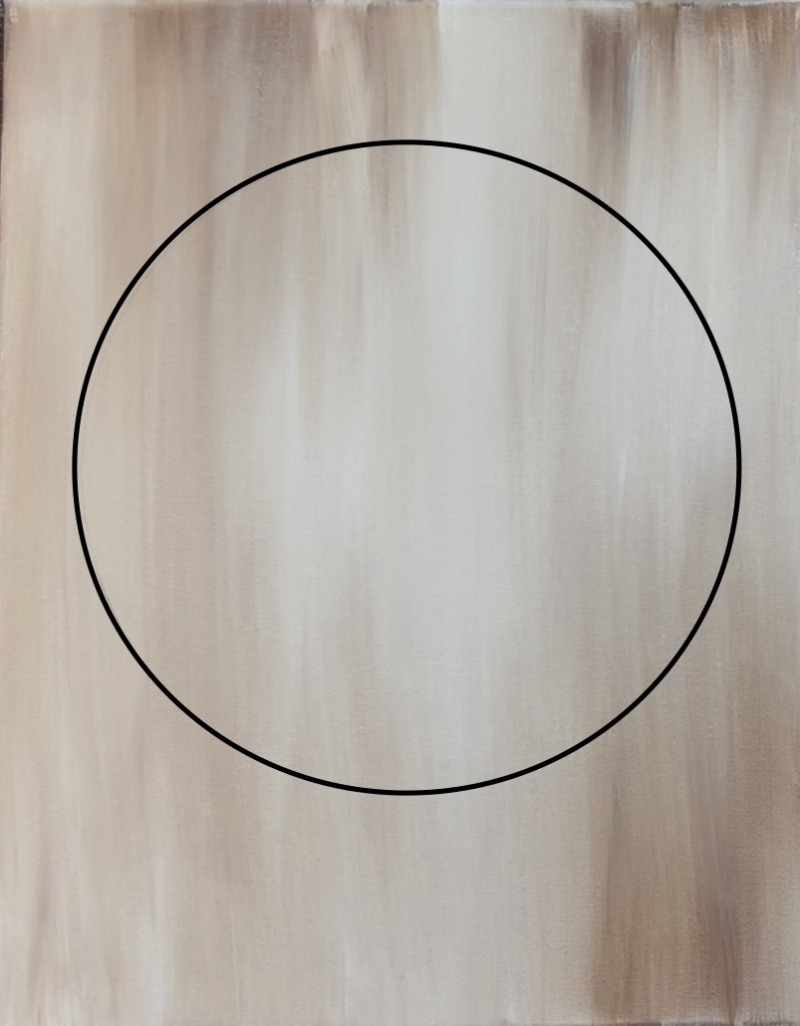
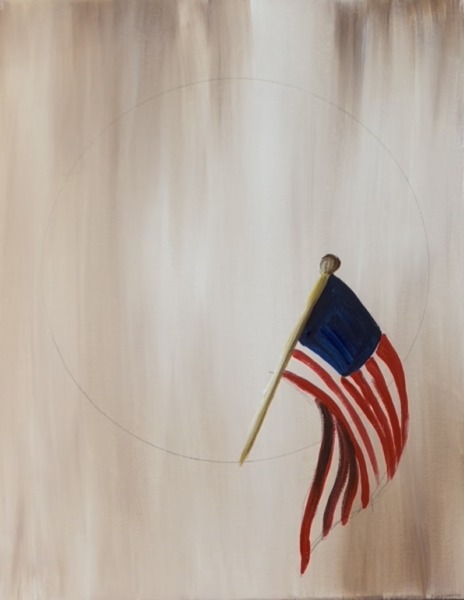
Next, trace a large circle on the canvas for the shape of the wreath. I used a paper plate that was about 8.5″ in diameter, however, you can trace something of similar size. Position the circle so that it is centered but a little bit higher on the canvas. You want to ensure there will be enough room for the flag that will be hanging down off the edge of the wreath.
Trace the circle lightly with a pencil.
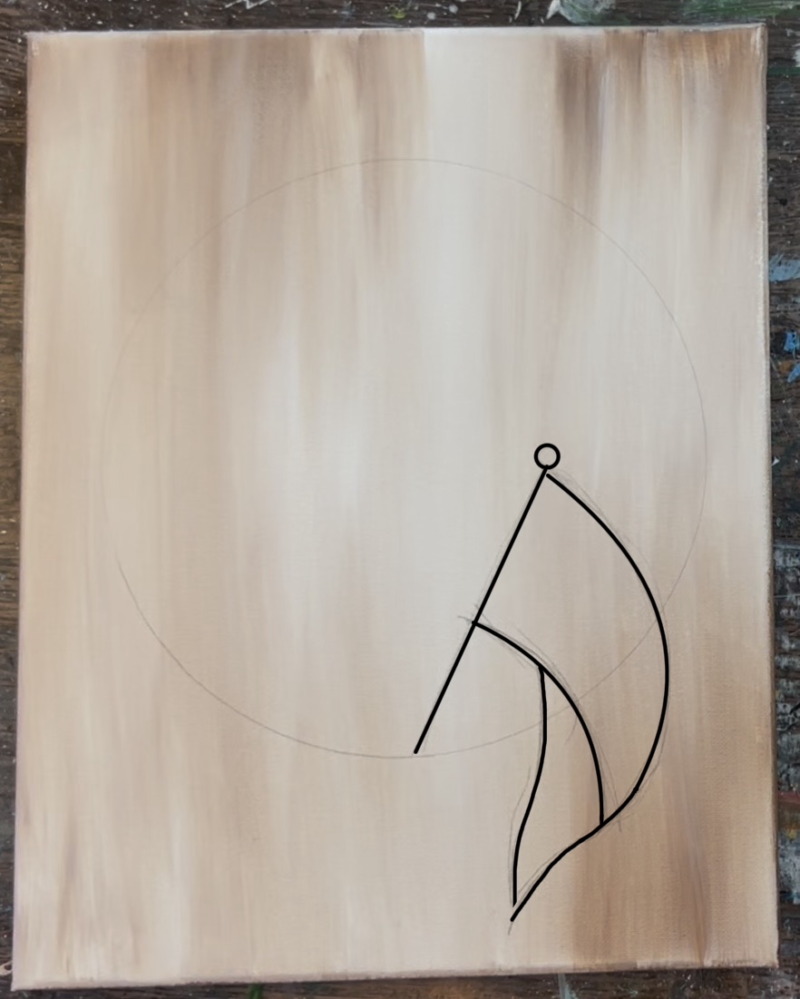
Next, draw the flag. Use a ruler to draw a diagonal line on the inside lower right quadrant of the circle. Draw a small circle on the top of that diagonal line. Then draw a set of curved lines that go to a point. This first shape for the flag will look triangular at first! Notice how the flag overlaps the wreath circle/ goes outside of the circle.
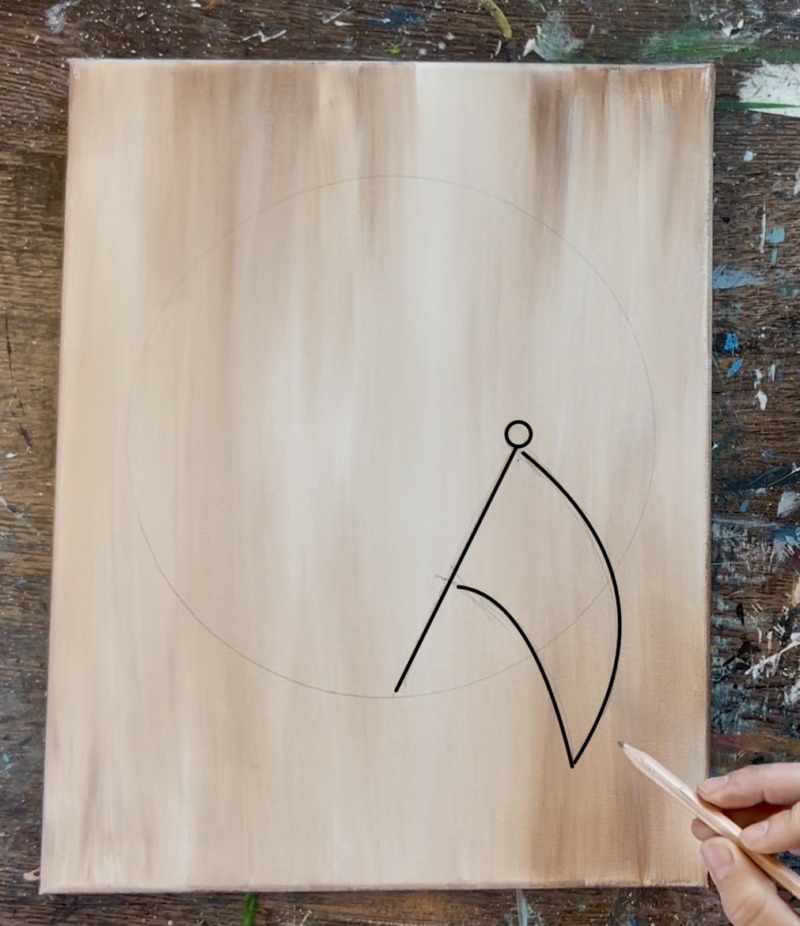
Then draw another sort of triangular shape for the under side of the flag to make it look like the flag is curled/ folded under. This part goes outside of the wreath circle and points downwards.
3. Paint Flag
Load your paint palette with the color “phthalo blue” and “mars black”. Mix about 1 part black to 3 parts blue to create a very deep blue. Use the #4 round brush to paint the rectangular shape of the flag (where the stars will be).
Paint it in solid dark blue. Then paint the red stripes! Load your paint palette with the color “cadmium red medium hue”. Use the #4 round brush to paint the first stripe. This stripe is on the top of the flag and it starts out wide but goes narrow as it approaches the part of the flag that curves.
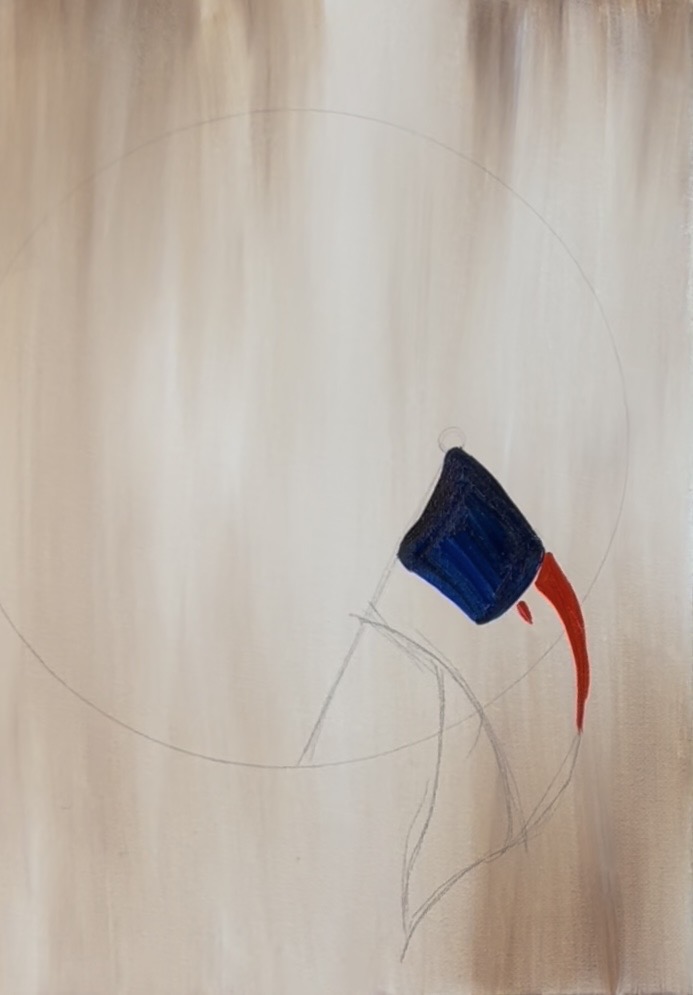
Repeat this to create several stripes. Leave a gap between them for the white stripes. As you paint these red lines, follow the curve of the flag. You can do the exact number of red stripes in the flag (7) or do less!
For the stripes that are showing underneath where the flag is folded, paint those red stripes slightly darker. To make the red stripes darker, add just a tiny dot of black into the red to mix a very dark red color.
Paint the pole of the flag next. Mix a “bronze” color on your paint palette by mixing 1 part “primary yellow”, 1 part “burnt umber” and 1 part “titanium white”. Use the #4 round brush to paint the pole and circle.
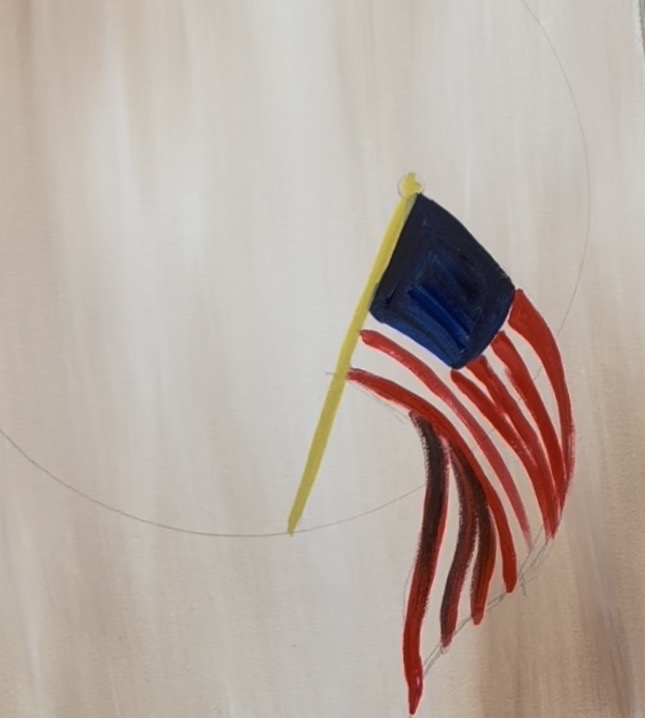
Add a tiny bit more dark brown on the right side of the pole and circle for shadowing.
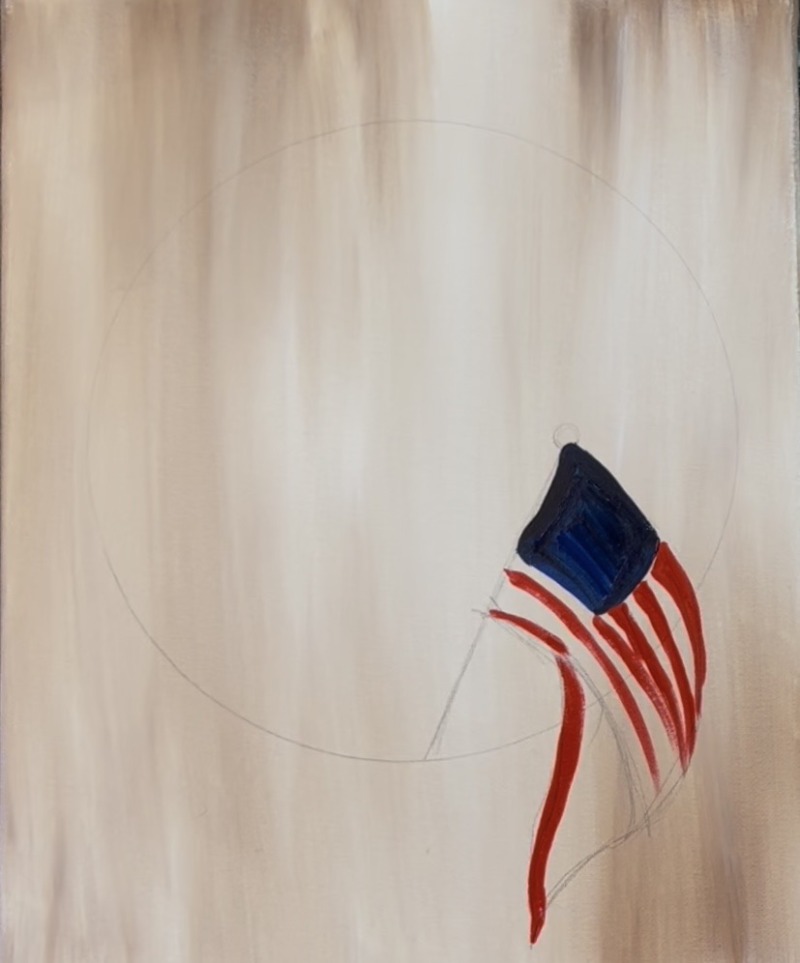
Wait for the red stripes to dry. Use the #4 round brush and “titanium white”. Paint the white stripes for the flag that run parallel to the red stripes.
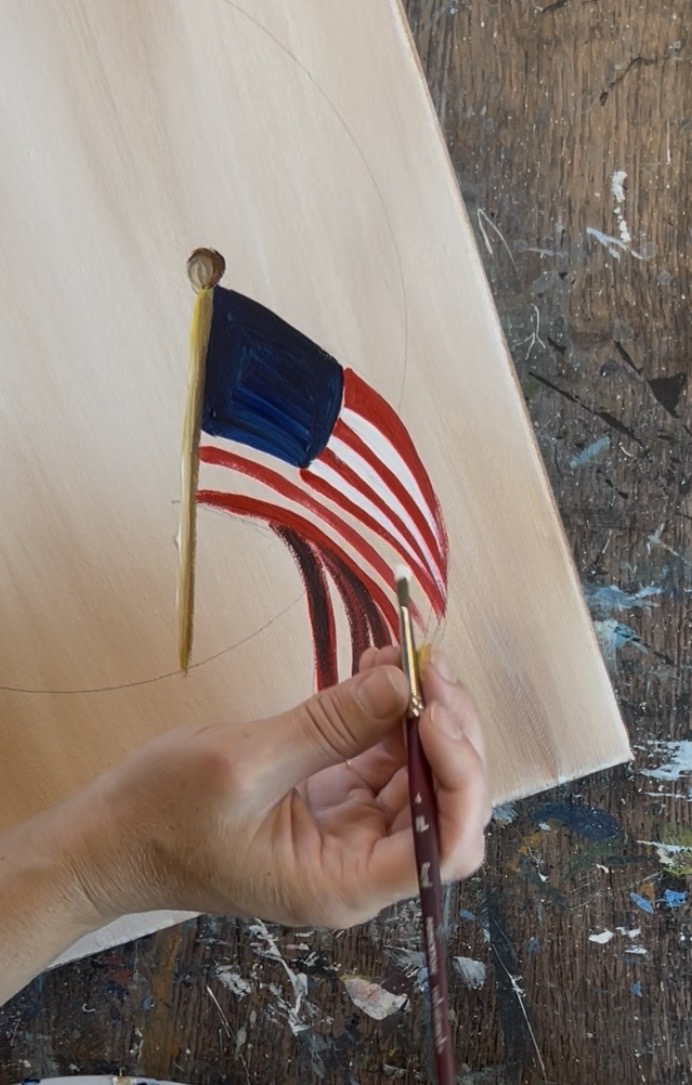
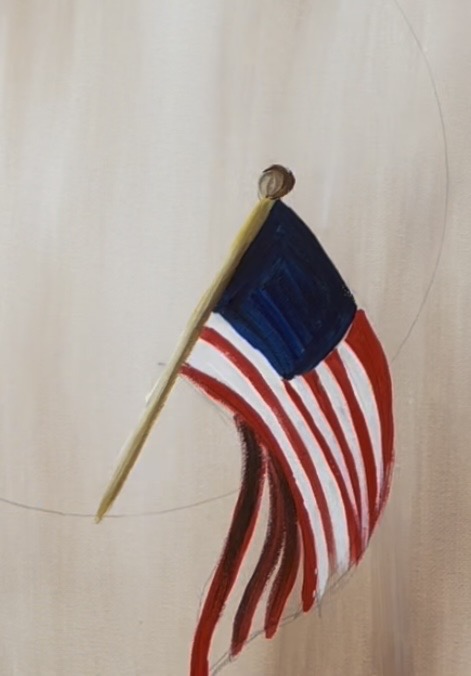
For the “underneath” white stripes, paint those a light to medium gray. To make this gray, mix a tiny bit of “mars black” into the white. The stripes in the back will look darker and shadowy. Then you can outline the edge of the shape of the flag with that gray color. This can help define the shape better.
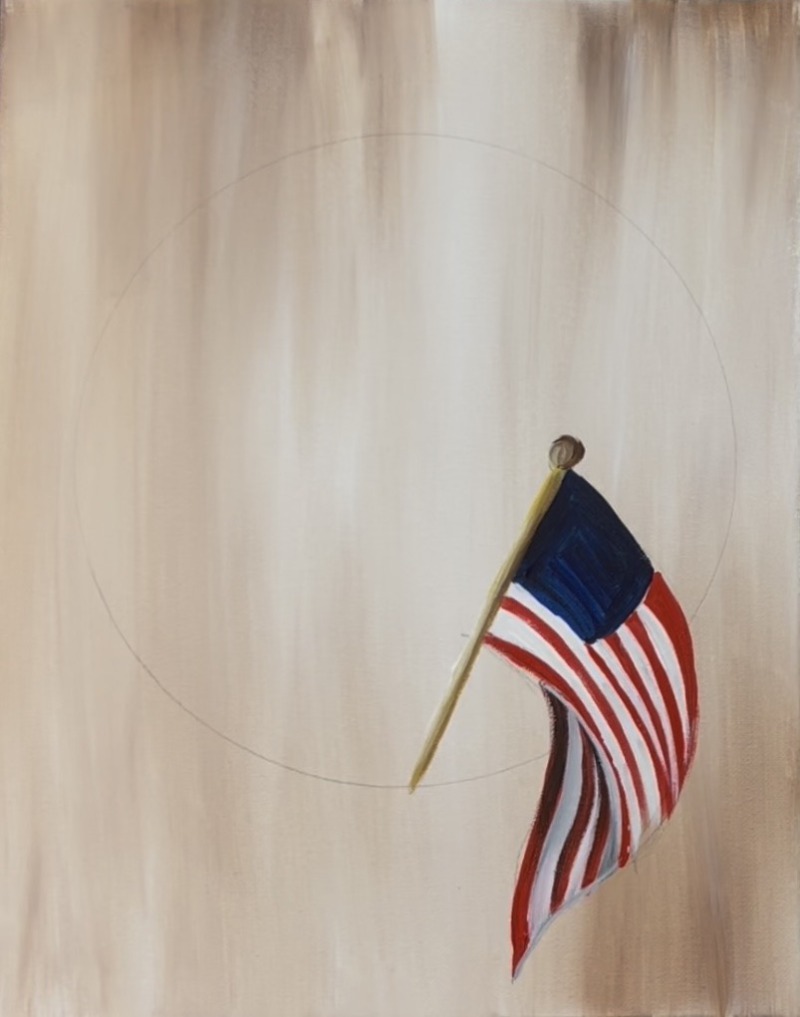
As a final touch for the flag before we move onto the leaves, paint a lighter blue layer over the dark blue layer. Mix equal parts “titanium white” and “phthalo blue” together. Then brush on this lighter blue using diagonal paint strokes that lightly cover the dark blue without covering it all the way.
Wait for the blue to dry before drawing/ painting the stripes.
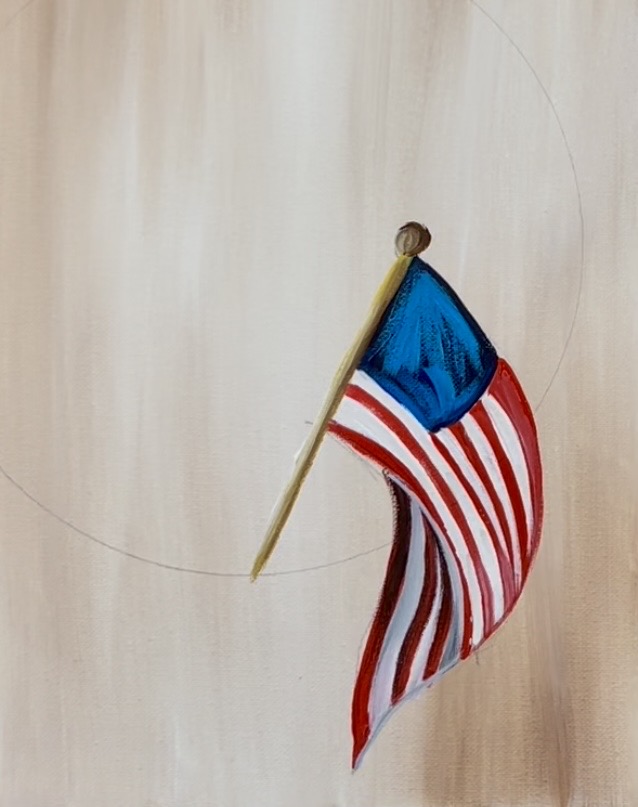
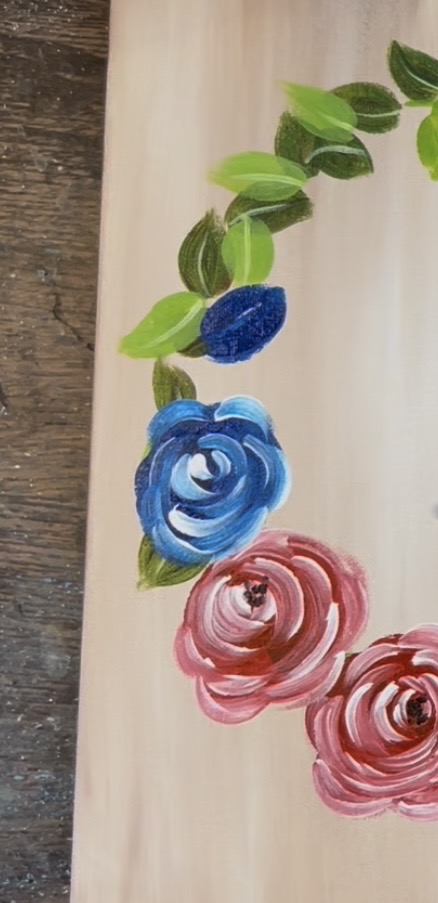
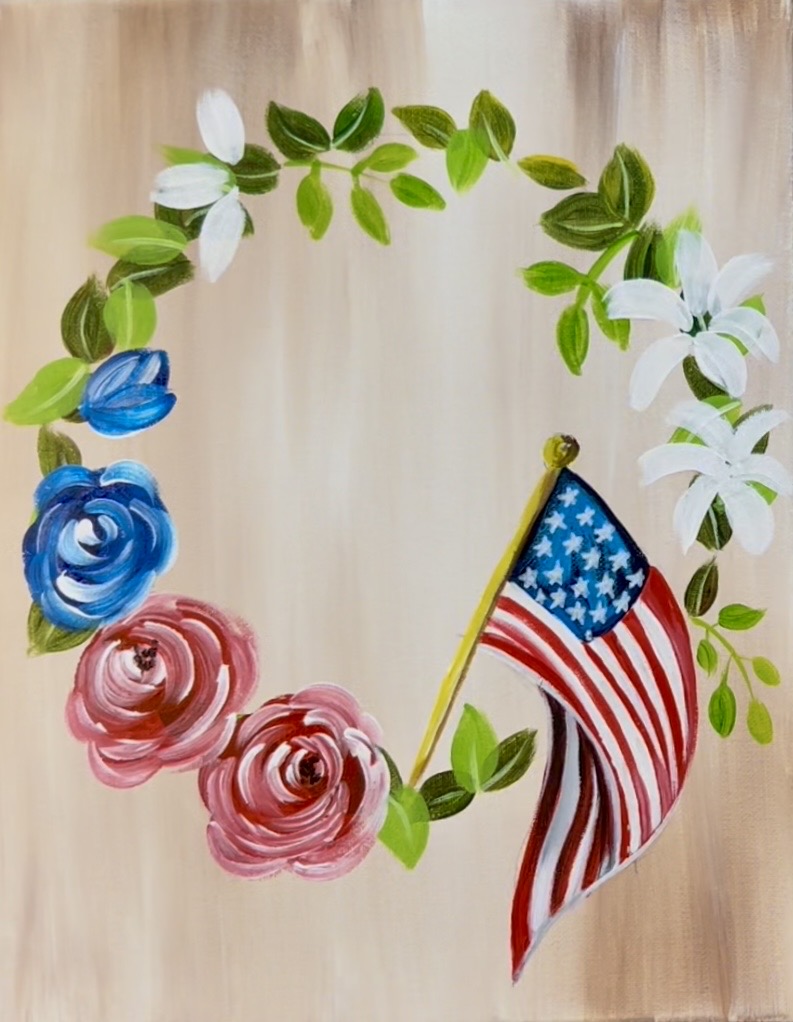
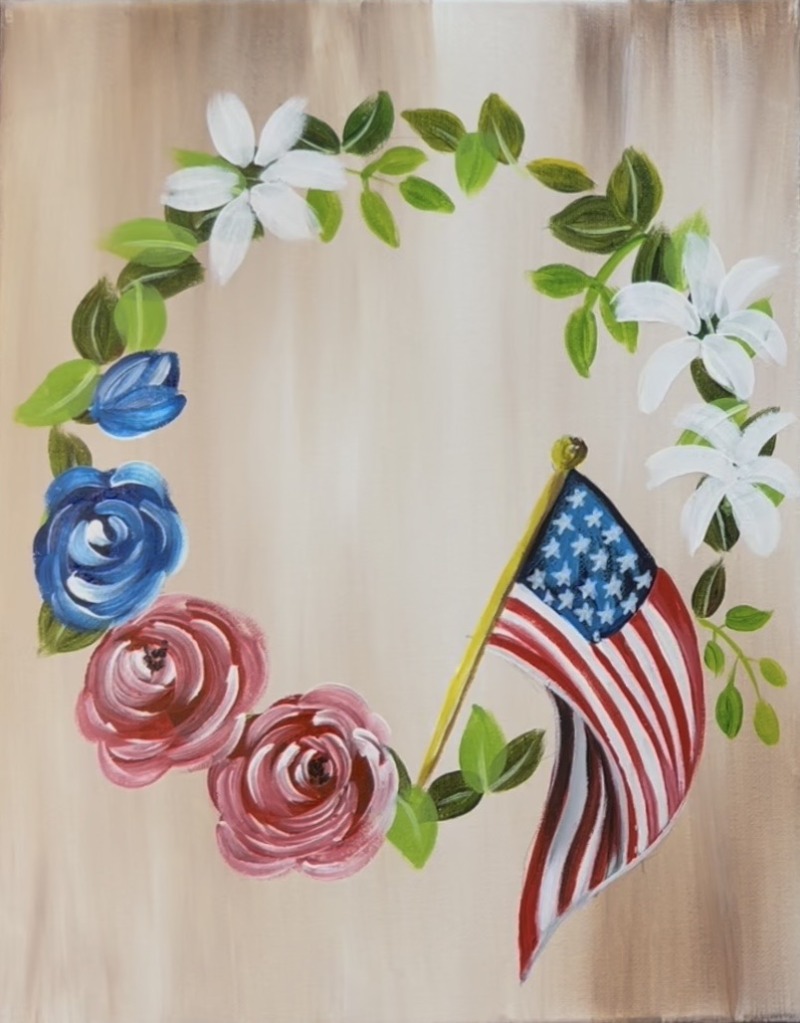
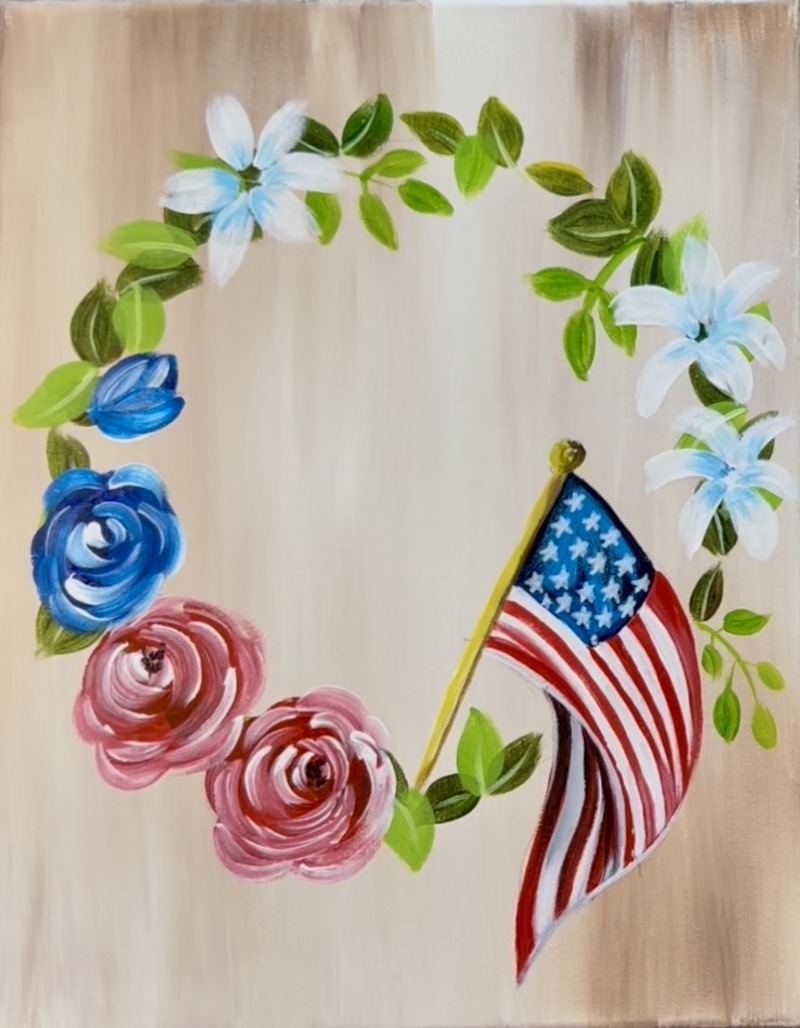
4. Paint Dark Leaves On Wreath
In this next step we will be painting our first layer of leaves around the circle we drew earlier. Mix a very dark green on your paint palette by mixing 3 parts “hooker’s green hue” and 1 part “cadmium red medium hue”. Adding the red in the green will create a darker, more natural green color. Paint these dark leaf shapes along the circle. They can all be going different angles and be slightly different in size.
Tip: add a little bit of water into the dark green color to help with the flow of the paint. You can also leave a small gap between the leaves.
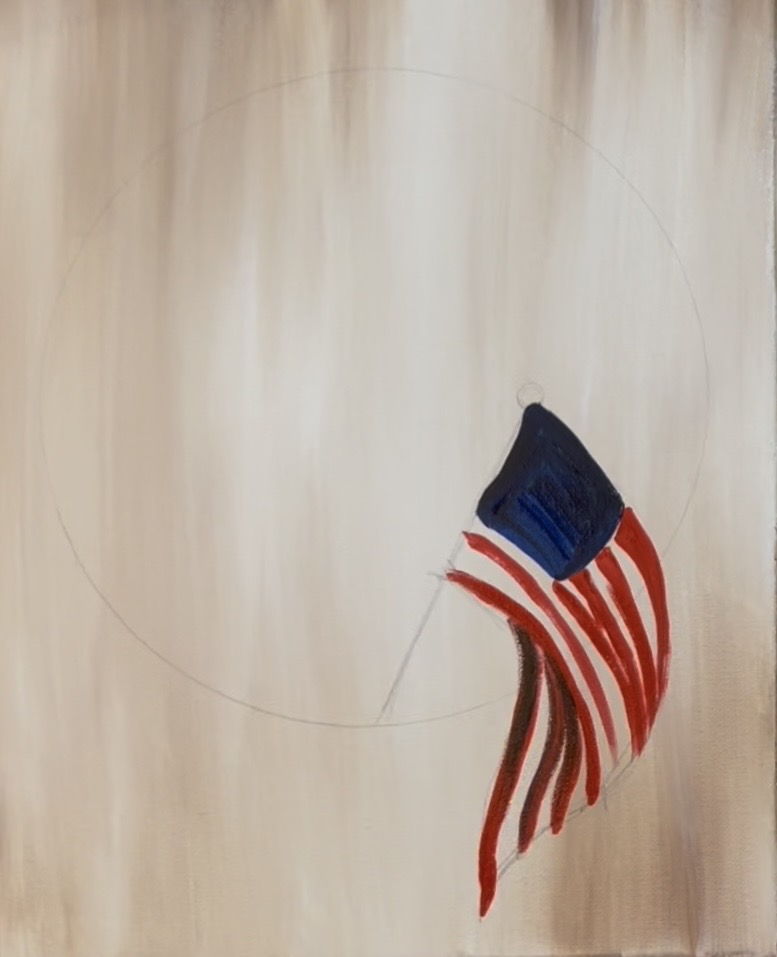
5. Draw/ Paint Stars
Use a white paint pen or a tiny detail brush to draw or paint stars over the blue part of the flag. Note: if using the paint pen you may have to let it dry and go back with another layer to make the white brighter.
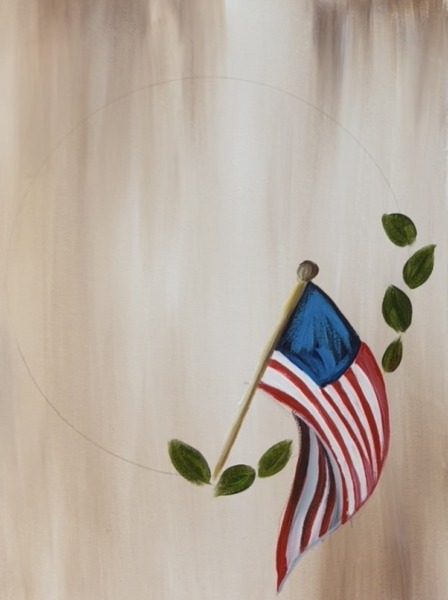
6. Paint Light Colored Leaves
Next, do a layer of light colored leaves. This time mix 2 parts “hooker’s green hue”, 1 part “primary yellow” and 1 part “titanium white”. Add a little bit of water to help with the flow of the paint. Paint sets of leaves with a stem that stick out of the wreath. Also, paint leaves the same shape as the dark leaves and overlap the dark leaves. This will create depth in the wreath.

Tip: don’t add too many leaves where the larger roses will be.
Optional: paint thin lines down the middle of the leaves. Mix white into your lighter green to create a much lighter green. Use the #8 long round brush (or a tiny detail brush) to paint a thin line down the middle of all or most of the leaves.
7. Paint Roses
I recommend practicing these roses first if you’ve never painted them before.
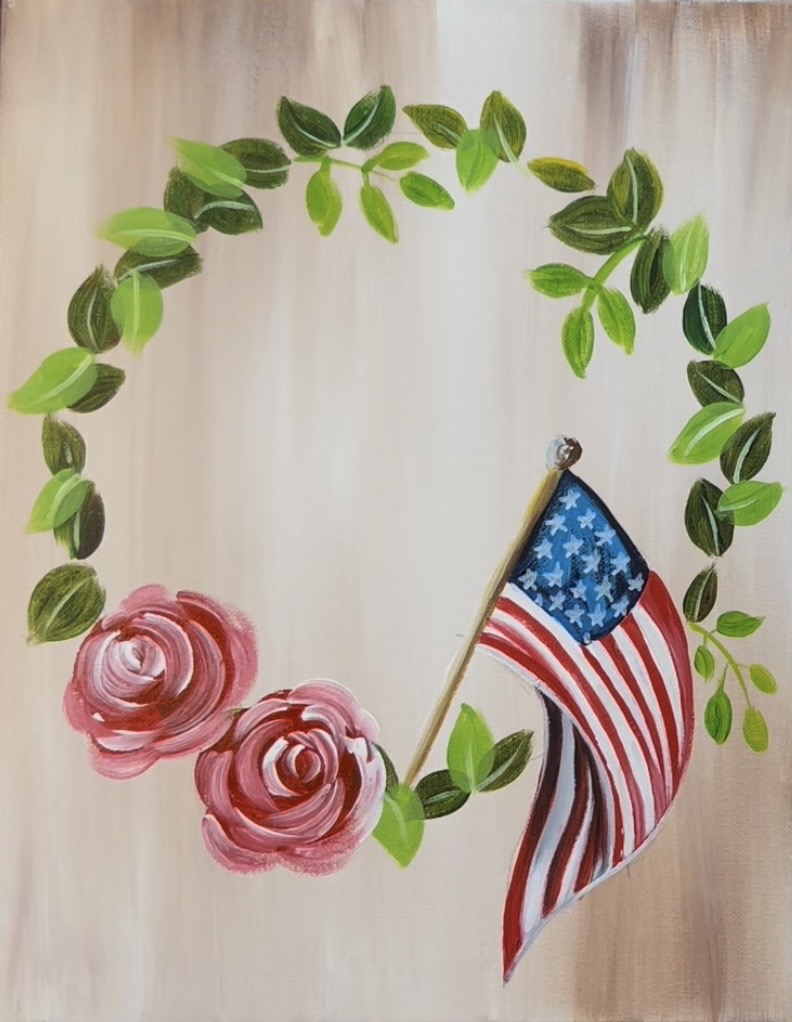
Use the #4 round brush to paint the roses. Start with just the “cadmium red medium hue”. Paint a circle and then paint curved edges coming out from the edges of the circle. You are essentially painting a solid color rose shape.

Before this dries, paint the petals of the rose. Double load the #4 round brush in white and red. Start in the center of the rose and paint a set of small “C” paint strokes. Continue to paint “C” paint strokes going outwards from the center. Leave a small gap between each of the petals (for shadowing).
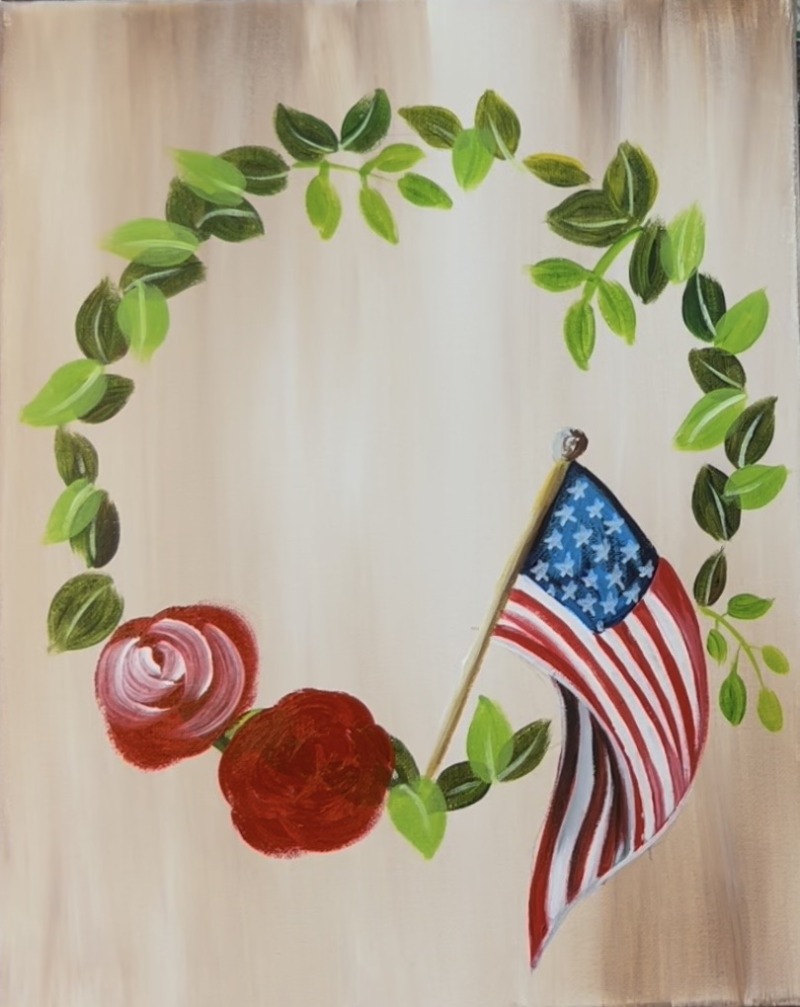
Paint larger “C” strokes as you work your way from the center outwards. This will form a decorative rose.
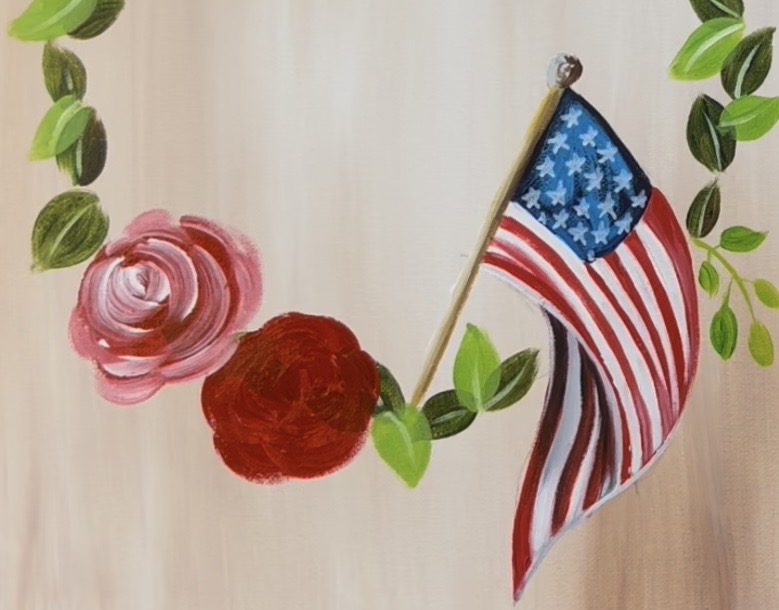
Repeat this for the other rose shape.
Next, paint a blue rose to the left of the two red roses. Start with just “phthalo” blue. Then double load the #4 round brush into blue and white to paint the petals.
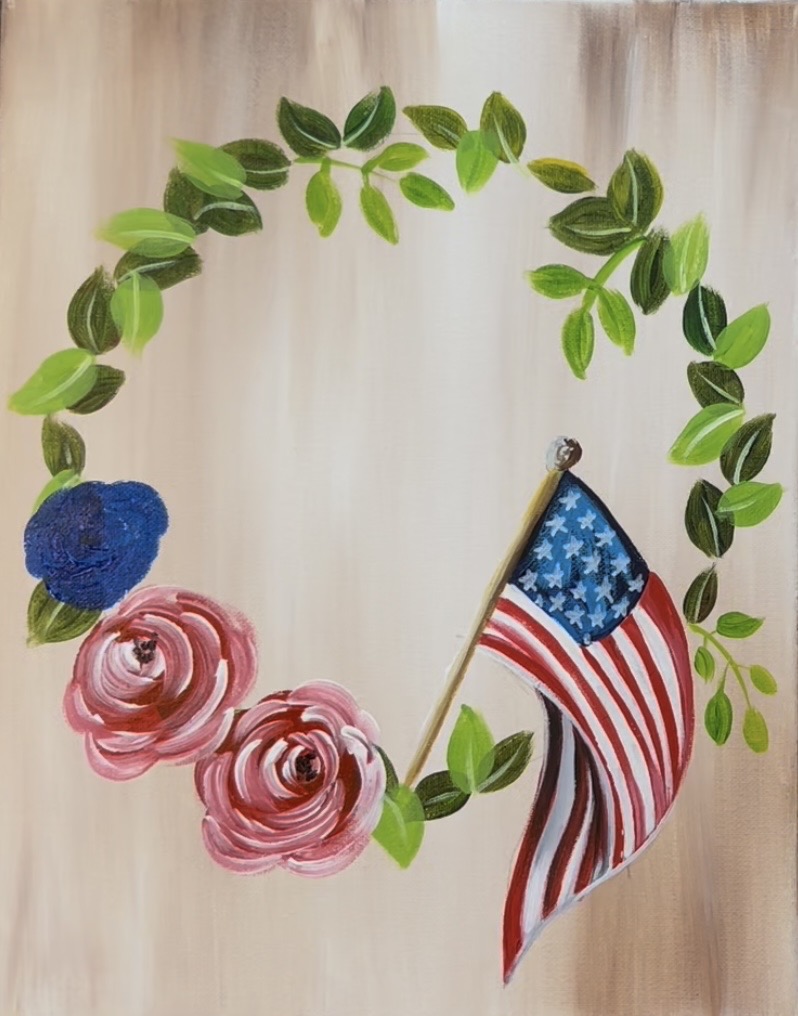
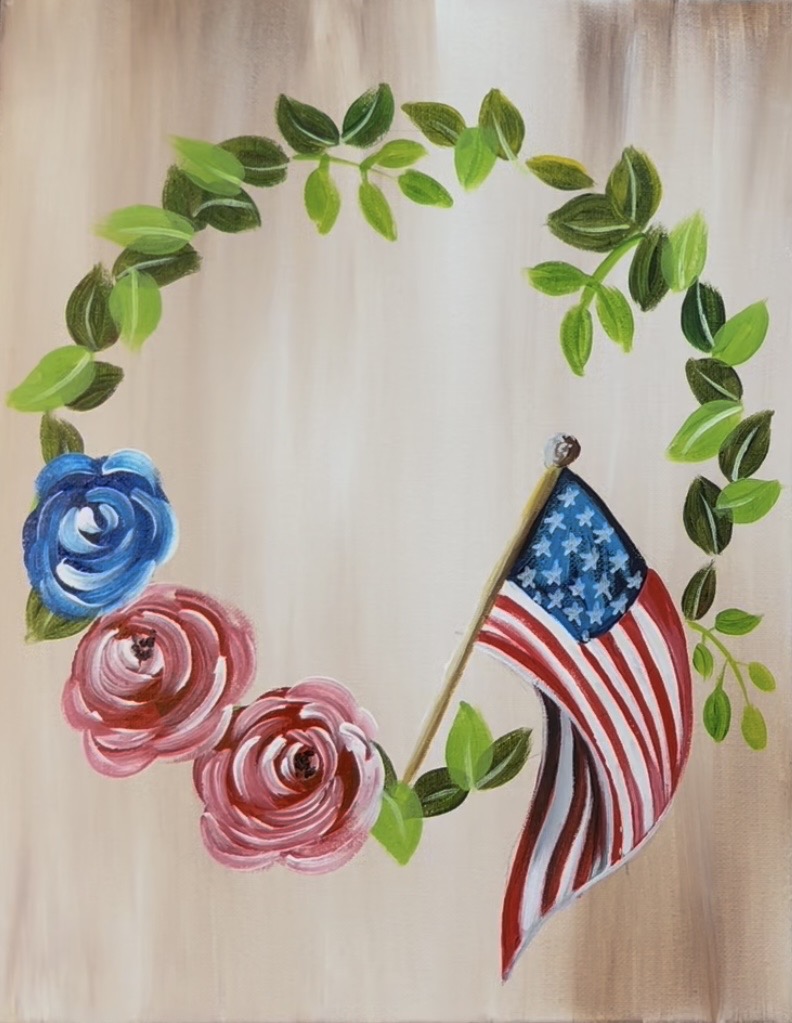
Paint a rose bud with the blue and white. Paint a set of petal shapes that are a similar size and shape to the green leaf shapes. Then paint a layer of white over the blue so that it slightly blends with the blue.
8. Paint Daisies
Use the #4 round brush and “titanium white” to paint petals that curve outwards from a center point. The petals are narrower at the base and go wider/ more rounder at the edge. I did 6 petals on each one.
Repeat this to paint three daisies.
Next, paint a very light blue at the base of each of the daisy petals. Double load the #4 round brush in white and a small amount of “phthalo” blue. Drag the brush from the bottom of the petal towards the rest of the petal about a third of the way.
Then use the color “burnt umber” and the #4 round brush to paint little brown dots in the center of each of the daisies.
Wait for the brown to dry. Then go back over the brown and paint little yellow dots on the tops of the brown centers of the flowers.
9. Paint Twigs/ Baby’s Breath Flowers/ More Leaves
Mix a very dark brown by mixing brown with a tiny dot of black. Slightly water it down. Use the #4 round brush to paint a few branches that are sticking out of the wreath.
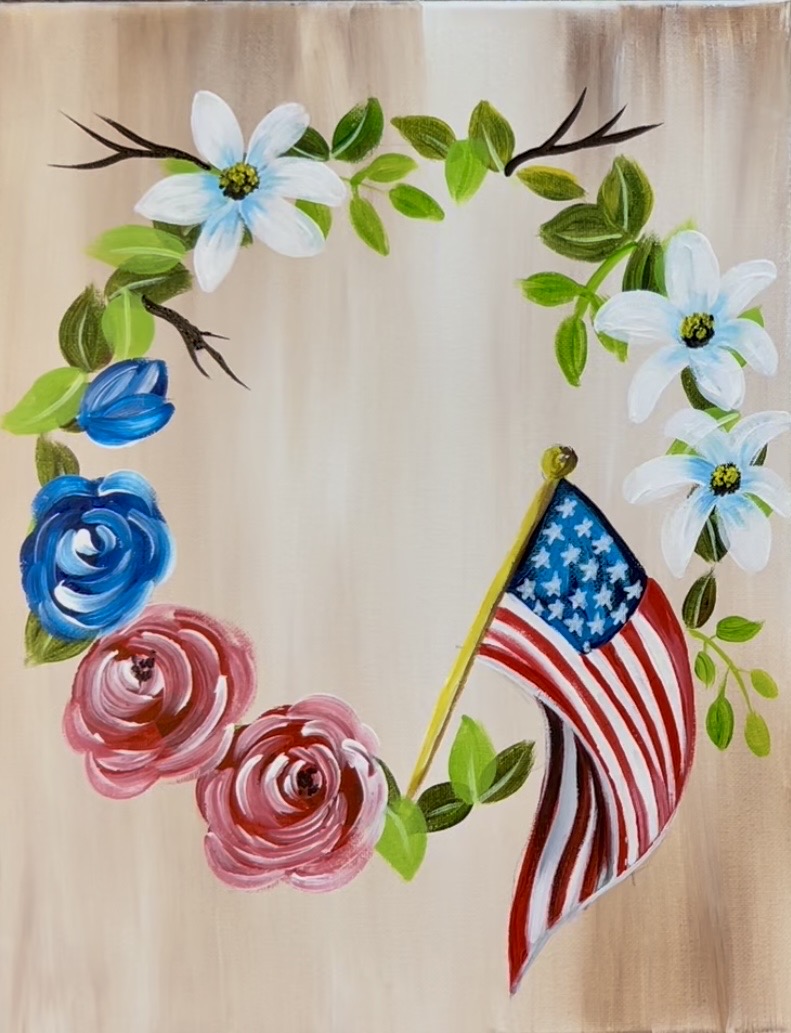
Then use your “dark green” color to paint small branchlike stems for the “baby’s breath” flowers on the bottom of the wreath. I did one to the left of the flag and another one in between the two roses.
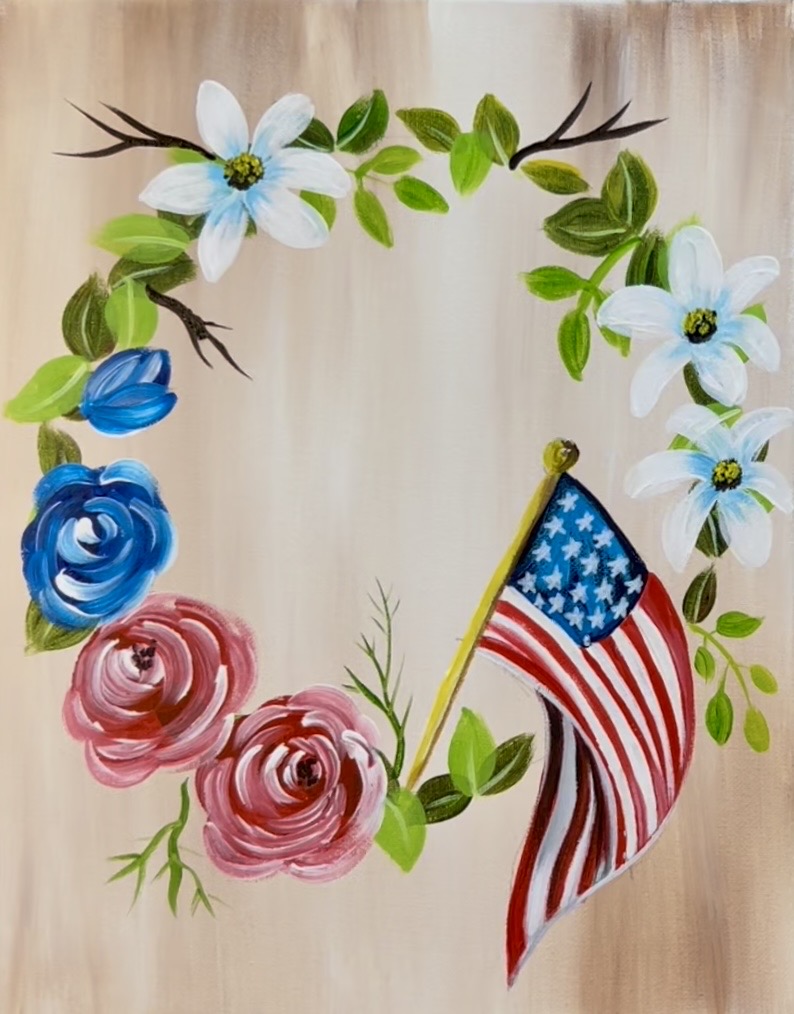
Then use the #4 round brush and “titanium white” to paint white dots on the green branches.
Paint red and blue berries on the ends of the dark branches. Then paint a white curve on one side of all the circles for highlights.
Paint a set of dark green leaves protruding from the red roses. Use the same dark green you used for the first layer of leaves on the wreath. These leaves are larger and more rounded on the edges and pointed on the ends. After painting the leaves with a first layer of dark green, go back with your #8 long round brush (the thin point) and paint the lines on the leaves with light green.
8. Final Touches
Some final touches for this painting can be: painting more berries, another red rose bud (I did one at the top of the leaf), another layer of white on the daisy petals, dark dots in the centers of the roses and another layer of red and white on the stripes of the flag. An optional quote can be written in the middle of the wreath!