
Would you like to save this?
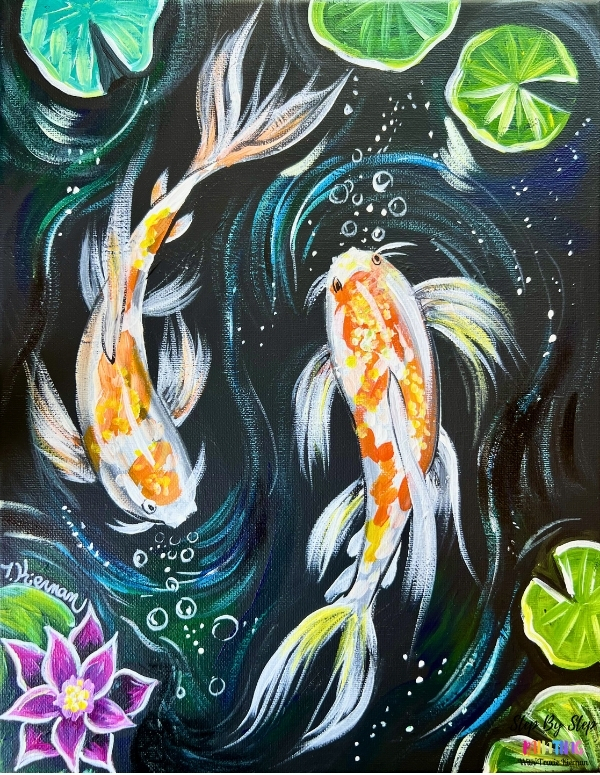
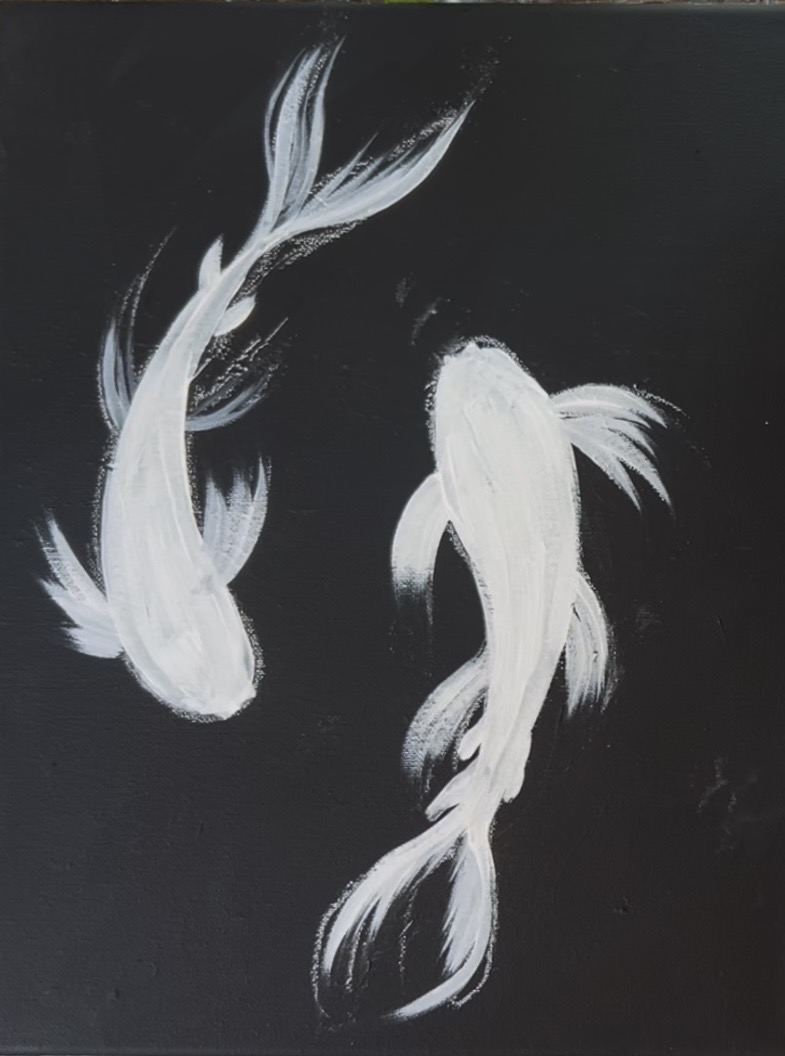
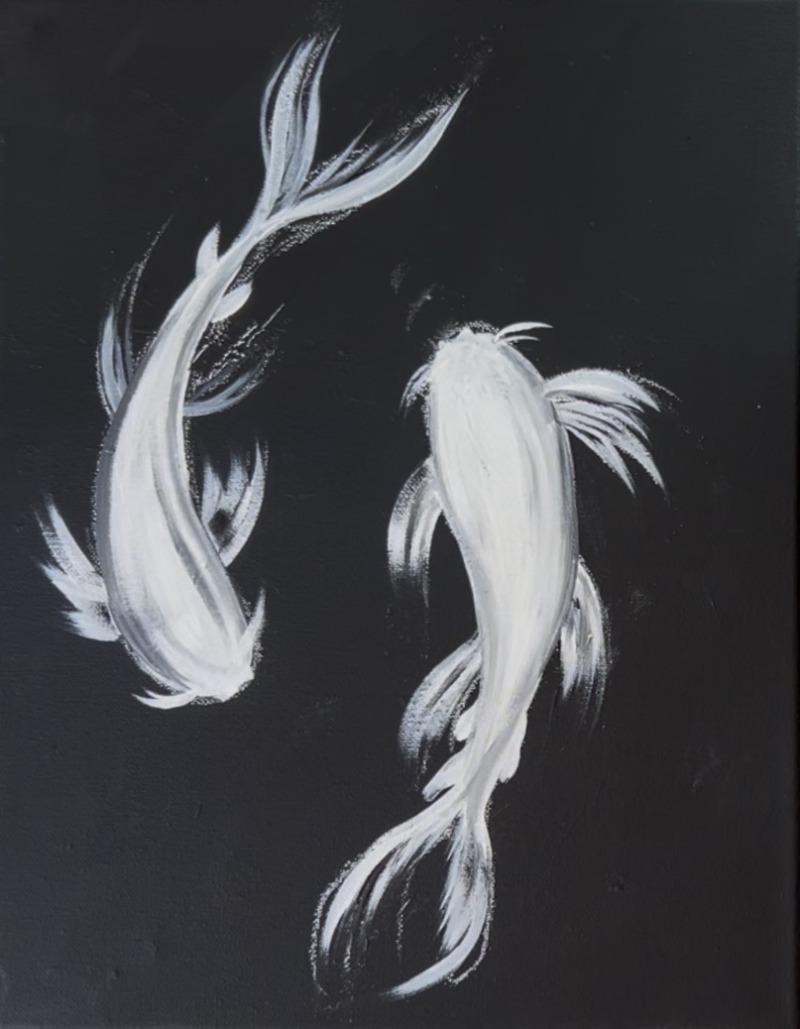
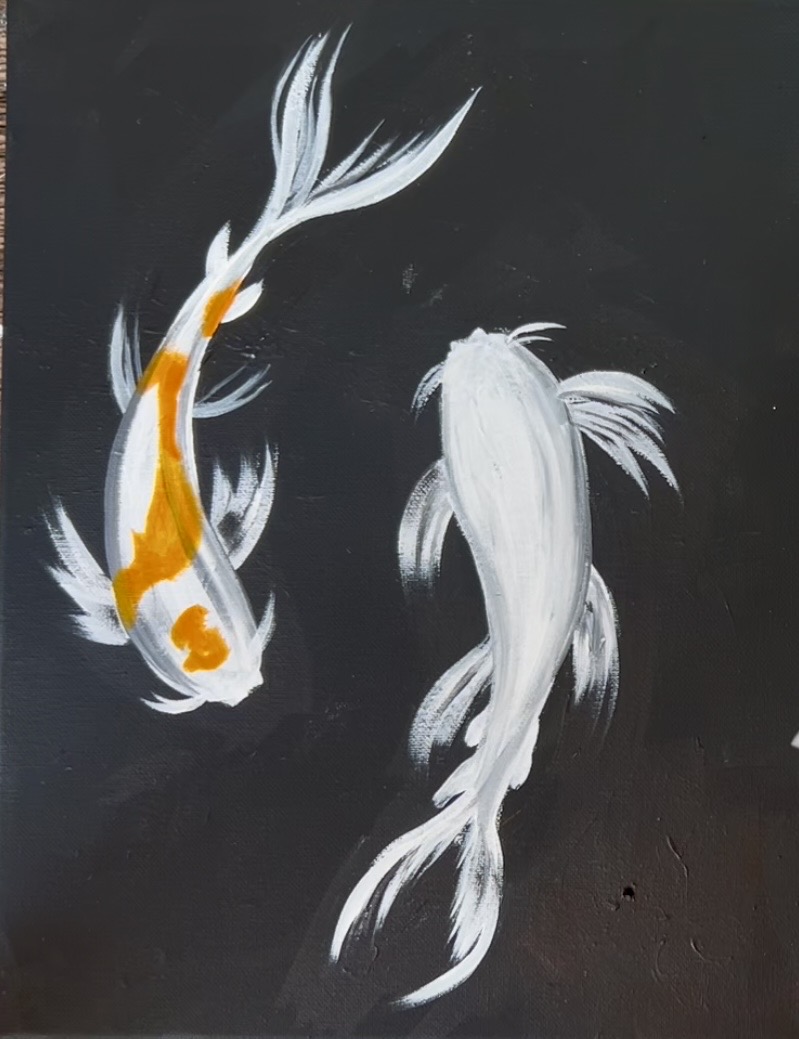
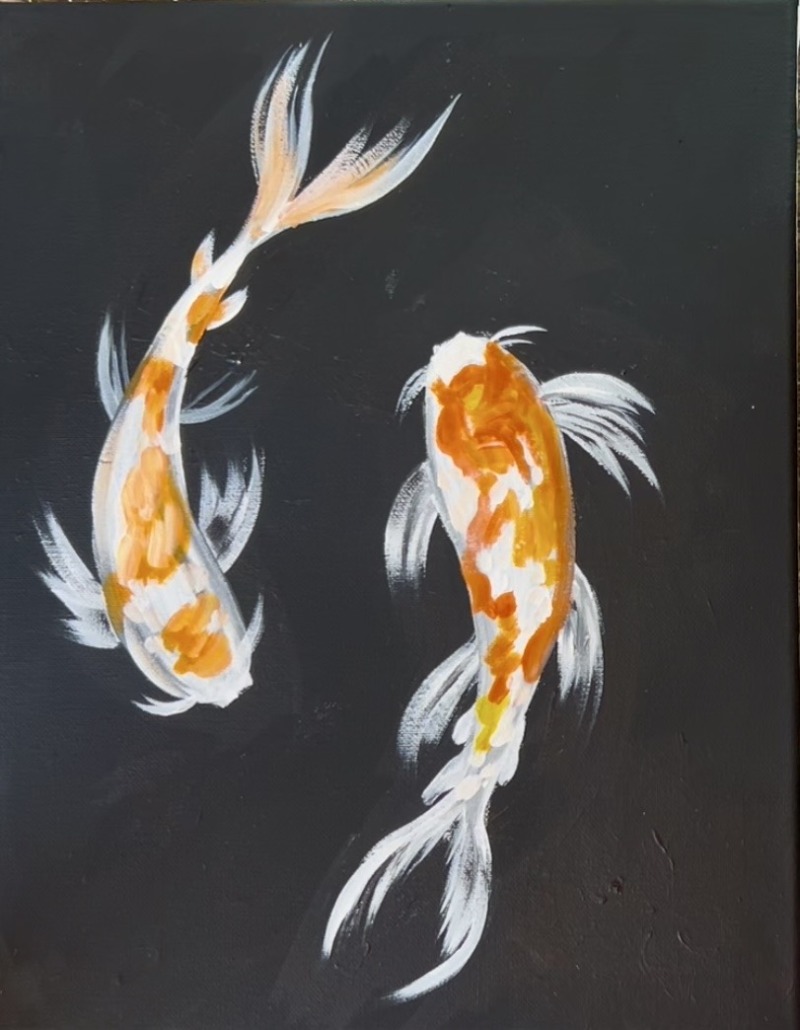
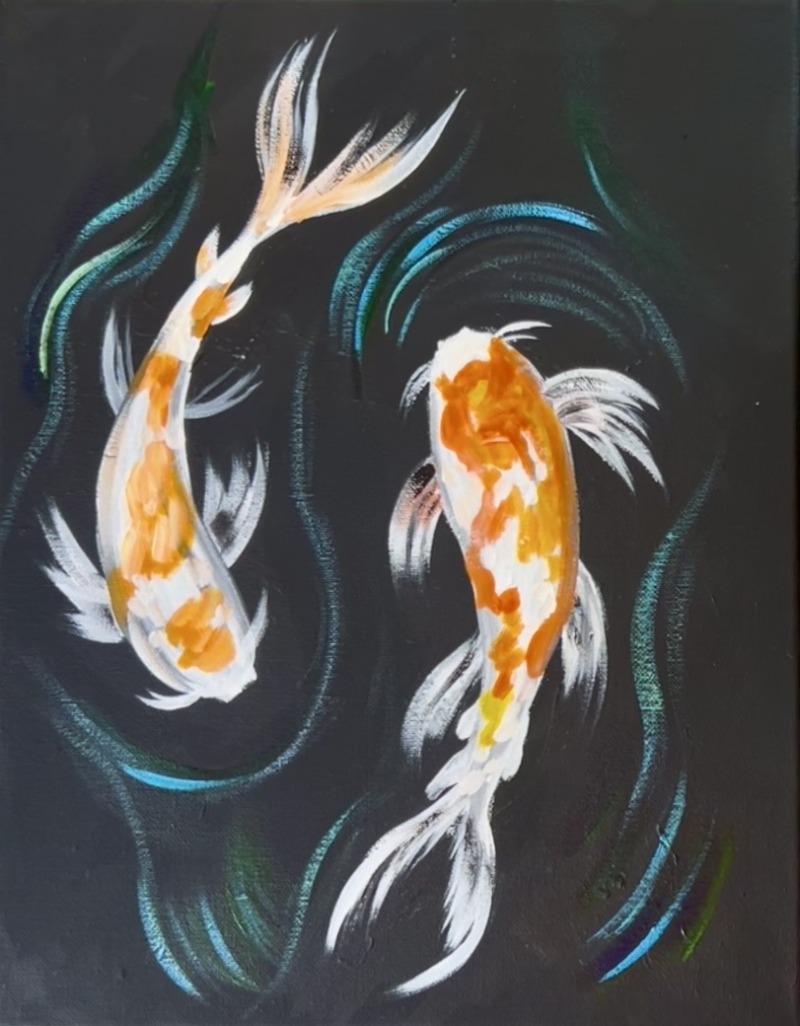
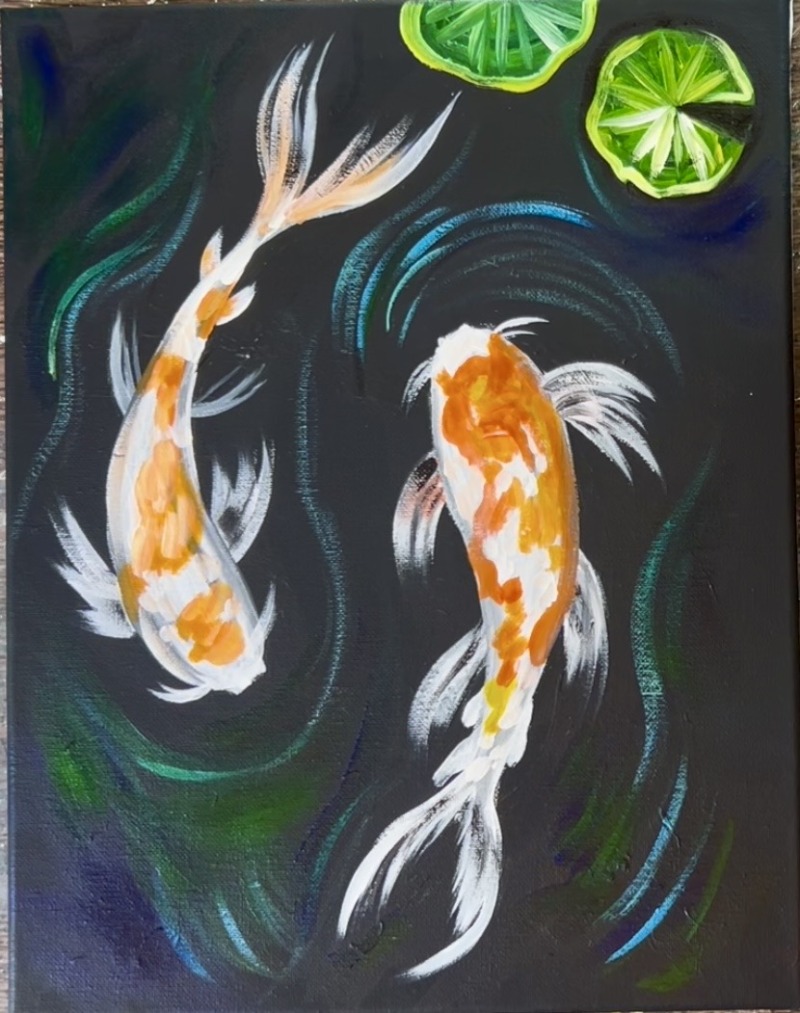
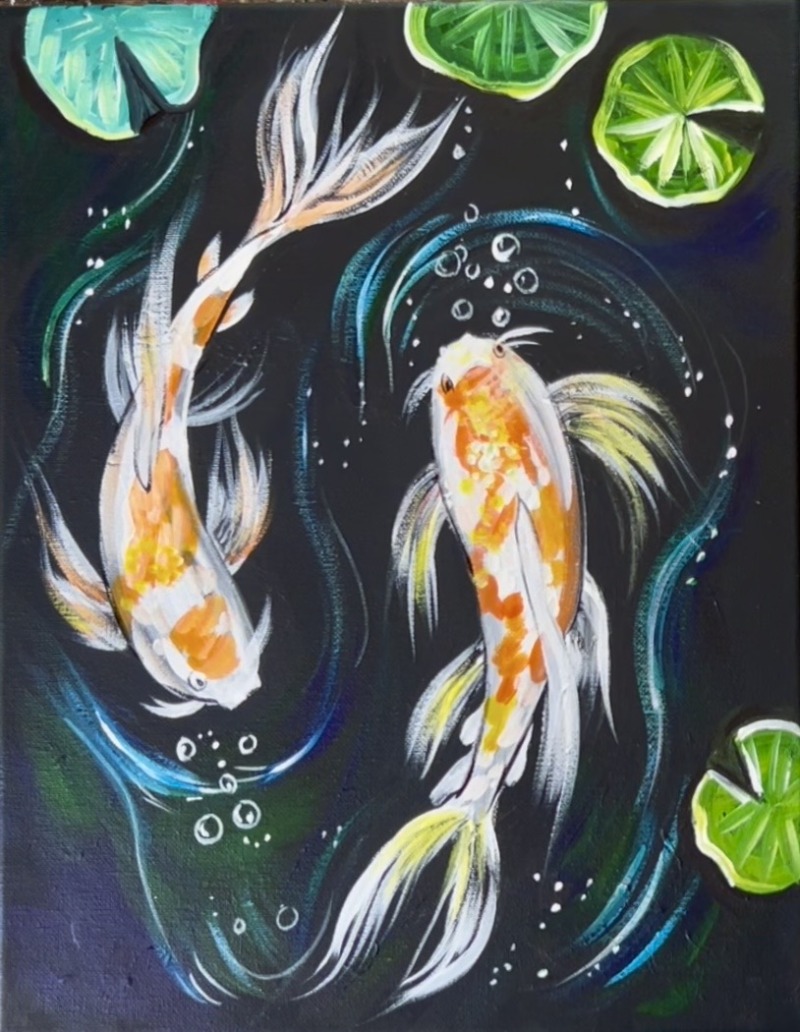
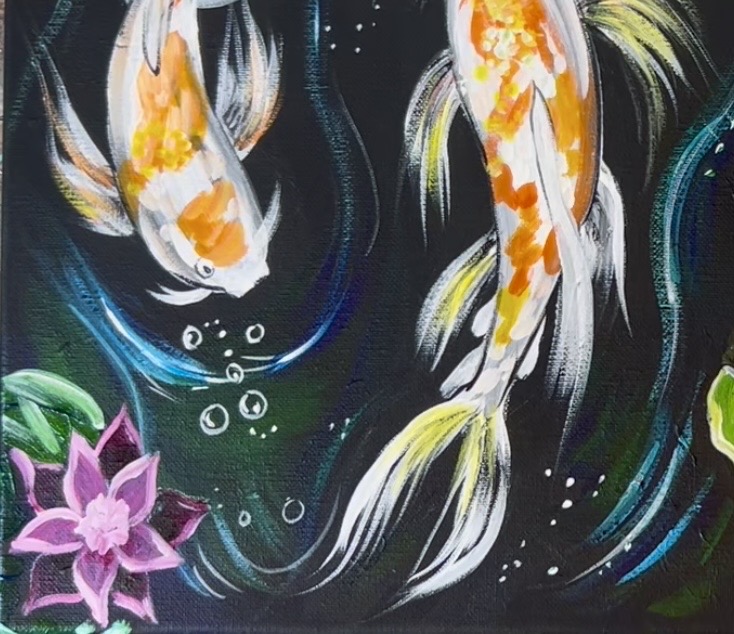
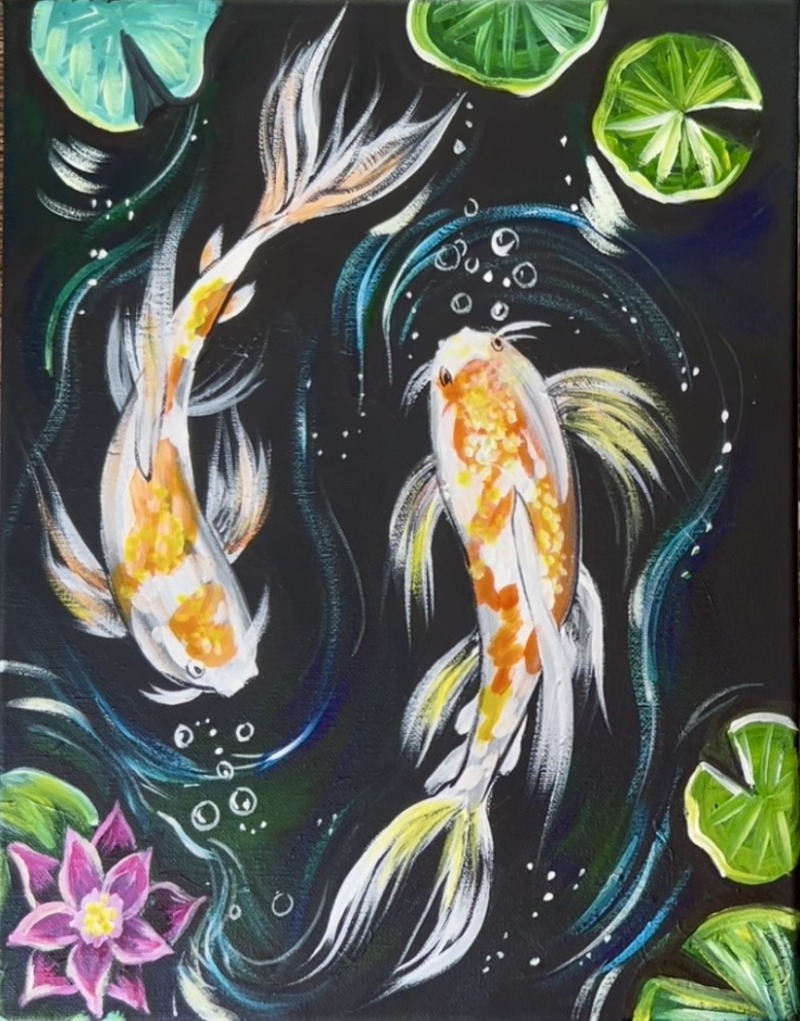
In this beautiful new tutorial, we’ll be painting a pair of graceful koi fish gliding through dark, swirling water. Their flowing fins and bright orange-and-white markings create a striking contrast against the deep background, while soft water movement and bubbles bring the whole scene to life.
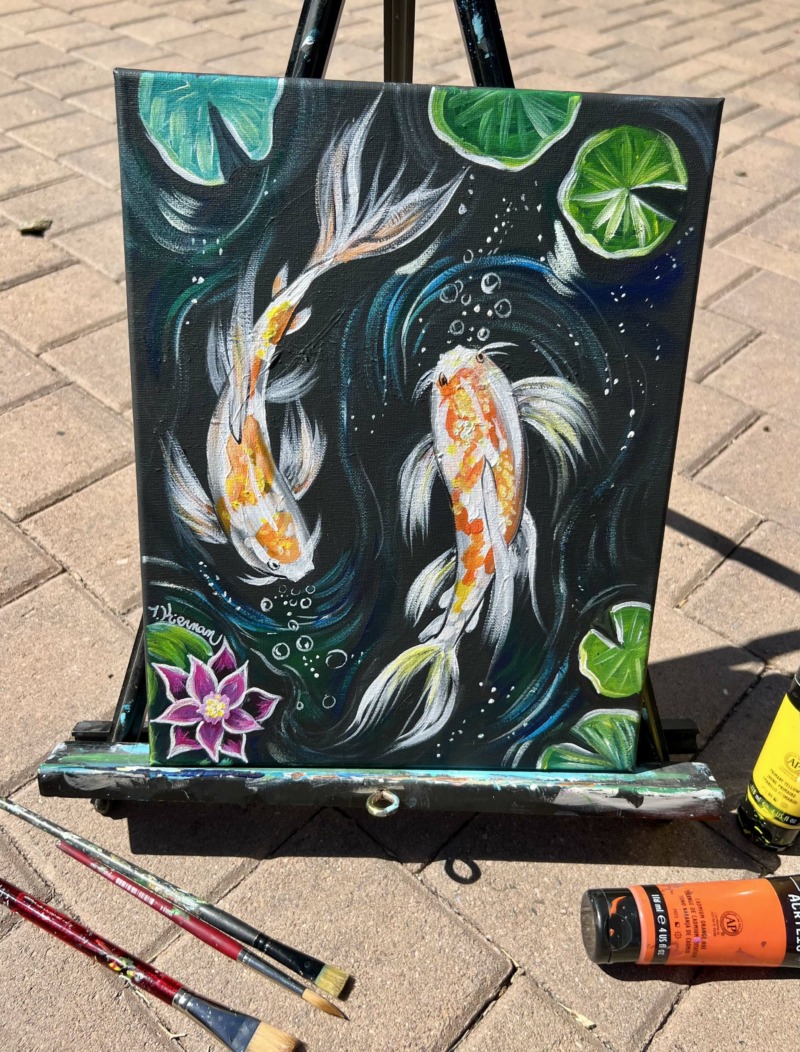
This tutorial is painted on a black canvas. An optional traceable is available for it too!
Enjoy and happy painting!
Materials
Midnight Koi Fish - Acrylic Painting Tutorial
Learn how to paint two koi fish in dark water with bright reflections. This painting is done on a black canvas.
Materials
- 11 x 14 Black Canvas (paint a canvas black)
- Acrylic Paint
- Brushes
- White Chalk Pencil
- White Chalk
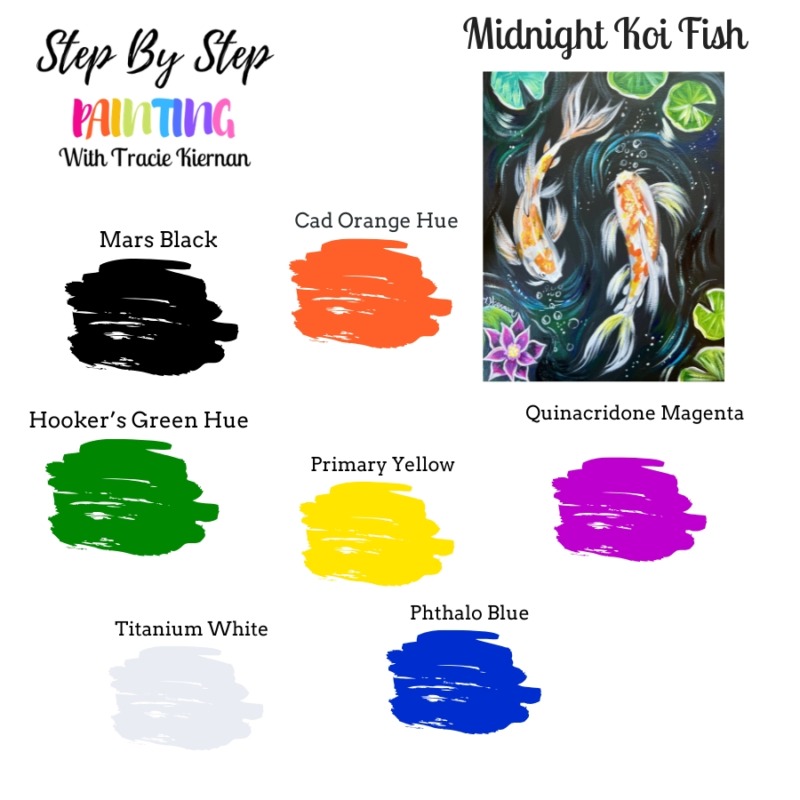
Colors
- Mars Black
- Titanium White
- Quinacridone Magenta
- Cadmium Orange Hue
- Primary Yellow
- Phthalo Blue
- Hooker's Green Hue
- Brilliant Yellow Green (optional)
Brushes
- #12 Bright Brush (1/2" Flat)
- 8 LONG Round
- 4 Round
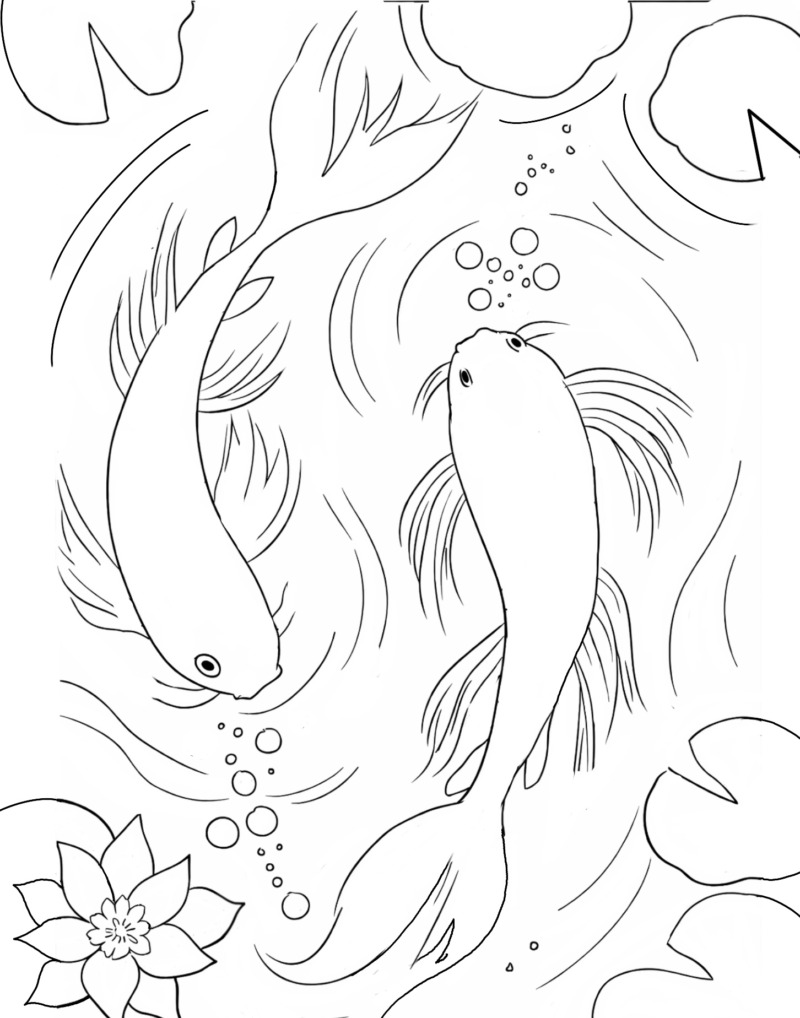
Traceable (optional)
If using this traceable, trace with white graphite paper so the lines show on the dark canvas. For other sizes, you can purchase the download in my PDF shop.
Brushes
Note: 3/4″ flat is only used for painting canvas black & the #12 bright brush is about 1/2″ wide.

Color Palette
Directions At A Glance

Step By Step Directions
1. Paint Canvas Black
You can paint over any blank white canvas with a single layer of black paint. I like to use “Black Apple Barrel Matte” paint, however, you can also use “Mars Black Liquitex Basics” or, really, any black paint you have available! One coat of paint with the 3/4″ wash brush is all you need. Let this dry before continuing onto the next step.
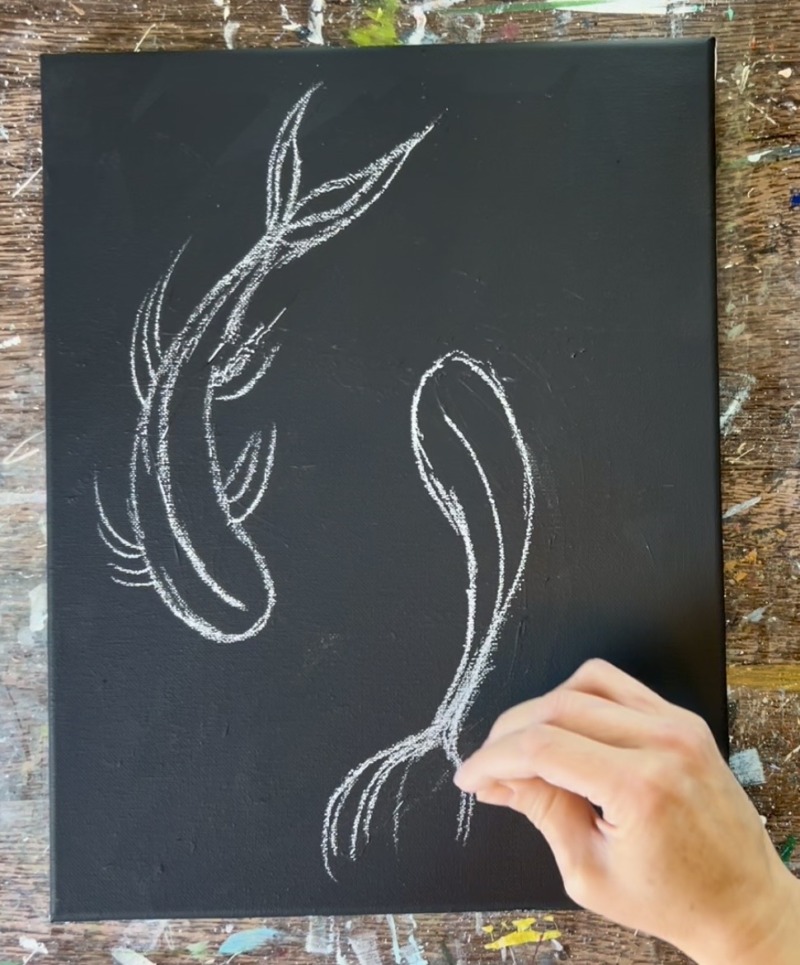
2. Draw Fish With Chalk
I recommend practicing the drawing first! Chalk does erase, however, too many chalk erases may make the canvas a bit messy. You can erase with a clean wet paint brush or a soft baby wipe.
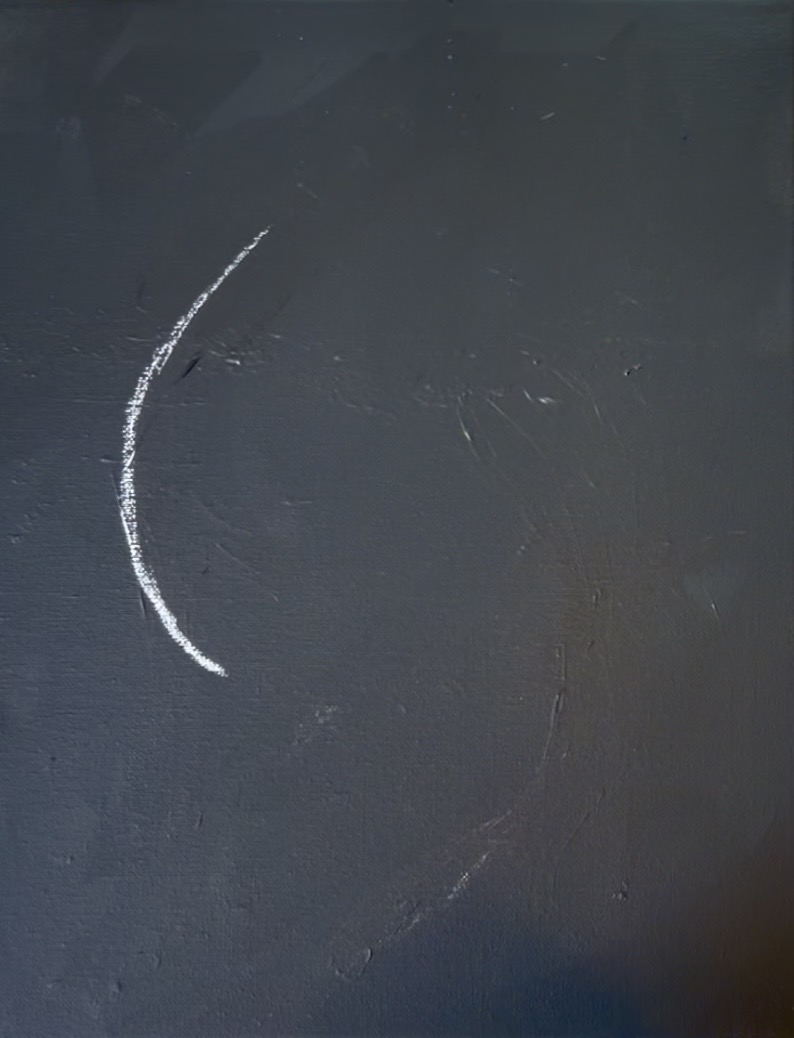
Use a plain white piece of chalk. Draw a large curve “C” line. This line represents the fish’s backbone and the curve/ direction it is swimming. Since I want both koi fish to be slightly curved, I did a slightly curved line.
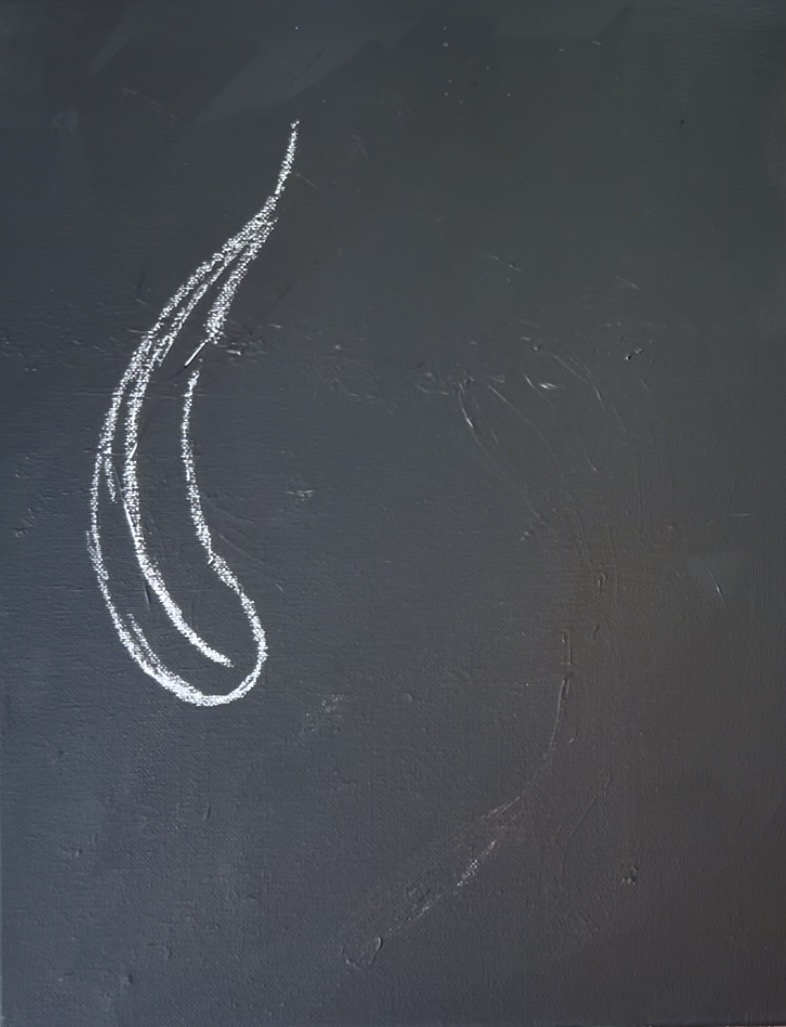
Then take this line and draw a fish shape around it. The head of the fish should be curved and wider while the back tail area goes to a point.
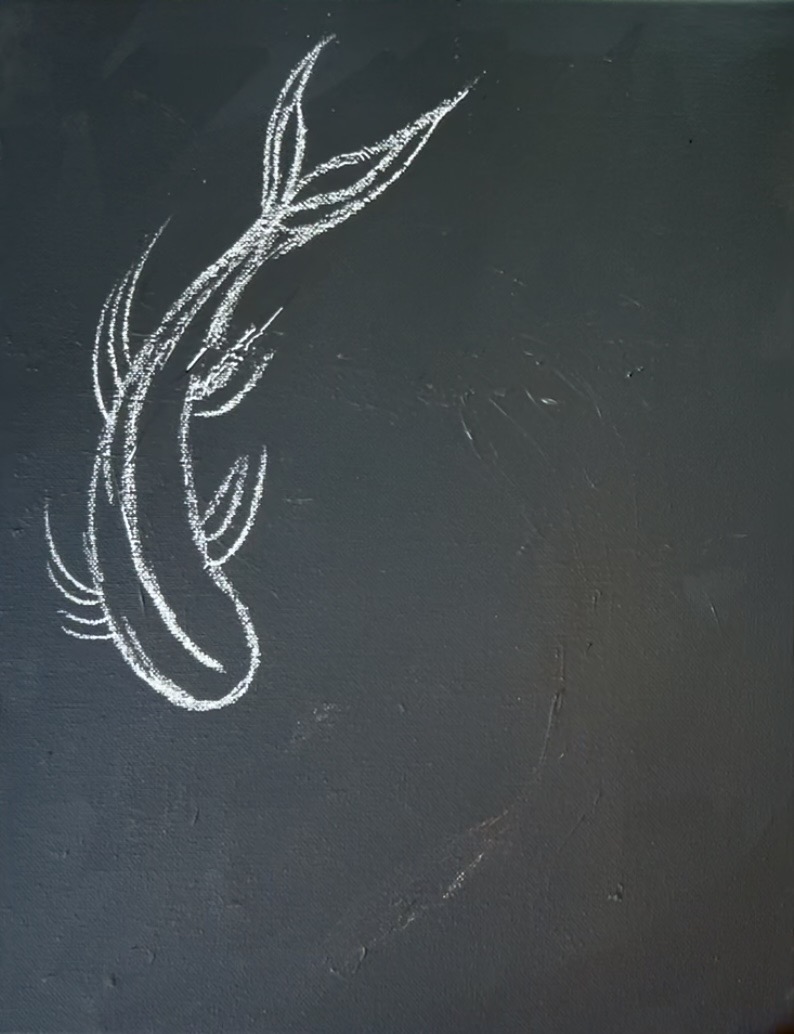
Next, draw the back tail fins. This looks very much like a mermaid tail! Draw a set of front and back fins. by drawing curved lines all pointing back towards the tail.
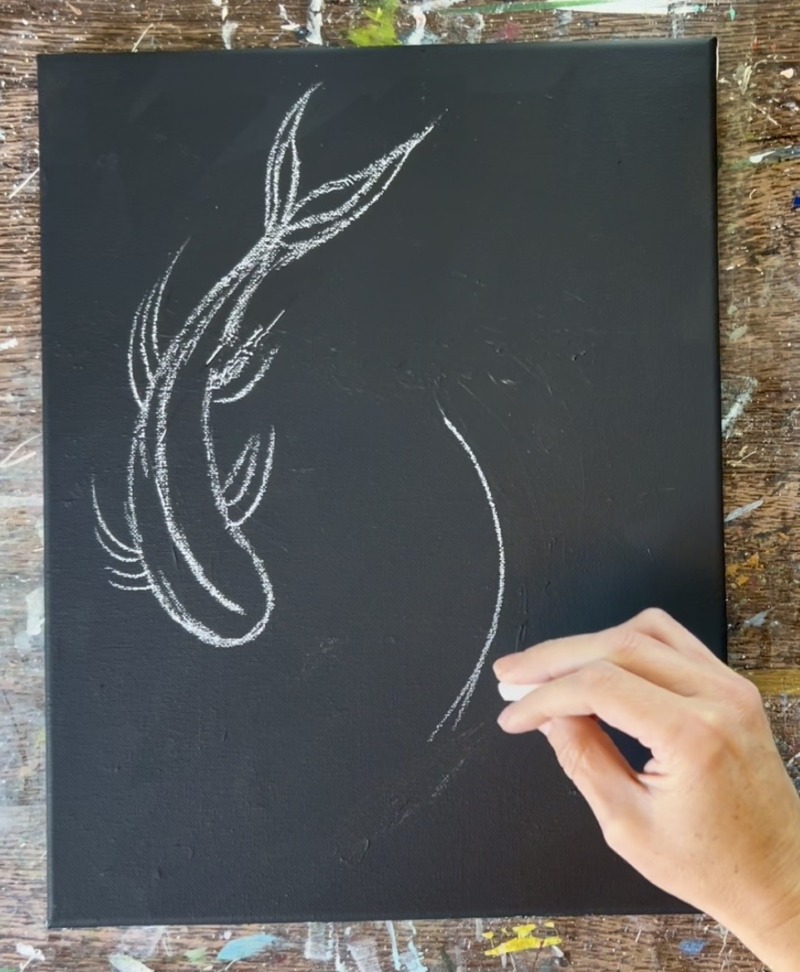
Repeat this step for the other fish. You can make it go a different direction if you want! I wanted to do the head going the opposite direction so I basically drew the exact same fish shape again, only flipped vertically.

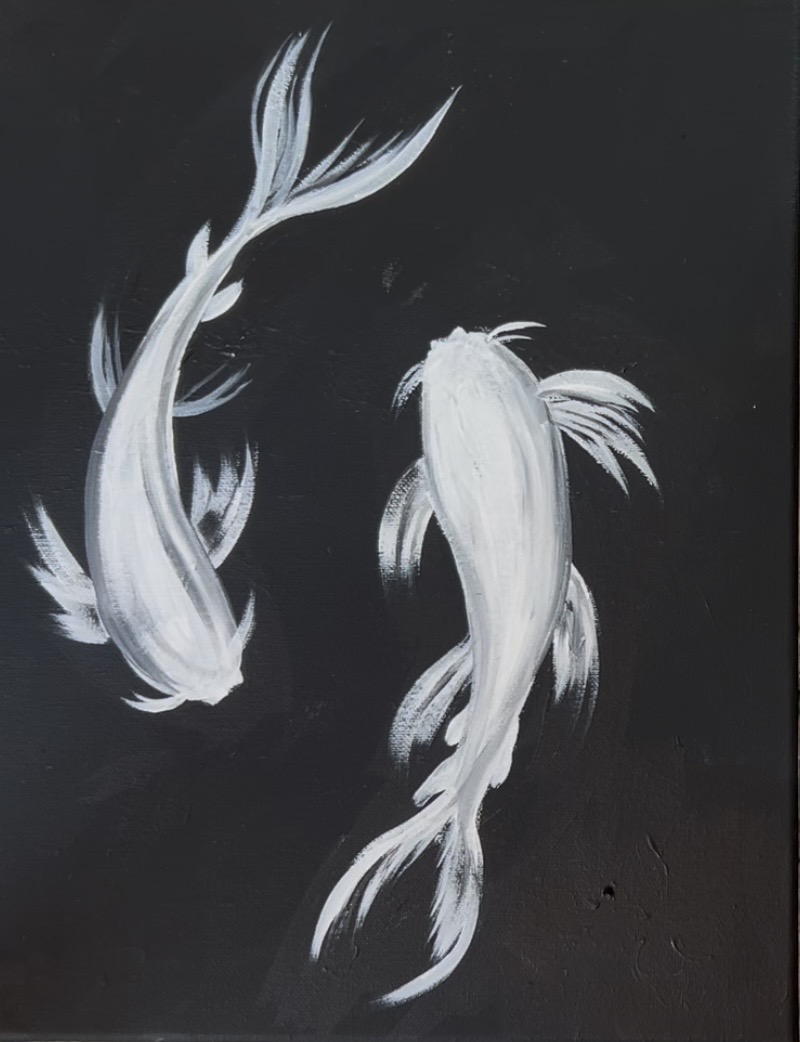
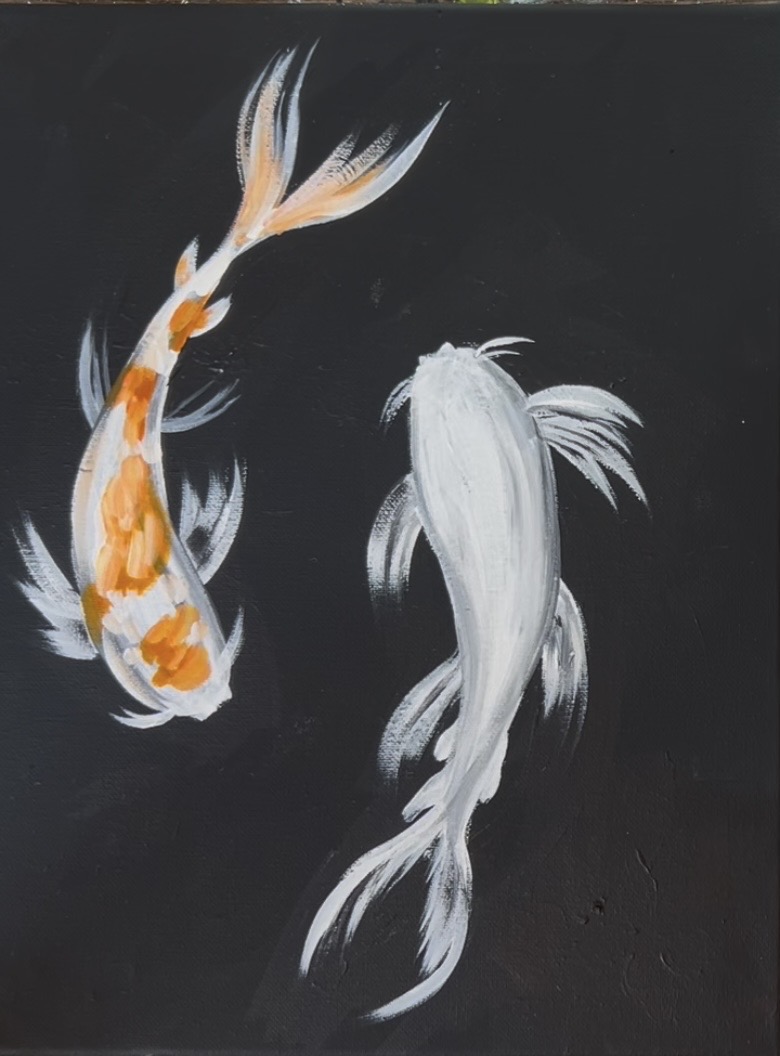
3. Paint Fish White/ Add Some Shading On Sides
Use the #12 bright brush and the color “titanium white” to paint the shape of both of the fish. You want to fill in the body of the fish solid white, however, when it comes time to fill the fins in, you want to apply only a small amount of white in those areas.
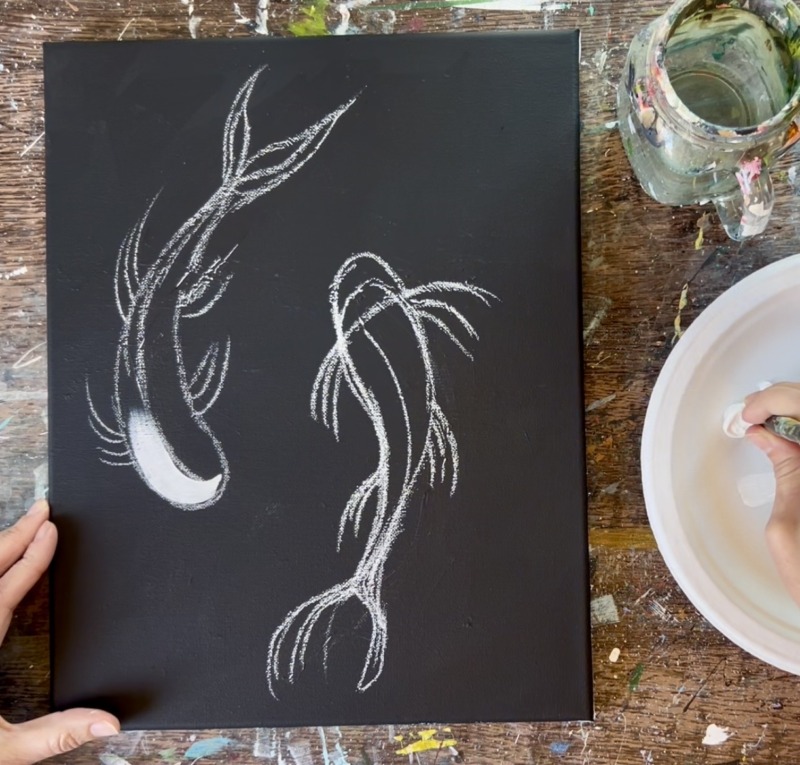
Basically, the fins should be more “dry brush style”. That means some of the black from the canvas should be showing through. Drag your paint stroke outwards and release the pressure of the brush to make a paint stroke that kind of “fades away”. If needed, apply a second coat of paint to the body of the fish to ensure that it is nice and opaque.
Repeat this for both of the fish. If needed, use a #4 round brush for the fins in some of the smaller areas. Remember to keep the fins somewhat thin with paint but the body with a thick, opaque layer.
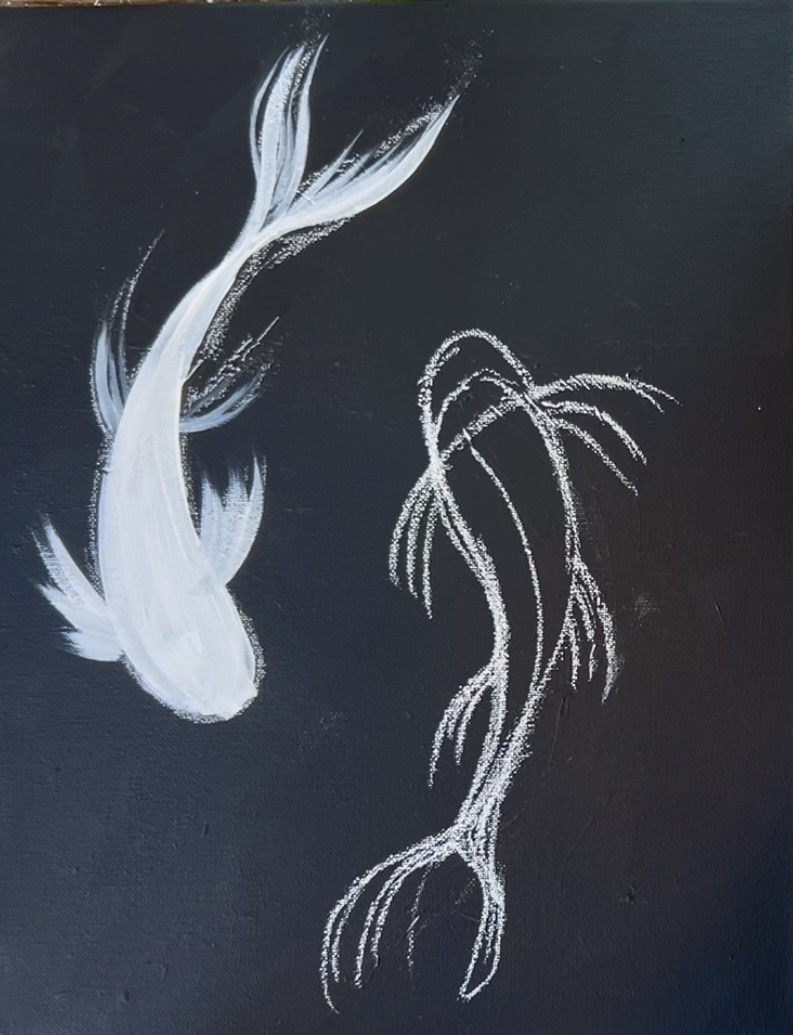
You can either wait for the white to dry or do your shading now. Basically you want to blend some darker gray colors on the sides of both of the fish bodies. This will create depth in the fish/ make them look a little less flat. To do this, mix about 2 parts white to 1 part black to make a medium gray color. Then paint just the edges of the fish body shapes. Blend white into the gray so that it fades to bright pure white in the middle of both of the fish. Add a few dark gray lines in the fin areas as well.
Wait for this to dry before going onto the next step.
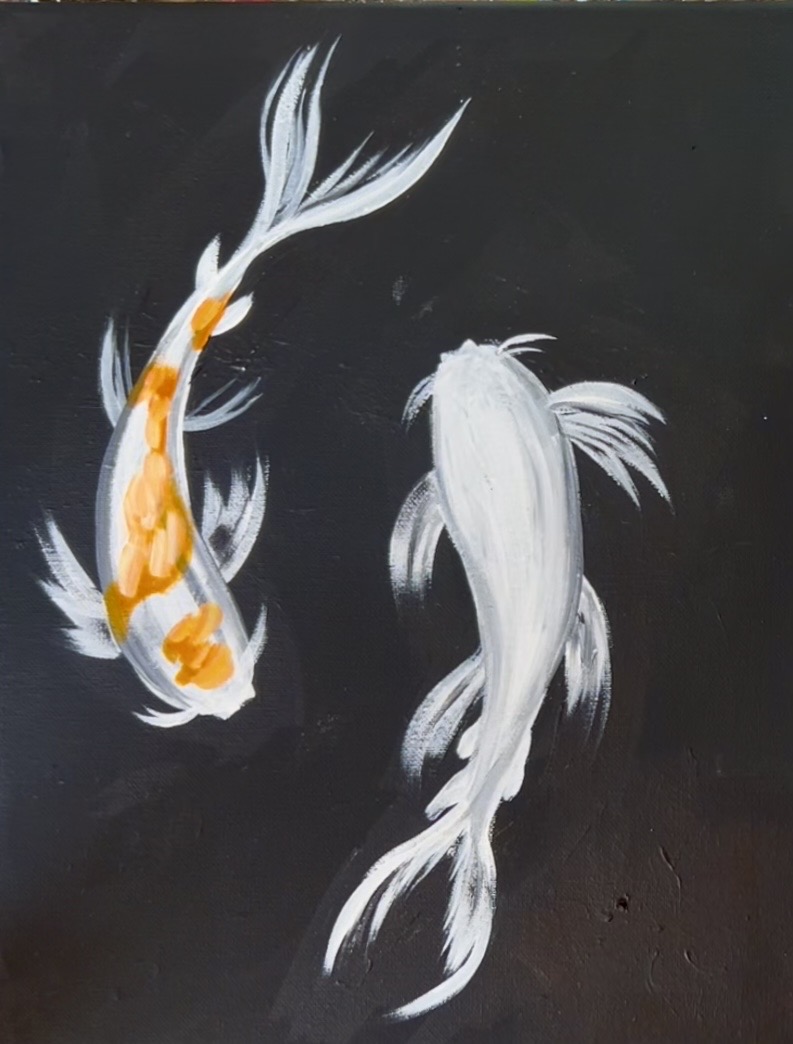
4. Paint Orange and Yellow Speckling
After your fish have dried, erase any leftover chalk marks on the fish.
Load your paint palette with the colors: “cadmium orange hue” and “primary yellow”. You will also need “titanium white”. Use the #4 round brush to paint orange “splotches” on the fish’s body.
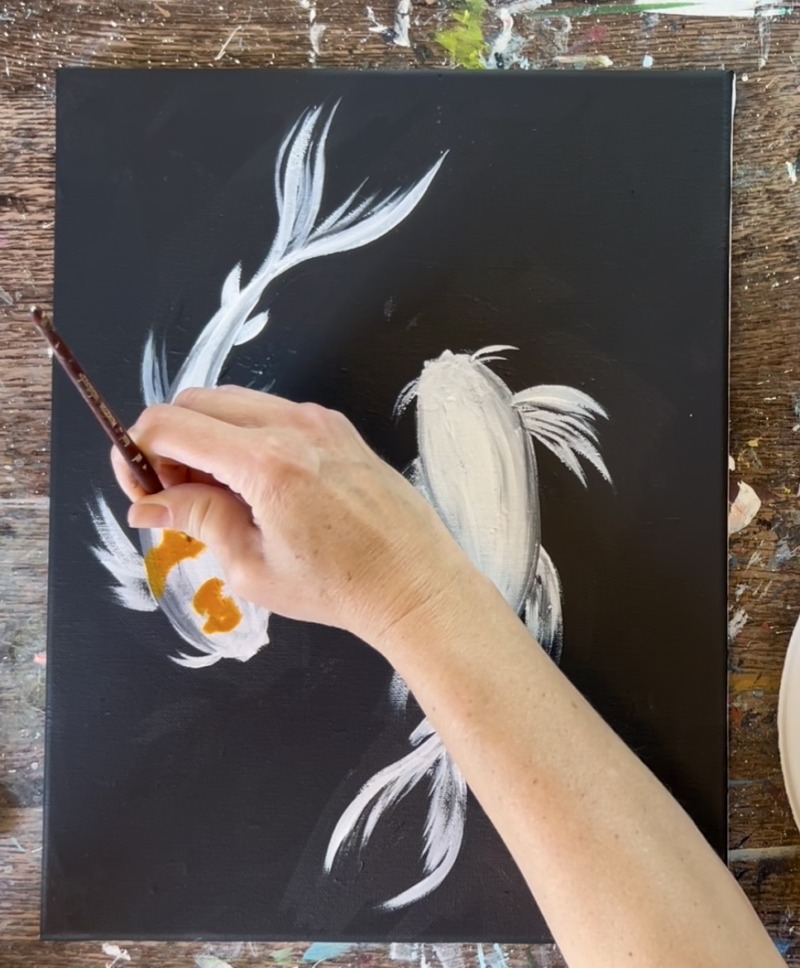
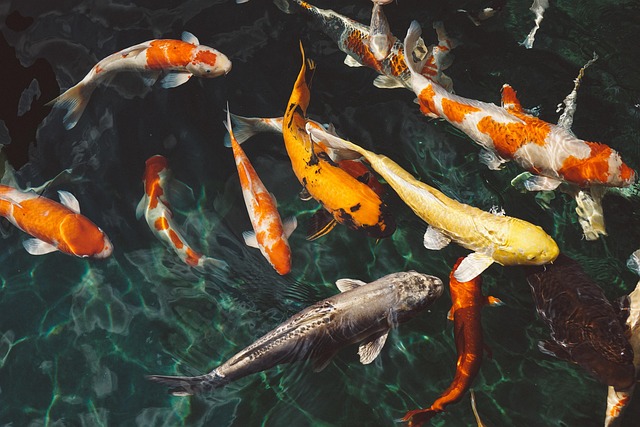
You can look at a reference photo of an orange and white koi fish to observe the patterning or just paint random splotches on the fish.
Leave a lot of the white showing in between the markings that you paint.
For “color variation” and “shine” in the markings, load your #4 round brush with a little bit of white (with the orange) and gently blend some white into some of the splotches on the already painted orange markings. You can also blend in some yellow into some of the orange for a more golden orange color.
Additionally, you can “dry brush” some orange or orange and yellow over the tail/ fins.
Repeat this for both of the fish. If you want, you can make the other fish a different color such as solid orange/yellow or even with black and white splotches!
Blend in some yellow and yellow white into the splotches.
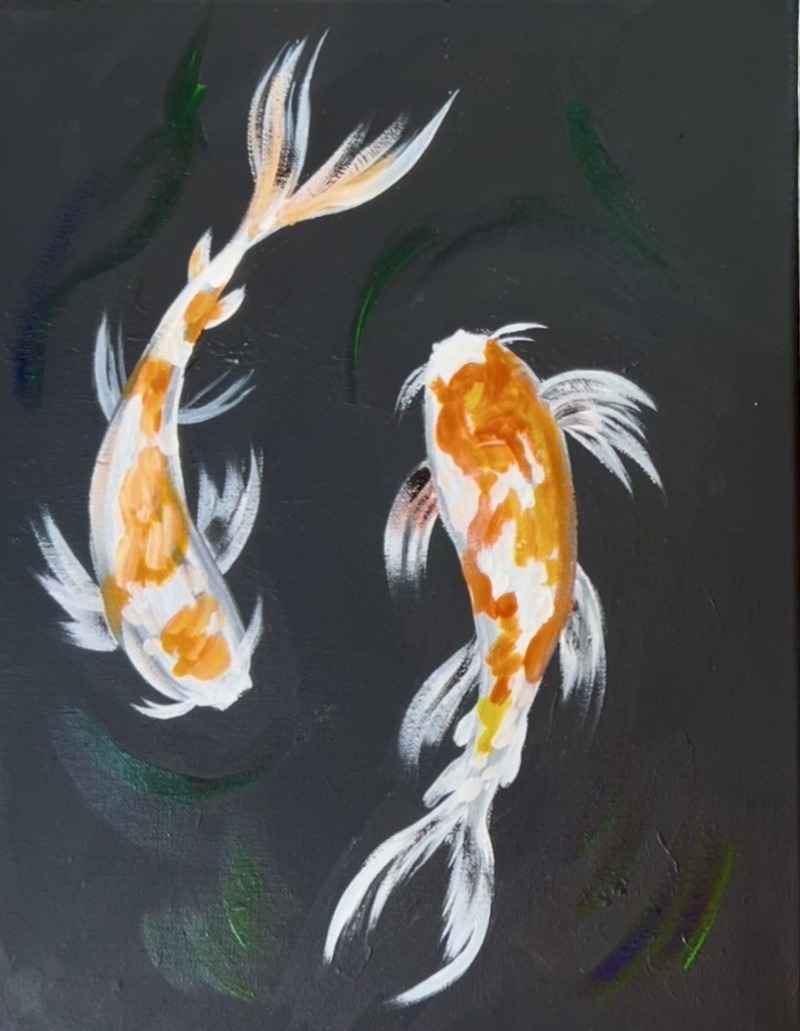
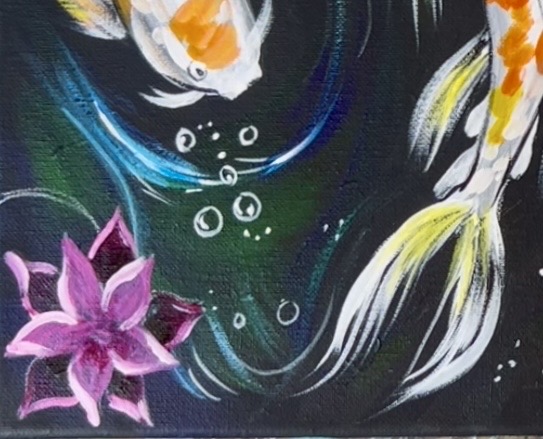
5. Paint Water Ripples
Load your paint palette with the two colors: “hooker’s green hue” and “phthalo blue”. Use the #4 round brush OR the #12 bright brush to paint loose water lines around the fish. Since these are both dark colors, you won’t see them very brightly right now and that is the point! These will be the darker/ shadowy water lines. Double load your brush into both the green and blue. Paint swirls/ curved lines that contour around the fish.
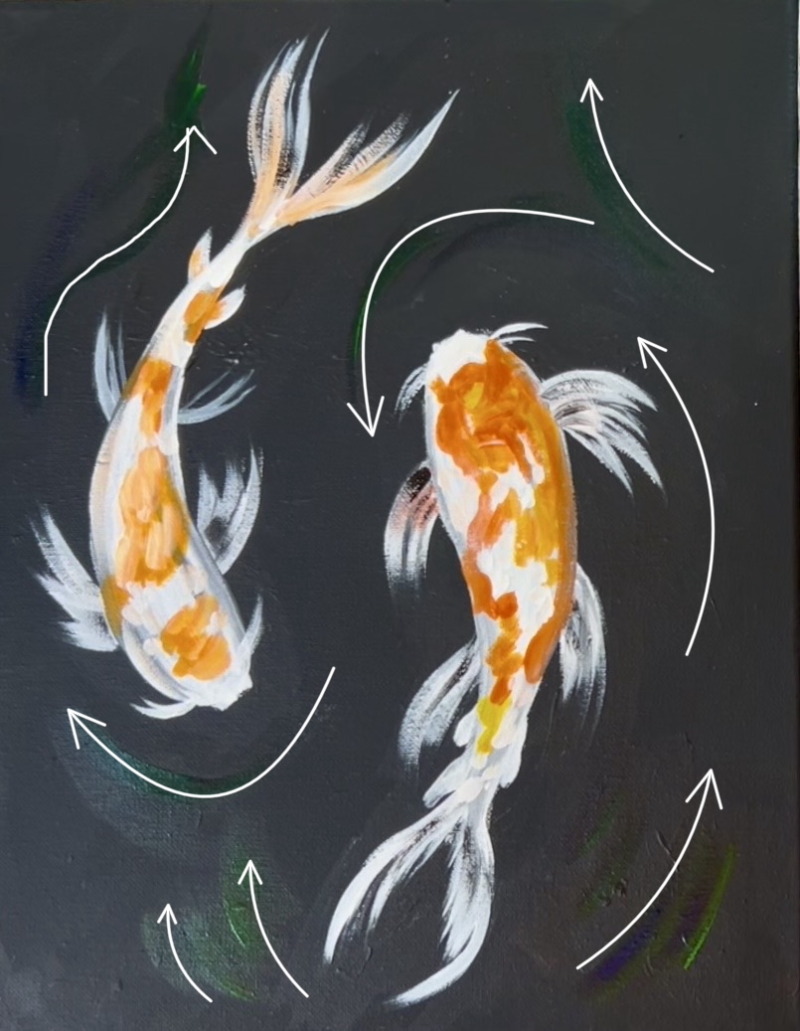
In this photo, arrows are added so you can see the direction of the flow of the lines. You don’t have to follow this exact direction! You can change it but it looks more natural when the water lines flow around the fish shapes.
Next you are going to paint some lighter lines! Be careful not to make these too bright just yet! Use the #4 round brush and mix a little white into “phthalo blue”. Then lightly paint thin and curved lines over some of the darker shadowy water lines you just painted.
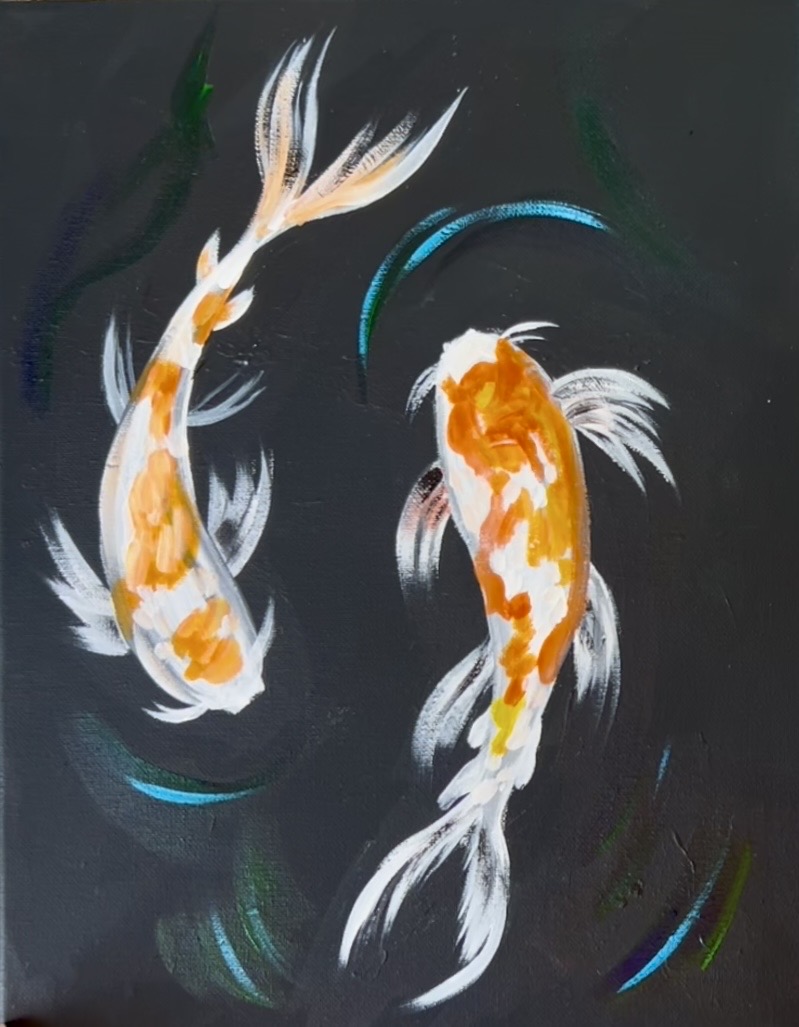
This highlights your lines and makes them look a little more like water ripples. You can do several of those light lines going in the same direction. Make sure you are applying this very lightly to the canvas. Tip: only load a tiny amount of paint on the brush or have a towel handy to wipe off excess paint.
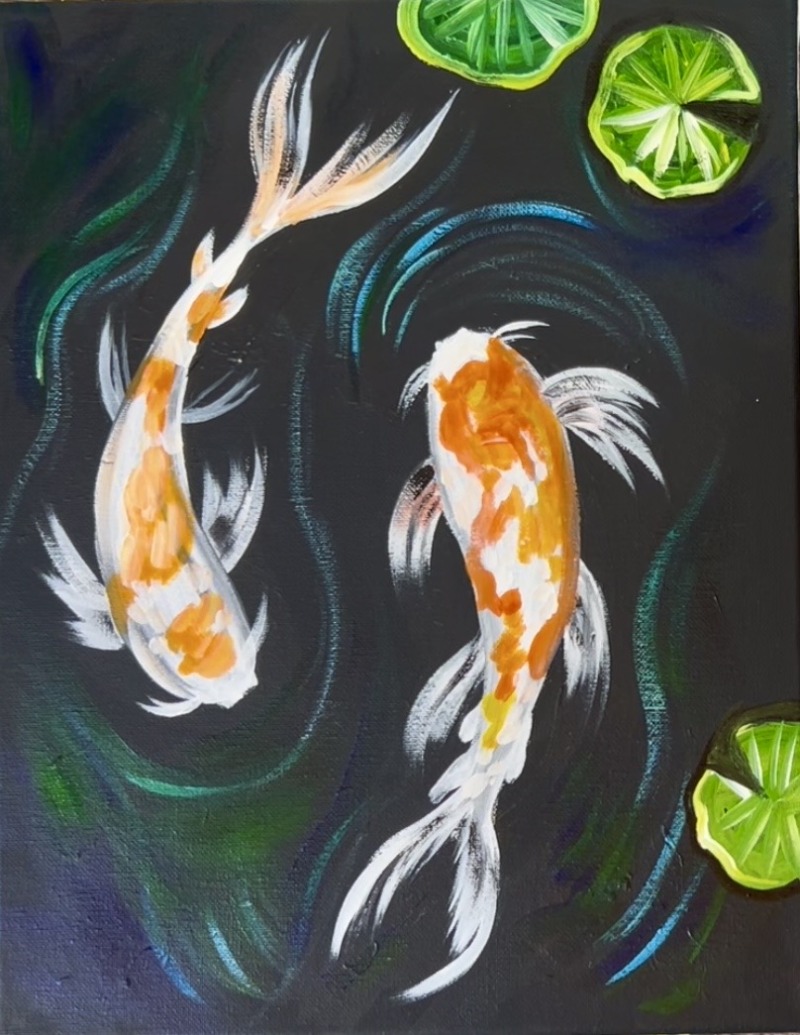
6. Paint Lily Pads
To do the lily pads, use the #4 round brush and “hooker’s green hue” with a little bit of “primary yellow”. Start by painting a basic circle. I did my first lily pad in the upper right corner. The nice thing about these is they don’t have to be a perfect circle! They can be irregularly shaped. You can make it solid dark green or mix the light and the dark green together.
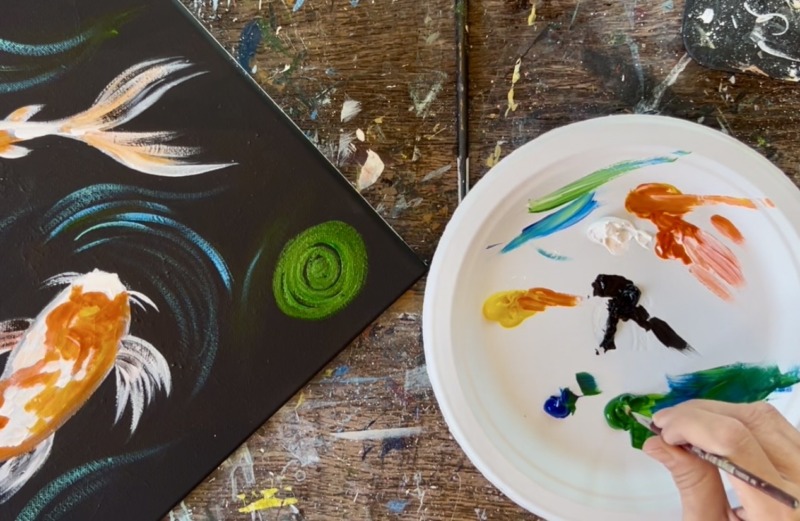
After painting the initial circle, double load the brush into titanium white and your light green color. Paint simple lines going from the center outwards. Mine actually looks like a citrus slice!
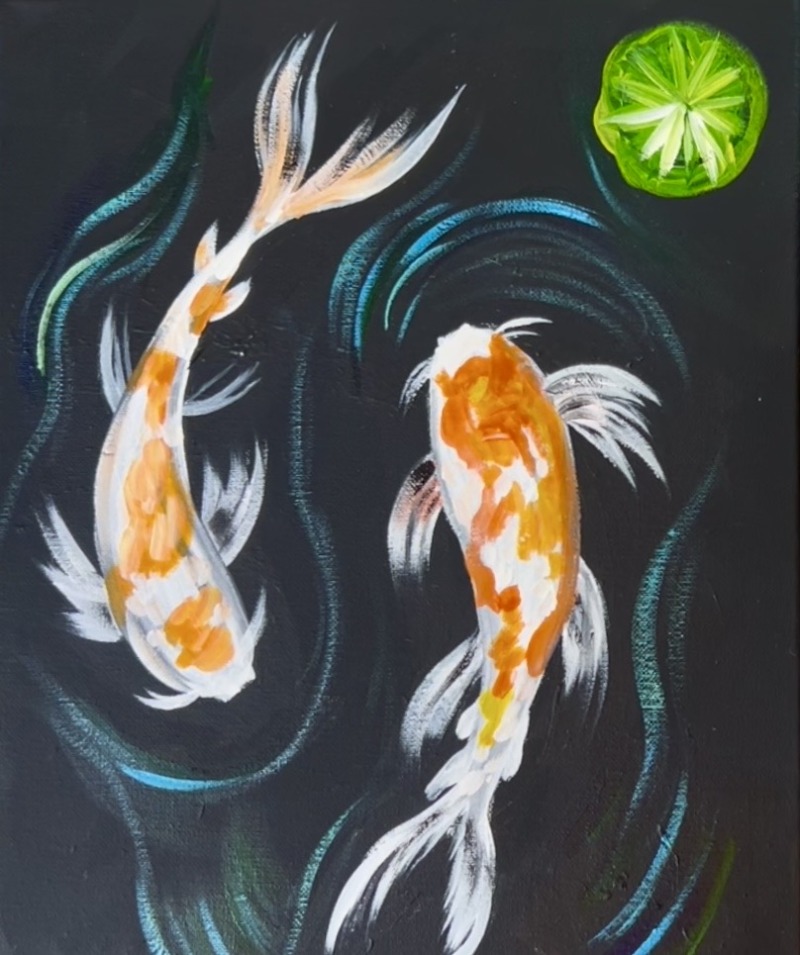
Then use the color “mars black” to paint a little triangular notch into the circle. Outline the entire circle with black/ make the edges a little “wavy/ irregular”.
You can also brighten the lily pad up a bit more by outlining the edges with yellow mixed with white and green. This gives it more of that bright “lime green” coloring. Repeat this step for more lily pads. Make some going off the edge of the canvas.
I did three lily pads for now and more will be painted later.
7. Optional Details On Fish
These details on the fish are optional! You can leave them out if you are trying to simplify this painting or do the details that you feel most comfortable with!
Use the #8 long round brush (the fine point) or a tiny detail brush or a black paint pen to paint the eyes of the fish. I tried to make these as simple as possible. For the fish on the left, I did only one eye. This is a very small dot with a loose circle shape around the dot. The fish on the right has two eyes visible. These are also two very basic dots with a circle around the dots.
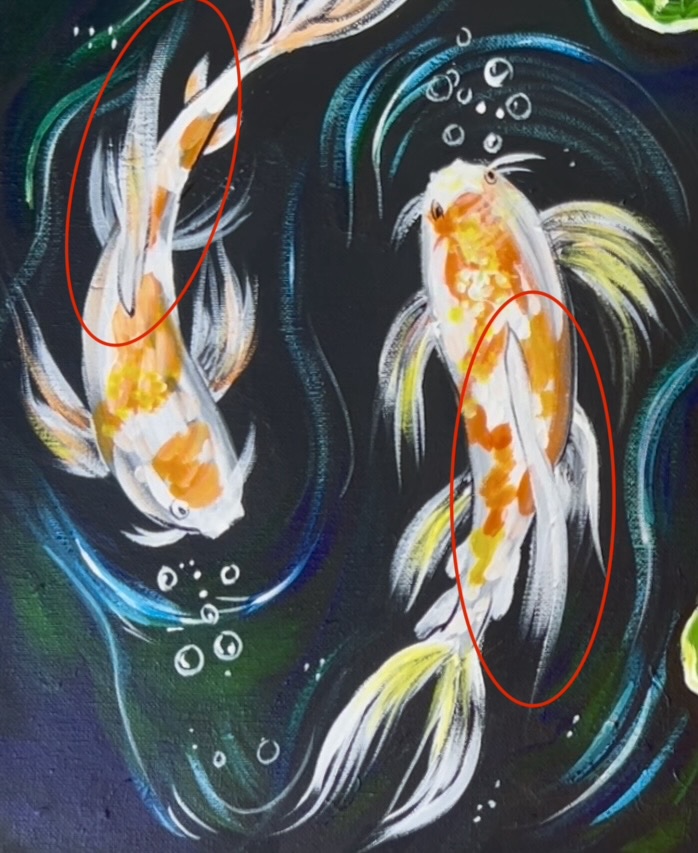
You can also paint the fish’s back/ dorsal fin! Use titanium white and the #8 long round brush to paint a fin that starts on the back and flows back towards the tail. You can also lightly outline this with thin black lining.
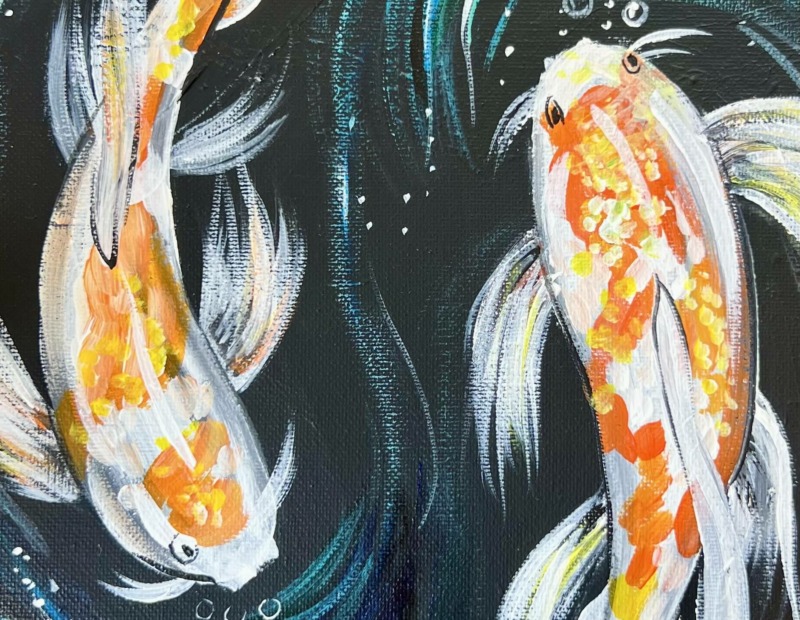
The other detail can be adding some shiny “scales” to the fish. I did this with the #4 round brush double loaded with orange and white and/or orange and yellow. “Stipple” the brush to create little dotted texturing with this light color over the orange splotched areas. You don’t have to cover all of the coloring with scale texture, just a few clusters of it are enough to give it that extra sparkled look!

Another added detail is to use “mars black” and the #8 long round brush (the fine point) to add some lines to the tails/ fins. This adds to the texturing on the tails. You can also lightly outline the body of the fish with a very loose black line.
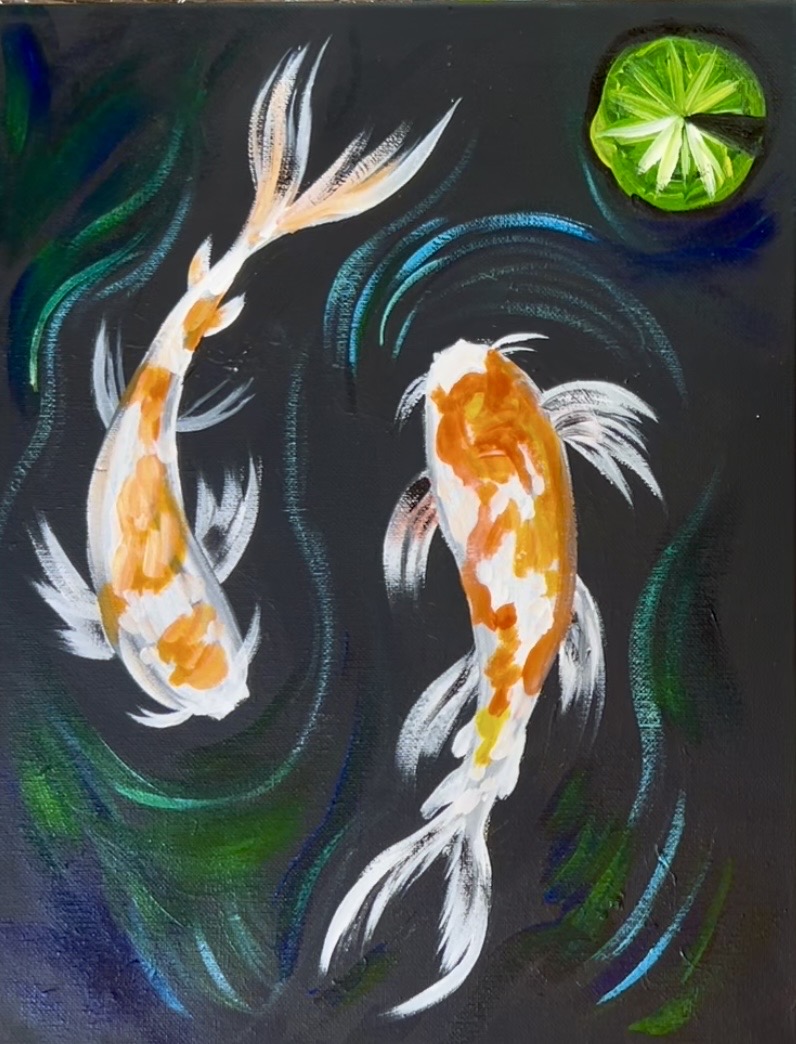
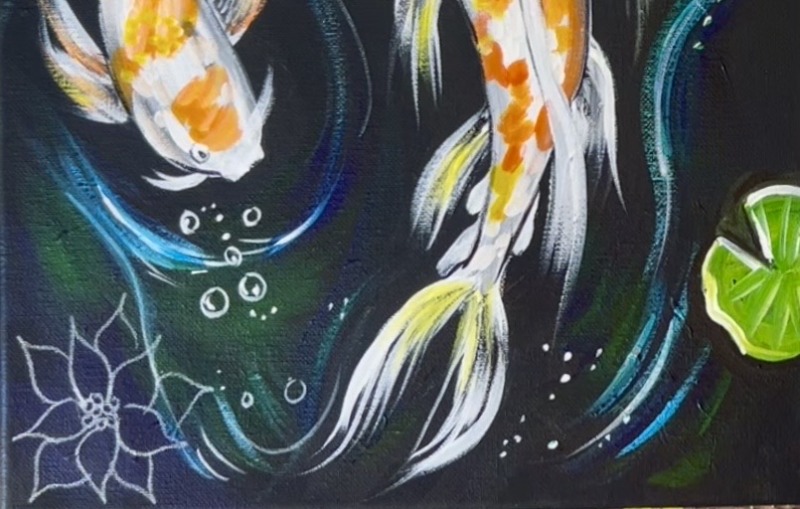
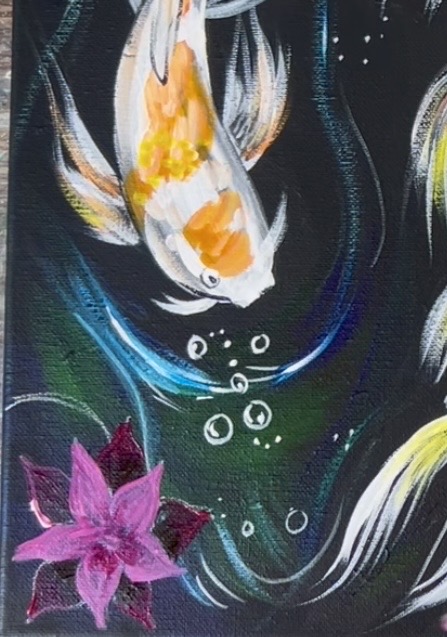
8. Bubbles, More Ripples & Lily Pads
Use the end of the #8 long round brush (the fine point) OR a white paint pen OR a tiny detailer brush. Paint little circles for bubbles. I did this mainly in front of both of the fish’s heads. Then paint a few very thin white lines along the ripple water lines you painted earlier.
In addition to little circles, paint tiny white dots in little clusters throughout the water.
I also did another lily pad in the upper left corner area.
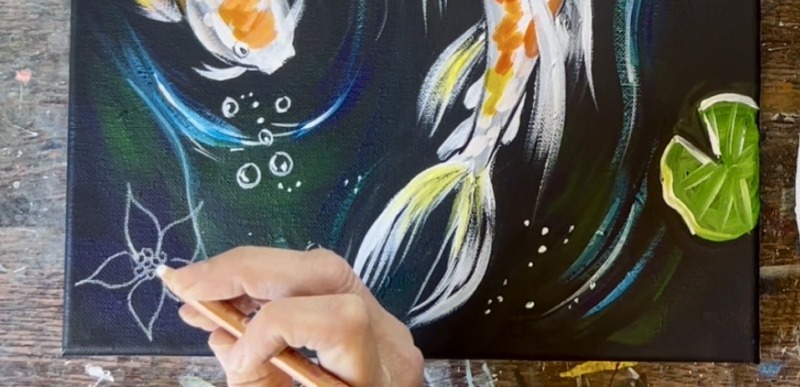
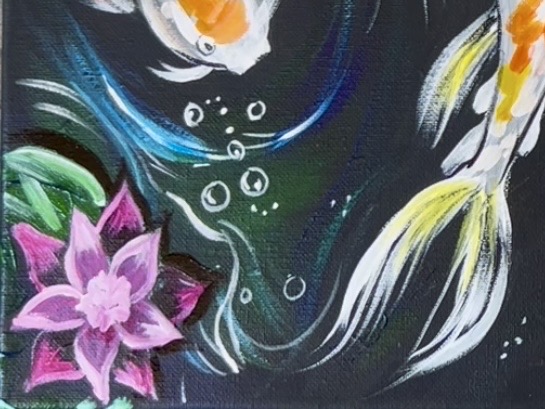
9. Paint Lotus
This lotus was a bit of a challenge! I recommend drawing it out with a white chalk pencil first. Start by drawing a cluster of tiny circles forming a central circular shape. Then paint 5 teardrop shaped petals radiating around that center.
After the first 4 details, paint a set of 5 more petals that go in between each of the middle petals for a total of 10 petals for this flower.
Next, paint the outer petals. These are the darkest petals. Use the #4 round brush and “quinacridone magenta” to paint each of these outer petal shapes. Blend just a dot of “mars black” on the bottom of these petals and blend into the magenta. This will create a shadowy color.
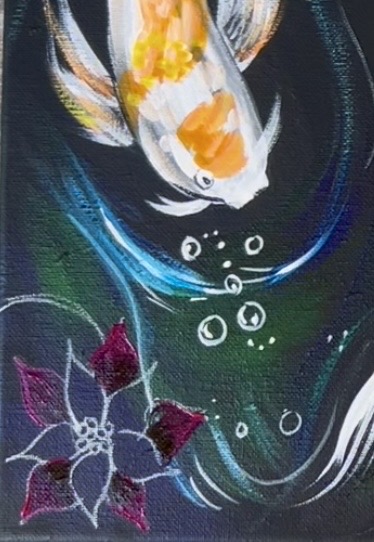
Then paint the front petals with a lighter magenta color. Mix equal parts white and magenta together then paint each of the petal shapes.
Blend a little bit of dark magenta (not mixed with white) on the bottom of these details for shadowing.
Next, outline all of the petals with light pink. Mix about 3 parts white to 1 part magenta to make this light pink. Then use the edge of the round brush to outline all of the petals.
Paint light pink “dots” in the center of the lotus (we will add yellow on this after it dries). Then paint a lily pad around the lotus (if you want).
Outline the flower/ lily pad with black to the edging around it looks like shadowing.
Wait for the lotus to dry. Then mix “primary yellow” with “titanium white” and paint little bright yellow dots in the middle of the flower.
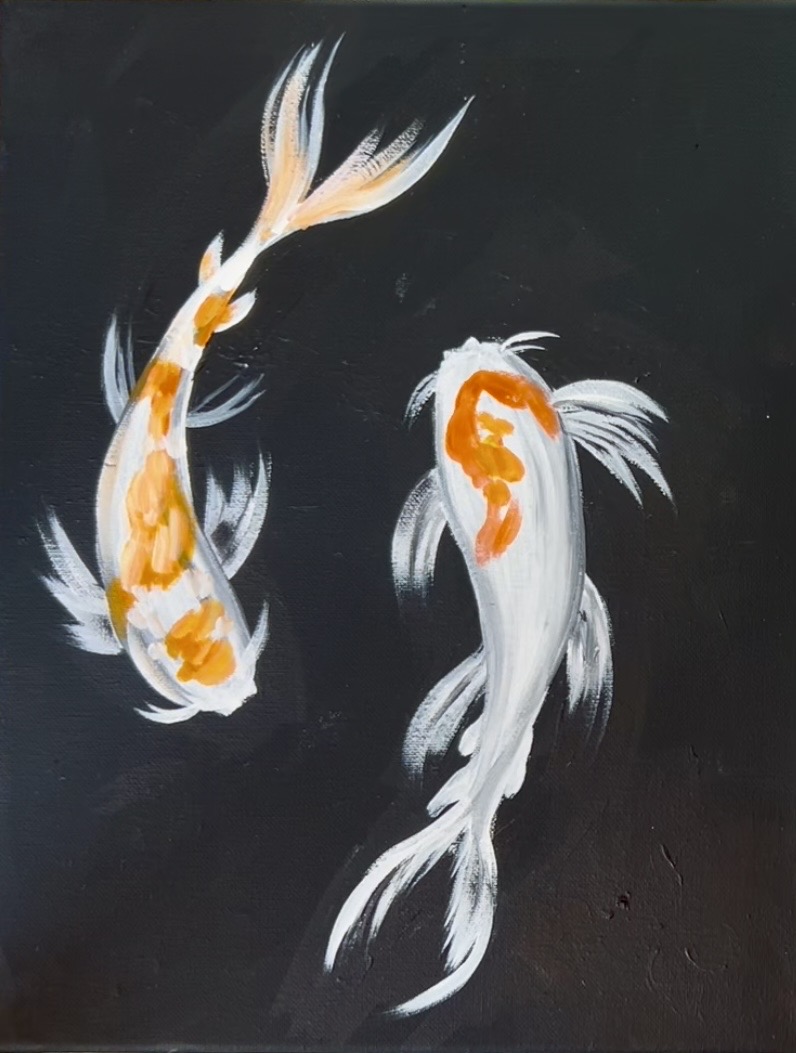
Finished!
Just finished this and I love it so much!
That’s so great to hear! I’m so glad you loved doing this painting!