
Would you like to save this?
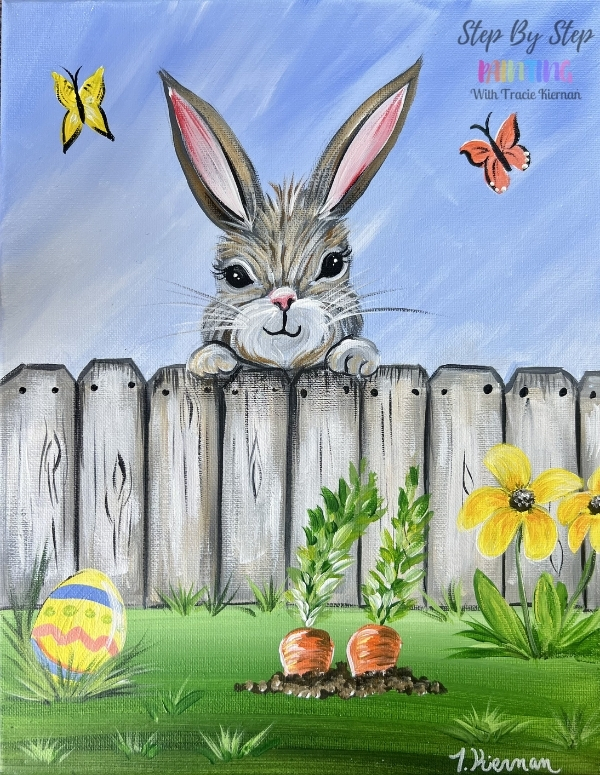
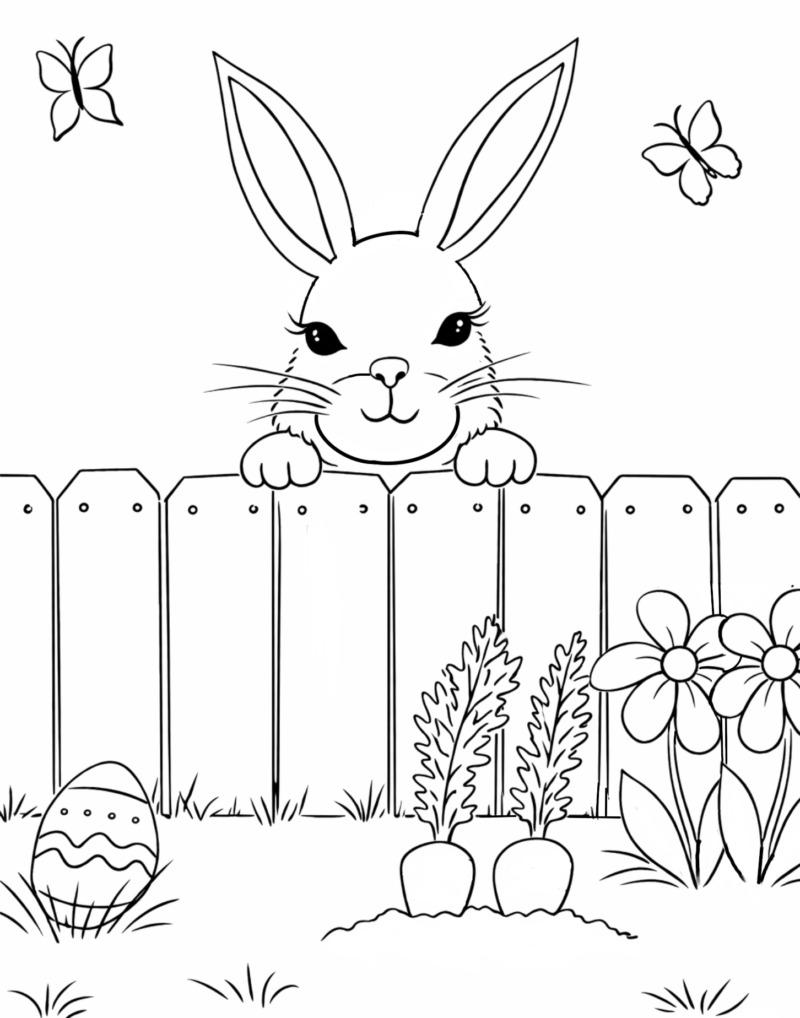
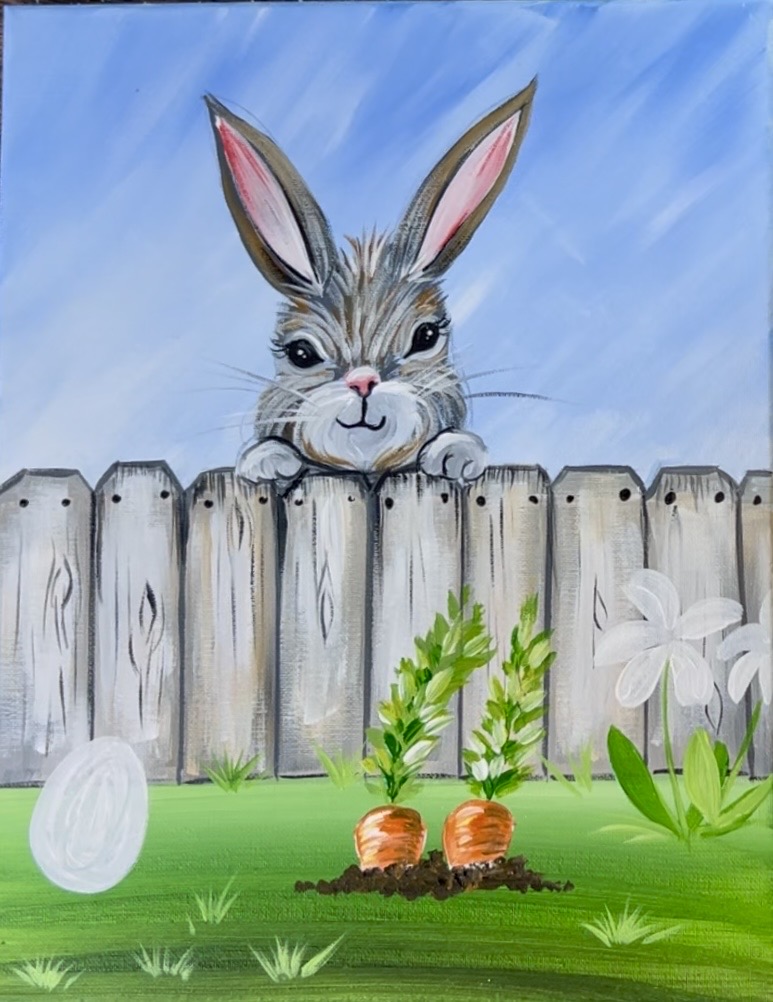
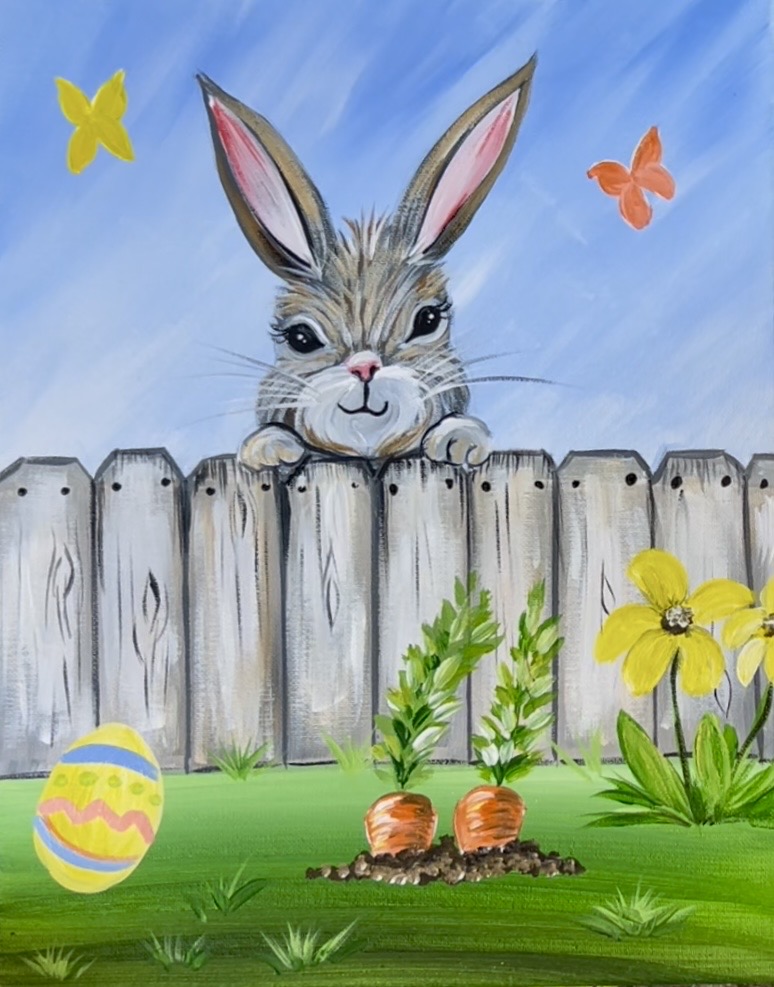
Welcome to this adorable spring painting tutorial! In this lesson, we’ll create a sweet backyard scene featuring a curious bunny peeking over a fence, colorful butterflies fluttering above, and fresh carrots growing in the garden below.
This step-by-step tutorial is designed to be fun and beginner-friendly, while still helping you build confidence with blending, layering, and adding expressive details.
An optional printable template is included if you’d like extra guidance with the drawing portion — but you’re absolutely welcome to freehand it as well!
Enjoy and happy painting!
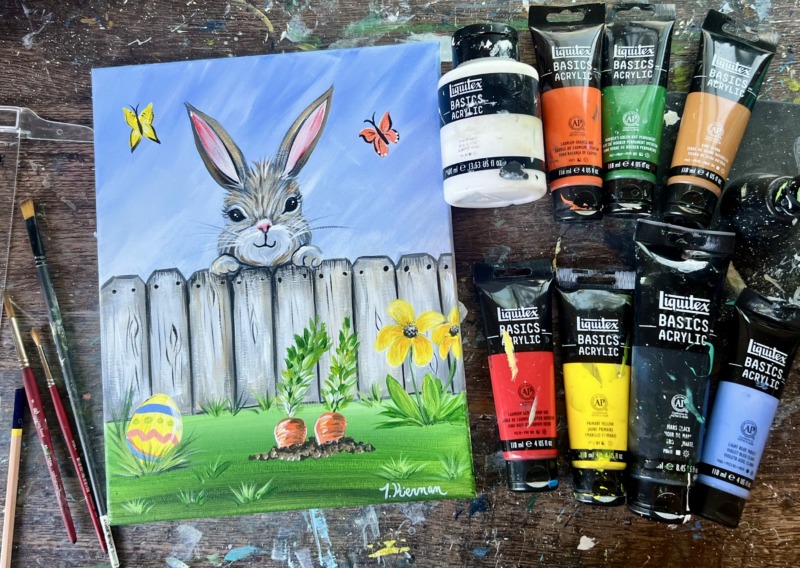
Materials Needed
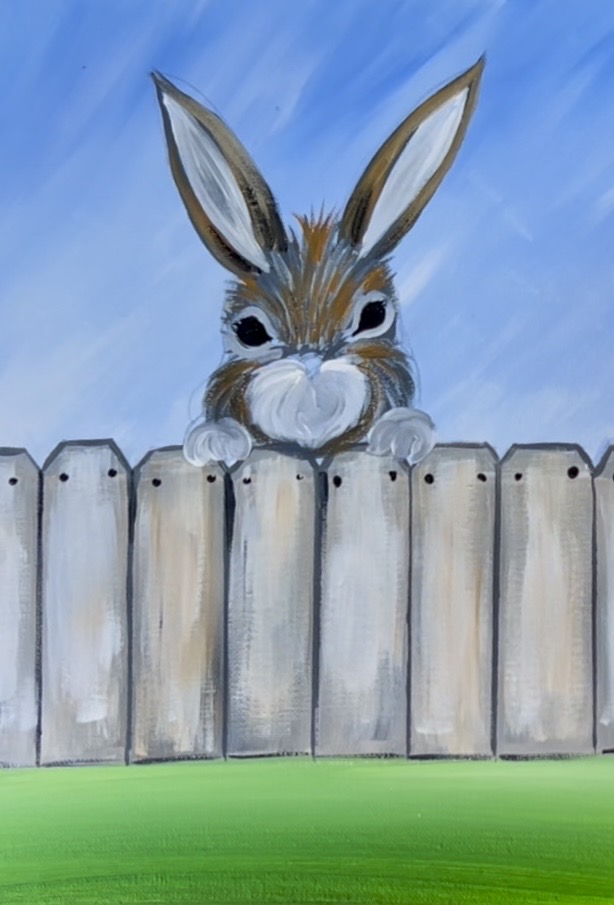
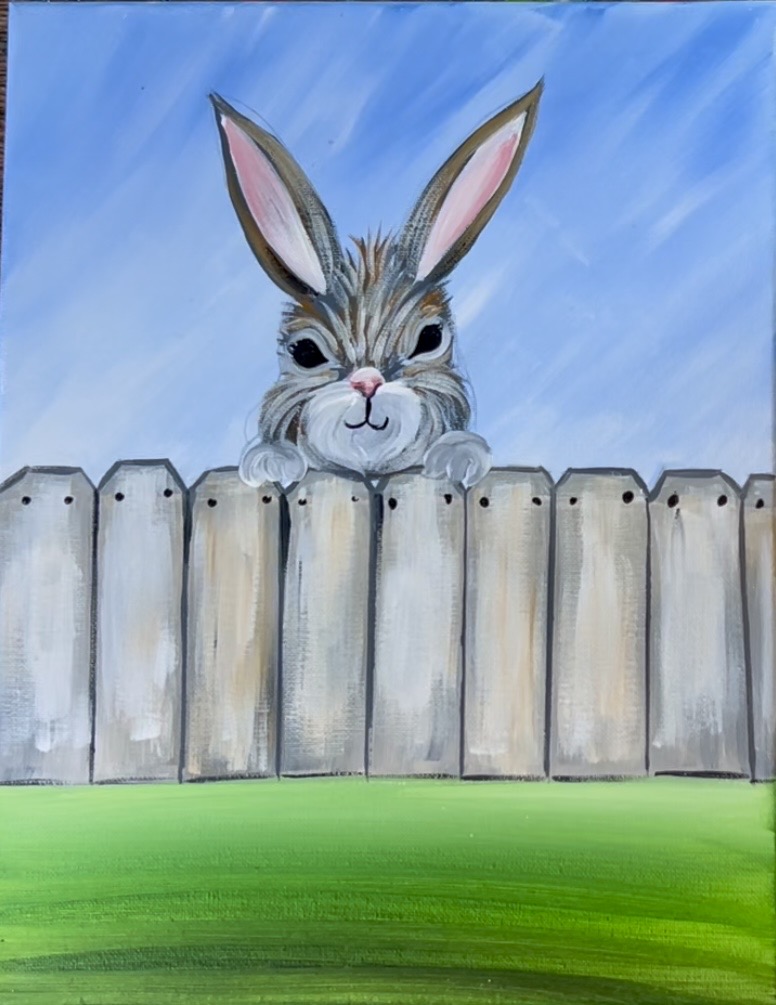
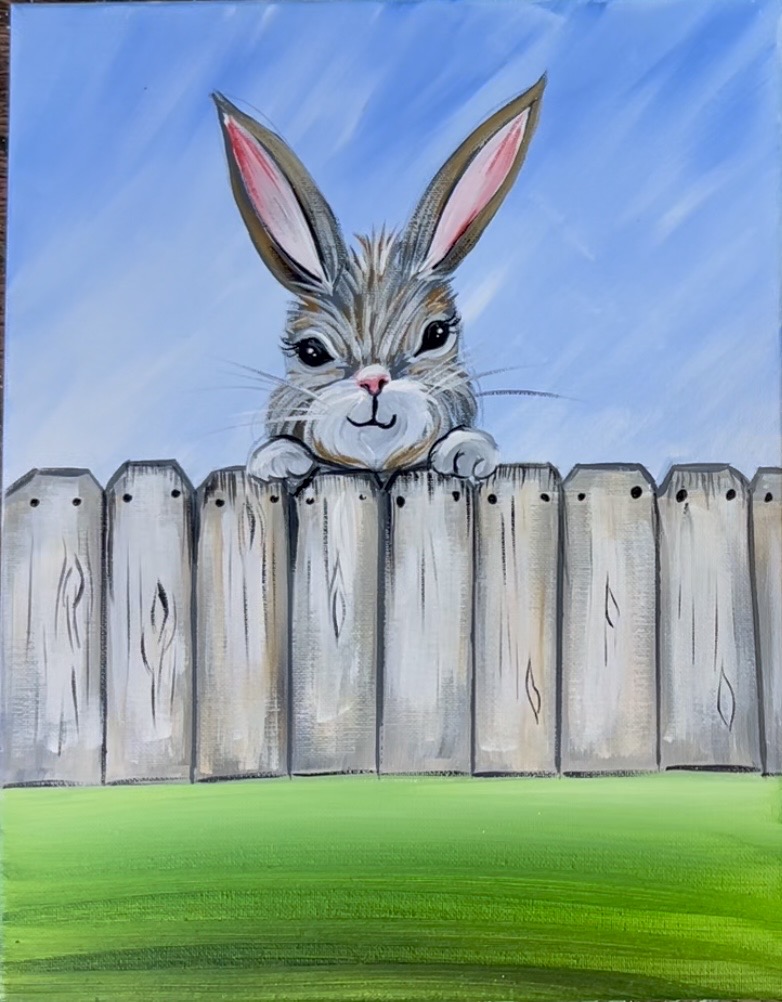
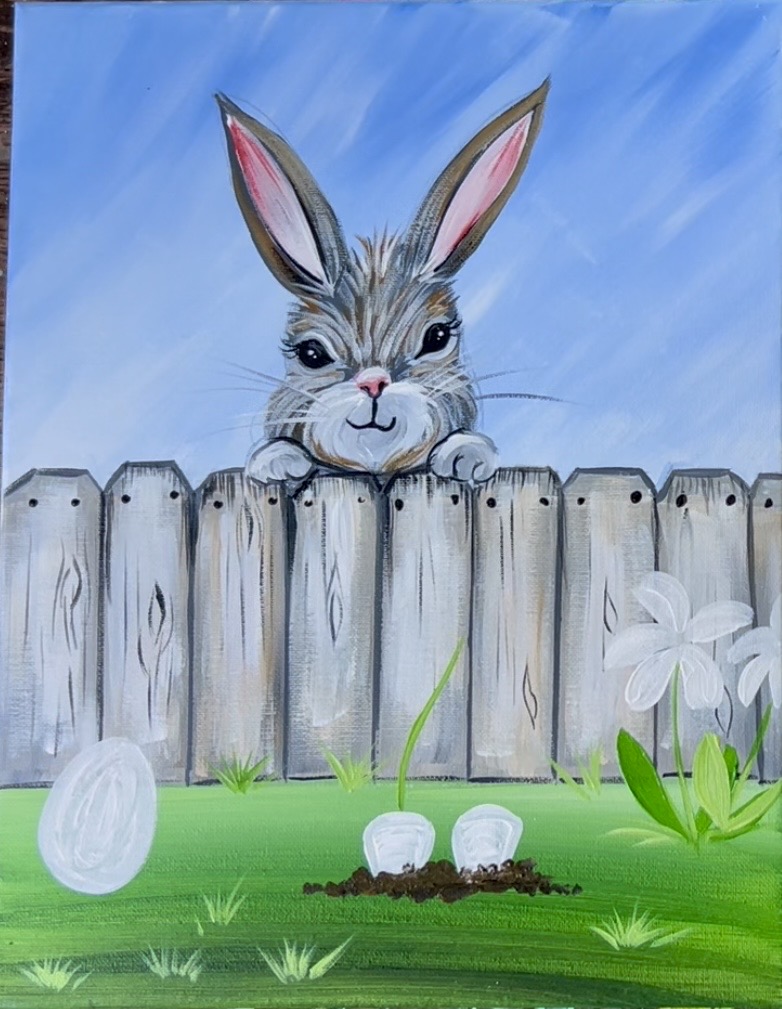
Carrot Patch Cutie - Acrylic Painting Tutorial
Learn how to paint a cute bunny peeking over a fence with an Easter themed garden.
Materials
- 11 x 14 Canvas
- Pencil & Eraser
- Optional Template
- Optional Graphite Paper
- Acrylic Paint
- Brushes
- Ruler
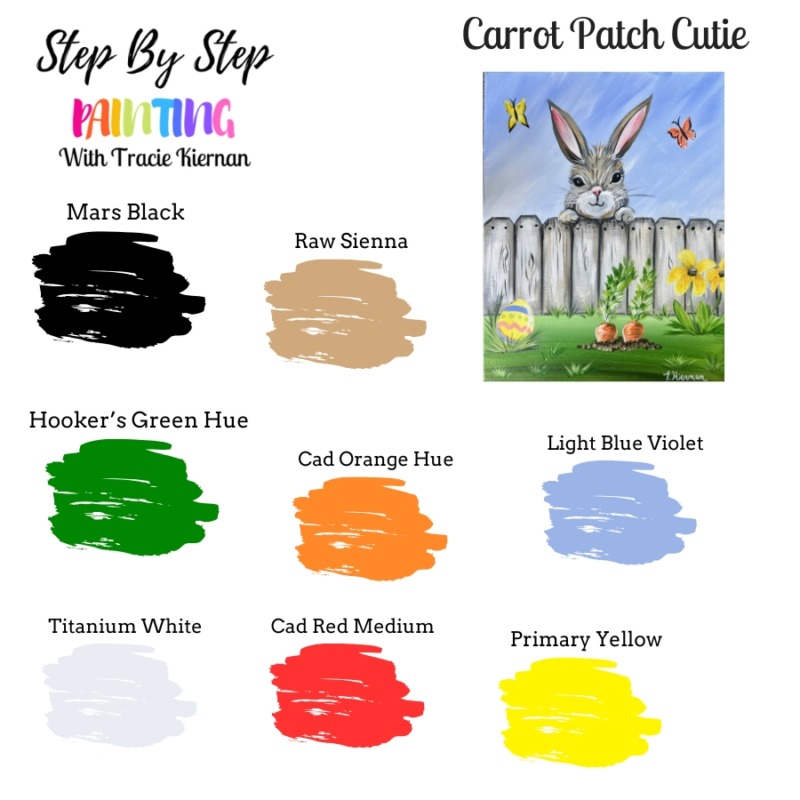
Colors
- Titanium White
- Mars Black
- Raw Sienna
- Primary Yellow
- Cadmium Red Medium Hue
- Cadmium Orange Hue
- Hooker's Green Hue
- Light Blue Violet
Brushes
- 8 LONG round
- 4 round
- 12 Bright
- 3/4 Flat
The brushes I use are called “Princeton Velvetouch” brushes. You can find a pack on Amazon here! The only brush that is not in this pack is the #12 bright brush. That brush can be bought at Blick or a similar pack of these sizes can be bought at Amazon.

Color Palette
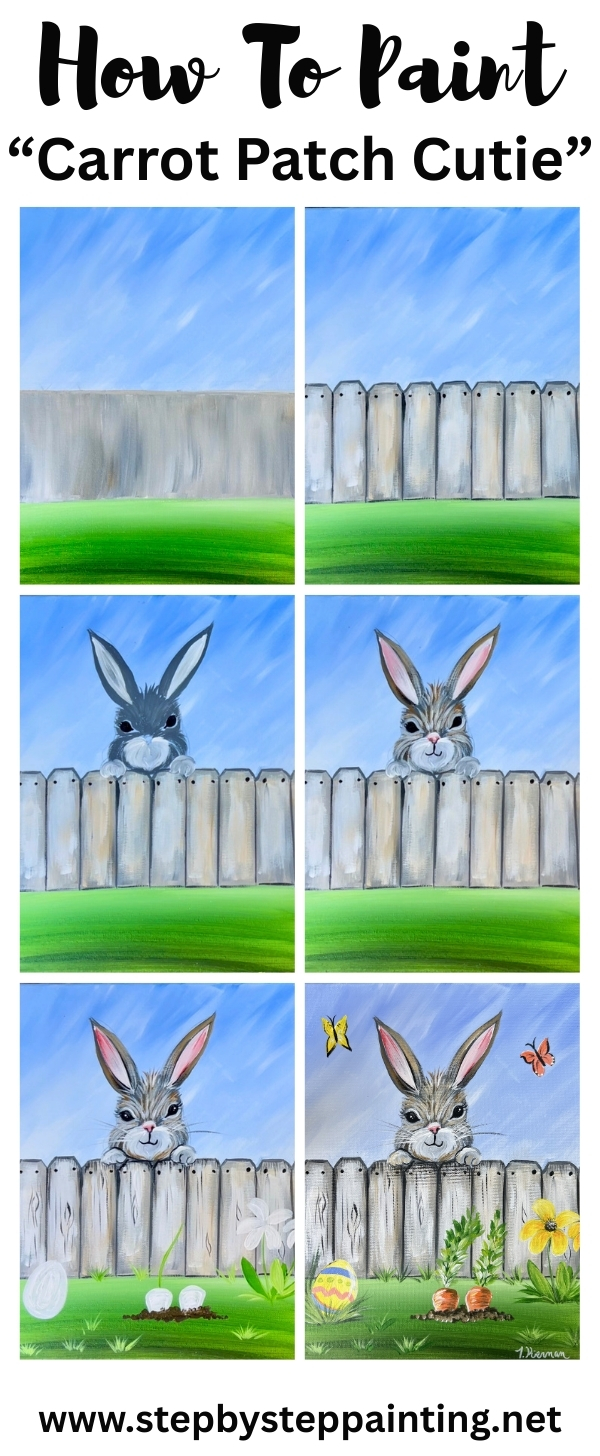
Directions At A Glance
Traceable (optional)
This is an optional traceable you can use to transfer the design to the canvas and skip the drawing portion. In the instructions and video, I will show you how to draw the bunny and fence design with a pencil.
Step By Step Instructions
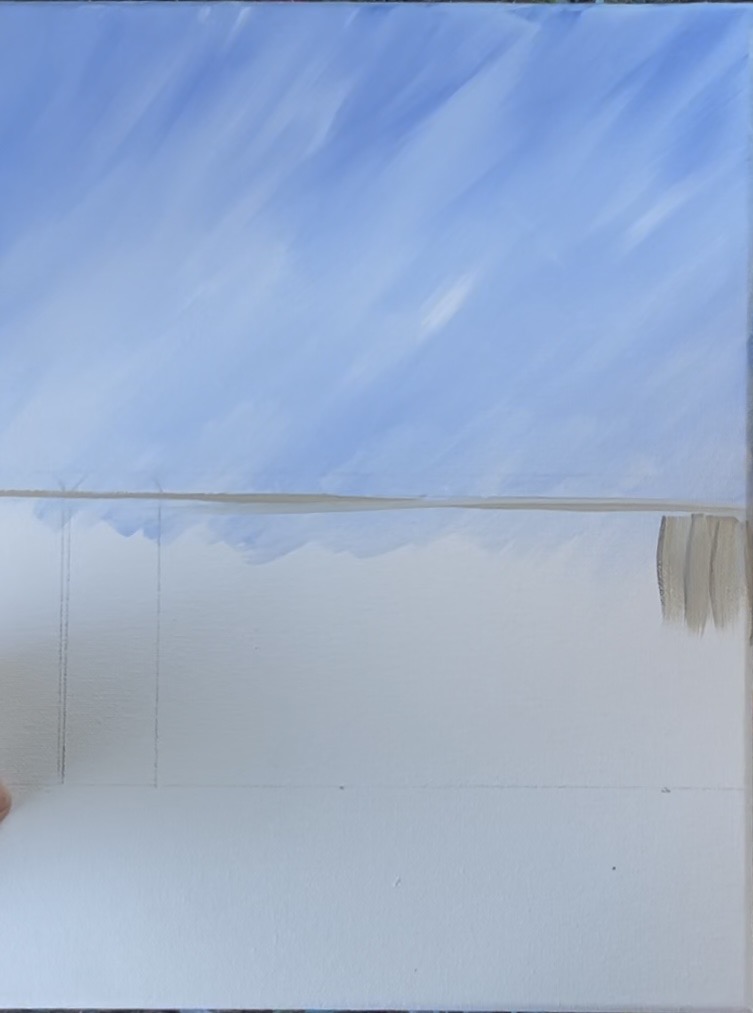
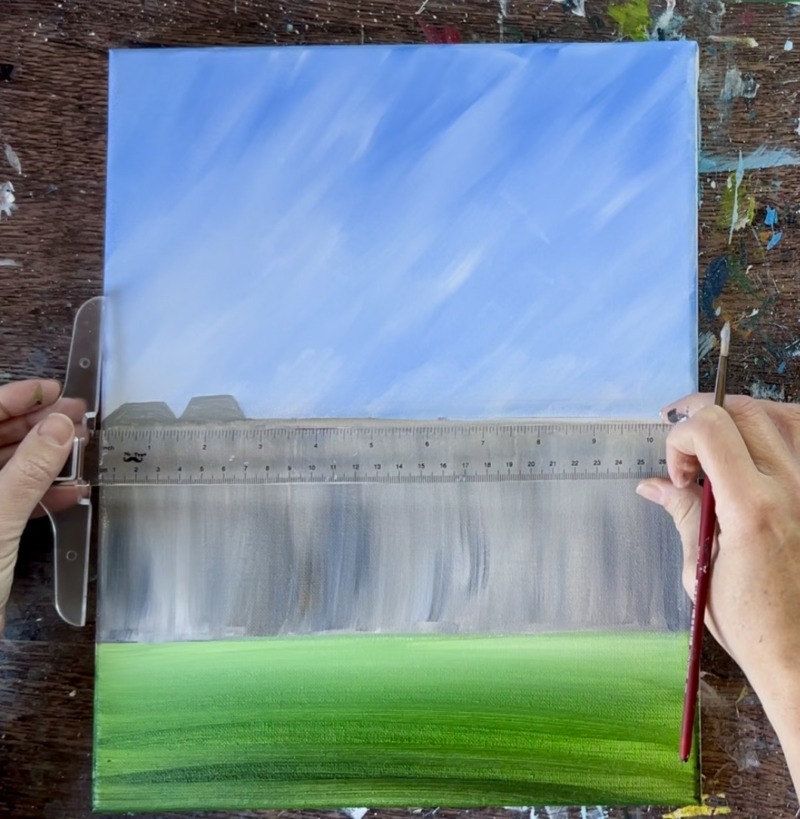
1. Draw Lines for Fence/ Sky/ Ground
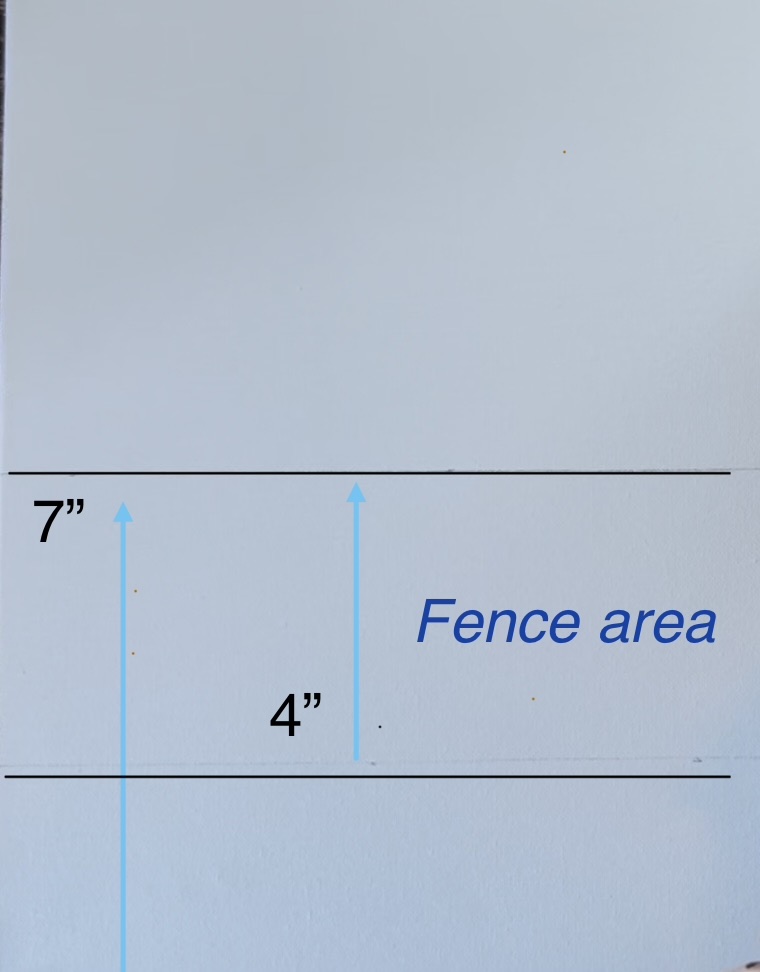
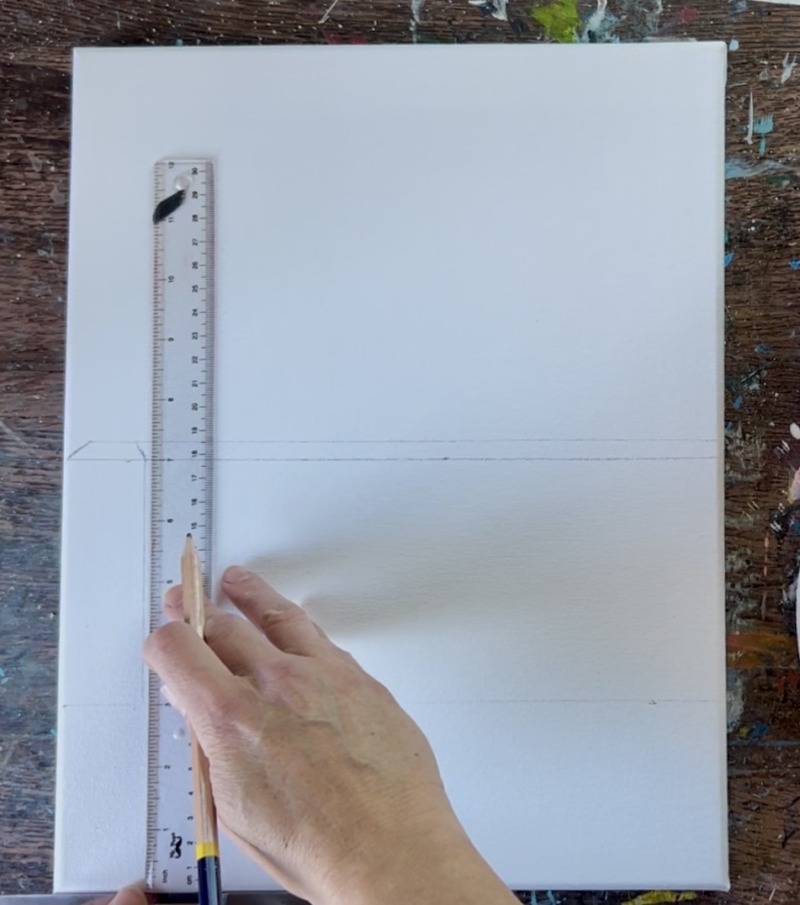
First locate the center of the canvas while the canvas is placed vertically. Since my canvas is 14″ high, I located 7″. Draw a horizontal line across the middle of the canvas. Next, locate 4″ below that middle line and draw another horizontal line. This will be the area where the fence will be. Note: if you are working on a different size canvas, estimate the fence to be about 1/4 of the height of the canvas.
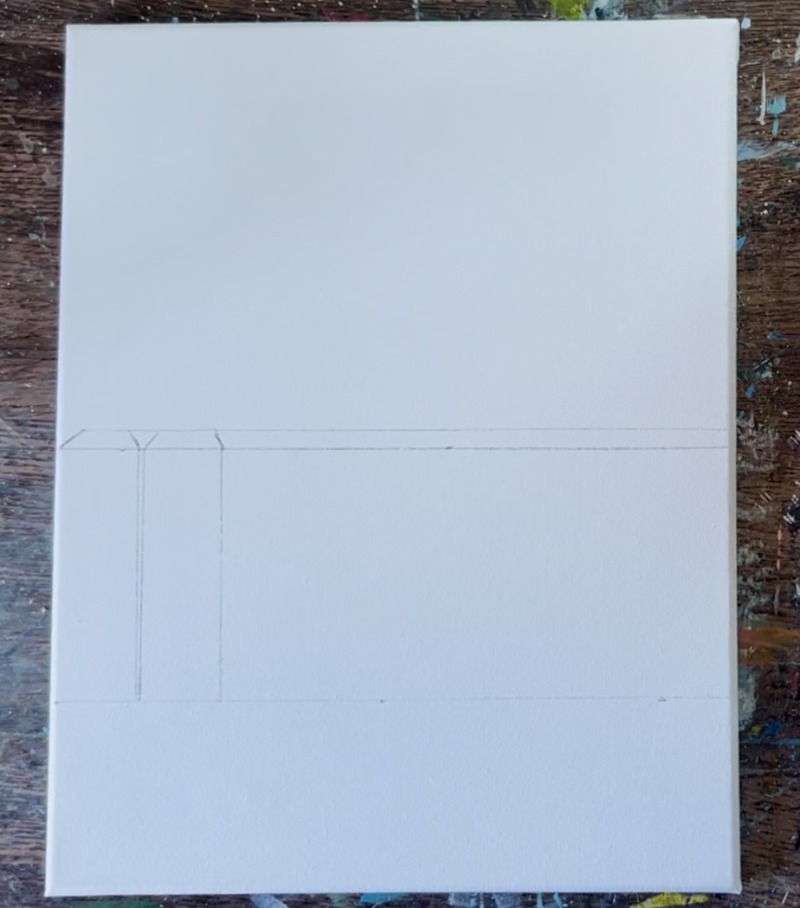
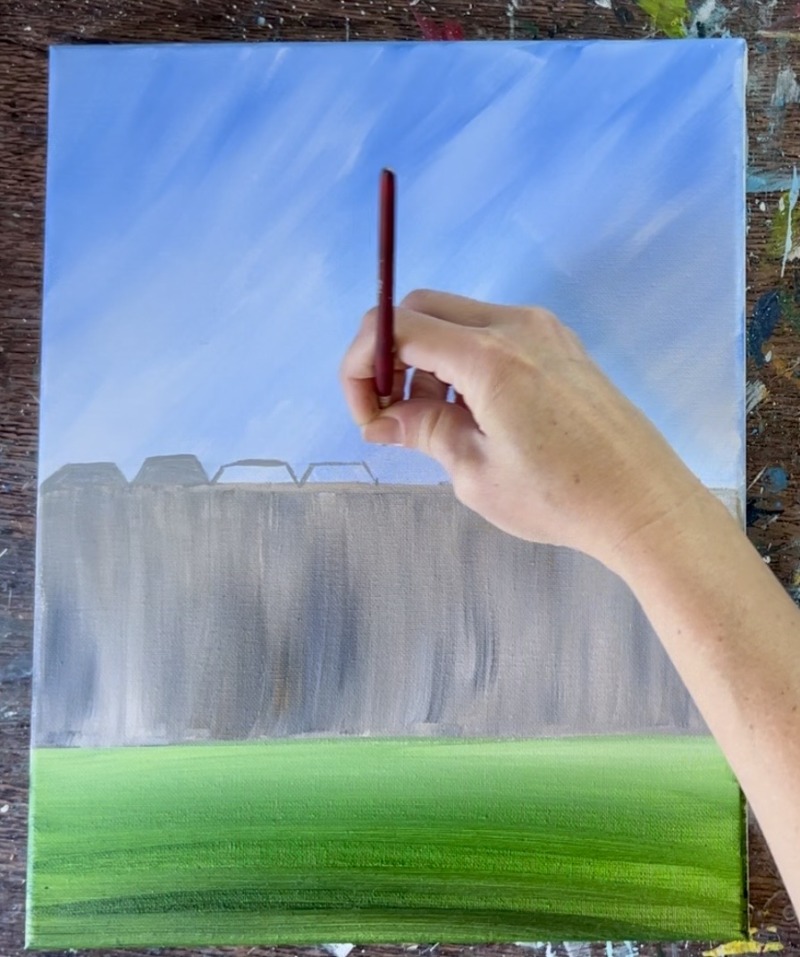
This next step is optional. I decided to draw a few of the picket fences to get a visual of what they will look like. To draw the bevel, draw another horizontal line about 1/4″ above your line that goes down the center of the canvas. This will be the very top of the fence bevel. Then draw two little diagonal lines and then a horizontal line. Leave a little “slither” of a gap between each fence post. Then draw a second picket fence post.
Each picket fence piece is about 1.5″ wide. You don’t have to use these exact measurements and you can estimate if you don’t want to measure everything! I decided to draw only two fence pieces and not go all the way across.
Now that we have a visual of where everything is in the painting, we can paint each section of this design!
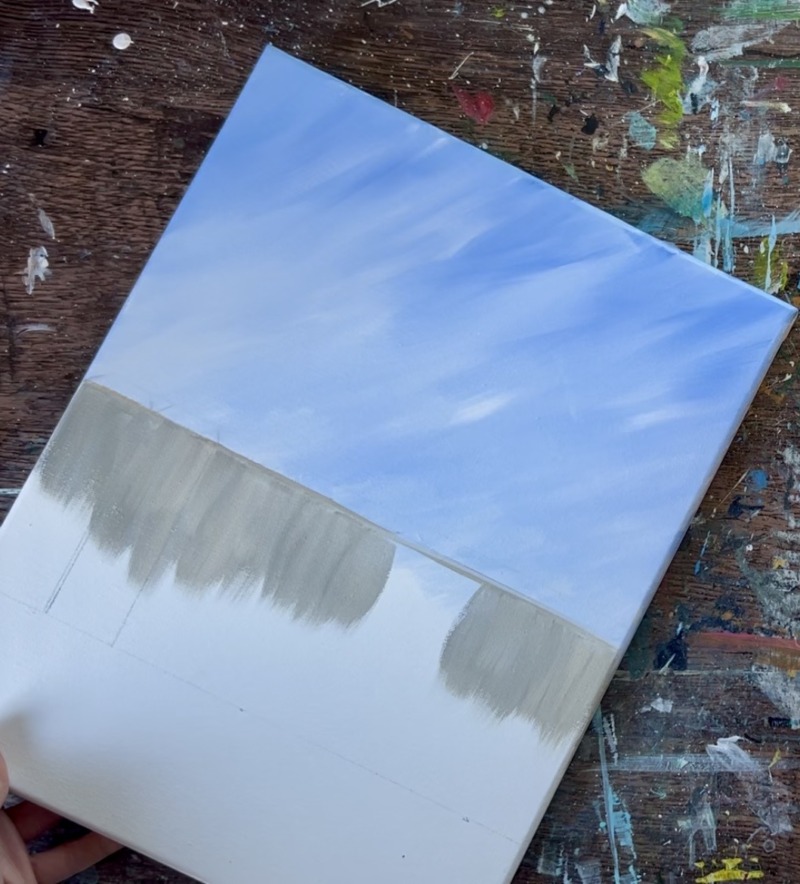
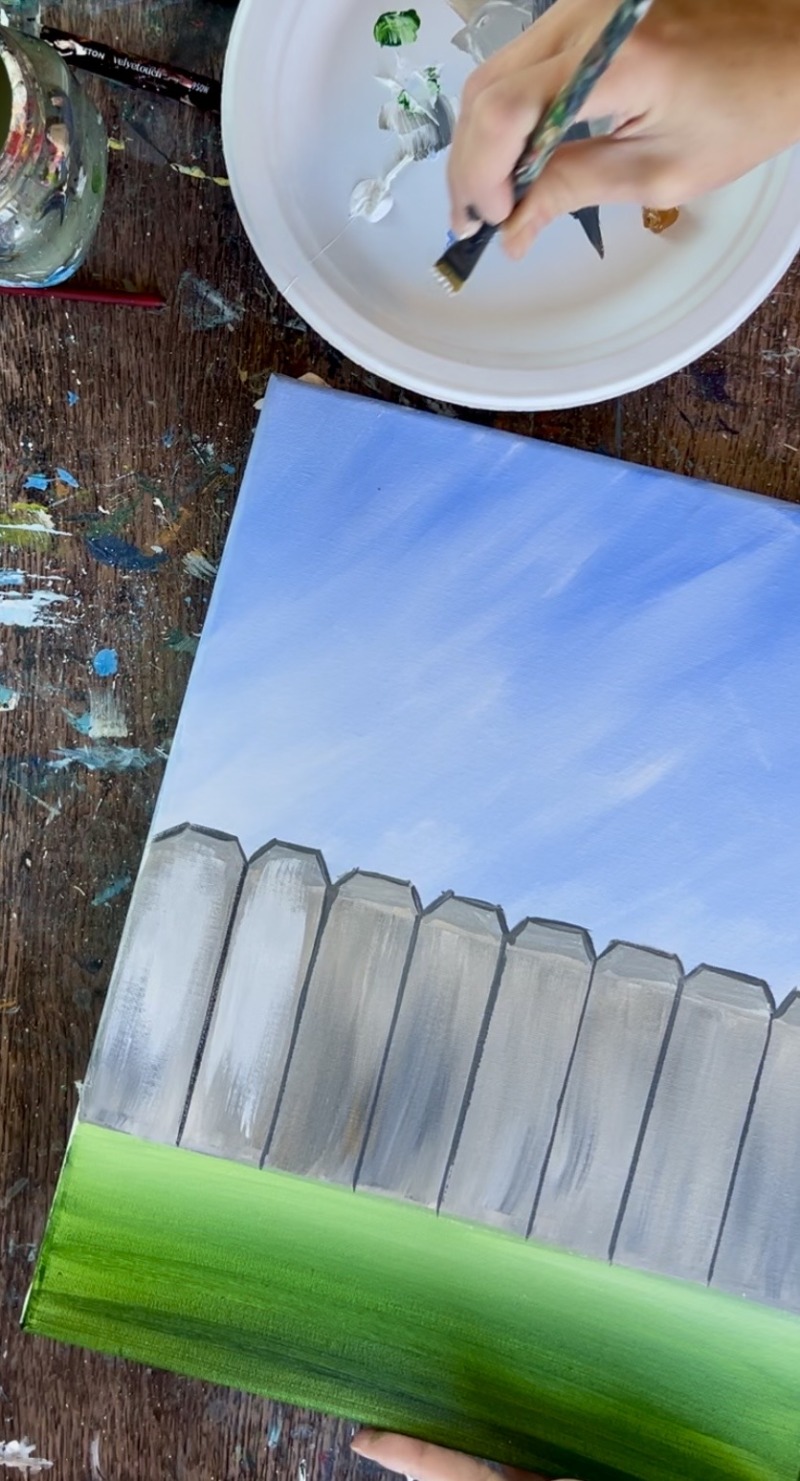
2. Paint Sky
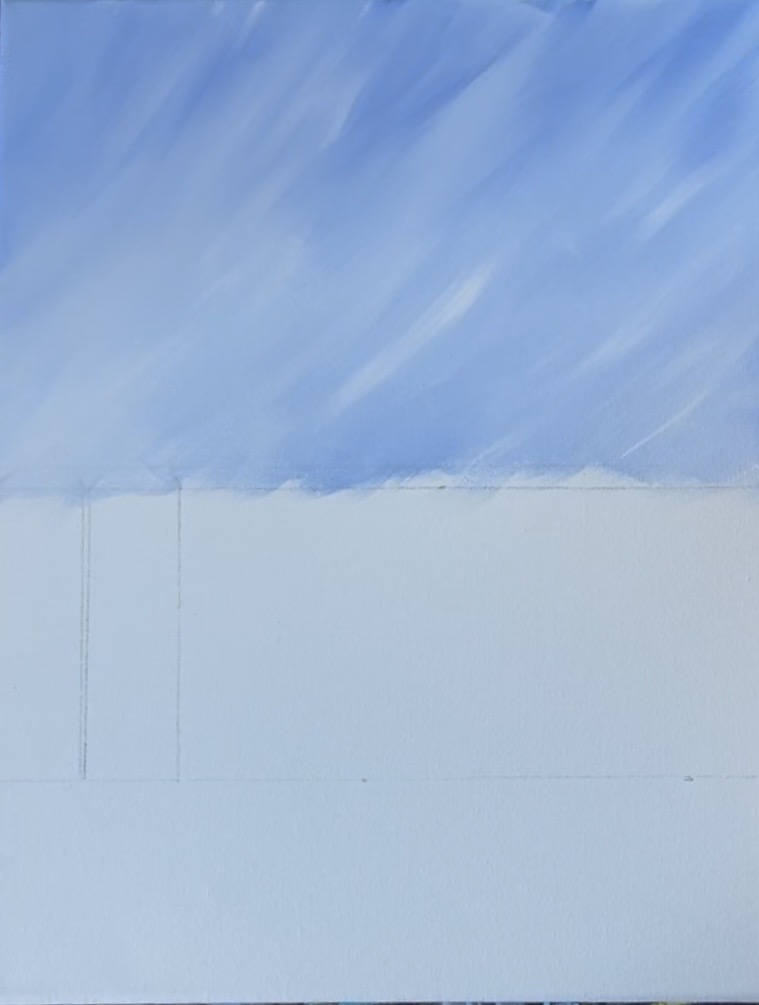
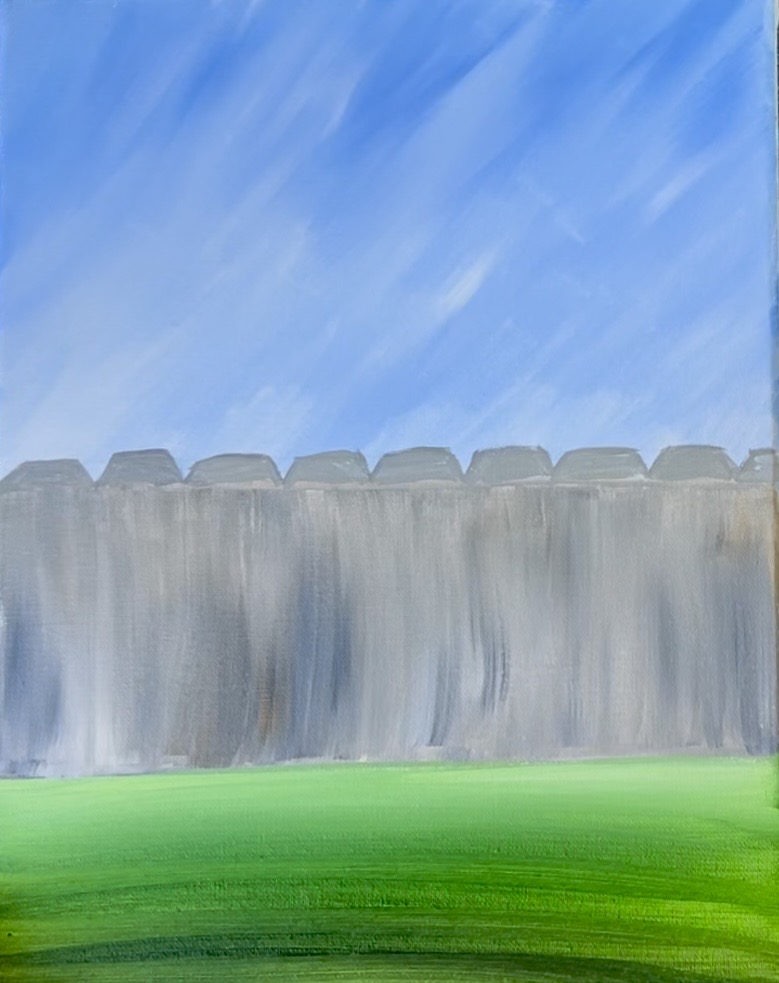
The sky section is everything above your middle line. Load your paint palette with the two colors “light blue violet” and “titanium white”. Double load the 3/4″ flat brush into blue and white. Then paint the sky using paint strokes that go in a diagonal direction (you can change the direction of your paint strokes if you want).
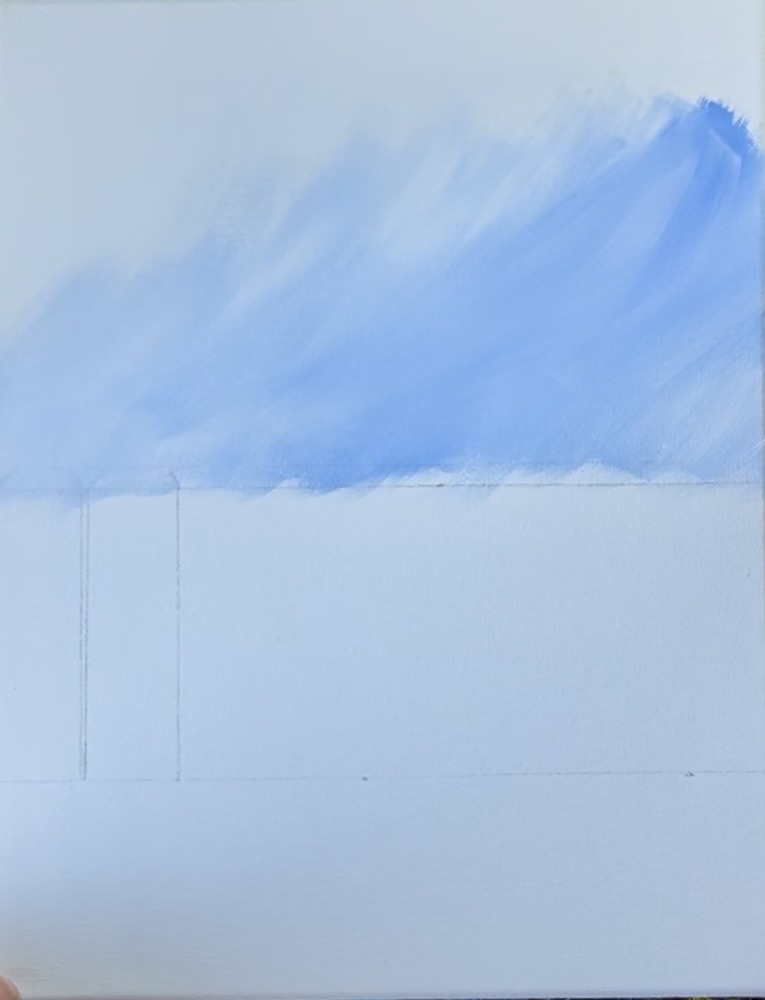
Blend your white and blue on the canvas but leave some streaks of white in the color of the sky. Make the sky slightly darker at the top and slightly lighter on the bottom. Note: I painted over the part of the fence where it “bevels” because some of the sky will be showing in between those shapes.
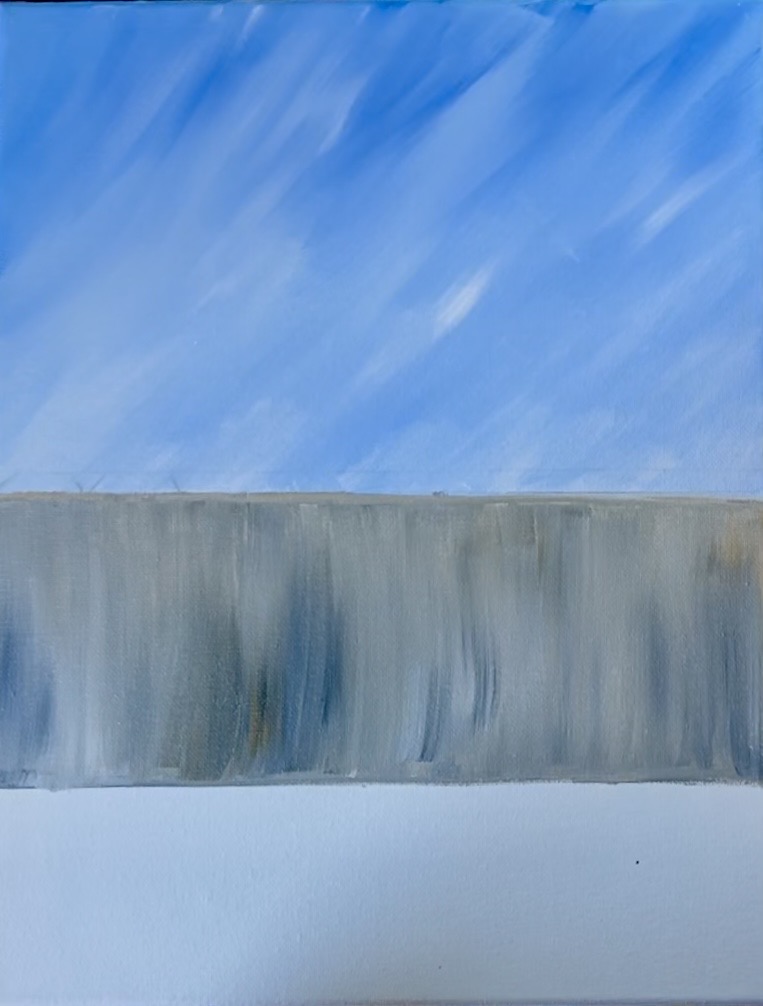
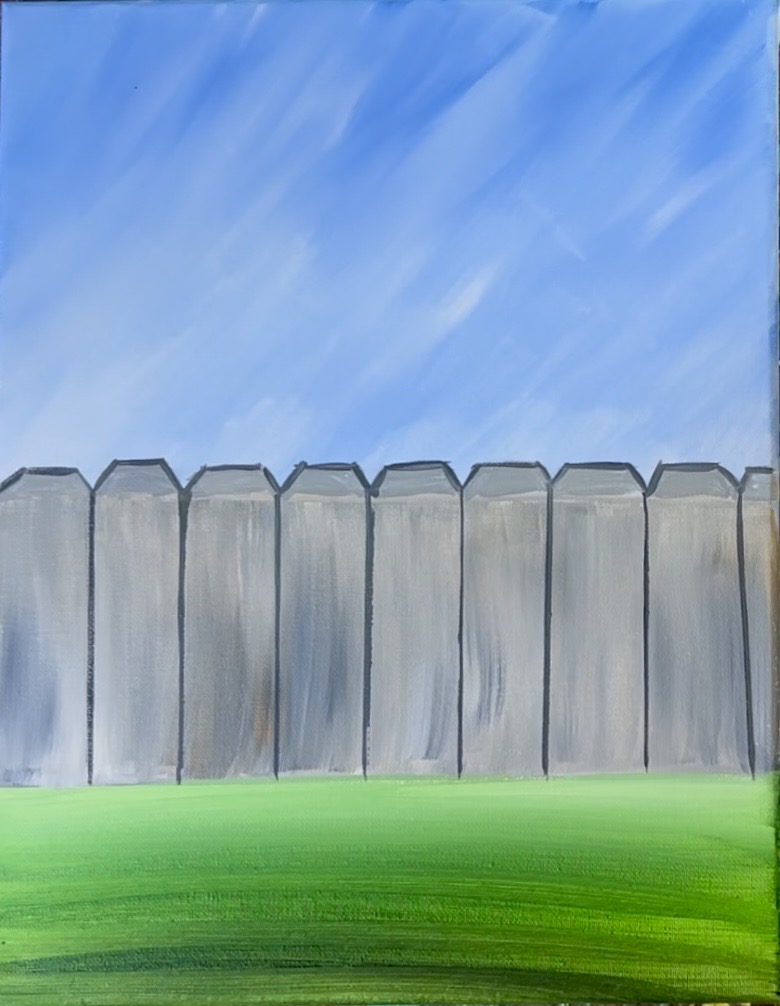
3. Paint Fence (first layer)
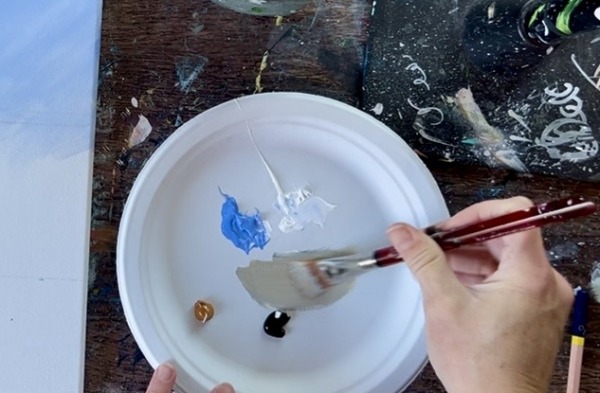
Load your paint palette with the three colors: titanium white, mars black and raw sienna. Mix 3 parts white, 1 part black and 1 part brown. To do this, I like to load the full width of my 3/4″ brush with the titanium white and then load just the corners with a small amount of black and brown. Mix this together on the paint palette to get a medium “taupe” color.
Use your ruler to help line the edging of the fence and paint a straight edged line using the edge of your 3/4 flat brush.
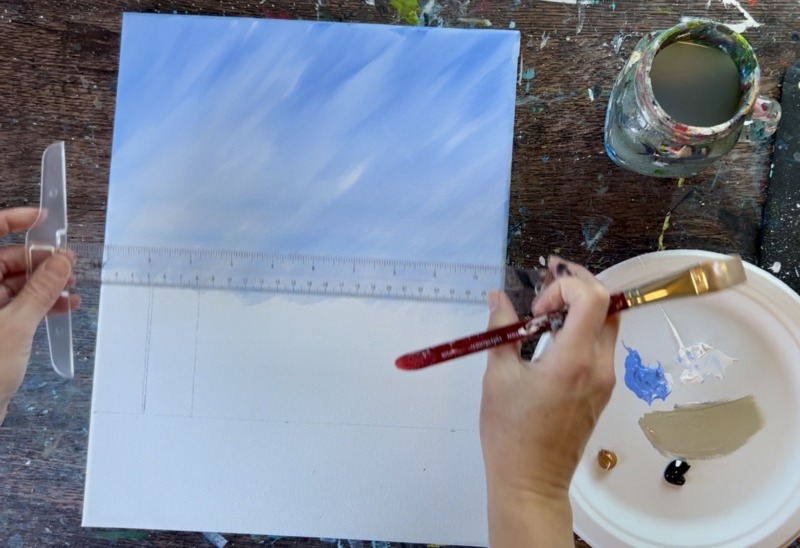
Next, paint the fence using all vertical paint strokes. Basically, use the full width of your brush and drag your paint strokes down in a vertical direction.
Fill the entire fence area using this technique. You can blend in some darker and lighter colors in there for some “color variation”. However, the fence should be a medium taupe color. When this fence dries, we will layer on lighter colors to make the fence lighter and brighter.
4. Paint Ground
Use the color “hooker’s green hue” to paint the ground. Make a slight gradient on the ground by making the bottom part slightly darker and the top (just under the fence) slightly lighter. Do this by mixing just a tiny dot of “mars black” into your green to make it slightly darker. Then blend using left and right paint strokes. Make the middle of your grassy area pure “hooker’s green hue”. Then add just a bit of white at the top part of the grassy area and blend that in at the top.
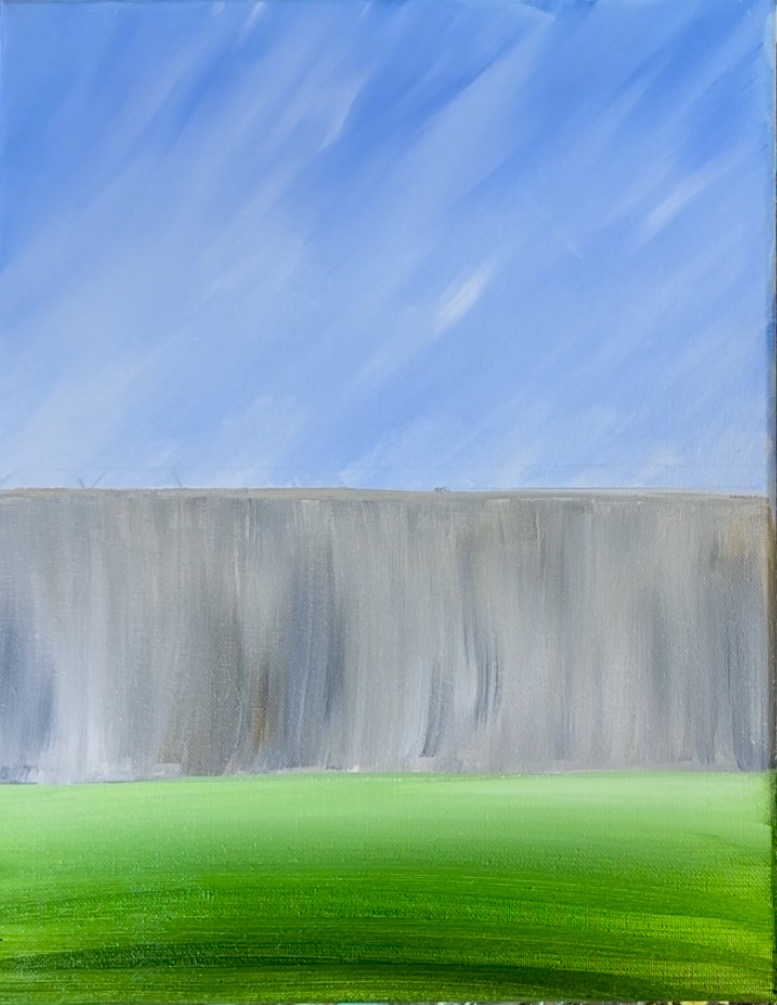
We will add grass texture to this area later!
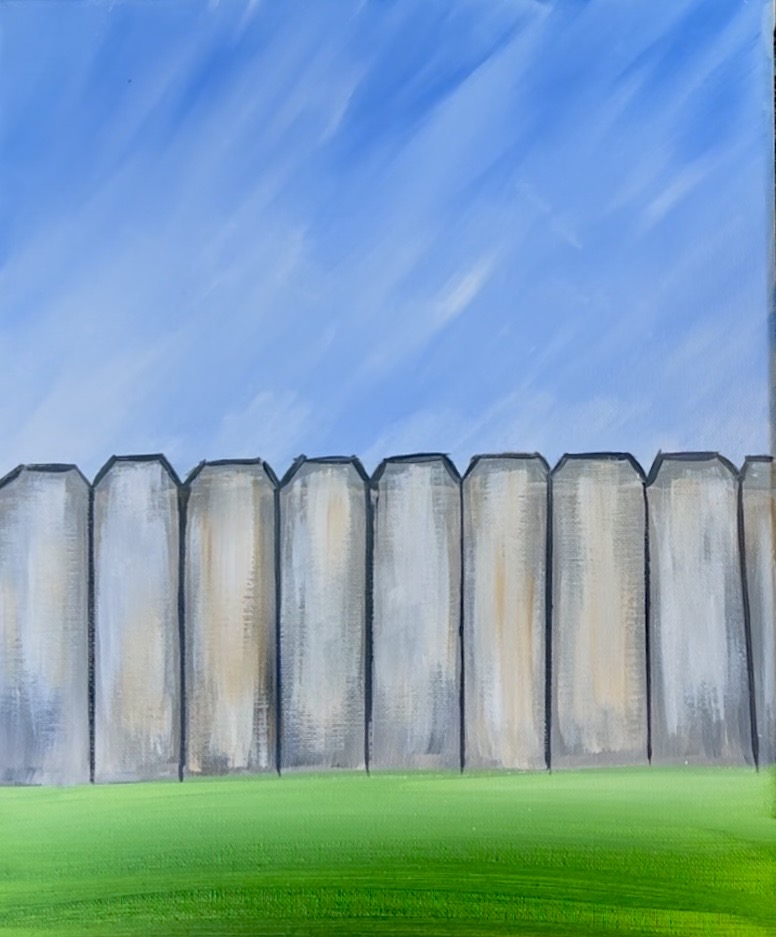
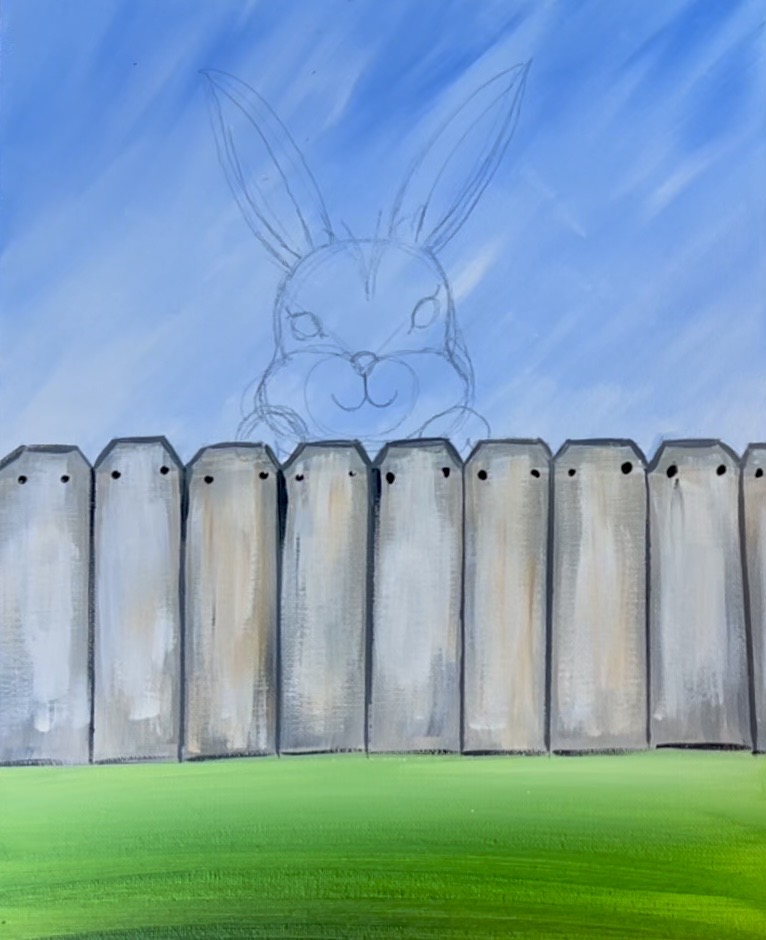
5. Paint Fence Bevel Shapes
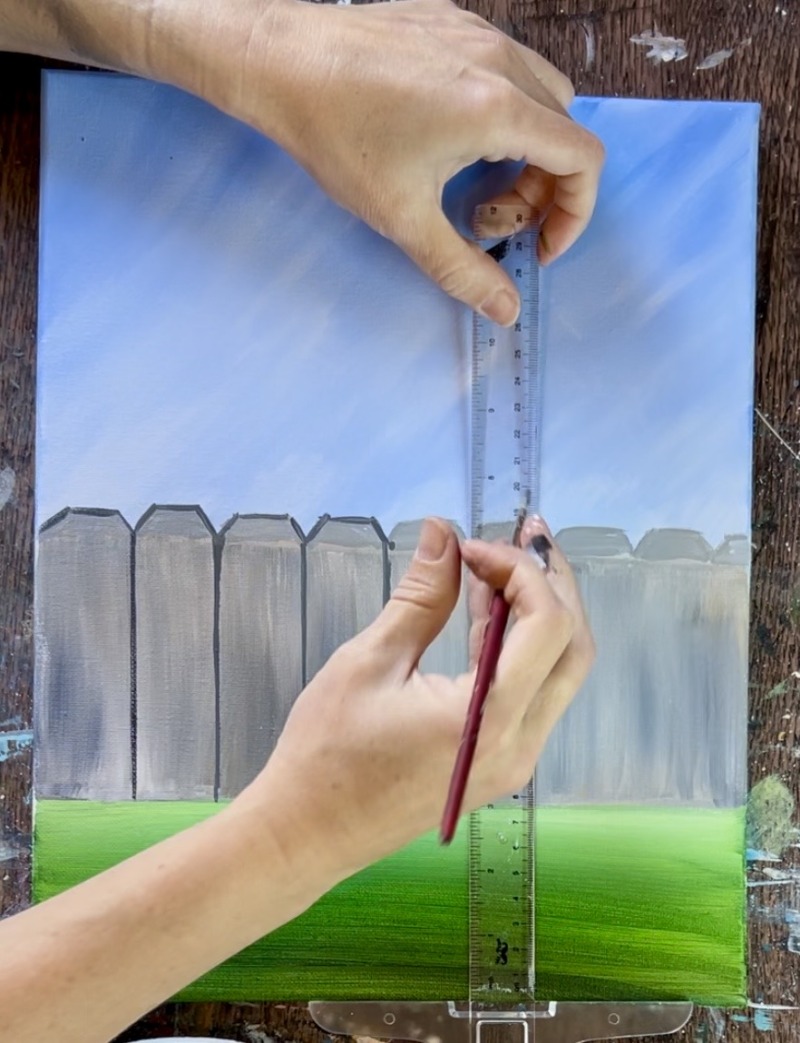
Use the #4 round brush for this step. Earlier we drew two bevel shapes for our fence. Outline both of those (I was still able to see my drawing through the light blue layer of paint). Fill them in with the same “taupe” color you used for the fence. Then paint the rest of your bevel shapes. Each one is about 1.5″ wide, however, this does not have to be exact.
You can mark out each of your posts and then paint each of the bevel shapes. Use that top horizontal line as a guideline for how high to go.
It’s okay if they are uneven! It adds to the “rustic nature” of this fence.
6. Paint Lines Between Fence Pickets
Next you are going to outline each of your fence pickets. Mix black with a little bit of white to make a dark gray. Then add a little bit of water into the color to slightly water it down. It should be an “ink consistency”. This will make it easier to do the outlining. Use a ruler to paint all of your vertical lines for the fence pieces. Then outline all of the bevel shapes.
Let everything dry before going onto the next step.
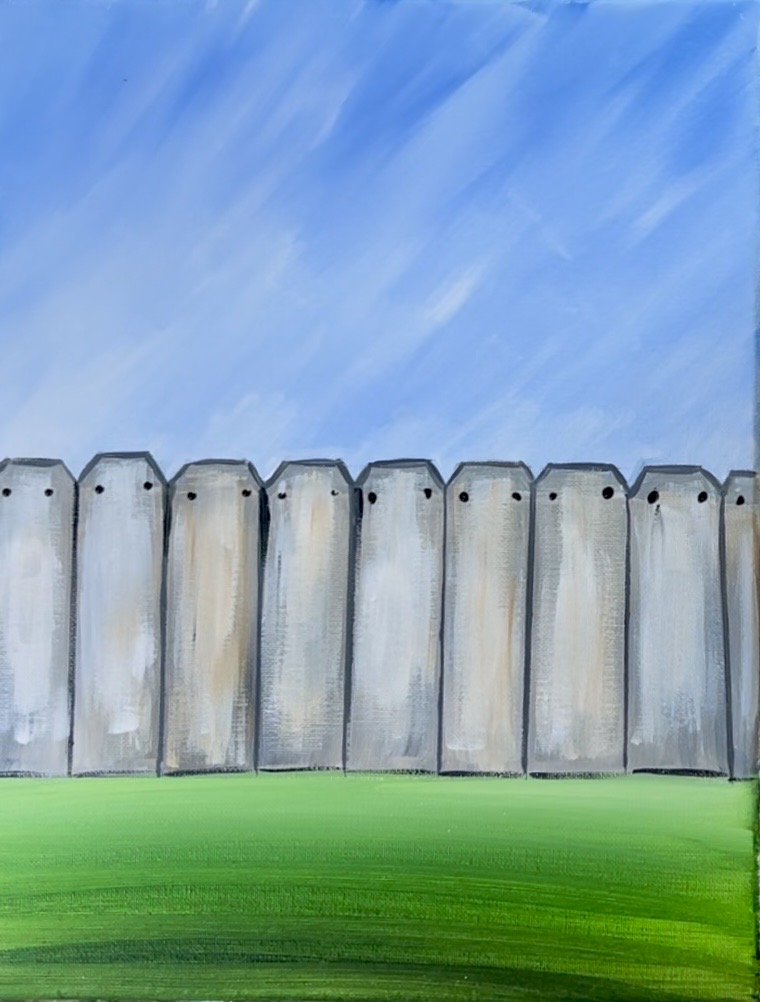
7. Dry Brush Lighter Colors On Fence Pickets & Paint Nails
In this next step you will “dry brush” lighter color paint onto the fence pickets. Use the “#12 bright brush” (1/2″ flat brush) for this. Mix on your palette with about 3 parts “titanium white” to 1 part “raw sienna”. This will make a light beige color. Then use this color to paint vertical paint strokes on each of the fence pieces. When you load the brush, wipe off some of the color so that when you paint this, it shows up “dry” and somewhat translucent.
You don’t want to cover all of your first layer, you are “glazing over” that layer. This lightens the fence and also adds depth and texturing.
As you “dry brush” each of the pickets, try varying your color a little bit. Do this by adding more “raw sienna” to your brush in some areas and more “titanium white” in other areas”. Try not to dry brush over your dark lines (do the dry brushing mostly in the middle of each picket).
Next, use either the back of your paint brush handle or the end of the bristles to paint little nail dots along the top of the picket (you can place your nails lower if you want). Do this with the color “mars black”. I did two dots on each fence piece.
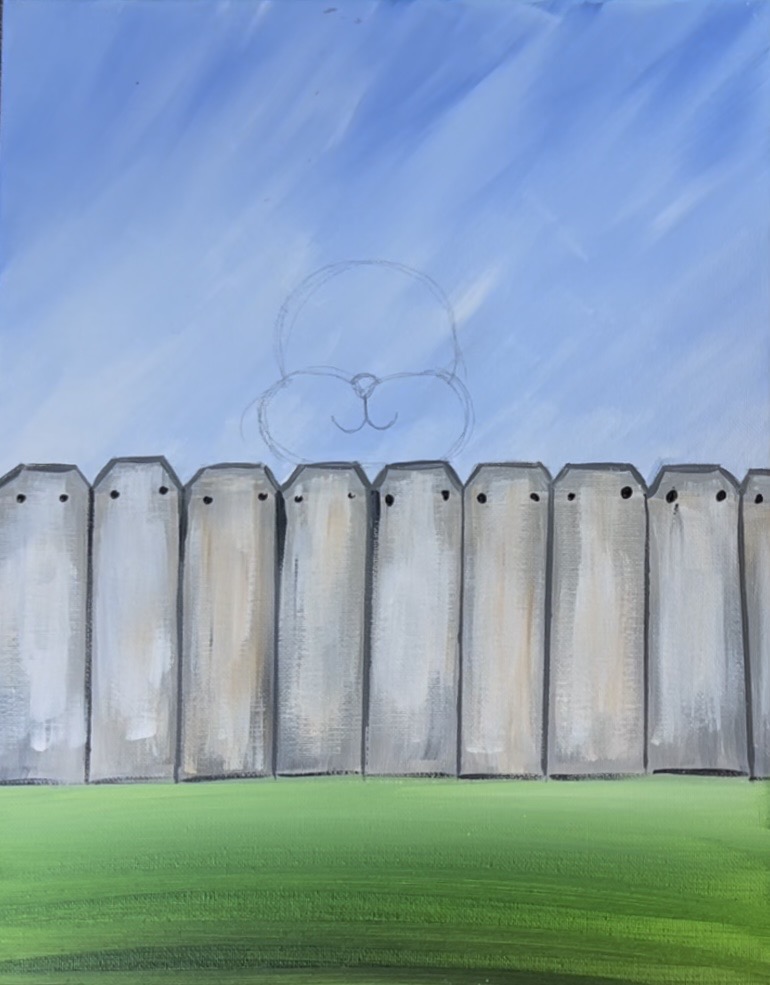
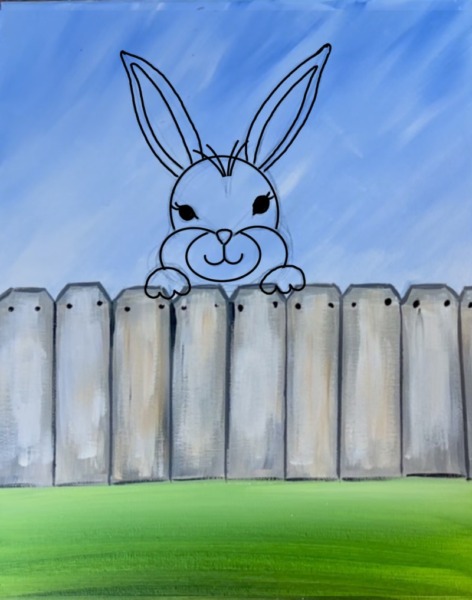
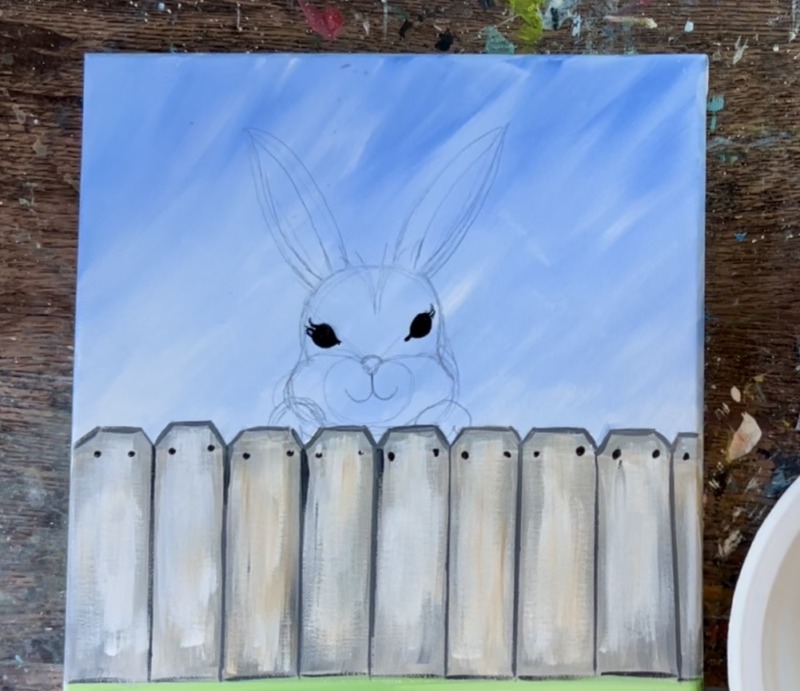
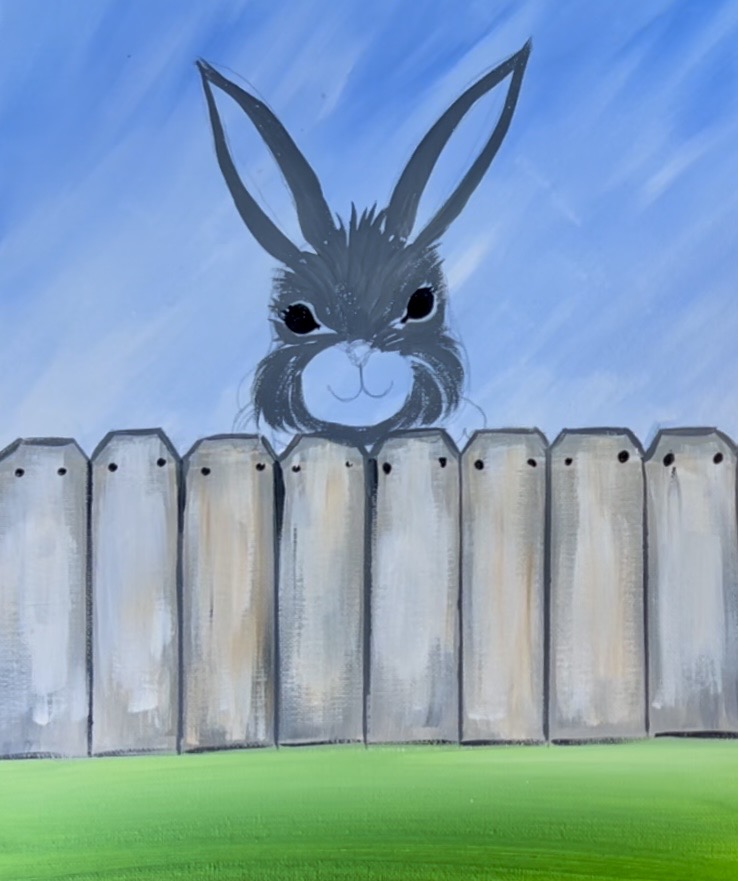
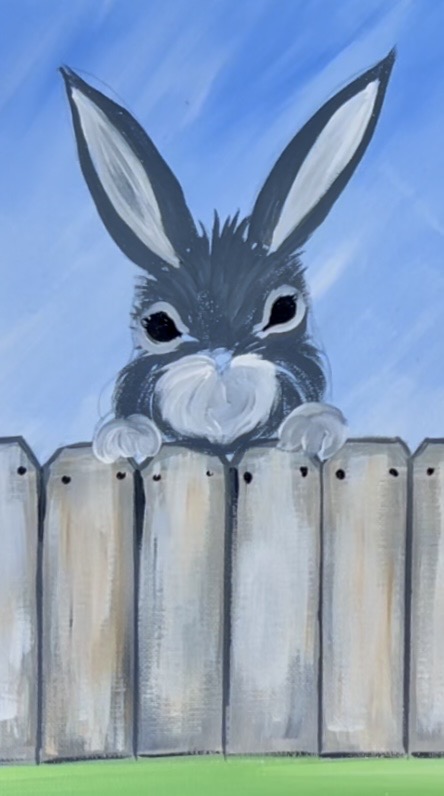
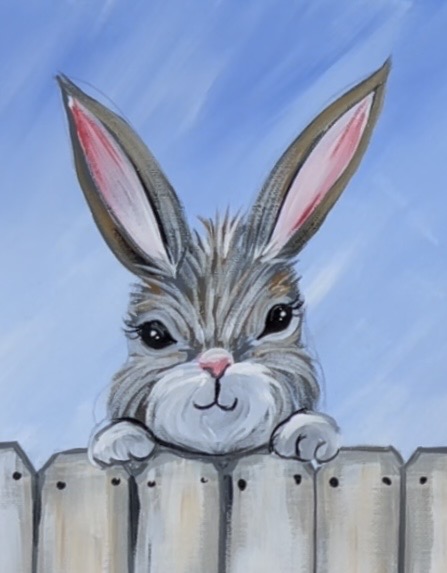
8. Draw Rabbit
Use a pencil to lightly draw an arc for the rabbit’s head. Draw an oval shape below that for the mouth/ cheeks. This oval slightly sticks out wider than the arc/ head shape. Draw a little triangle for the nose and a simple line and two curves for the mouth. Note: for reference, the bunny’s head from top of that curve to the fence is only about 3″ high

Draw two diagonal temporary lines extending up from the nose to the sides of the head. These lines will help you line up the eyes. Draw almond shaped eyes going along those diagonal lines. Then draw a small oval around the nose and the mouth.
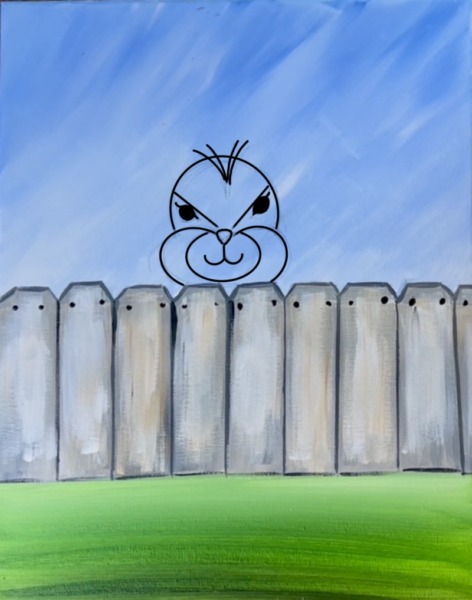
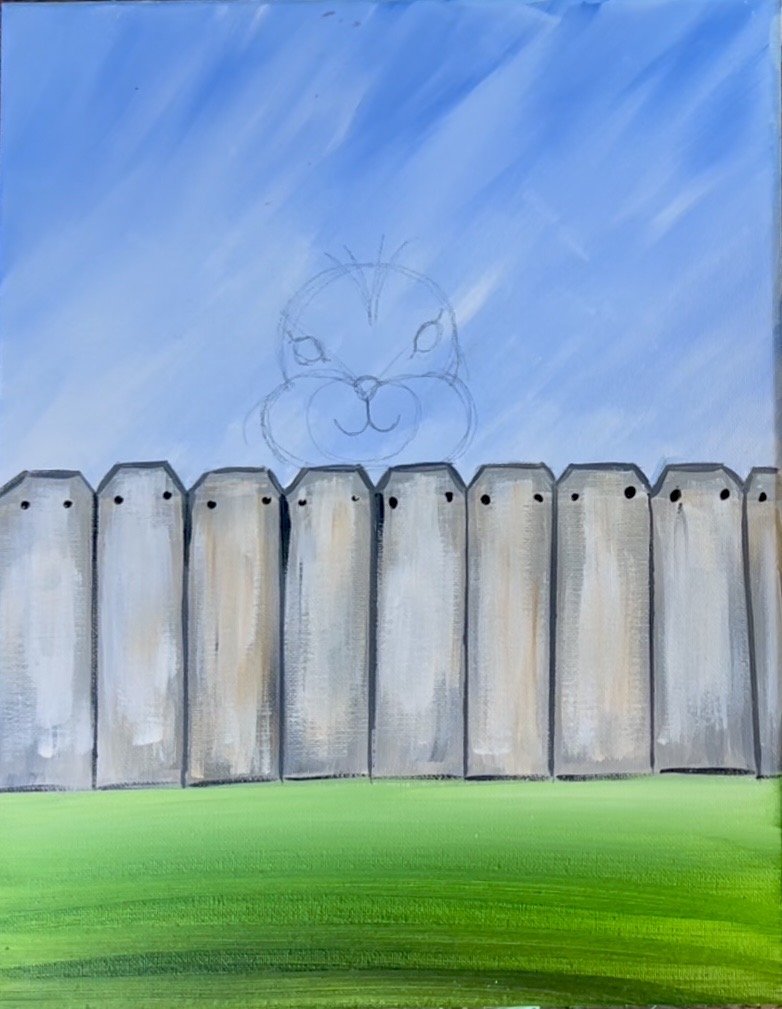
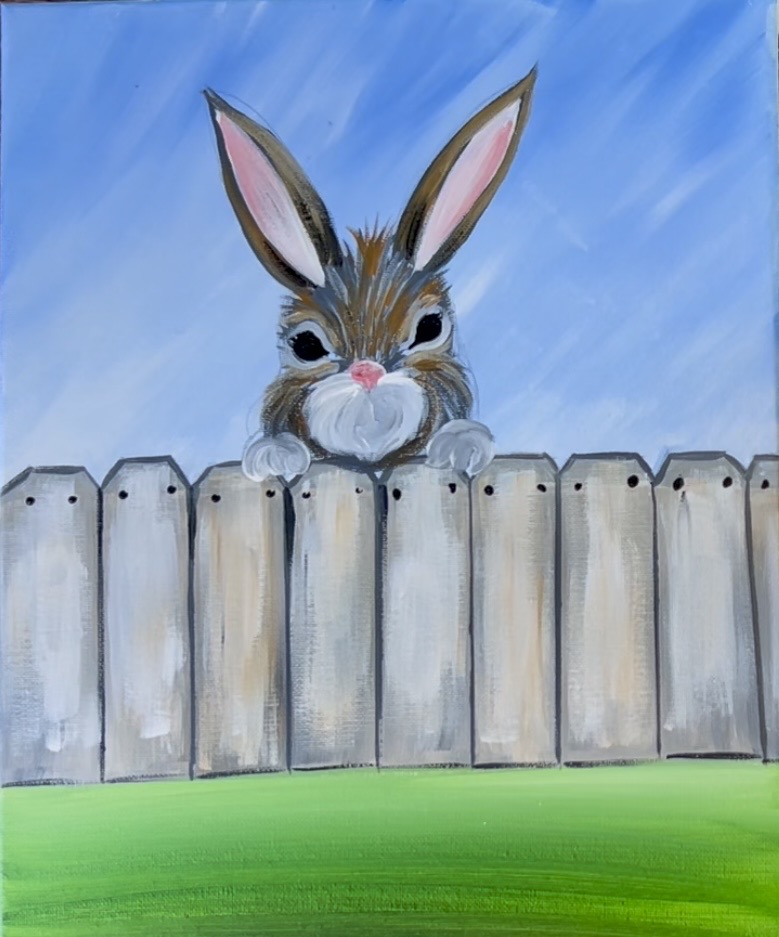
Erase those temporary diagonal lines. Then draw two simple paw shapes that overlap the top of the fence. Draw a few “fur lines” on the top middle of the bunny’s head. Then draw two diagonal lines for the center of the ears. These will help you establish the length and angle of the ears. For reference, my bunny’s ears are about 3.5″ long.
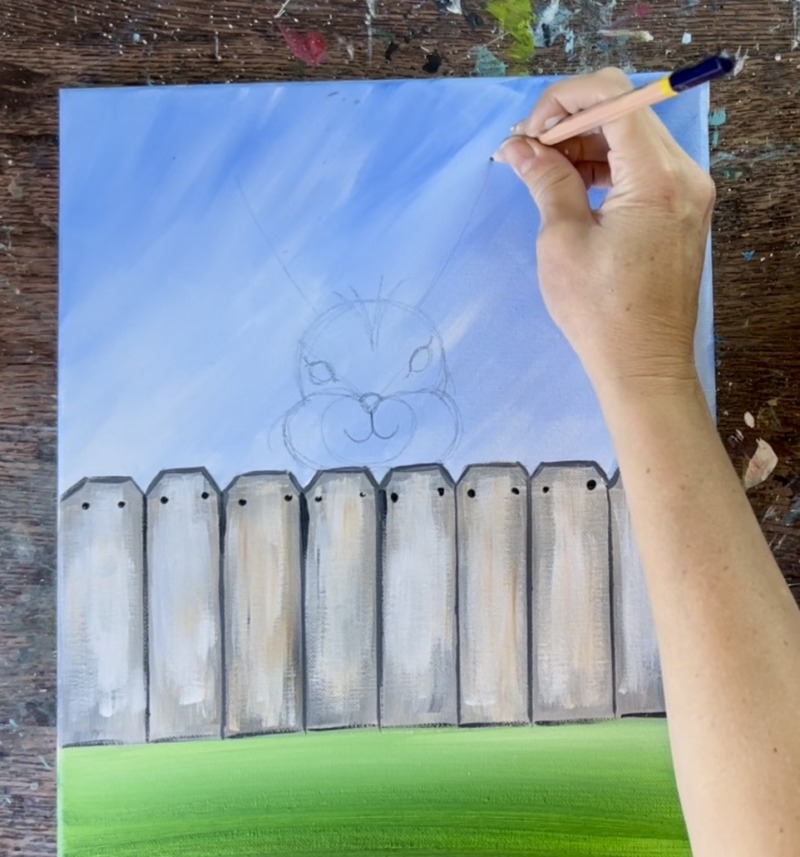
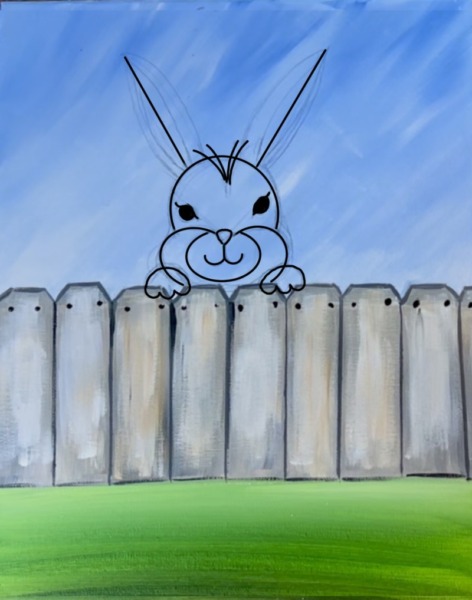
Then draw the shape of the ears around those diagonal middle lines.
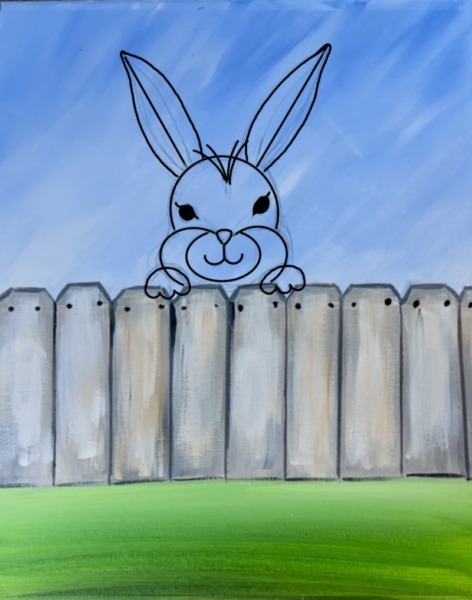
Erase the middle lines of the ears and then draw the middle shapes inside of both of the ears.
9. Paint Eyes, Ears & First Layer Of Head Fur
Use the #4 round brush and “mars black” to paint the eyes of the rabbit. You can paint the eyelashes too but this will be painted over with the fur/ you’ll have to redo the eyelashes later.
Next, mix a dark gray on your paint palette. Mix equal parts “mars black” and “titanium white” together. Use the #4 round brush and paint diagonal fur paint strokes going in a triangular area between the eyes. This fans out to the top of the bunny’s head and around the top part of the eyes.
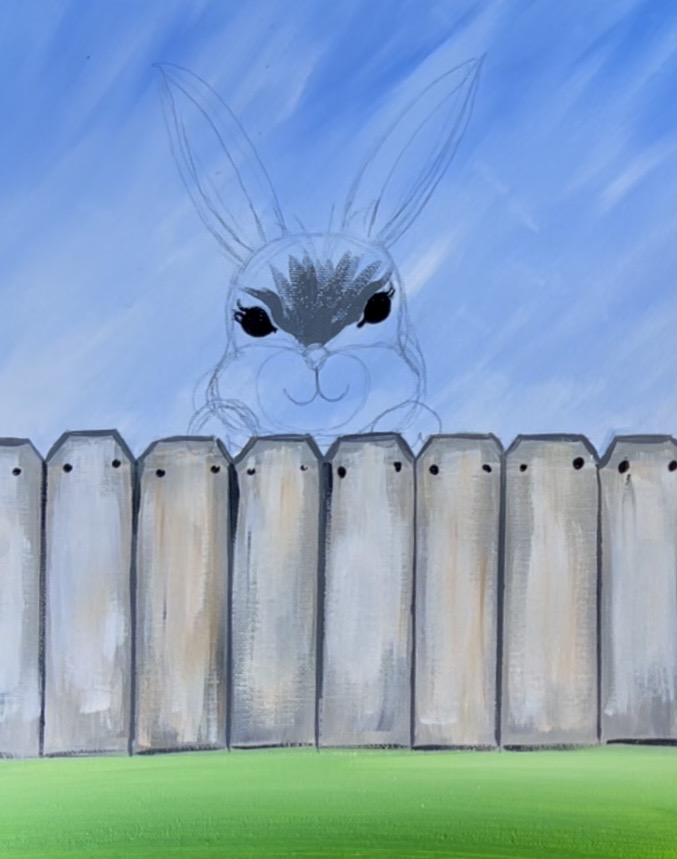
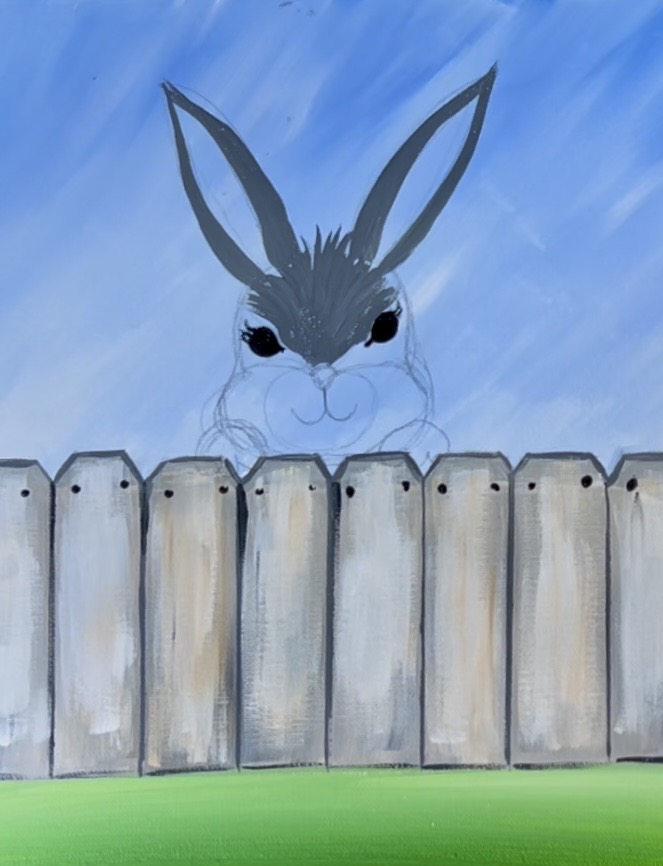
Paint little fur pieces sticking up in the top middle of the bunny’s head between the ears. Then paint the ears but leave the inner parts of the ears blank. When you paint the ears, you can do smooth paint strokes for this.
Next you are going to paint the fur under the eyes and around the mouth area. Paint your dark gray paint strokes so they curve outwards and around the oval shape of the mouth area. Paint gray paint strokes that curve/ contour around the shape of the eye but leave a little “slither” of space around the black eye shapes.
10. Paint Paws, Mouth Area & Inner Ears
Next you are going to paint the mouth area and the paws. These are going to be a much lighter color than that dark gray we were just using! Mix about 3 parts white to 1 part black to make a light gray. Then use the #4 round brush to paint the paws and mouth area. For the paws, just outline the shape of each of the paws and fill in using rounded paint strokes. The paws slightly overlap the fence posts.
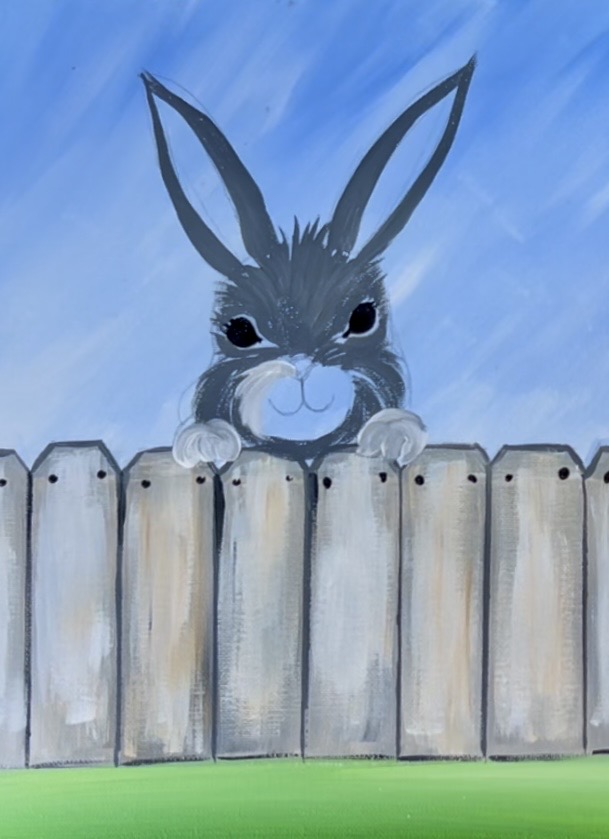
Then paint the mouth area. This is the same light gray color as the paws. Start around the nose and paint strokes that go outwards to fill in that oval shape. You can slightly overlap some of the edging over your dark areas of the bunny.
Next, paint the inner parts of the ears with that light gray color. Note that the dark gray border is slightly thicker on the parts of the ears facing inwards and thinner on the parts of the ears facing outwards.
Let everything dry before going onto the next step.
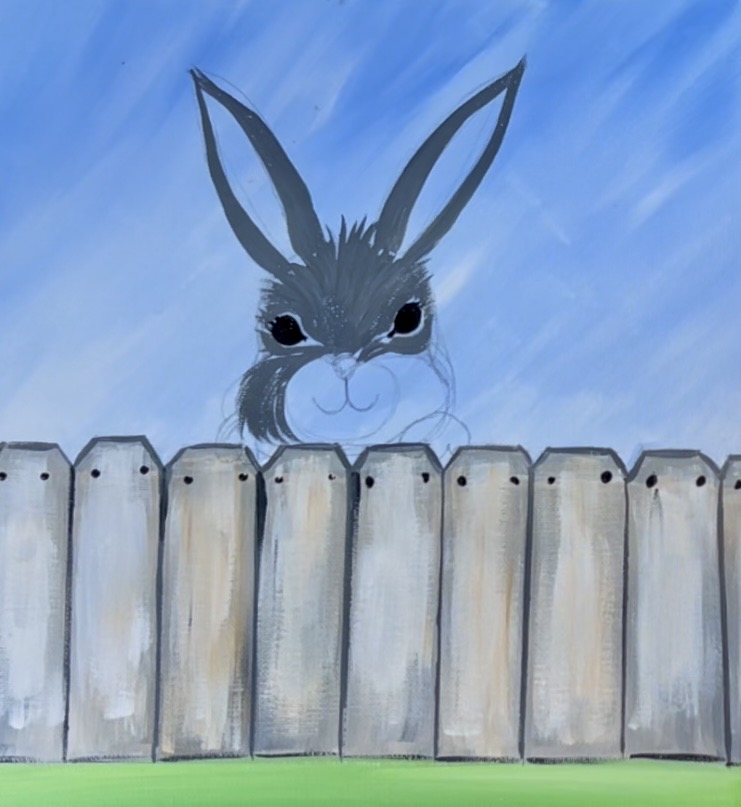
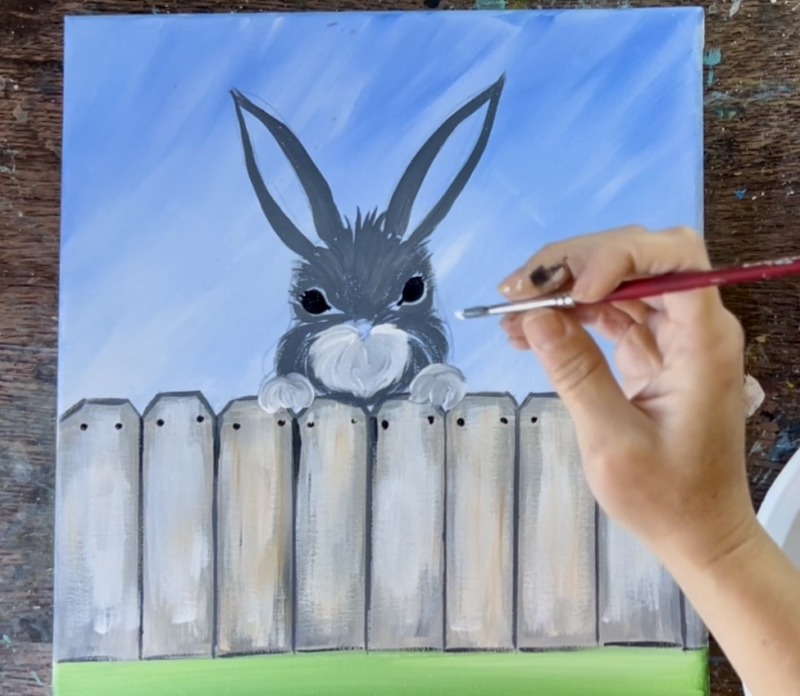
11. Outline Eyes & Paint Next Layer Of Fur Texturing
Use that same light gray color to paint a thin outline around both of the eyes.
Then use either the #4 round brush or the #8 LONG round brush to paint your next layer of fur texture. This is going to go over that dark gray layer. Paint thin light gray lines that start above the nose and fan outwards around the top of the rabbit’s eyes. Don’t cover all of your dark layer.

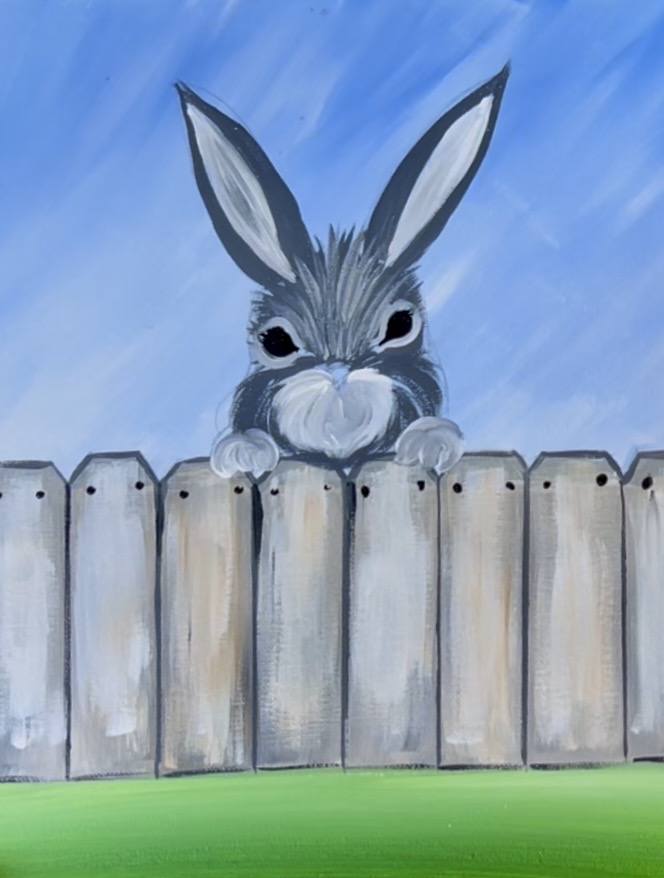
Do the same kind of paint strokes on the bottom half of the rabbit’s head but go around the mouth/nose area.
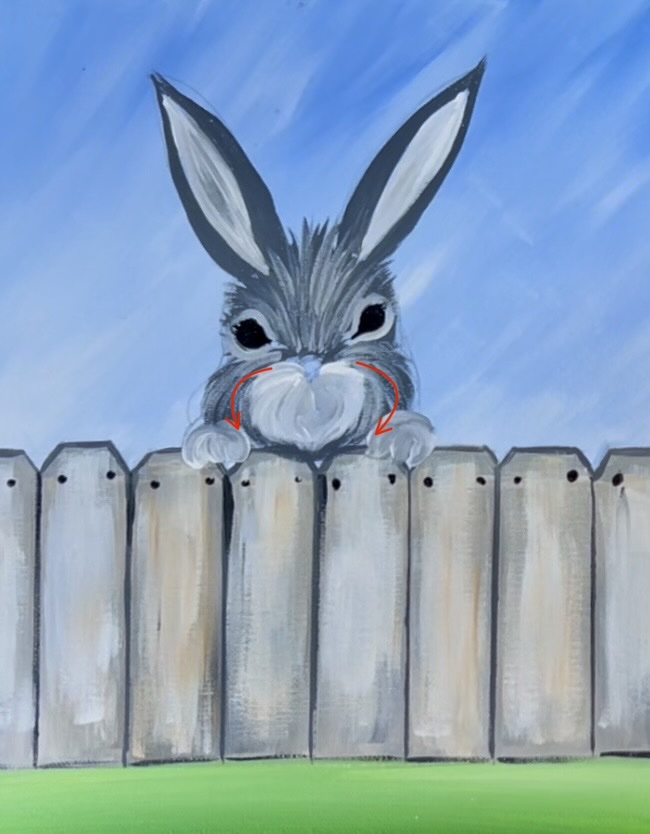
12. Add Brown Layers
Load your #4 round brush with a small amount of “raw sienna”. Lightly paint this light brown color over the dark gray on the ears. Do this very lightly so that a lot of the dark gray shows through this layer of paint. Add a tiny bit of mars black on the bottom of the ears and blend up into the brown.
Next, use the brown to paint the next layer of fur texture. Start in the middle just above the rabbit’s nose and paint little hair paint strokes that go in the same direction as your dark gray layer. Don’t cover all of the dark gray/ leave some showing through between paint strokes. Paint the brown around the nose/mouth area as well. This also goes the same direction as your first dark gray layer.
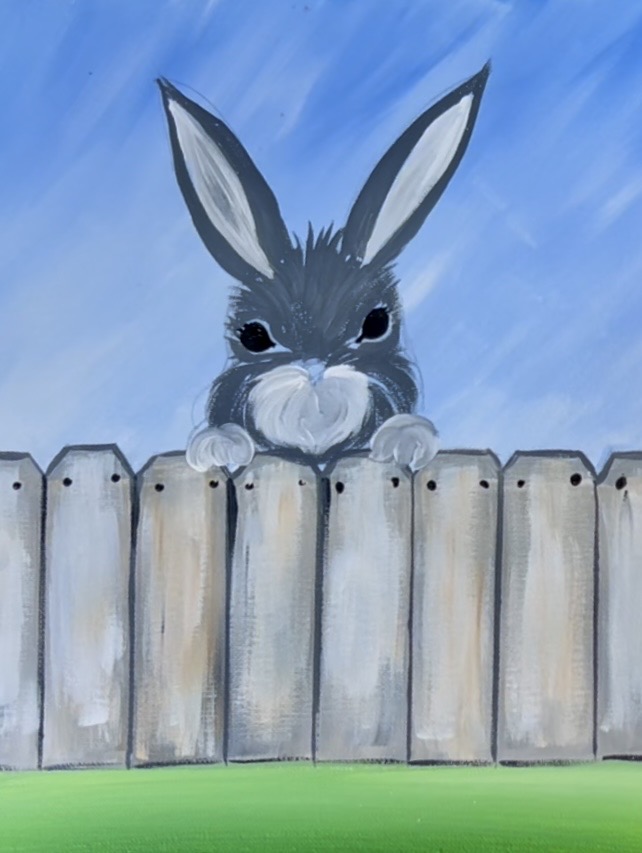
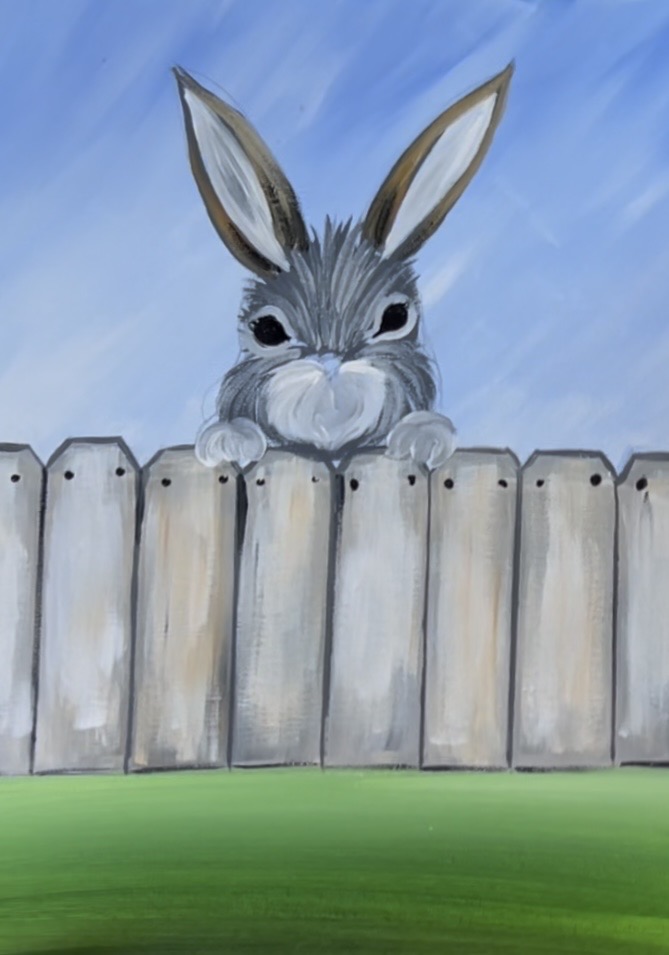
13. Paint Inner Parts Of Ears & Nose Pink
Rinse the #4 round brush. Then load your paint palette with “cadmium red medium hue”. Mix a very tiny amount of red into “titanium white” to make a pink color. This is about 1 part red to 5 parts titanium white. Then use the #4 round brush to paint the rabbit’s nose.
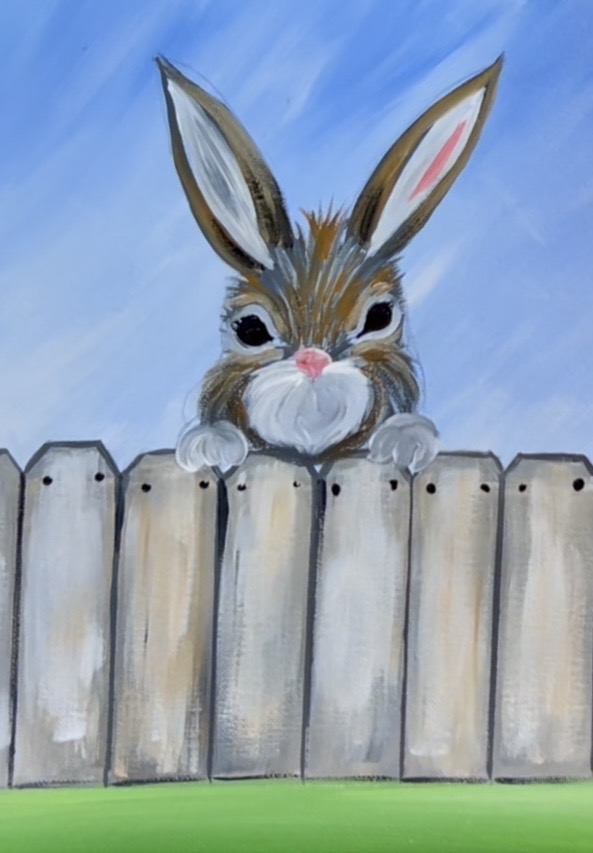
Paint the inner parts of both of the rabbit’s ears with this same light pink color. I made the bottom parts of both of the ears slightly lighter by blending in an extra bit of white in that area.
14. Paint Mouth
Use the #4 round brush (or a paint pen or sharpie) to paint the mouth. This is a tiny vertical line under the nose and two “U” lines for the mouth.
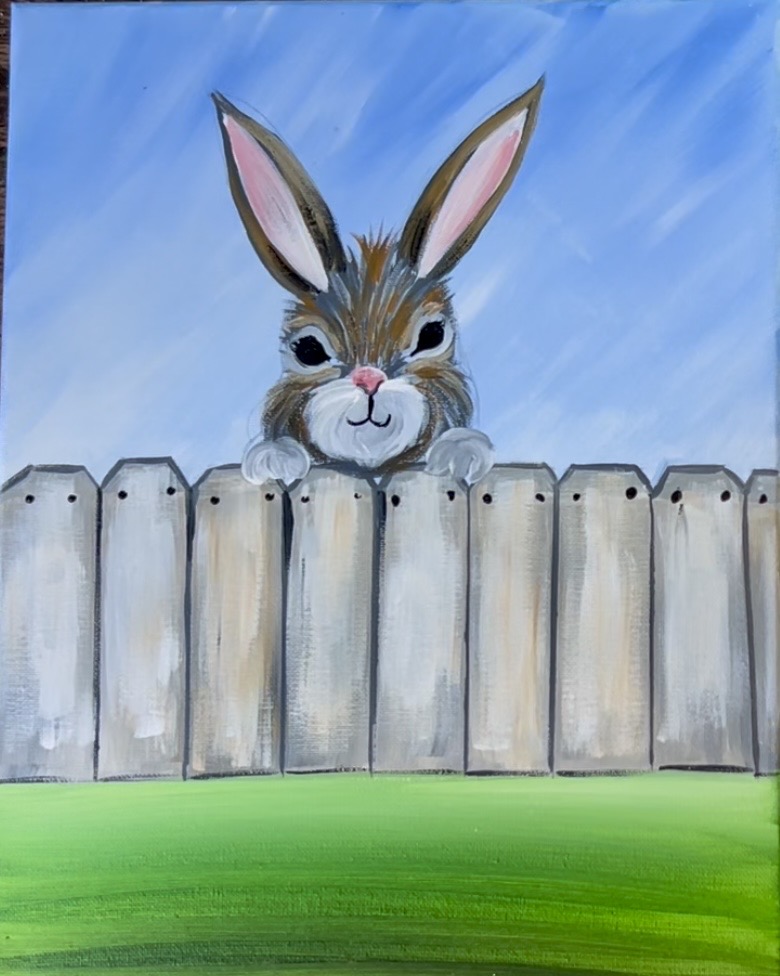
15. Paint Light Gray Fur Layer Texturing
Wait for your previous layers of the rabbit fur to dry. Then use the #4 round brush and “light gray” to paint a top fur layer of texture. This light gray is the same gray used on the mouth/ feet of the rabbit. Paint this fur pattern in the same direction as the brown and dark gray layers.
16. Paint Highlights On Eyes & Paint Lashes (optional)
Use the #8 LONG round brush (the tiny tip of the brush) to paint a set of little white highlight dots on the upper middle part of both of the eyes. I made one larger dot and one smaller. Then paint little eye lashes (optional) on the outer upper part of both of the eyes. This will overlap your fur texture and possibly part of the sky.
Use the same black to outline the paws/ little lines between the toes. You can also outline the bottom edging of the rabbit’s chin that hangs over part of the fence top.
Then load your #8 long round brush in either white or black (or both). Paint very thin long, extended lines that go outwards from the rabbit’s cheeks to form whiskers.
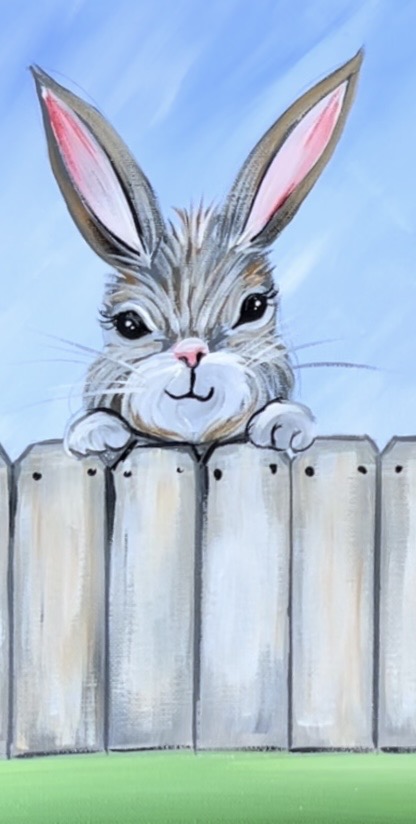
17. Paint Wood Texturing On Pickets
Use the #8 long round brush to paint wood line texturing on the fence. Use a medium to dark gray for this. Paint little vertical lines very loosely on each of the fence posts. Some of the lines curve to form an “almond shape”.
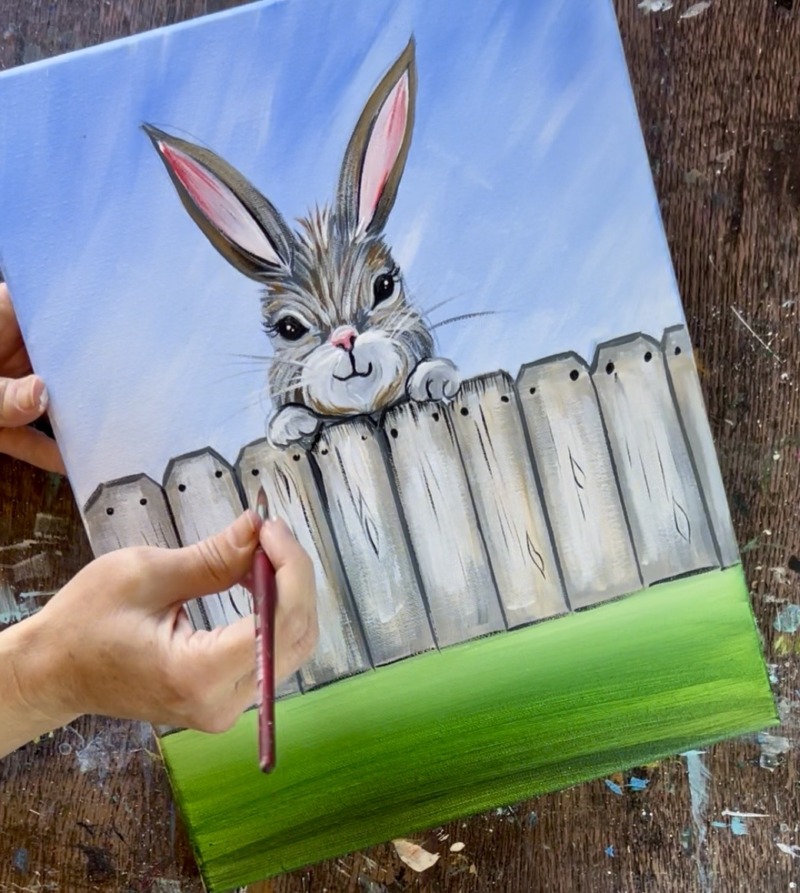
Add some extra little vertical “tic mark” lines on the top edges of all of the fence posts, especially under the rabbit for added shadowing.
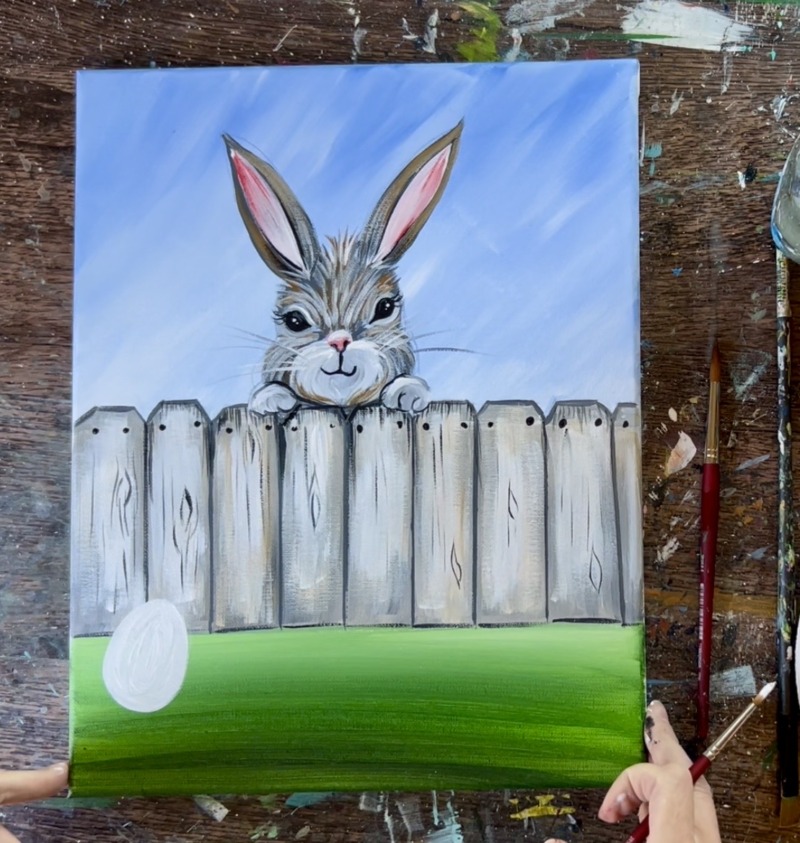
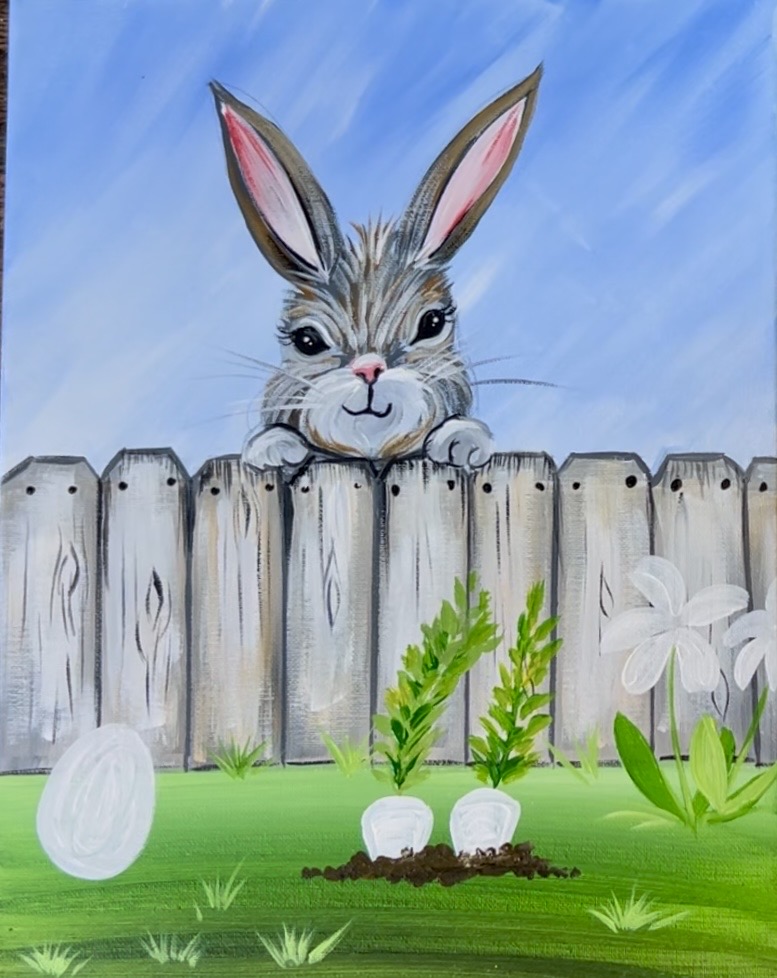
18. Paint Egg, Carrots & Flowers White
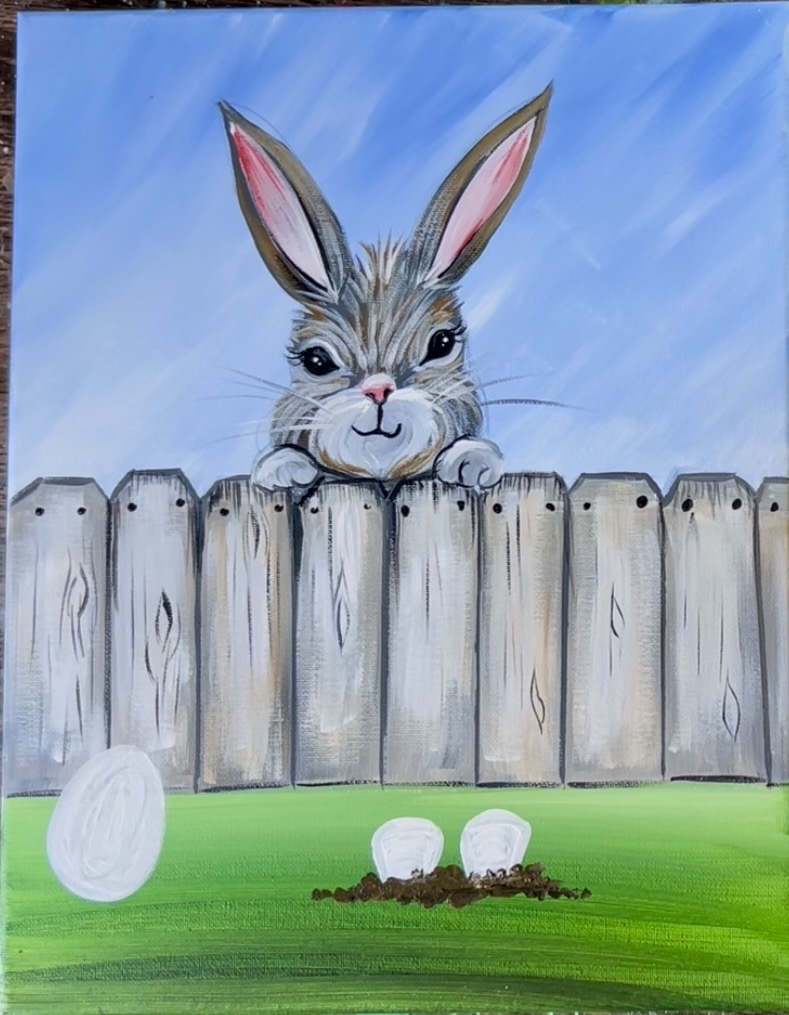
In this next part of the painting, we will “white out” areas to create the shape of the egg, carrots and flower. Use the #4 round brush to paint an egg shape on the lower left of the grass area.
Then paint two carrot shapes sticking up out of the ground. You can paint more if you’d like! We just see the end part of the carrot where the leaf attaches. Then use the #4 round brush and dark brown to “stipple/ dot” little piles of dirt surrounding the two carrots. To make this dark brown, mix a little bit of “mars black” into “raw sienna” to darken it.
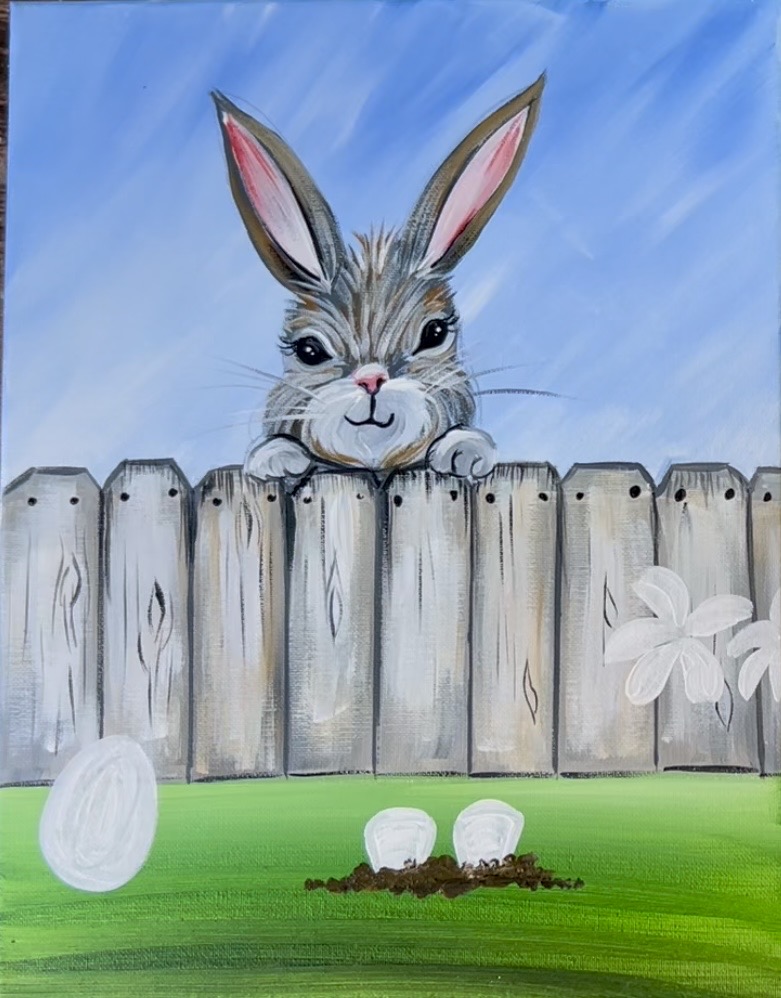
Next, use the #4 round brush and “titanium white” to paint petals for the two yellow daisies on the right. These can be very basic petals that look somewhat narrow at the bottom and wider/ rounded on the edge.
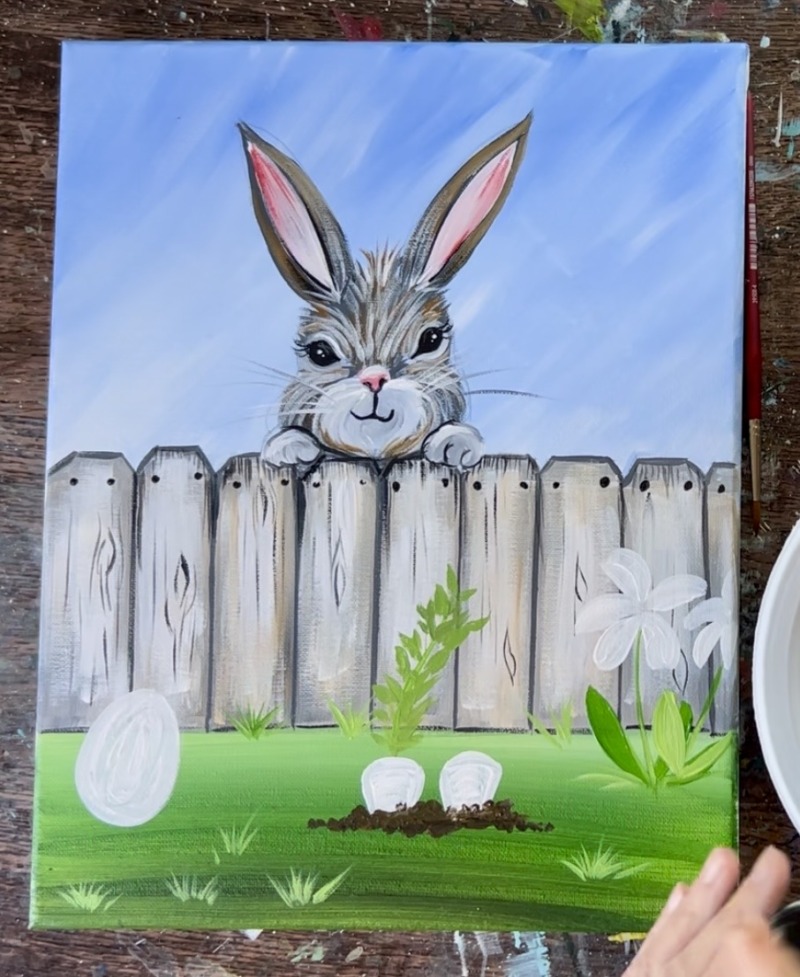
19. Paint Leaves/ Stems/ Grass
Mix a yellow green on your palette by mixing equal parts “hooker’s green hue” and “primary yellow” together. Paint two stems for the flowers and a set of leaves. Note: if the green isn’t showing up, try adding a little white to it to make it lighter/ more opaque.

Then use either of your round brushes to paint little clusters of grass on the ground. Mix white with the “yellow green” color to make it lighter so that it shows up. Paint little clusters of diagonal lines.
Then paint the leaves on the carrots. You can be kind of abstract about these leaves. I started by painting a middle line for the center of the leaf bundle. Then paint little green marks going outwards from that central line.
Layer on different greens by adding some darker green into the leaf bundle and some lighter/ more yellow.
20. Fill Carrots, Flowers & Easter Egg/ Paint Butterflies
Use the color “cadmium orange hue” to paint the two carrots one solid coat of orange. Then add some shading to the right side of both of the carrots using “raw sienna”. Paint little dashed lines using the #4 round and blend the brown into the rest of the orange layer.
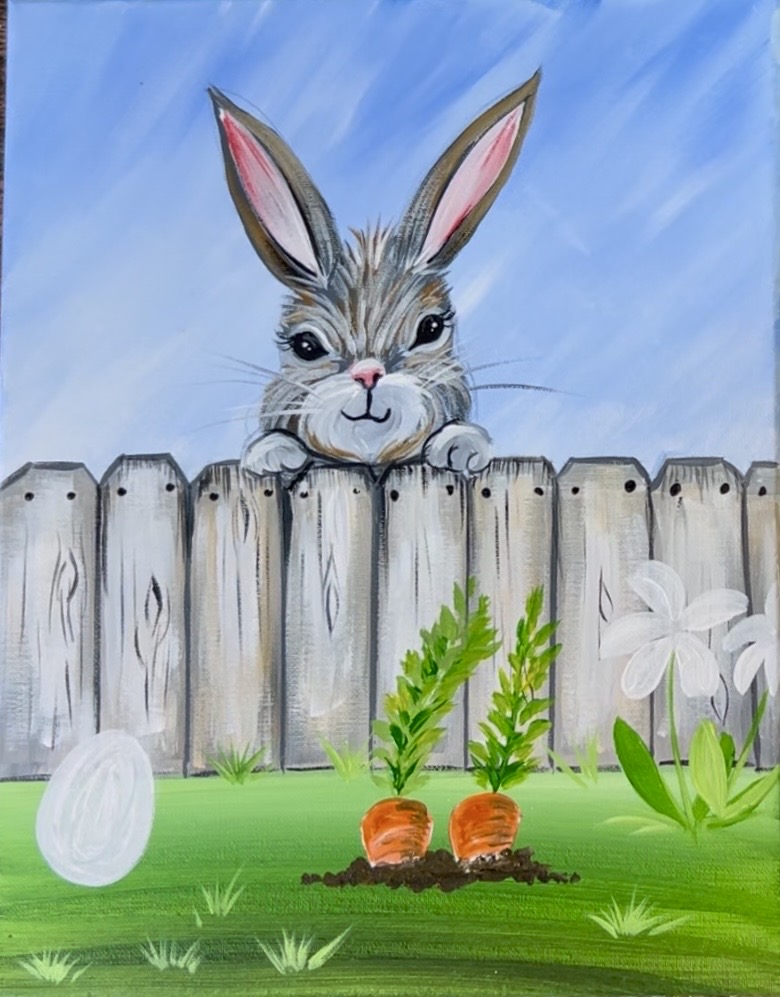
Then add some highlights to the carrots using the colors “primary yellow” mixed with “titanium white”. Blend this lighter color on the left side of both of the carrots by painting little dashed lines that blend into the rest of the orange on the carrots.
Next, paint the petals on the flowers using “primary yellow” or your chosen color. Paint the middle circle of both of the flowers using the “dark brown” color. Use the #4 round brush to paint little brown dots in the center of the flowers. Then add little white dots towards the top of the circles for highlights.
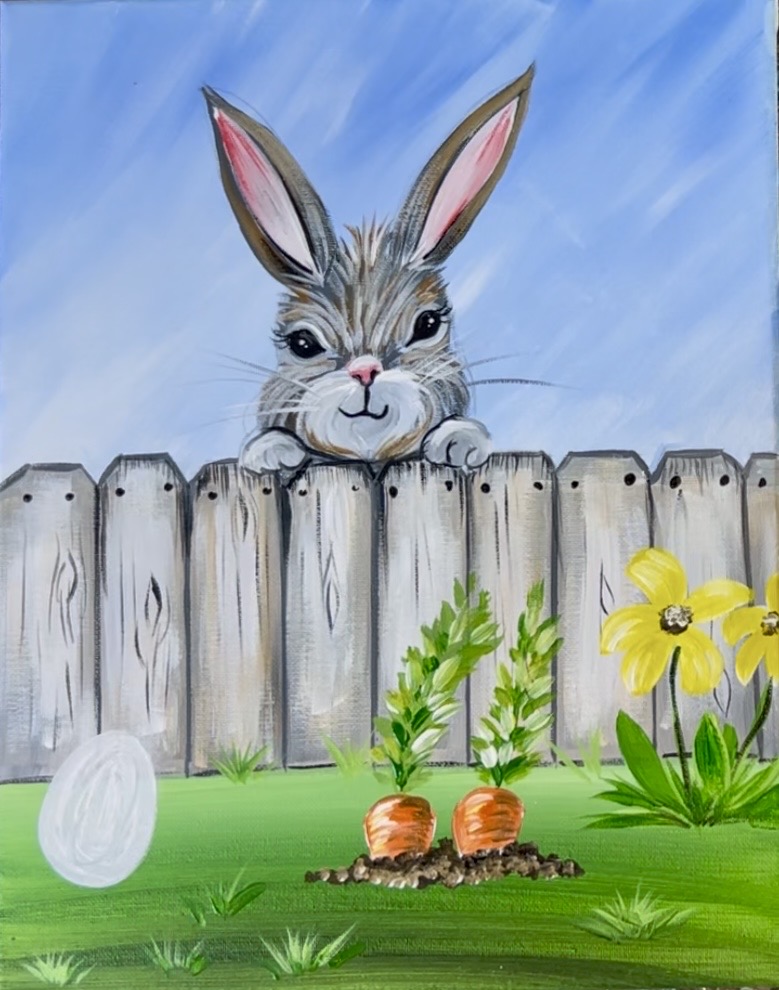
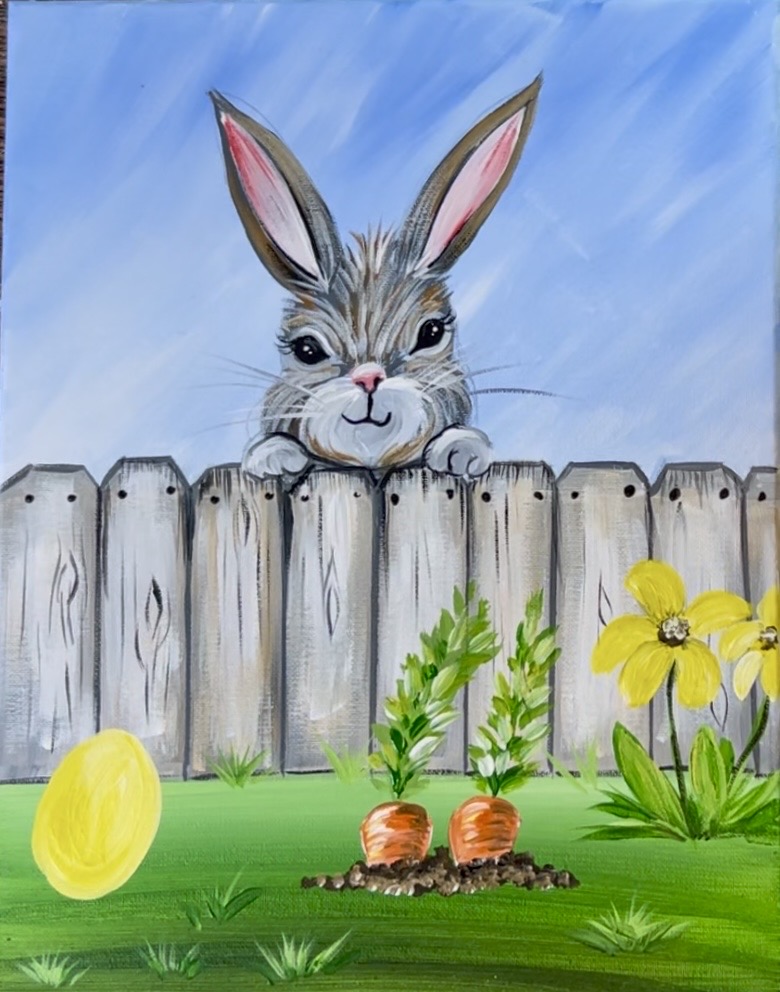
Paint the egg a solid color. I chose to mix yellow and white together and to paint the egg this light yellow color. You can do whatever color you want for this.
Use “titanium white” to paint the base shape for both of the butterflies in the sky.
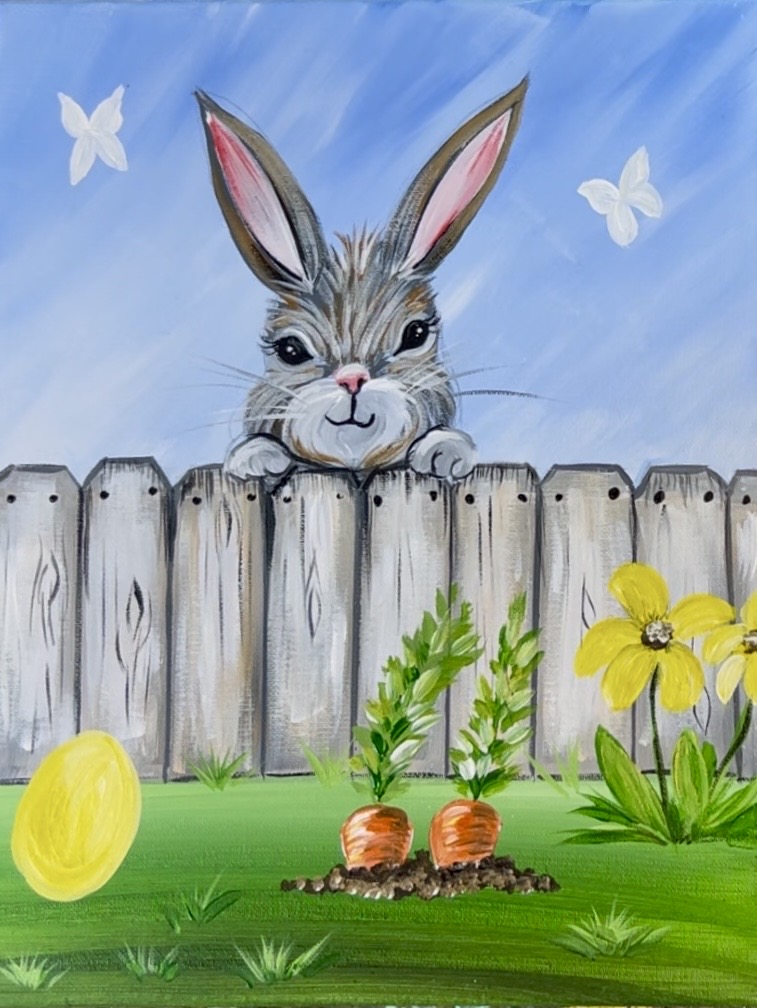
After the white dries, paint the butterflies your chosen colors. I did orange on the right and yellow on the left. Add design details on the Easter egg with various colors.
Add details to the butterflies such as the body and antennae as well as designs on the wings. I chose to add black borders to the wings and little white dots on the orange butterfly. Because these are so small and in the background, you don’t need to add a lot of detail to them.
After the layers of paint on the Easter egg dry, add grass that overlaps it to make it look like the egg is nestled on the ground. Use the #8 long round brush and the same green colors you used for the other grass. Paint little blades of grass that go diagonally on each side of the egg and slightly overlap parts of the bottom of the egg. Then add a highlight to the right side of the egg using titanium white. To do this, any of your round brushes to paint a curved white line.
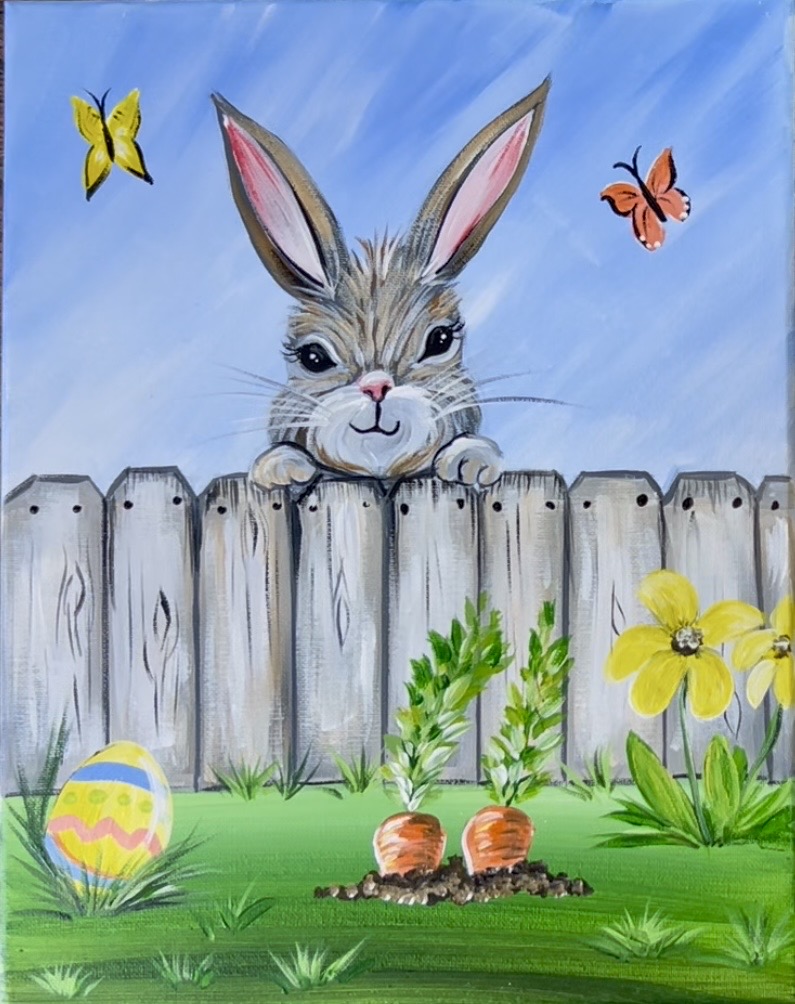
Finished!