
Would you like to save this?
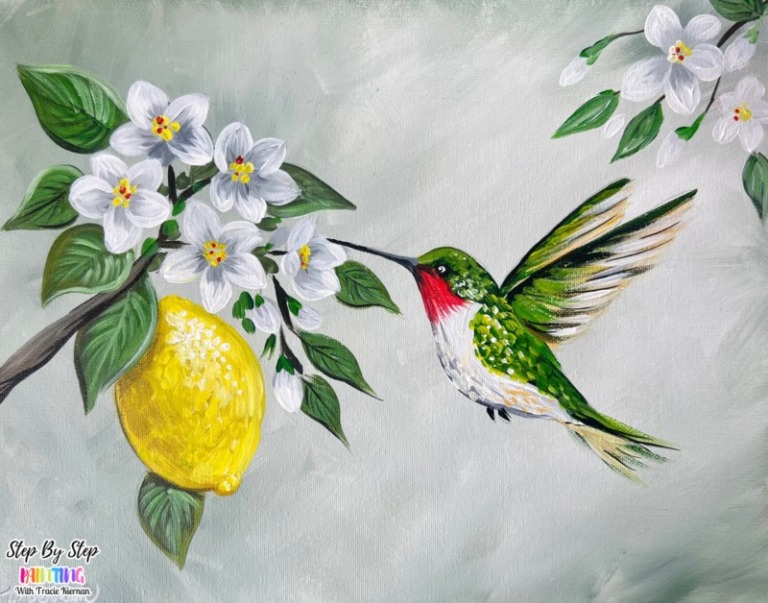
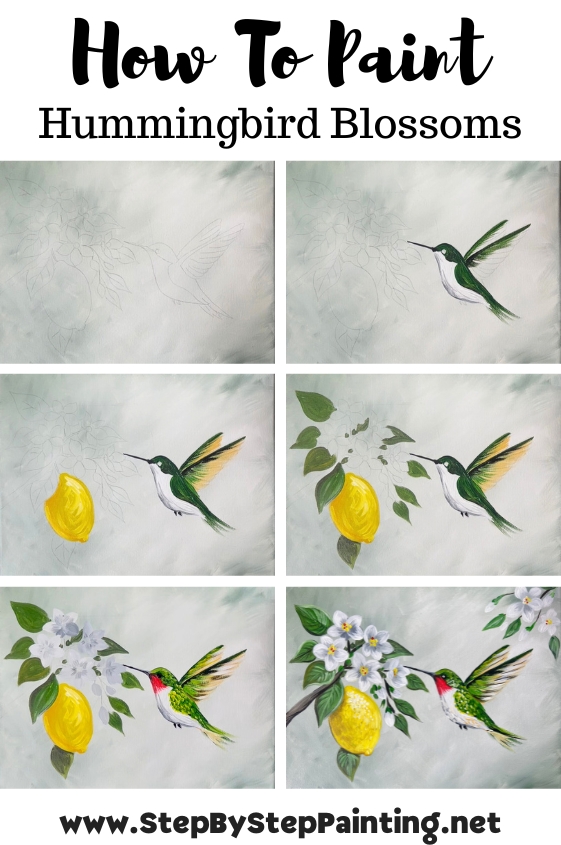
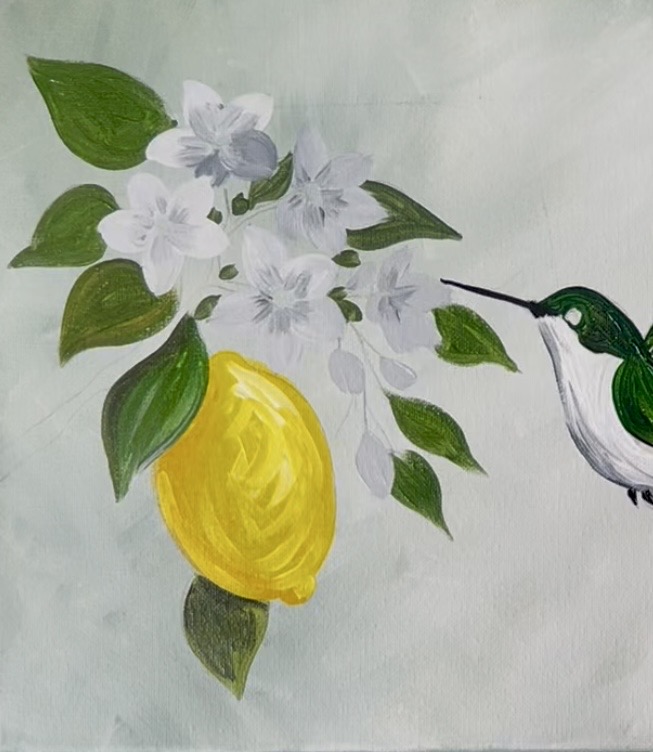
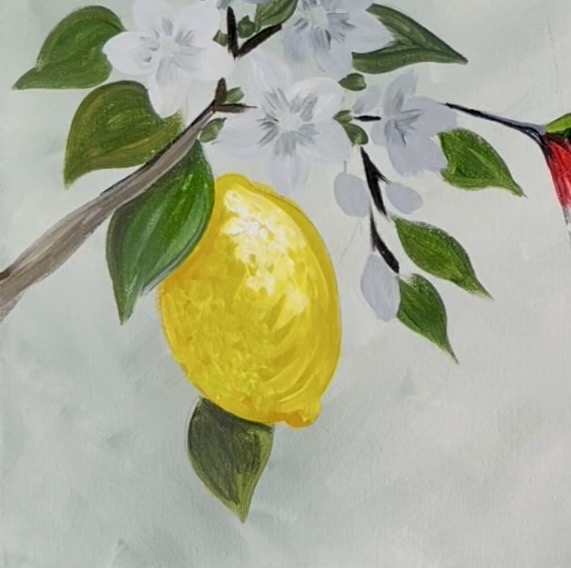
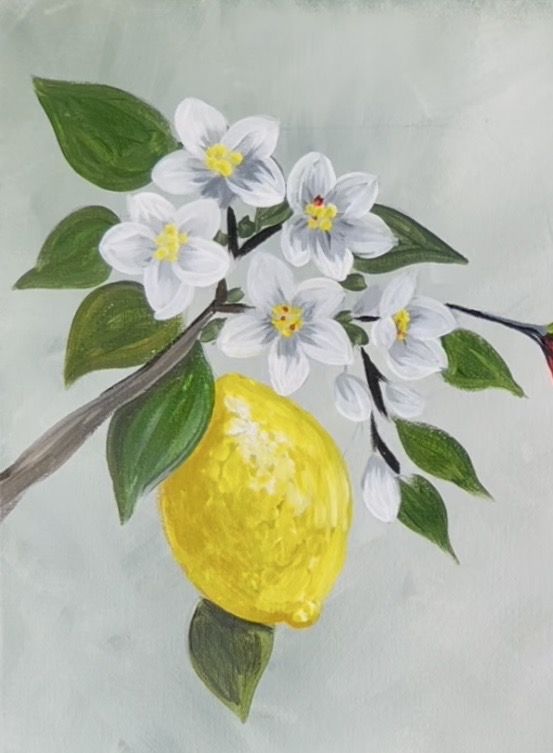
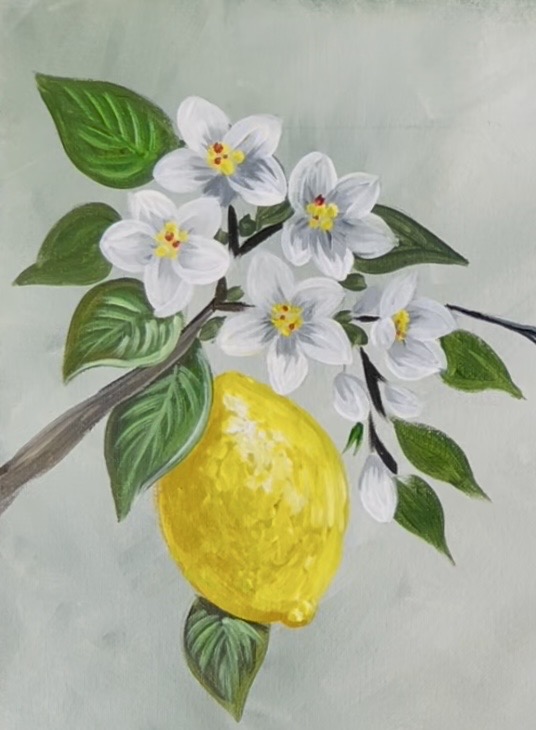
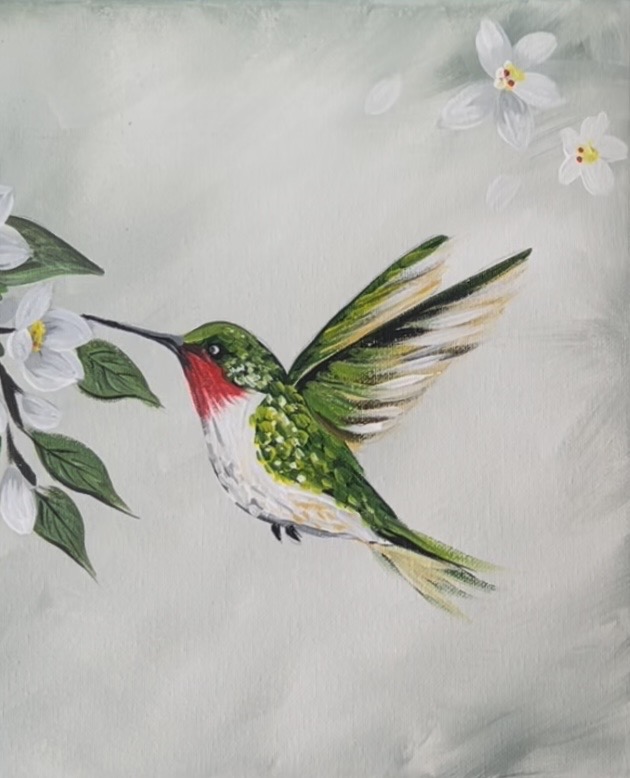
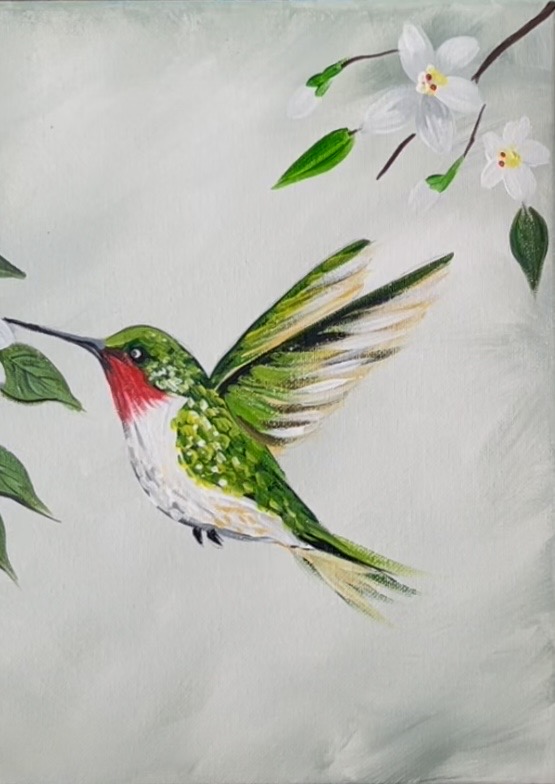
Bring a burst of sunshine to your canvas in this vibrant hummingbird and lemon blossom painting tutorial!
In this step by step painting lesson, you’ll learn how to create a soft “gray green” background, bright lemon tones, and delicate white blossoms. I’ll guide you through blending rich greens for the hummingbird’s shimmering feathers and adding fine details that make the wings feel light and full of movement!
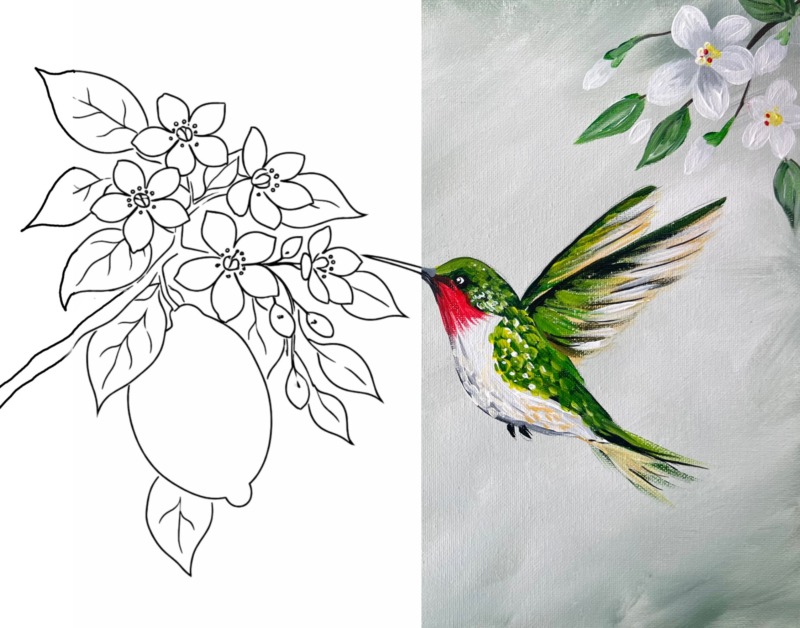
To make the process even easier, a printable traceable template is included with this tutorial—so you can transfer the design to your canvas and jump right into the painting. If you prefer more creative freedom, you are welcome to hand draw the design and not use the template.
This is a super relaxing and fun painting! Enjoy and happy painting!
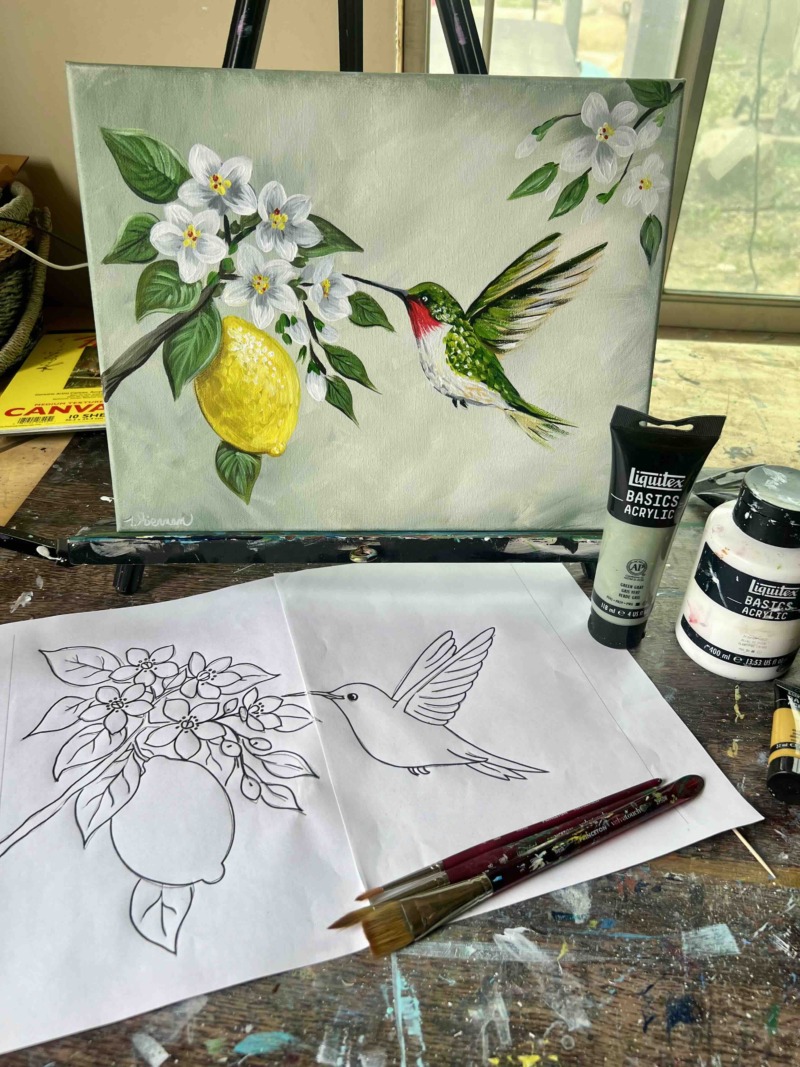
Materials Needed:
How To Paint "Hummingbird Lemon Blossoms" - Acrylic Tutorial

Paint a hummingbird sipping the nectar of a lemon blossom. This acrylic painting tutorial has a template and will show you techniques for layering on paint to create a realistic painting.
Materials
- 11 x 14 Canvas
- Acrylic Paints
- Brushes
- Template
- Graphite Paper
- Pencil
- Tooth pick
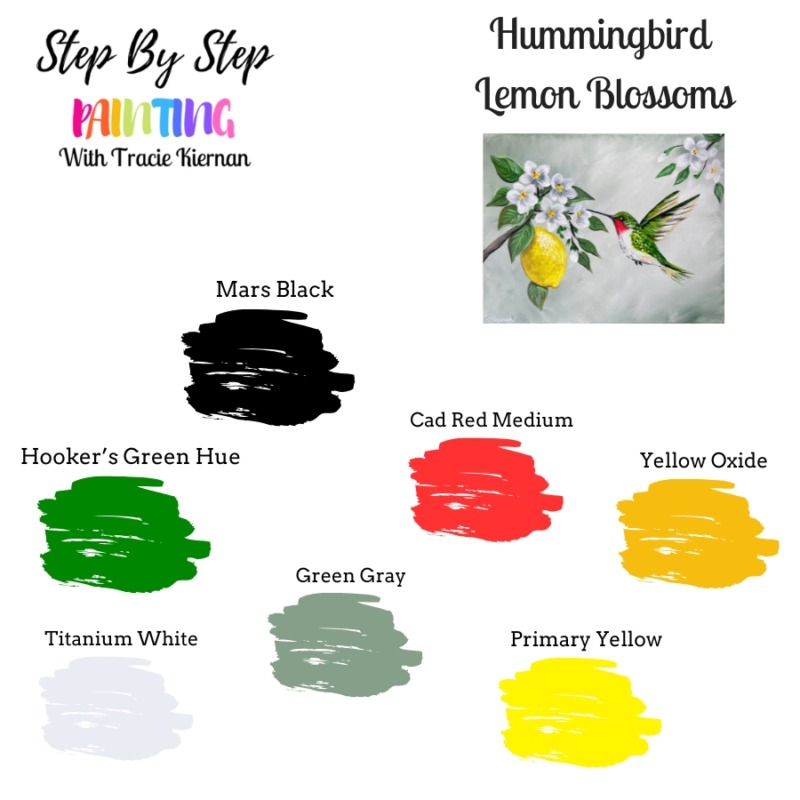
Colors
- Cadmium Red Medium Hue
- Primary Yellow
- Yellow Oxide
- *Green Gray
- Mars Black
- Titanium White
- Hooker's Green Hue
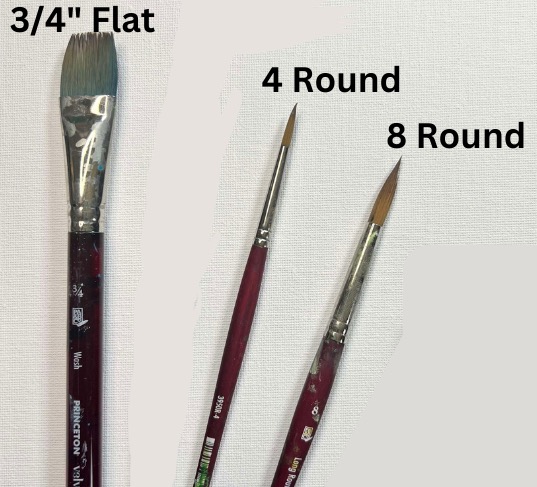
Brushes
Tools
Notes
*"Green Gray" is a special color made by Liquitex BASICS. You can create this color by mixing yellow oxide, ultramarine blue and titanium white together.
These are the brushes that I use. They are called “Princeton Velvetouch” brushes!
Traceable

Color Palette
Note: to make “Green Gray”, mix ultramarine blue, yellow oxide and titanium white. Green Gray is a specific “Liquitex BASICS” color.
Directions At A Glance
Step By Step Instructions
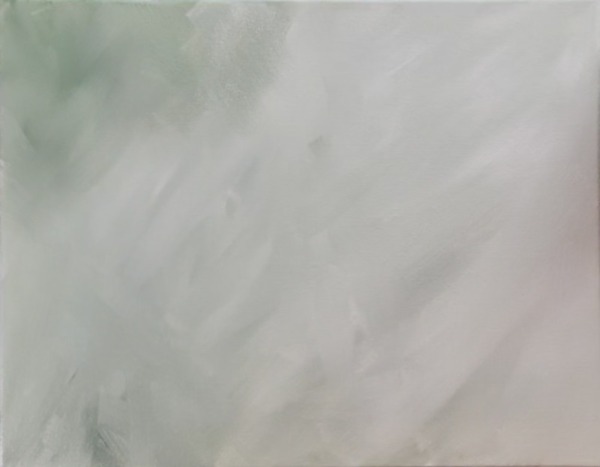
1. Paint Background
Use the color “Green Gray” and “Titanium White” to paint the background. Note: if you don’t have “green gray”, you can make it by mixing equal parts “ultramarine blue” and “yellow oxide” together and then adding a bunch of white to it.
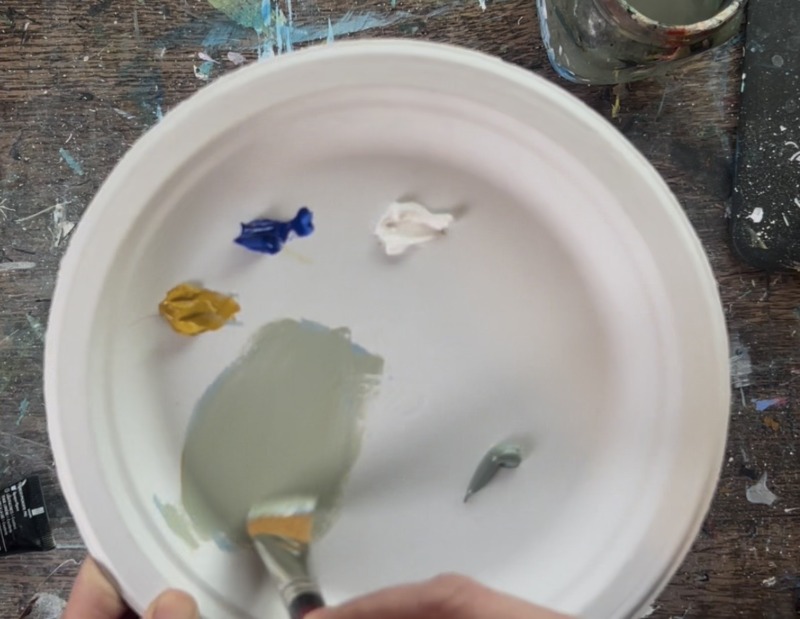
Use the 3/4″ flat wash brush. Double load it into “green gray” and “titanium white”. Paint angle paint strokes to fill the background. Create variations of color in your background.
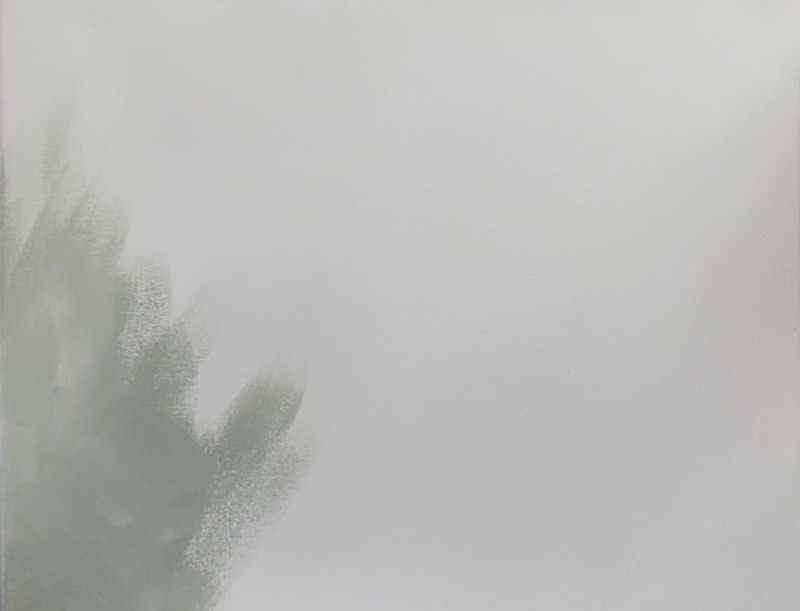
I intentionally make the left side of the background slightly darker than the right side. Paint large angle paint strokes that blend the white with the “green gray” to create an abstract, varied background.
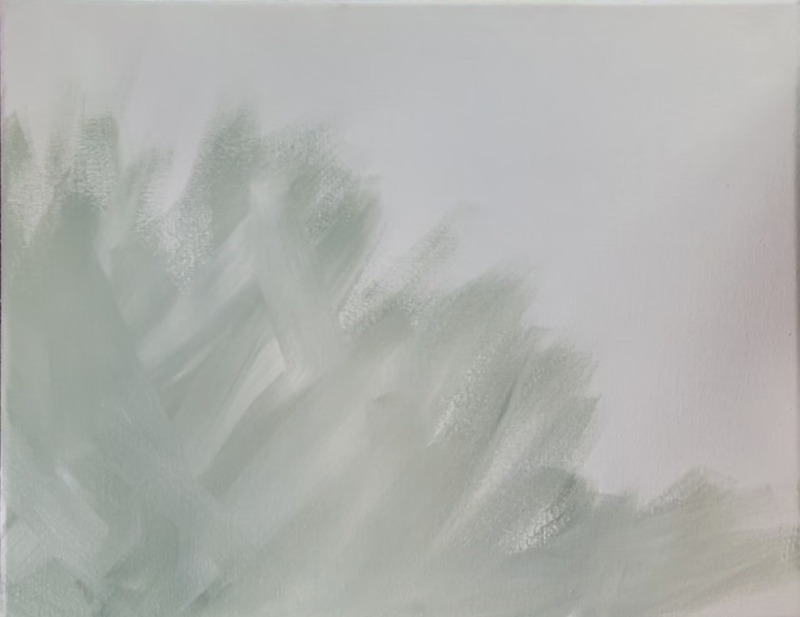
Let this dry before going onto the next step.
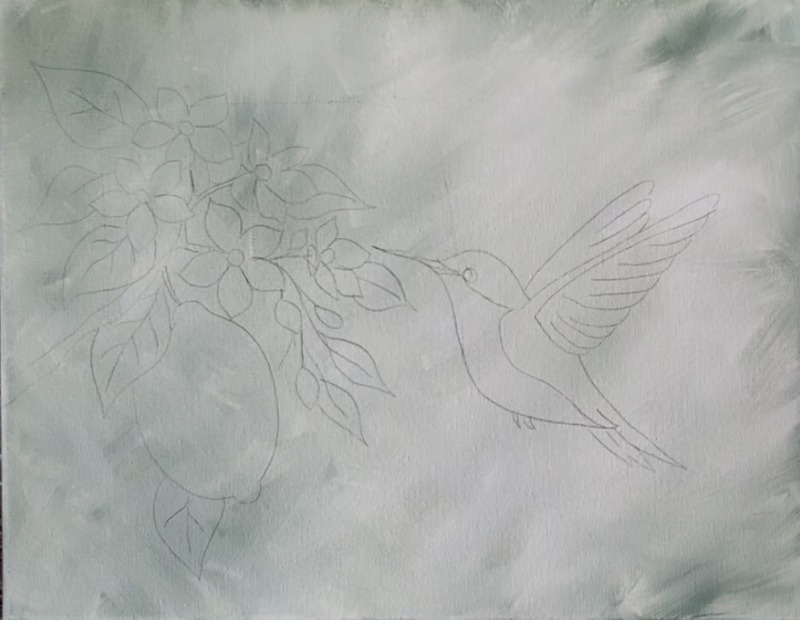
2. Transfer Design To Background
Print the template on two sheets and tape together.
Place a sheet of graphite paper below the template and firmly trace the design with pencil to transfer the lines to the canvas. Note: if you don’t have graphite paper, you can rub pencil on the back of the print out and then trace the front.
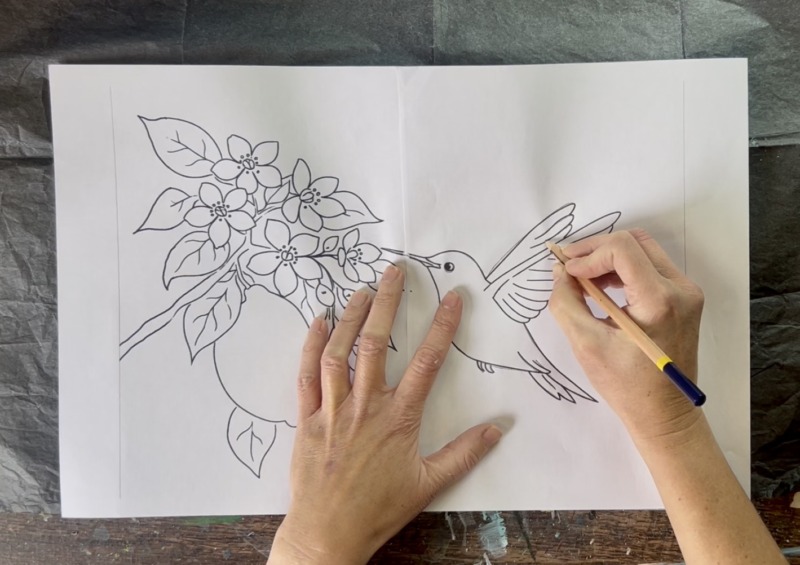
Draw “division lines” below the eye and wing of the hummingbird as shown below. This line will help you with the different blocks of colors on the hummingbird.
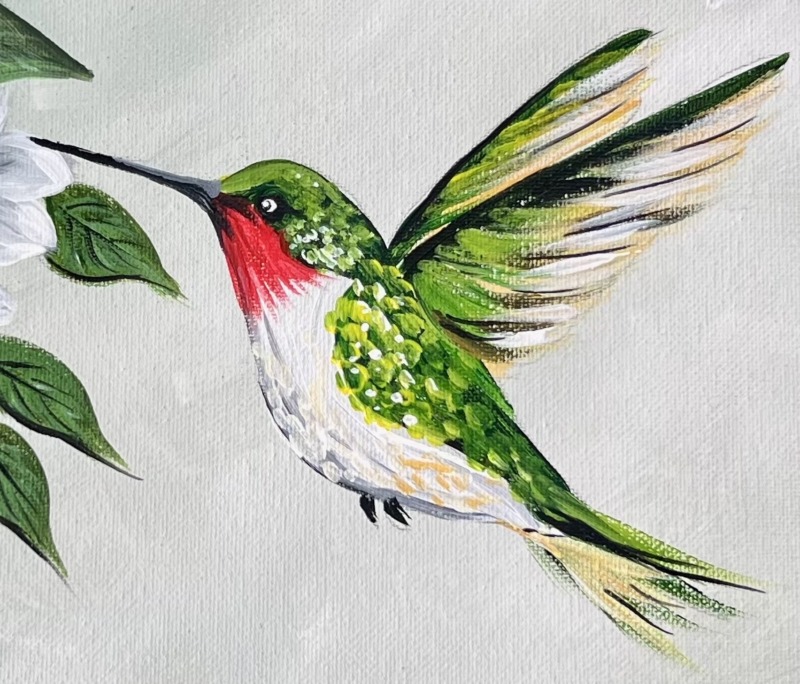
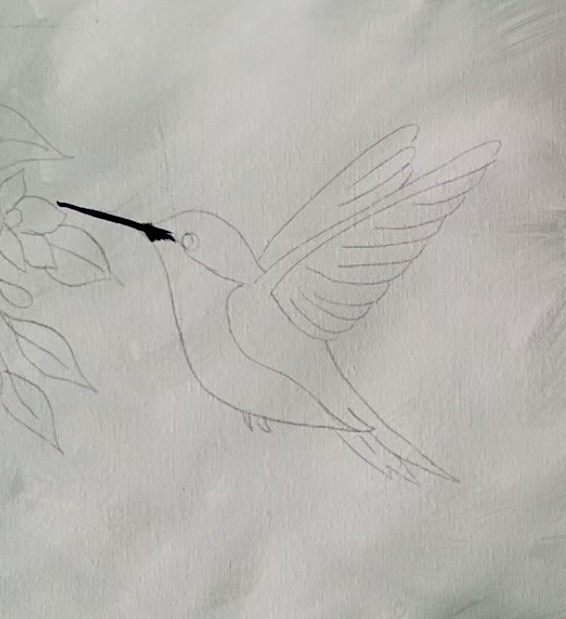
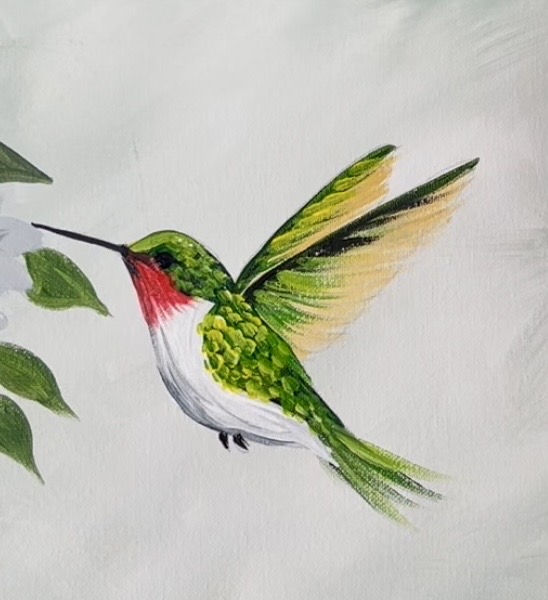
3. Paint Beak, Head, Back & Tail
Use the #8 long round brush and “mars black” to paint the beak of the hummingbird.
Next, mix 1 part “mars black” to 3-4 parts “hooker’s green hue”. This will make a really dark green. Use the #8 long round brush to paint the head, around the eye and the entire back. To do the tail, drag your brush downwards to create a light “dry brush” style paint stroke. Release the pressure at the end of the tail to create that thin “translucent” feather look.
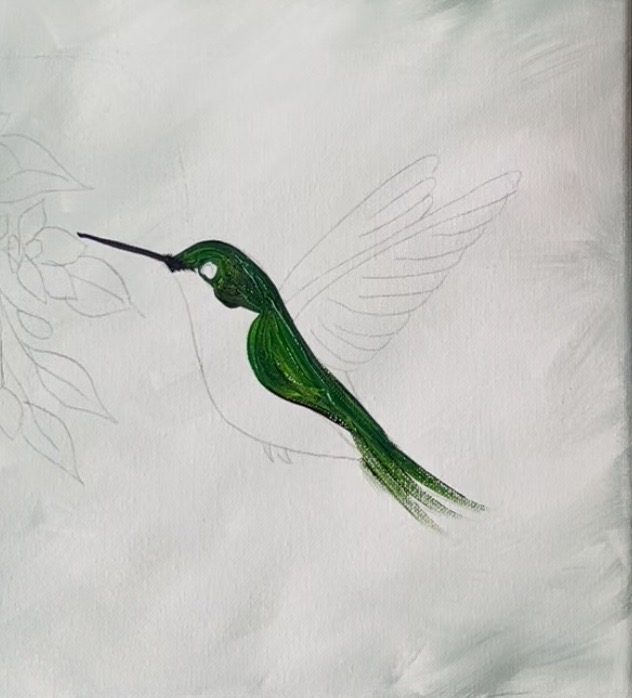
4. Paint Wings/ Belly
Use the #8 long round brush and that dark green color to paint the top edge of both of the wings. Then “drag” the dark green downwards in an angle (going the same angle as the drawing lines on the wings). Make those angle paint strokes sort of “dry brush” style by releasing the pressure of the brush as you drag downwards.
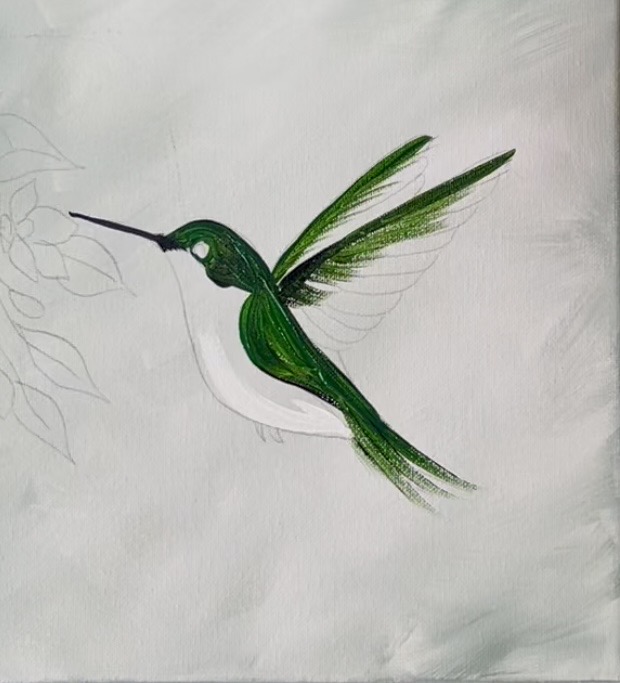
Rinse the brush. Then use the #8 long round brush to paint the entire under belly and throat part of the humming bird with “titanium white”. Blend a small amount of “mars black” on the bottom/ side edge of the bird for some shading/ shadowing in that area.
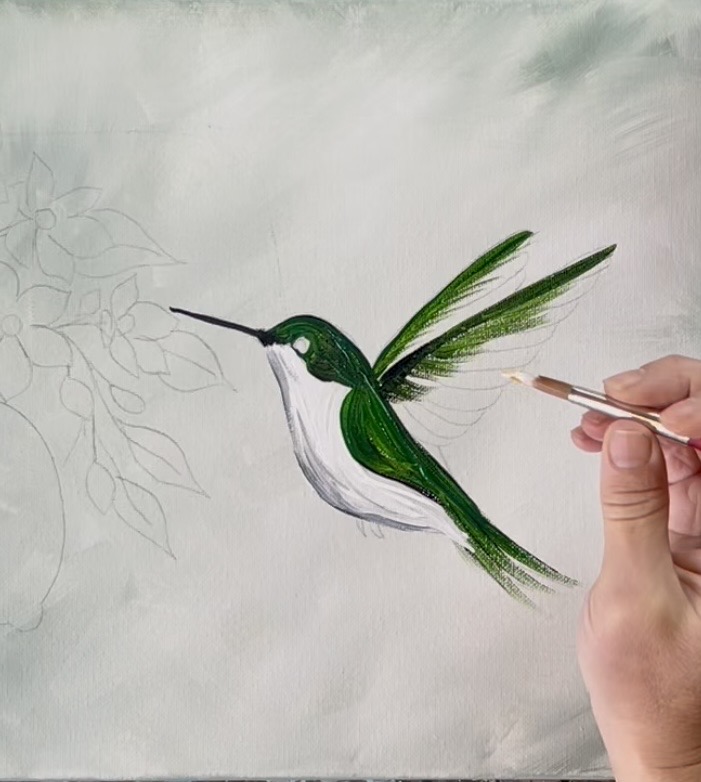
Next, rinse the brush. Mix “yellow oxide” with “titanium white” (about equal parts). Use the #8 long round brush to drag paint strokes following the lines on the wings. Try to drag some of the green with it so it blends a little at the top.
Then wipe the brush. Load it into “hooker’s green hue” and paint little line paint strokes that overlap the yellow at the top of the wings. Paint little black marks on the bottom for the feet.

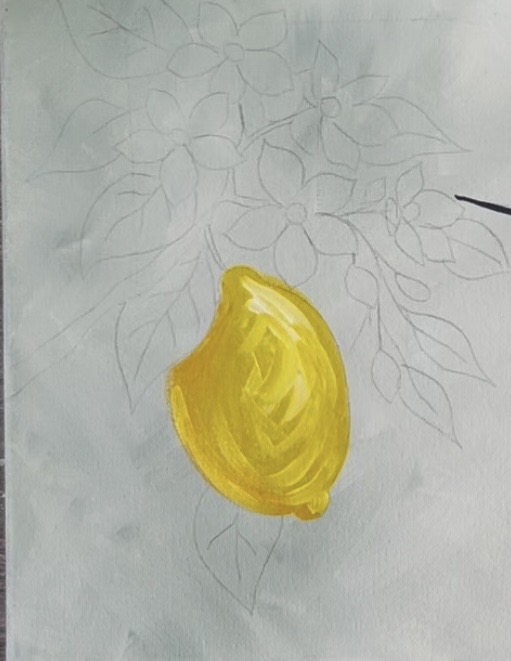
5. Paint Lemon
This first layer will be just blocking in the color of the lemon. We will add a texture layer to this after it dries. Use the #4 round brush. Paint the left side of the lemon “yellow oxide”. Paint the right side of the lemon “primary yellow”.
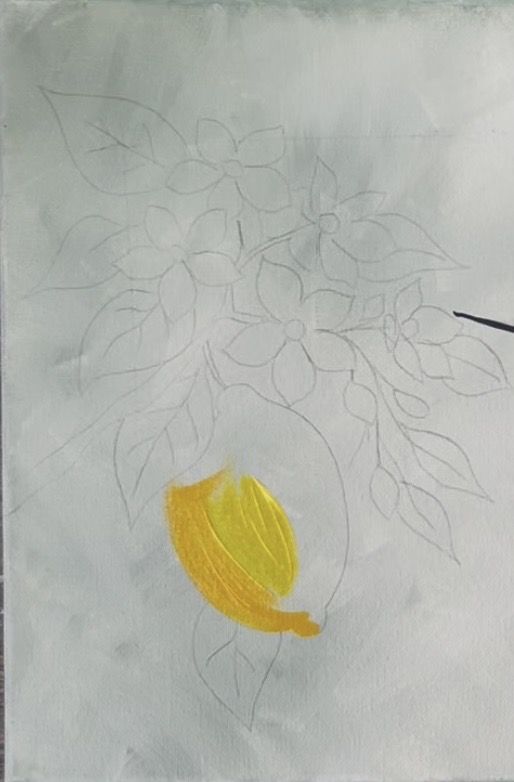
Make your paint strokes curve in the shape/ direction of the lemon. Then add just a bit of “titanium white” to the brush. Paint white on the right side of the lemon and blend it in with the rest of the yellow. This will make the right side of the lemon brighter/ highlighted.
6. Paint Leaves
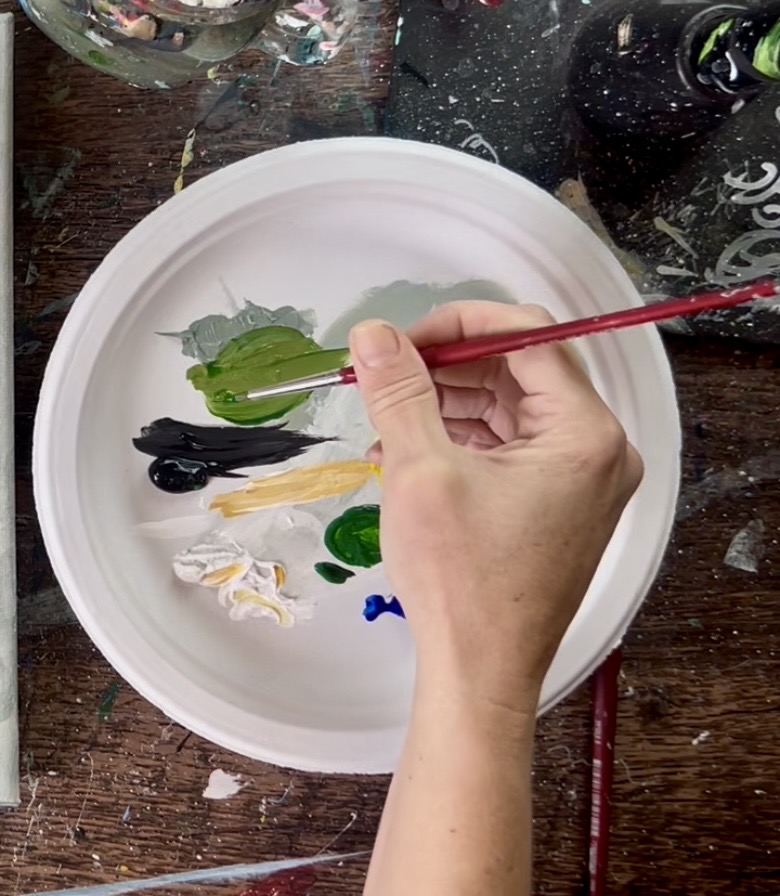
Mix your base color of the leaf on your paint palette. This is about 3 parts “hooker’s green hue”, 1 part “titanium white”, 1 part “yellow oxide” and a very tiny bit of “mars black”. Mix this together to get a dark, muted green.
Paint all of your leaves with this “dark muted green” color. Use the #4 round brush for this and outline the edges of the leaves then fill them in. You can add just a touch of black into the green and blend it in areas where the leaf might be a little shadowy (such as the leaf that is behind the lemon or areas of the leaves that will be behind blossoms).
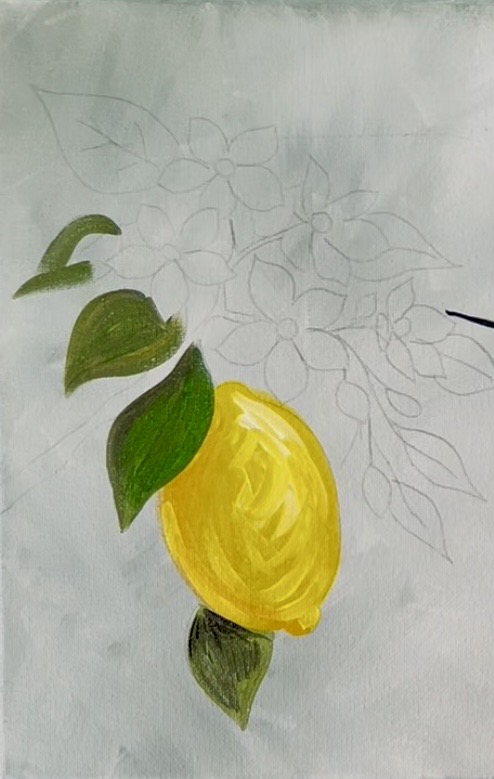
Paint a few random “abstract marks” with the green in areas behind/ around the flowers. This helps fill the blank spaces in a bit more.

7. Paint Flowers (first dark layer)
The first layer of these flowers will look very dim and close to the background color. This layer is important because it will help set the shadowing for the flowers when we paint the petals bright white in a later step. Mix about 1 part “mars black” with 3 parts “titanium white” to make a light to medium gray color. Paint all of the petals with this gray color using the #4 round brush. My petals look a bit varied because I altered some of the gray to be darker in some areas and lighter in other areas. Paint the “buds” of the flowers with this gray color as well.
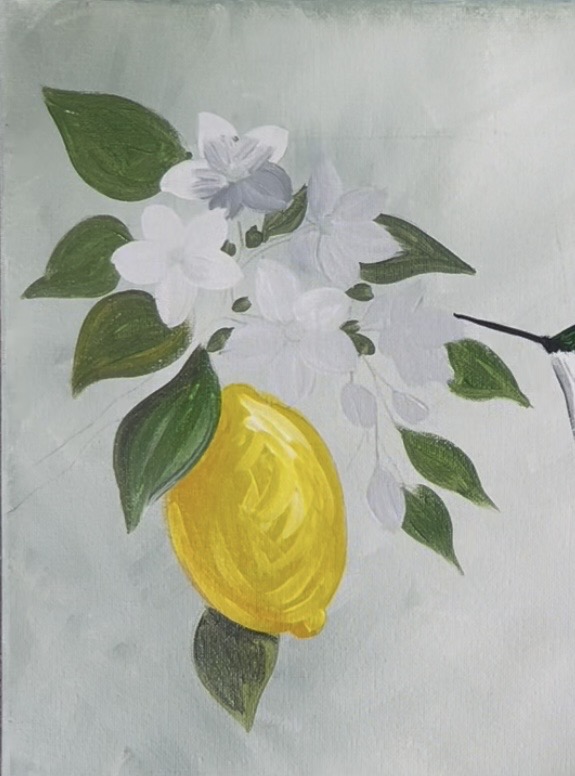
Then in the center of all of the flowers, drag just slightly darker gray on the bottom of the petals and about a quarter of the way up each of the petals. This will ensure the center of the flowers are more shadowy and this will help them to really “pop” in a later step.
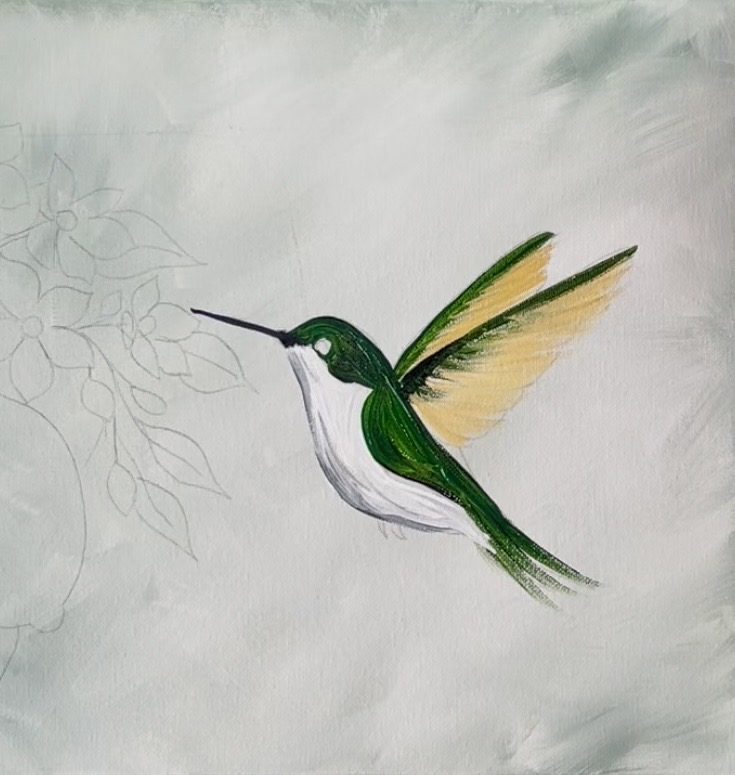
8. Details On Hummingbird
Make sure your first layer of the hummingbird is dry. Use the #8 long round brush and the color “cadmium red medium hue” to paint the red throat area of the hummingbird. Drag your paint strokes down at an angle about an inch below the beak. On the edging of this red area, drag little “dry brush style” lines so the edging sort of fades into the white part of the bird.
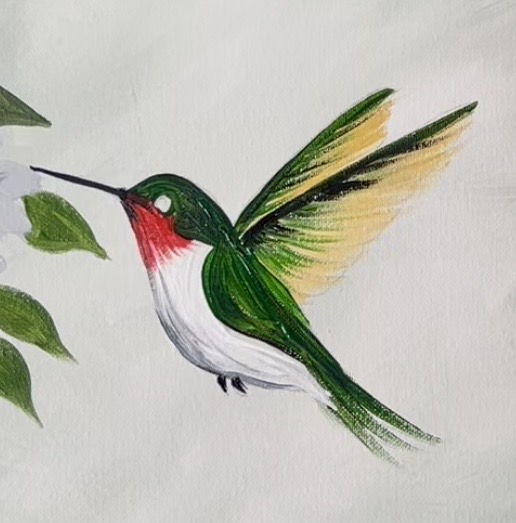
Next, use “mars black” and the #8 long round brush (or #4 round) to paint the entire eye black.
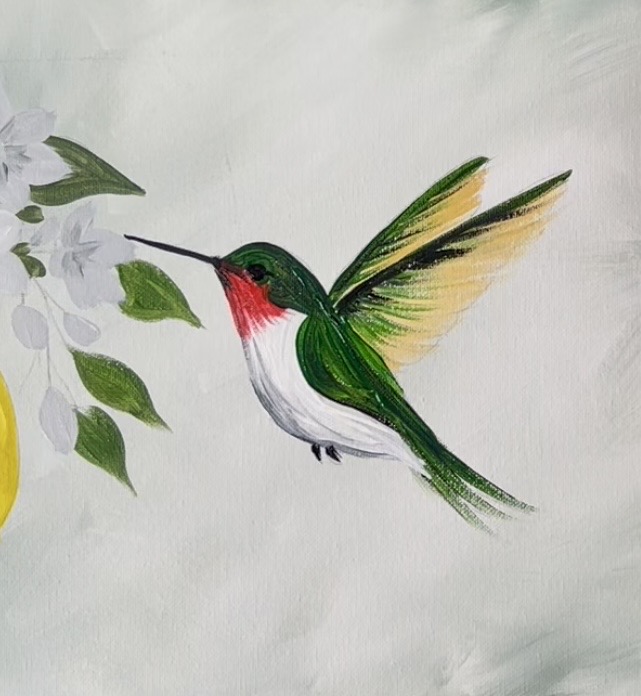
Then use the #4 round brush to paint little feather textures on the hummingbird. Load the tip of the round brush into “primary yellow” and “hooker’s green hue”. Make little oval marks on the dark green back side of the hummingbird. Fill this area in with the little “feather marks” but don’t cover all of the dark green.
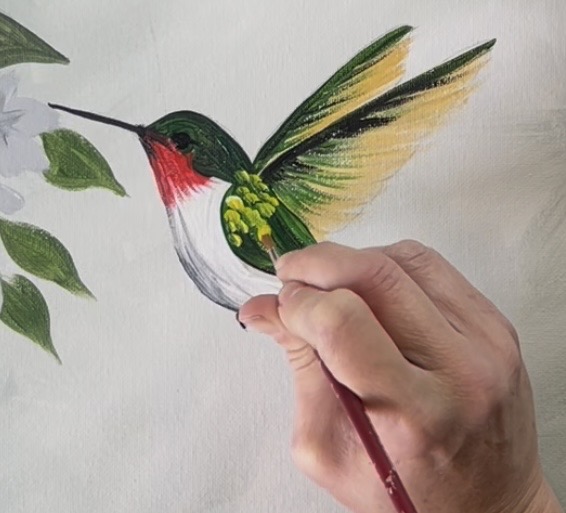
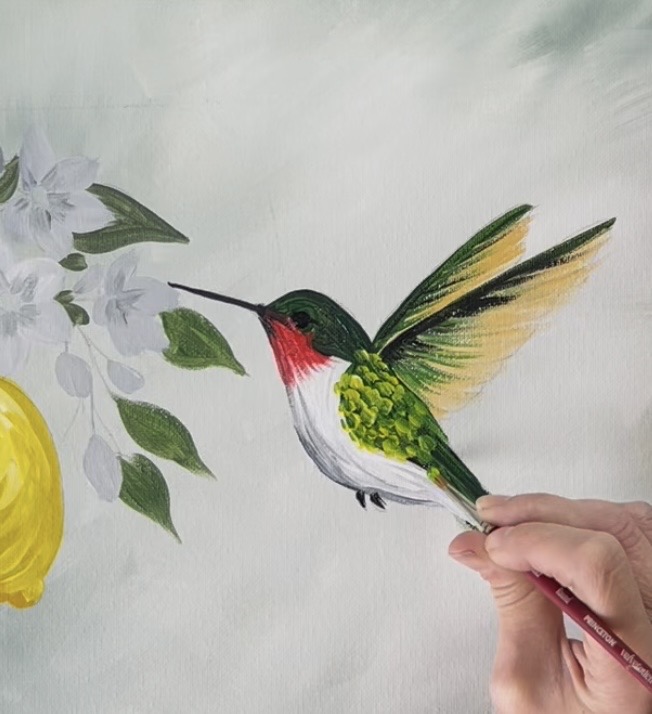
Make these same little marks on the head and go around the black eye.
Next, add some of this same style of texturing to the belly area of the bird. Use the #4 round brush and “titanium white” to make little white texture markings. Then add a tiny bit of “yellow oxide” to the brush with the white and add light cream color markings on the very bottom of the bird (by the tail). Use this yellow oxide mixed with white on the brush to paint a few feathers on the bottom of the tail. Then add some white markings and a few black markings (dry brush style) to the wings of the bird.
Use either a toothpick or the end of the round brush to paint a very small white dot/circle inside of the black part of the eye.
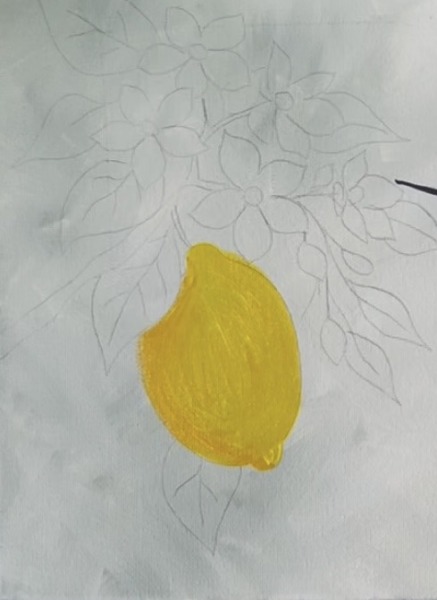
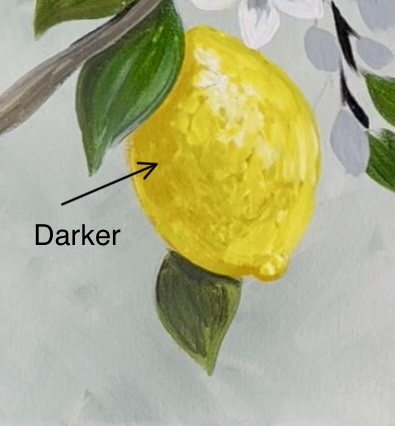
9. Paint Texture on Lemon (optional)
We painted our first layer on the lemon. This next layer is to add texturing. Start by using the #4 round brush. Mix yellow with white (equal parts). Then paint little “splotches” or “dots” by stippling the brush. Do this in the upper right portion of the lemon. Note: when you add this stippling, you don’t want to cover all of your first layer.
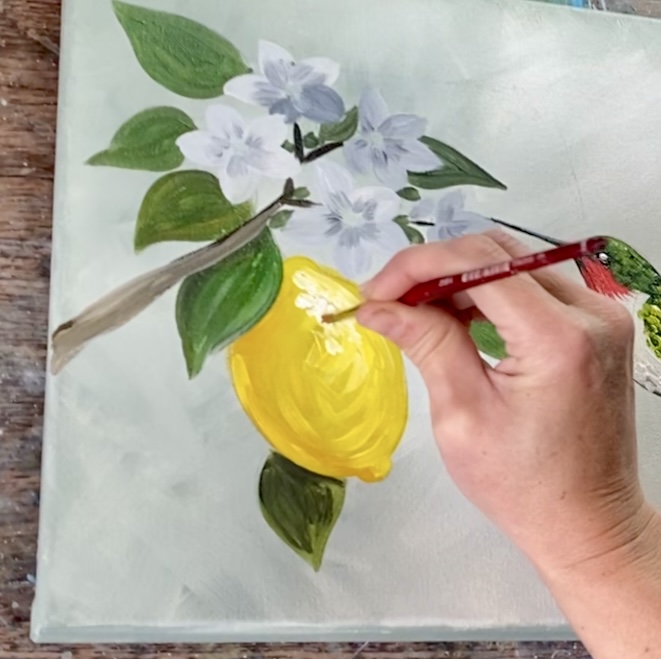
This will highlight that area of the lemon even further. Next, wipe the brush. Load just “primary yellow” on the brush. Then do the same type of “stippling” on the rest of the lemon around your bright highlight layer.
Then wipe the brush. Load it into “yellow oxide”. Add darker “splotches” around the leaf and on the far left side of the lemon.
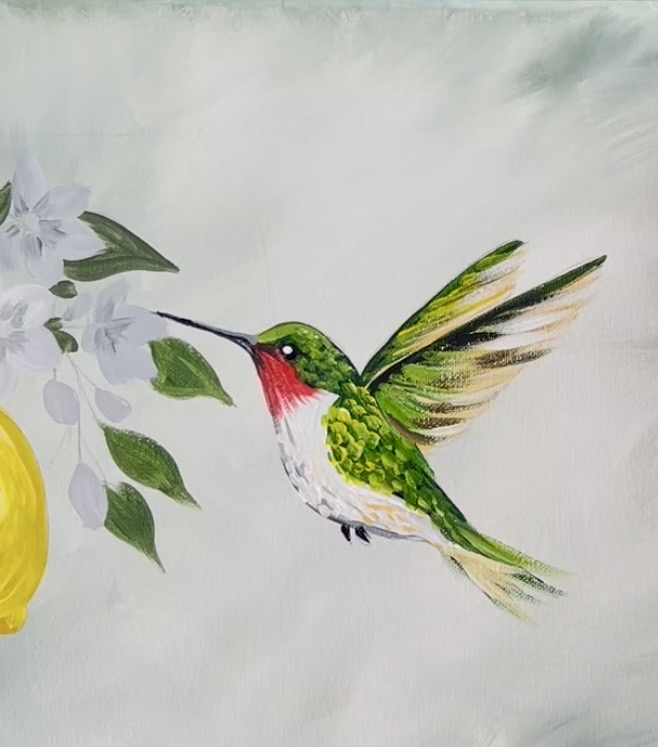
10. Paint Bright White Layers On Flowers
Make sure the first gray layer of your flowers is dry. Then use the #4 round brush and “titanium white” to paint all of the petals but leave the center part of the flowers the dark gray. Drag your brush inwards towards the center and release the pressure of the brush so the gray remains. Then use primary yellow to paint little yellow dots in the center of the flowers. Add a few tiny red dots as well.
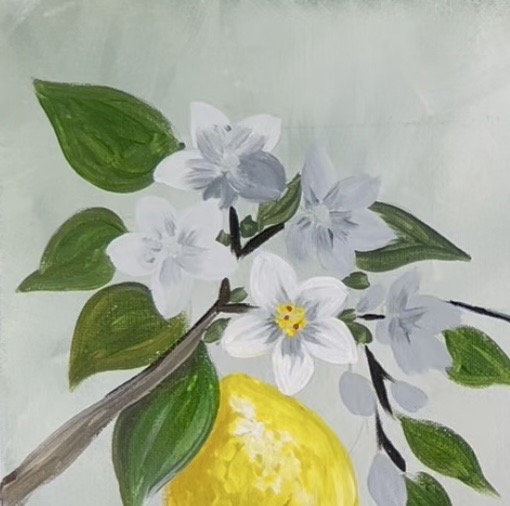
Repeat this for all of the flowers ensuring the edges of the petals are bright and white and the centers are dark.
11. Paint Lines On Leaves (optional)
Use the same “base color” that you used for the leaves earlier. Add “titanium white” into it to turn it into a lighter tint of green. Then use the #4 round (or #8 long round) to paint a line down the middle of all of the leaves and lines going outwards from the middle line.
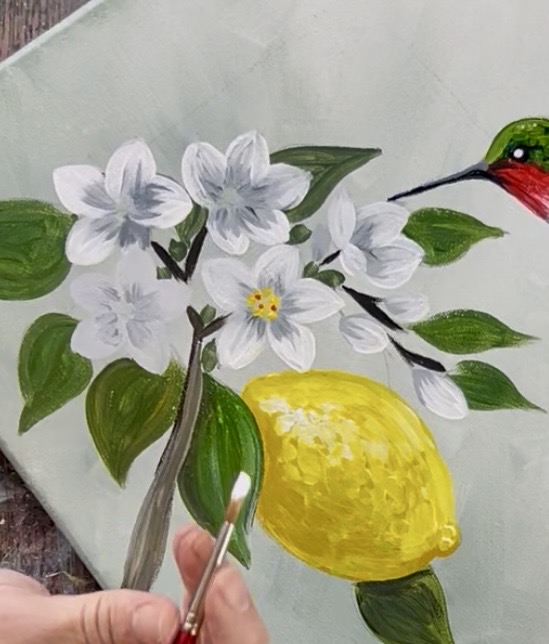
12. Final Touches (optional)
You can fill other areas of the painting with more lemon blossoms. I chose to add more flowers in the upper right corner! Start by painting little oval shaped petals. Lemon blossoms have 4-5 petals. Start by making these petal shapes gray (with the intention of adding another white layer). You can also draw out your petals/ leaves first before painting.

Paint the little yellow and red dots in the center.
Then add stems, leaves and more flower buds to fill the area.
Other final touches fore this include adding a final bright layer to all of the white flowers in the painting. Add this just on the ends of the petals and leave the centers dark. This really helps to make the blossoms pop!
You can also add a few more feather texture “dots” to the hummingbird’s head and back area. Do this with the same yellow/green but add a touch more white to it. Paint just a few of these bright dots in those areas to give the hummingbird and added “sparkle”.
Finally, use a toothpick to paint a very tiny white dot over the tiny black circle painted on the eye.