Would you like to save this?
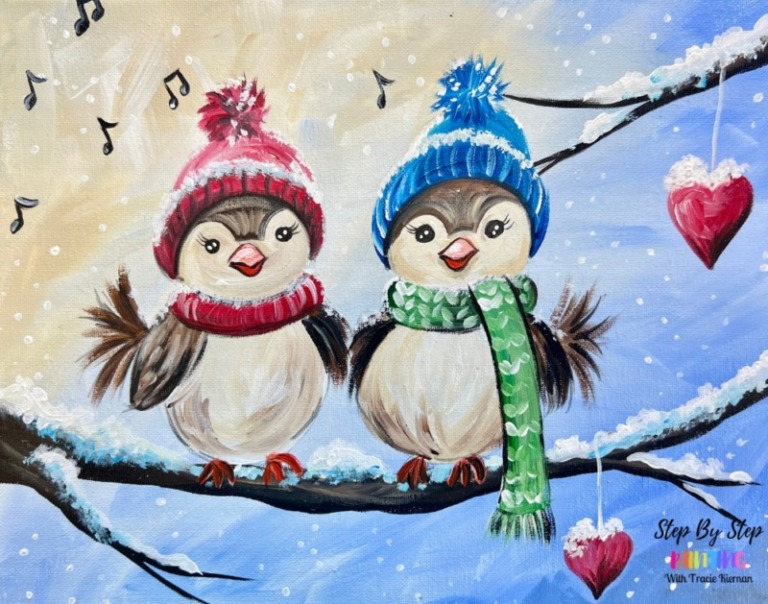
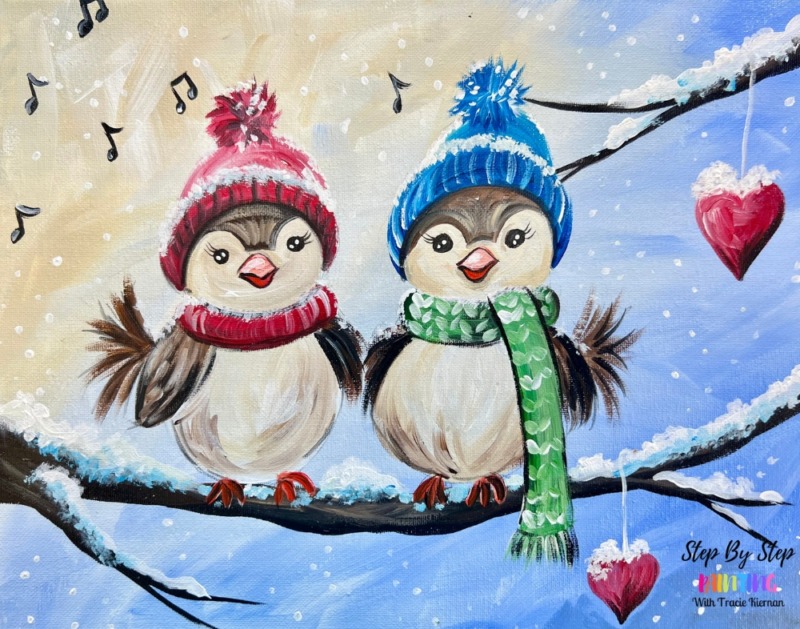
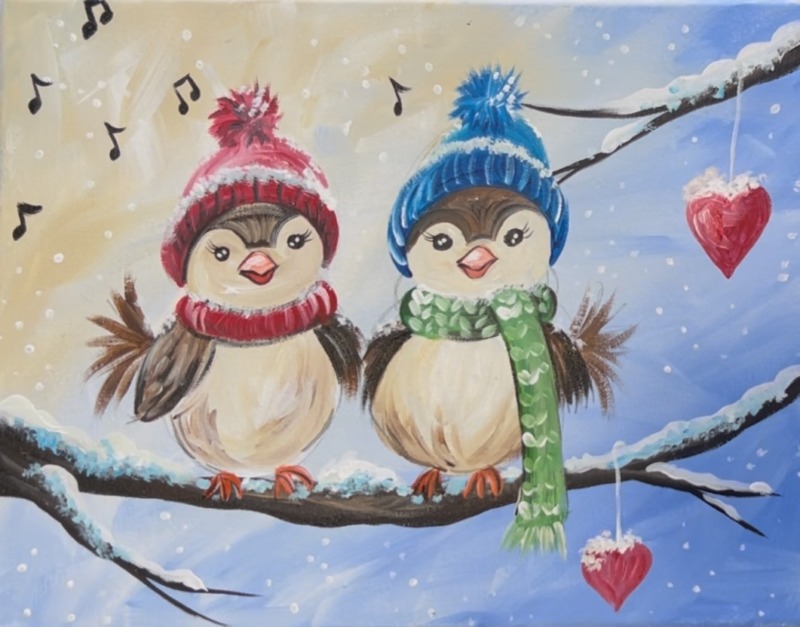
Cozy winter friends, sharing a sweet song. ❄️
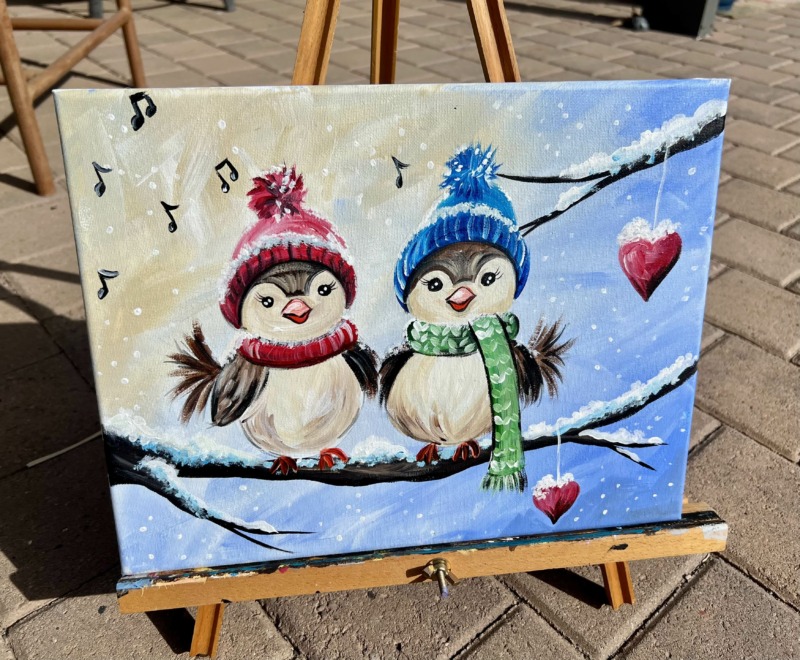
This tutorial will show you how to paint two cute songbirds sitting on a snowy branch in winter attire. The painting doubles as both a winter painting and an early Valentine’s Day painting with the cute little hearts hanging from the branches.
Enjoy and happy painting!
Materials Needed
Winter Songbirds
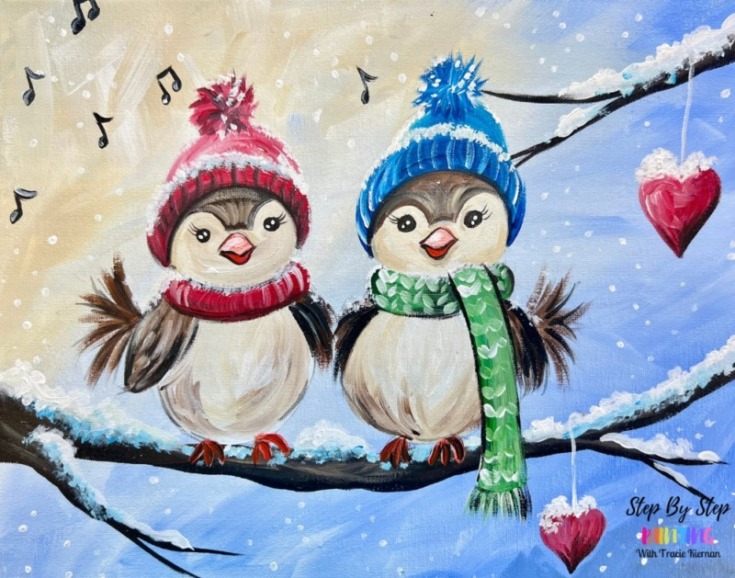
Cozy winter friends, sharing a sweet song. ❄️
Materials
- 11 x 14 Canvas
- Acrylic Paint
- Paint Brushes
- Drawing Pencil & Eraser
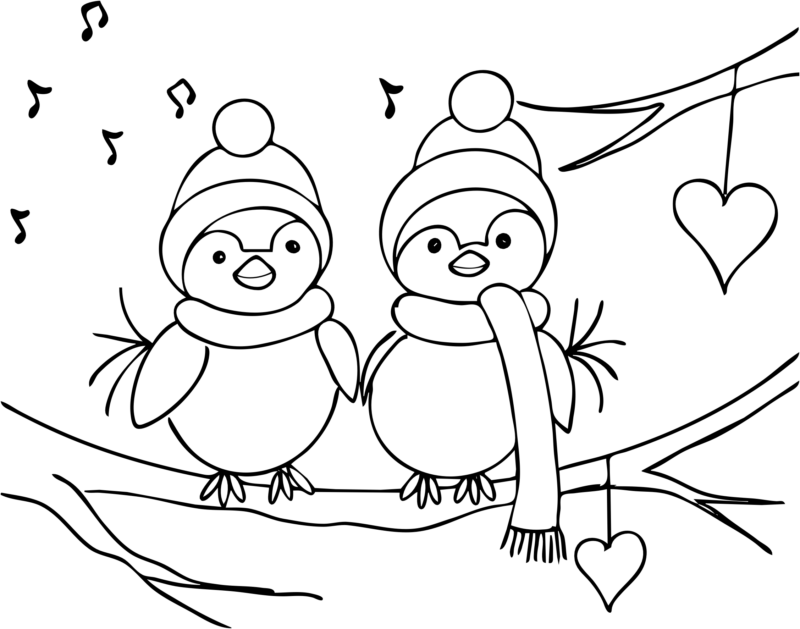
- Optional Traceable
- Optional Graphite Paper
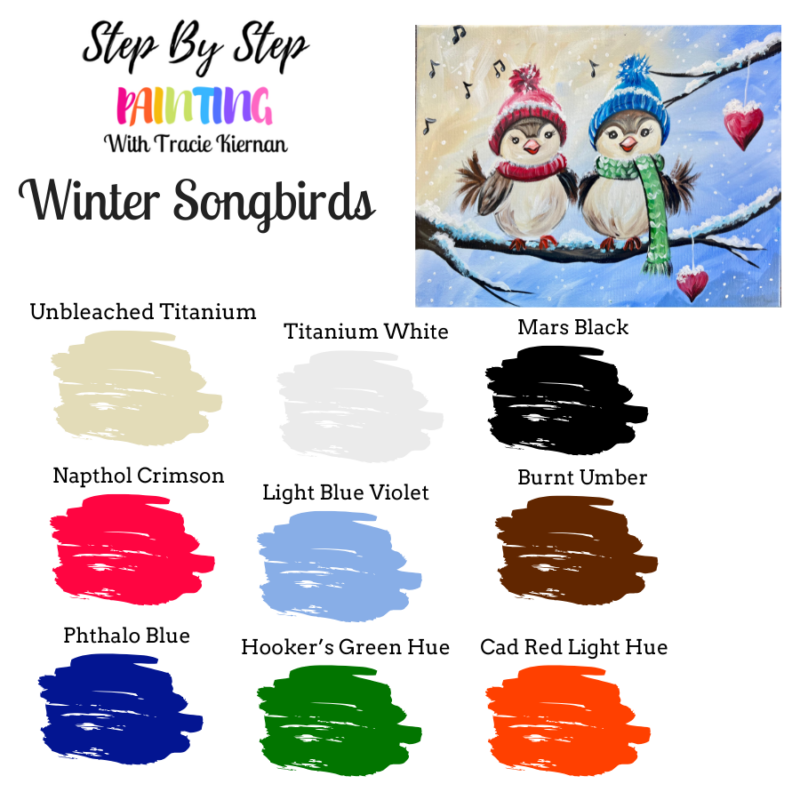
Colors
- Titanium White
- Mars Black
- Burnt Umber
- Unbleached Titanium
- Napthol Crimson (customizable color)
- Cad Red Light (or orange)
- Hooker's Green Hue (customizable color)
- Light Blue Violet
- Phthalo Blue (customizable color)
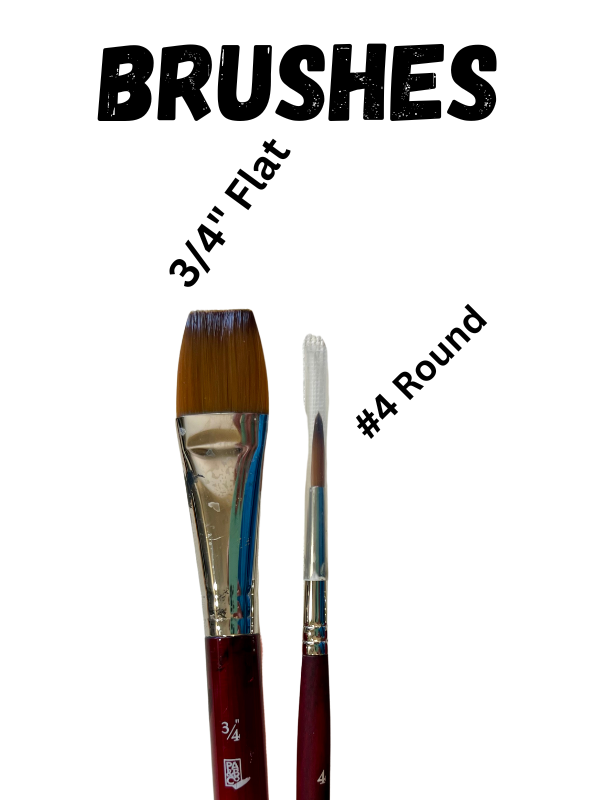
Brushes
- 3/4 Flat
- #4 Round
Color Palette
Traceable
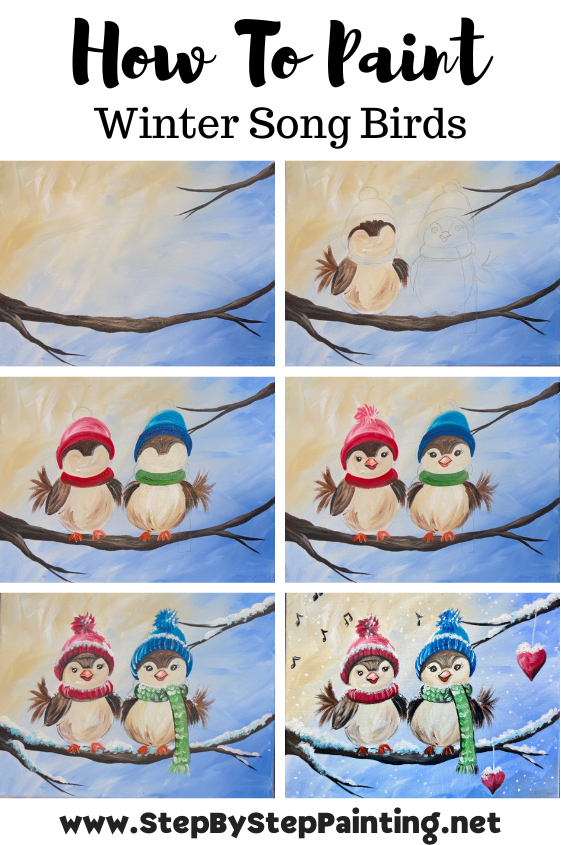
Directions At A Glance
Video
Step By Step Instructions
1. Paint background
Load your paint palette with the three colors: titanium white, unbleached titanium (beige) and light blue violet. Use the 3/4″ flat wash brush. Load the brush in water and “tap it dry”. Then load the brush into just the blue.
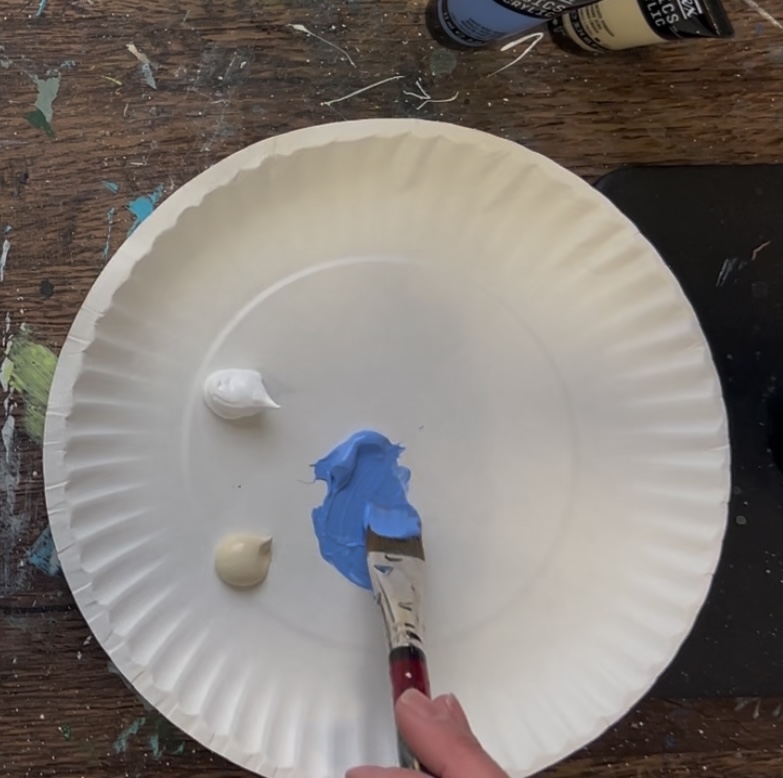
Start in the lower right corner area of the canvas. Paint large angle paint strokes to fill this corner region.
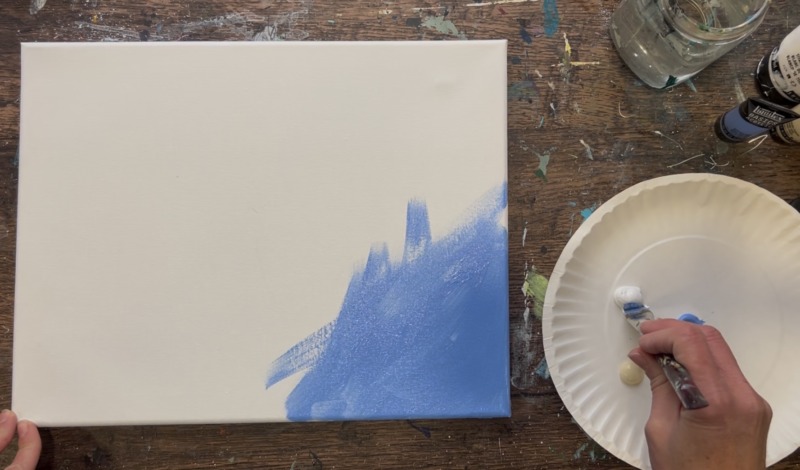
Before it dries, load the brush into white paint (without rinsing the blue off of the brush). Blend the white into the blue.
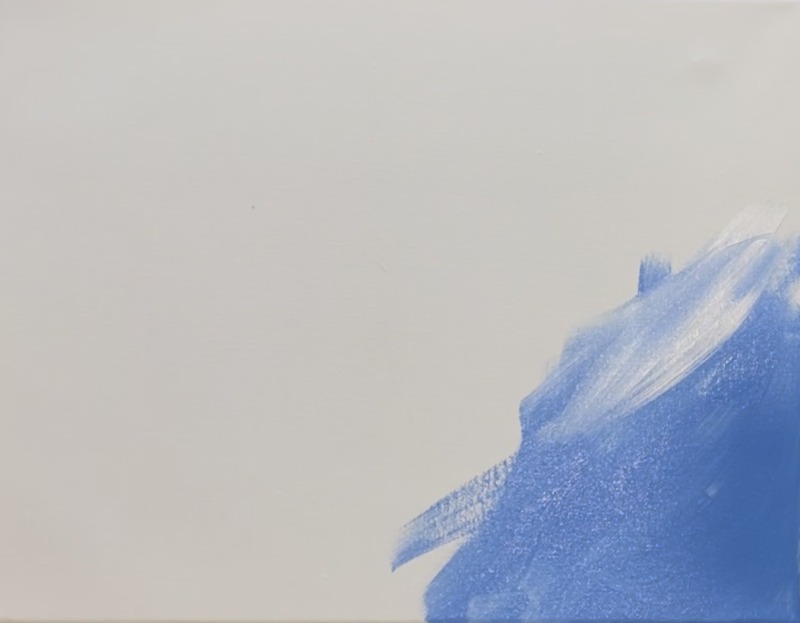
Work your way from the lower right corner to the middle with this white. Blend it into the blue “wet-on-wet” but don’t blend all the way.
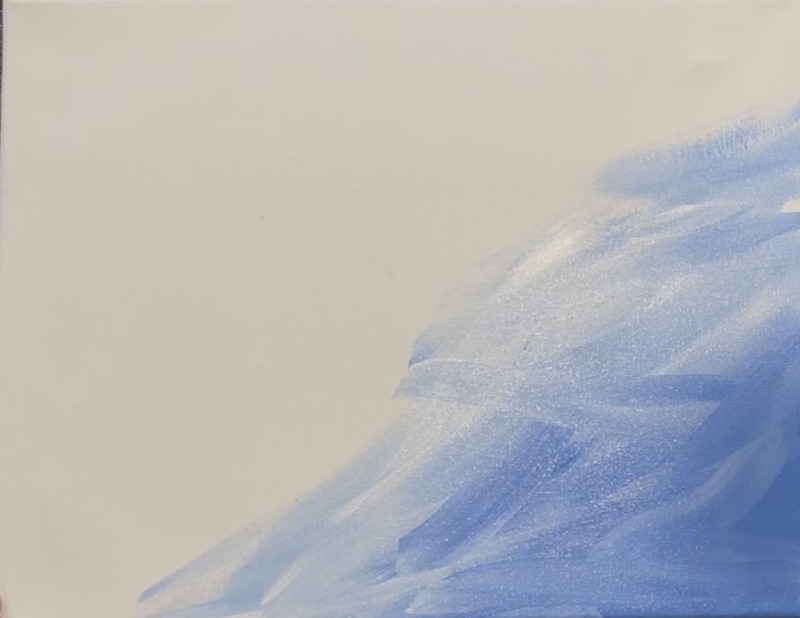
Fill almost the right diagonal half of the painting with this blue and white. Then, without rinsing the brush, load it into the beige.
Tip: if your brush seems “overloaded” with paint, try wiping the brush with a towel. Too much paint on the brush can make it harder to blend.
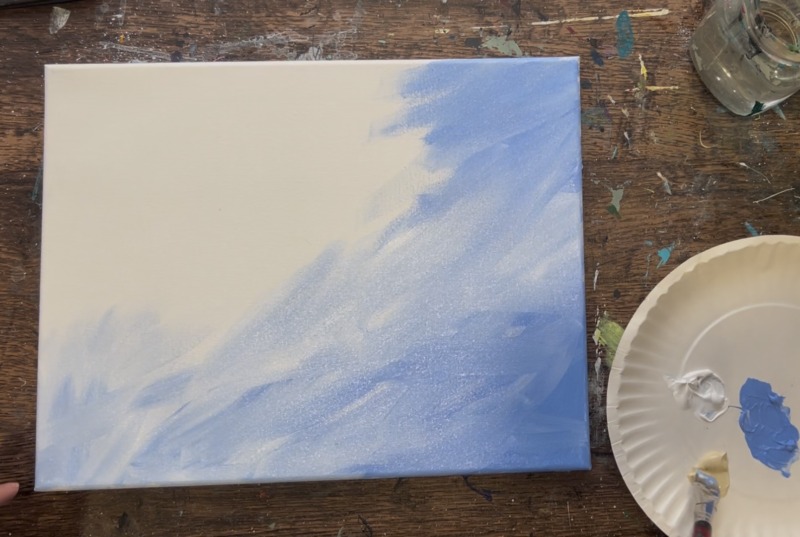
Add the beige in the upper right corner area using the same technique of paint strokes.
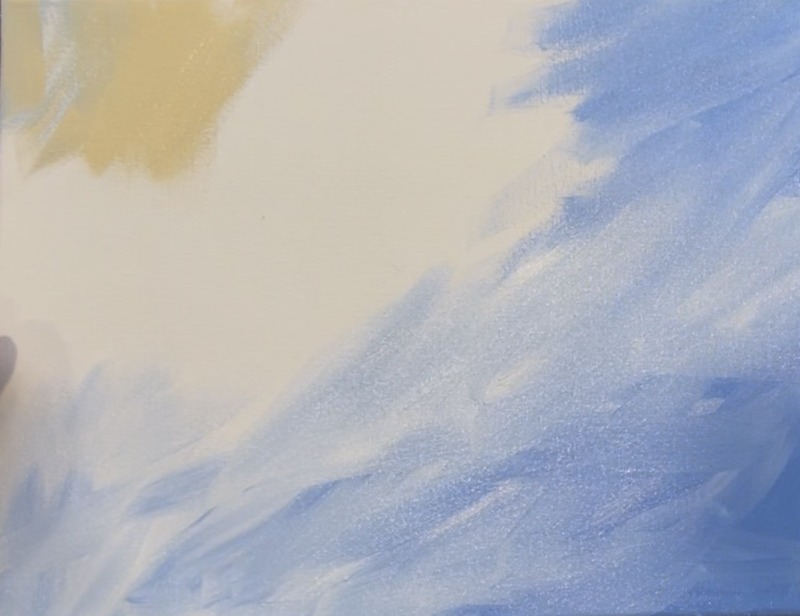
Then add white to your brush and blend it. The beige should turn much lighter. You’ll want to blend this very light beige into the blue area.
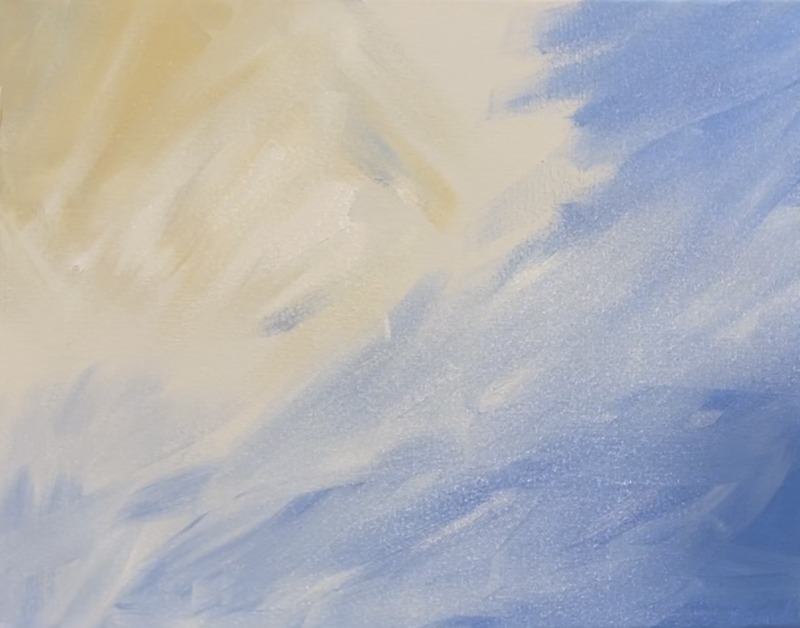
Blend this by painting wet-on-wet paint strokes. Brush some of the light beige color into some of the blue. It’s okay for this beige to blend with this blue! If needed add more white to your brush to help with blending.
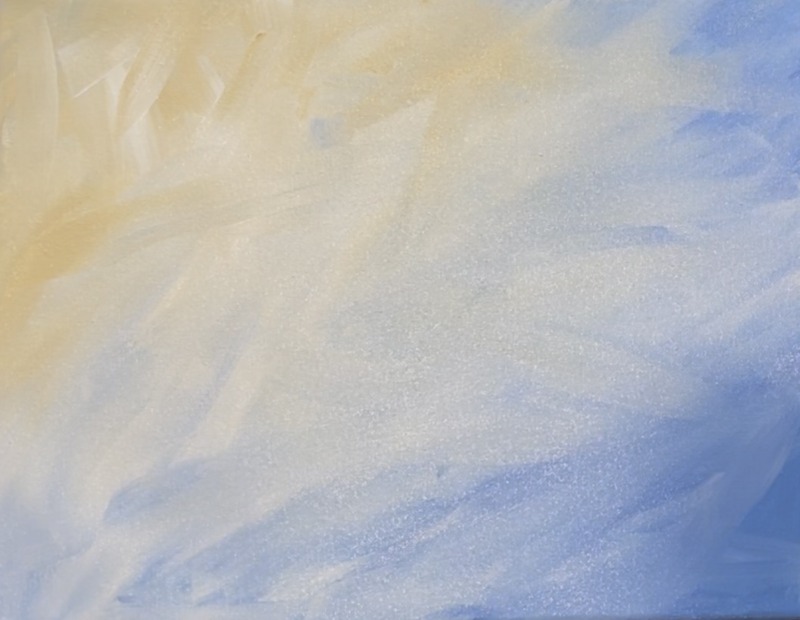
Wait for this to dry before going onto the next step.
2. Paint Branches (or use traceable)
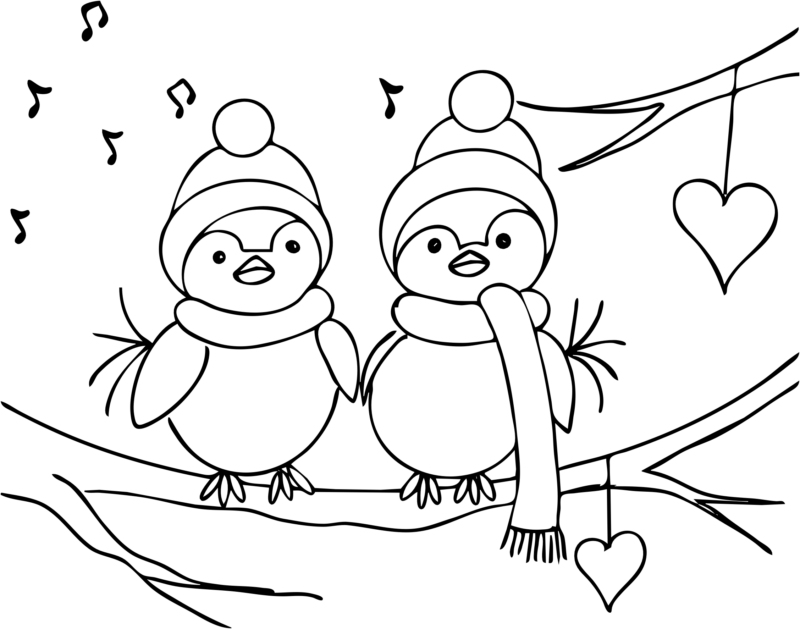
If using traceable, place a sheet of graphite paper below the tracing and use a pencil to transfer the design. The drawing will show up over the painted surface.
Use the 3/4″ wash brush and “mars black” to paint the main branch. Start about 3″ from the bottom left of the canvas and paint a large branch shape. This branch line is very wide on the left side and then gradually becomes thinner. Try making the edging a little “wavy” for a natural look.
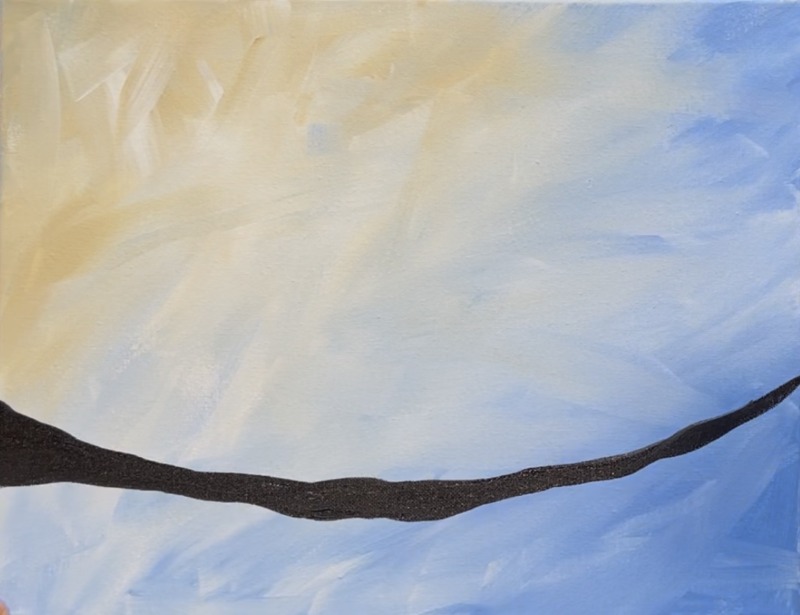
Tip: if you water down the black slightly, it makes it flow easier!
Use the edge of your 3/4 flat brush to paint smaller branches that extend down from the main branch. Hold the brush very lightly to get your line to be thin and more delicate.
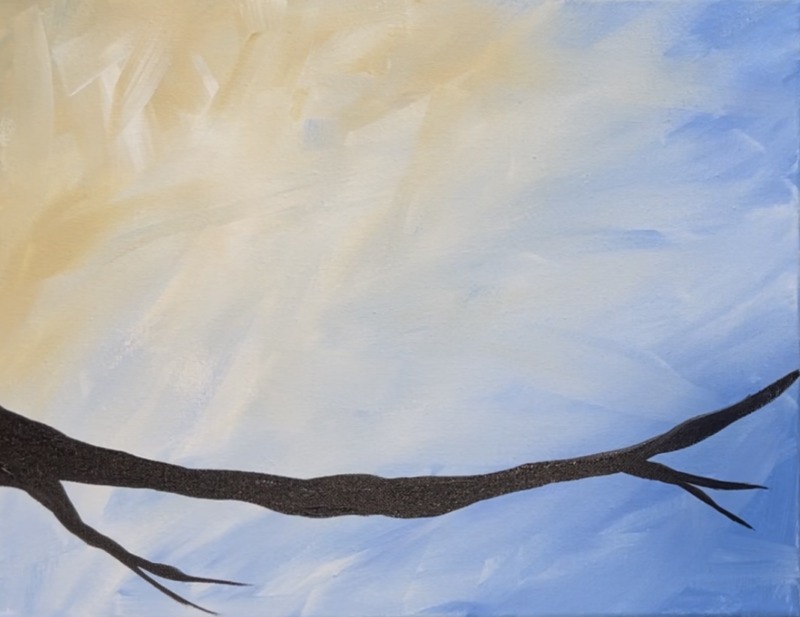
Paint another branch in the upper right.
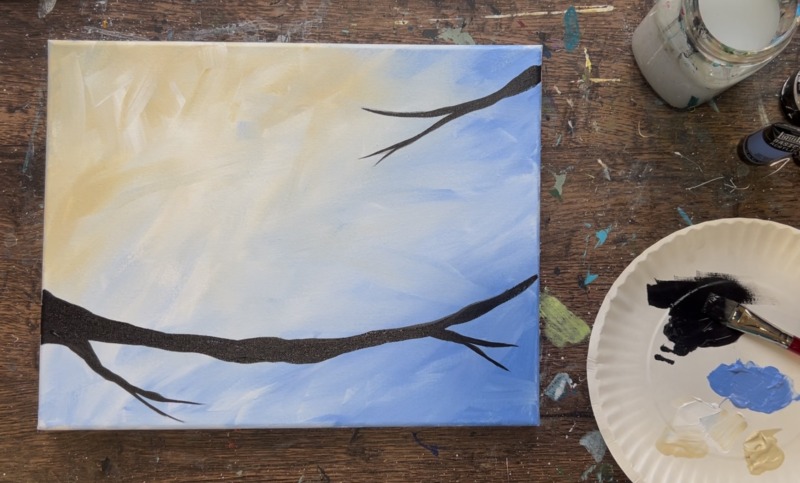
Optional: add color to your branch. Load your paint palette with “burnt umber”. Mix this brown with the beige to make an even lighter brown. Then use the #4 round brush to paint the top edge of your branch. Blend it with the black so that the top of your branch is lighter in color and the bottom of the branch is darker and shadowy.
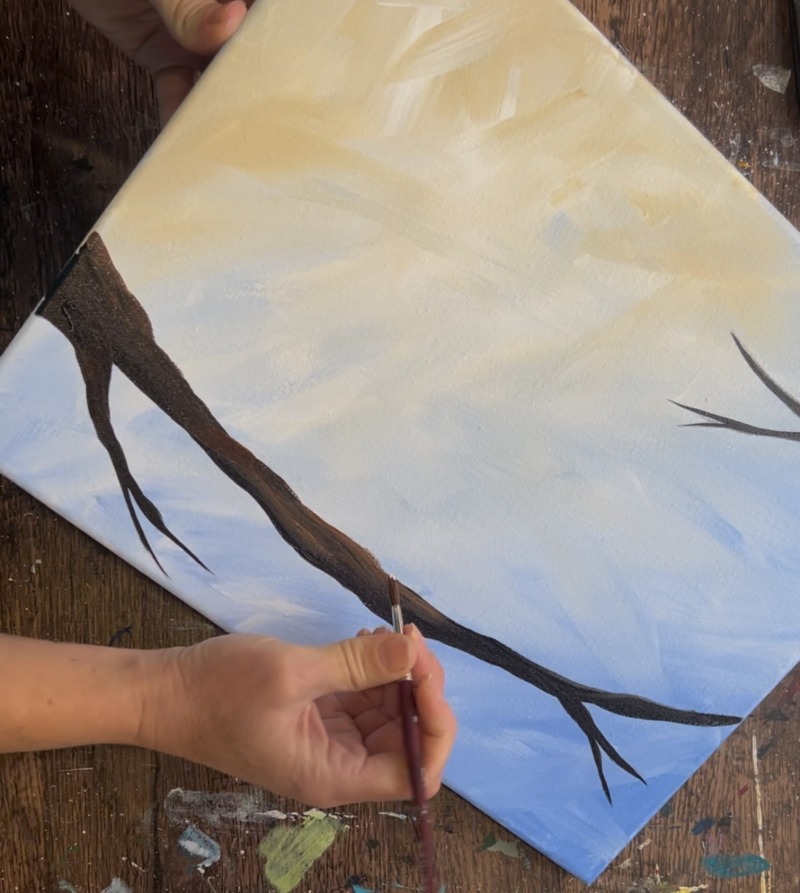
Paint loose wavy paint strokes that blend “wet-on-wet” to get this texture of the tree. If needed, blend a little bit of beige at the top edges of the branches to make some parts of the branches lighter.
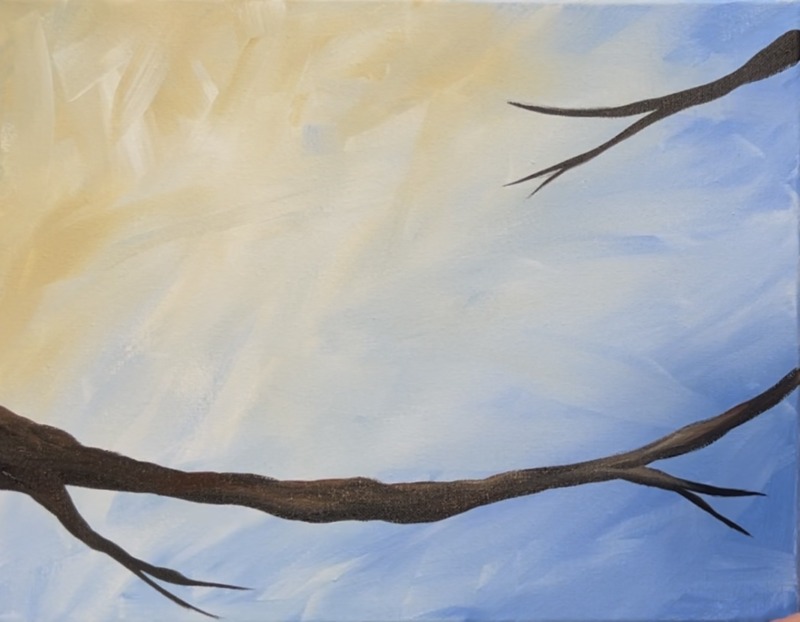
Repeat this technique for all of your branches.
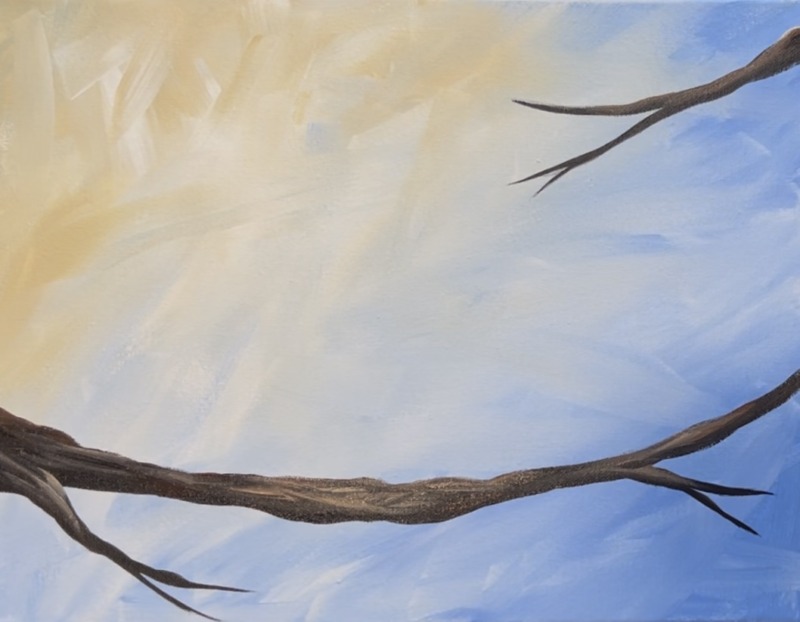
Let this dry before going onto the next step.
3. Draw birds (or use traceable)
Note: The birds are going to be about 5.5″ high from the bottom to the top of its hat.
I started with the bird on the left. Draw an oval for the head and then an egg shape for the body.
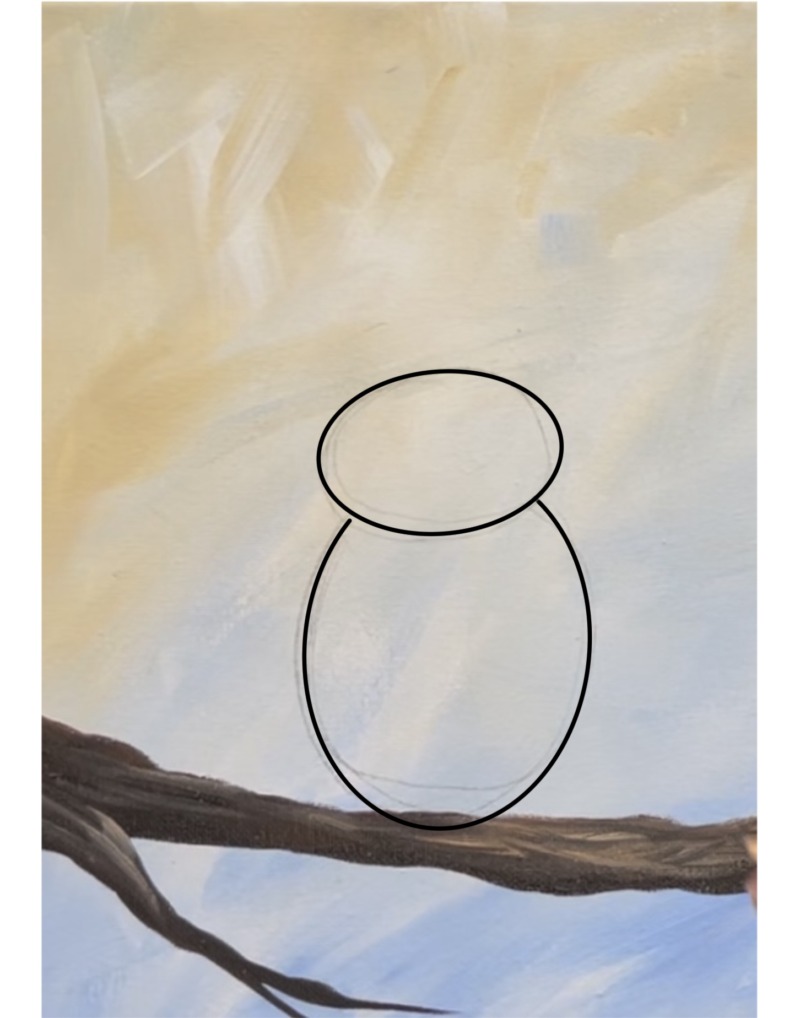
Draw a scarf shape between the head and oval shape. Then draw a “crescent shape” that is just above the head and an arc shape to form the hat plus a little circle shape on the top of the head.

Then draw a curved line that goes flat in the middle top of the head. This portion of the bird’s head will be painted darker.
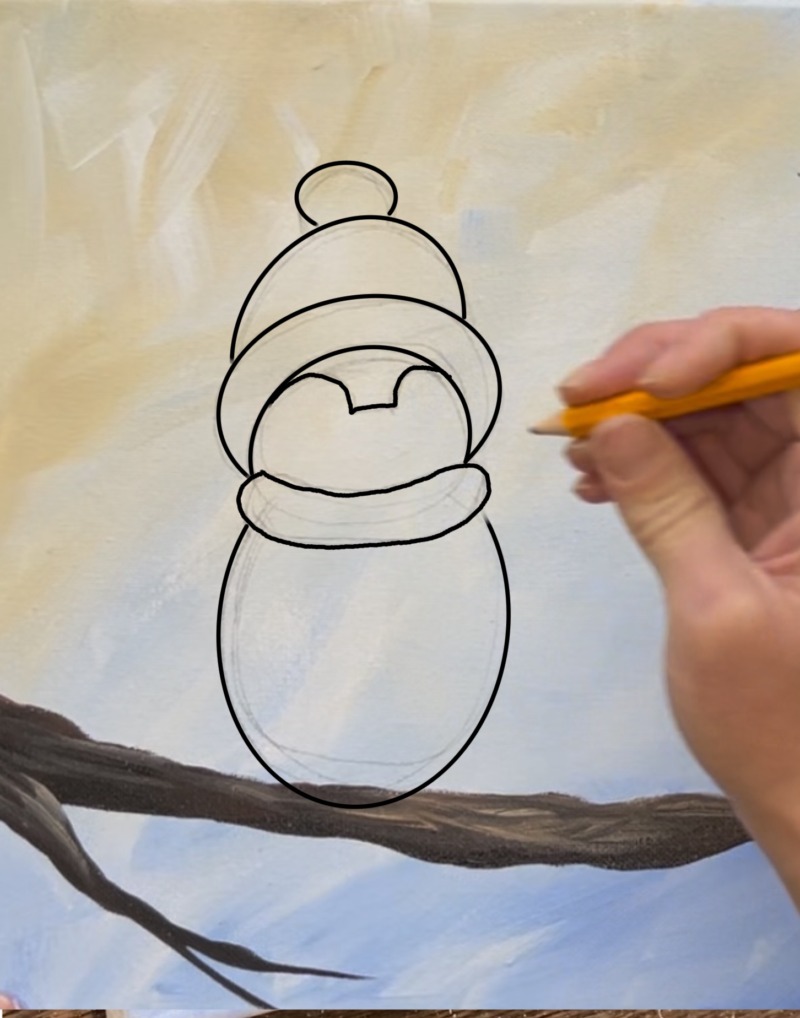
Draw the beak. Draw a little triangular shape that points upwards. Then draw another triangular shape pointing downwards.
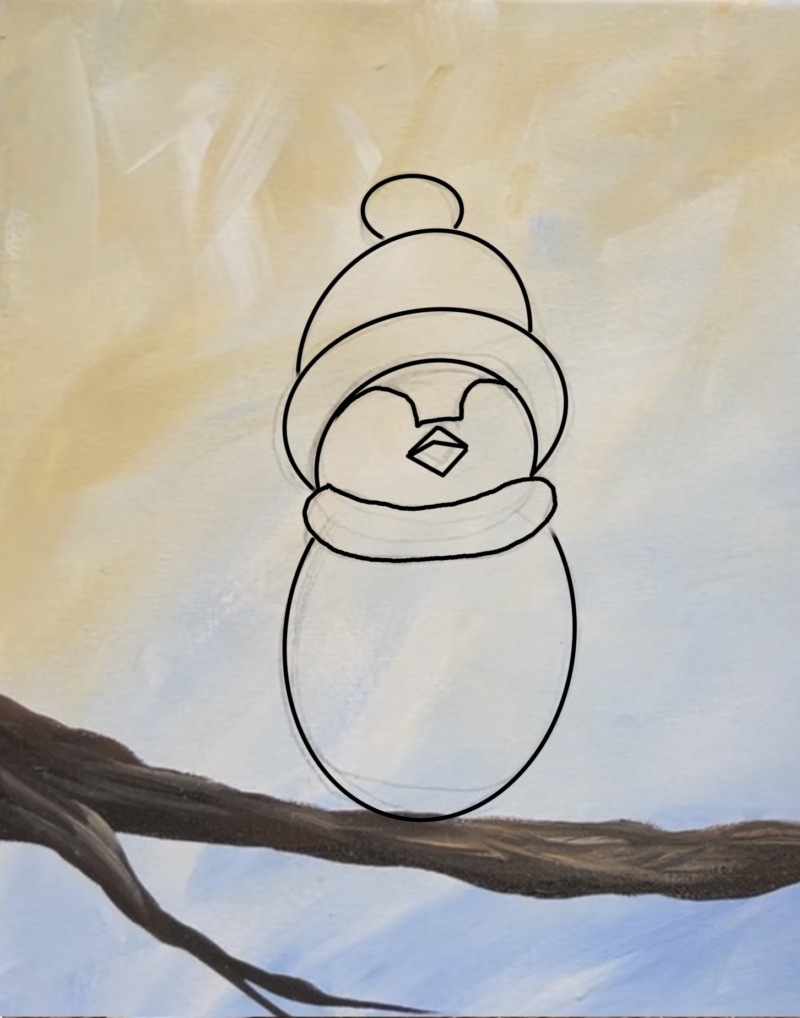
Draw two circles for the eyes. Then draw a little side wing on the right and then a larger side wing on the left. This left side wing will overlap part of the body.
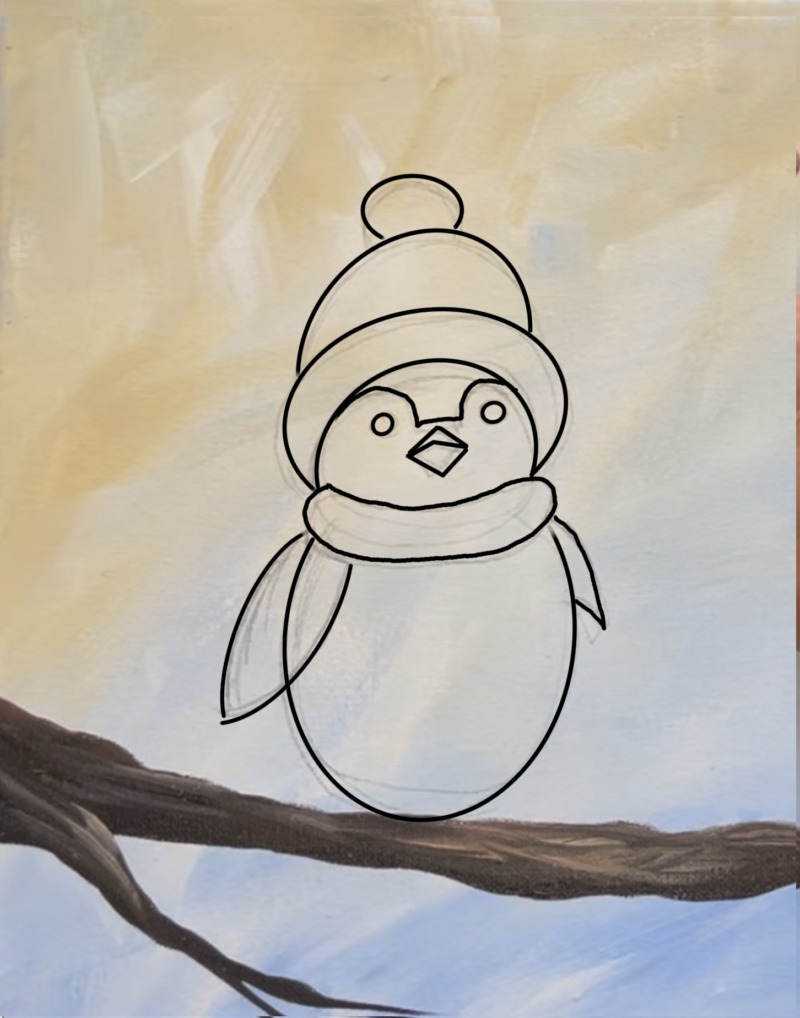
Then draw a few curved lines for the bird’s tail feathers.
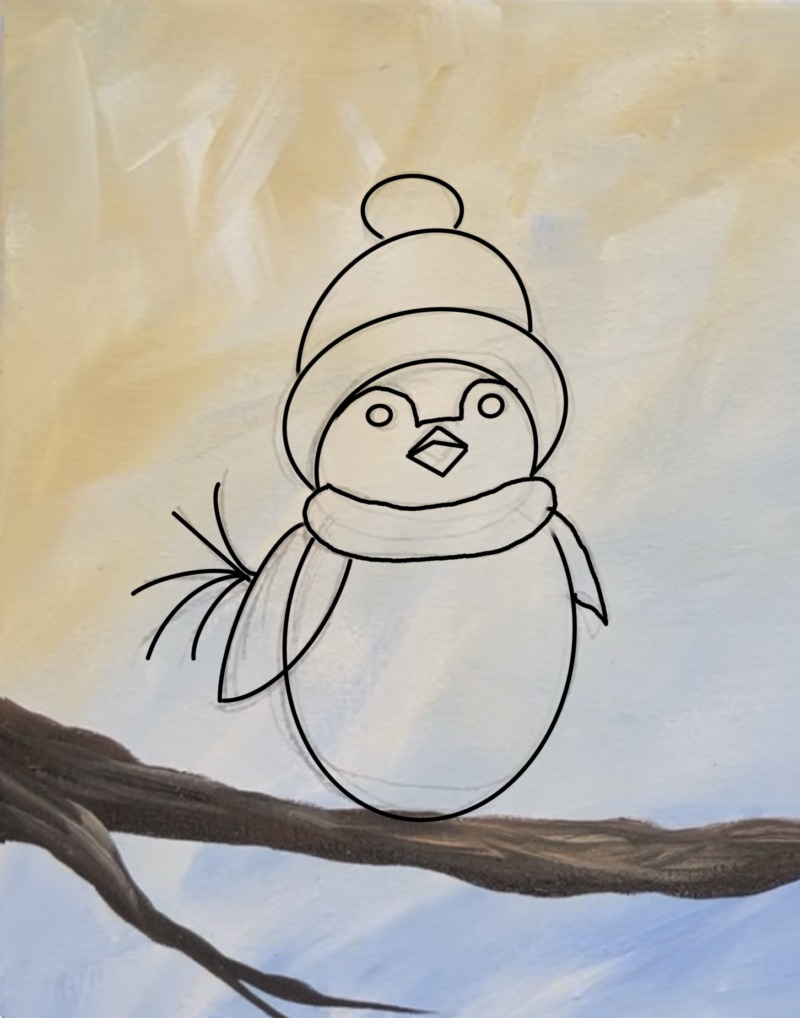
I also drew eyelashes and a little white circle inside of the bird’s eyes. Repeat this drawing for another bird on the right of the branch.
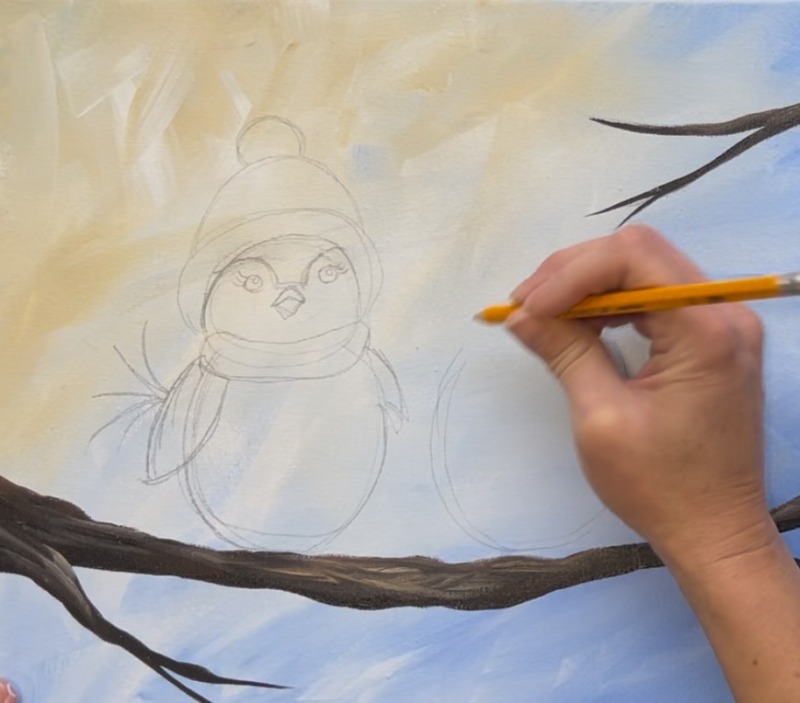
This time the bird’s scarf “tie piece” hangs down over the edge of the branch. You’re welcome to change this if you want!
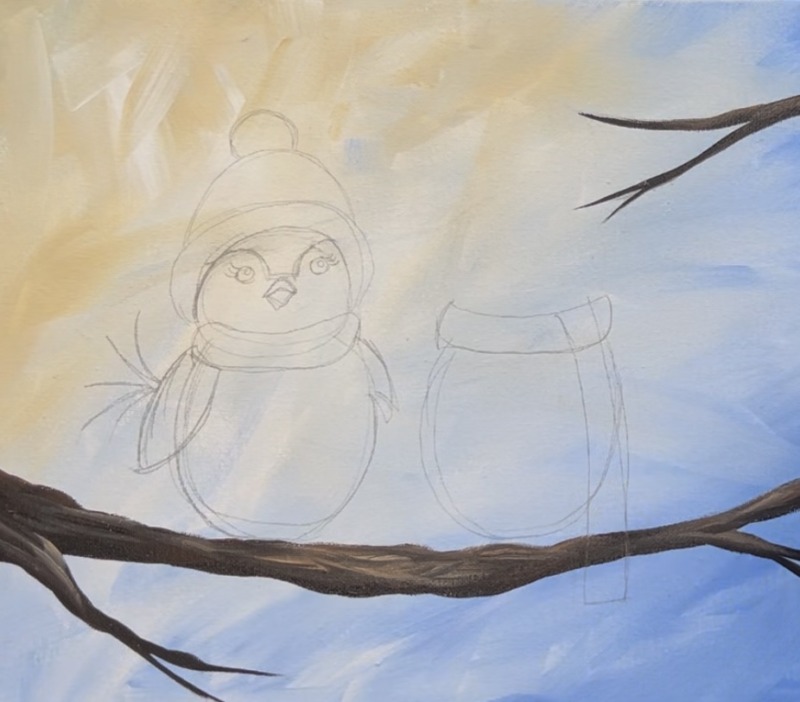
The hat is the same as the hat on the left.
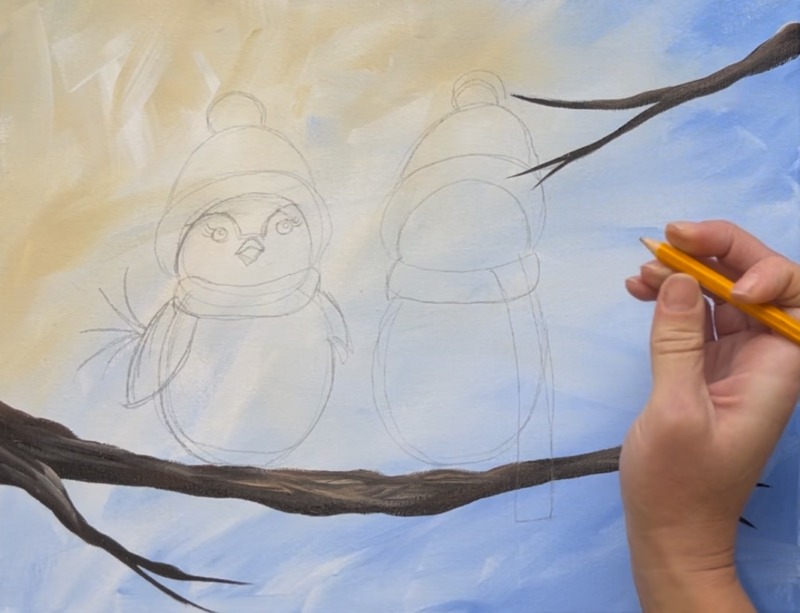
Draw the face the same way including the curved arc, the eyes and the beak. Draw the side wings plus the same type of tail.
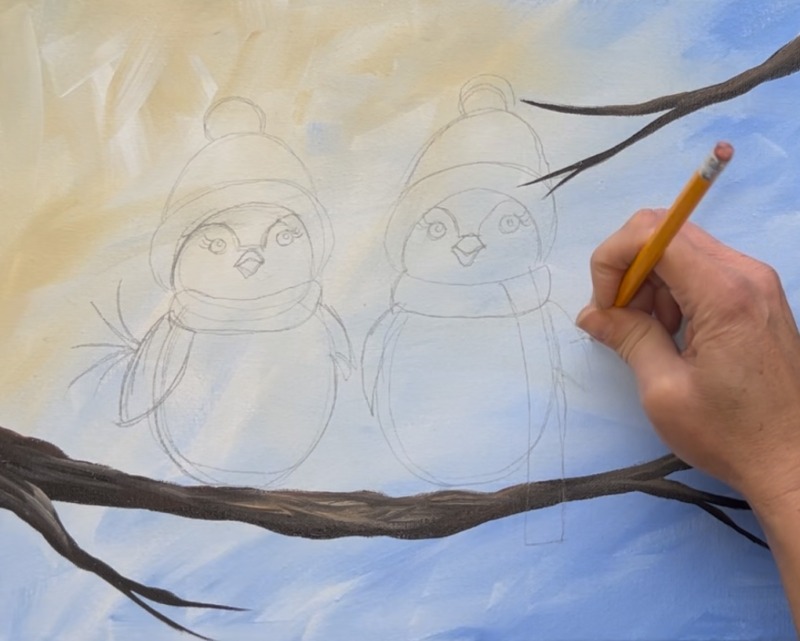

4. Paint Birds
Make sure your paint palette is loaded with the following colors: “burnt umber”, “titanium white”, “mars black” and “unbleached titanium”. Use the #4 round brush. Paint the body of the bird first. Double load the brush in both the beige and the white. Outline the shape of the body and then fill it in with curved paint strokes that go in the direction of the shape.
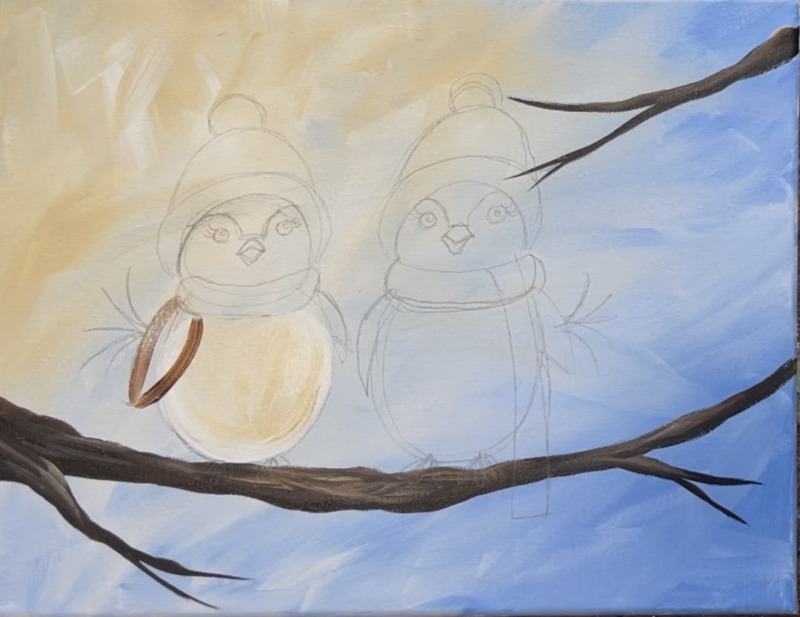
Tip: add more brown into the body area of the bird if it blends too much into the background.
Then, without rinsing the brush, load it into “burnt umber”. Paint the side wing by outlining the shape and then filling it in.
Paint the head using the same beige and white combination.
Then paint the tail feather by painting curved paint strokes that go outwards in curved directions. Do this with the “burnt umber”. Then paint the side wing of the bird with brown and black. Curve your paint strokes downwards. Then blend a little bit of brown into the body area.
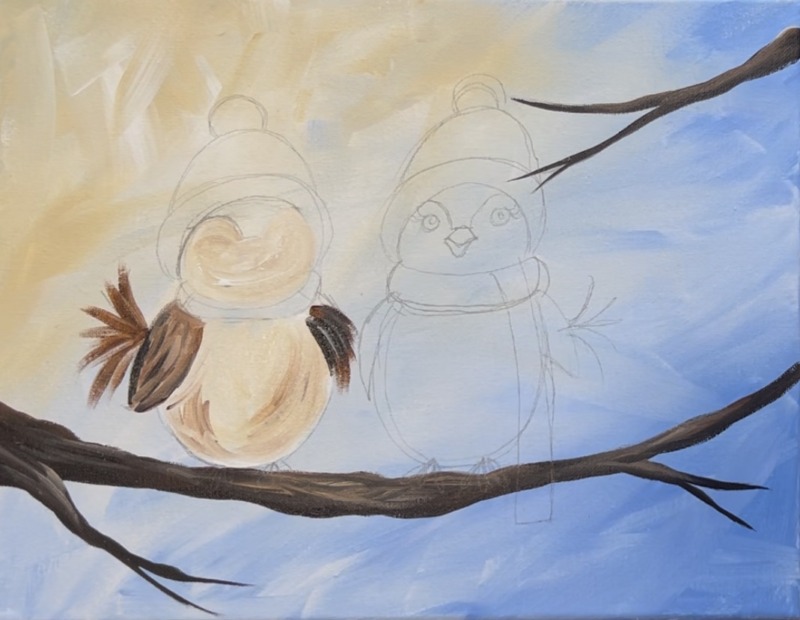
Start to paint the top part of the head that is darker brown. Double load your brush in both the brown and black. Outline the shape and then fill it in.
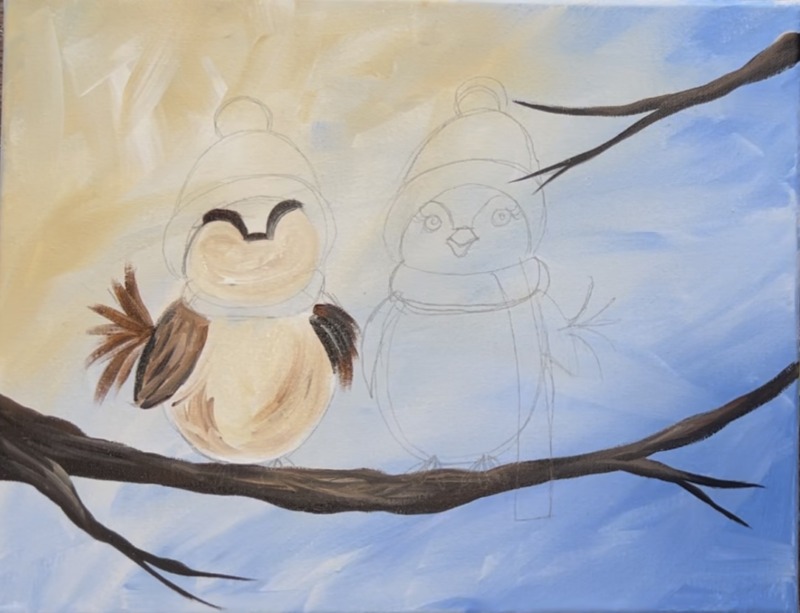
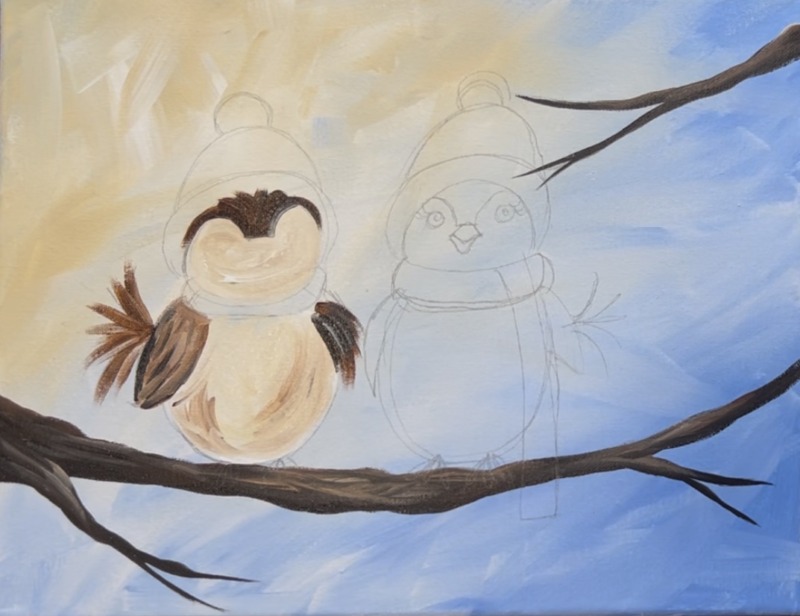
Next, load your paint palette with “naphthol crimson”. Paint the bottom rim of the hat with pure red. Then double load your round brush in both red and white. Paint the top part of the hat. Do this with curved paint strokes. This will make a lighter color red so that it stands out from the darker red.
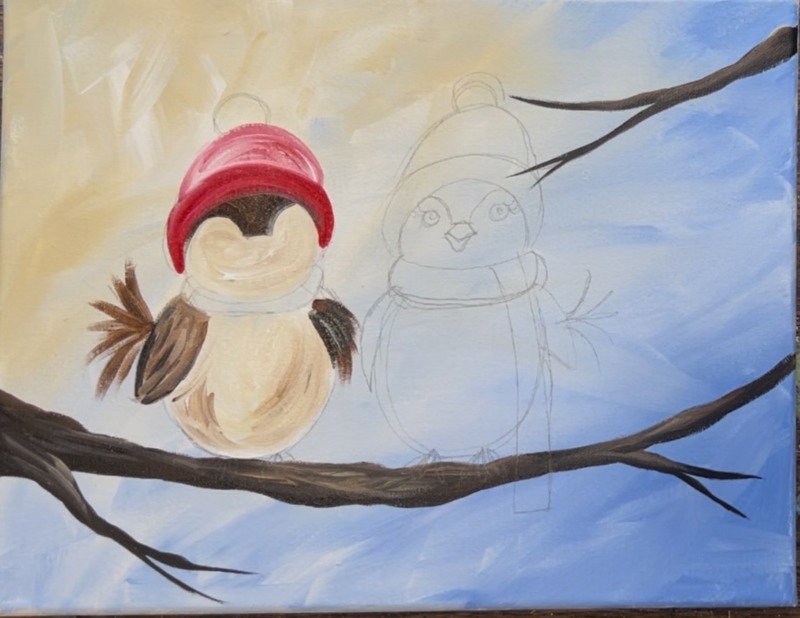
Then paint the scarf using red. Add a little bit of black shading on the bottom of the scarf. You can also add a little bit of black shading on the bottom of the hat just above the head.
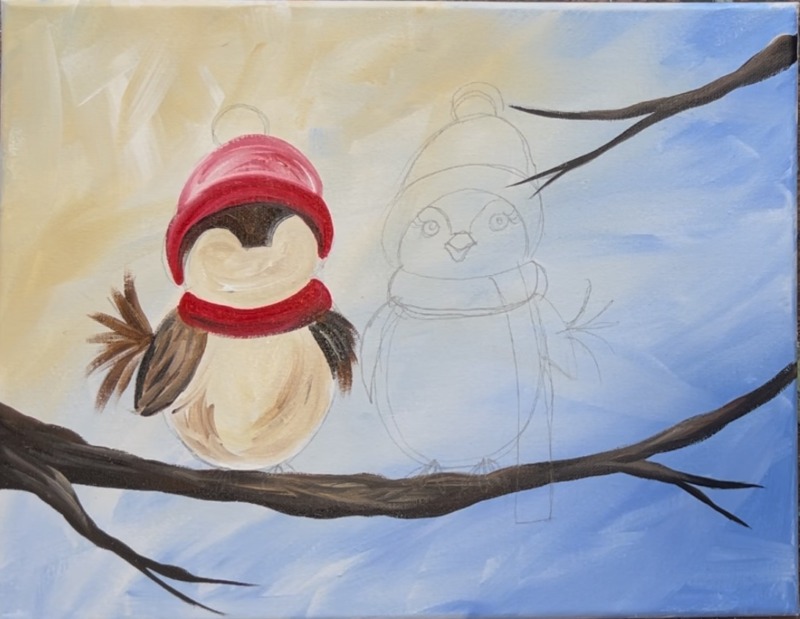
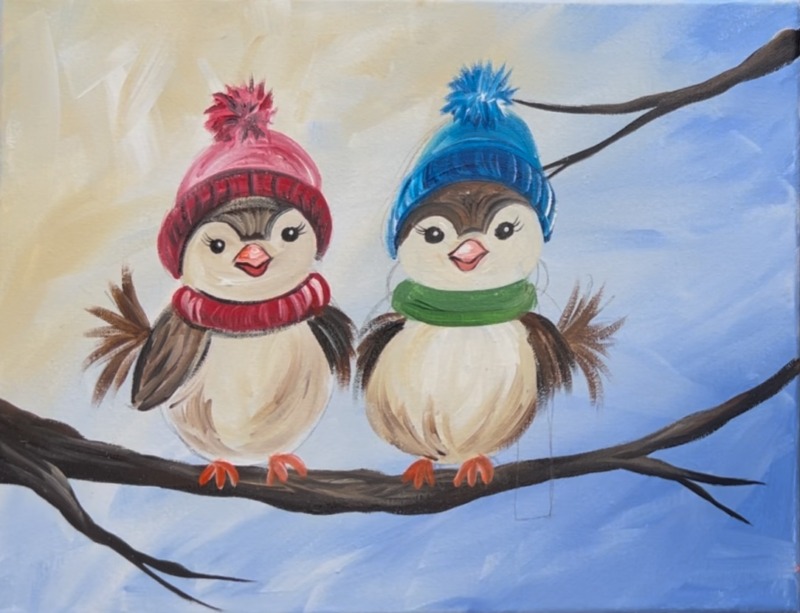
Then paint the other bird using the same colors and techniques. The only difference with this one is I changed the color of the scarf and made the scarf end piece hang over the branch.
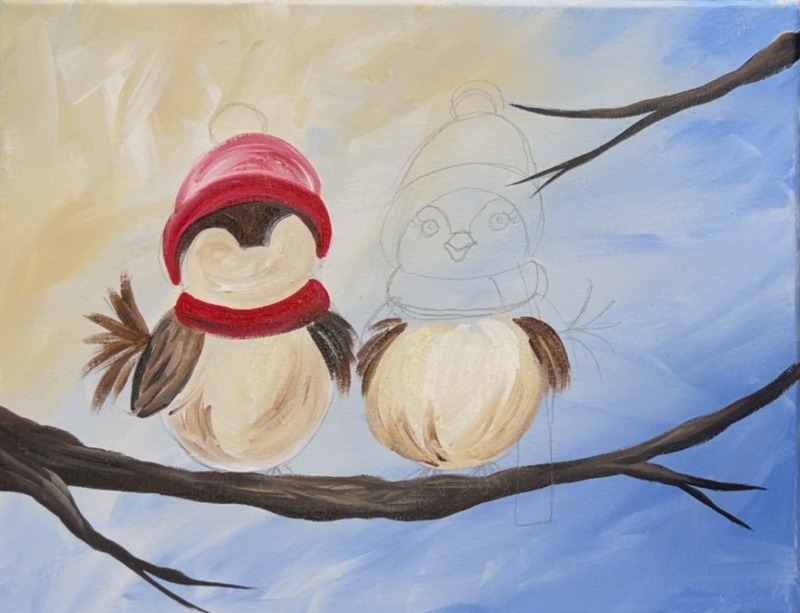
To paint the scarf, I used “hooker’s green hue” mixed with a little bit of “light blue violet”.

The hat of this bird is painted with “phthalo blue”. Use pure “phthalo blue” on the bottom of the hat and then mix white into the blue for the top part to make it lighter.
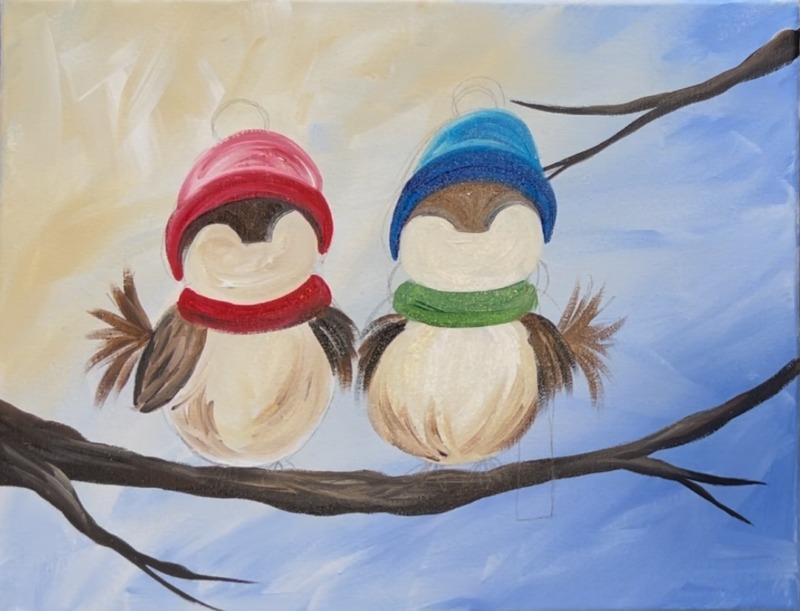
Then paint the bird feet using the color “cadmium red light hue” mixed with a little “titanium white”. When you mix white into this, it will help make the feet more opaque against the dark branch color.
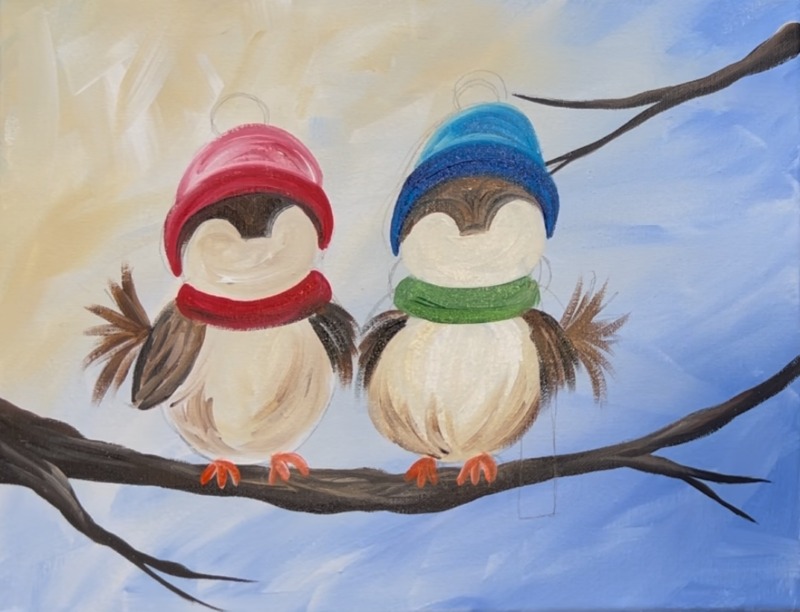
Then paint the beaks of the birds. This will look a little “weird” at first but when it gets outlined later, it will look better! Start by painting the top shape of the beak with just “cad red light hue” (solid orange).
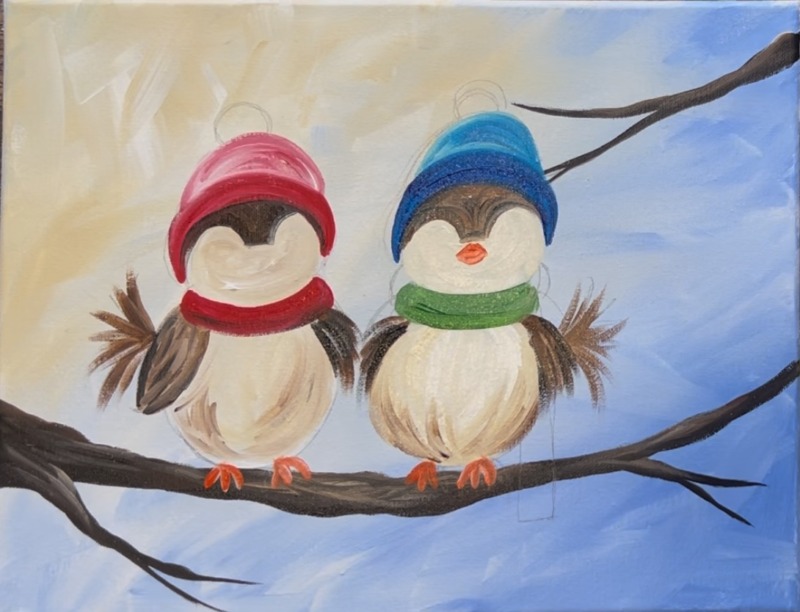
Then mix orange with red. paint the bottom half piece of the beak so that the bottom of the beak is darker.
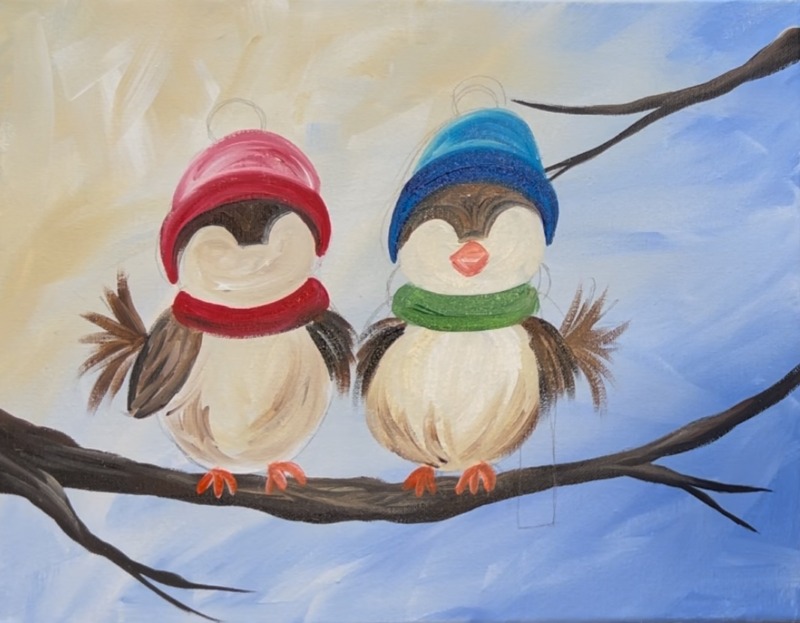
Repeat this for the bird beak on the left bird. Note: I added a little white into my orange for the top beak to make it lighter and stand out better next to the bottom of the beak which is darker.
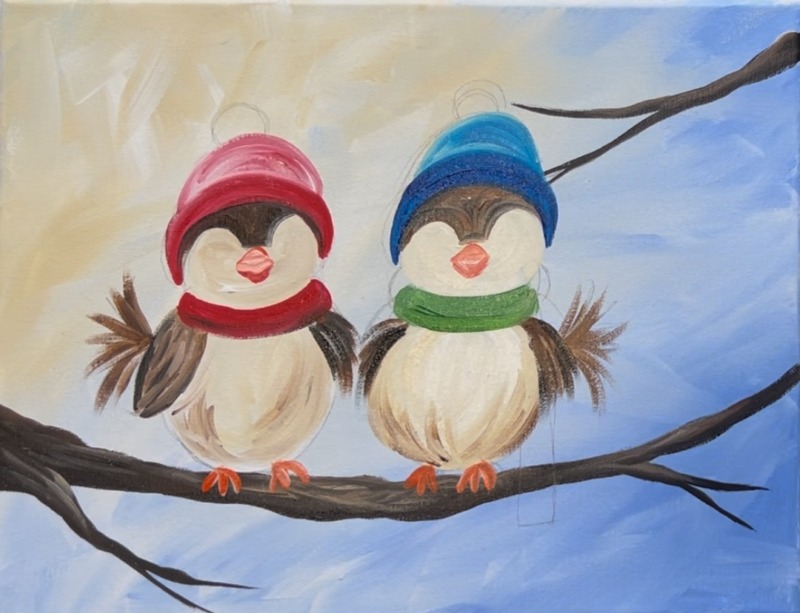
Use the #4 round brush and “mars black” to paint little circles for the eyes.
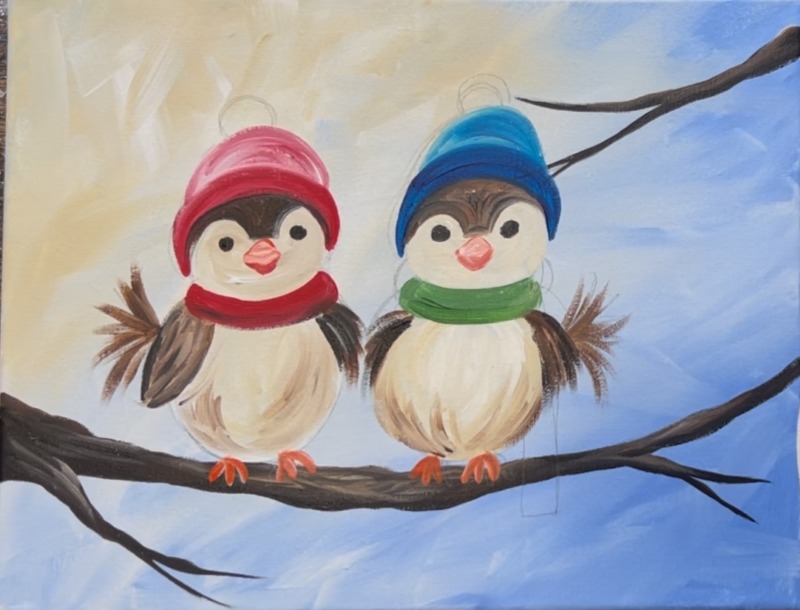
Let the beaks dry. Then either use a black paint pen or the #4 round brush and black to outline the shape of the beak. Outline the inside line as well as the outer line of the shape.
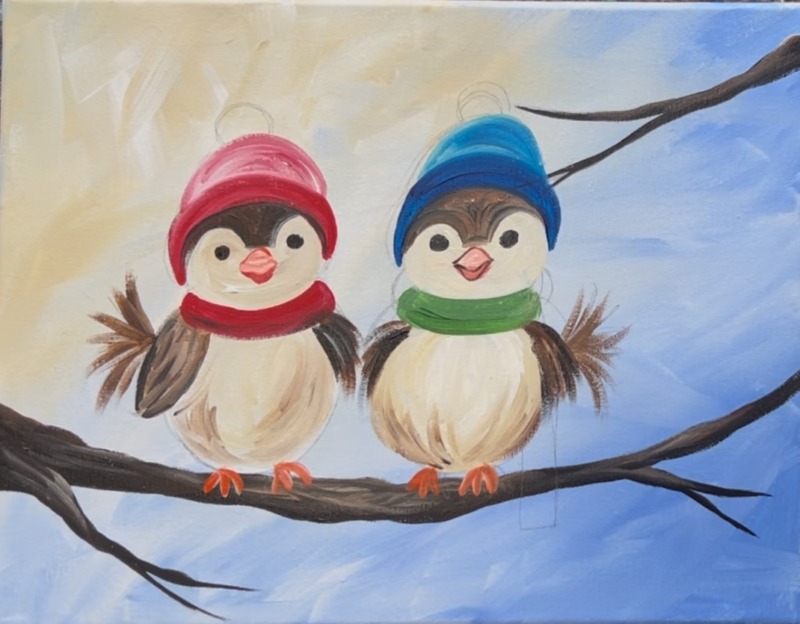
Do this for both beaks.
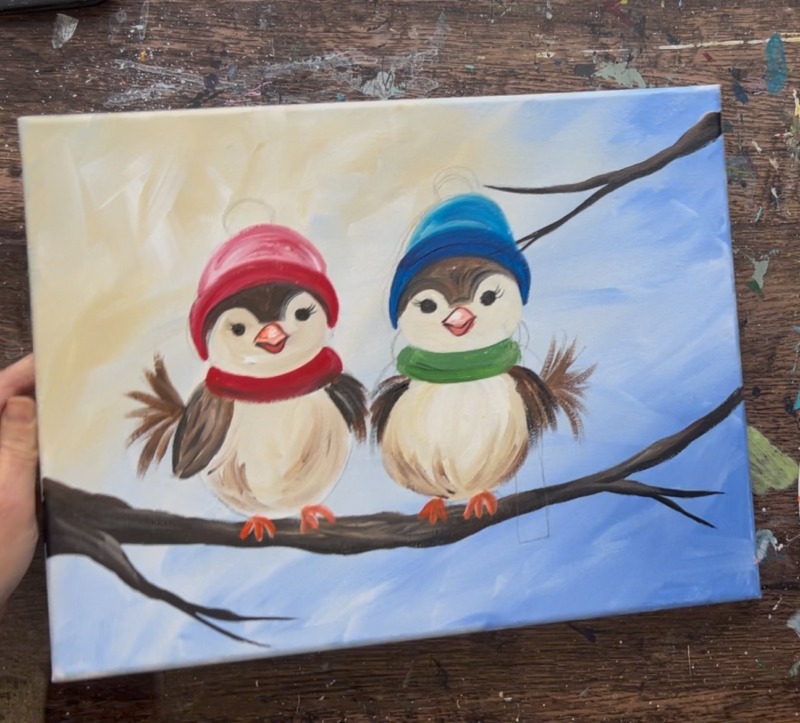
Then add details to the eyes. Paint little curved lines for the eyelashes. Then paint a little white dot in the upper right of each of the circles.
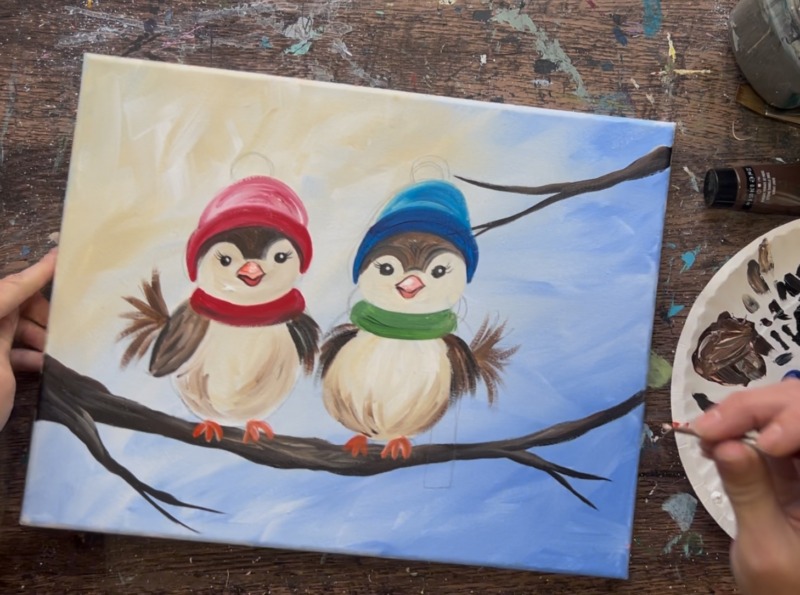
Add a little white “highlight” on the top of each of the beaks by painting a little white smudge in the center part of the top of the beak.
Next, paint the fuzzy ball on the top of each of the hats. To do this, use your round brush loaded in both white and red. Start in the center of the “ball” and drag your paint strokes outwards in diagonal directions to form the circle shape.
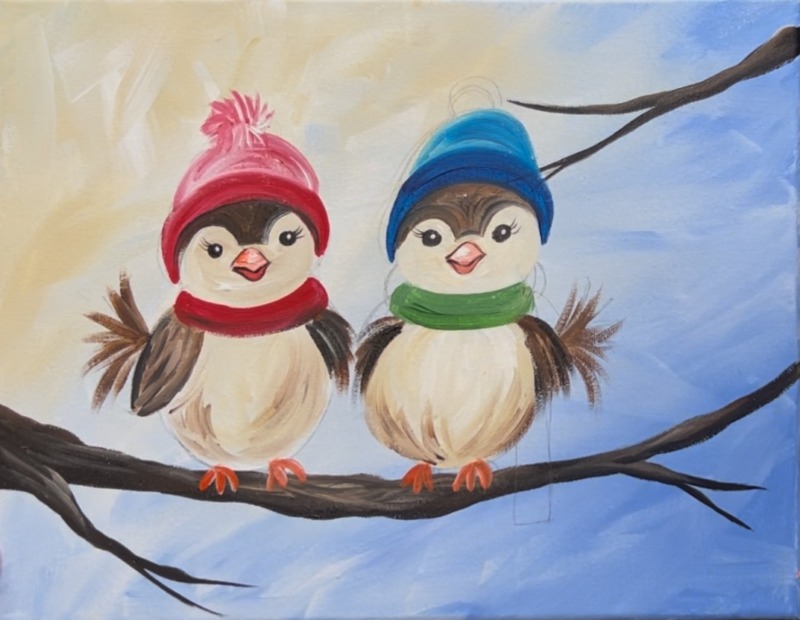
For more “color variation”, you can try adding a little bit of black into the red as well.
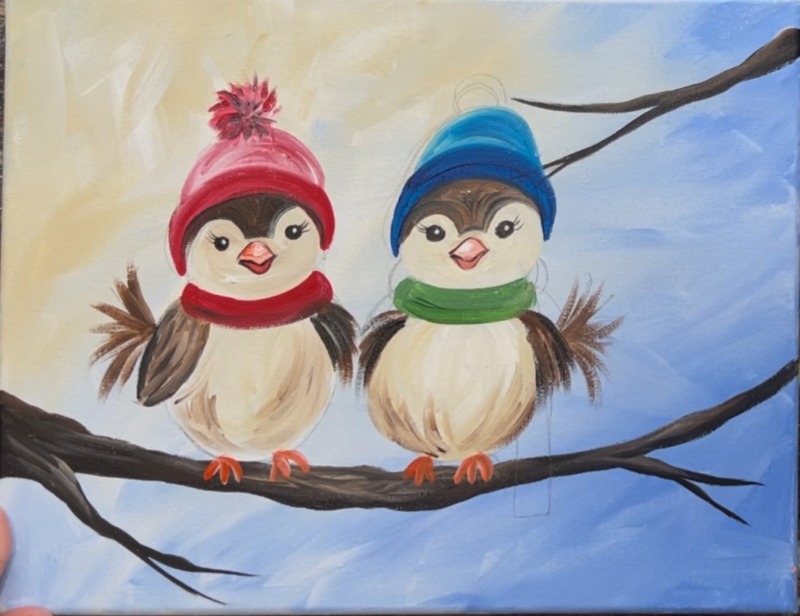
Then paint lines on the hat and scarf. These lines give it more of that “sweater” texture look. For the bottom of the hat, I did red and black paint (double loaded on the round brush). Paint curved lines along the bottom rim of the hat. Then do the same thing on the scarf but this time use red and white double loaded on the brush.
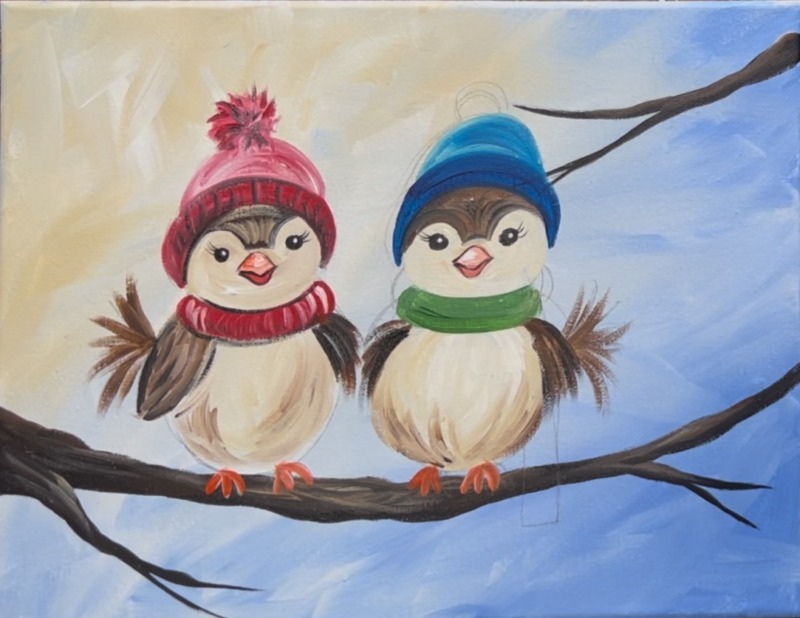
Repeat this for the bird on the right. Paint the fuzzy ball on the top of the hat using “phthalo blue”.
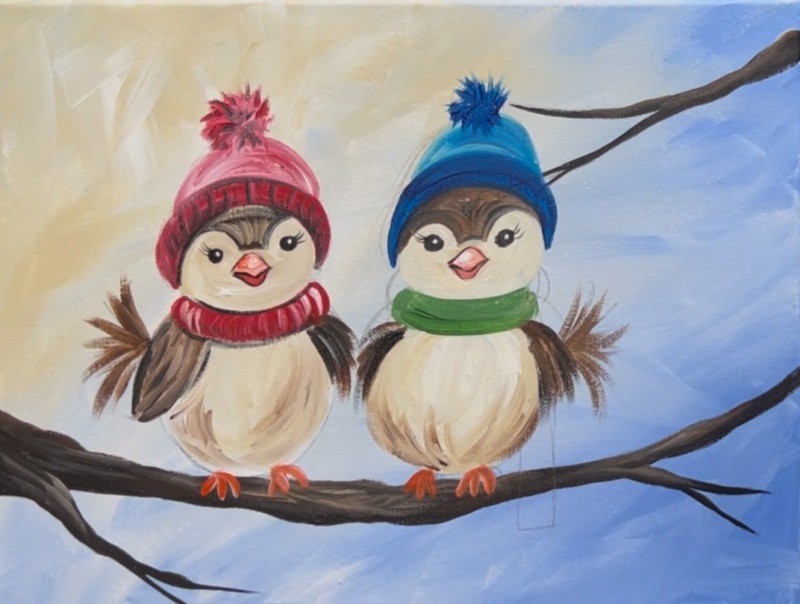
Then paint white lines on the fuzzy ball. Paint white and blue (double loaded) lines on the bottom rim of the hat.
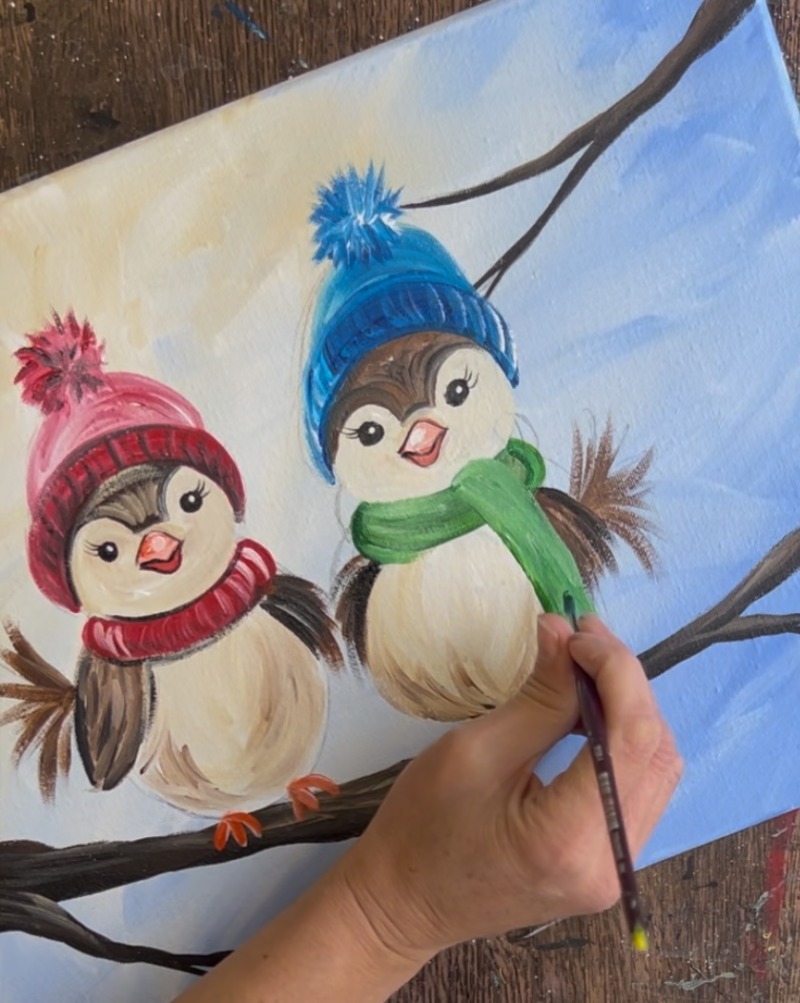
Then paint the tie of the scarf. Use the “hooker’s green hue” double loaded with “titanium white”. Paint the scarf piece hanging down and past the branch.
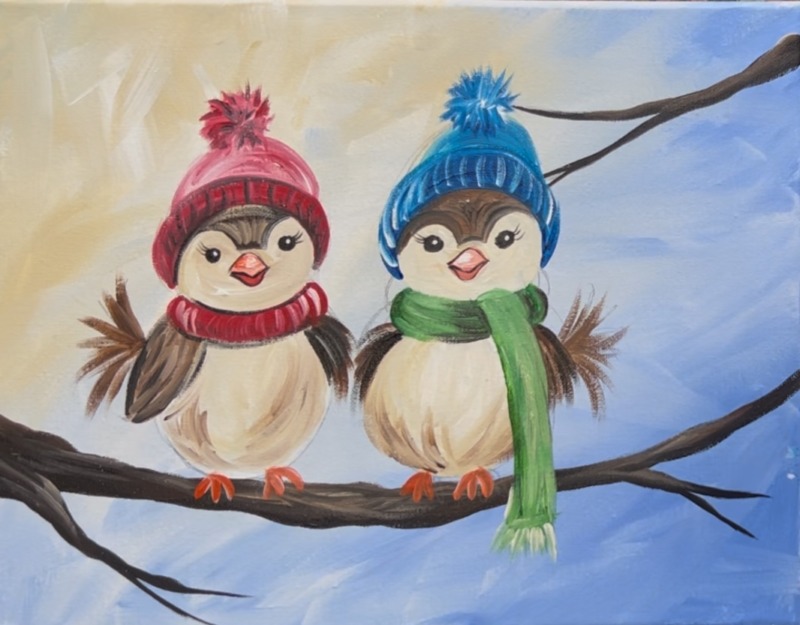
Paint little white “fray lines” on the end of the scarf using white and green. Then add some shadowing on the scarf. Notice there is a little bit of darker green on the left and right of the part of the scarf that folds over. Do this by mixing a very tiny bit of black with the green and then painting that area of the scarf in with the darker green.
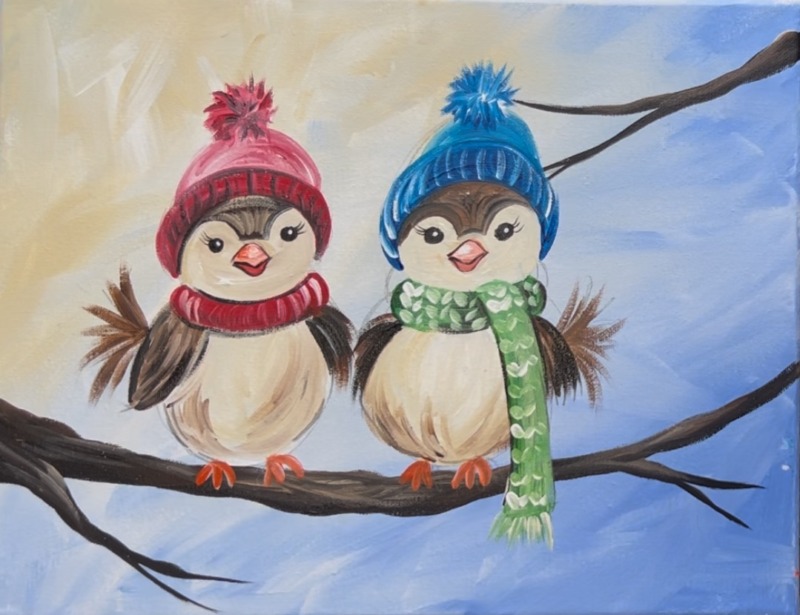
Then paint “knit sweater” texture on the scarf. To do this, double load the #4 round brush with white and green. Paint little diagonal paint strokes forming a zig-zag pattern. Leave a little gap in between each of the diagonal strokes. The “double load” technique will create “color variation” for the knit texture.
5. Paint Snow
Use the #4 round brush and “titanium white” to paint thick layers of snow that blanket the top edge of all of the branches. You’ll want to overlap some of the top of the branches but also create a little variation in height of this snow.
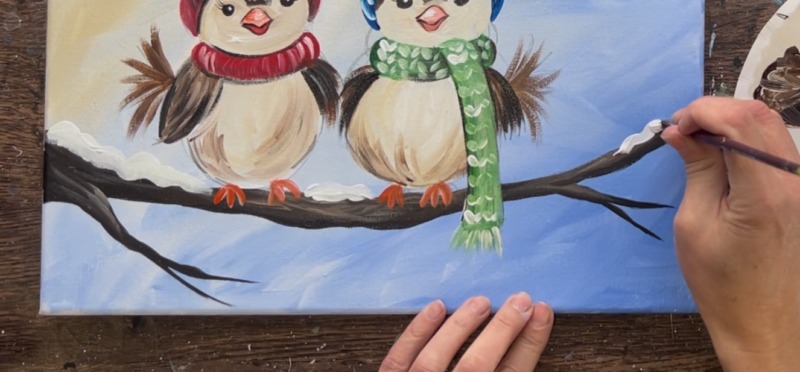
Do thick, wavy paint strokes to create this effect.
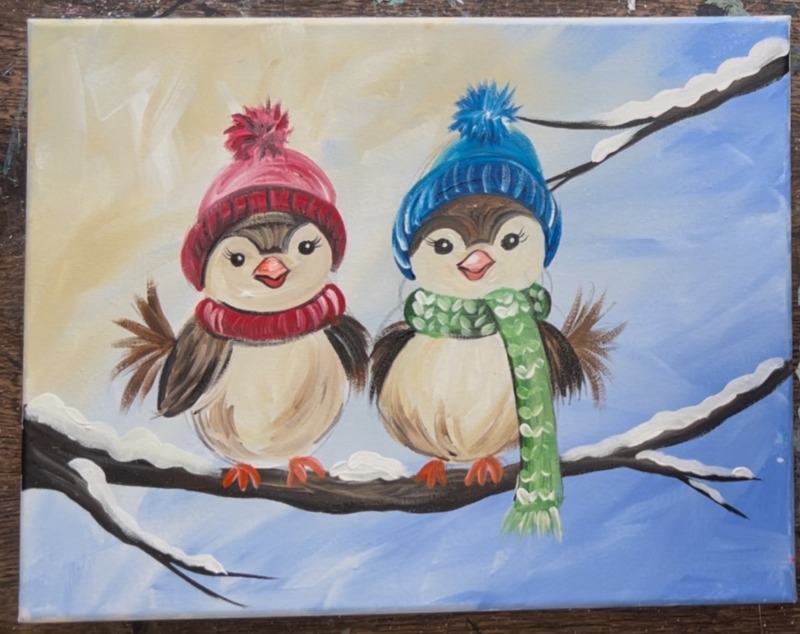
The snow shadowing is optional!
Then, without rinsing the brush, add a little bit of blue to the brush and “‘stipple” blue and white paint on the bottom of the snow. Blend it into the bright white from the top. This will get your snow to have shading. It should look much brighter at the top and darker on the bottom.
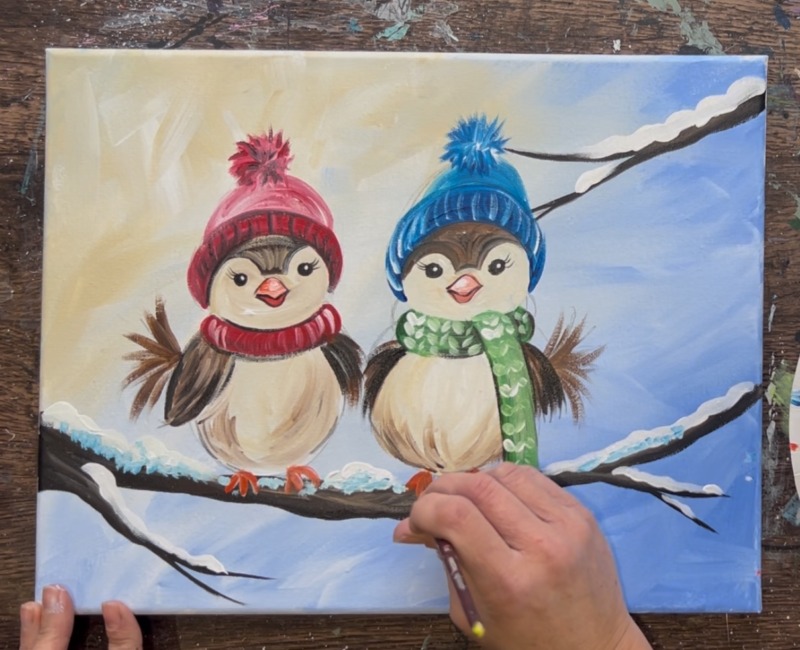
Do this to all of the snow on all the branches.
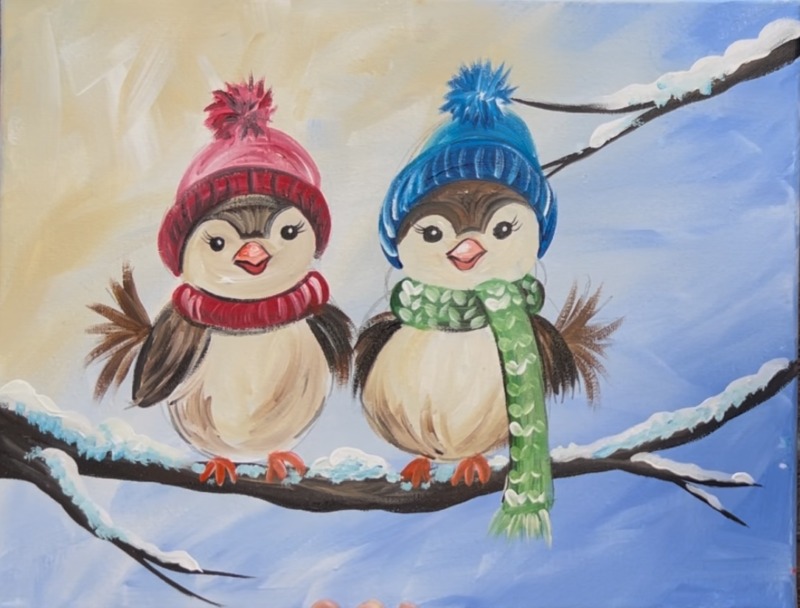
Then add a tiny bit of black to the brush and add a very small layer of black “stippling” on the bottom edging of the snow. This will enhance the shadow even more. Try not to get it too dark! If too much black gets into the snow, you can always add a little more white/ blue to your brush to blend it in more. If needed, go back on the very top layer and add more pure white so the top is the brightest.
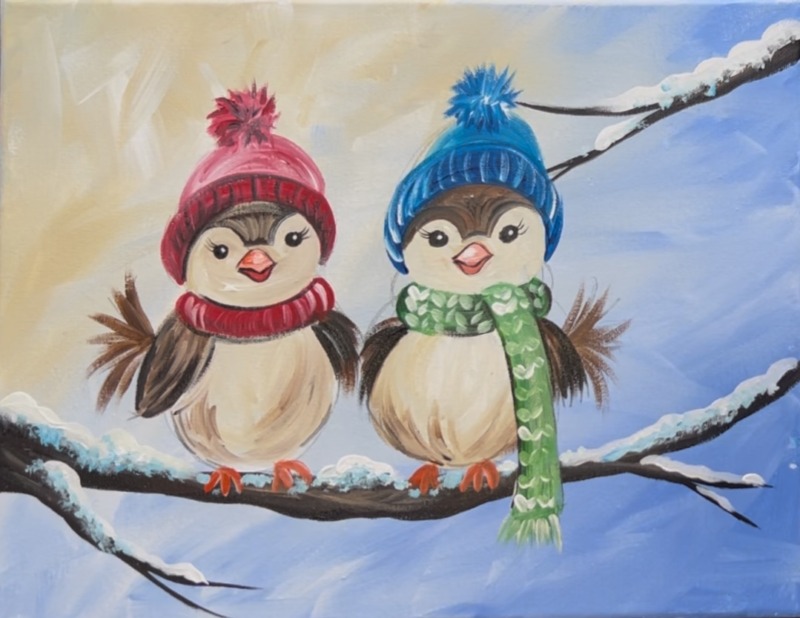
Then add little snow dots to the top edging of the hats. Use the “stippling technique” and just “titanium white”. I added snow dot edging to the top of the lining of the hats, the fuzzy balls of the hats and on the edging of the very top of the hats. I also did little snow dots on the top edge of each of the scarfs and a few snow dots on the bird wings.
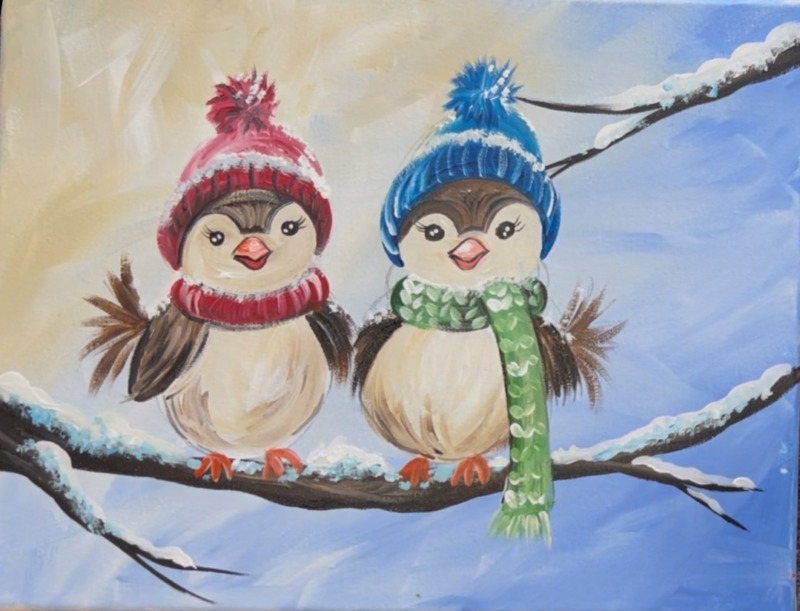
Another optional detail you can do is add a second set of dots on the bird eyes.
6. Paint Hearts
Use the #4 round brush and “naphthol crimson” to paint hearts. I did two hanging hearts on a string on the right side of the painting.
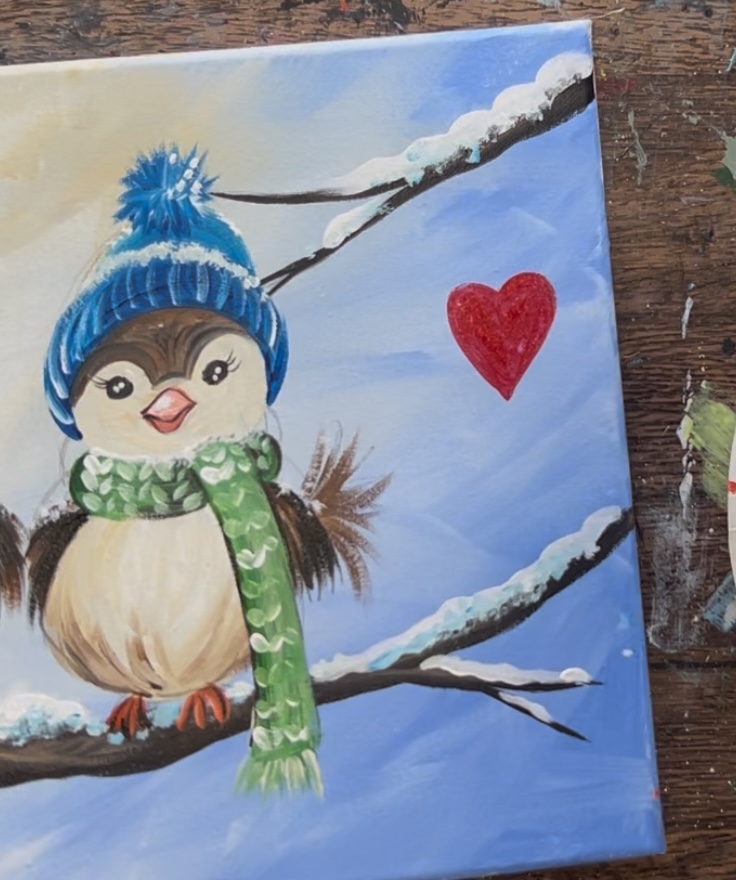
You can add a little white on the red of the heart on the left side and blend it in for highlights (or leave it solid red).
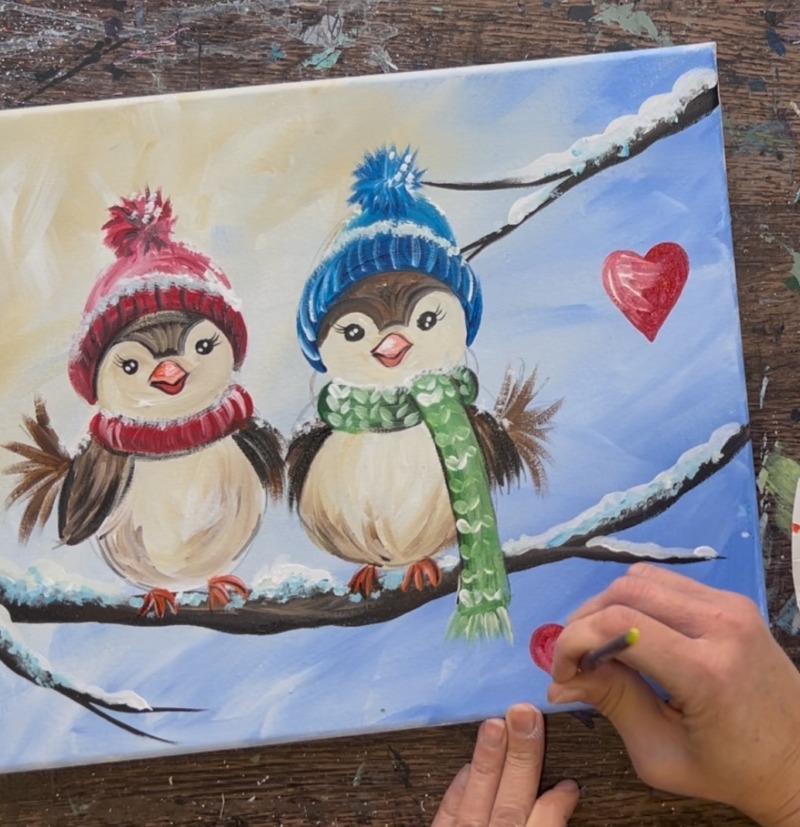
I used titanium white to paint a string attached to the hearts and attached to the branches.
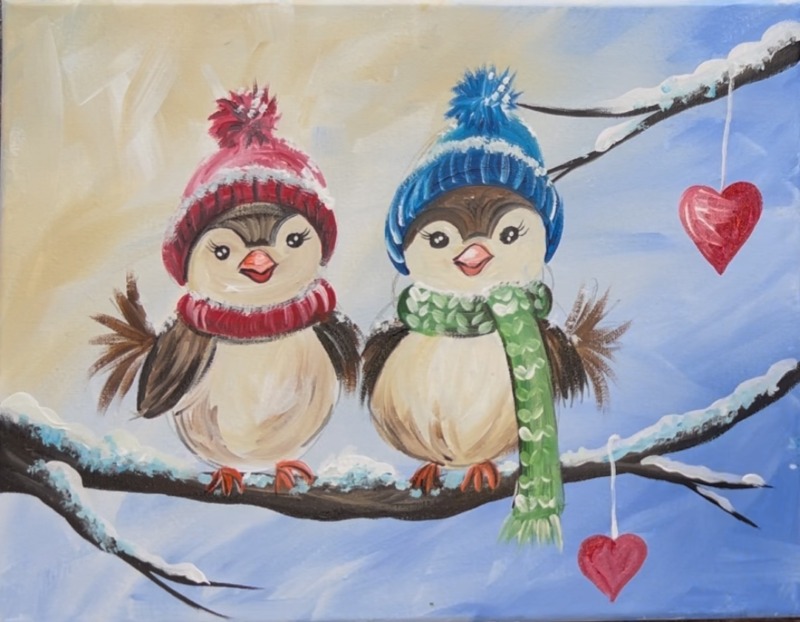
7. Paint Snow In Sky & On Hearts
Use the #4 round brush and white to paint little white snow dots all over the sky.
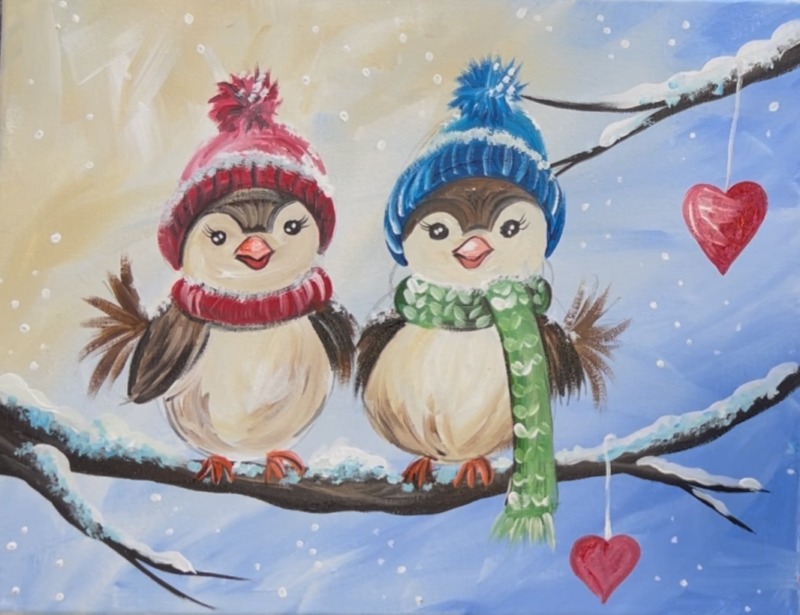
Then when the hearts dry, paint little white dots on the tops of each of the hearts.
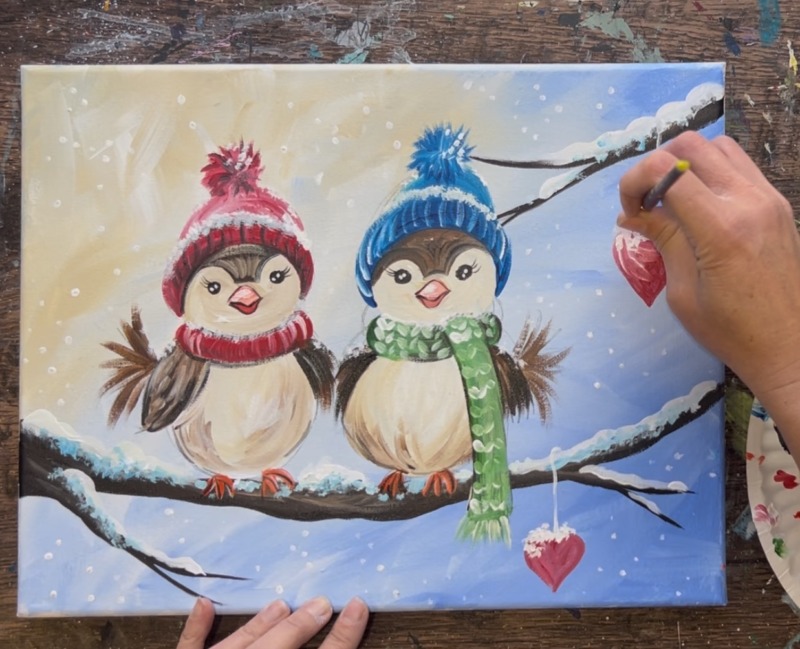

8. Paint Music Notes
Use “mars black” and the #4 round brush to paint a variety of music notes in the upper left corner.
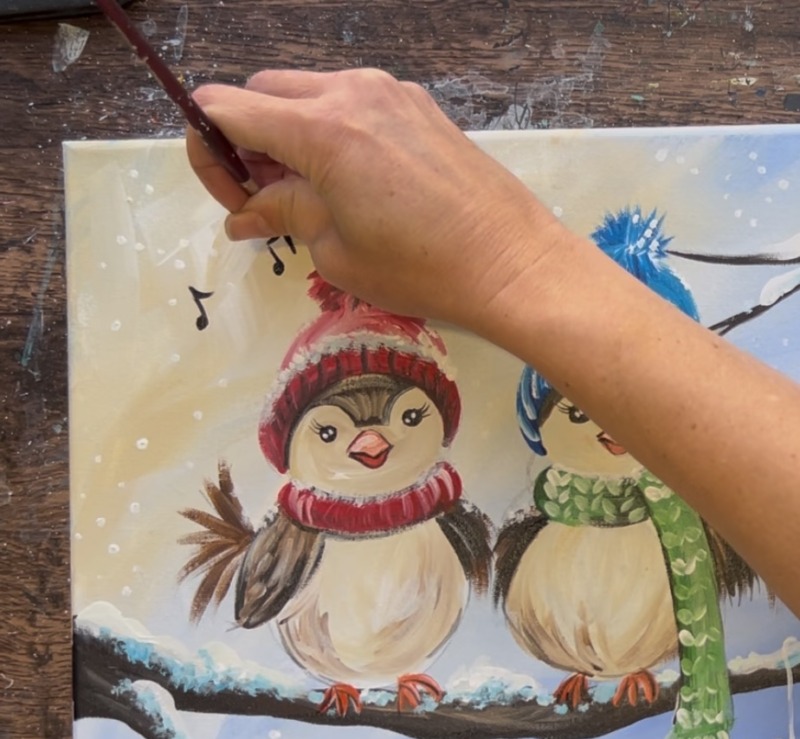
And you are finished!

