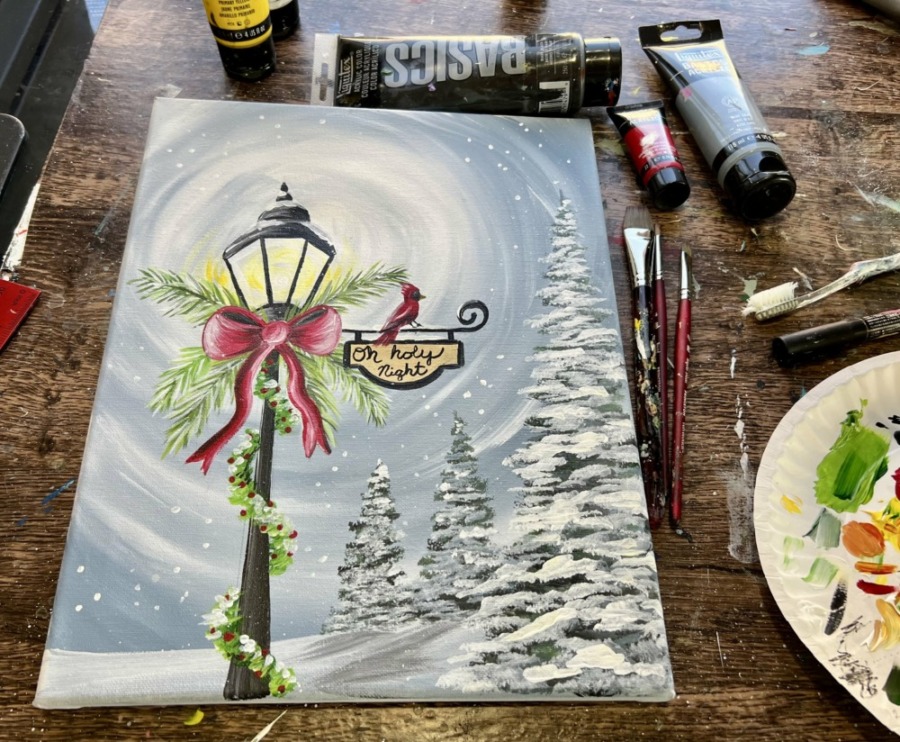
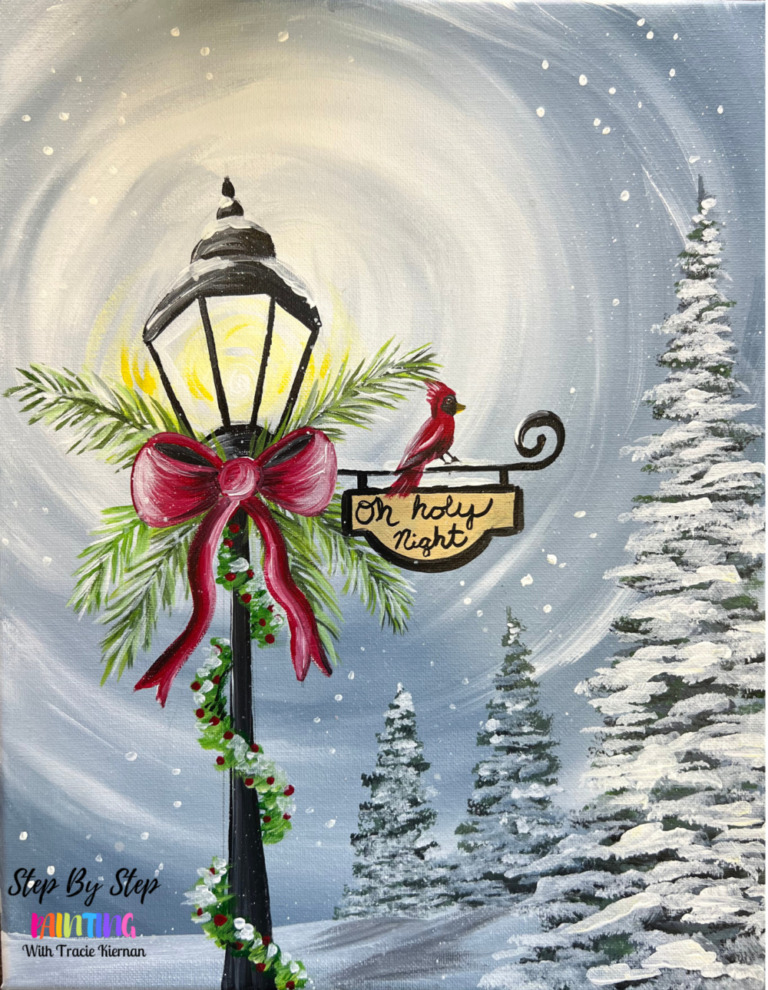
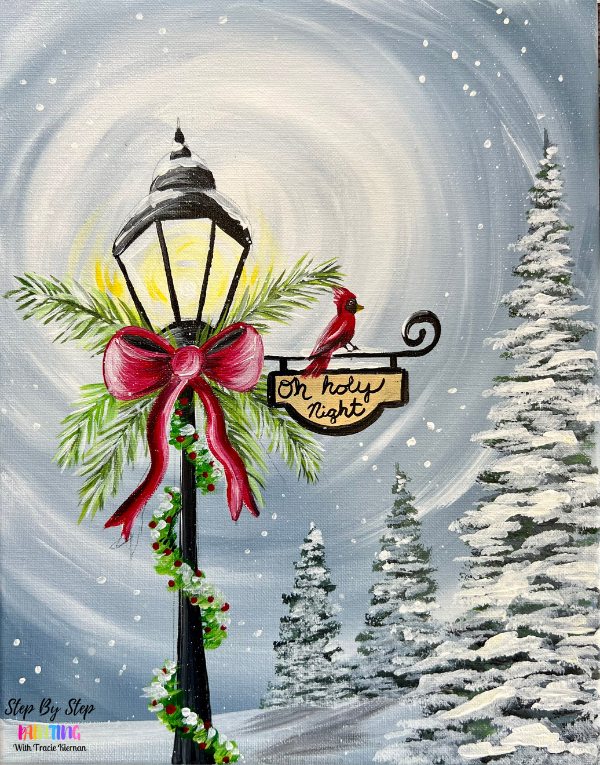
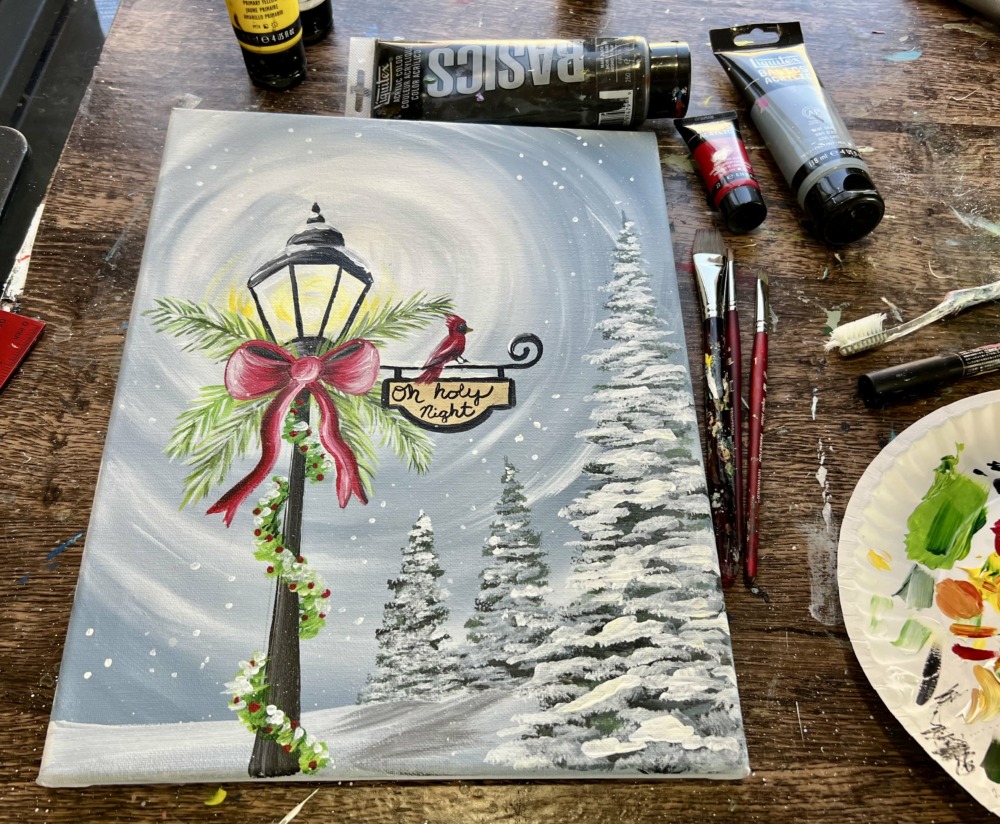
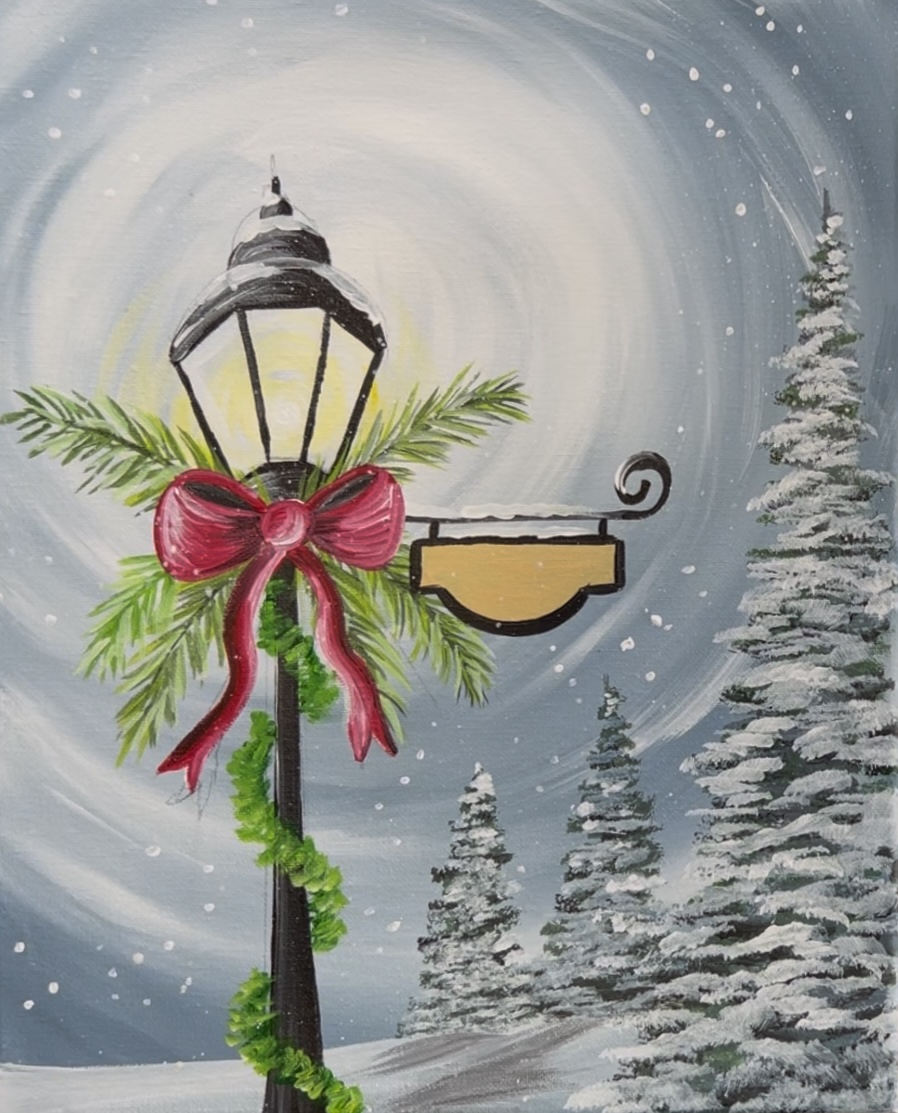
A street light dressed in a festive wreath, illuminating the joy of the season! There is a cardinal perched on a sign that says “Oh Holy Night”.
Would you like to save this?
This acrylic painting tutorial will show you how to paint this lovely and simple Christmas landscape scene. Customize the sign with a name, date or different quote.
Enjoy and happy painting!
Materials
Christmas Lamppost

Learn how to paint a lovely Christmas landscape with glowing lamppost.
Materials
- 11 x 14 Canvas
- Acrylic Paint (Liquitex BASICS)
- Brushes (Princeton Velvetoch)
- Ruler
- Pencil
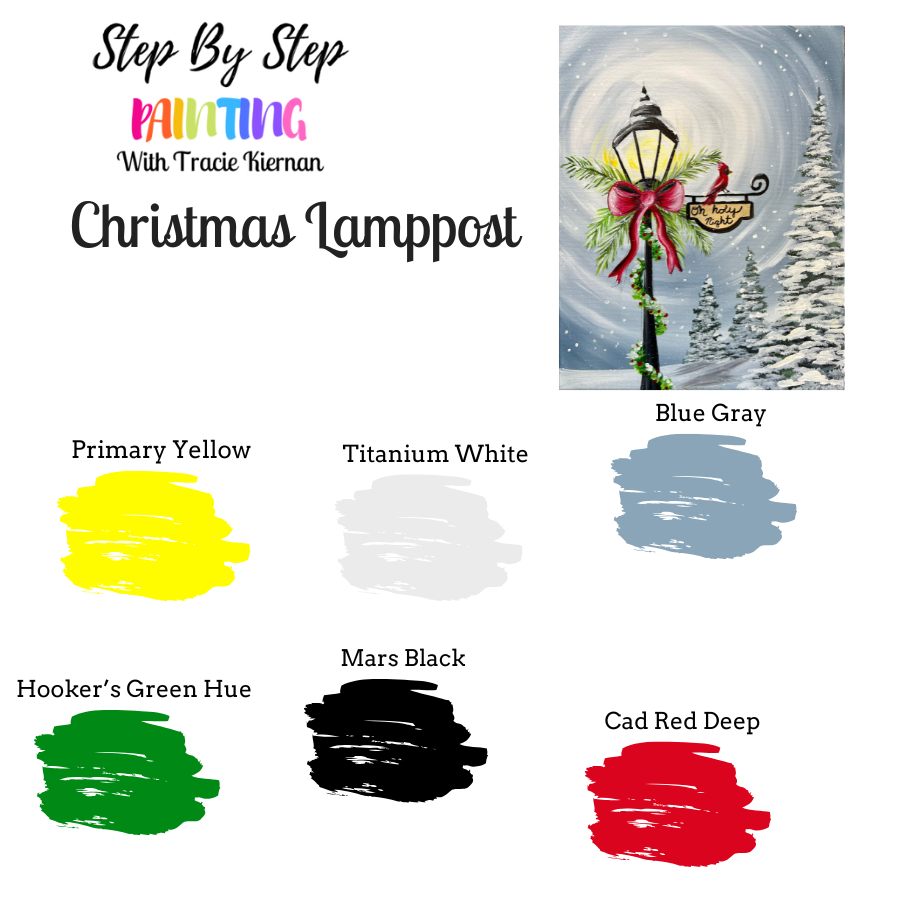
Colors
- Titanium White
- Mars Black
- Blue Gray
- Hooker's Green Hue
- Cadmium Red Deep Hue
- Primary Yellow
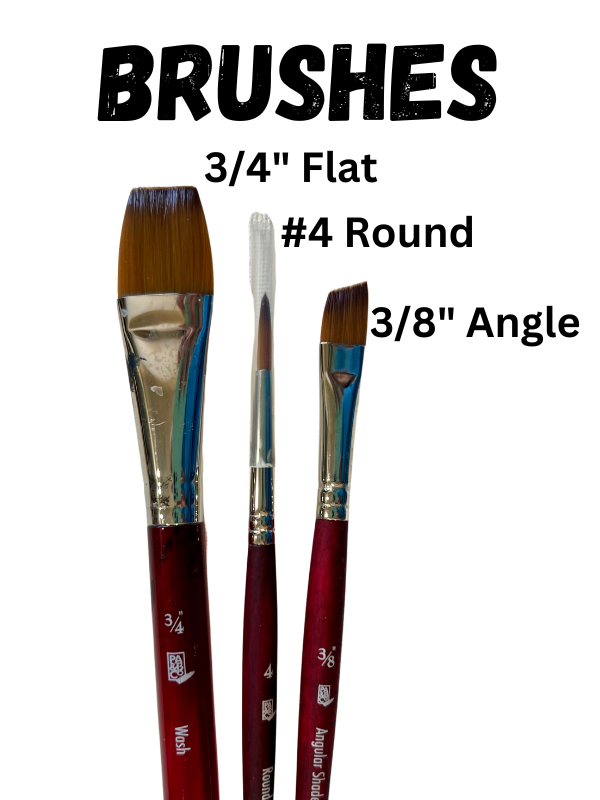
Brushes
- 3/4 Flat
- 4 Round
- 3/8 Angle
Color Palette
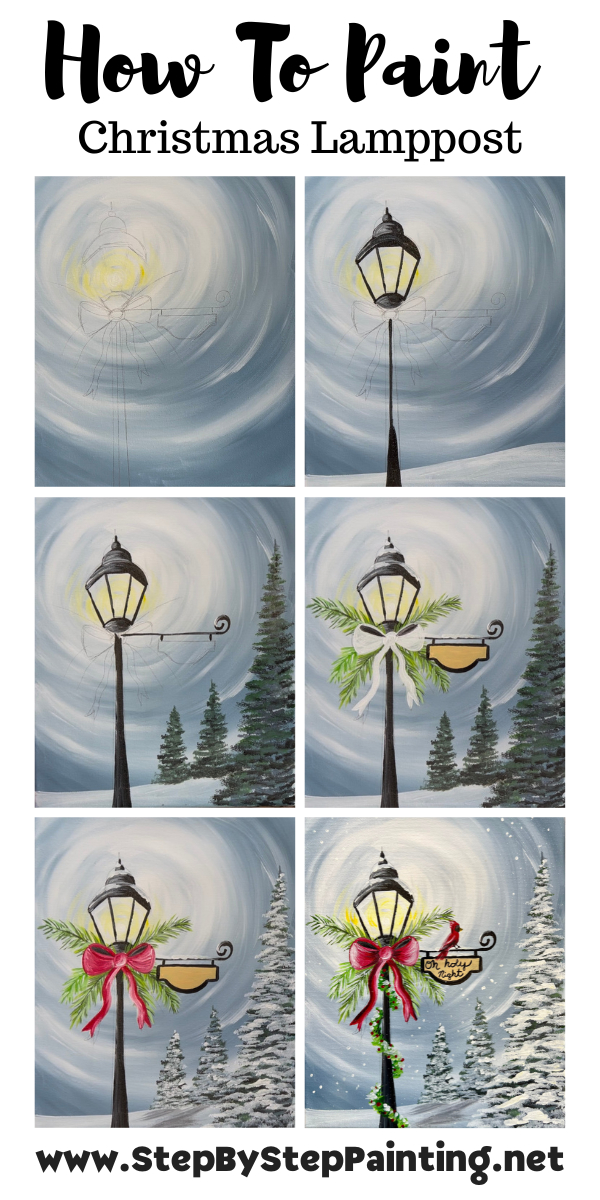
Directions At A Glance
Video
Step By Step Directions
1. Paint sky
Use a 3/4″ flat brush to paint a swirly gray and white sky! To do this, load your paint palette with “titanium white” and “blue gray”. Start with white and paint a circle in the upper left quadrant of the canvas. This is where the brightest part of the sky will be because this is where the lamp will be glowing its light.
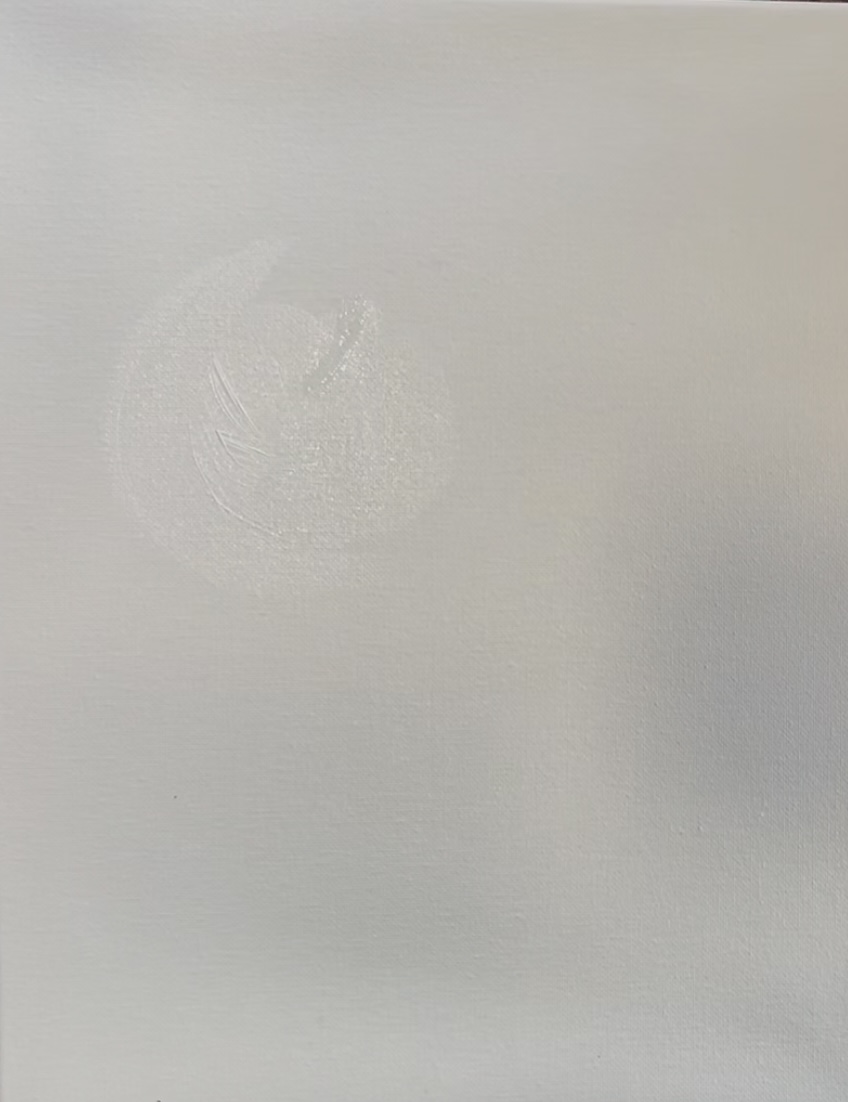
Go out about 6 or 7 inches with this circle. Then, without rinsing the brush, load a tiny bit of “blue gray” on the corner of the brush. Gently blend this into the white circle but not all the way. You want this sky to gradually get darker the further you are away from the center bright circle.
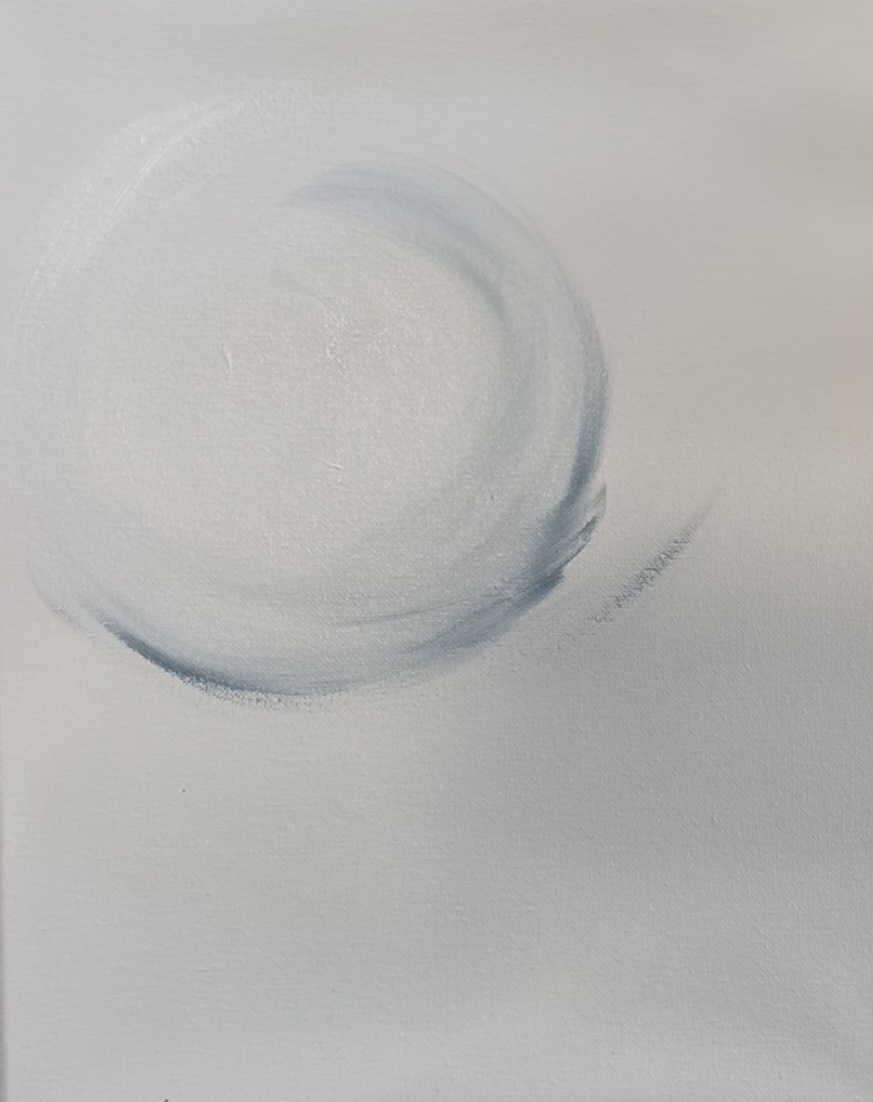
We will be painting the entire canvas with circular strokes that blend on the canvas! Gradually add more gray to your brush and blend with the white. If needed, add more white to your brush to help it to blend. You want a “swirly sky” effect with the gray and white blending and getting gradually darker towards the edges of the canvas.
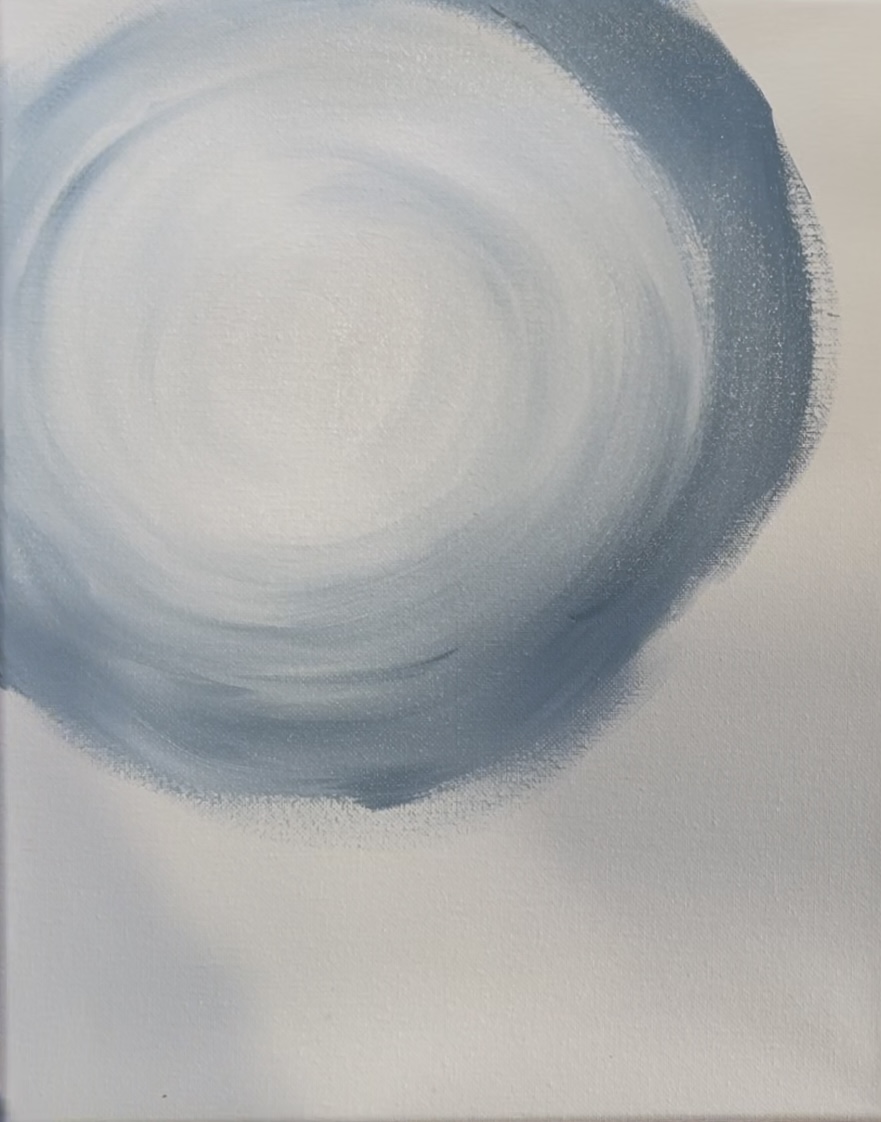
Keep painting gray and white circular strokes until the entire canvas is full. You want the edges of the canvas to be darkest. If needed, go back and add a few more light colored strokes in the sky over some of the darker areas. This will sort of exaggerate the white glowing beams around the lamp into the sky!
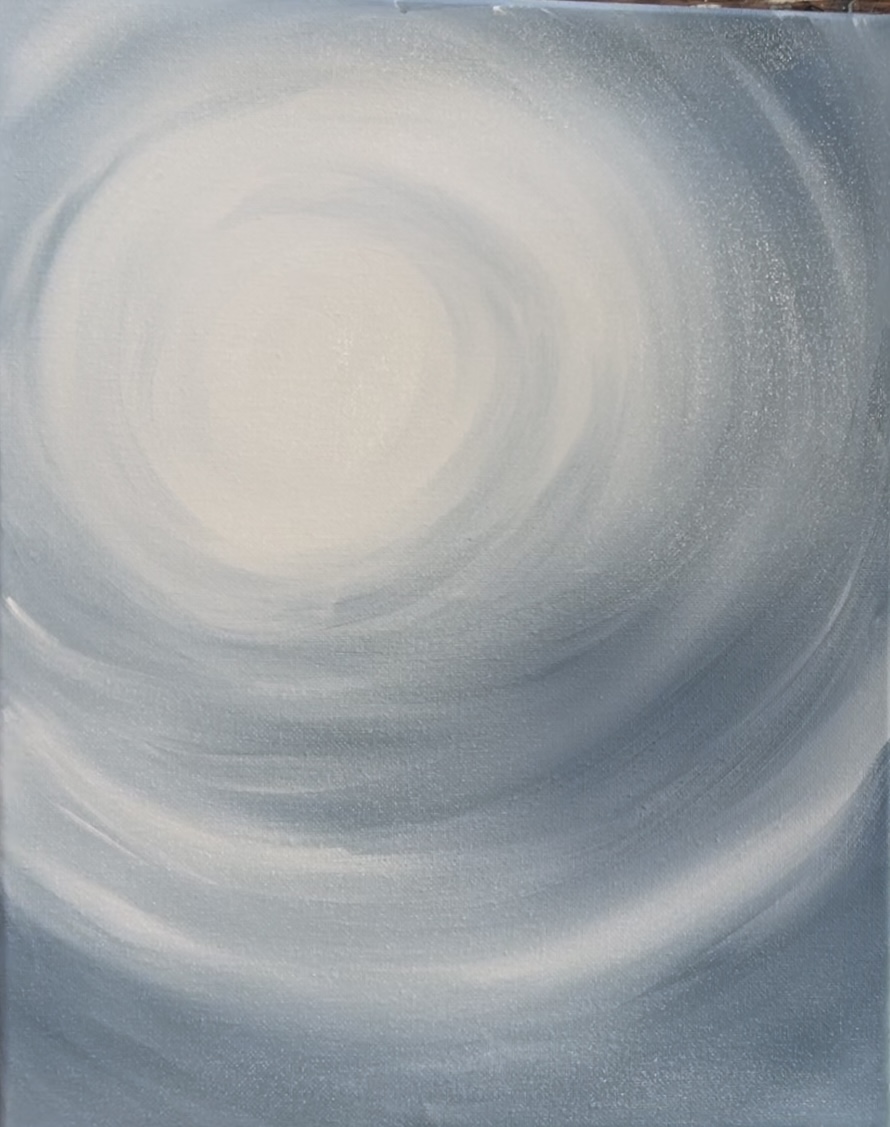
Let this dry before going onto the next step.
2. Draw lamppost
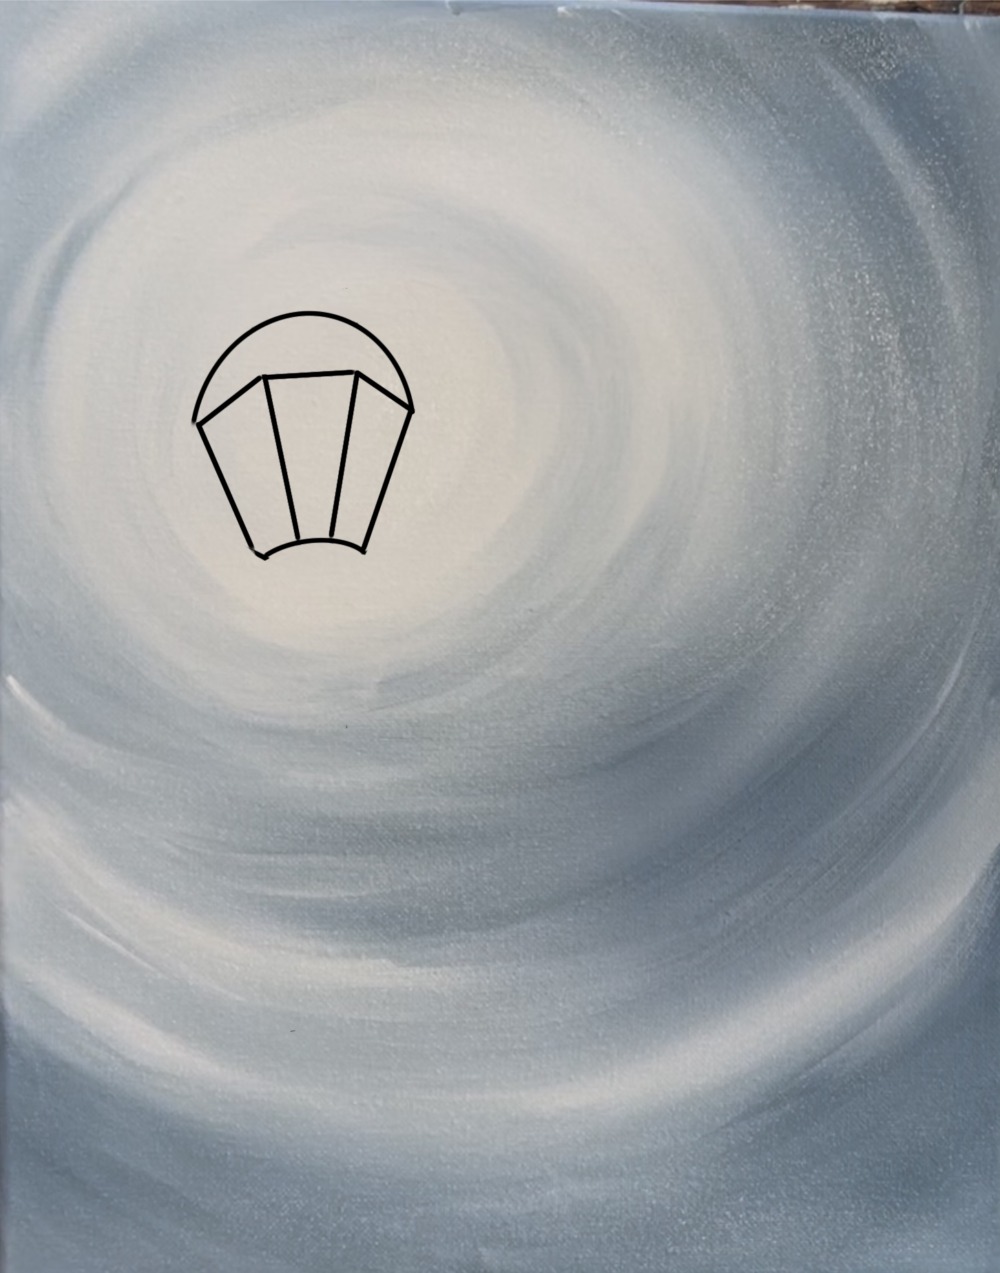
Use a pencil to draw the lamp. The lamp needs to be directly over your brightest part of the sky (that middle white circle). Draw four diagonal lines as shown below with a flat line on the top and two angle lines on each side.
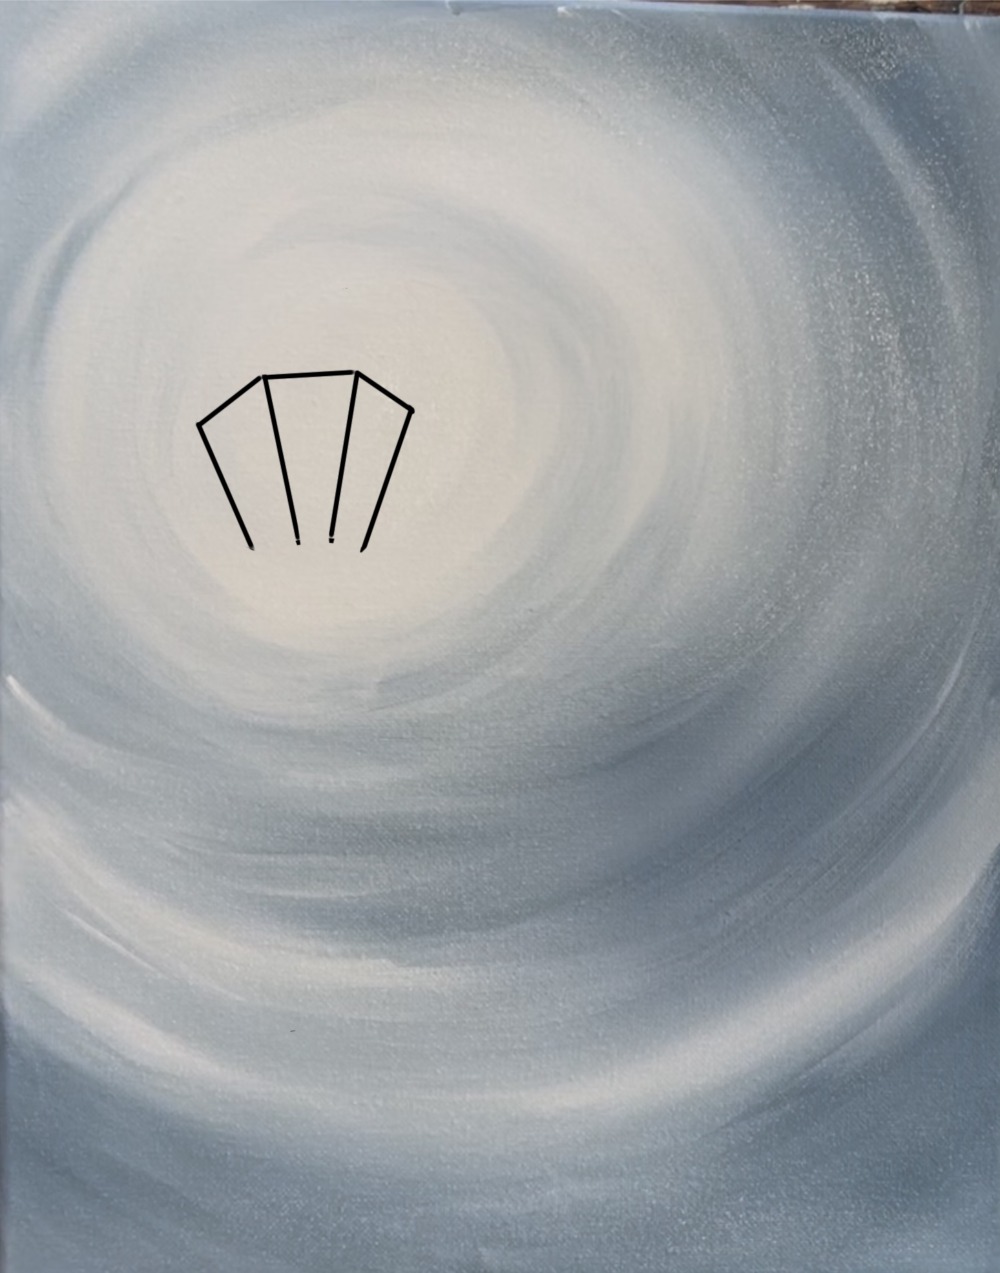
Draw a large dome on the top for the top of the lamp and a small curve on the bottom.
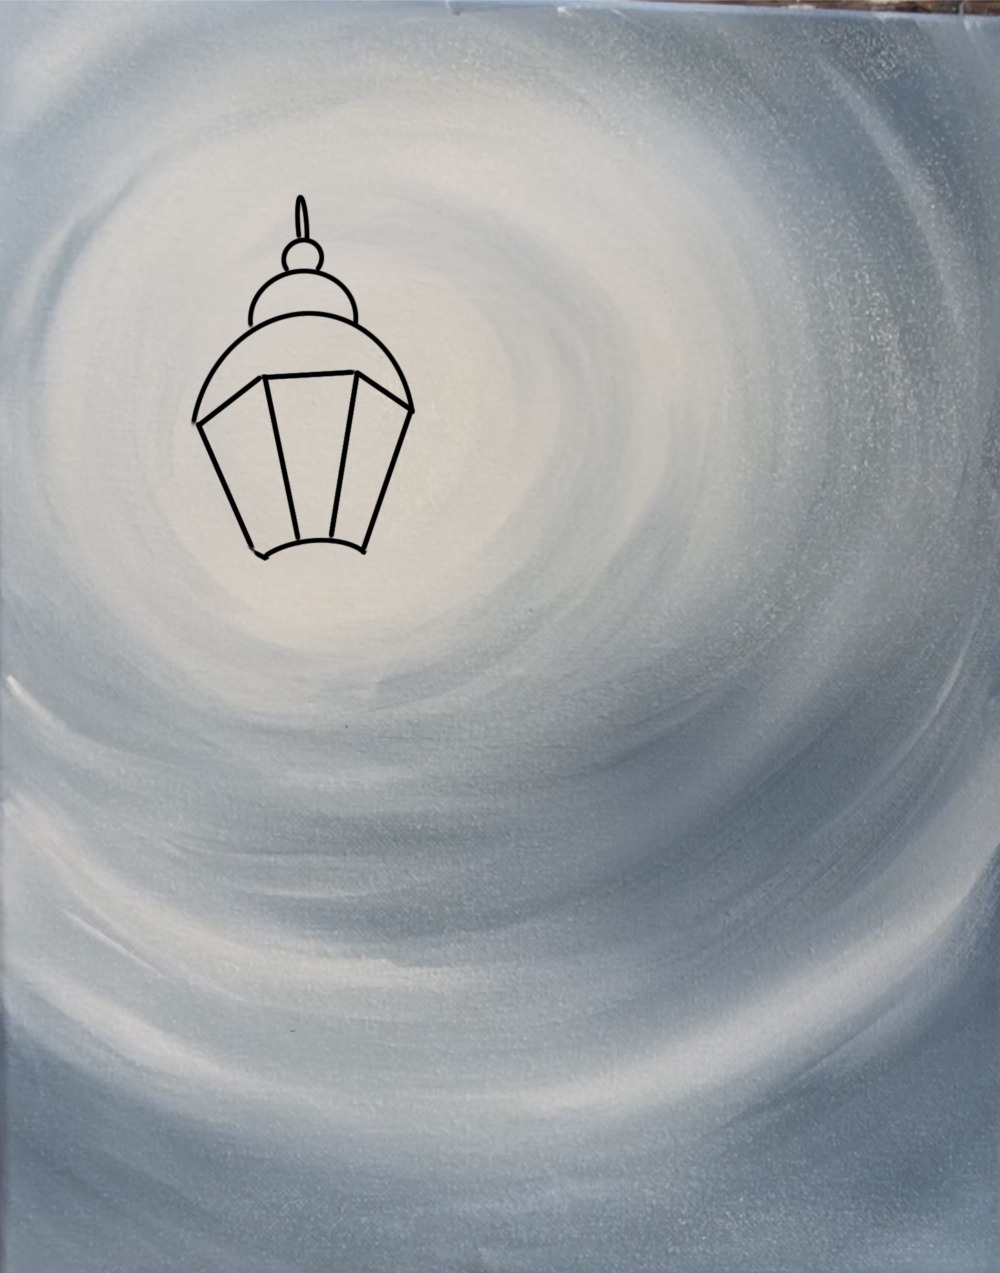
Draw another small dome on top of the larger curve. Then draw a small circle and a little “notch” for the very top of the lamp.
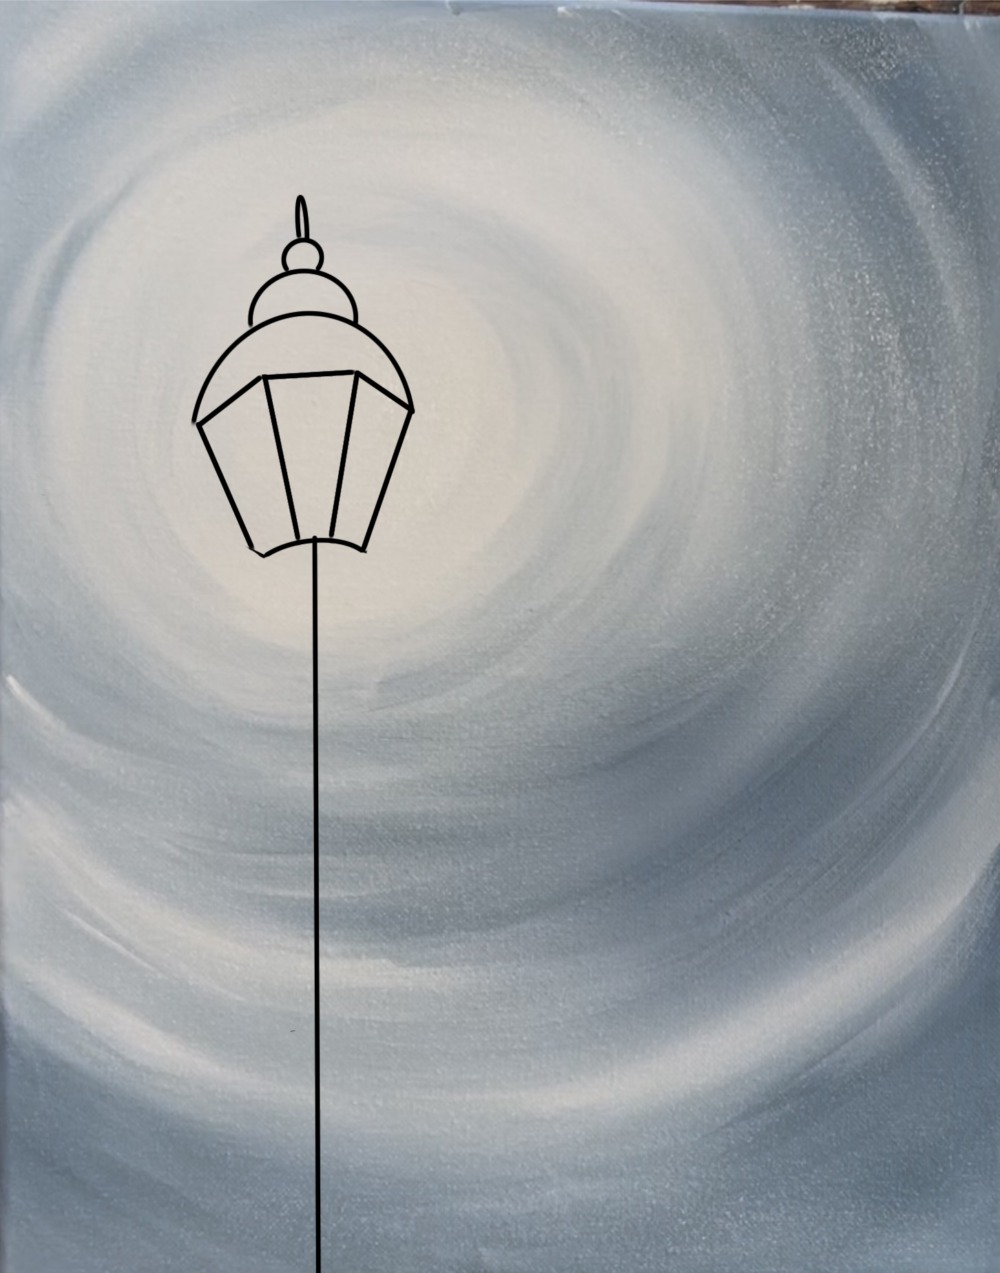
Then draw a vertical line in the center of the lamp for the center of the post. This line goes all the way off the edge of the canvas on the bottom.
Draw the bow next. Draw a circle for the center of the bow just below the lamp.
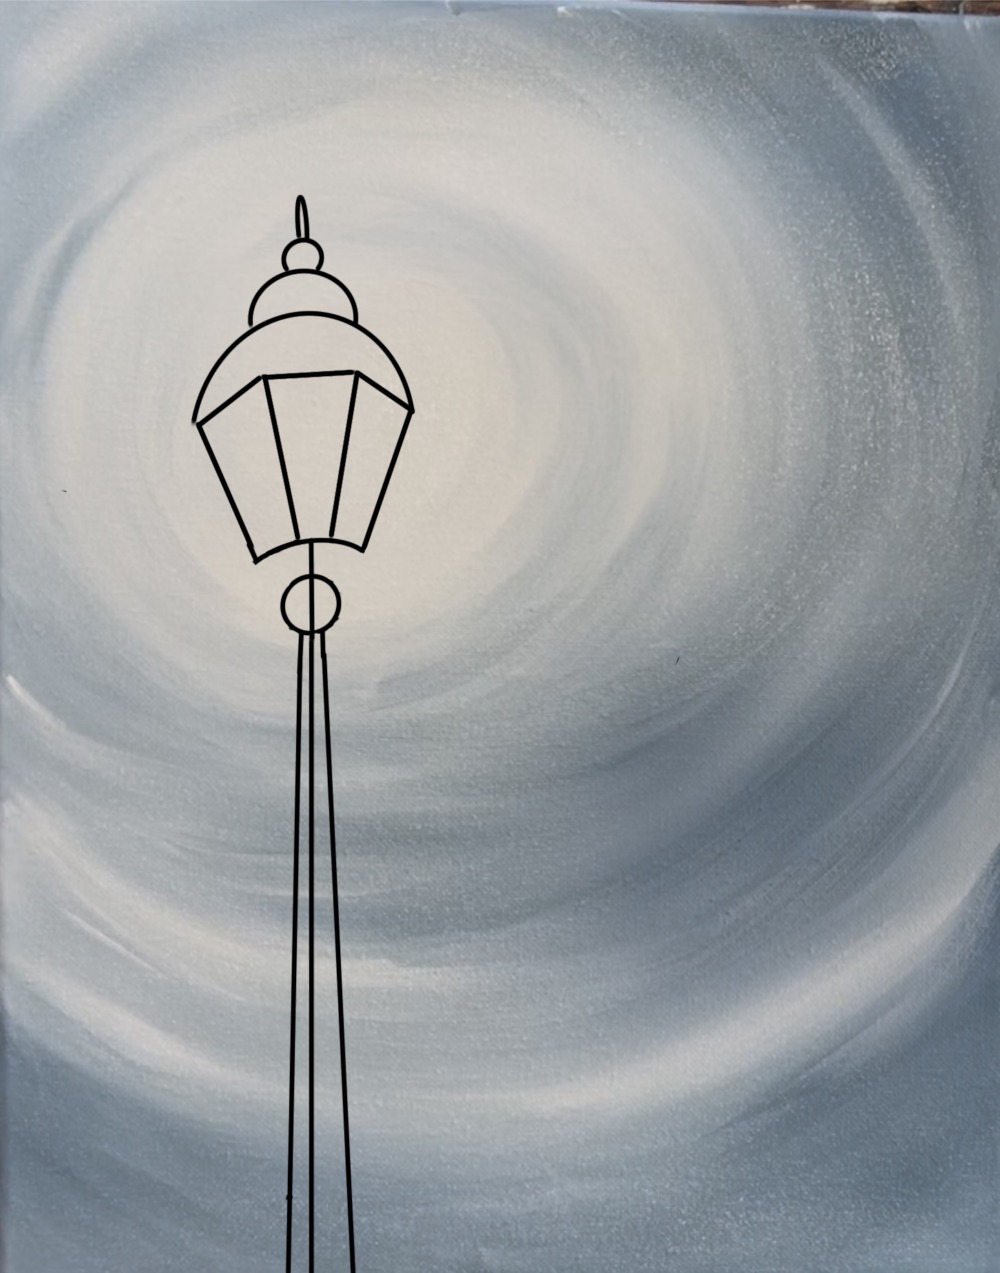
Draw two oval shapes for the openings of the bow and then two triangular shapes for the two loops. This is on each side of that circle.
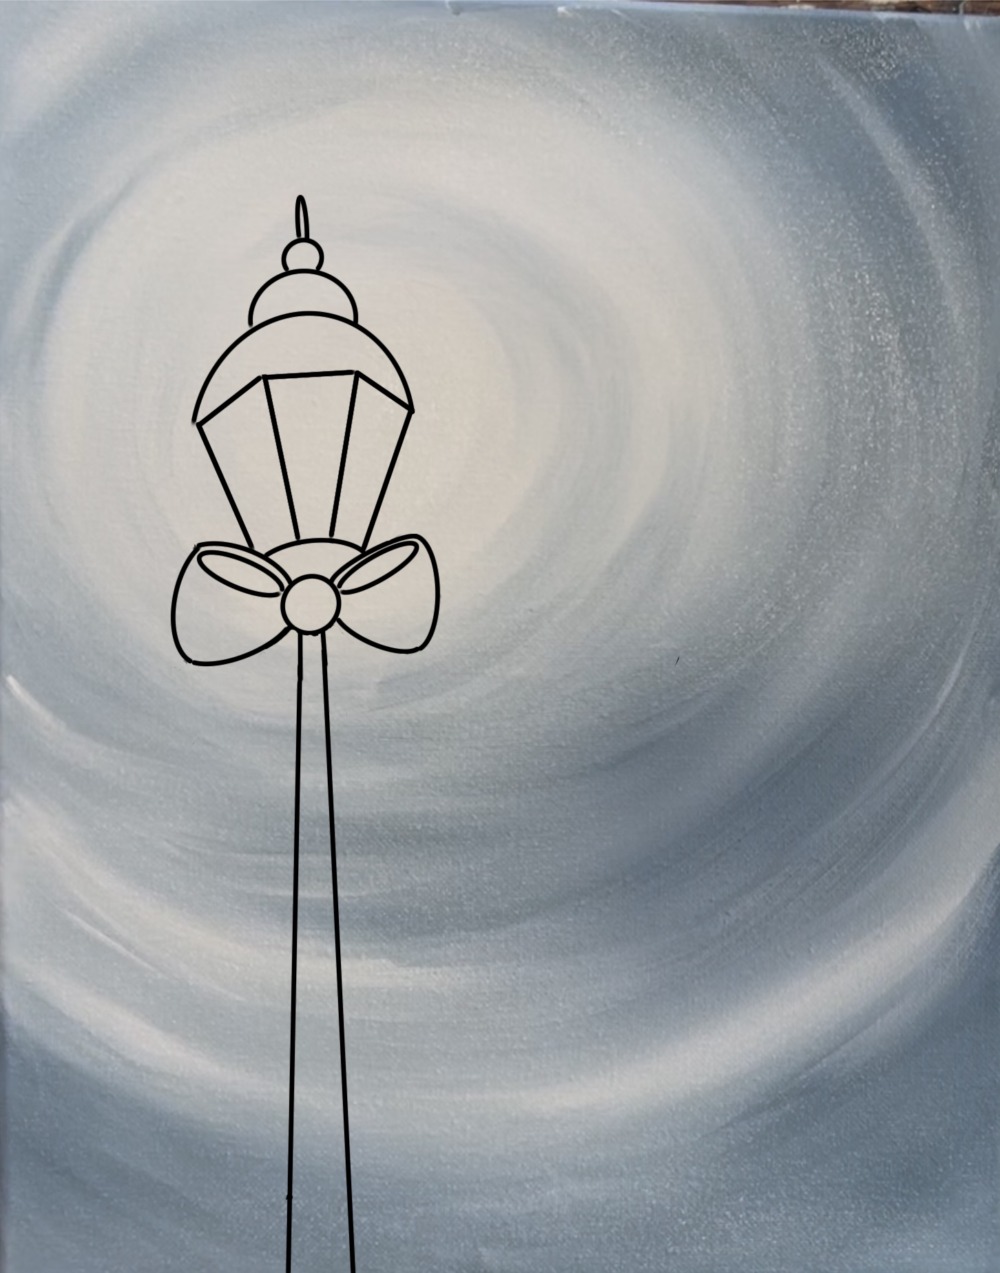
Then draw the two bow tie ends as two wavy shapes with pointed ends. Erase any unneeded lines.
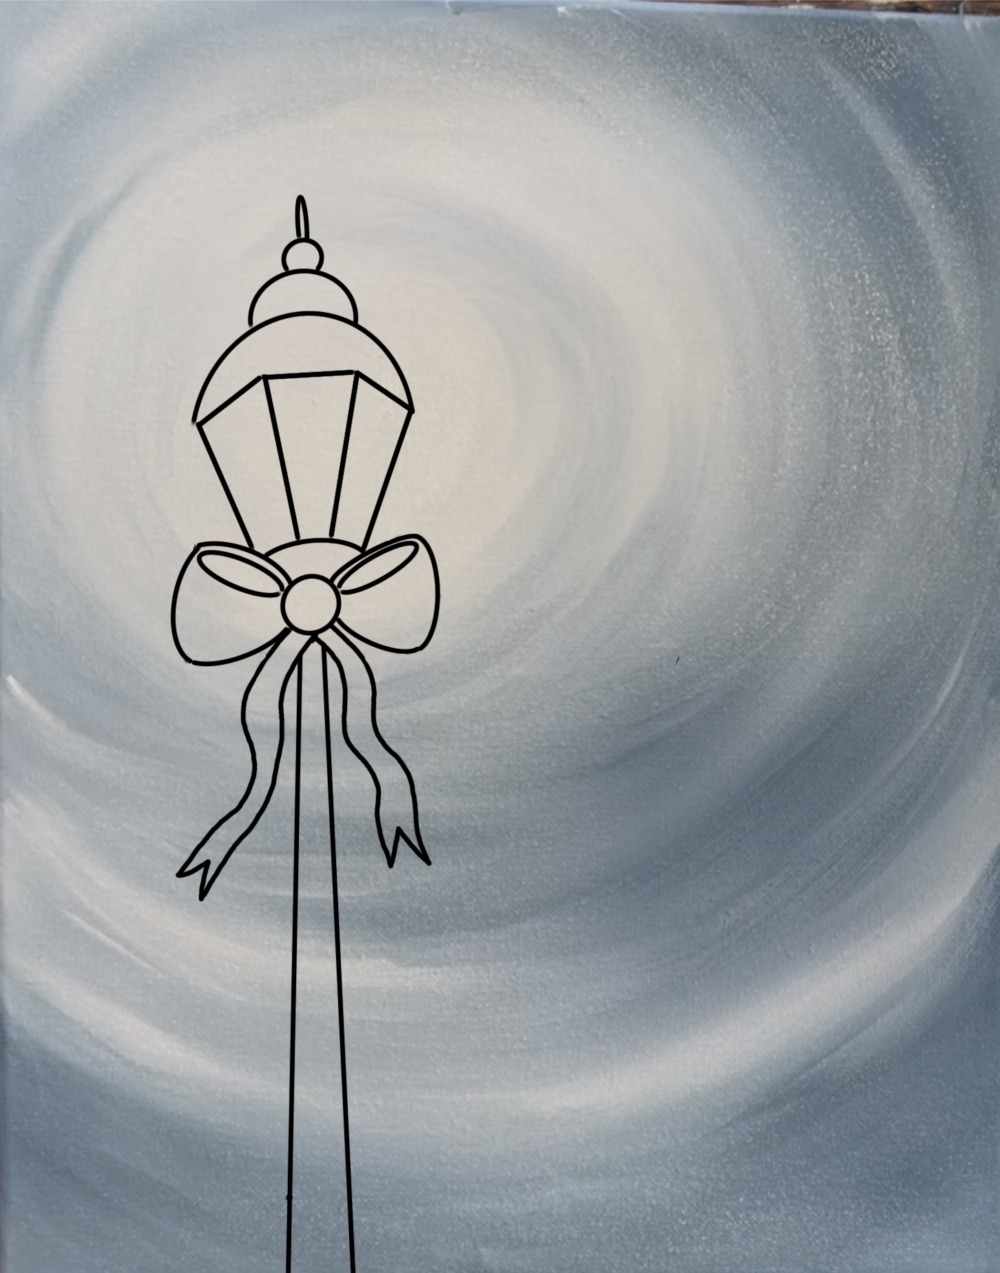
Use a ruler to draw a horizontal line to form the sign holder. Draw a decorative “spiral” on the end of this beam. Then draw the sign hanging down from this horizontal beam.
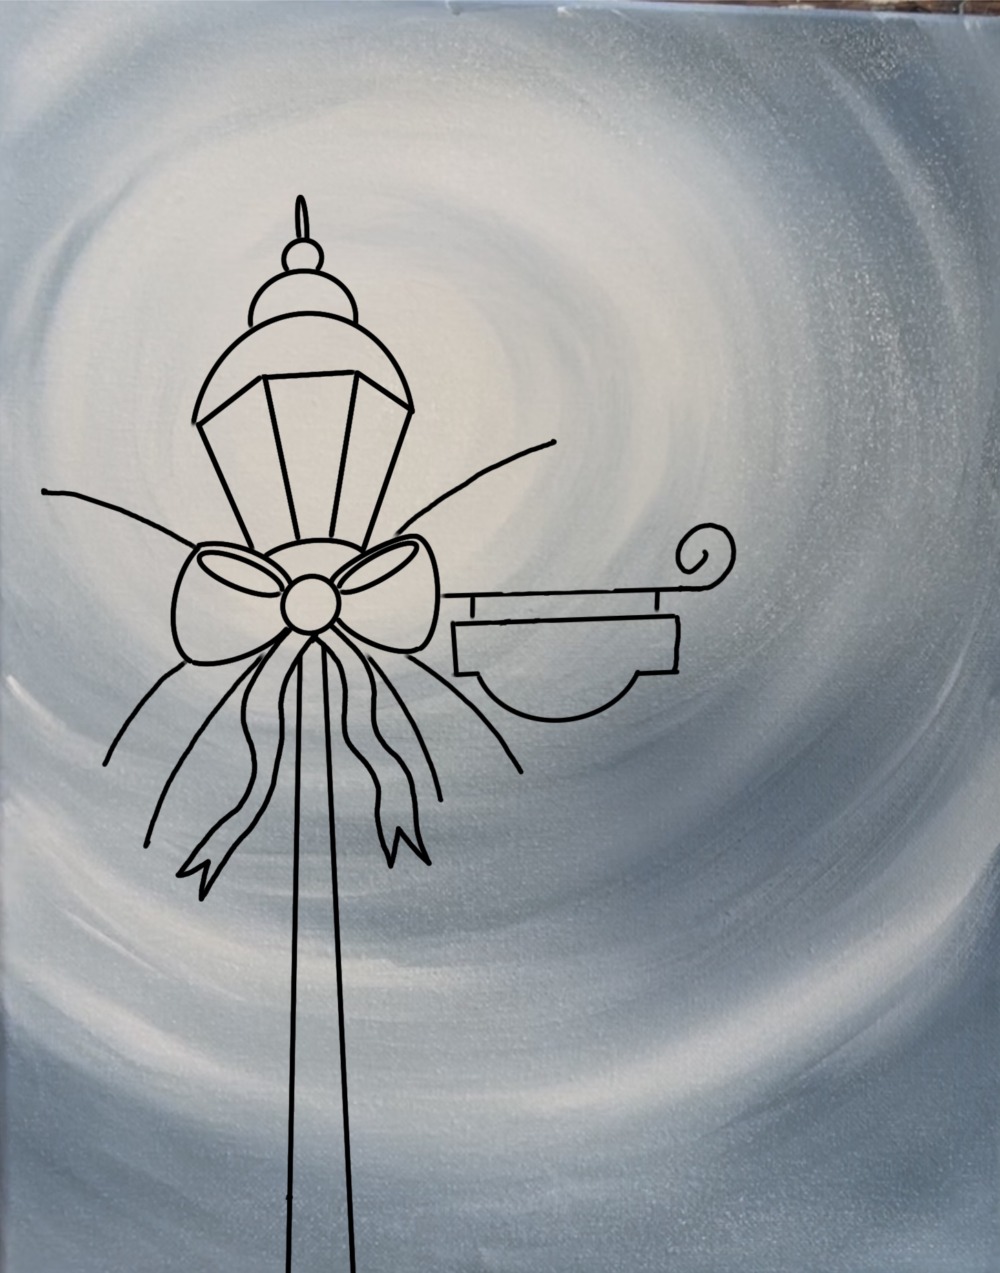
Draw a few lines coming out from around the bow. These will be the branches for our pine needle branches we will paint later.
3. Paint yellow glow behind lamppost
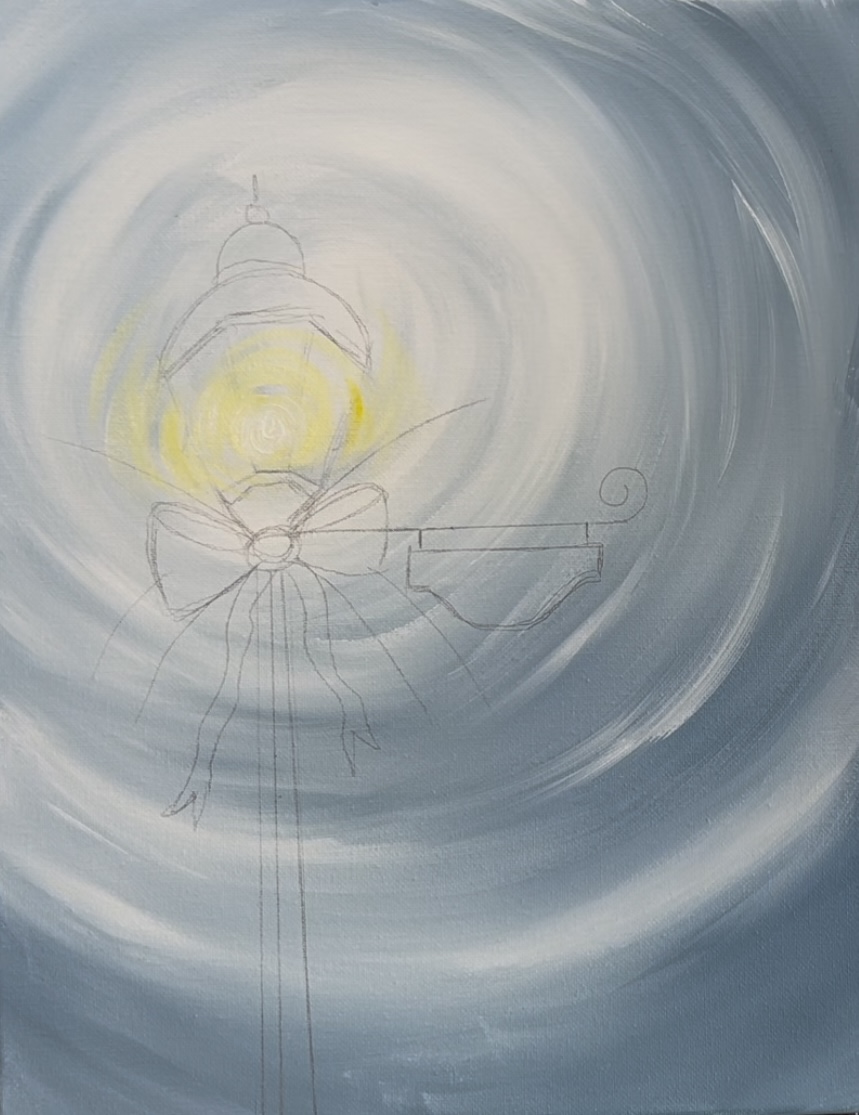
Use a #4 round brush and the two colors: “primary yellow” and “titanium white”. Mix equal parts of both of those colors together to create a pale yellow. Paint over your drawing but try not to “smear” the pencil lines. Start in the center of the lamp and paint radiating circular lines that beam outwards. Then rinse the brush. Add titanium white to your brush and paint a small circle in the center of the lamp for the bright bulb.
4. Paint snow on ground
Use titanium white and the 3/4″ flat brush to paint a hilly area on the bottom. This starts out flat on the left and lifts up on the right.
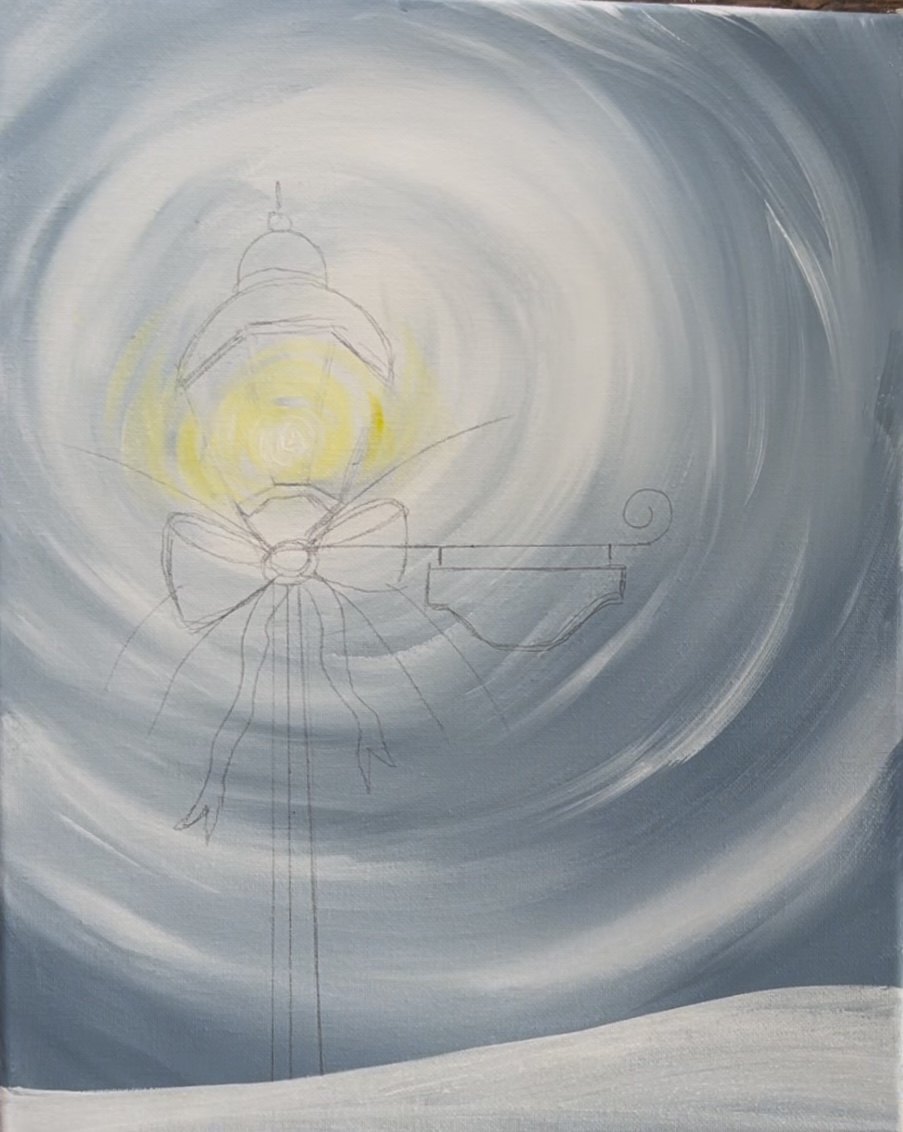
5. Paint lamppost
Use the #4 round brush and mars black. Paint the lamppost according to your drawing lines.
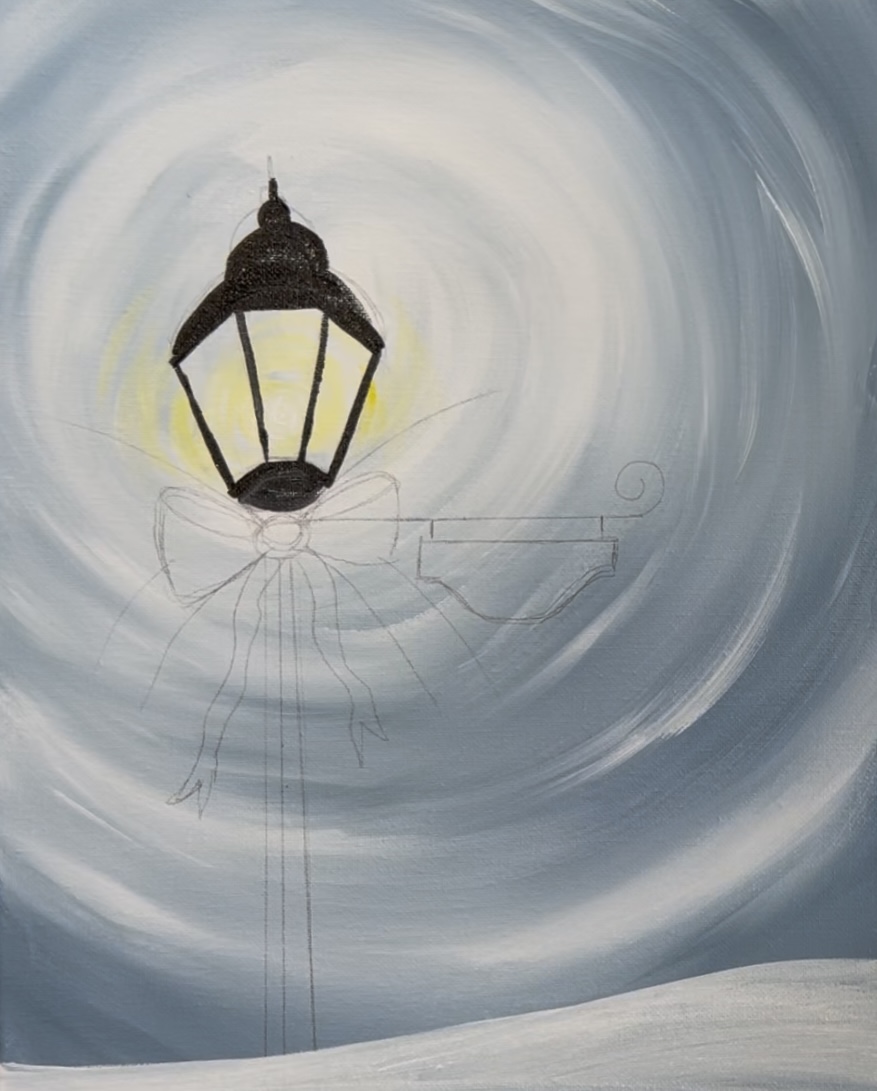
Start with just the black at first. Then gently blend some white into the black on the left sides of the lamp. This will highlight the lamp a bit and give it some dimension/ two toned look.
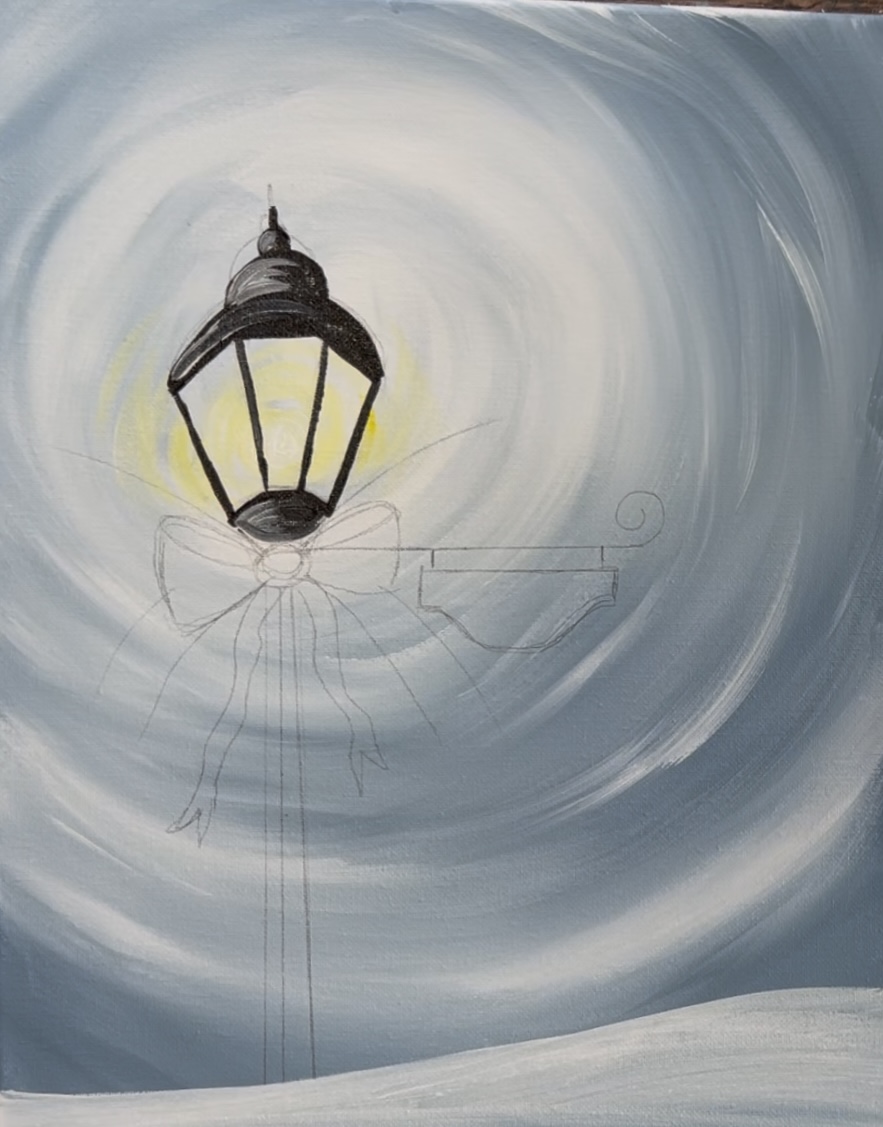
Paint the lamp pole. This pole overlaps the bottom snow area and goes off the edge of the canvas. It also is thicker on the bottom and thinner on the top.
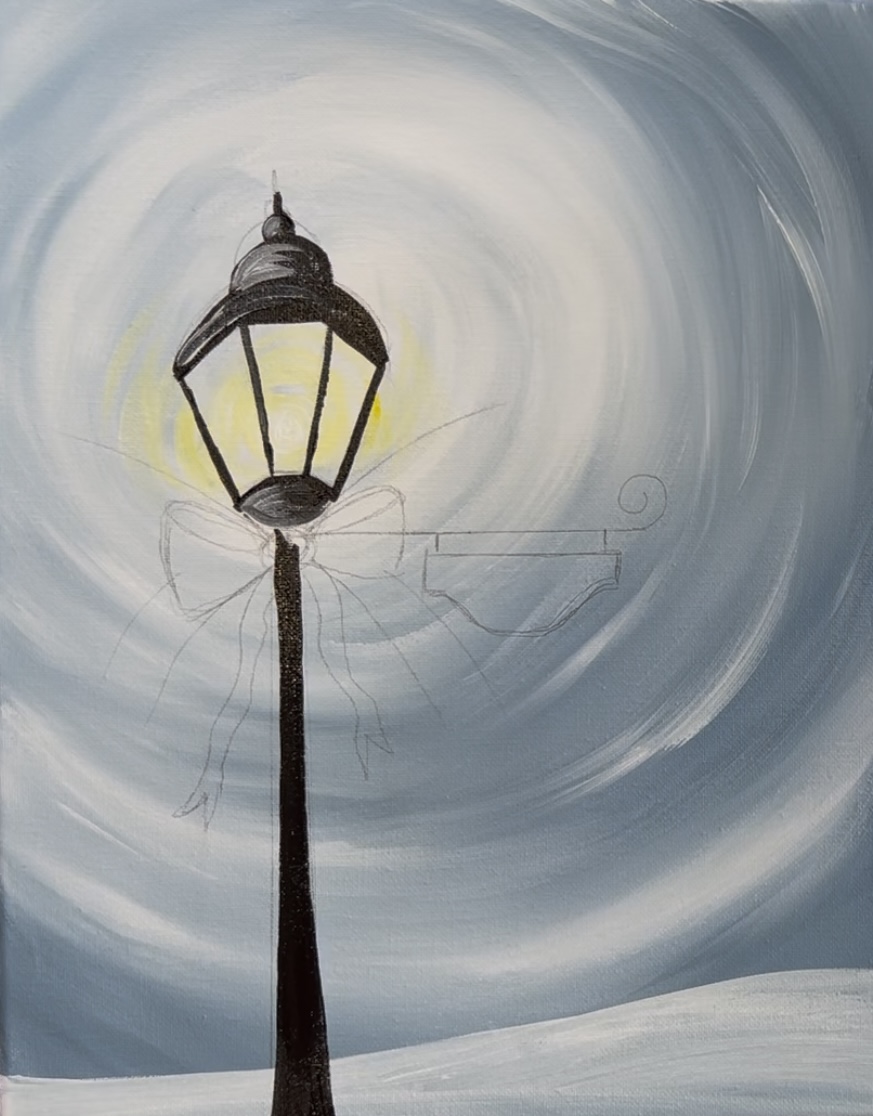
Then paint a horizontal beam that will hold the sign. This has a spiral on the end. You can also change the style of this to something else if you want!
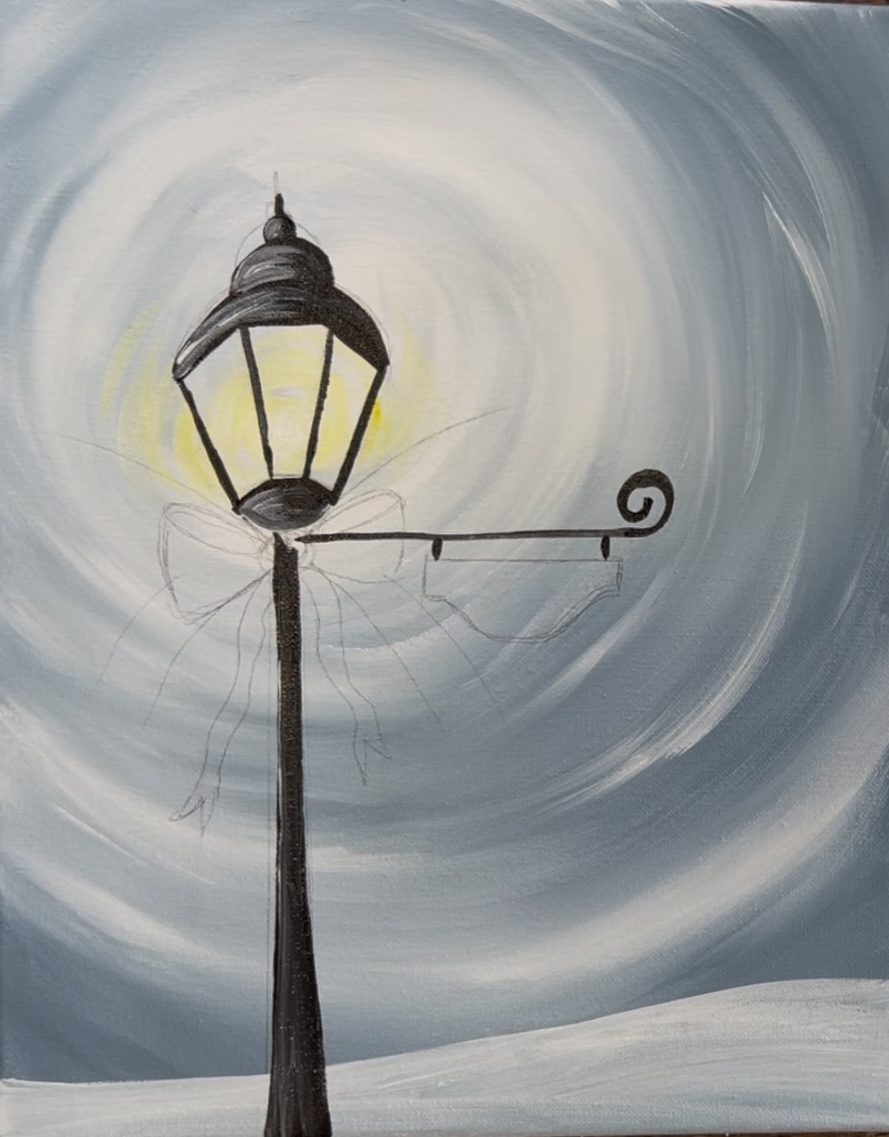
Add a little bit of white highlight to these black lines as well.
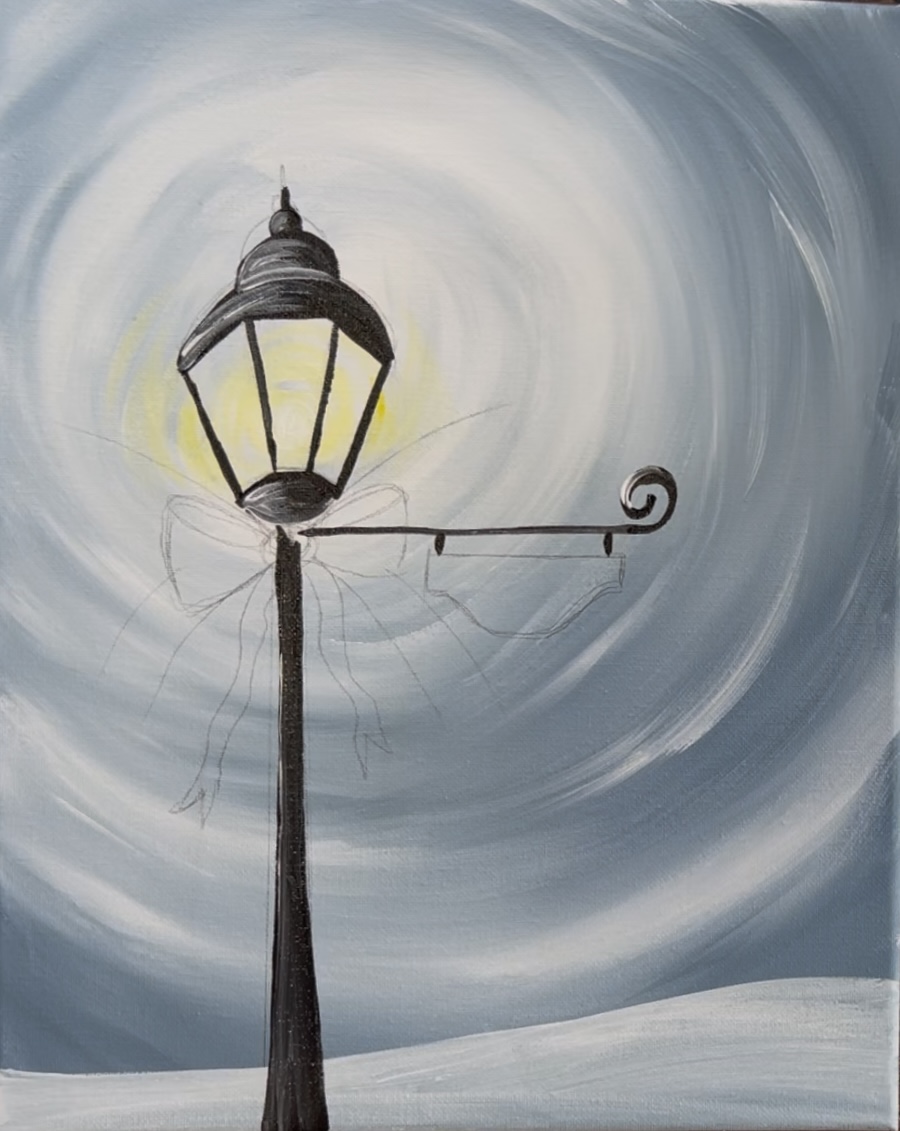
6. Paint trees (first layer is dark and without snow)
I like to use a t-square ruler to help line my trees up.
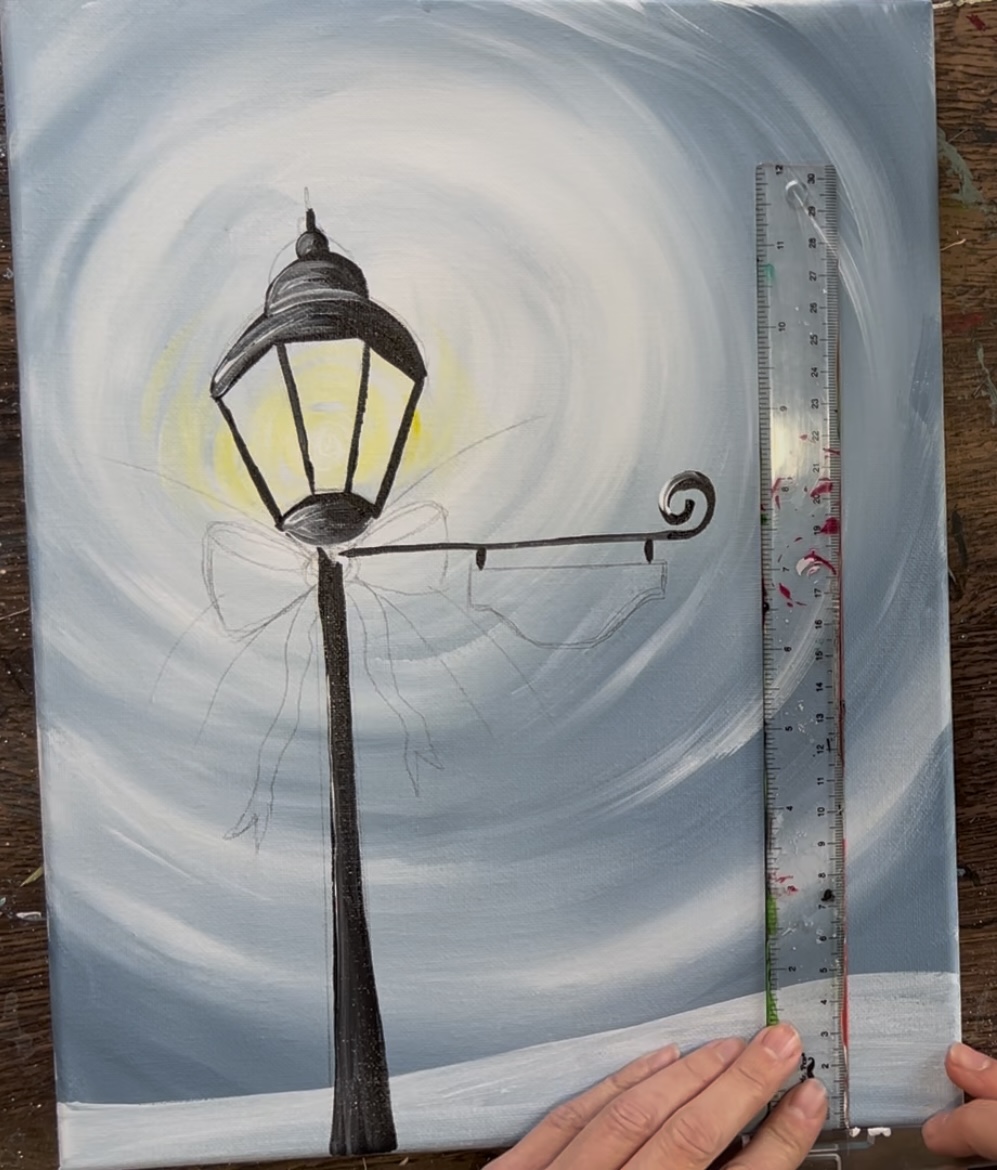
Mix a medium gray on your palette by mixing the “blue gray” with a little bit of “mars black”. You want to create a shade of gray that is just slightly darker than the sky background. Use the edge of the brush to paint a vertical line about the same height as the lamp.
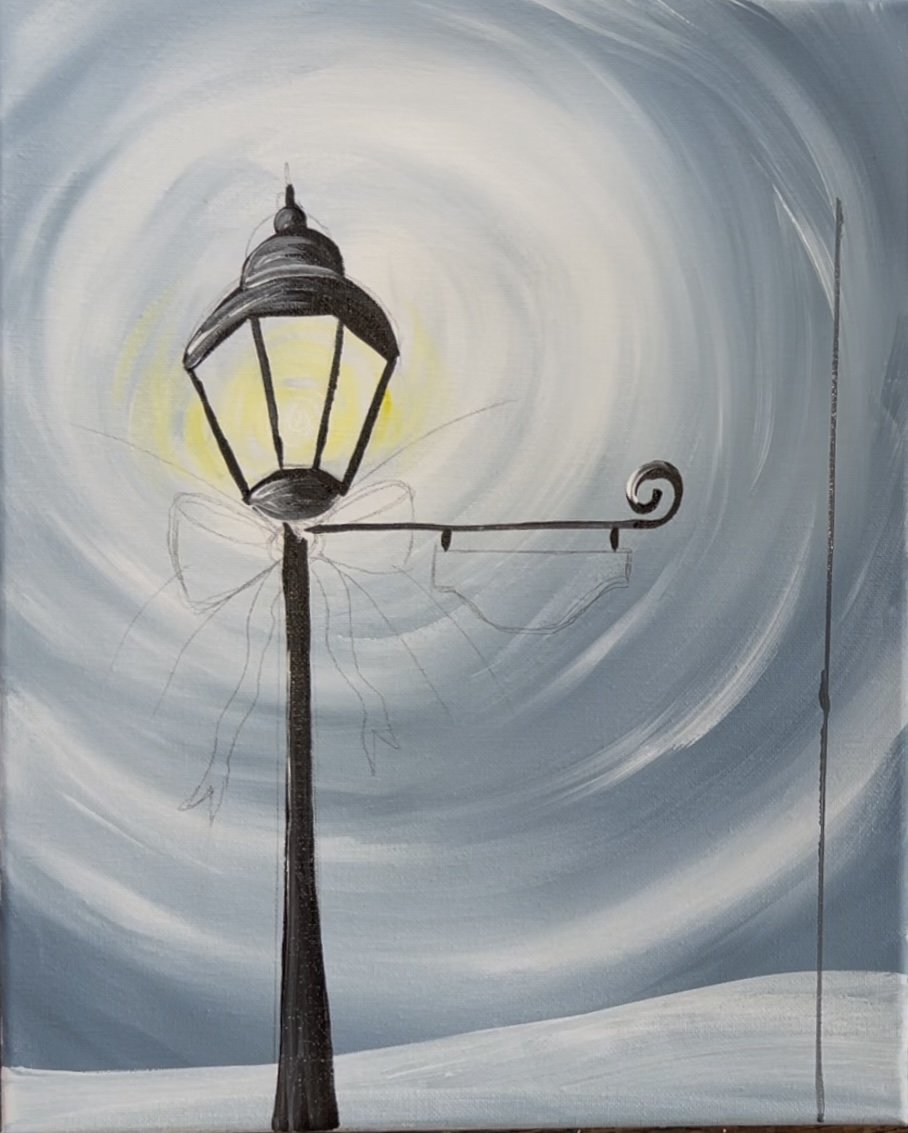
Tip #1: make the branches for this tall tree narrow so that it doesn’t take up too much space on the right side of the canvas.
Tip #2: Sometimes it helps to draw a triangular shape lightly with a pencil so you have a guide for filling your trees in.
Use the edge of your 3/4 flat to “stamp” tree branches. Start at the top of the line. Use just the corner of the bristles at first to make little marks. Work in a zig-zag direction going left and right to form the tree branches. As you work your way down, your branches get wider and form a triangular shape for the tree.
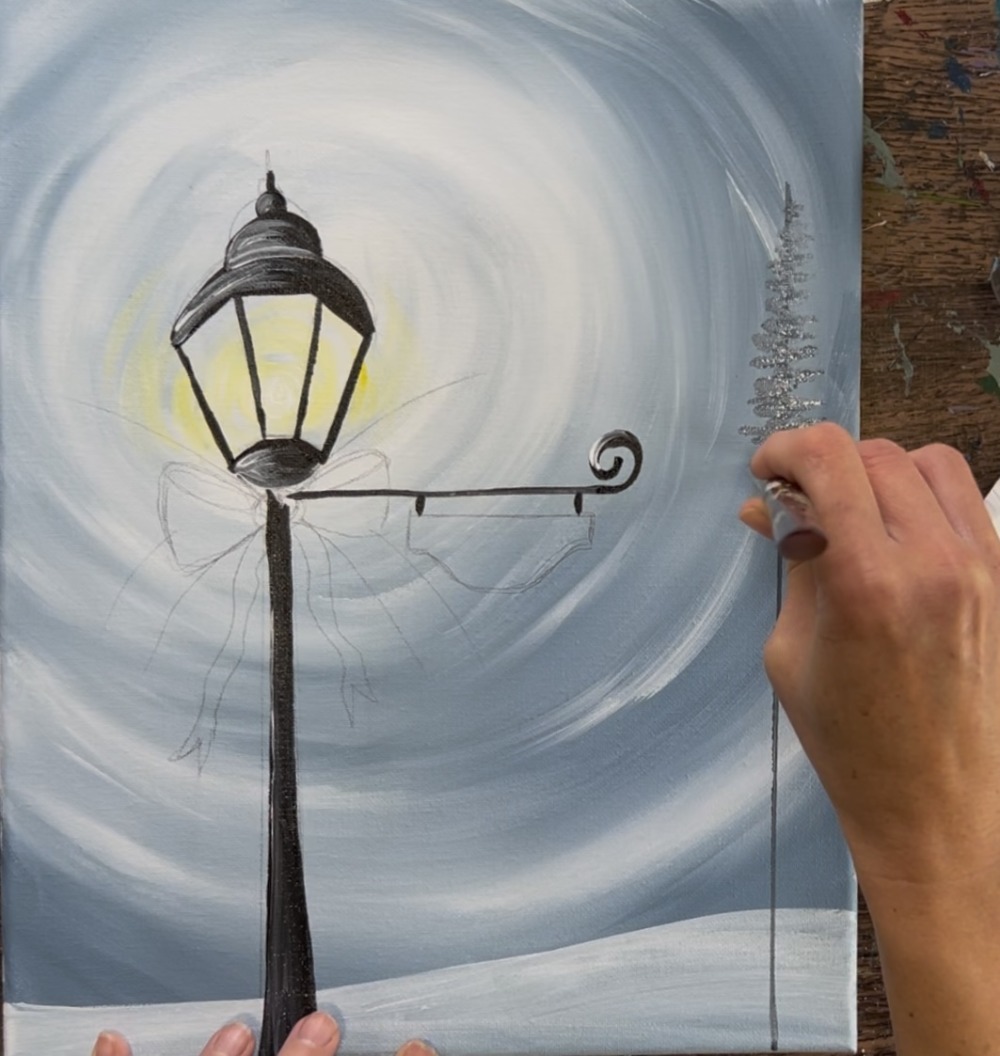
Work your way all the way down until the tree goes off the bottom edge of the canvas. We don’t see the bottom of this tree.
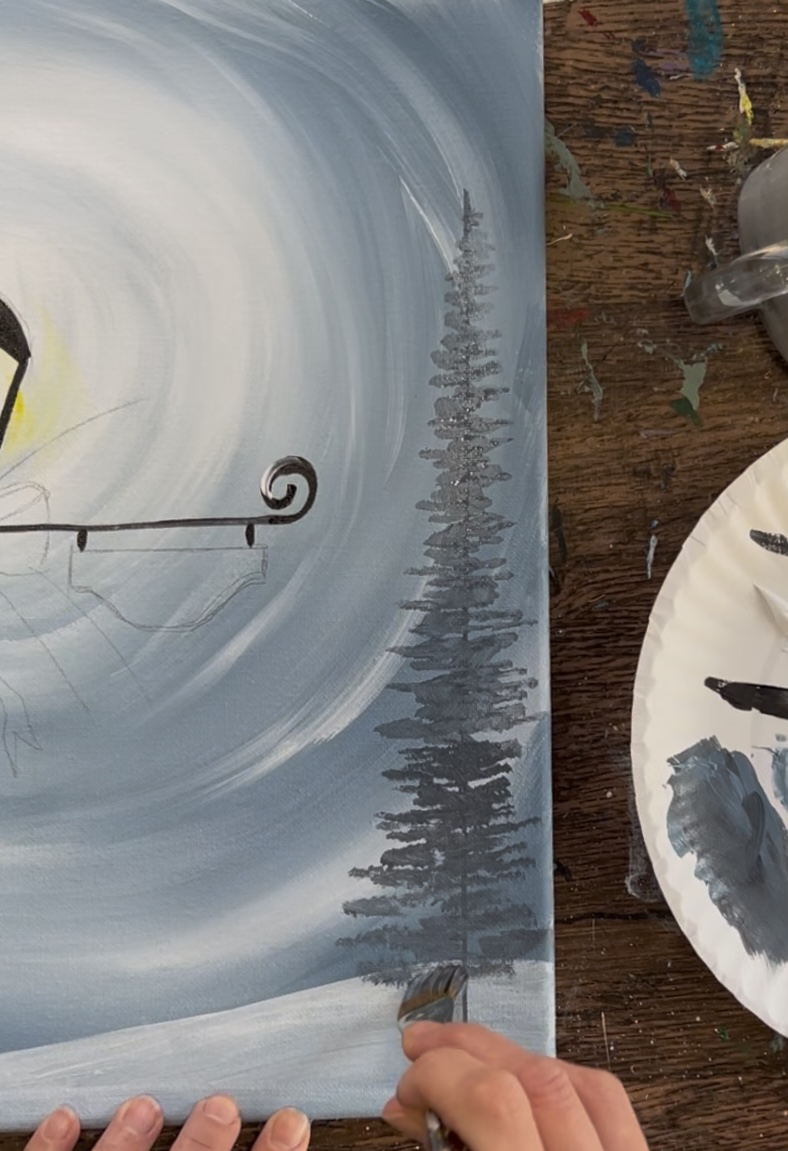
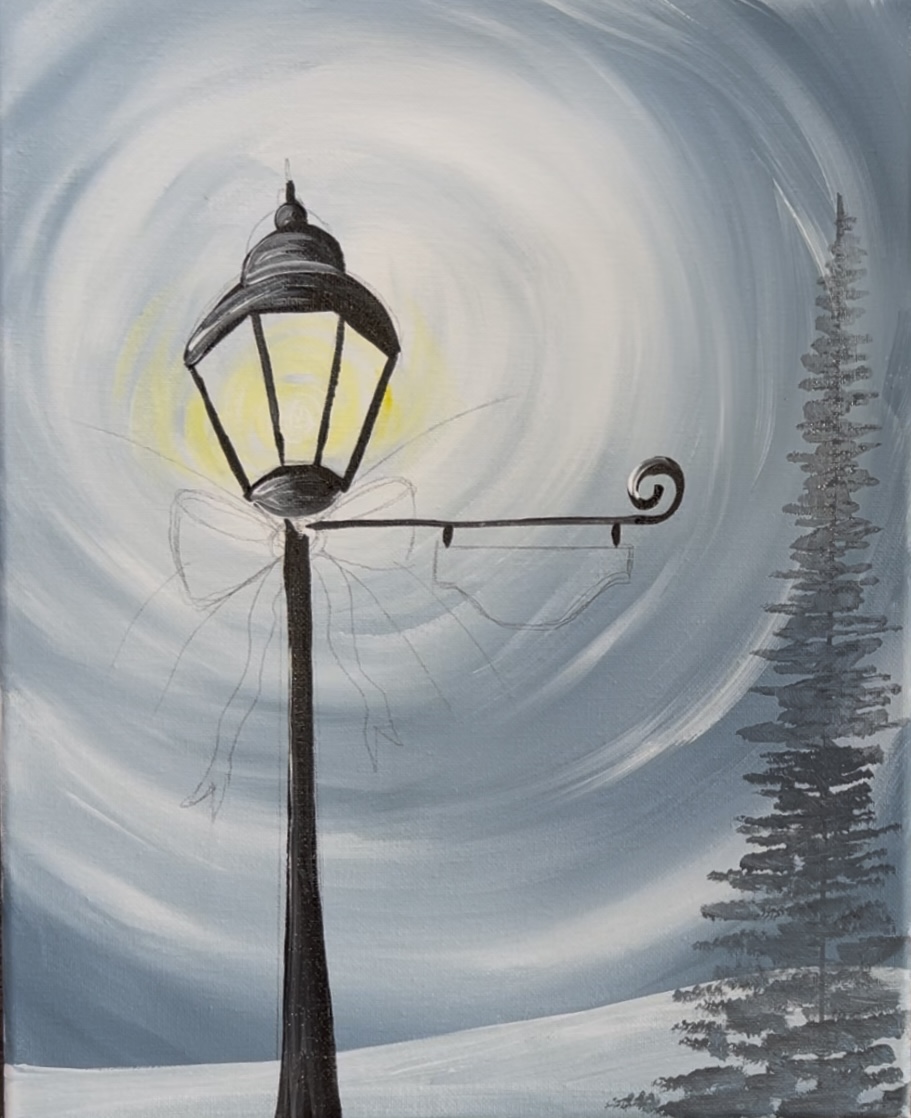
Next, mix “hooker’s green hue” into the dark gray you just used to paint the tree. Go back over this tree with a second layer of green. Do not cover all of the dark up, leave some showing through.This creates depth/ shadow in your tree.
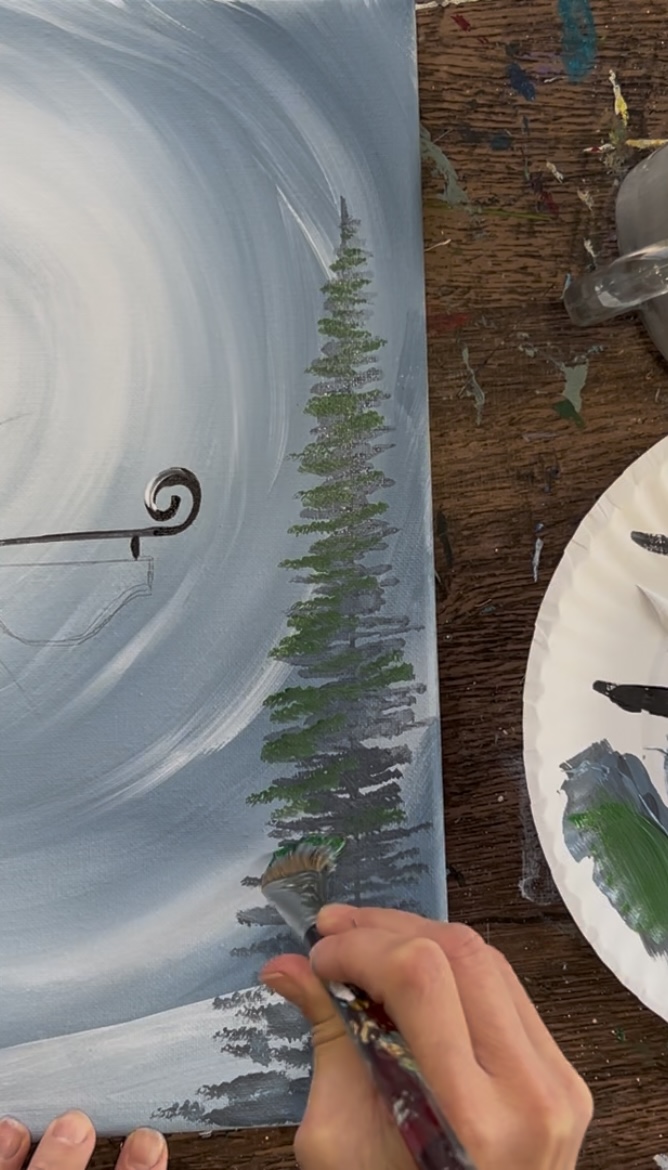
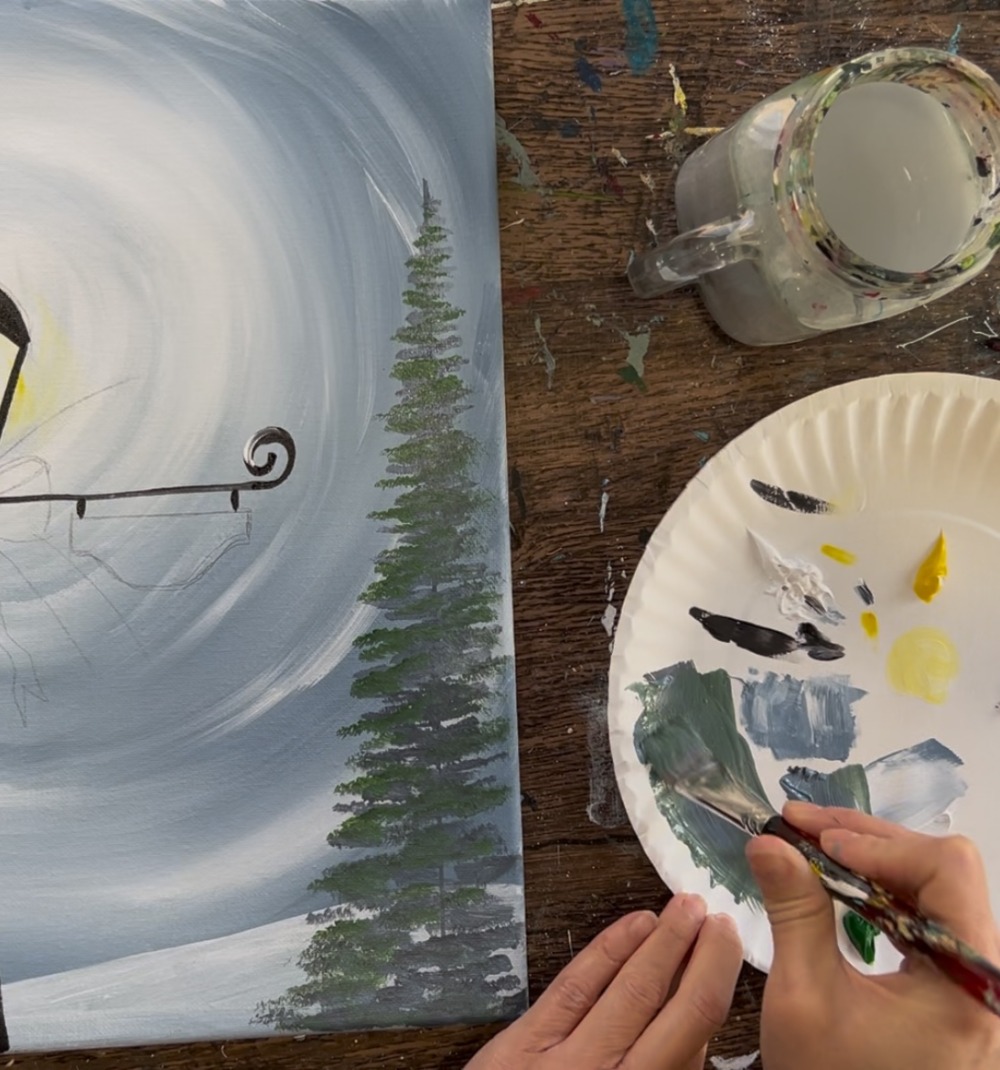
Repeat this same technique for a second and third smaller tree. These two trees actually start on the top of that hill line and are much smaller than the tree on the far right.
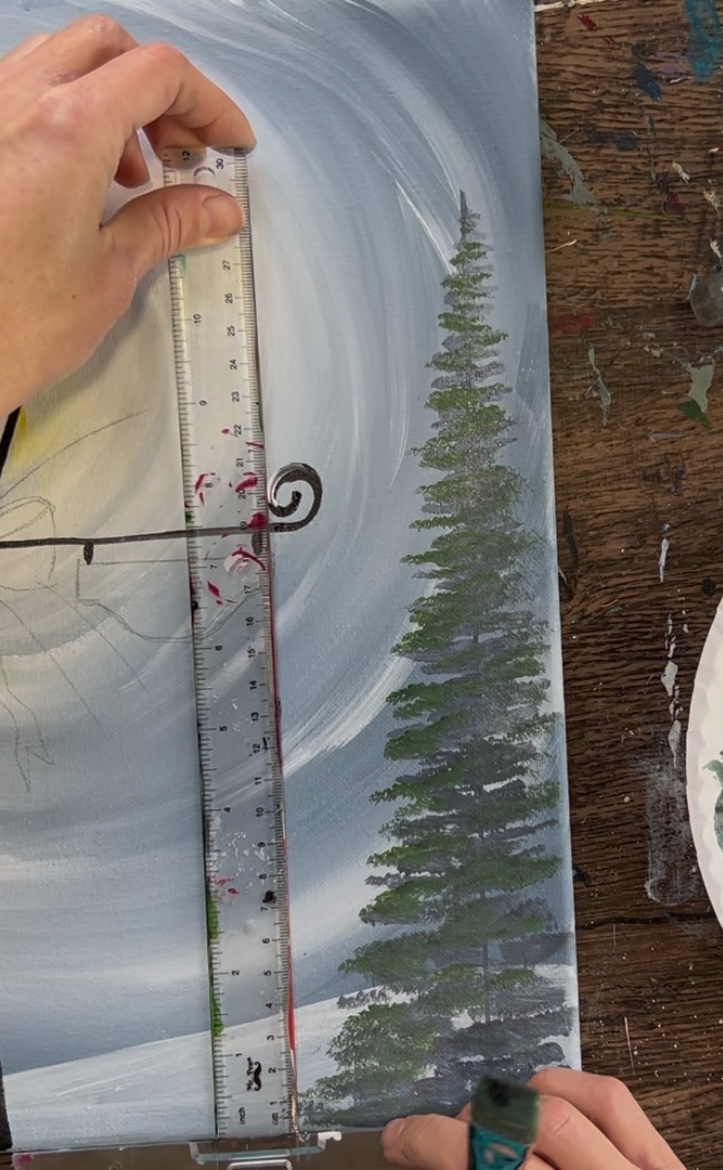
Start with just the vertical line.
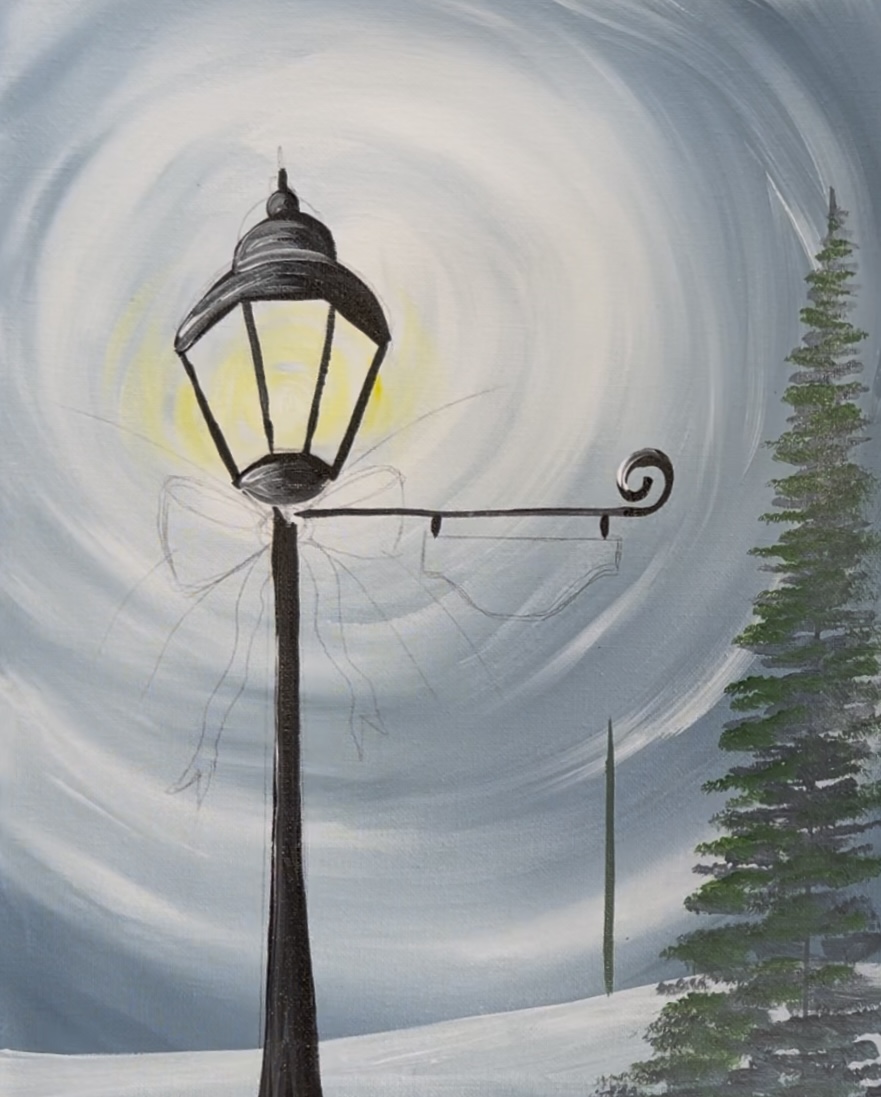
Then form the tree branches starting from the top of the line and working your way down.

Paint a third tree to the left. This one I painted just slightly shorter than the middle tree.
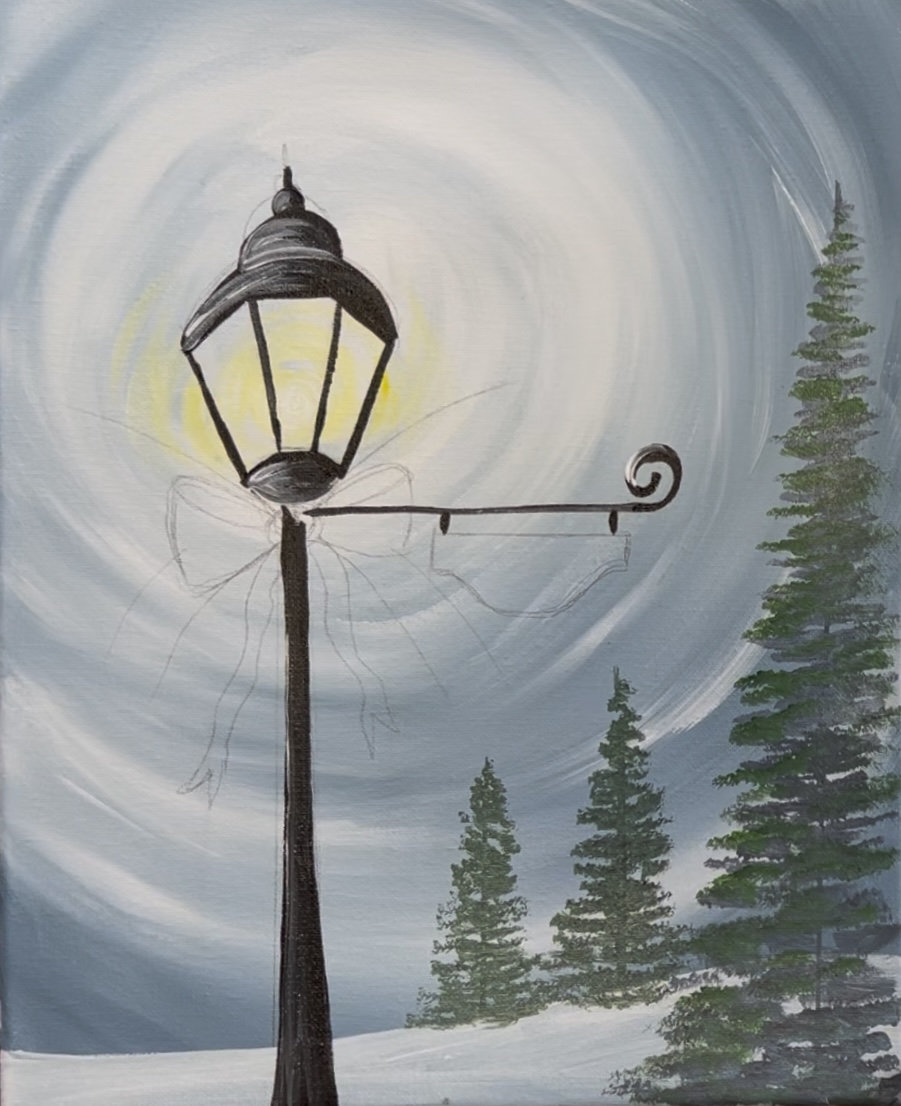
Next, add a little black to your brush (this is green mixed with the dark gray and now a little black to create a much darker shade). Go back over each of your trees and add this dark color to your branches using the same stamping technique. Do not cover all of your previous layers.
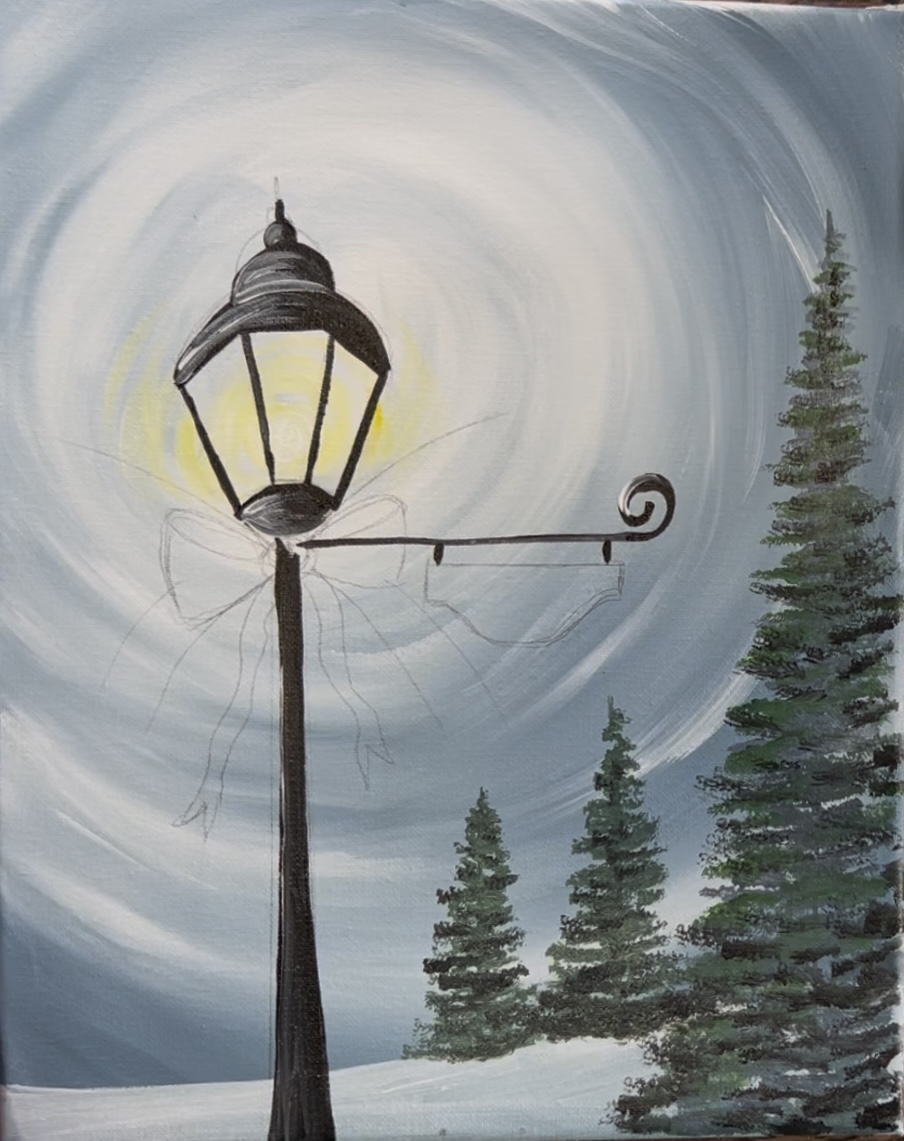
7. Paint pine branches
Use a 3/8″ angle brush to paint pine branches. Start by mixing a small amount of black with hooker’s green hue to make a really dark green. Use the edge of your 3/8″ angle brush to paint a line for the middle of the branch. These are the lines that we drew earlier with pencil.
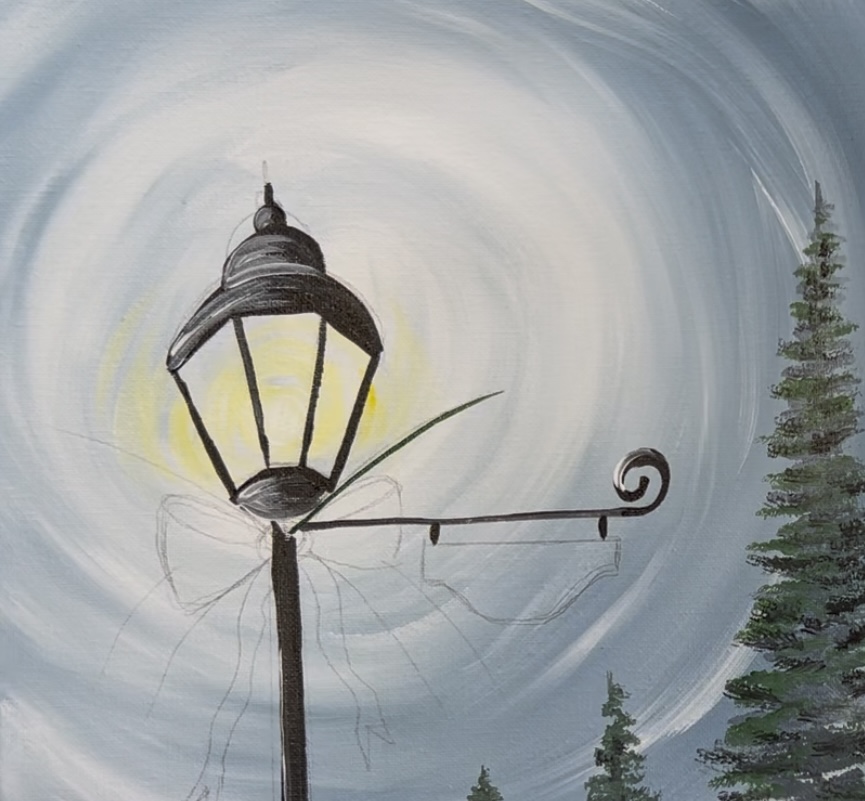
Next, paint pine needles using the 3/8 angle brush and the same dark green color. Start on the end of the branch line and paint little diagonal paint strokes. Work your way from the end of the branch to the start of the branch and overlap many of your lines.
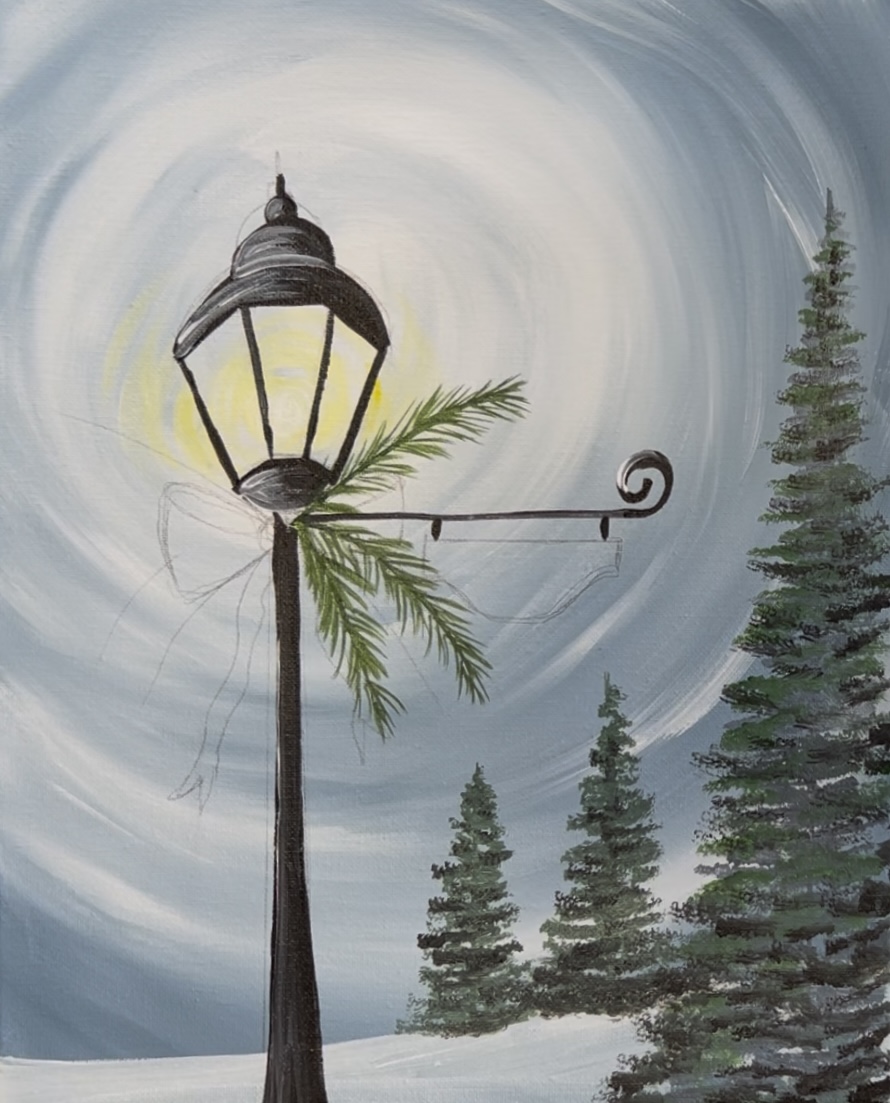
Paint the pine needles on each of your branch lines.

Next, without rinsing the brush, mix “primary yellow”, “titanium white” and “hooker’s green hue” together to make a bright yellow-green color. Go back over your pine needle branches and paint more lines. Create a layer of lighter green and don’t cover up all of your darker green layer.
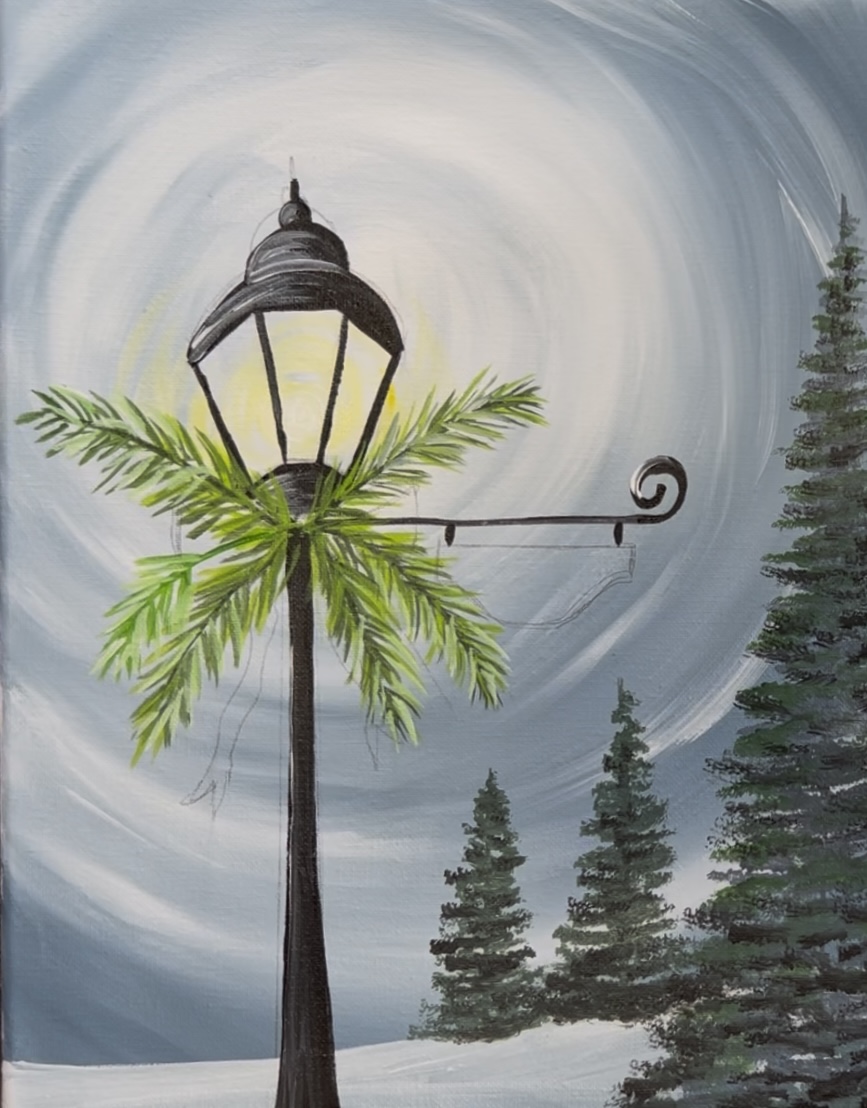
8. Paint snow on lamppost and paint sign
Use the #4 round brush and “titanium white” to paint snow on the top of the lamp and on the top of the sign holder.
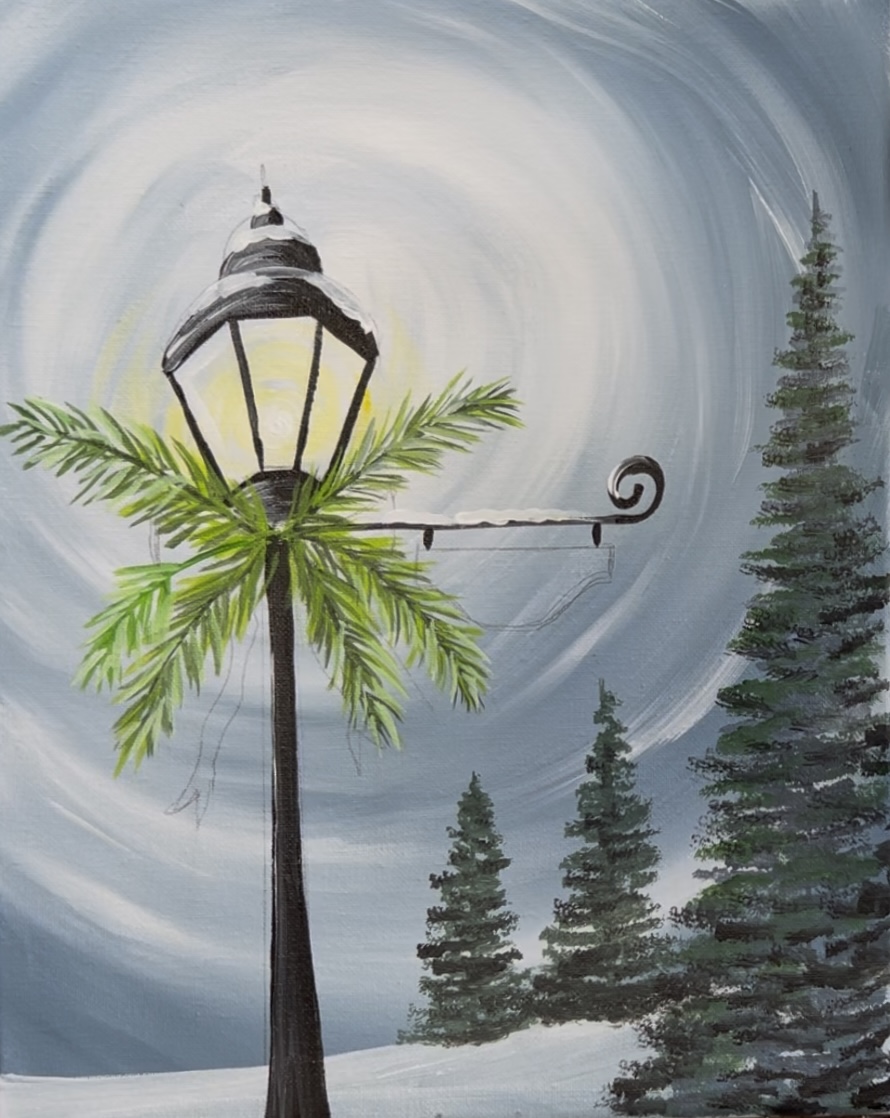
Next, mix the color you will use to paint the sign. To do this, mix 1 part “titanium white”, 1 part “cadmium red deep”, 1 part “primary yellow”. Add more white into it until it becomes a peach color. Then use the #4 round brush to paint the sign shape.
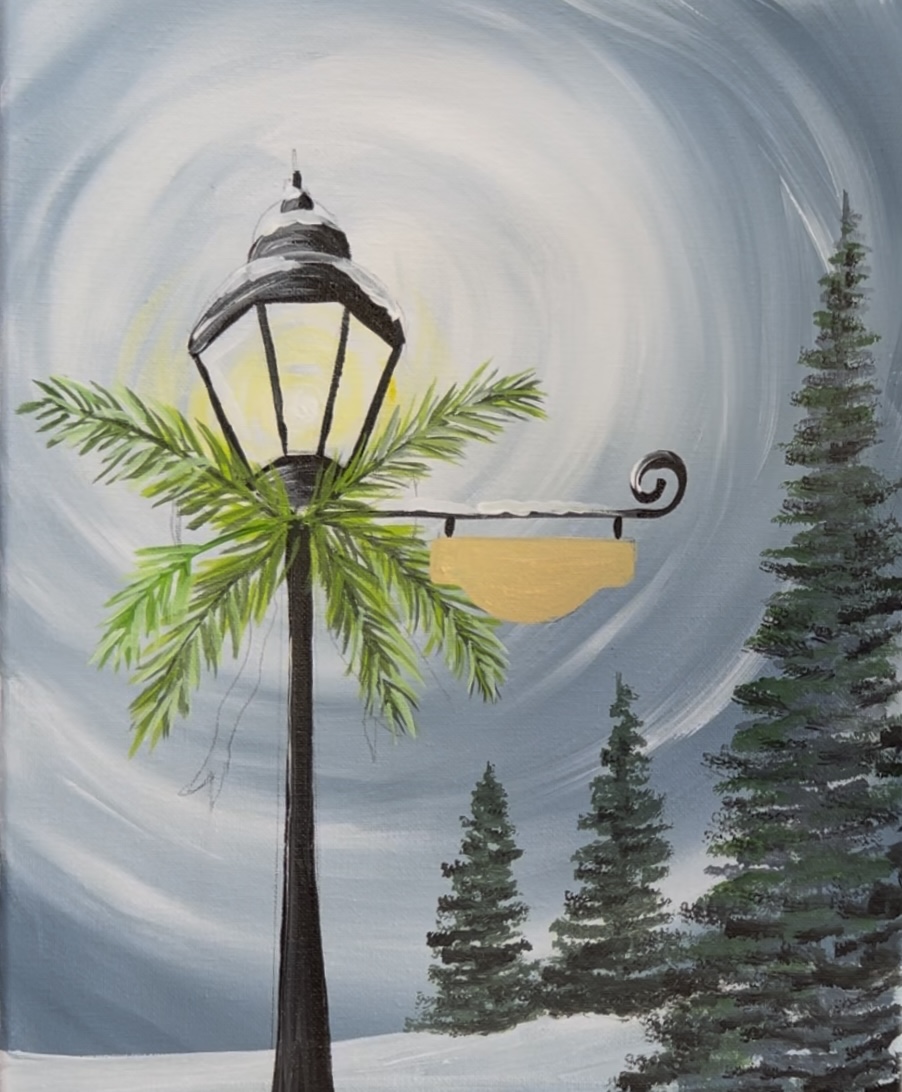
Then, rinse the brush off. Use “mars black” to outline the frame of the sign.
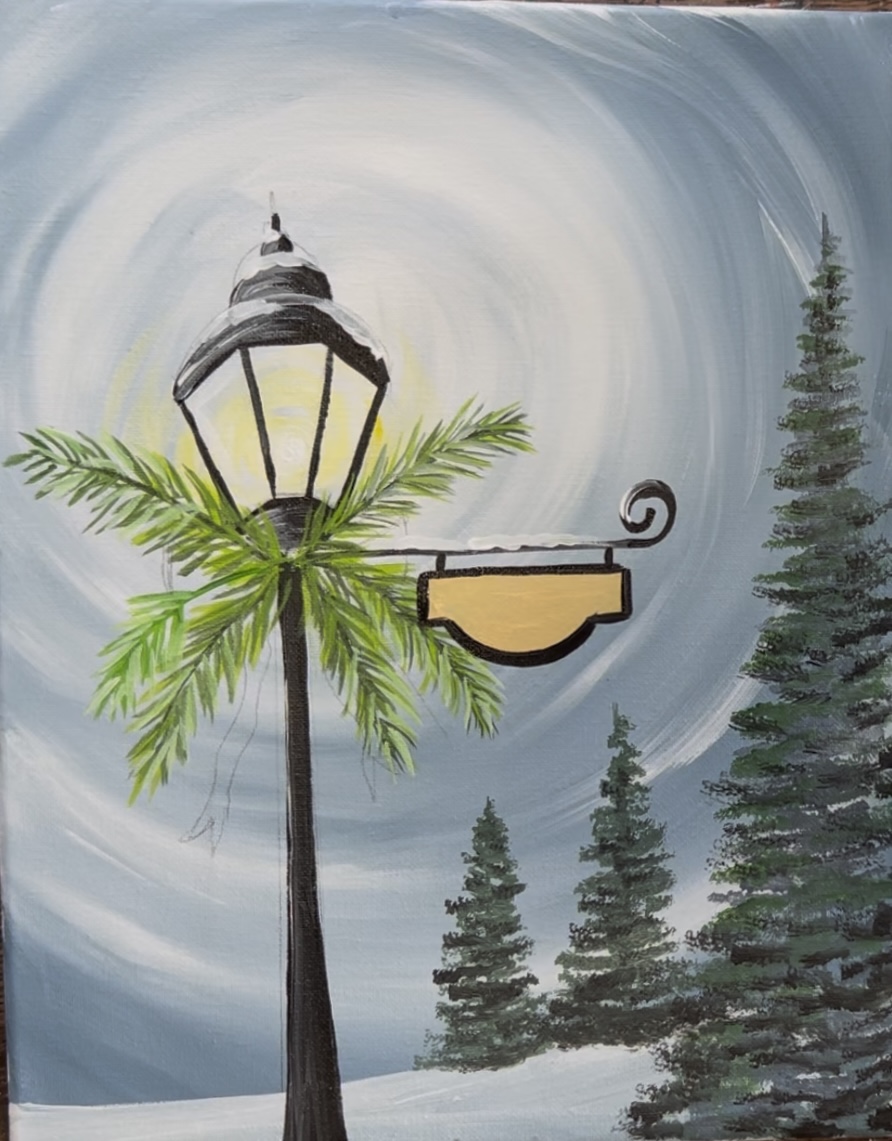
9. Paint bow first layer
In order to ensure brightness with the red in the bow, I recommend painting the first layer with “titanium white”. Use the #4 round brush to paint the entire bow in, excluding the opening part where the loops are.
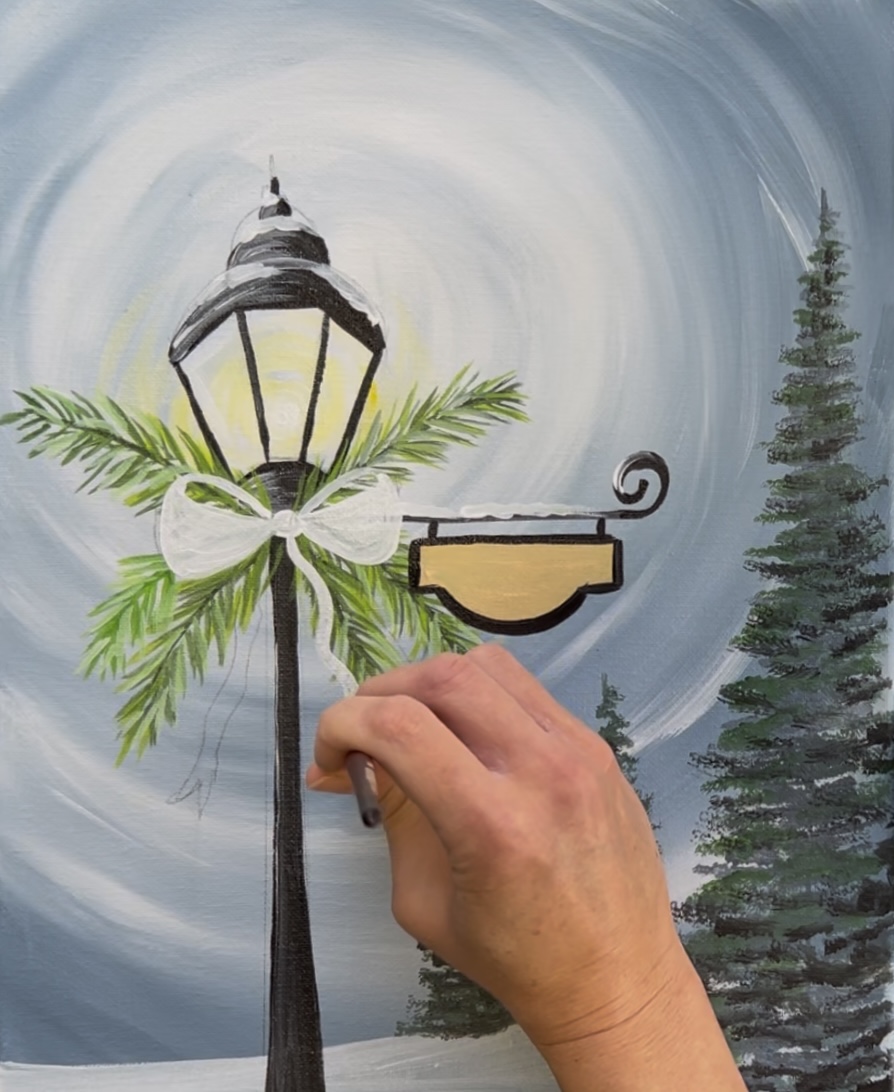
After painting it in white, use “mars black” to paint the opening part of the loops in.
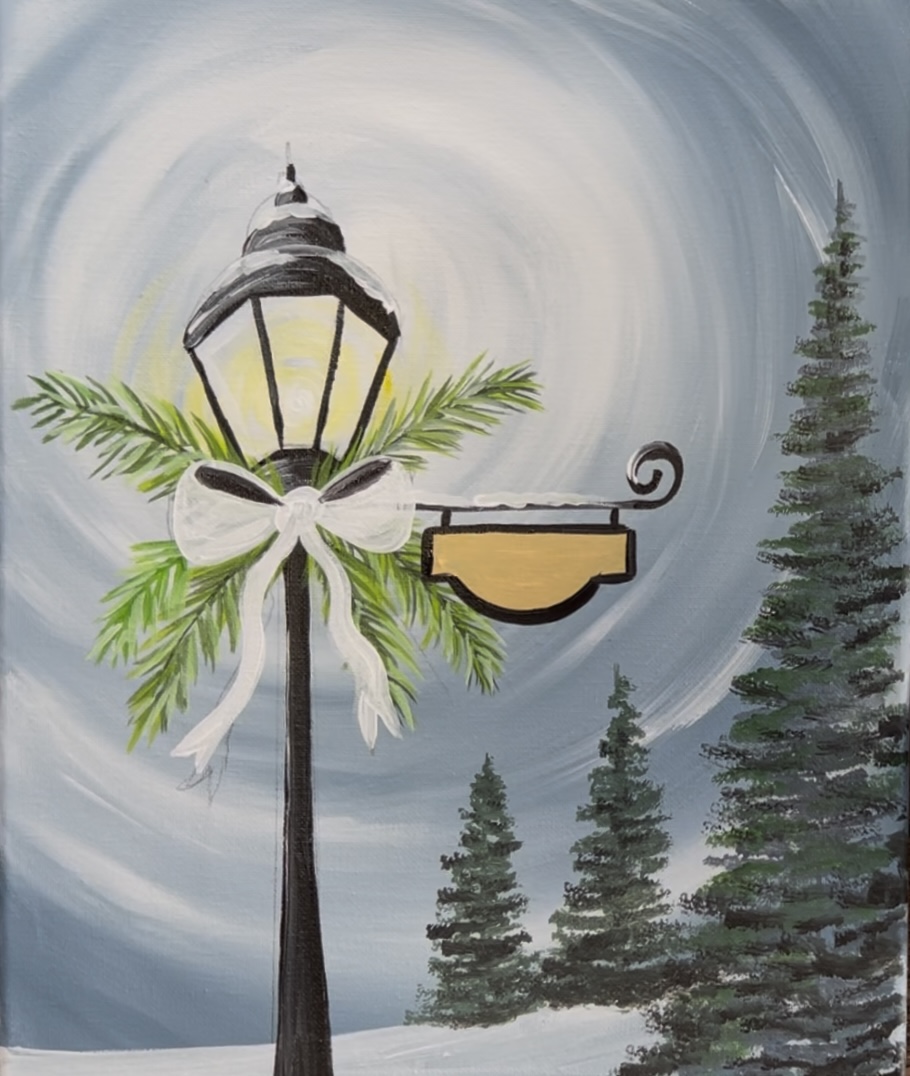
10. Paint snow on trees
Use a 3/4 wash brush and titanium white to paint a layer of snow on the trees. Repeat the same technique you used earlier to paint the dark layer of the trees. This time you are adding a snow layer! Make sure a lot of the shadow layer of the trees is still showing through. This will give your tree more “dimension” with shadows showing between the snow on the branches.
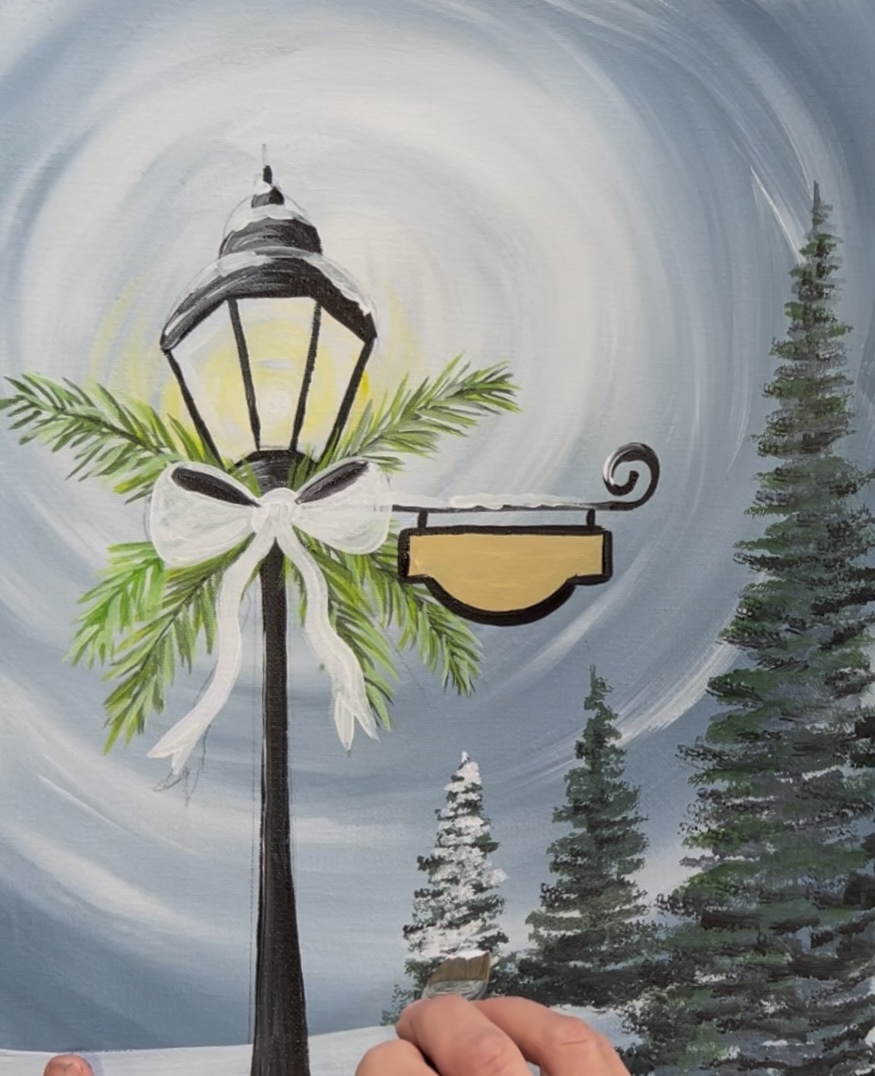
Optional: try adding different tints of the white by adding little bits of gray into it. That way you get some “color variation” with your snow. For the tree in the middle, I did a layer of white that had a small amount of gray in it.
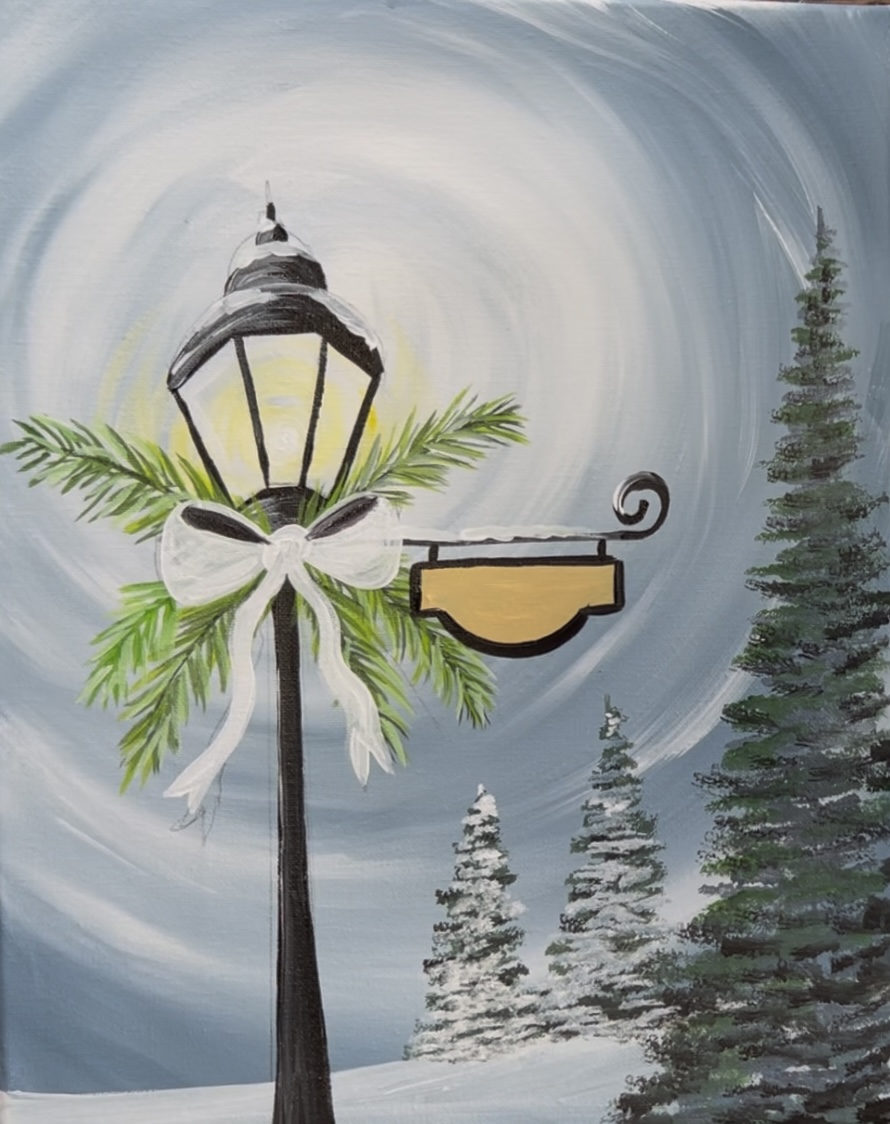
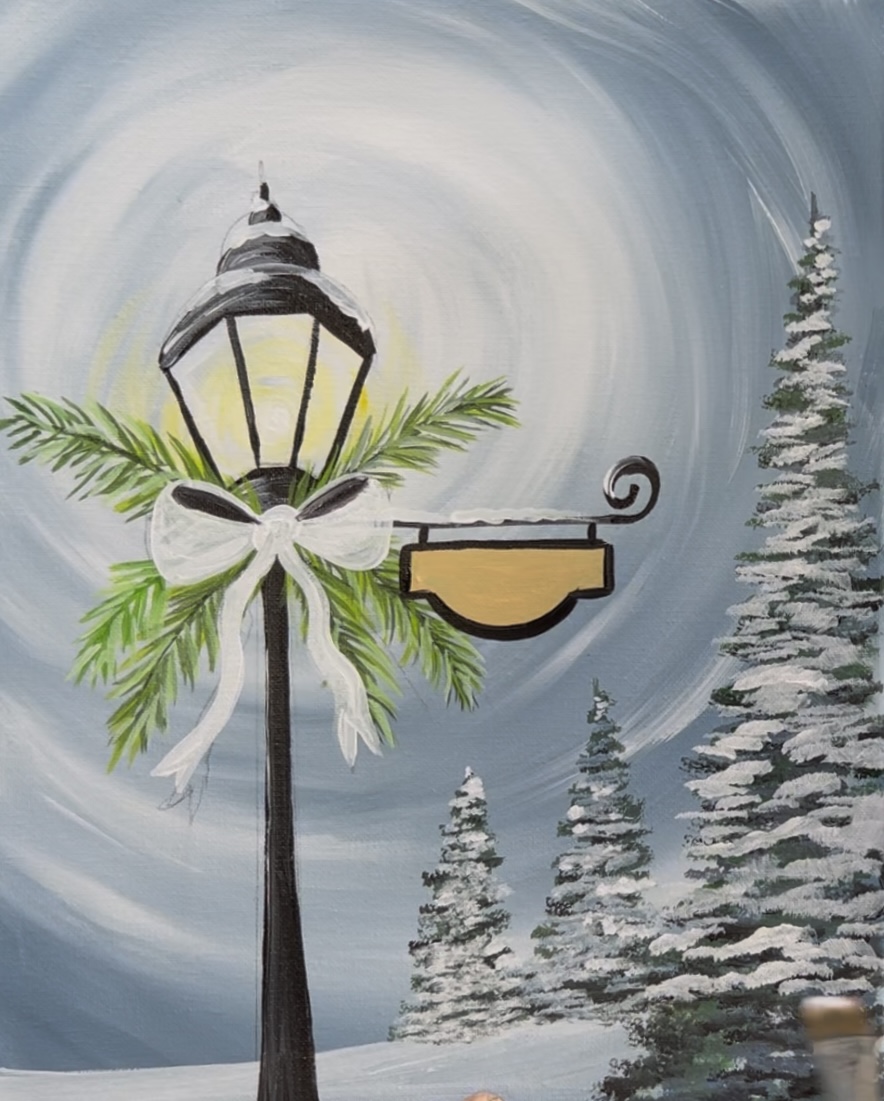
Tip: emphasize snow on the edges of the branches. You can have the “stamping motion” from the brush curve downwards a bit to make it look like the snow is pushing down on the branches.
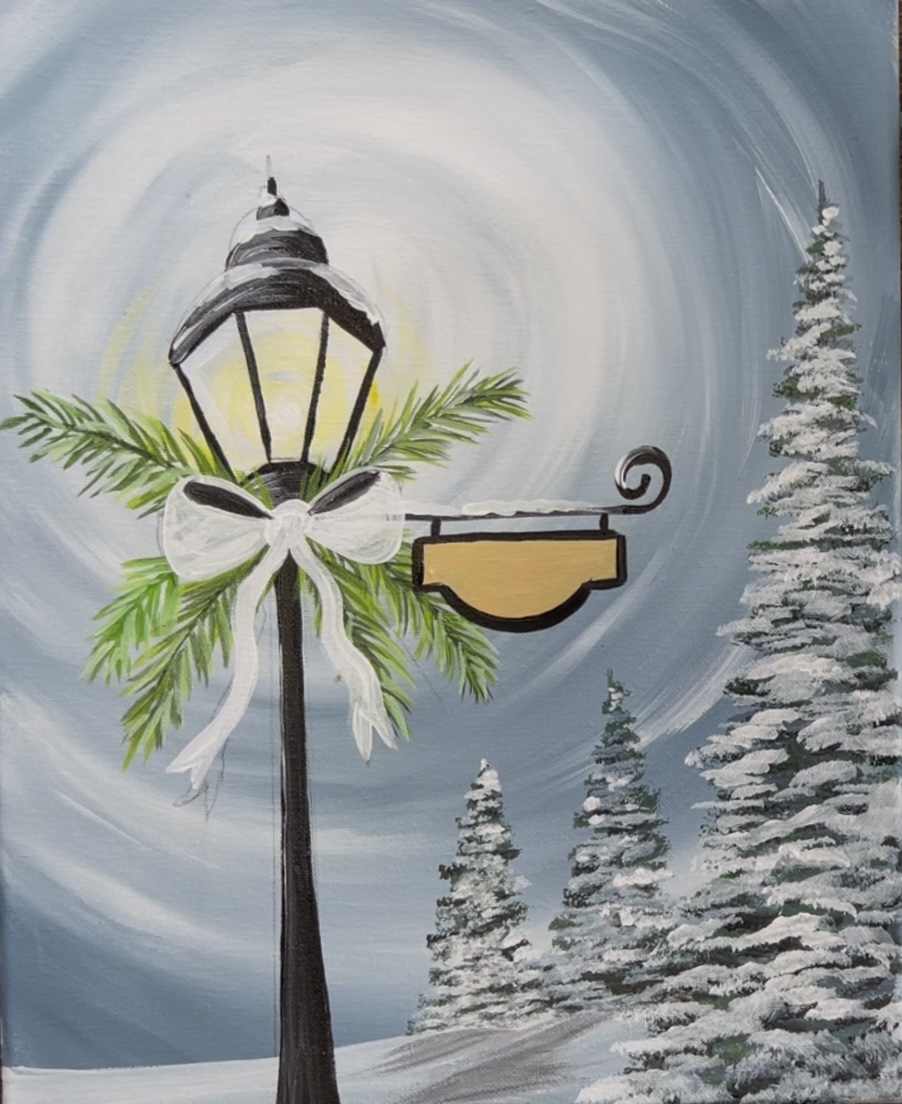
Also, add some “shadow” on the ground below the trees. Use the 3/4 flat brush and gently paint light to medium gray on this area and drag the paint down at an angle.
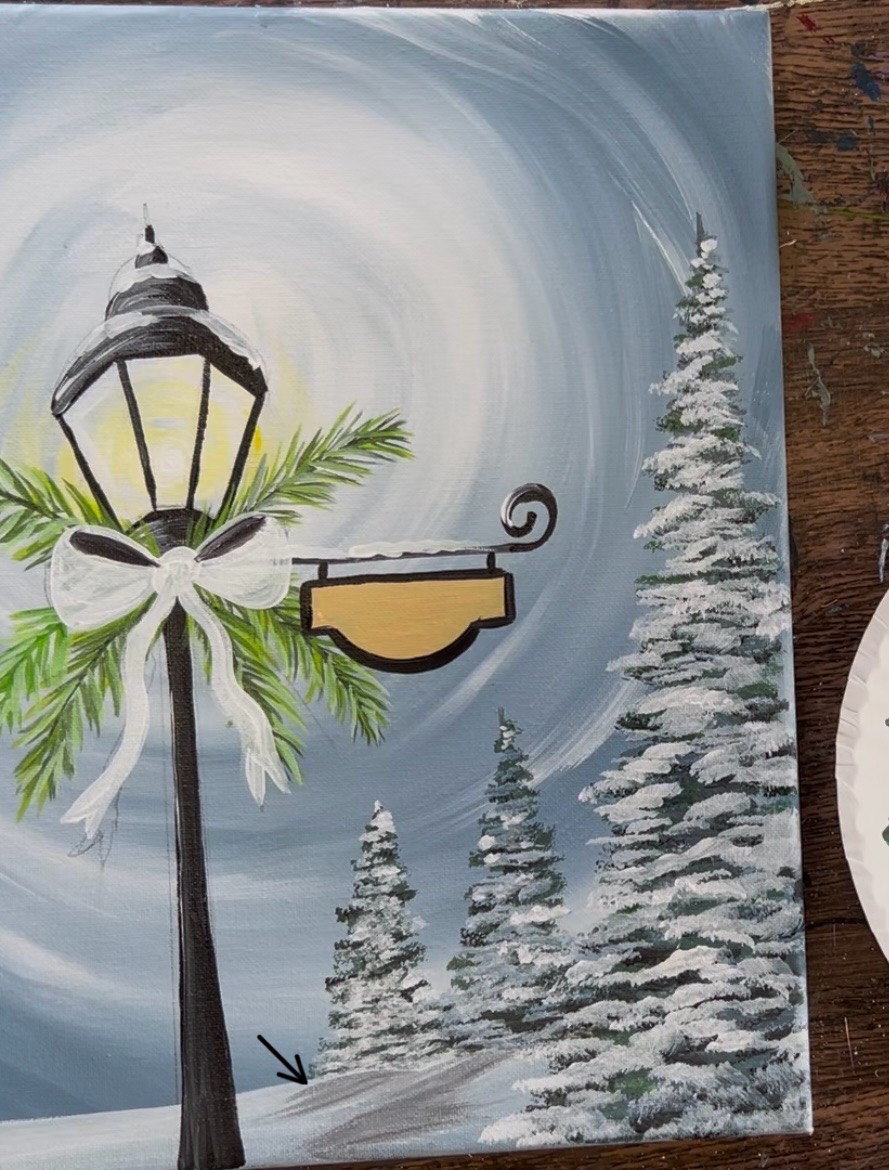
11. Paint bow red
Use the #4 round brush and “cadmium red deep hue” to paint the bow. As you are painting this, blend a little bit of “titanium white” on the outer parts of the bow loops and drag it inwards.
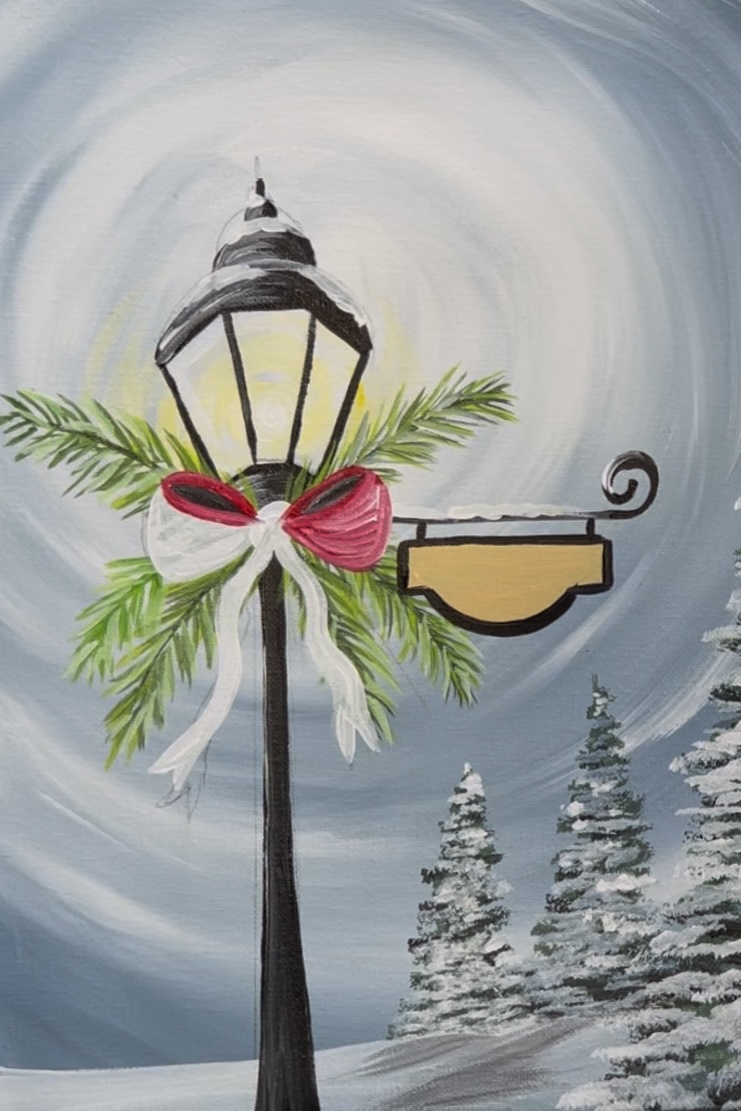
Paint the bow tails as well with a solid coat of red.
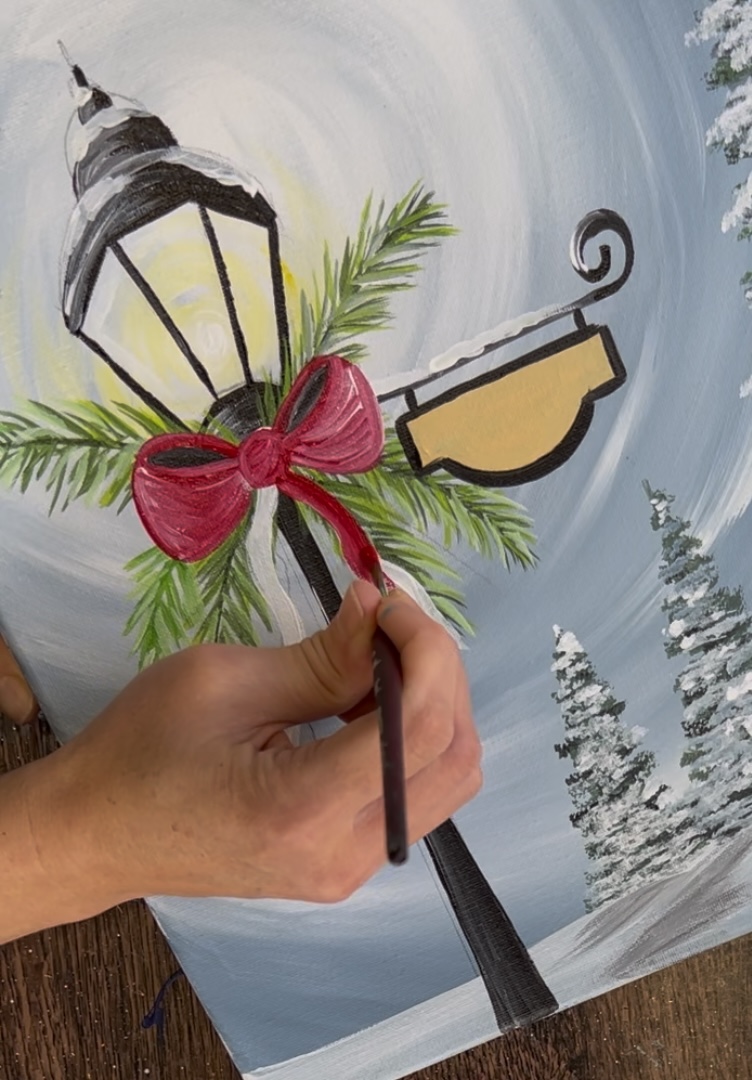
Then, mix a very small amount of black into your red (without white on the brush). Use this very dark red to paint the center parts of the bow and drag it outwards to blend. Also, add a little bit of this dark red on one side of each of the bow ties and blend.
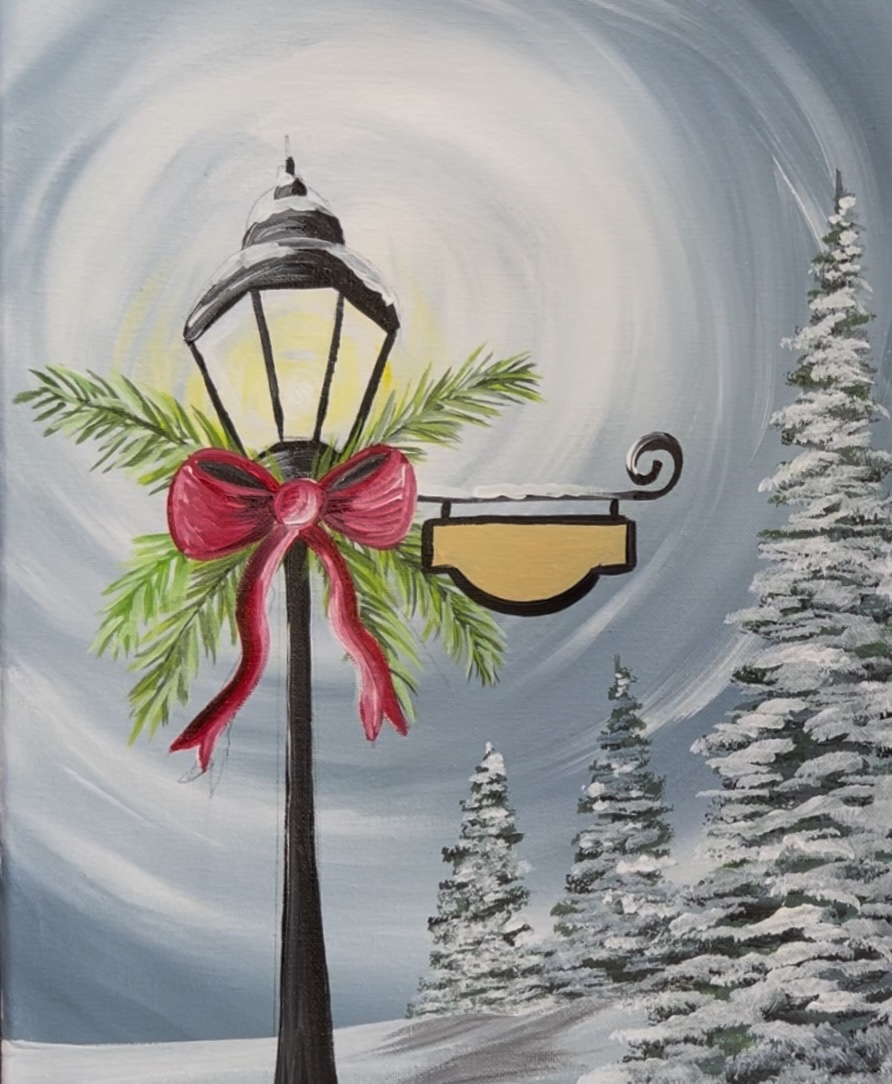
12. Paint garland
Use the color “hooker’s green hue” to paint a loop line around the lamppost pole. Make it look like it is wrapped around the pole by picking your brush up where it goes behind and overlapping it where it goes in front.
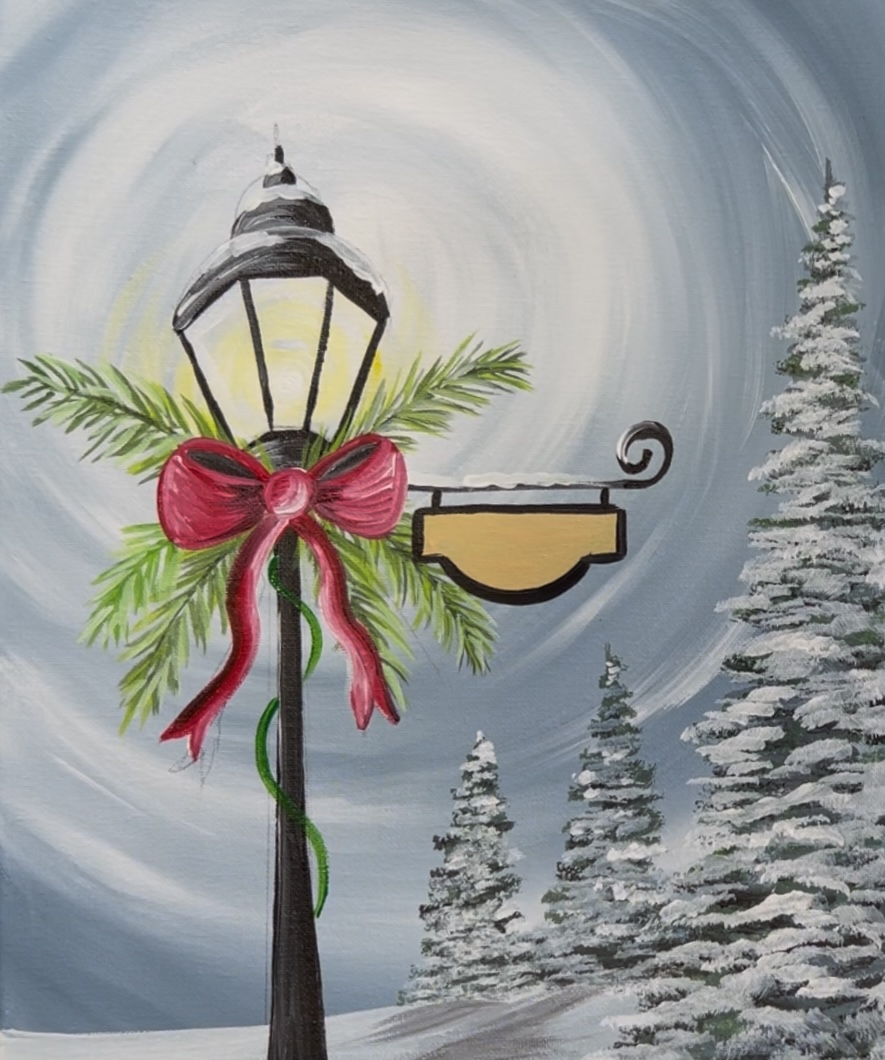
After painting your initial line, add texture to this. Paint little “x mark” paint strokes along this line.
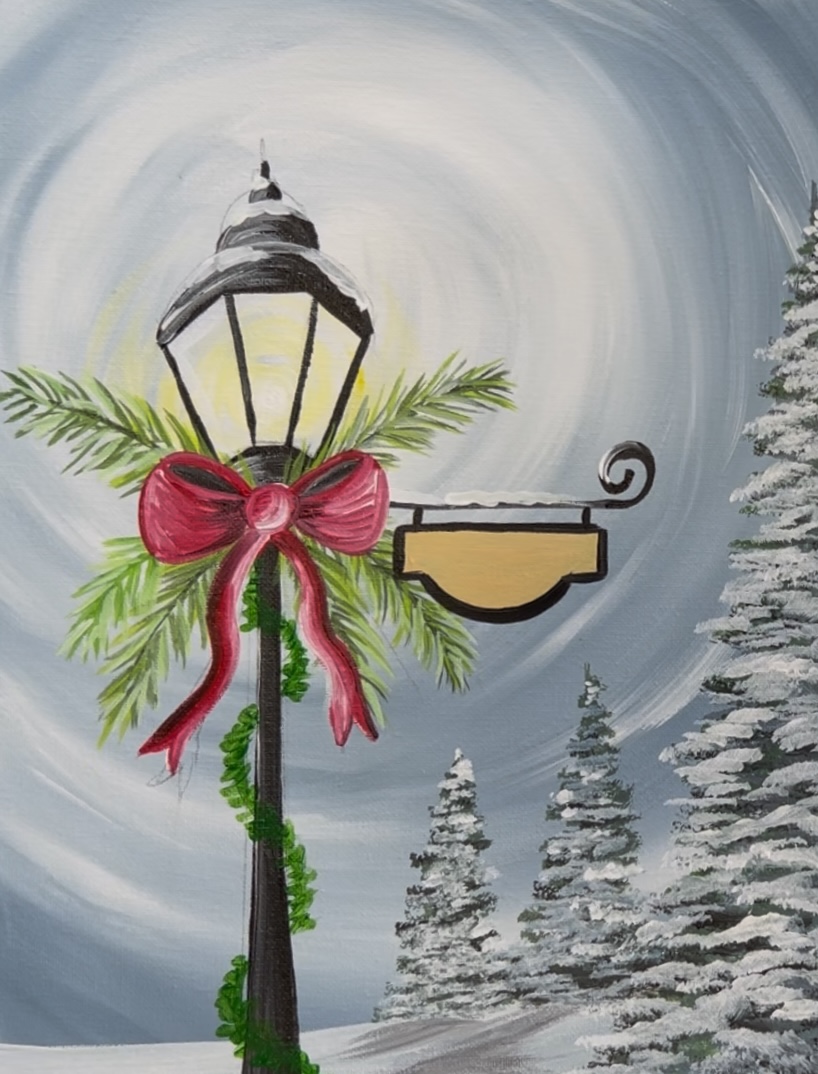
Mix a little white with your green. Then go back over this first layer with this lighter color. This will highlight your garland and give it some dimension.
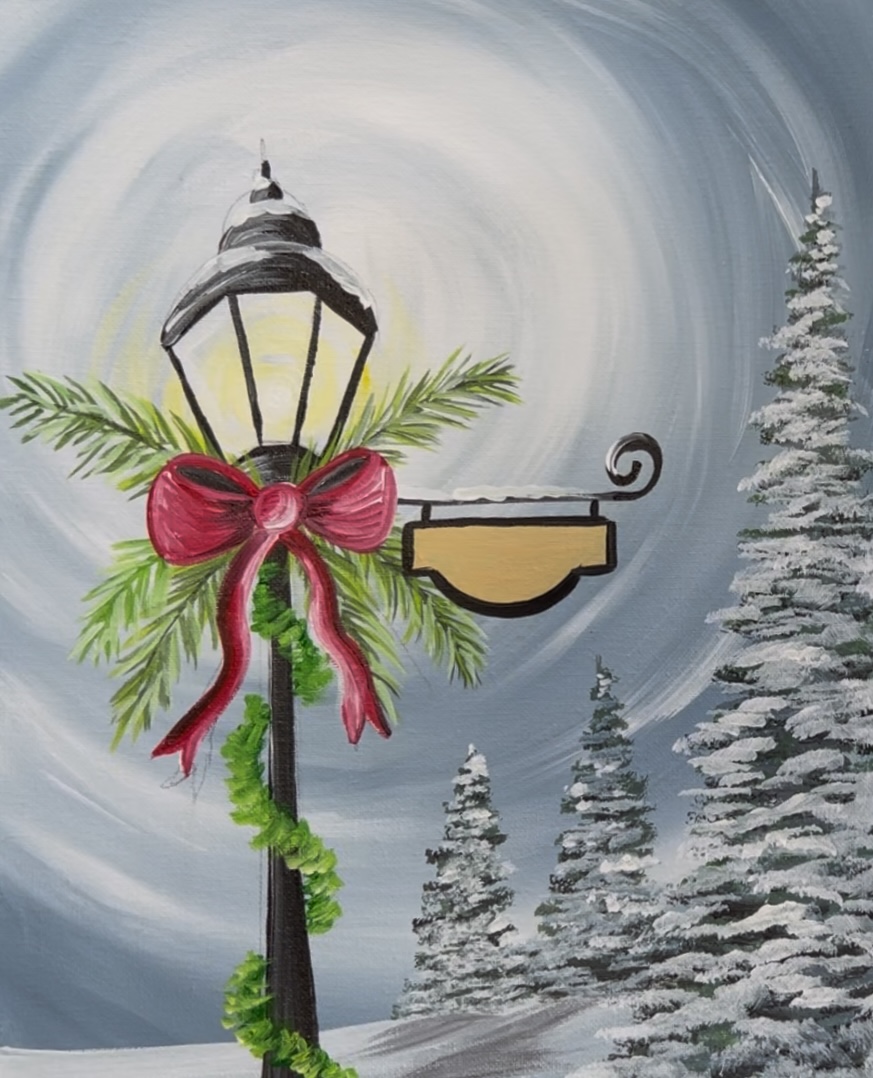
13. Paint snow falling
Use the #4 round brush and titanium white to paint little dots all over the sky. Paint a variety of dots. Some are larger, some smaller and clustered together. You can also use your “paint toothbrush” at this point to splatter little fine specks all around the sky and the objects in your painting.
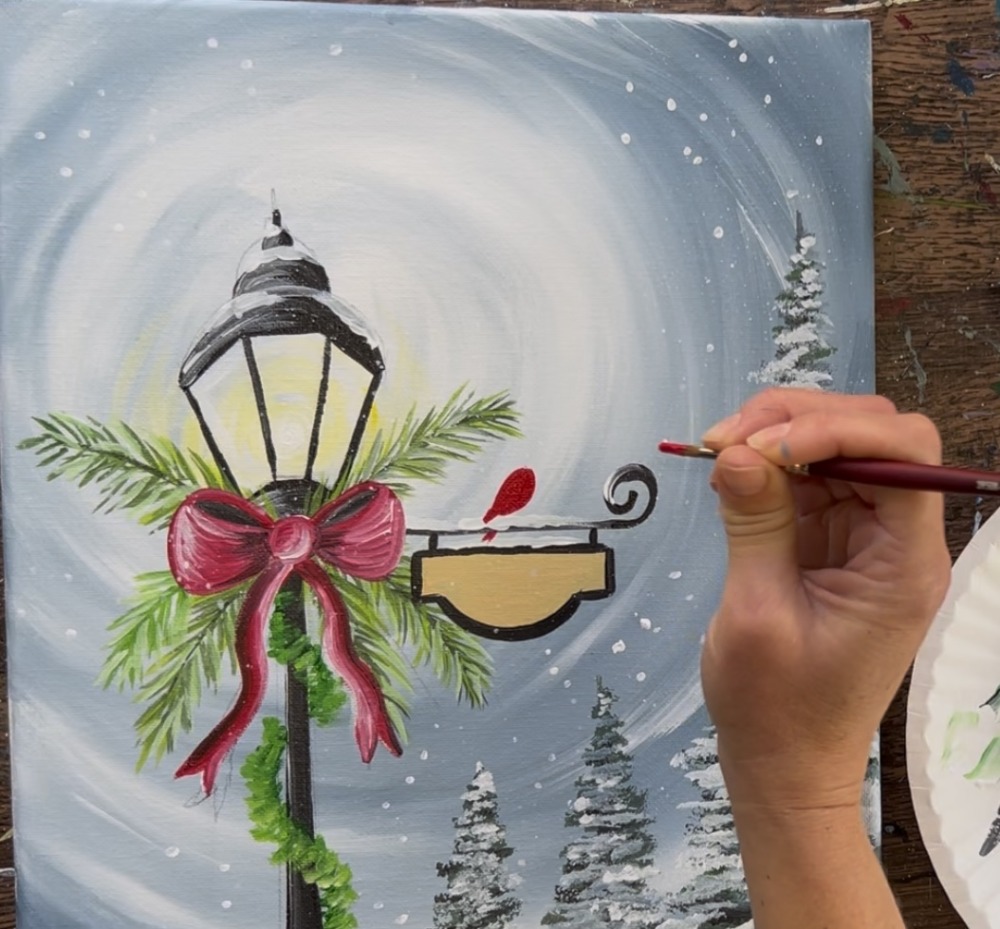
14. Paint cardinal
Use the #4 round brush and cadmium red deep hue to paint the carding. Start by painting a small half circle shape for the wing and a little red mark going diagonally down for the tail feather. You can decide if the tail is going behind or in front of the sign.
Paint a small circle for the head and drag paint diagonally outwards for the “crest” on the top of the cardinal’s head.
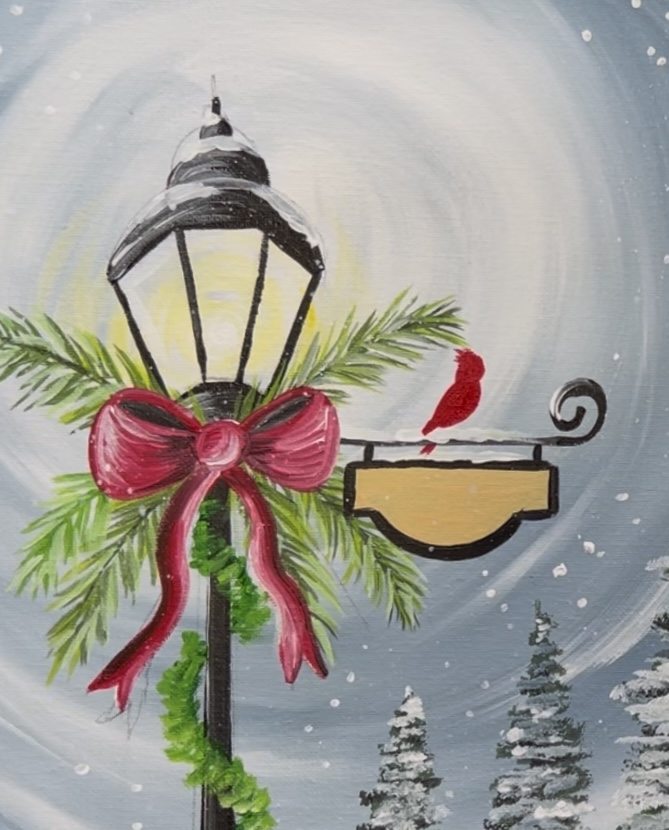
Then use black to paint a little rounded area on the right side of the cardinal’s face. Use titanium white to outline the wing/ let it blend with the red.
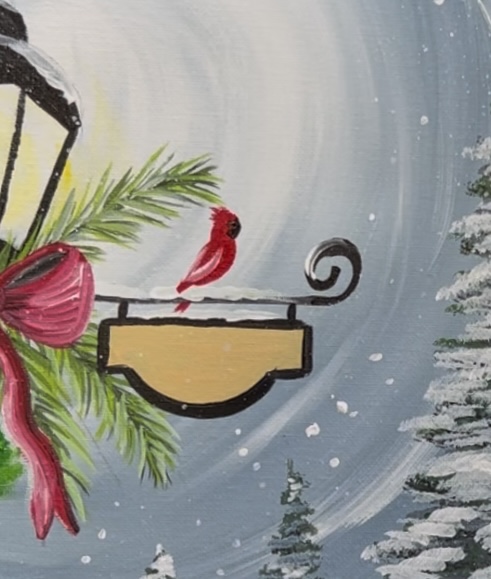
Paint the legs with black (you can use a paint pen for this if needed). Then mix an orange on your palette by mixing red and yellow together. Paint a beak. Note: my orange turned a little muddy because it mixed with the black.
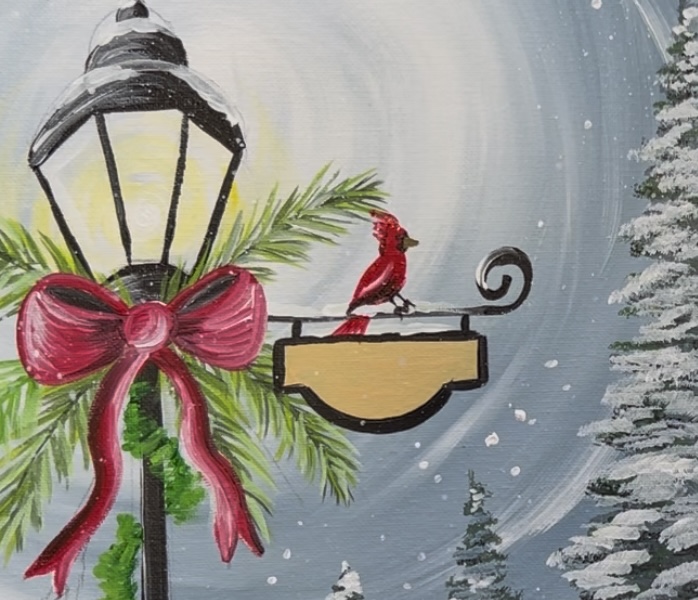
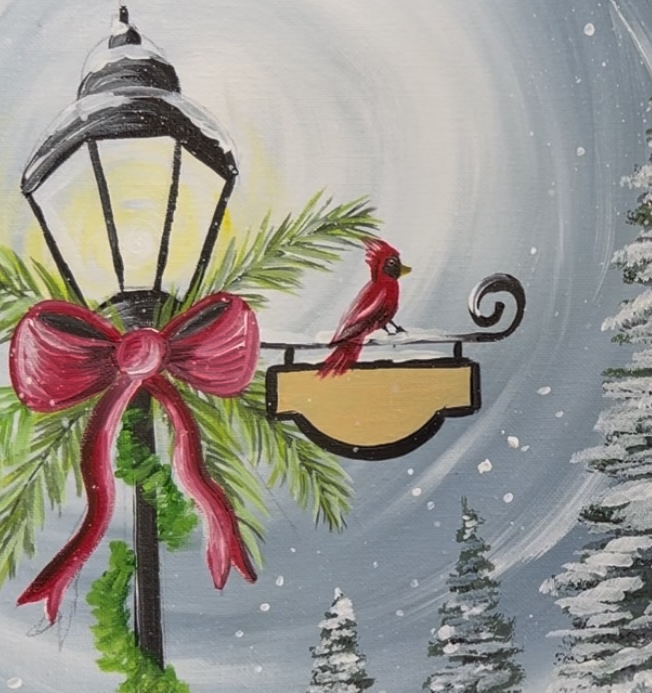
Optional: add more light red/ white highlights to the wing and crest of the cardinal. I also made the tail overlap the sign instead of going behind.
Paint a little white dot and then a little black dot on top of that for its eye. You may want to use a paint pen or toothpick for that step because the eye is so tiny!
15. Paint words on sign and final touch ups
You are welcome to write anything on the sign! You can put a year, a name, a small quote, etc. I decided to write “oh holy night”.
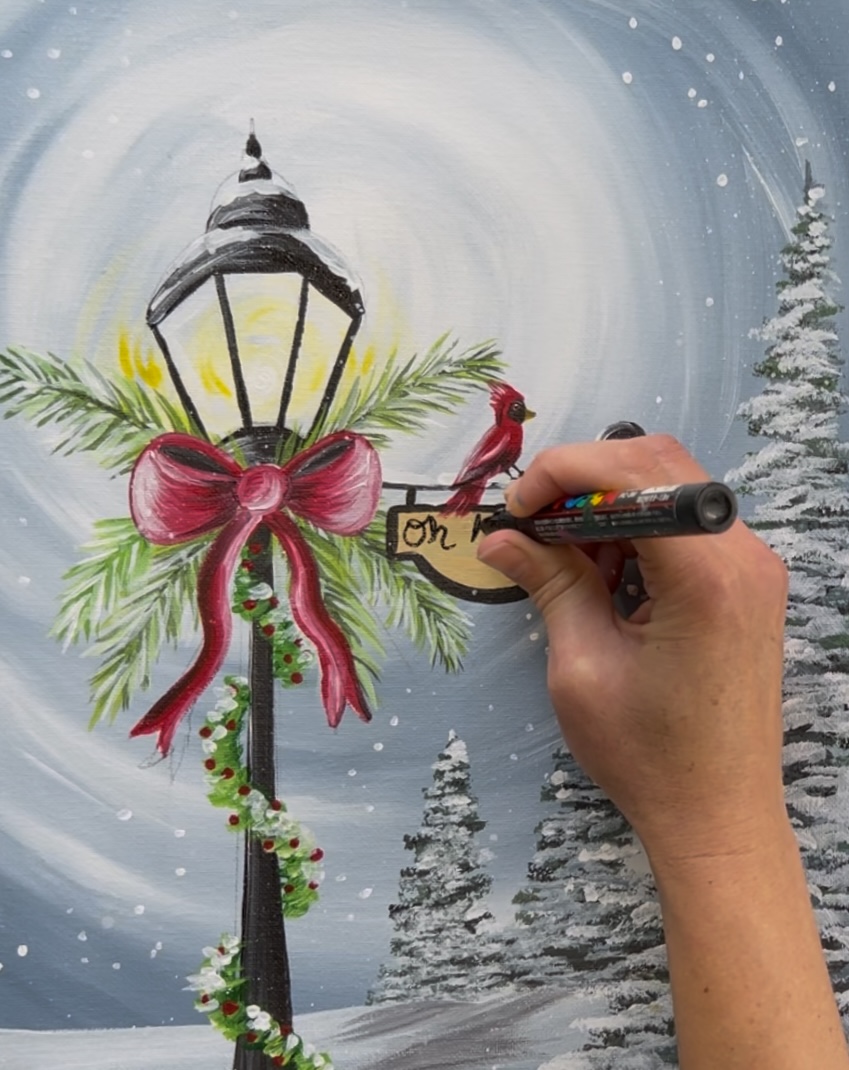
Some other final touch ups with this painting could be adding little bits of snow on the garland, painting red dots on the garland.
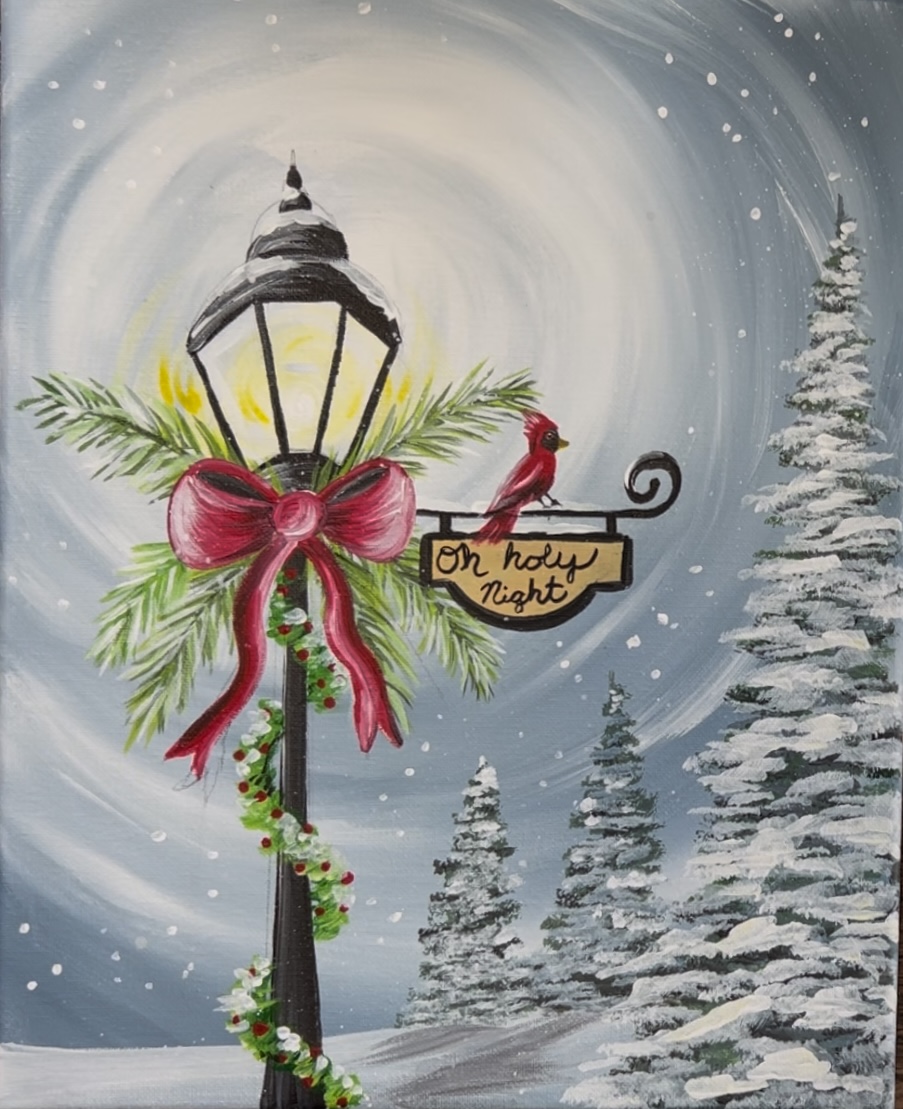
Finished!
