

Would you like to save this?
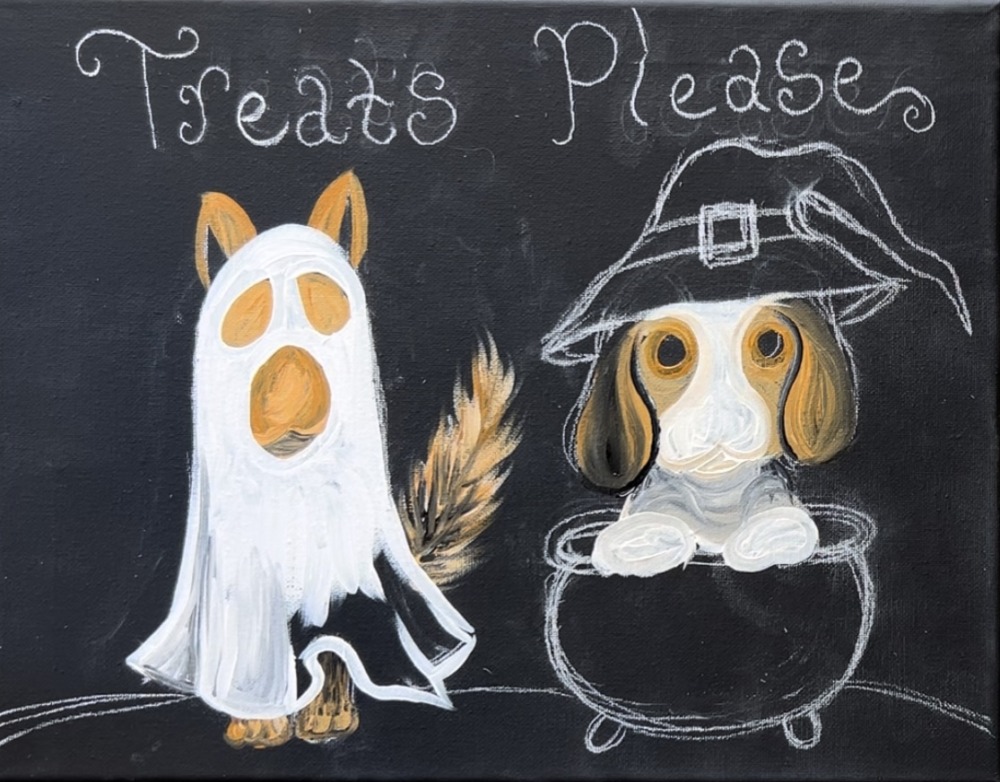
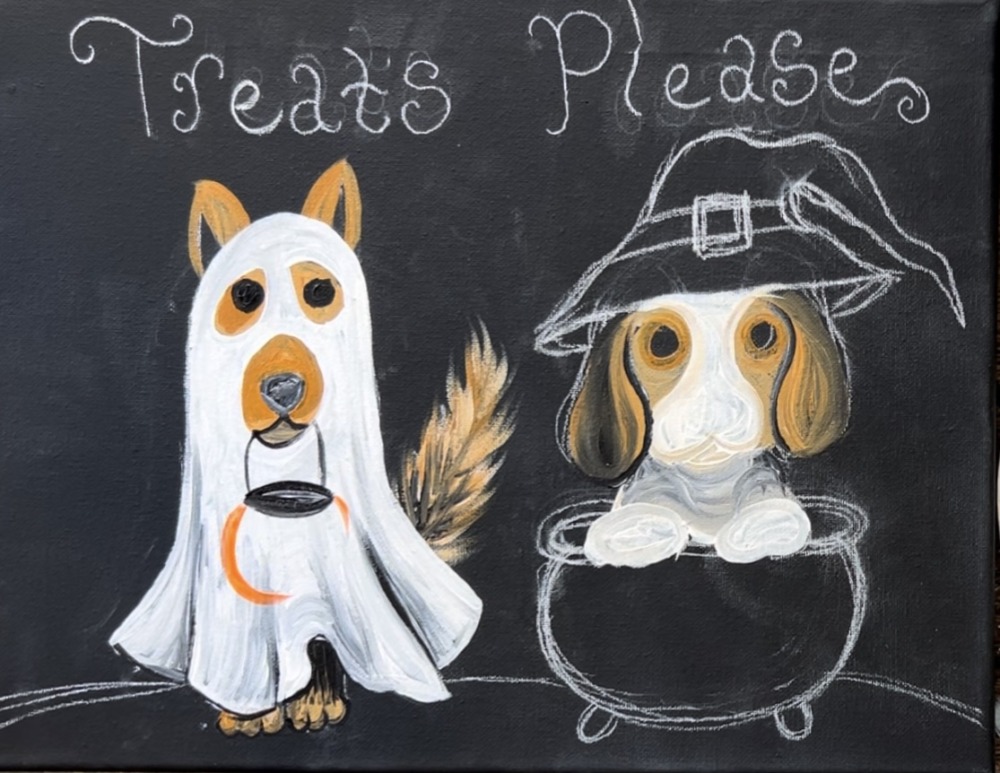
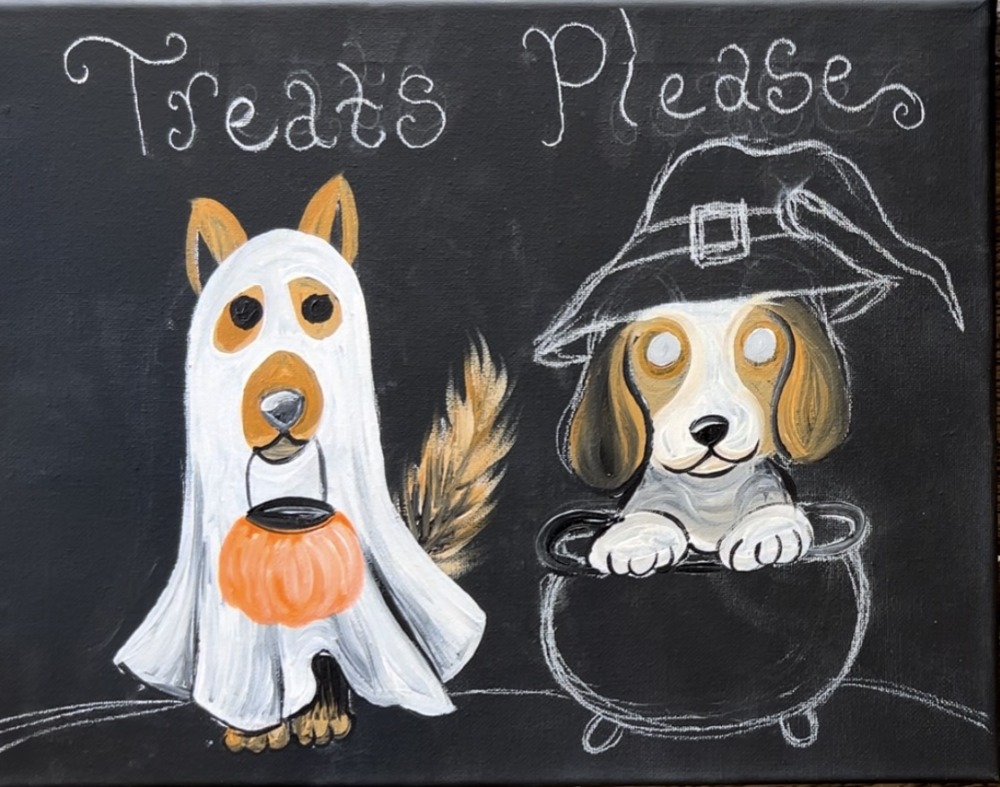
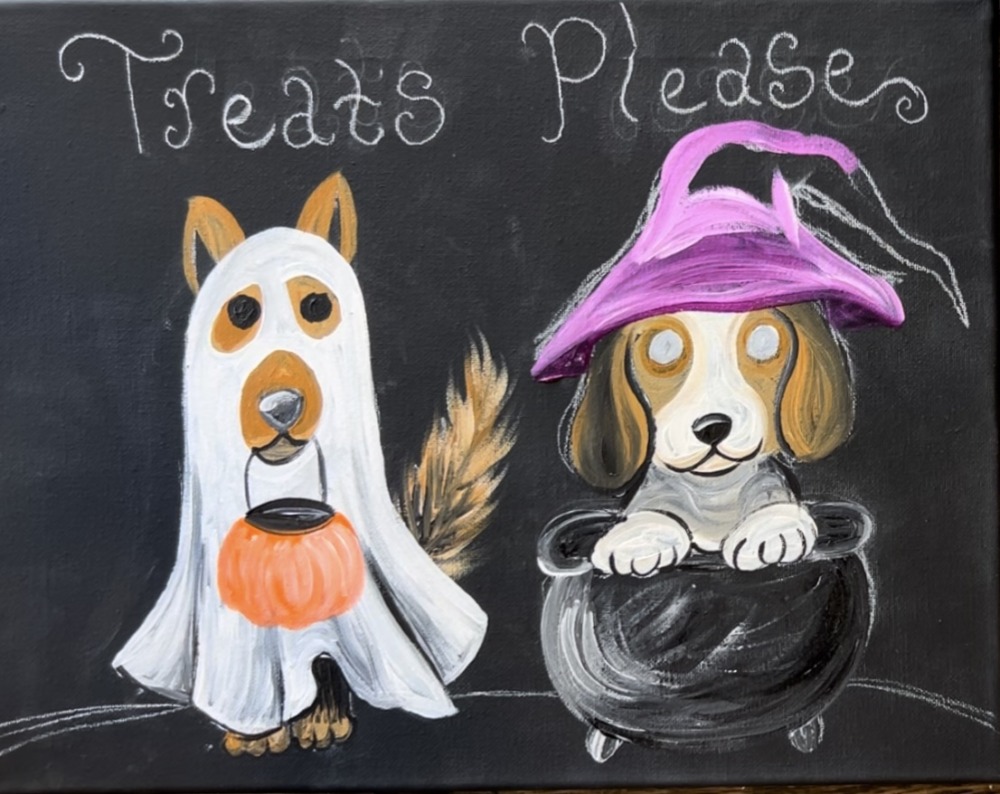
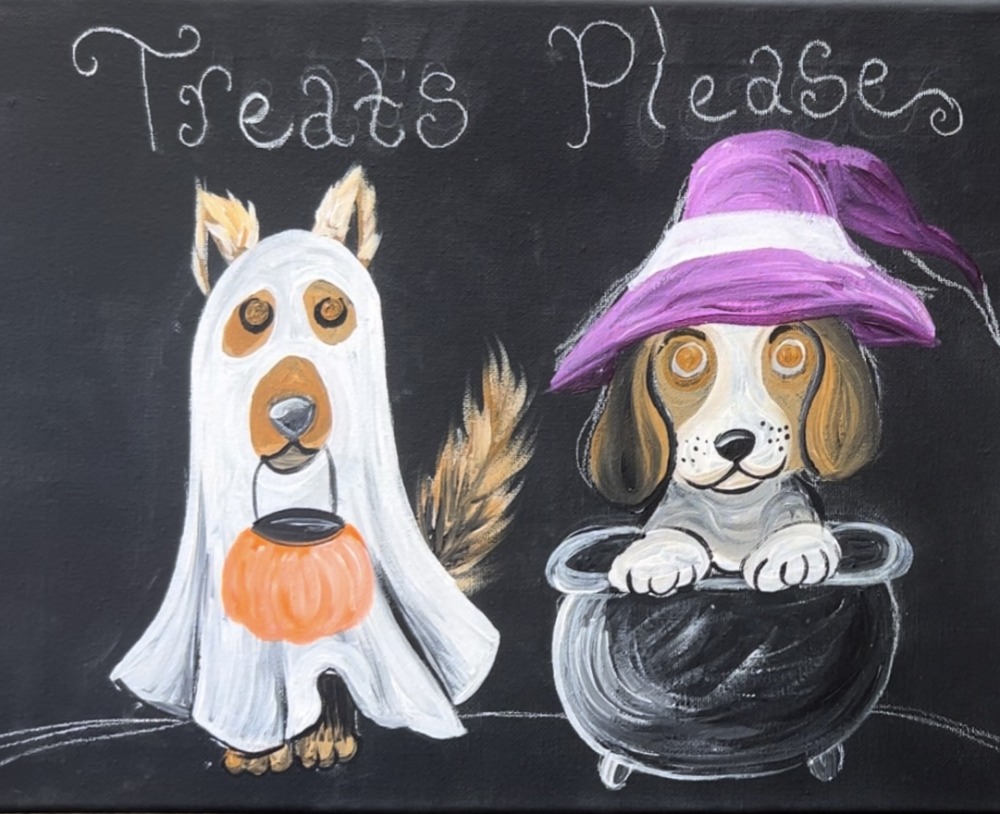
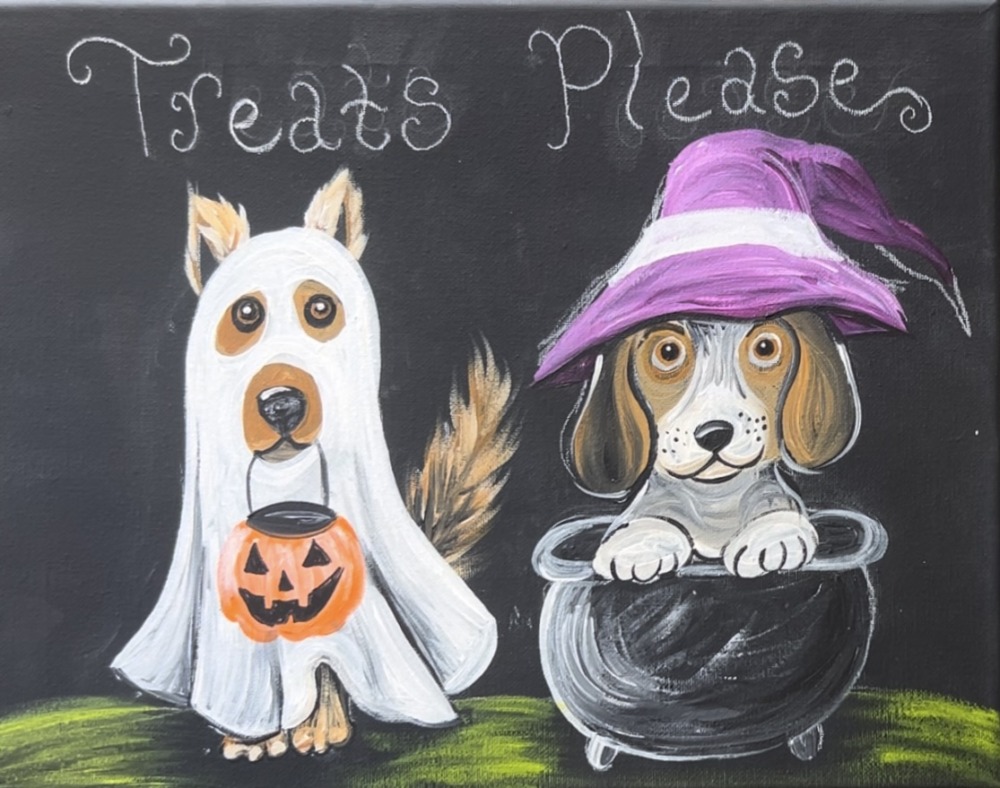
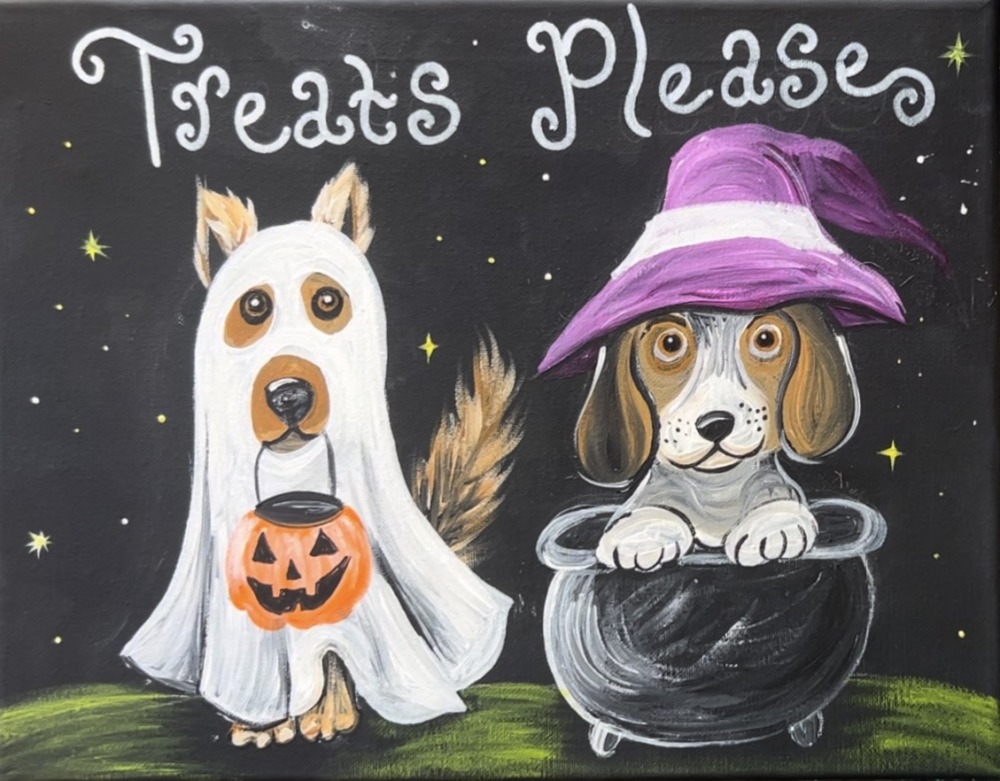
Double the trouble, double the cuteness! These furry friends are all dressed up and ready for some spooky fun! Treats please and no tricks!
In this tutorial, we will be learning how to paint a pair of super cute Halloween Dogs with acrylic paints! Add the words “Treats Please” at the top for an extra adorable touch! You are also welcome to customize this painting with different colors or a different quote!

This painting is done on a canvas that I painted black! Painting on a black canvas is fun! I have quite a few tutorials like this! Sometimes these are easier or quicker paintings to do because we don’t have to paint the background in the painting. We also can use the black background as our shadows in the painting which eliminates the step of adding shading to our painting.
The one challenge we face when painting on a black canvas is making sure the colors show up. A trick that I always do is mix white into colors that I’m using. This will allow colors to show up vibrant against the dark background.
Enjoy and happy painting!
Materials:
How To Paint "Halloween Dogs" - Acrylic Painting Tutorial
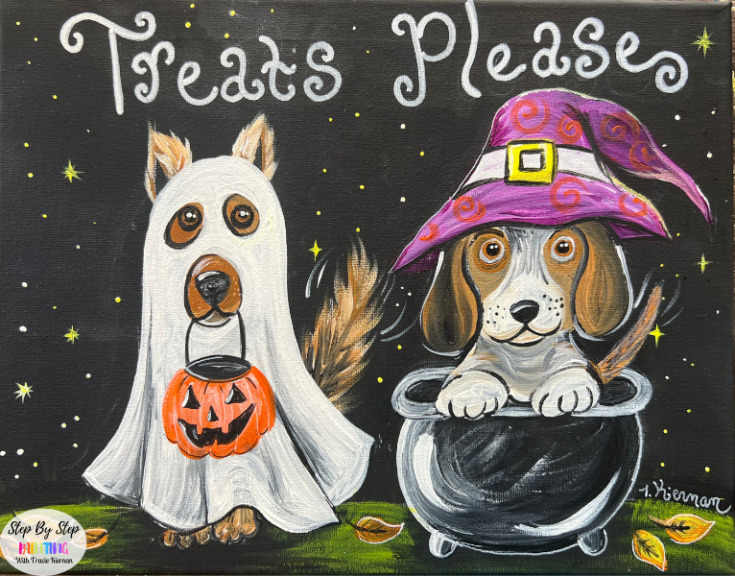
Celebrate the spirit of Halloween with this delightful painting of two dogs dressed in their festive costumes!
Materials
- 11 x 14 Canvas (painted black)
- Paint Brushes
- Acrylic Paint
- White Chalk Pencil
- Ruler
- White POSCA Paint Pen
- Black POSCA Paint Pen (optional)
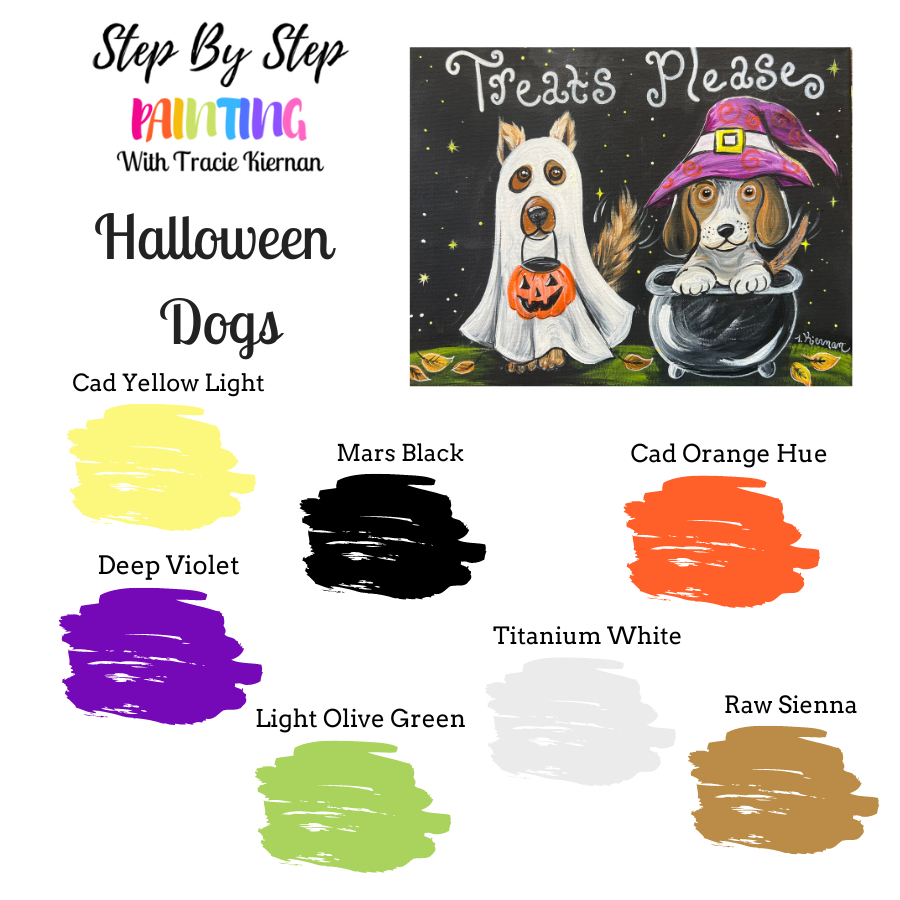
Colors
- Titanium White
- Mars Black
- Cadmium Orange Hue
- Cadmium Yellow Light Hue
- Light Olive Green
- Deep Violet
- Raw Sienna
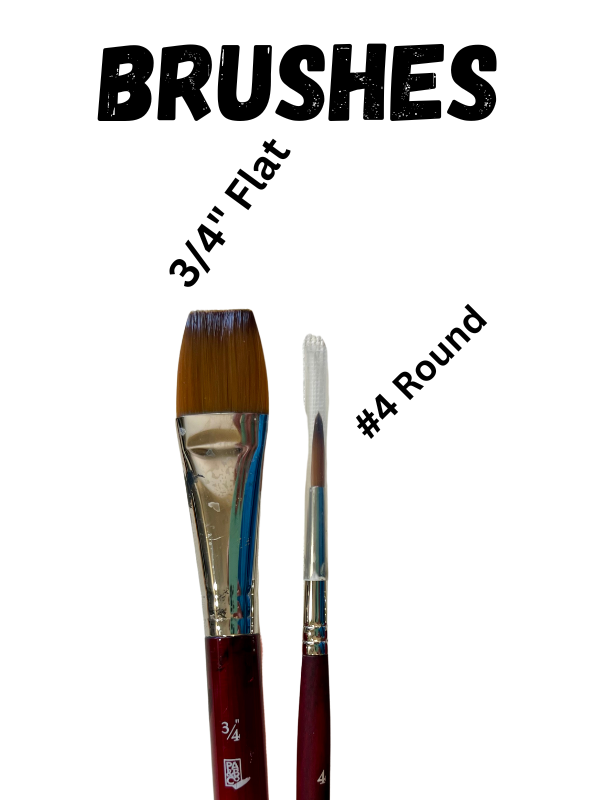
Brushes
- #4 Round Brush
- 3/4 Wash (to paint canvas black)
Template (optional)
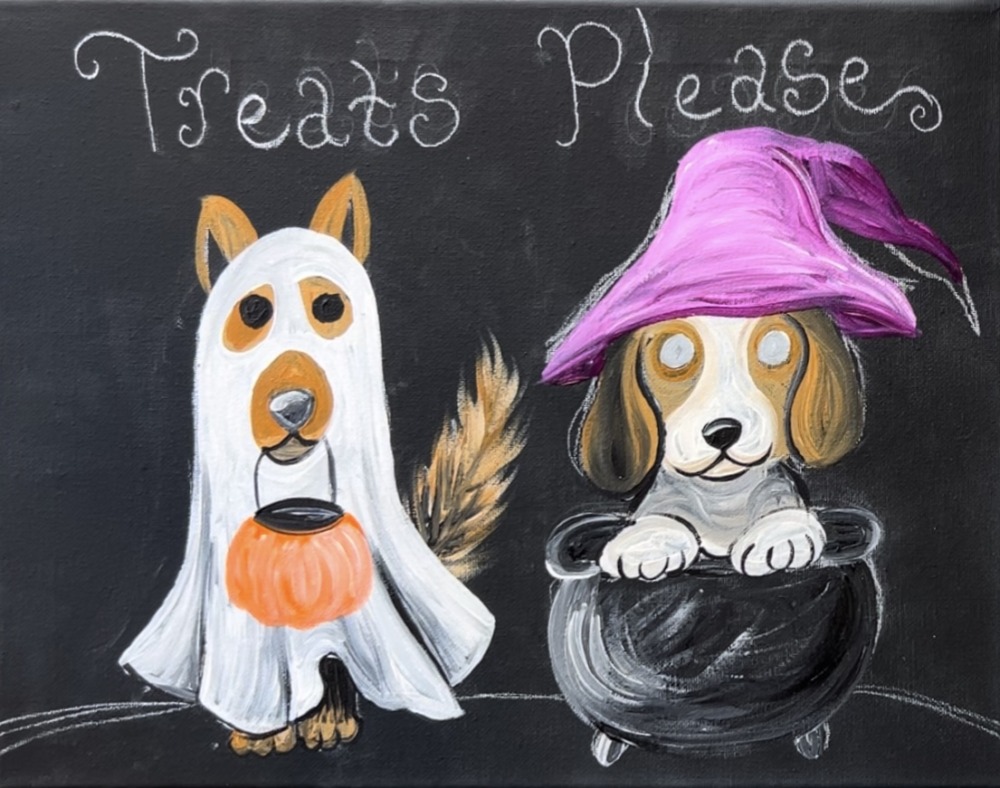
You can use this tracer if you want to skip the drawing portion! I would recommend tracing the design on white graphite paper.

Color Palette:
Directions At A Glance:
Video:
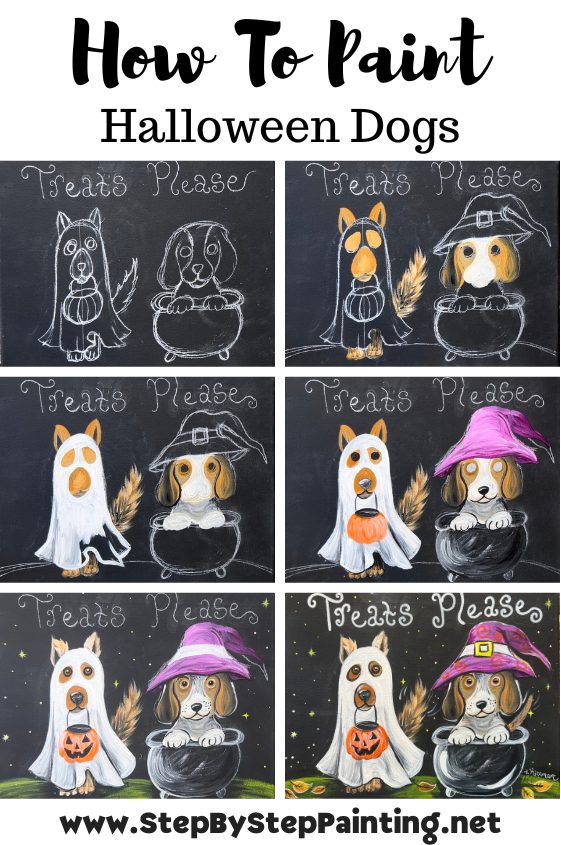
Step By Step Instructions:
1. Paint a canvas black
I like to paint “mess up canvases” with a layer of “Black Apple Barrel” paint. This is acrylic paint that has a flat matte sheen to it! I find the flat sheen to work nicely with these black canvas paintings because the sheen of the acrylic Liquitex BASICS paint is “satin” which helps give the painting extra contrast! If you don’t have Apple Barrel paint, you can paint a canvas with any black paint you have available! Satin is okay too!
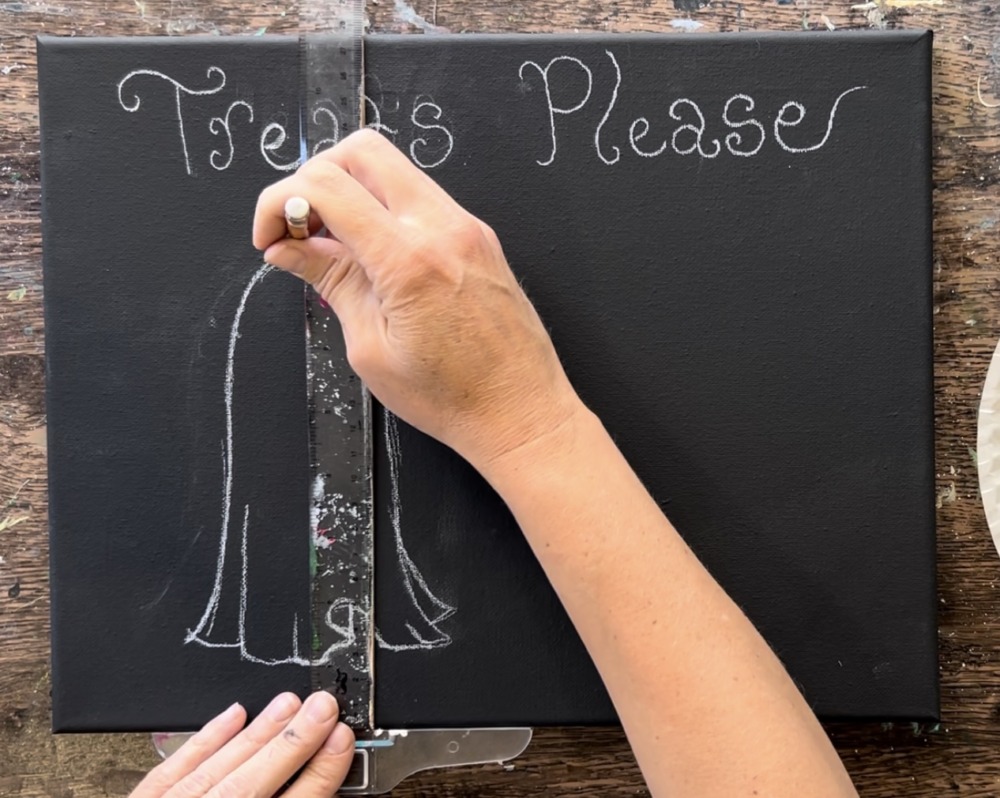
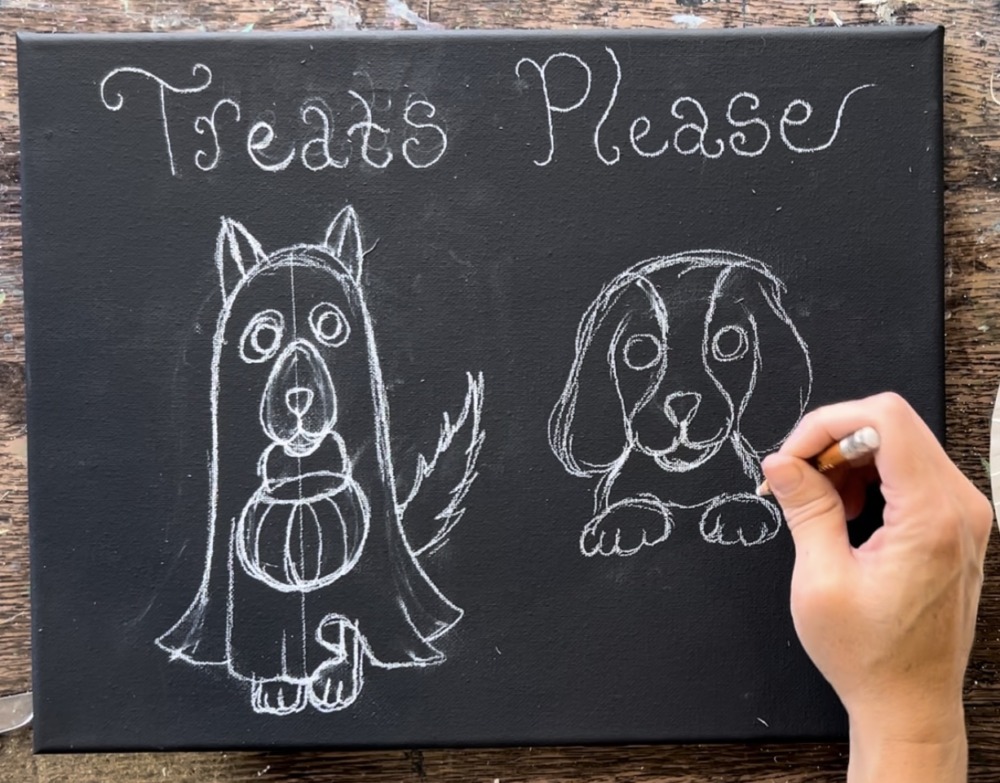
2. Draw Design With White Chalk
I use a white chalk pencil to draw this on a black canvas! This is a pencil that can be found on Amazon. It shows up just like white chalk and has an eraser on it. Alternatively, you can draw with a regular pencil or a white colored pencil.
I recommend writing the words out first so you can get the placement of the dogs. If you don’t want to do the words or aren’t sure what quote to write yet, leave about 2″ of space on the top of the canvas.
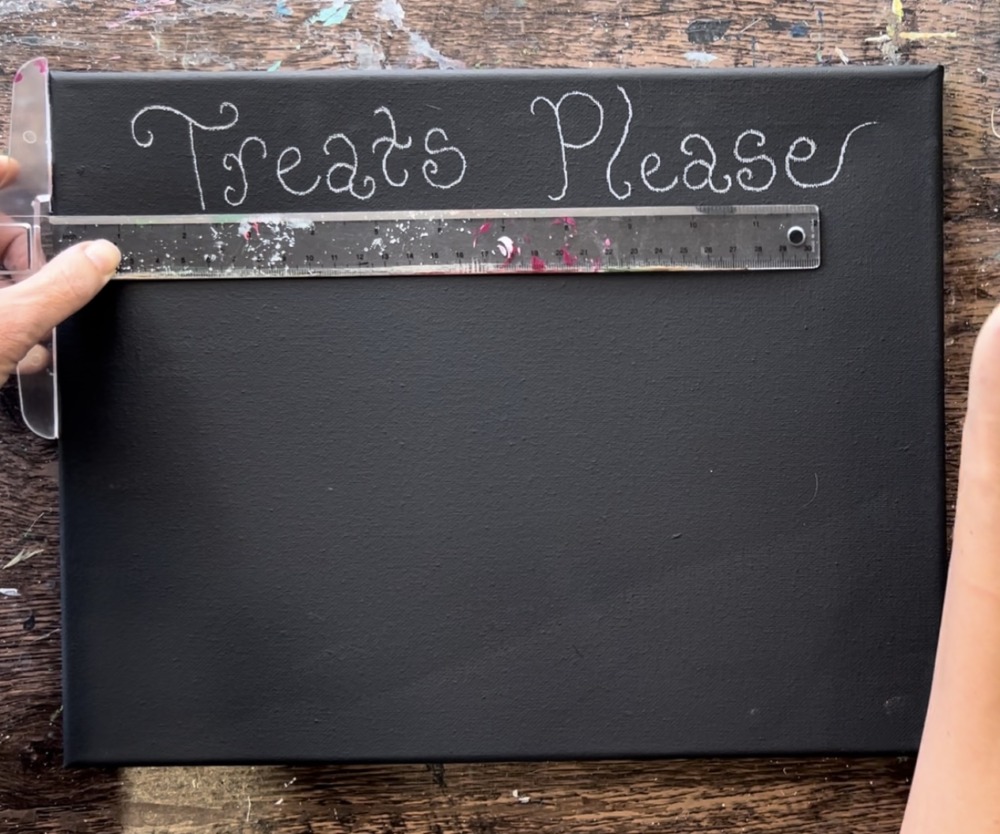
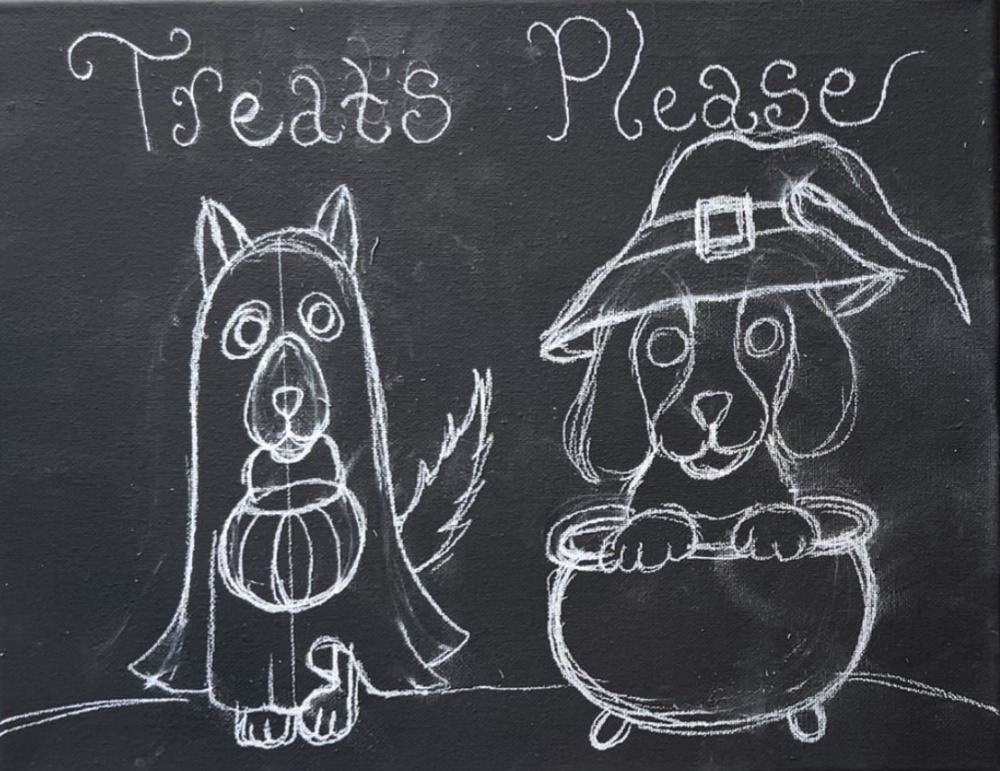
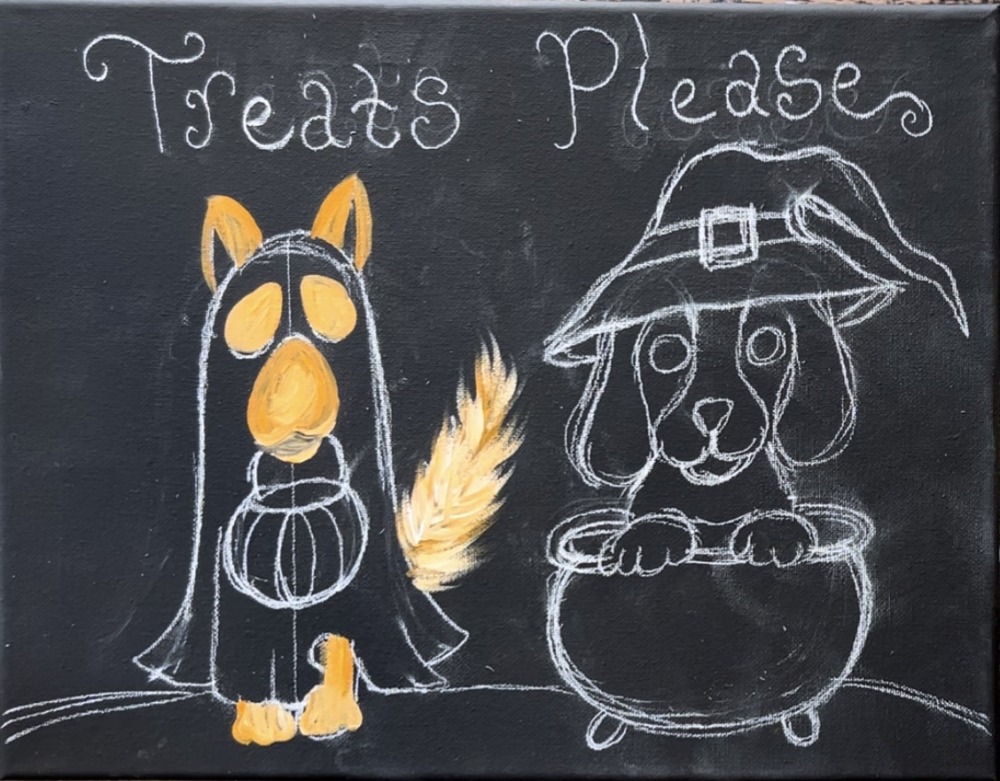
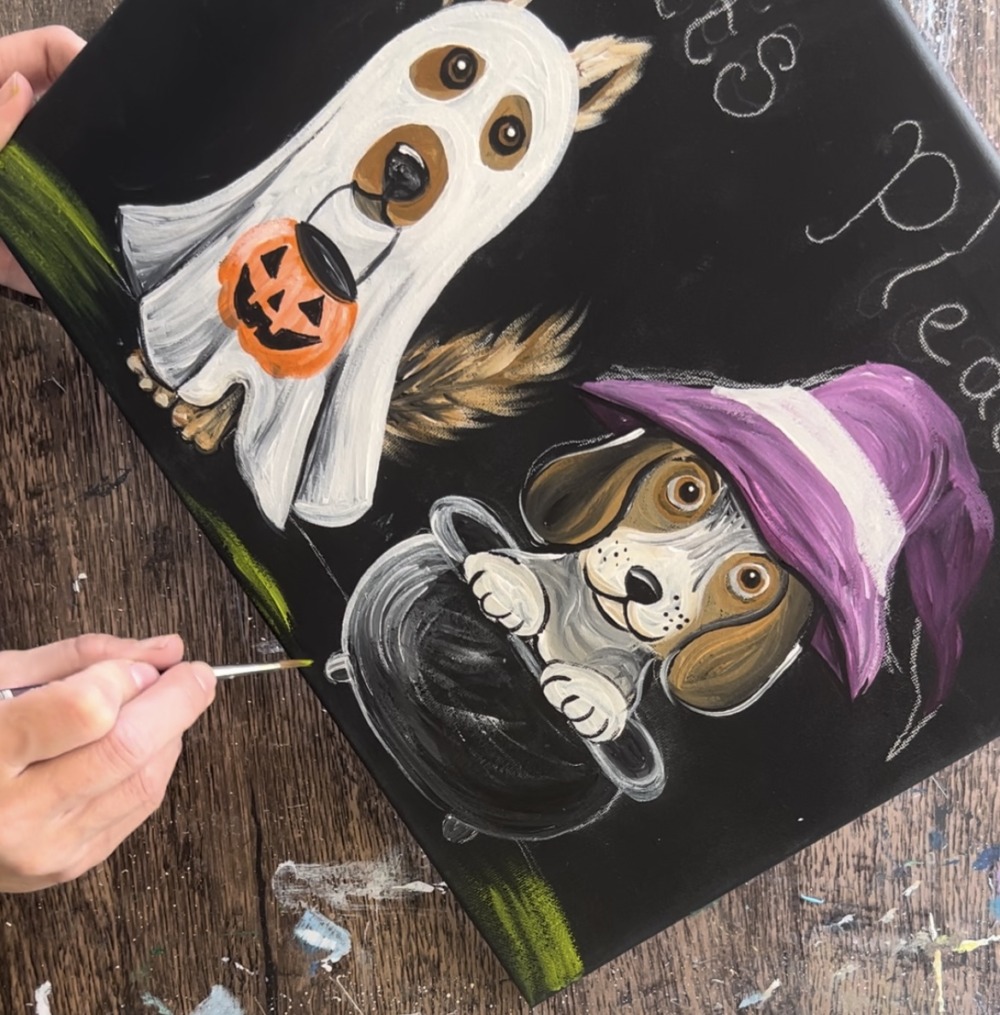
Next, start sketching the ghost dog on the left. Start by drawing a ghost shape. This “flutes out” on the bottom and is narrow and rounded on the top. The height of my shape is about 7″ high and 5.5″ wide on the widest part on the bottom.
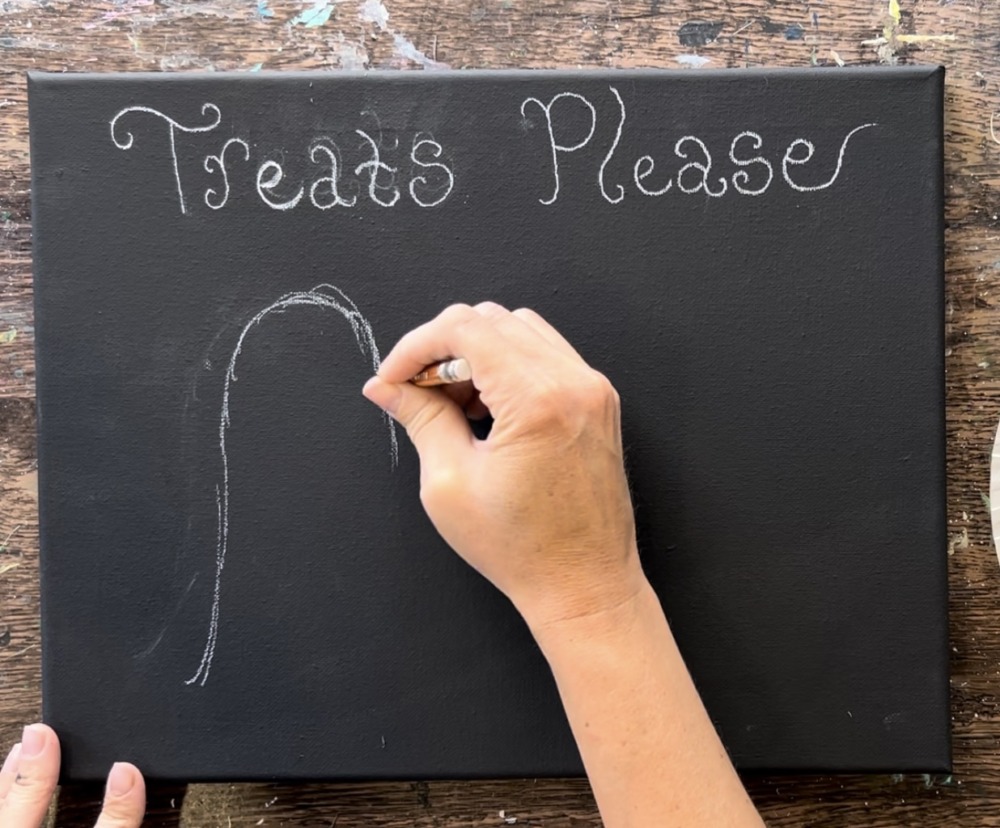
As you sketch the wrinkles on the bottom, draw a combination of vertical lines and curved lines for the bottom of the sheet.
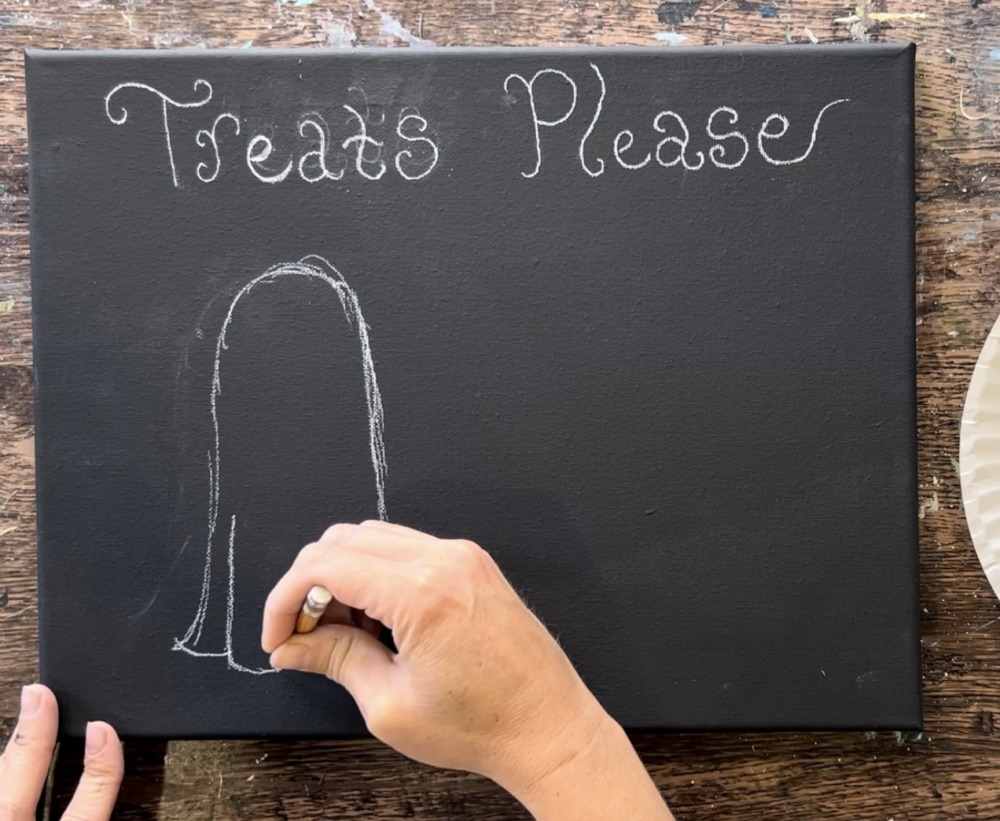
You can curl some of the lines. Remember this is just a sketch for now and we can always adjust this when we paint it in!
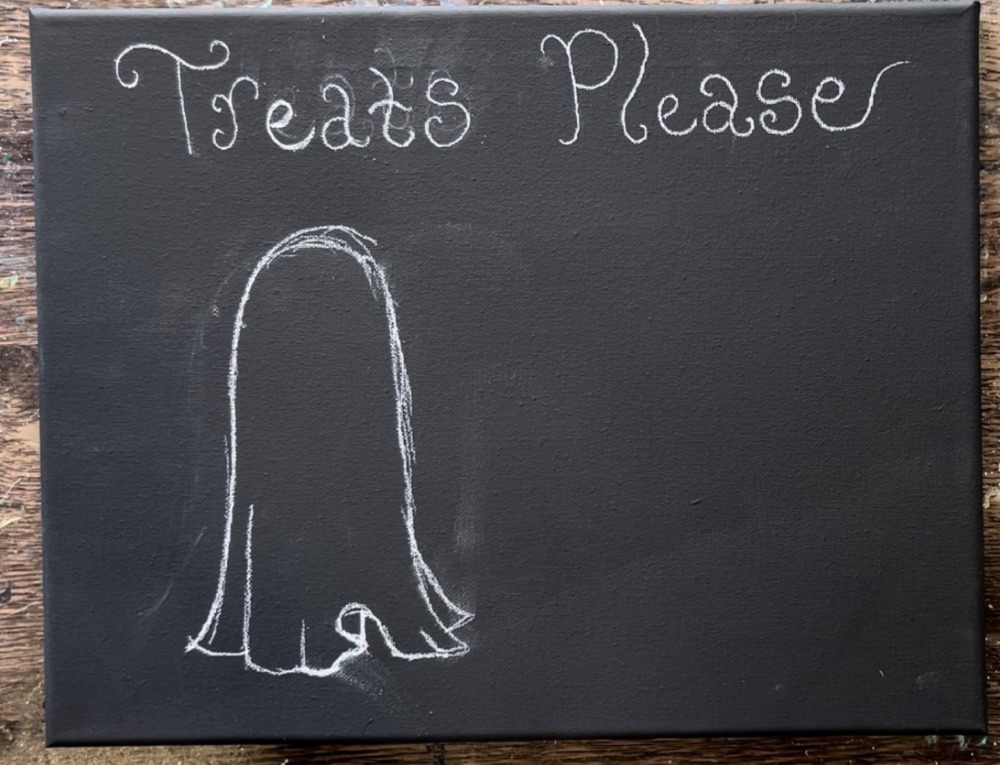
After sketching the ghost shape, I recommend drawing a vertical line right down the middle of the ghost dog. This will help us get the eyes and mouth shapes to be symmetrical for the dog.
Then draw the snout, nose and mouth. The nose is a triangle with curved points. The snout is an egg shape that really is the “cut-out opening” of the sheet.
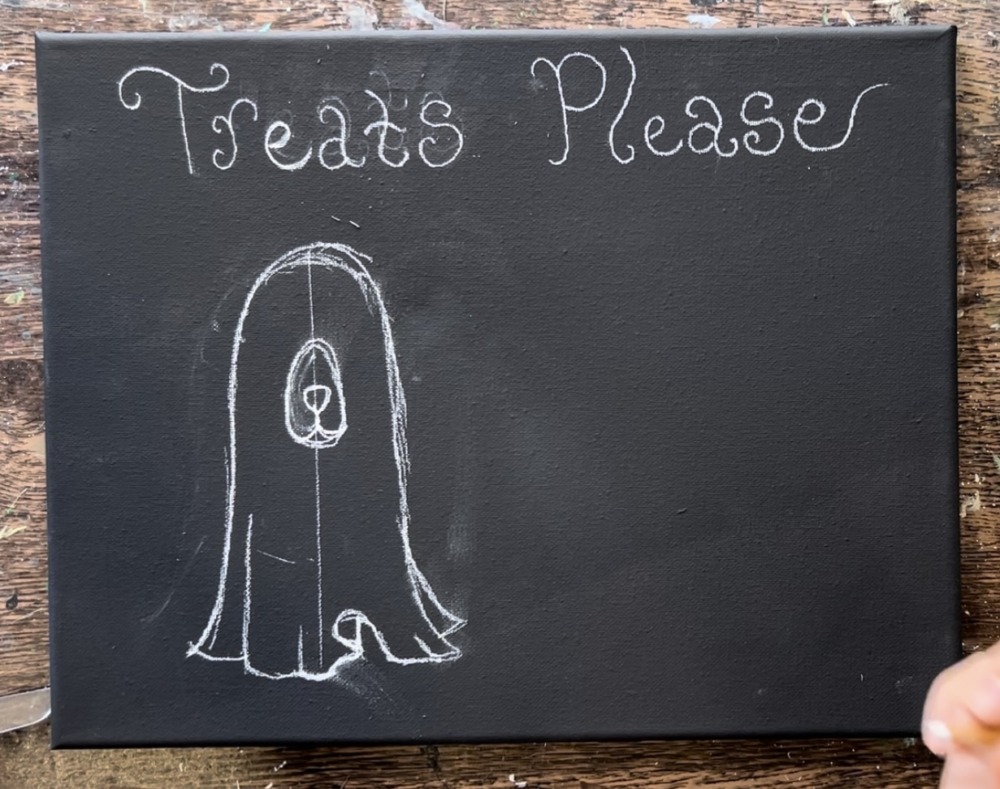
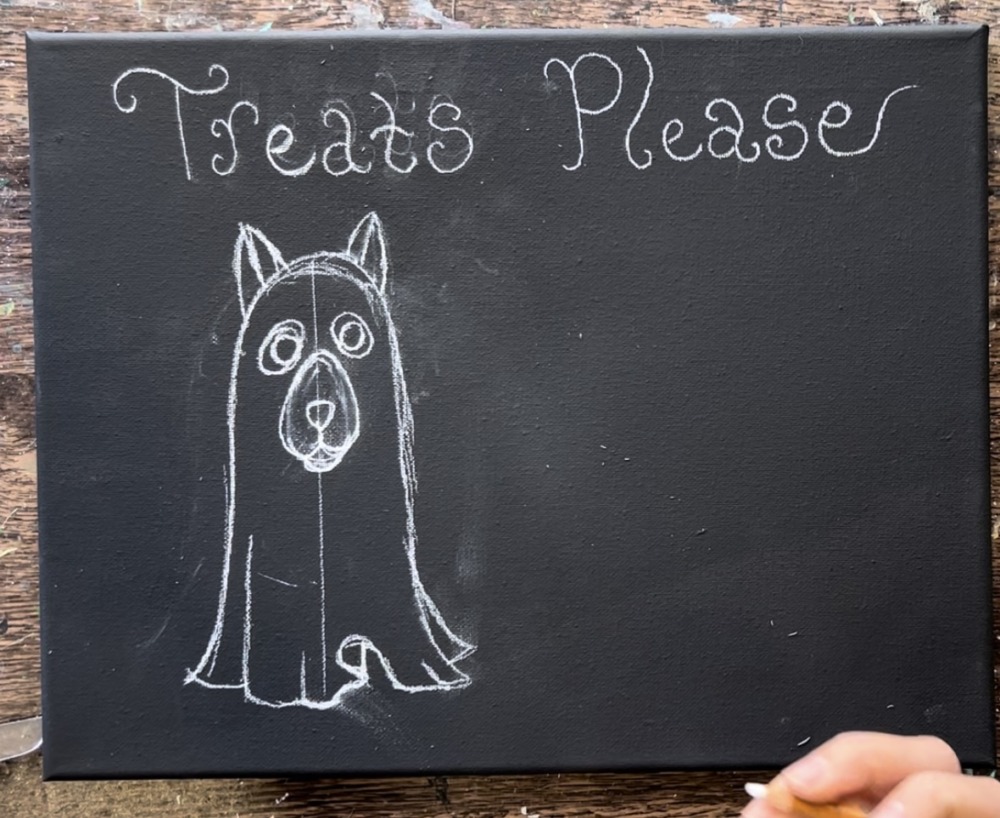
Draw two pointed ears. Then draw two oval “cut-out shapes” that go at an angle toward each other. Draw two circles inside the oval cutout shapes for the eyes of the dog.
Next, draw the pumpkin bucket. Draw the handles so that it goes to the bottom of the dog’s mouth. This will make it look like the dog is holding the bucket.
Then draw the bucket with an oval opening on the top. To make this a pumpkin, draw it rounded first. Then you can add the curved lines after drawing the circle shape.
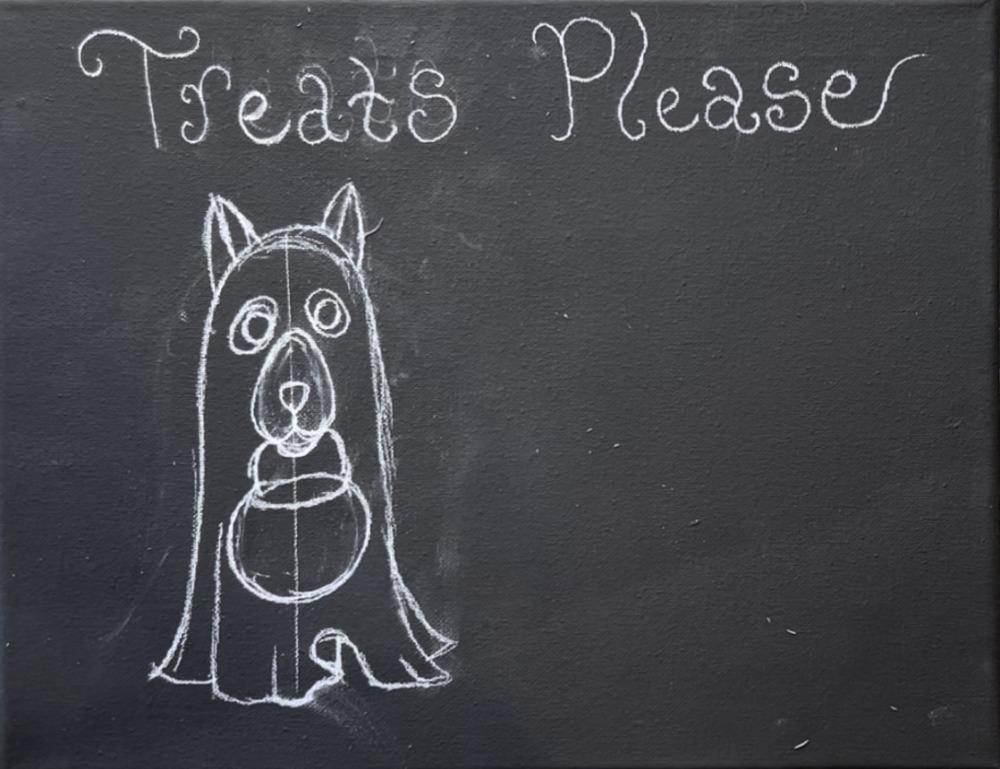
Draw the curved lines on the pumpkin. Start by drawing an oval in the center of the circular shape. Then draw 1 or 2 curved lines going from the top of the pumpkin and down on each side of that oval shape. Note: I end up painting over the pumpkin drawing any way when I paint the white sheet of the ghost dog. It still is nice to draw this first so that we can make sure we have enough room for the placement of it!
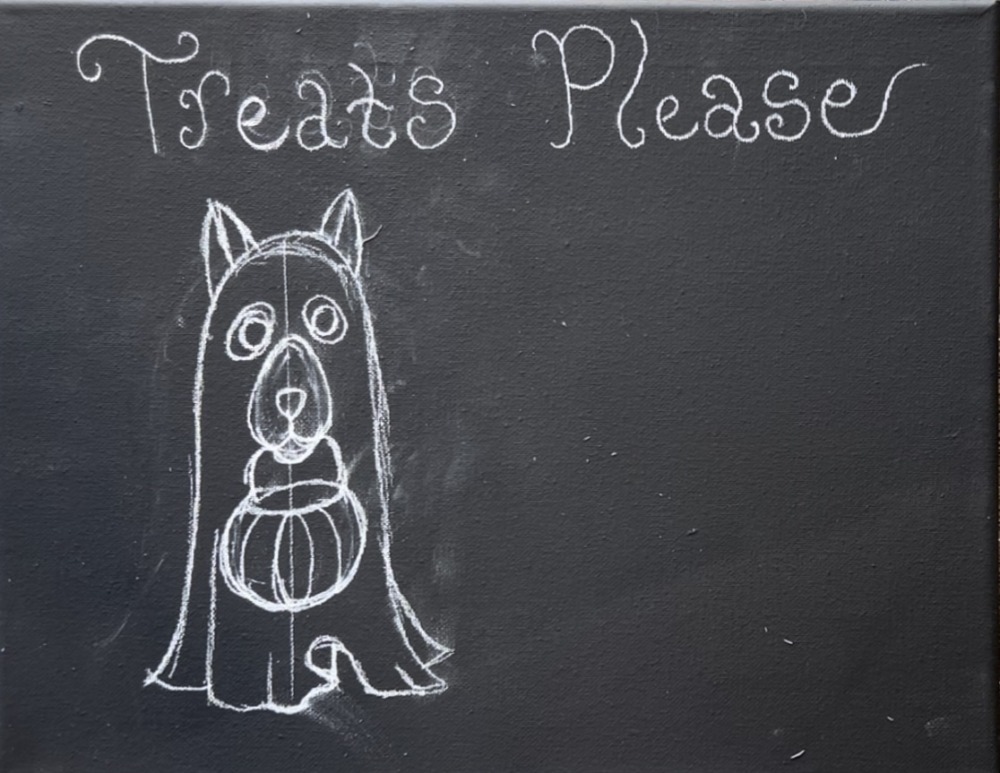
Optional: draw a tail and the legs/ feet of the dog. You can also just do a tail and no legs showing under the sheet. It’s up to you!
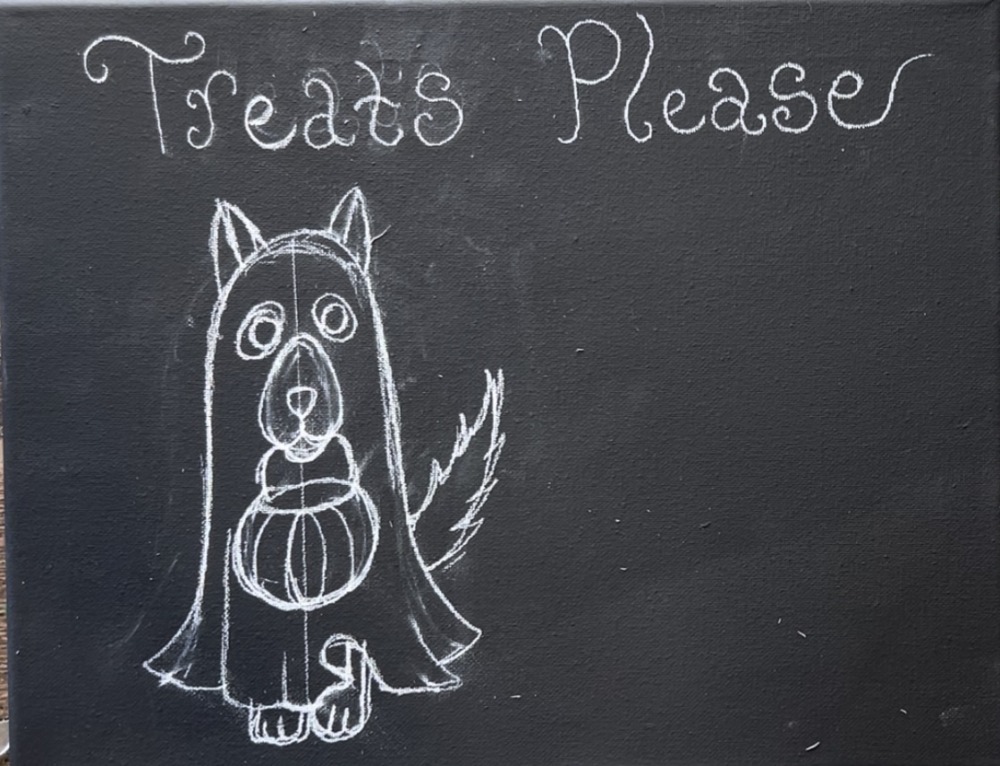
Next, draw the beagle dog on the right! Start by drawing the nose and the mouth. Draw a triangle with curved points and then draw two curved lines for the mouth of the dog. Note that this is a little lower on the canvas than the nose of the ghost dog. We want to make sure there will be enough room for the witch hat.
Draw two curved lines that go around the mouth to create the cheeks of the dog.
The bridge of the nose goes up to the top of the head. Then draw two sets of ears that “flop” on each side of the dog’s head. Also, draw two circles for the eyes.

Draw two curves for the front paws. Draw two diagonal lines that extend from the bottom of the mouth to the paws.

The nice thing is we don’t have to draw the body of the dog because he or she is inside a cauldron!
Then draw curved lines for the toes on the paws.
Sketch the cauldron around the dog so that the opening oval shape goes between the paws. You want it to look like the dog’s paws are on the rim of the opening. Then draw a large circular shape for the bowl of the cauldron.
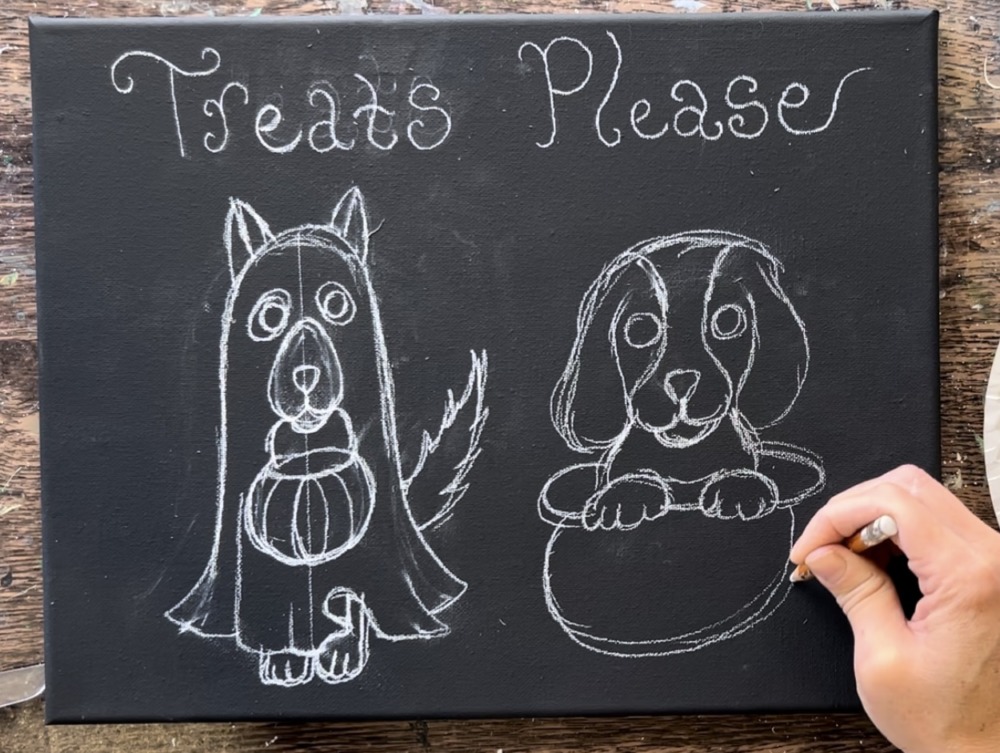
Draw two little legs on the bottom of the cauldron.

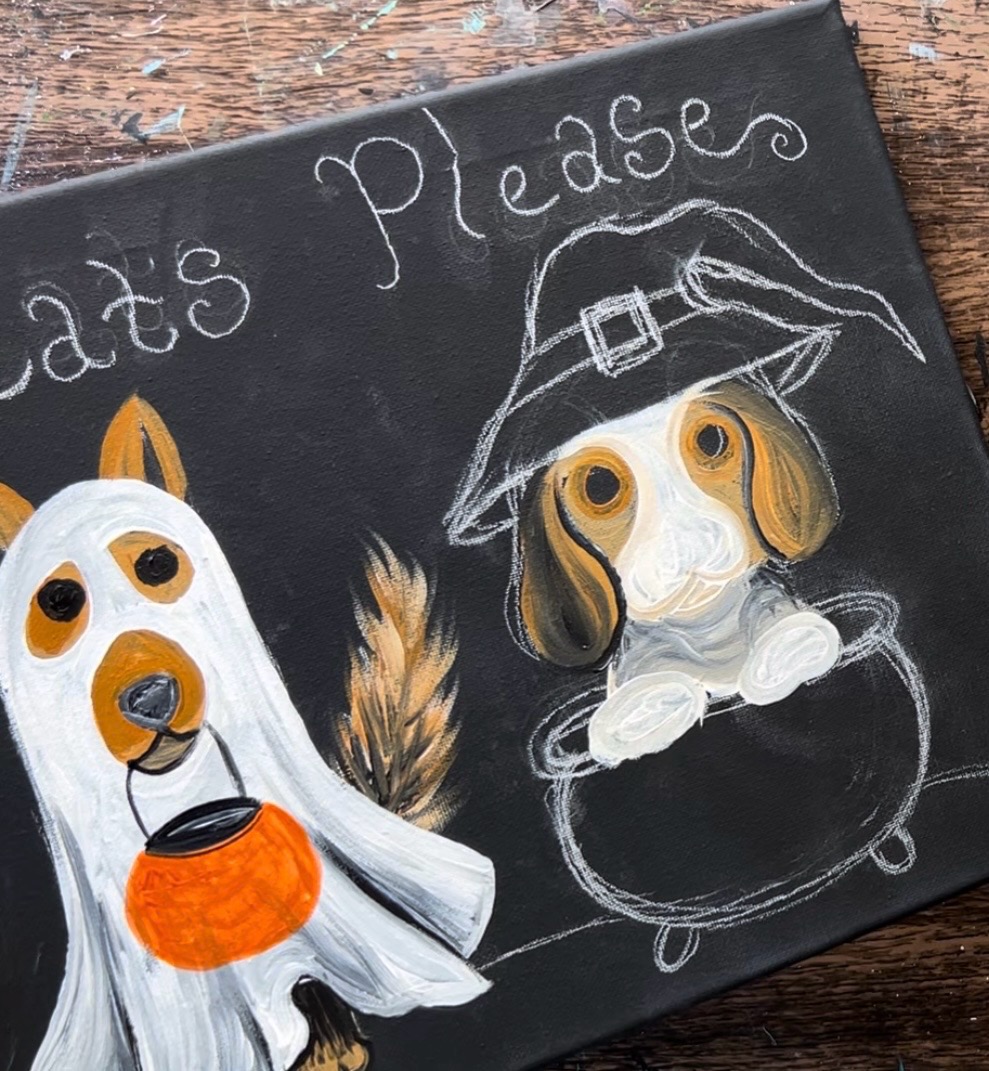
Draw the witch hat so the brim of the hat overlaps the top of the dogs’s head.
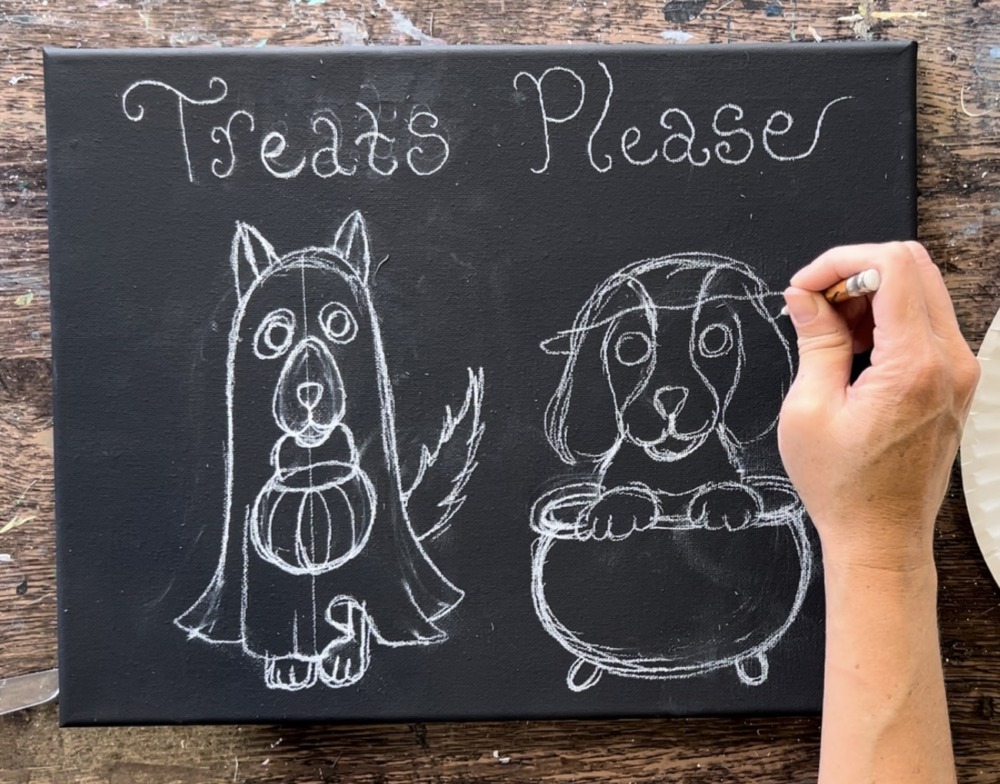
Then sketch the rest of the heat so that it goes narrow and then to a point. I made the point of my witch hat flop down on the right and go to a point. It got a little “squished” in that area because of the lettering! We can always just the letters to go a little higher or make the hat go lower.
Then draw a buckle on the hat.
3. Paint First Layer Of Ghost Dog
Load your paint palette with: raw sienna, mars black and titanium white. Use the #4 round brush.
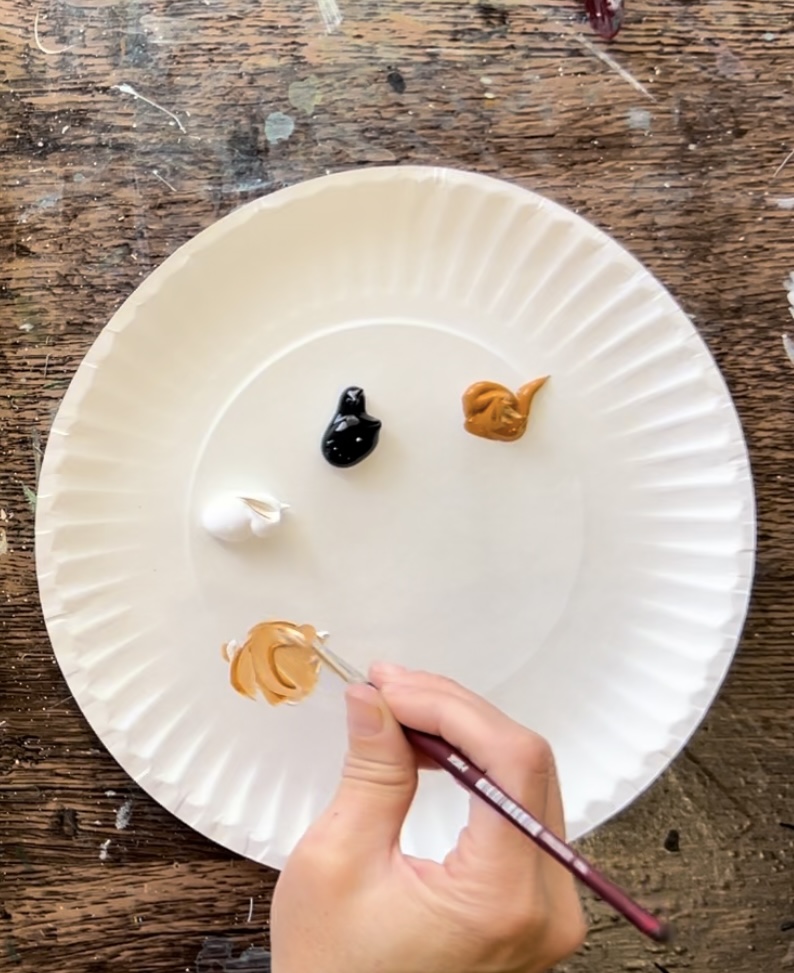
Mix equal parts titanium white and raw sienna together. This will be referred as “light golden brown” in this tutorial. We will be using this as a base color for most of both of the dogs.
Then use that light golden brown color to paint the nose and bottom of chin of the ghost dog. Make the bottom chin area slightly darker by adding just a little bit of mars black to the color.
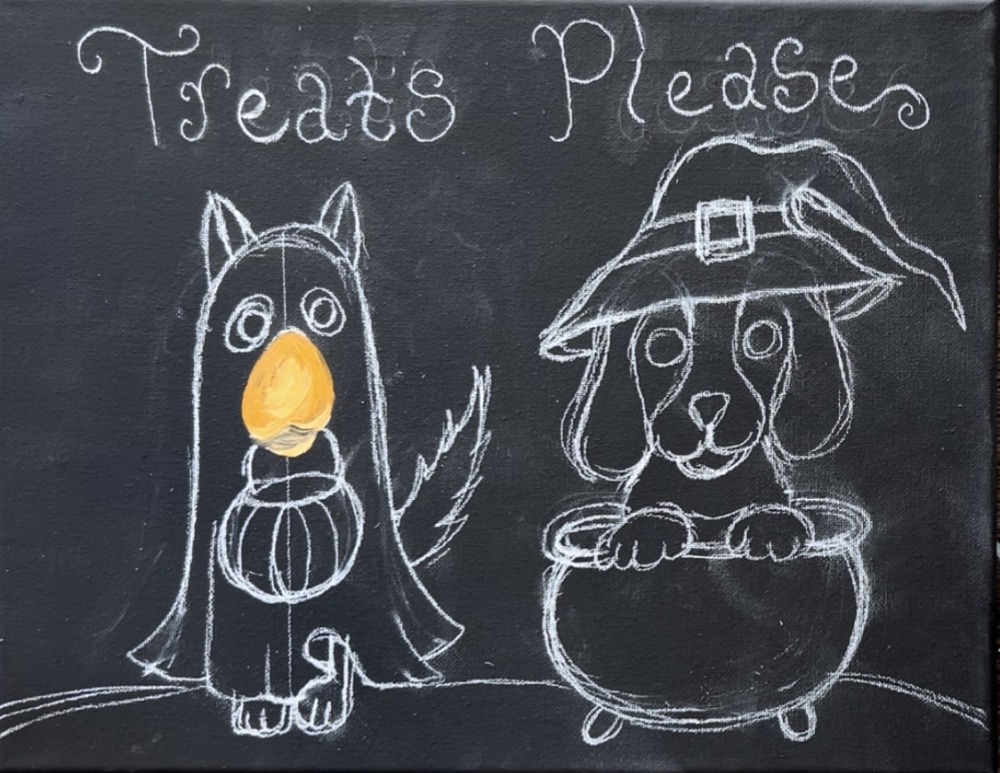
Paint the ears and eye area with the same light golden brown color. Leave the opening of the ears blank. The nice thing about using a black canvas is that we can use the black background to help us with dark shadowy areas in our painting!
Paint the tail using curved paint strokes that are slightly “dry brush” style so the edges of the tail have fur texture.
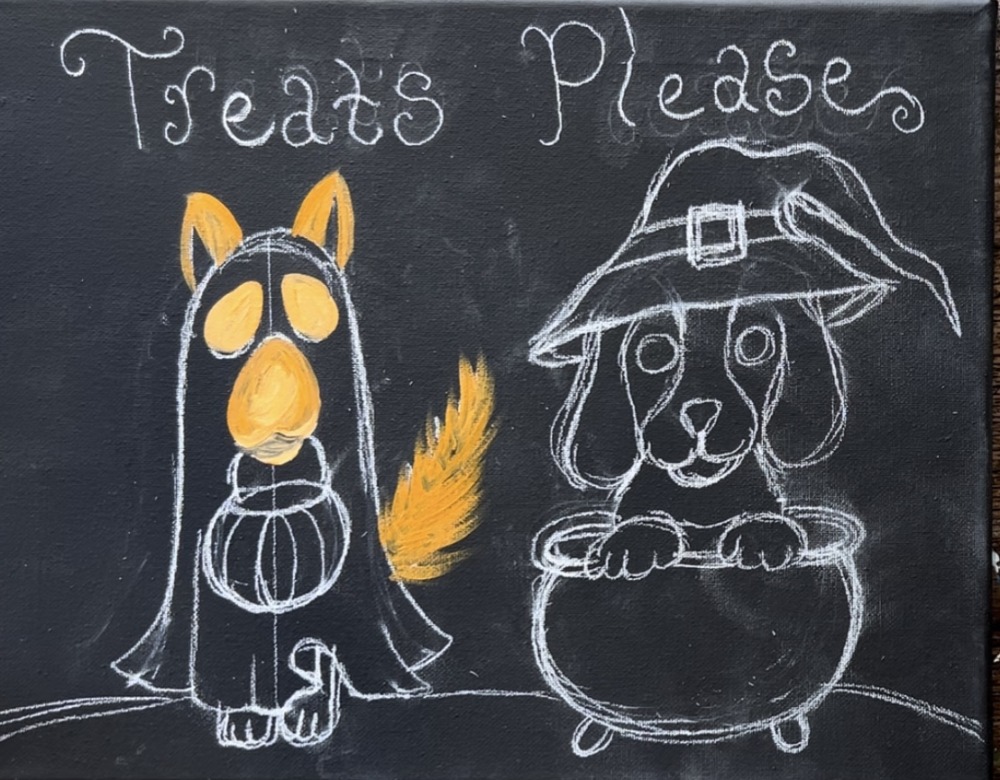
Add titanium white to the brush and paint a layer of white over the tail.
Then paint a layer of black over the tail. This creates color variation and texture on the dog’s tail! I also added some black on the legs/ paws. Be careful not to add too much black to the tail or you will loose the contrast in it because it’s so close to the color of the background.
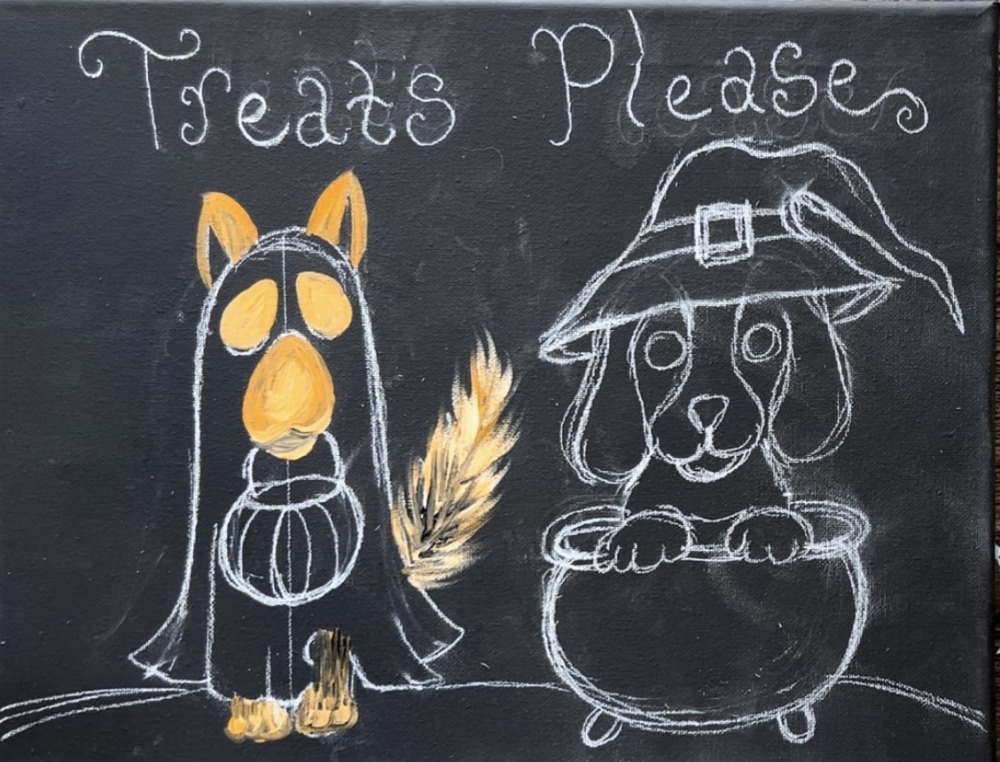
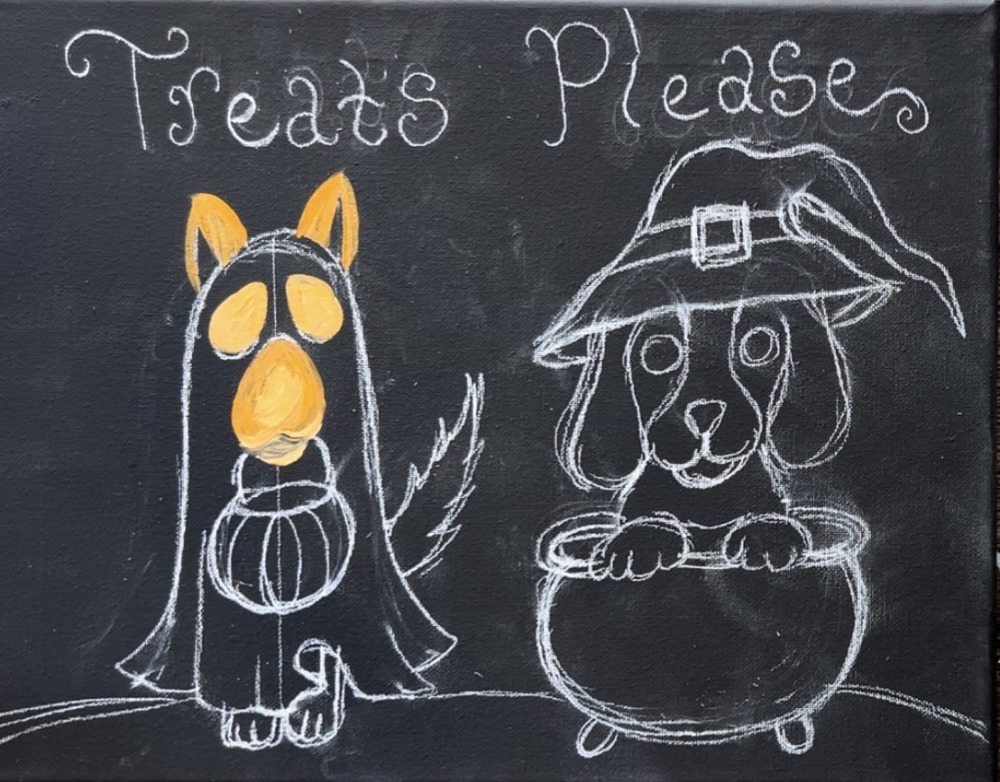
4. Paint First Layer Of Witch Dog
Next, paint the ears of the beagle. I used a combination of the golden brown color but blended in some black on the outer parts of the ears. Again, be careful when adding black into the color and don’t add too much black.
Do this on both sides.
Then paint the head area around the eyes and between the ears. I did this with the “light golden brown” color but added just a bit more white to it so it shows up lighter.
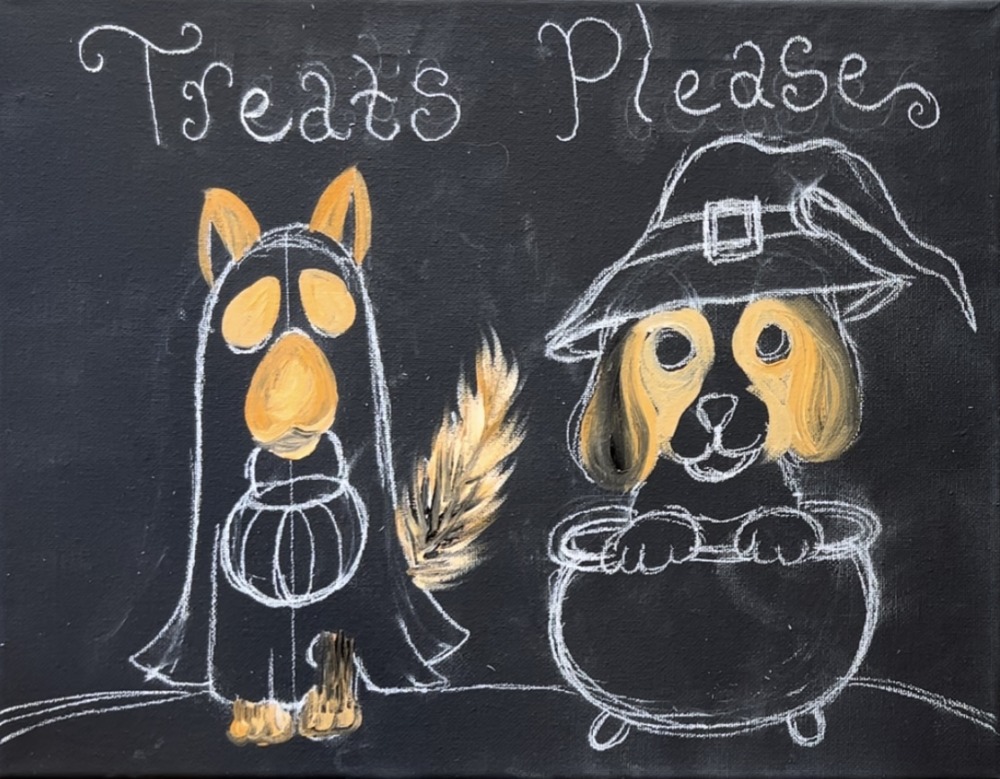
Paint the center part of the head, the bridge of the nose, the cheeks and chin with titanium white paint (rinse the brush off). Note: I added just a bit of brown into this white to that it is more of an off white color rather than pure white.
Paint the front chest area under the mouth with a gray color. Add a little bit of black to the same color you used for the light colored part of the head.
Then paint the paws with white. Lightly outline the ears with black so the shape of the ears stand out. Tip: for outlining and thin line work, you can also use a black paint pen!
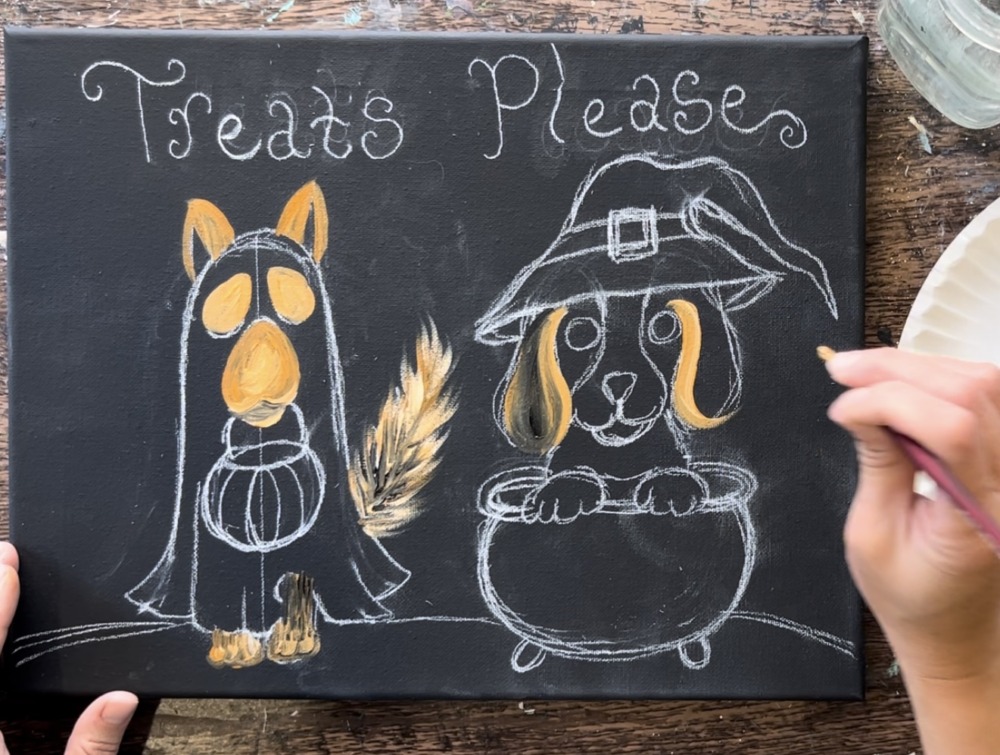
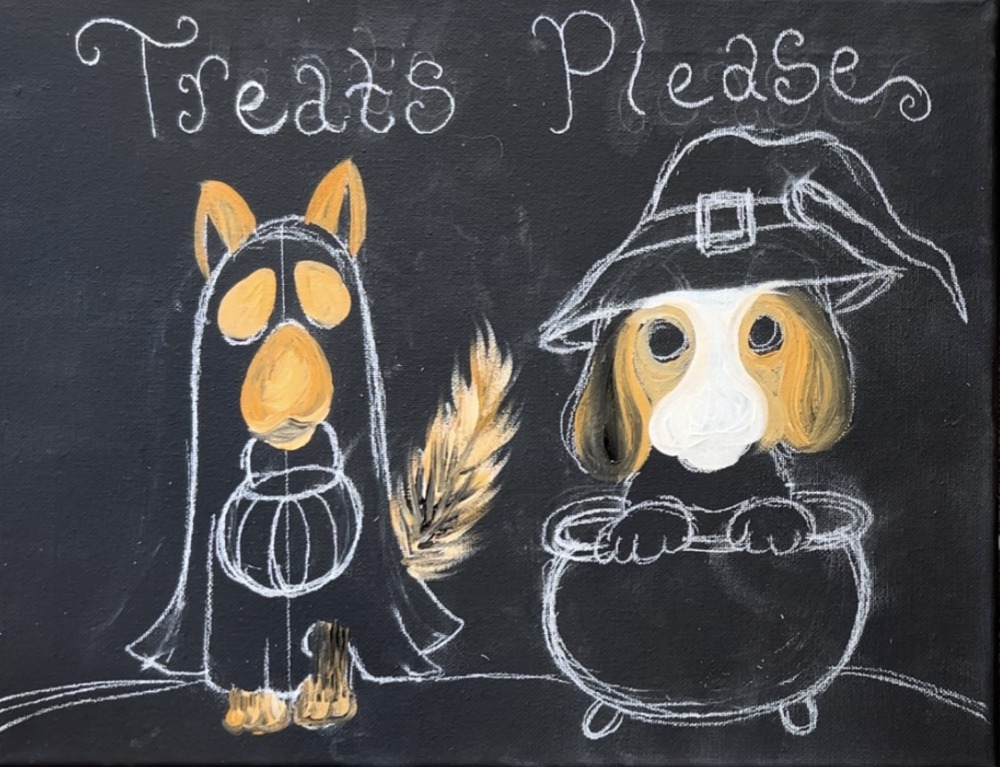
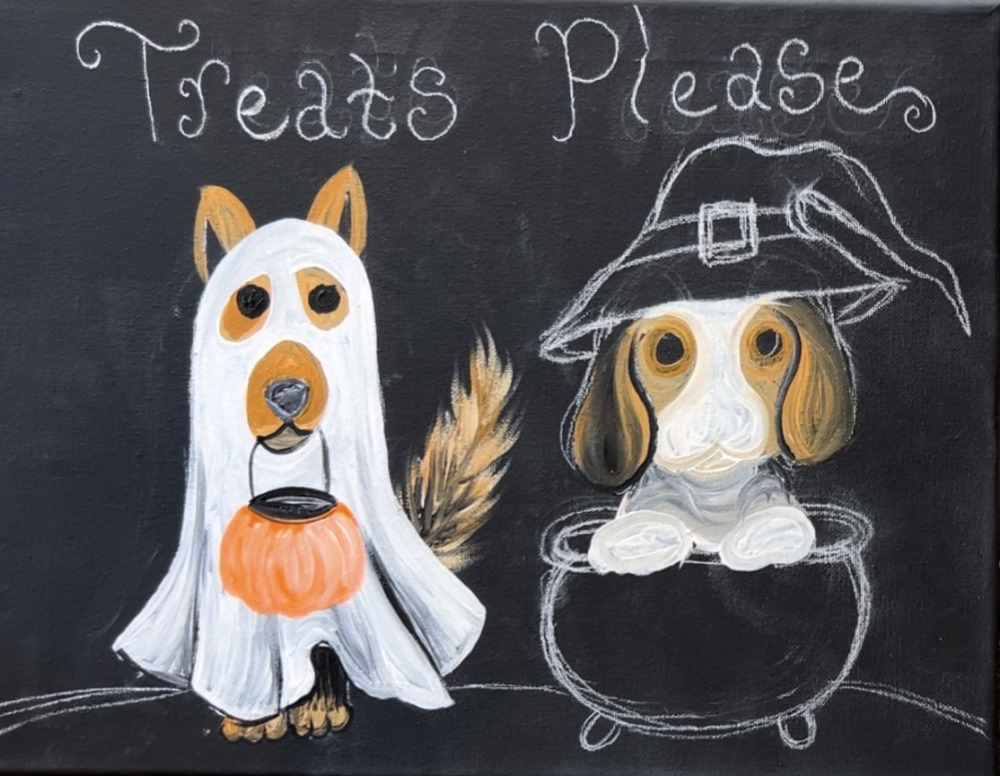
5. Paint Sheet On Ghost Dog
Use pure titanium white (not mixed with anything) to paint the sheet of the ghost dog. Start out by outlining the shape of the sheet including the wrinkles/ lines.

Paint around the eyes and mouth opening.
When you start to paint the curves and folds on the bottom of the sheet, add a small amount of black into the color so it is more of a gray. This will create shadowing in the ghost sheet. Paint the vertical lines with gray and blend it in with the white.
Note: I painted over the pumpkin drawing. We can re-paint the pumpkin in a later step and the orange will show up bright against the white background!
6. Paint Nose & Eyes Of Ghost Dog
Still using the #4 round brush, paint the nose and mouth of the dog with mars black. Alternatively, you can use a black paint pen for these steps that require fine detail work with black!
Paint the eyes solid black circles.
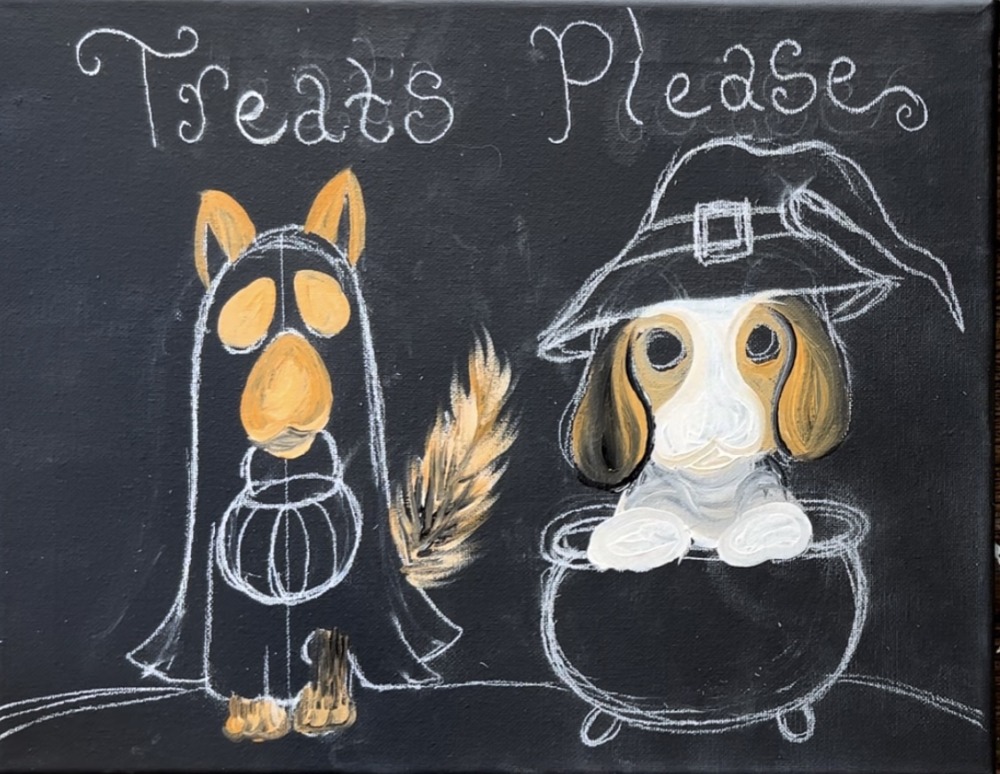
7. Paint Pumpkin Bucket
Paint the handle of the bucket. Paint an oval/ellipse opening for the top of the bucket. Note: this can be dark gray or black. I did mine dark gray.

Rinse the brush. Then use “cadmium orange hue” to paint the pumpkin. Start by outlining the shape of the pumpkin with the orange paint.
Then paint the shape in solid orange.
Use titanium white to blend curved lines into the orange. This creates texture for the pumpkin.
8. Paint Nose, Eyes & Outlines Of Witch Dog
Use either a black paint pen or the round brush and black paint to paint the nose, mouth, bottom of chin and outline the paws/ toes.
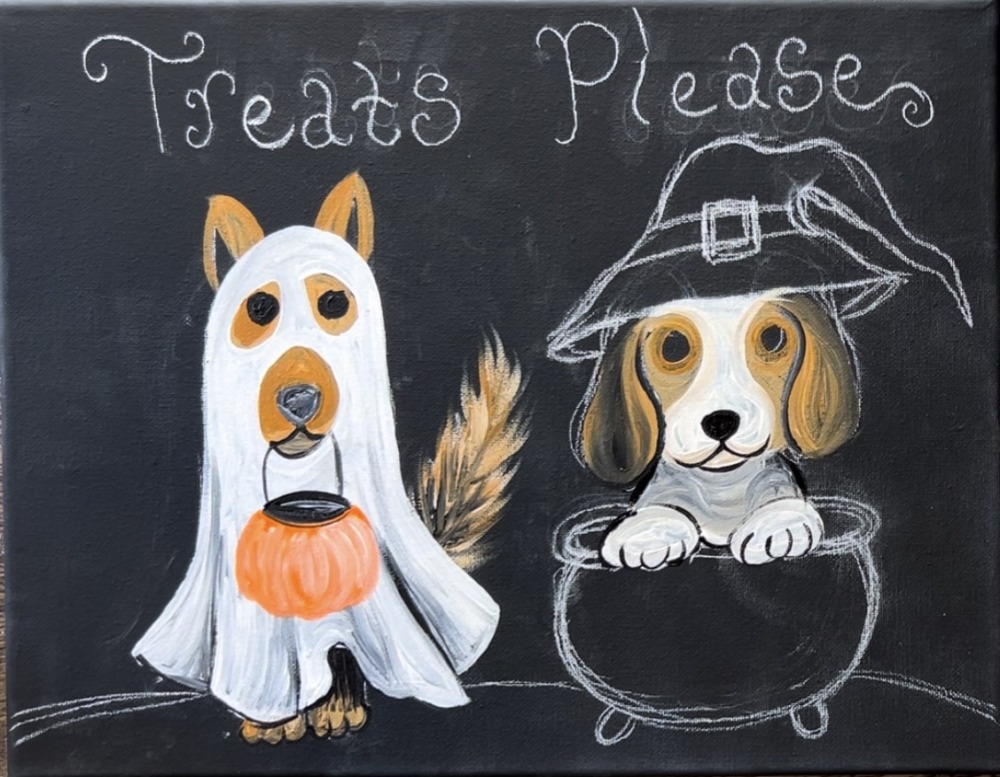
Paint the eyes of the beagle gray or white (I did them in light gray).
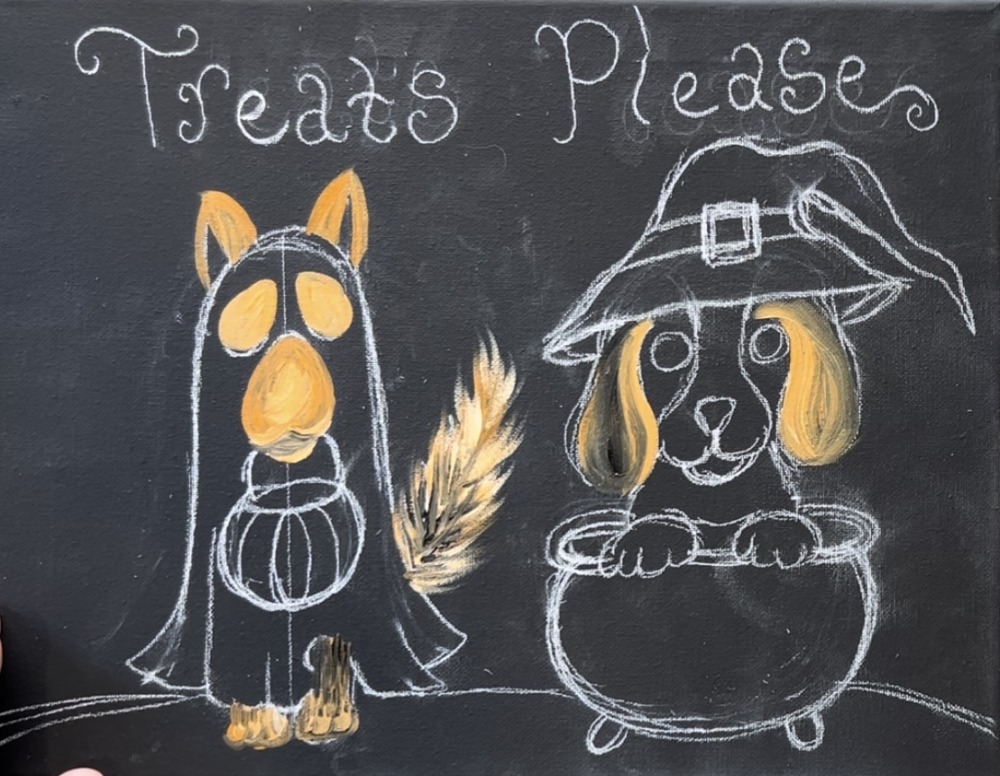
9. Paint Cauldron
Then start painting the cauldron. Start by painting the top rim of the cauldron dark gray. Note that the cauldron being black makes it kind of tricky to show up on the black canvas. You need to use white to add highlights and outline the cauldron so that it will show up! Also, use gray and dark gray for the shape of the bowl. This will create the illusion of a dark black cauldron.
Paint the cauldron a mix of dark gray with white highlights on the edges. Paint the edges of the cauldron with rounded paint strokes to create form in the bowl. Also, make the left side of the cauldron slightly lighter and the right side slightly darker.
10. Paint the Witch Hat
Load your paint palette with “deep violet”. Mix white into the deep violet so that it will show up bright on the dark canvas. Paint the bottom of the witch hat with this light-medium purple.
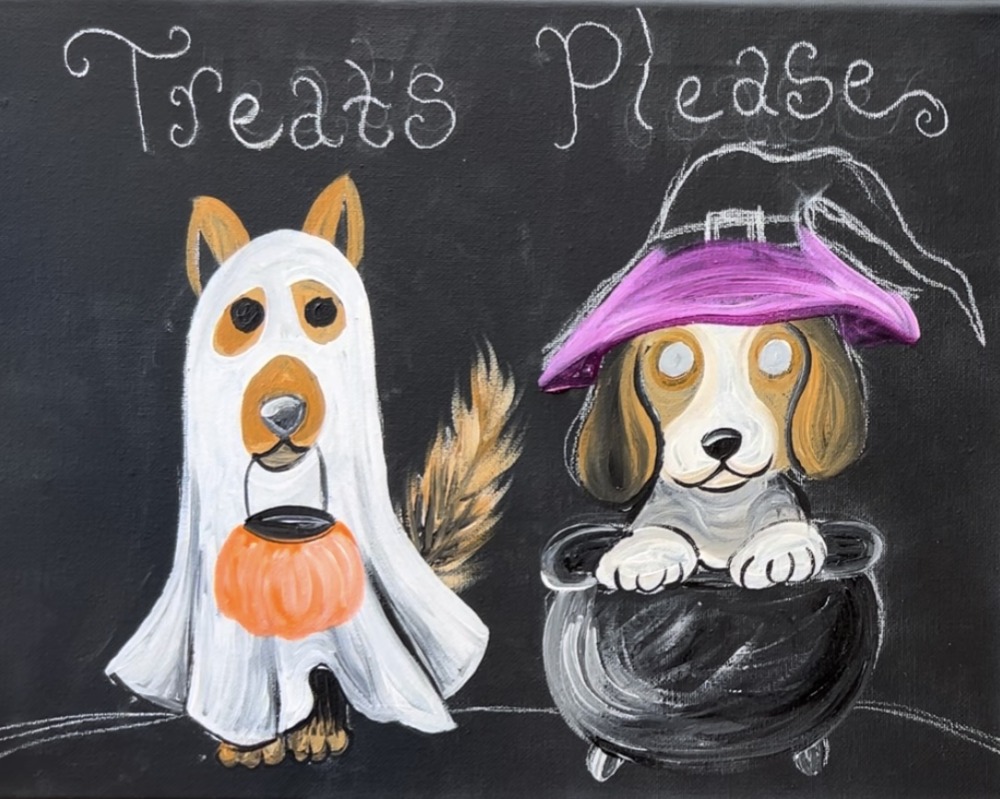
Paint the under part of the hat with darker purple (no white) so that it looks shadowy on the part we see above the dog’s head. Then blend more white into the hat towards the top. I did a lot of “wet on wet” blending with the white and purple. This creates variations of purple on the hat.
Paint the part of the hat that folds over so that it shows up slightly darker.
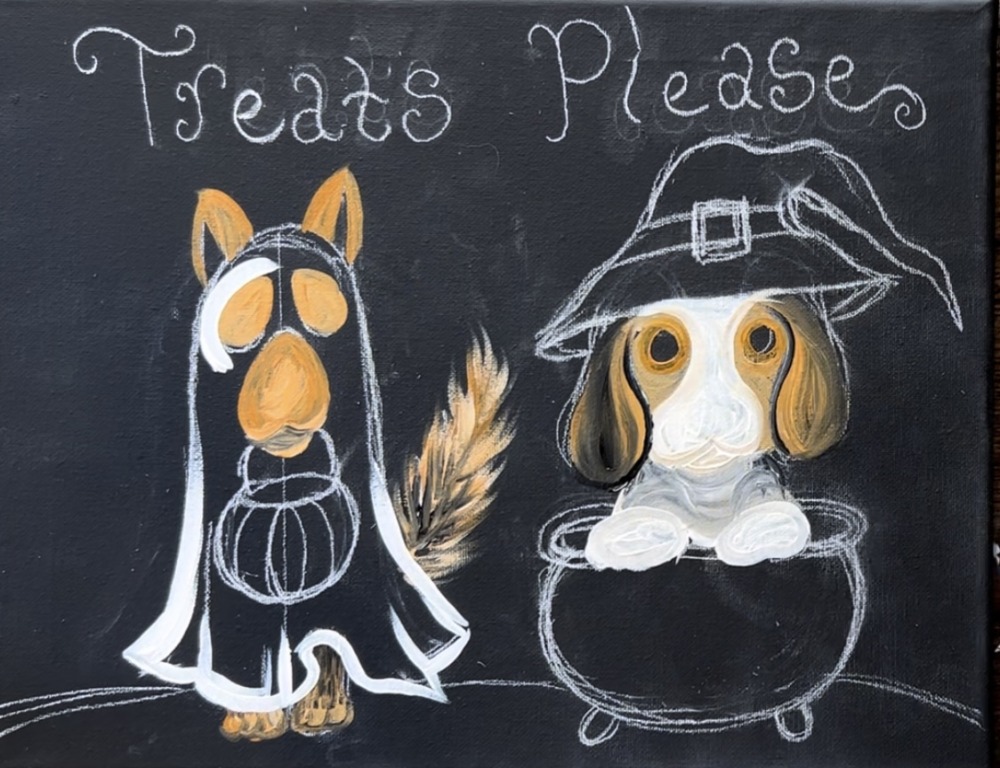
11. Detail Eyes, Ears Of Ghost Dog & Witch Hat
Use the golden brown color (white and raw sienna) to paint smaller circles on the inside of the eyes of the dogs. Let this dry.
Add a white band on the witch hat.
Then paint fur paint strokes on the ears of the ghost dog. Do this with white mixed with the raw sienna.
12. Paint Face On Pumpkin Bucket
I used a black paint pen to draw the face on the pumpkin bucket. Alternatively, you can do this with the round brush and black paint.
13. Highlight On Eyes
When the black circles on the eyes are dry, paint a little white dot on each of the dog’s eyes. I used the back of the paint brush to paint these white dots.
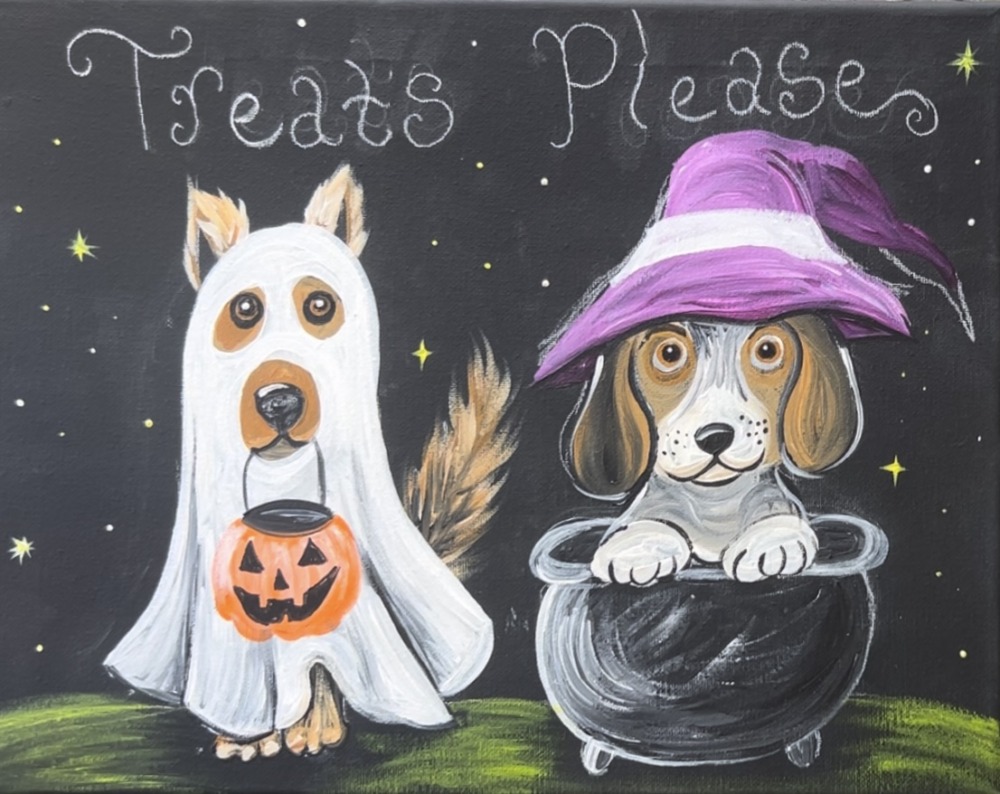
14. Paint Green Ground
Use the color “light olive green” and the #4 round brush to lightly paint the ground. I did this in a way where a lot of the black from the canvas is still showing through. To create shadowing, leave the blank black canvas without paint. I did this under the dogs so that it looks like there is shadow on the ground.
Paint the ground in a curved direction of the hill.
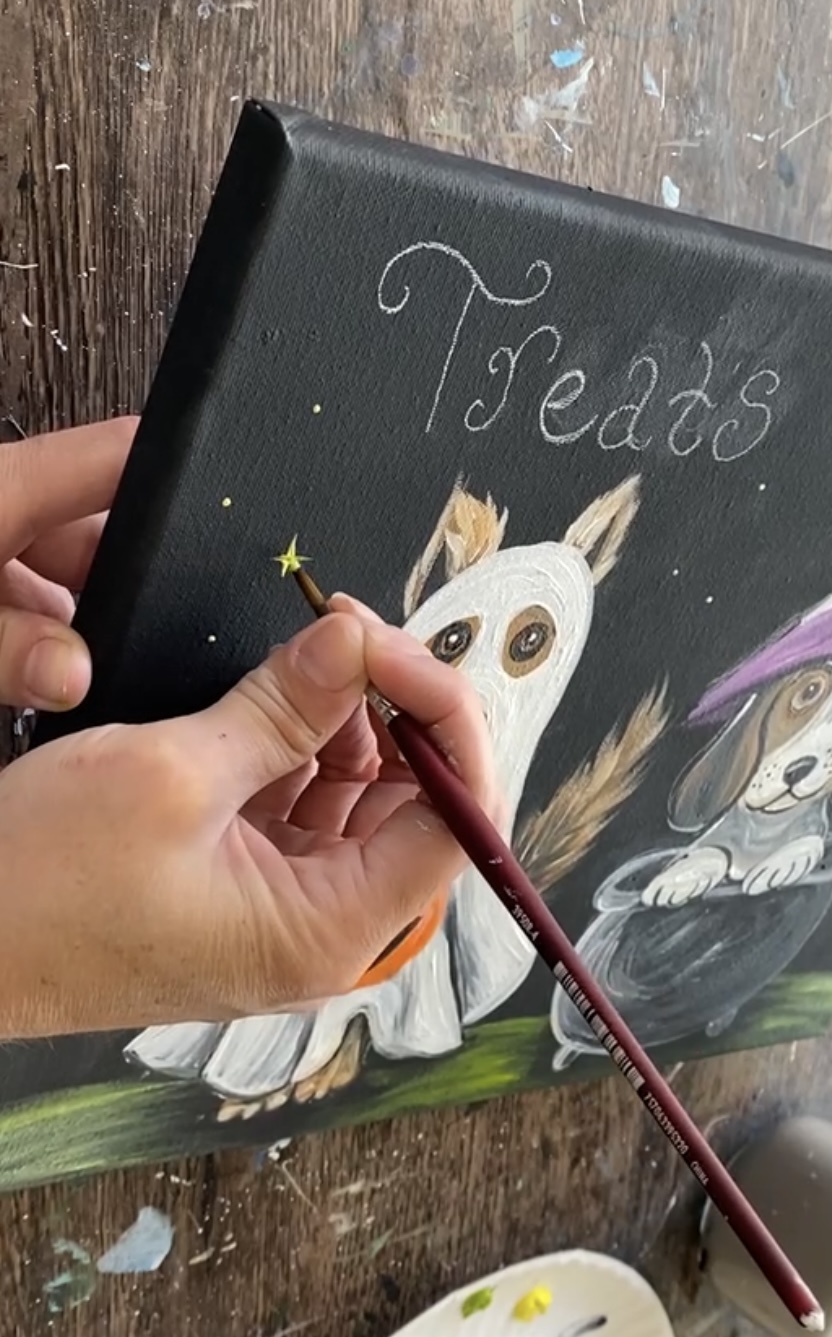
15. Paint Stars
Use the #4 round brush and “cadmium yellow light hue” to paint stars all throughout the sky. I did a combination of little dots as well as “diamond twinkle stars”.
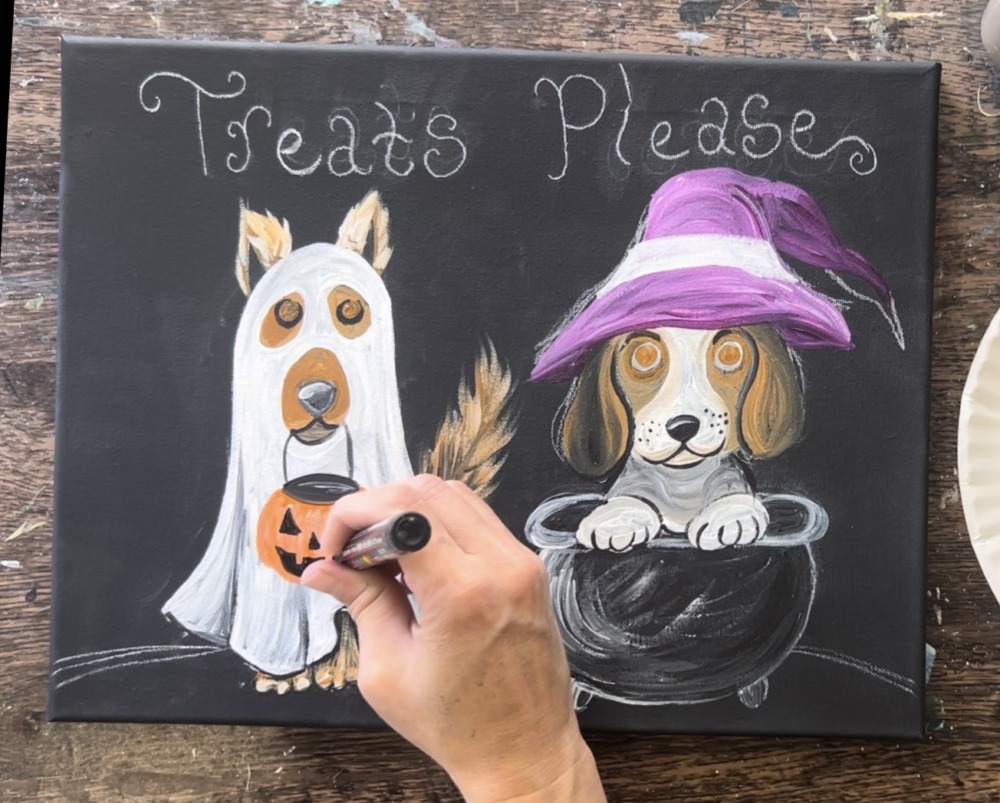
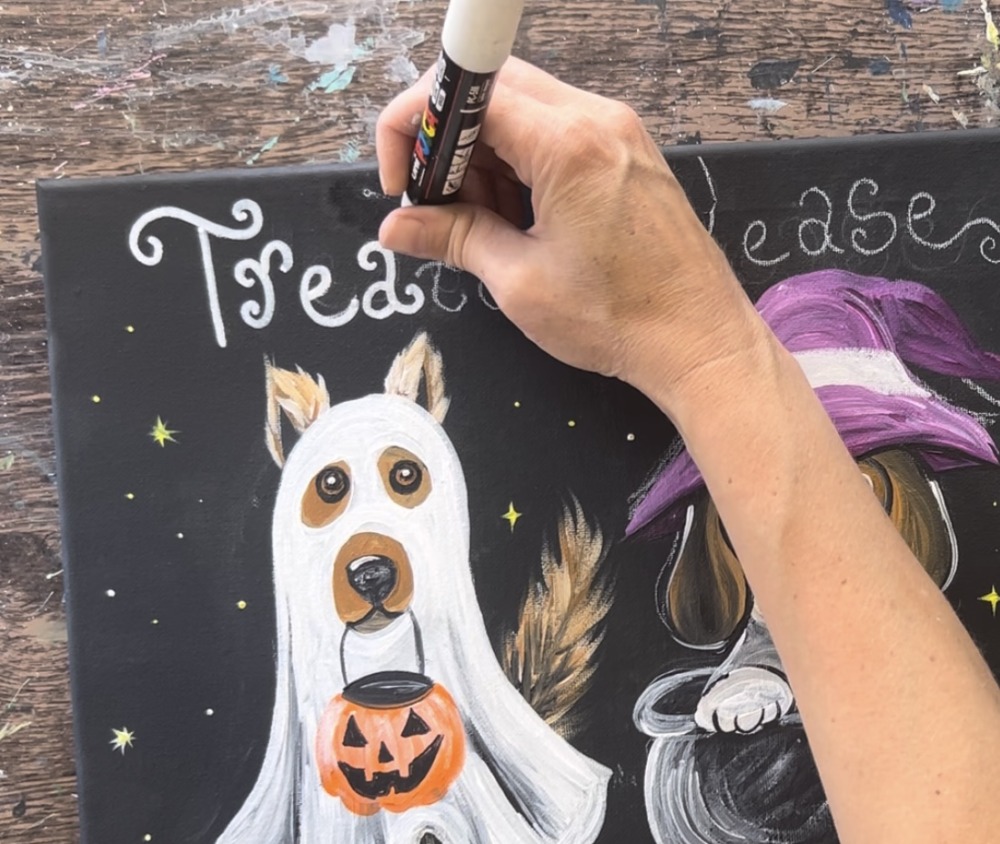
16. Write “Treats Please” with paint pen
Use a white POSCA paint pen to write the lettering. I did have to do this in two coats so the letters show up nice and bright!
After your lettering dries, erase any leftover chalk lines. I also erased any other leftover lines throughout the painting. You can touch up “stubborn lines” with black paint if needed.
17. Final Touch Ups & Extra Details
Some other details I added in this painting include: painting a dog tail for the beagle, painting white motion lines around the tails so it looks like the tails are wagging. I used the “golden brown” color for the beagle’s tail.
I also did orange spirals on the witch hat and painting a yellow square buckle on the band. I also outlined the buckle on the hat.
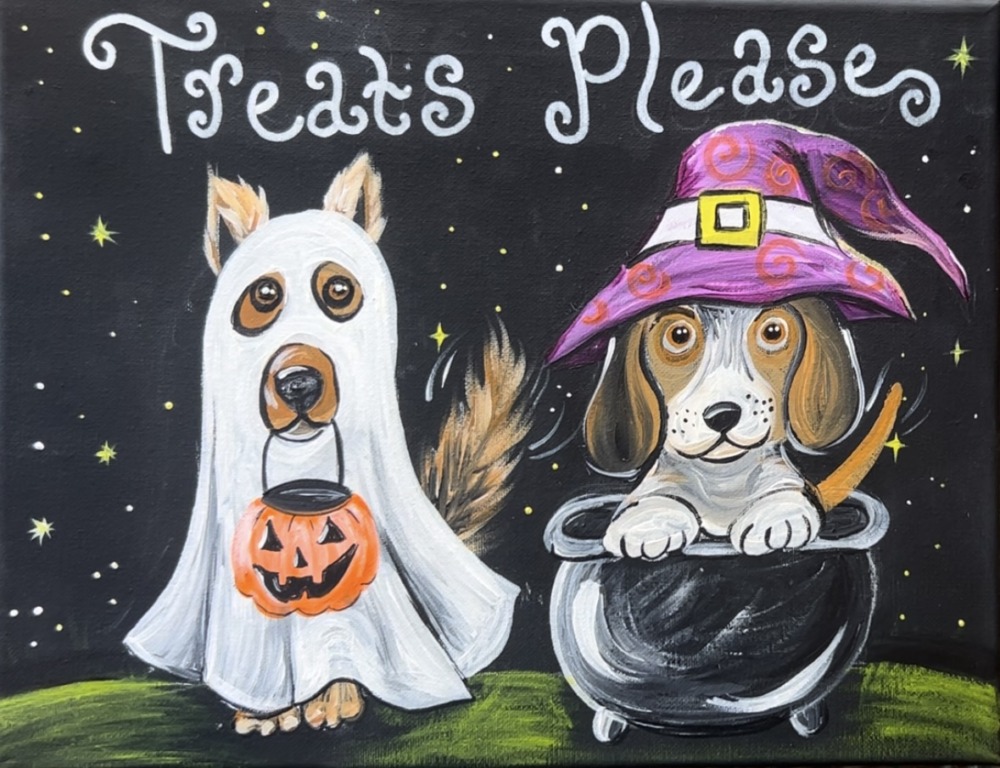
Another final touch for this painting was adding little fall leaves on the ground! This added a fun pop of color in that area. I did that with yellow and orange. Outline the leaves with a white paint pen and then draw the stem and veins with the black paint pen.
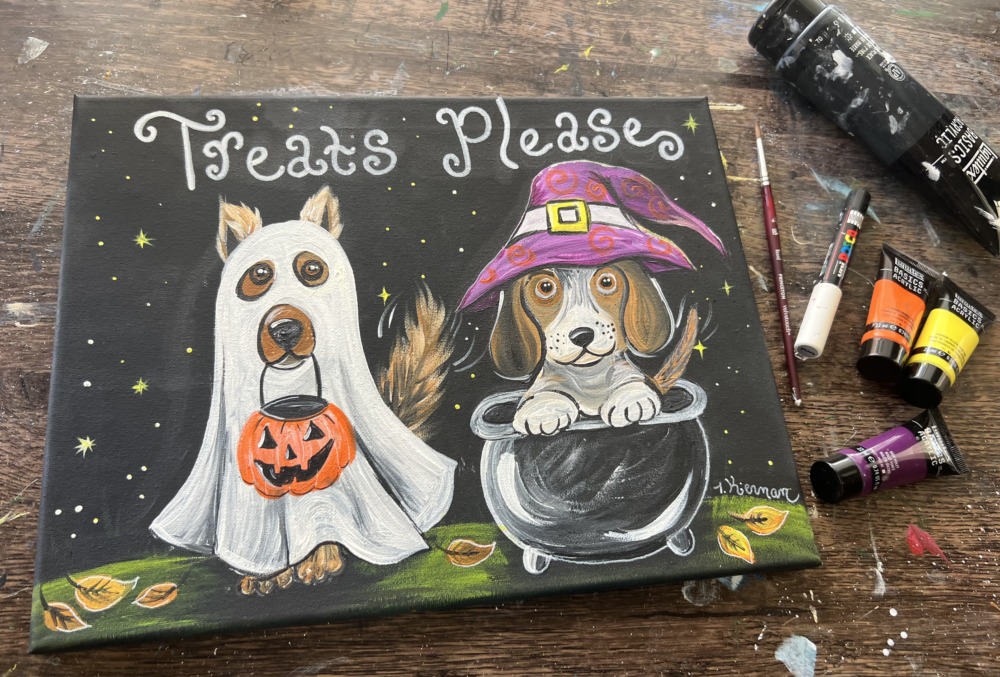
Finished!