
Would you like to save this?
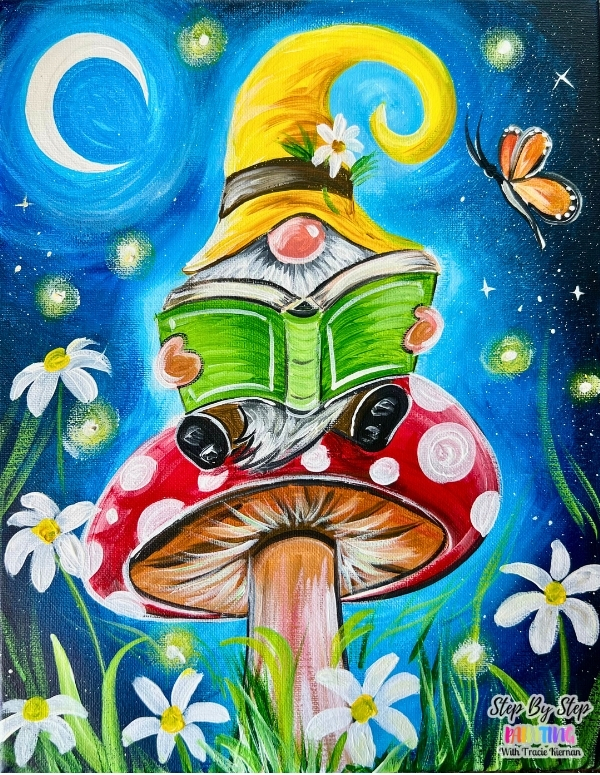
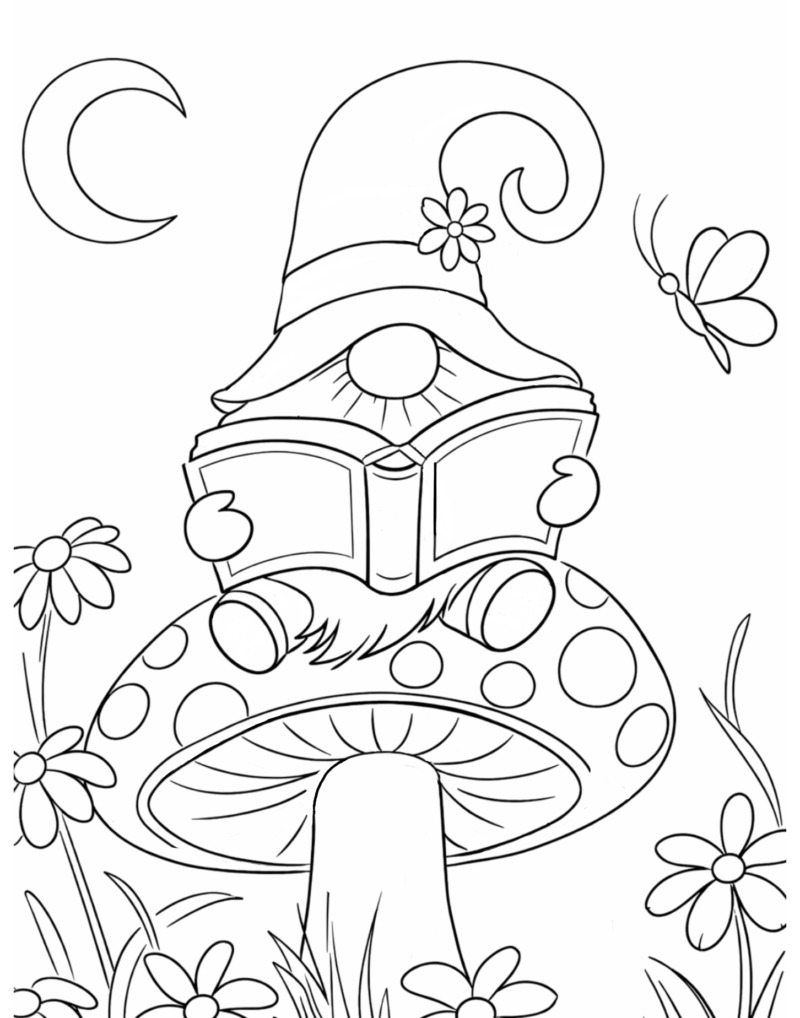
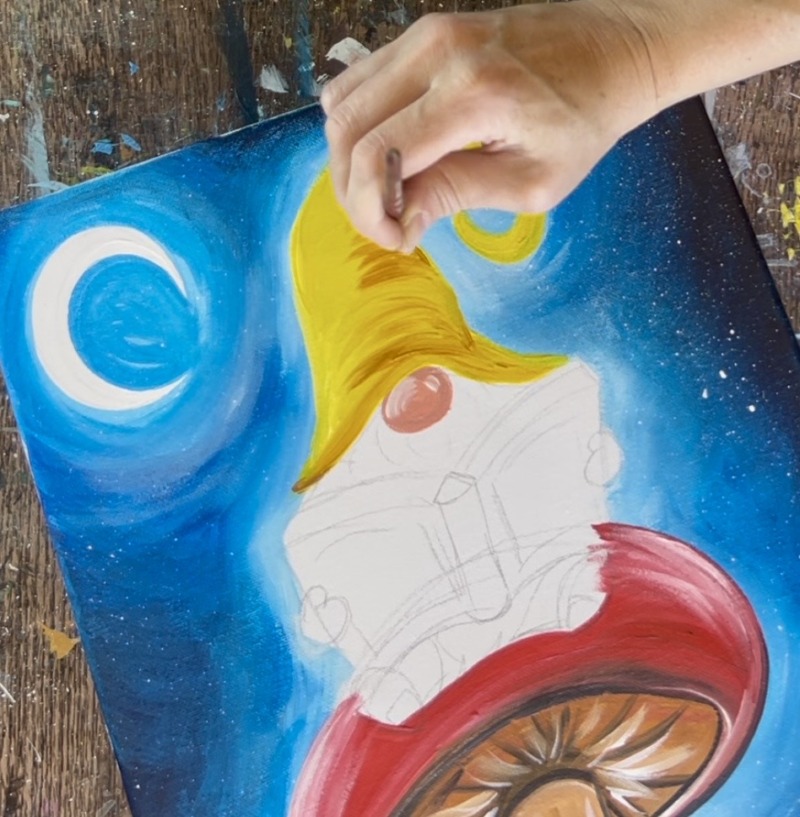
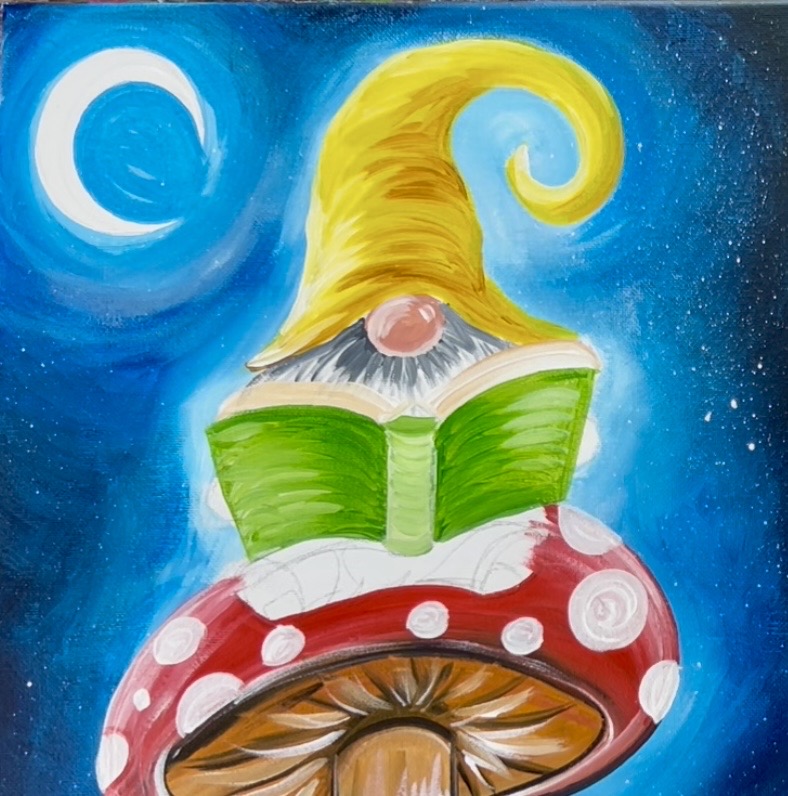
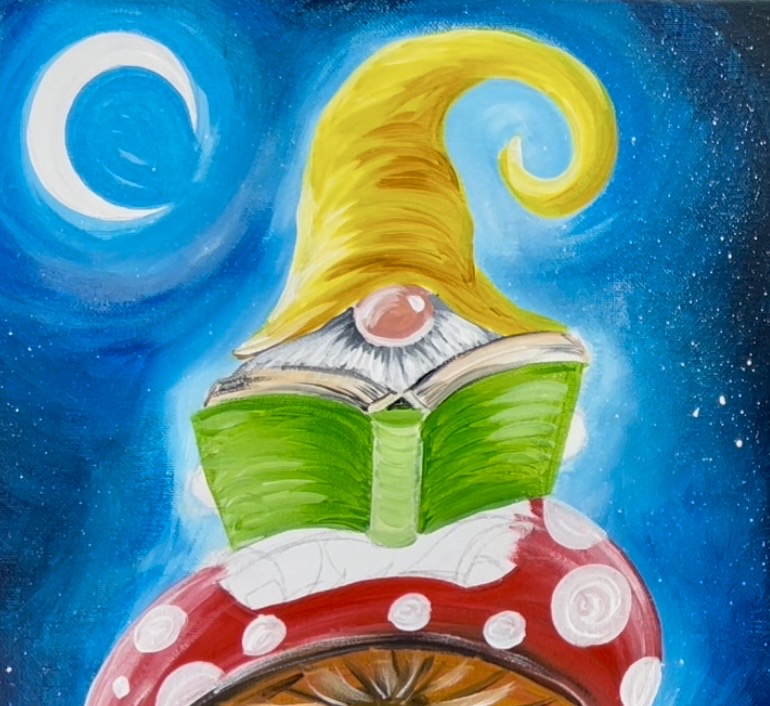
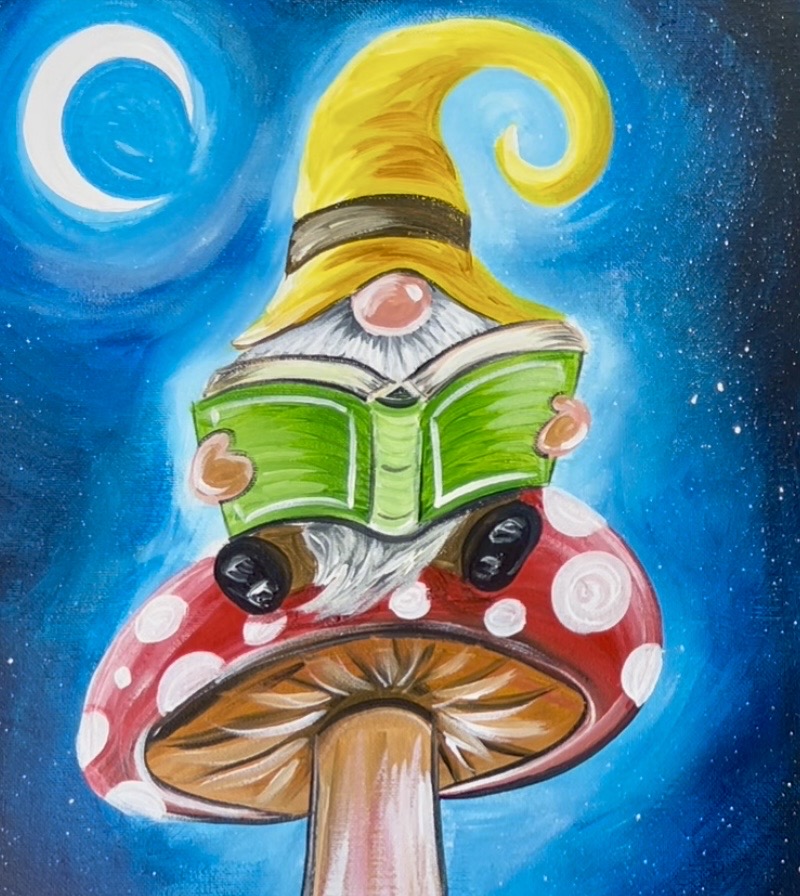
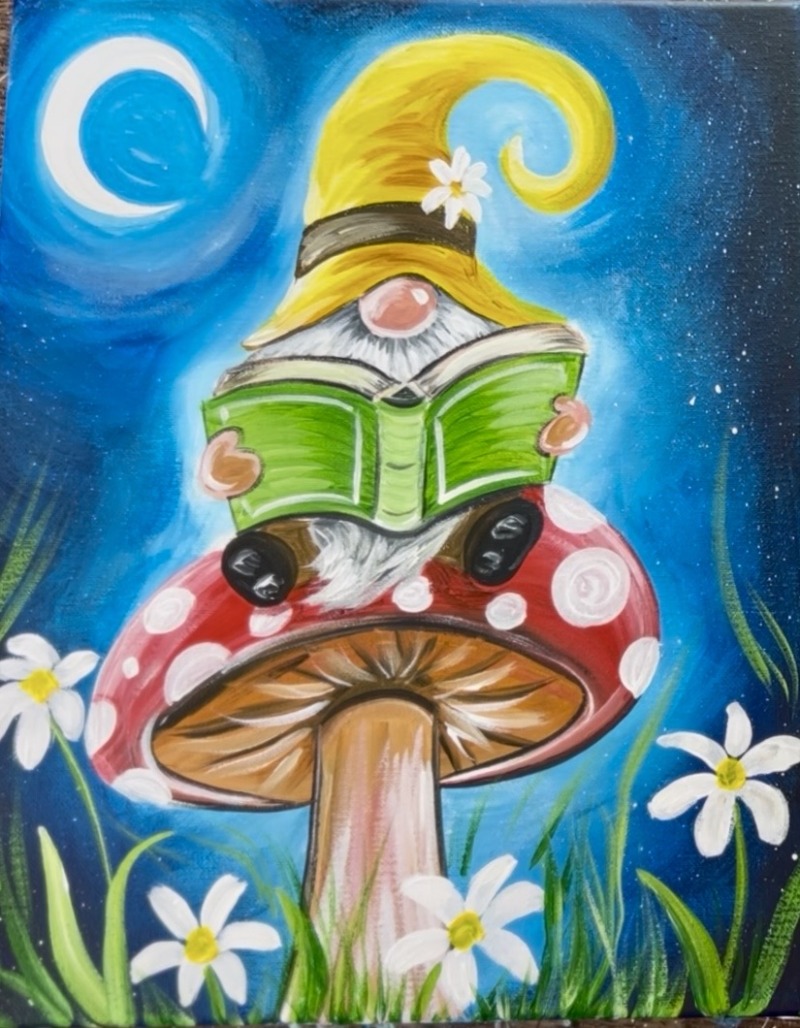
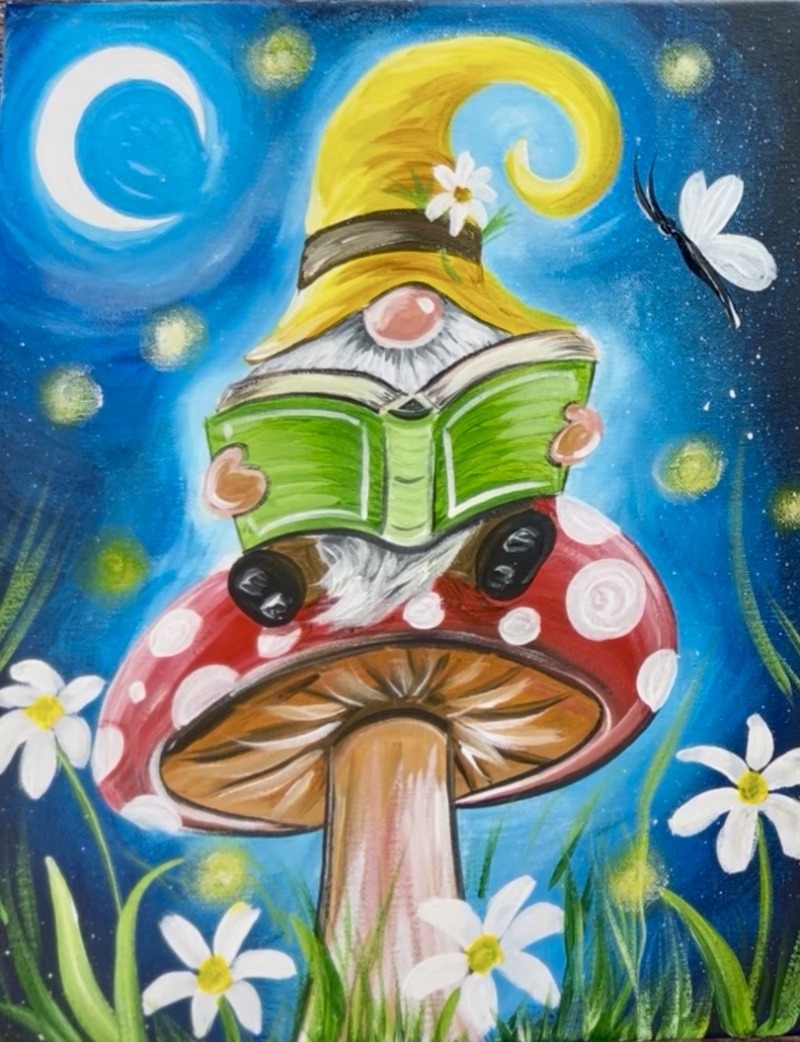
Learn how to paint a magical, whimsical scene of a gnome sitting on a mushroom and reading a book! My favorite part of this painting is that “glow” in the background around the gnome, mushroom and moon! This is a great background painting technique that provides amazing contrast to the main subject of the painting. It works especially well for dark, night sky backgrounds. Basically, you blend a much lighter color around the subject and allow the edges of the canvas to remain darker.
This tutorial has both drawing instructions and an optional traceable you can print out and use.
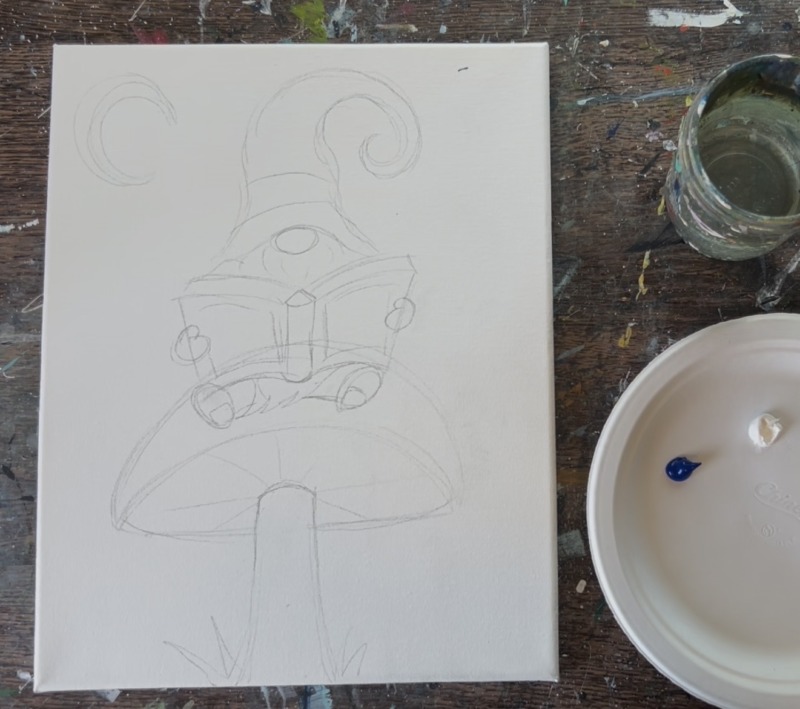
Materials Needed:
Storybook Gnome - Acrylic Painting Tutorial
This tutorial will show you how to paint a gnome siting on a mushroom reading a story. You will learn how to create a magical glowing background that adds a whimsical feel to the whole painting!
Materials
- 11 x 14 Canvas
- Acrylic Paints
- Paint Brushes
- Pencil & Eraser
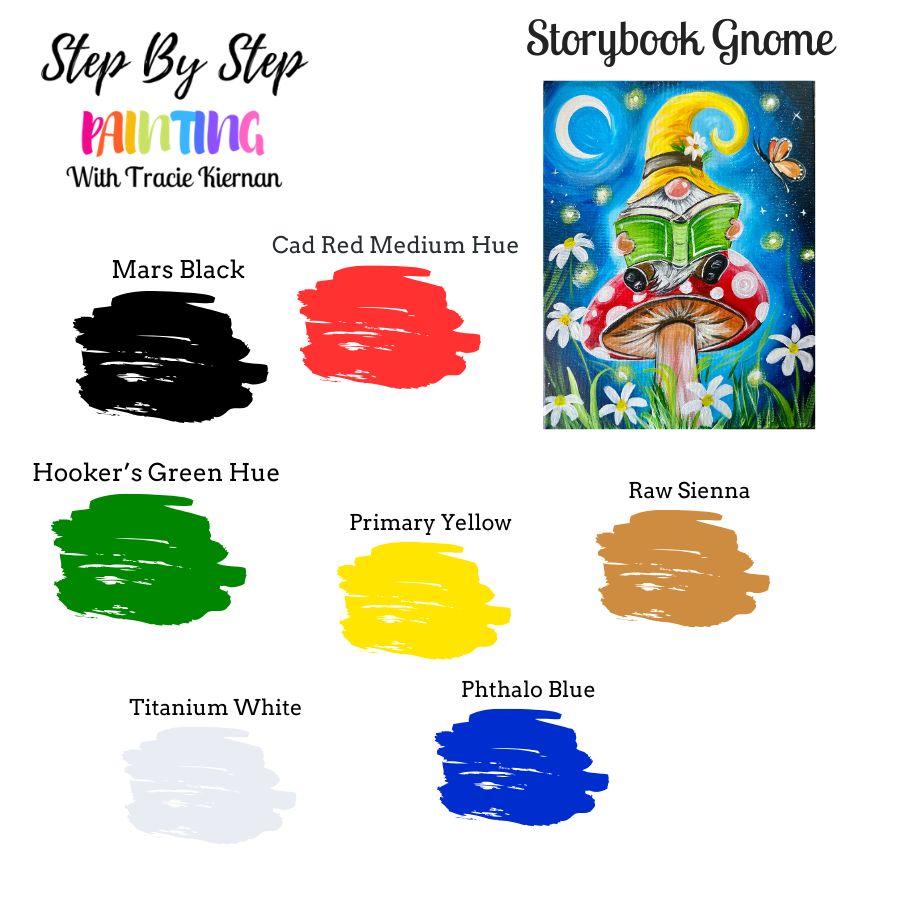
Colors
- Titanium White
- Mars Black
- Cadmium Red Medium Hue
- Primary Yellow
- Hooker's Green Hue
- Phthalo Blue
- Raw Sienna
Brushes
- 3/4" Flat Wash Brush
- #12 Bright Brush
- #4 Round Brush
- #8 Long Round Brush
- Toothbrush (optional)
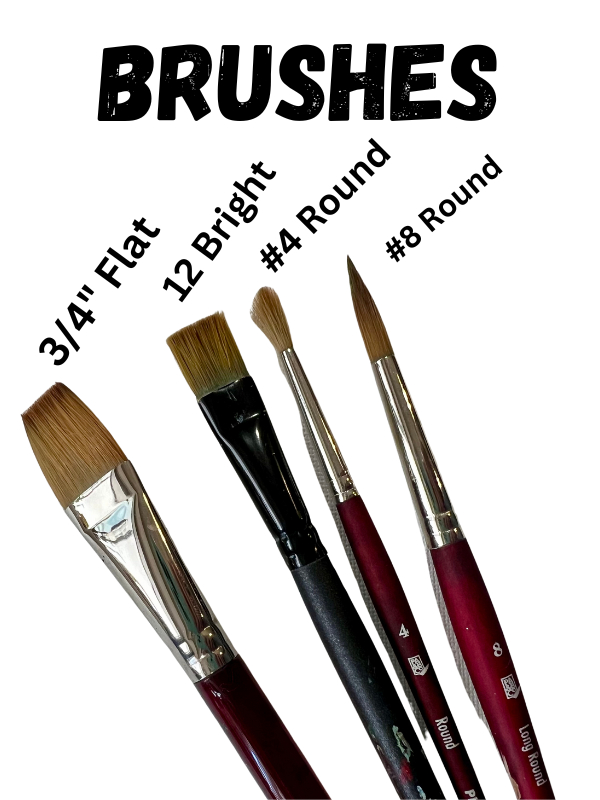
These brushes are “Princeton Velvetouch” brushes with the exception of the bright brush. The “bright brush” is a “Royal Majestic” brush and it’s about 1/2″ wide. You will also need a toothbrush for splattering stars.
Color Palette
Directions At A Glance
Optional Traceable
Video
Coming soon!
Step By Step Directions
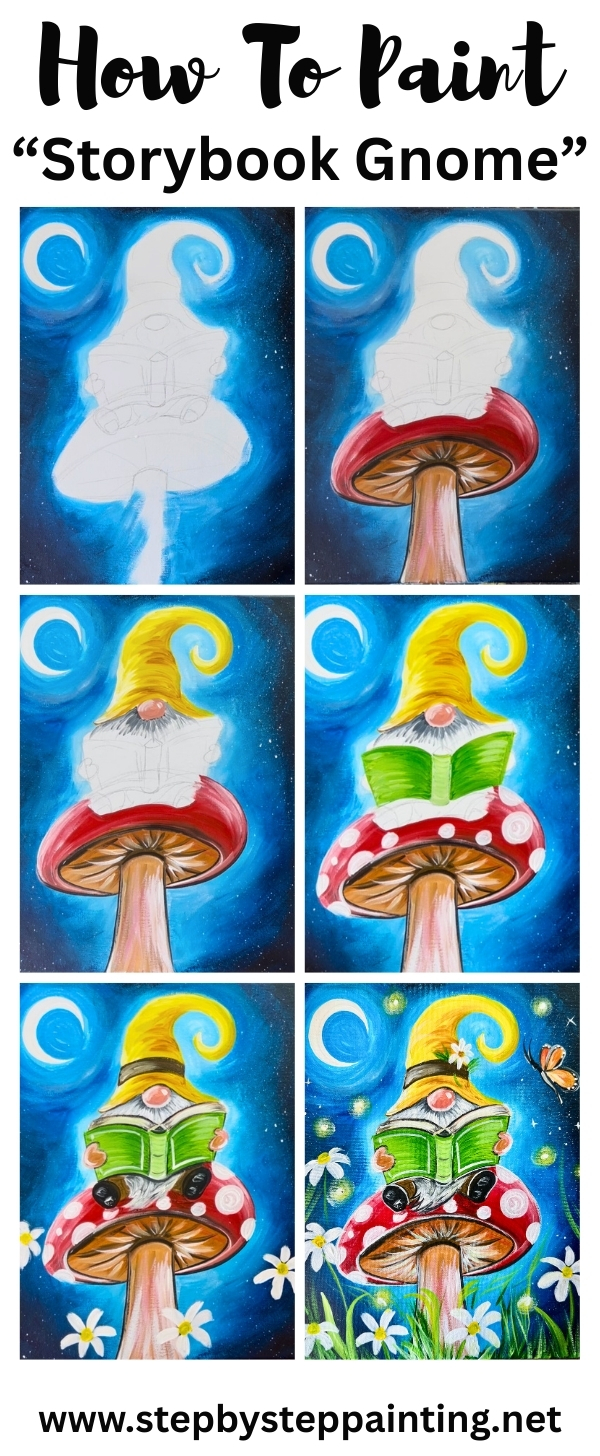
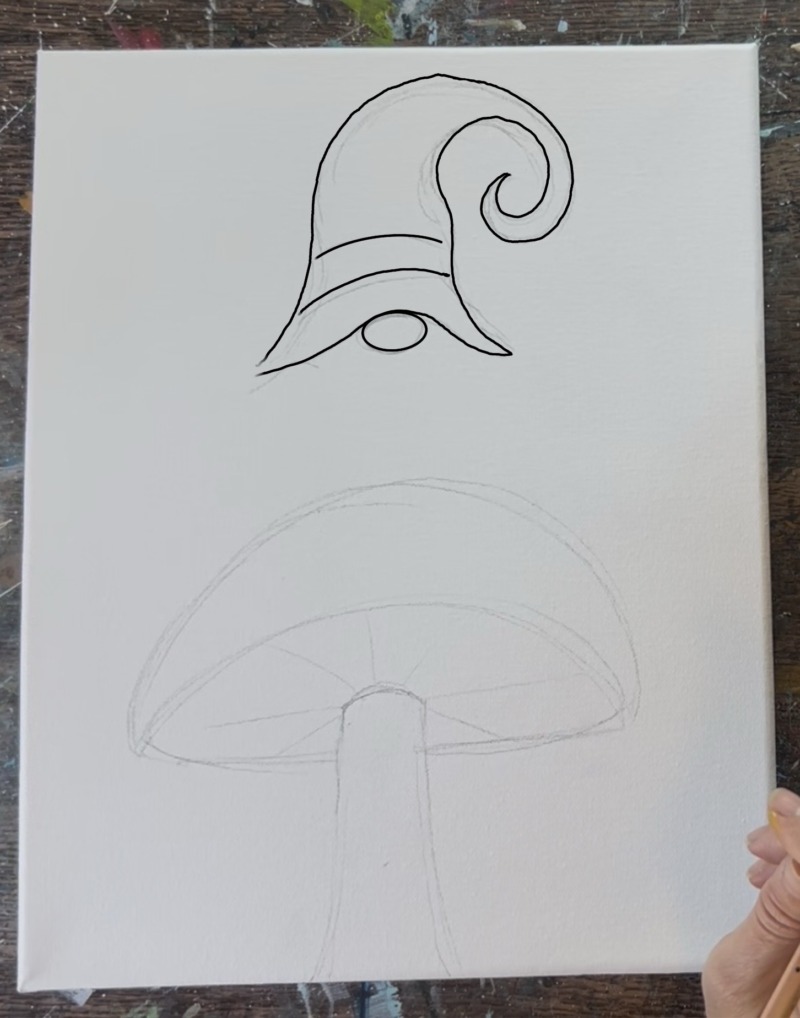
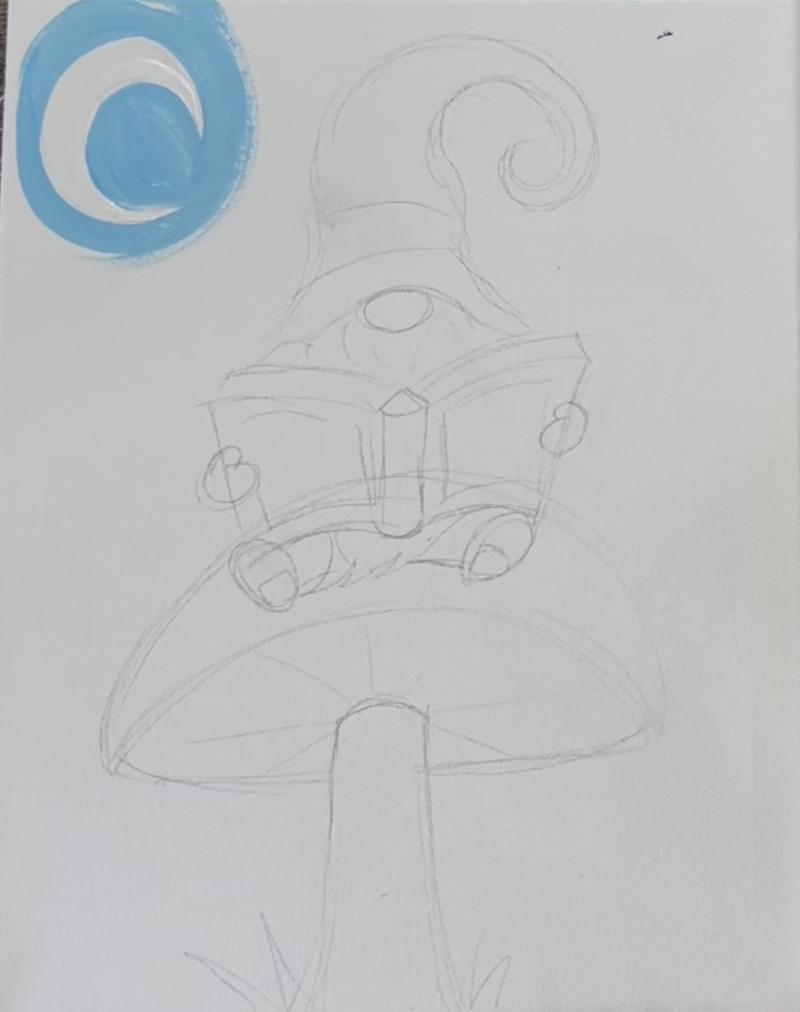
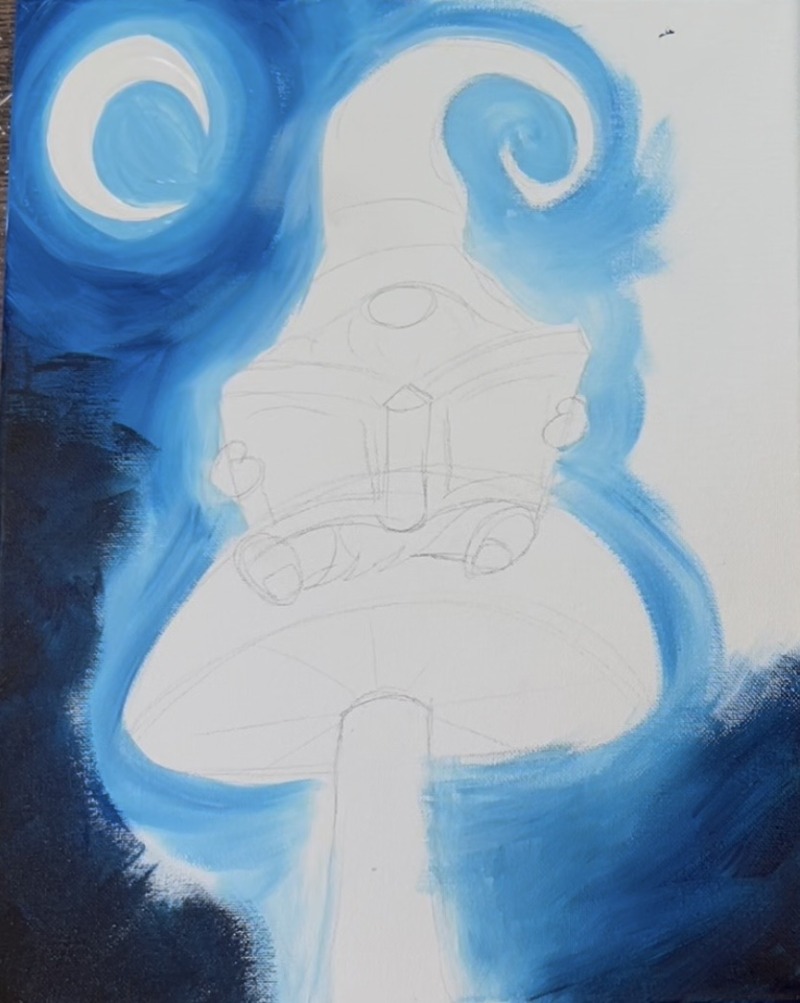
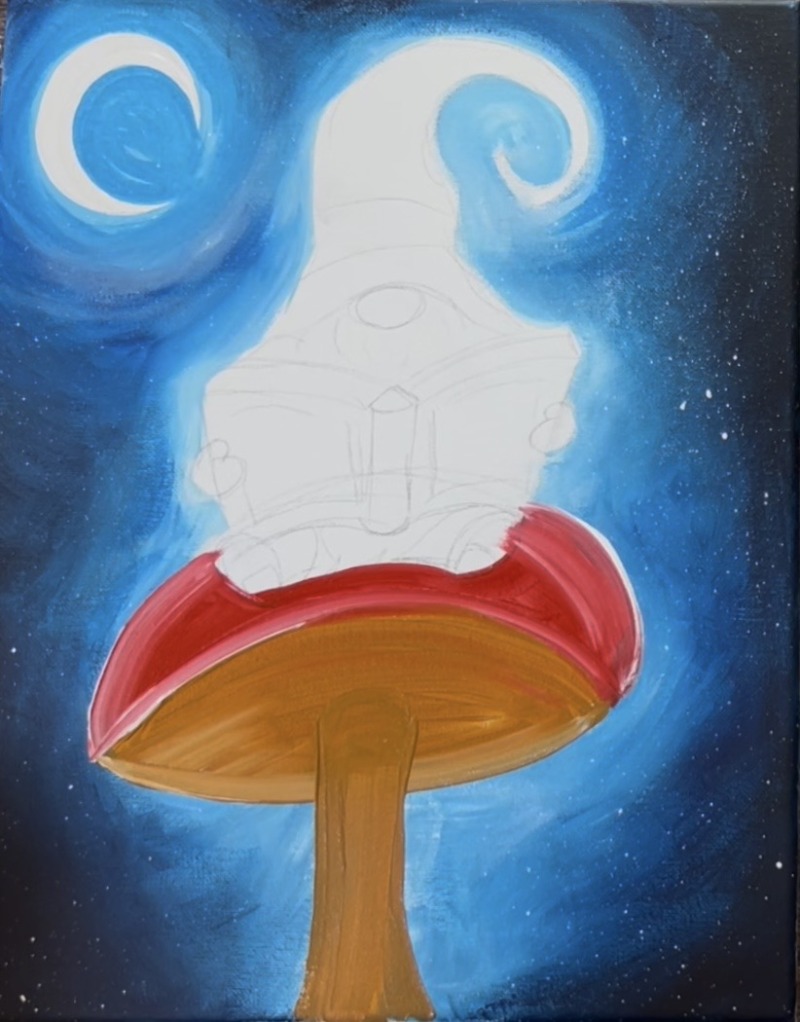
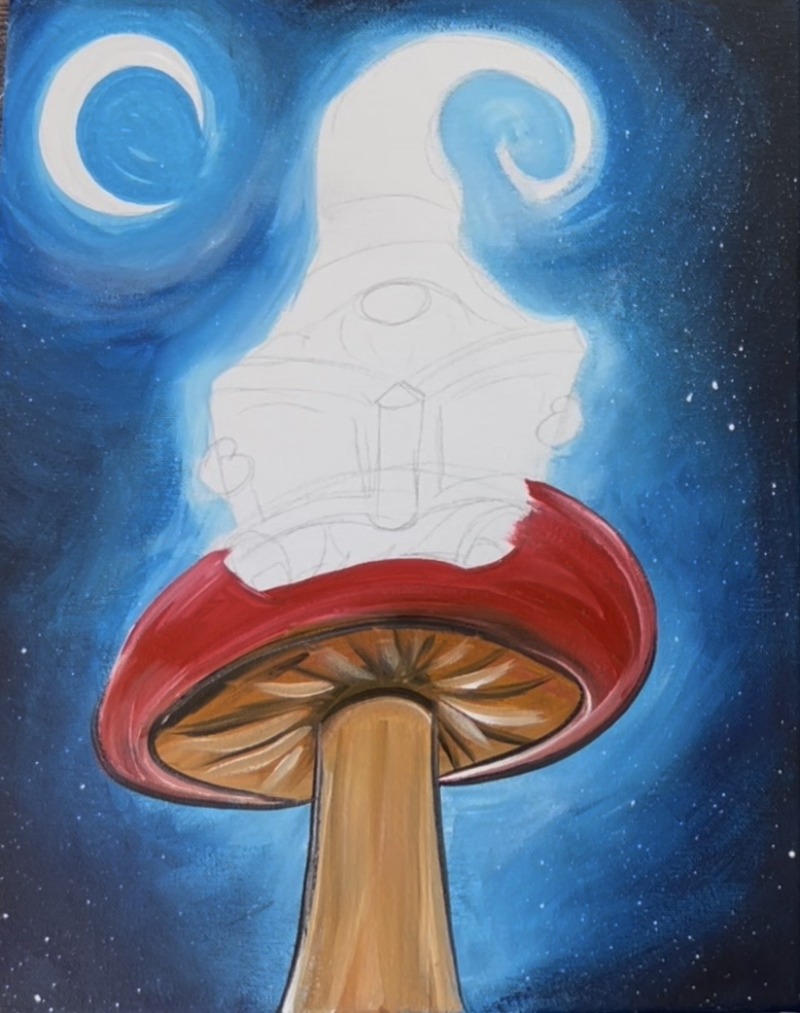
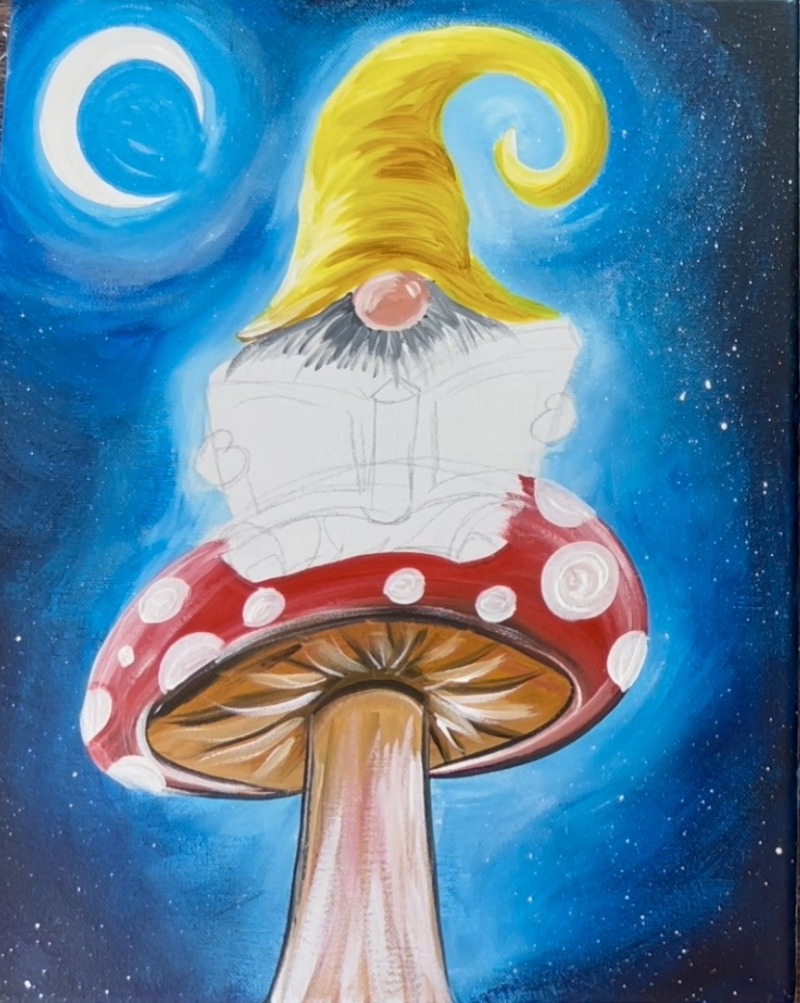
1. Draw Mushroom, Gnome & Crescent Moon
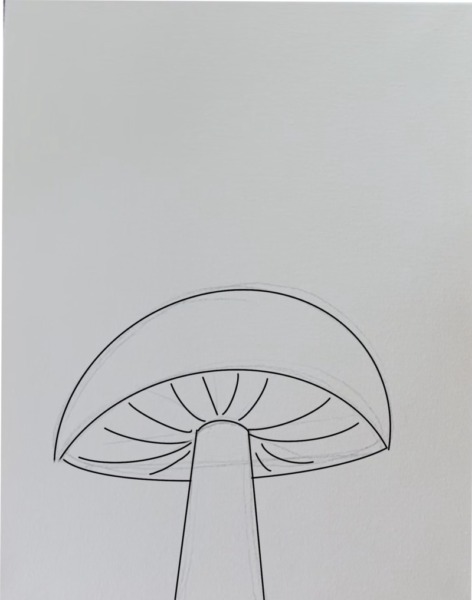
The bottom half of the canvas consists of the very large mushroom that the gnome will be sitting on. Start by drawing a large and wide crescent shape (for the top of the mushroom. Then draw a stem extending from under the crescent shape. These are two lines that go wider closer to the bottom edge of the canvas. The top of this shape is a small arc line. This entire mushroom is about 7″ high (working on an 11×14 canvas).
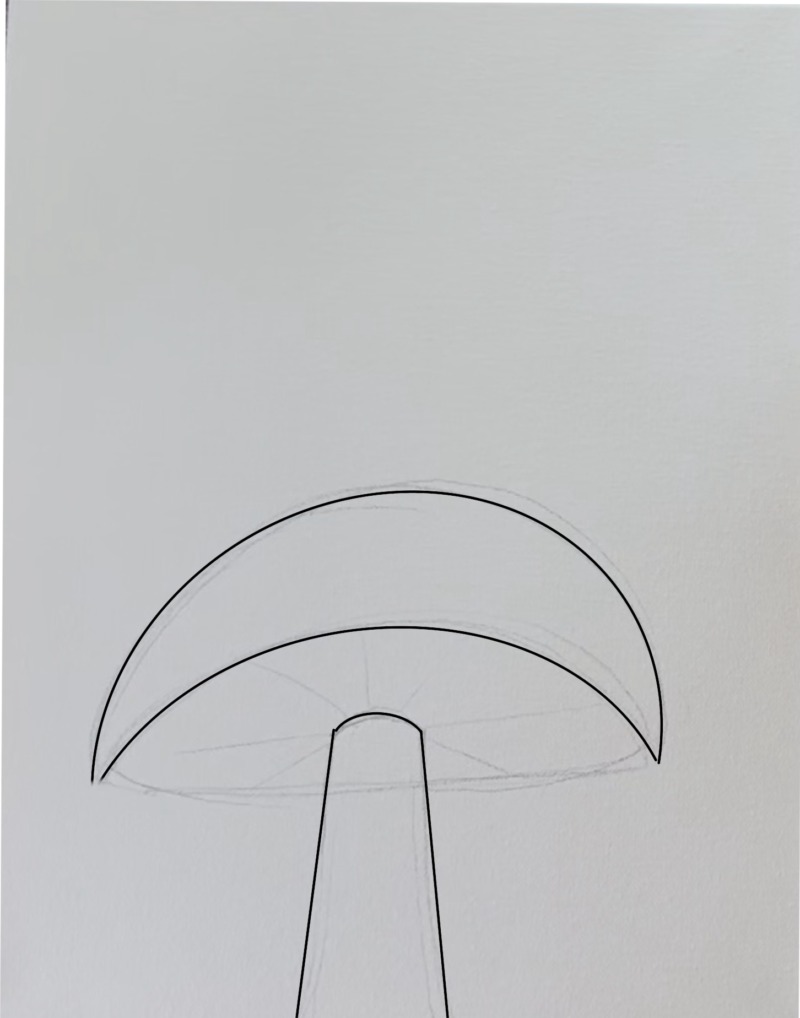
Then draw a curve line that extends behind the stem and connects to the points of the “crescent shape”. Draw “gills” under the mushroom by drawing several curved lines that extend from the top of the stem to the outer parts of the mushroom top.
The nose is about 2″ above the top edge of the mushroom top. Draw a small oval shape (about 1″ wide). Then draw the hat. Start by drawing a line that curves up and above the gnome’s nose. Then draw the hat so that it curves to the left and then spirals to a point on the right.
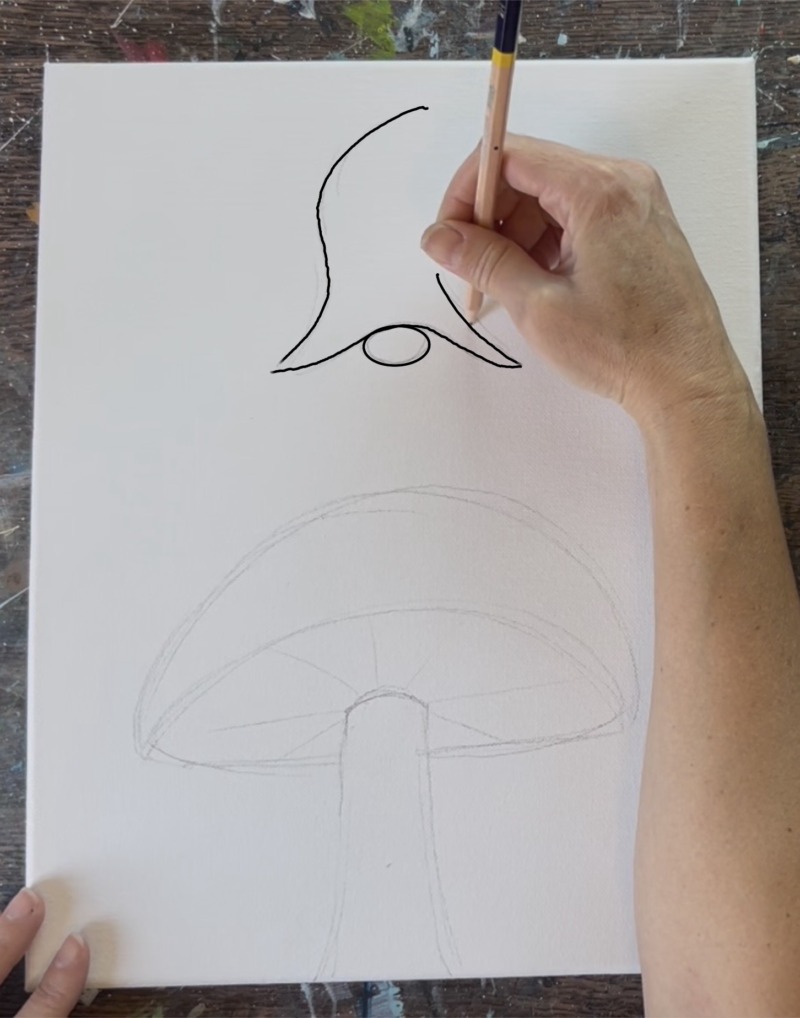
Draw a belt line on the hat.
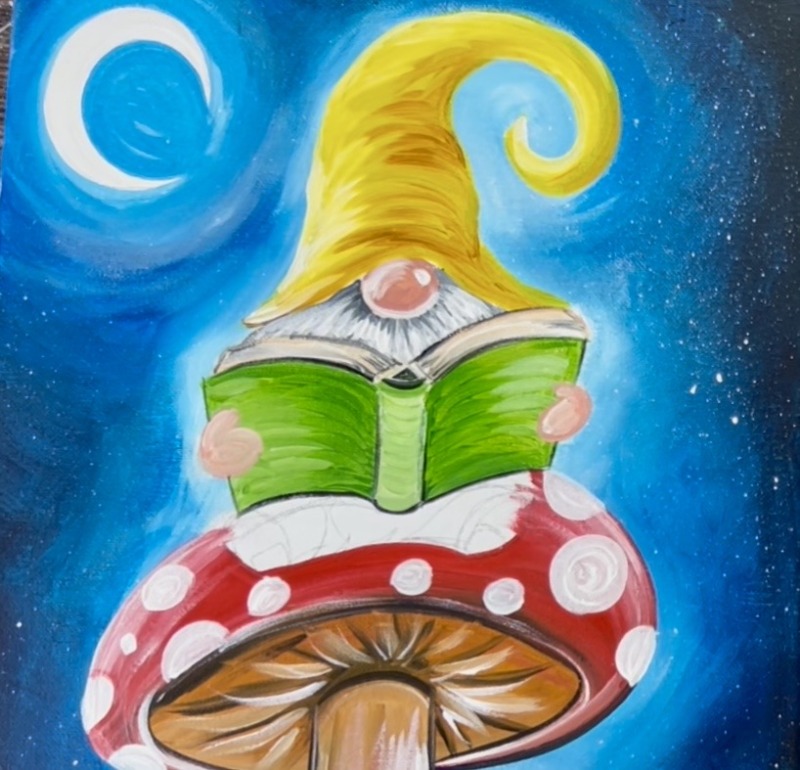
Then draw the book. This book will take up a good portion of the gnome because of how large it is! Start by drawing two curved lines that meet in the middle where a little triangle is. This is directly below the bottom corners of the hat, hence only a little space will be under the gnome’s nose and where the book pages are.
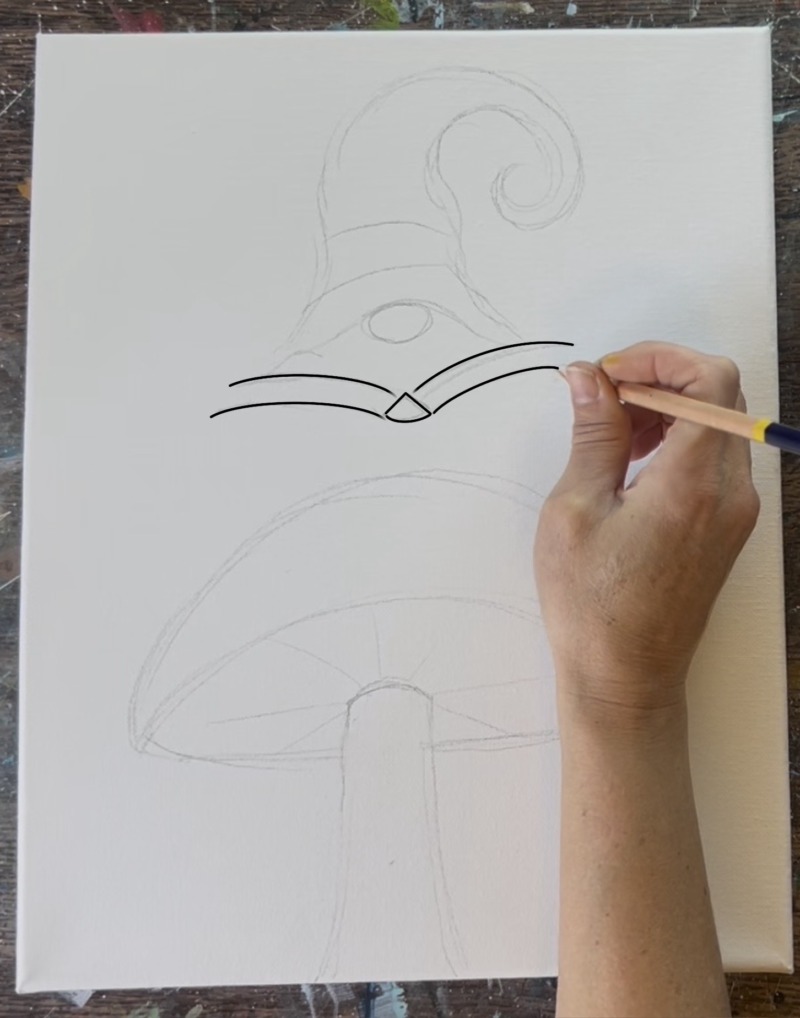
Then draw two diagonal book cover ends for the edges of the book. These extend down below the pages. Note: there are two diagonal lines going inwards on the left and right edges of the pages. Then draw another set of curved lines for the bottom of the book.
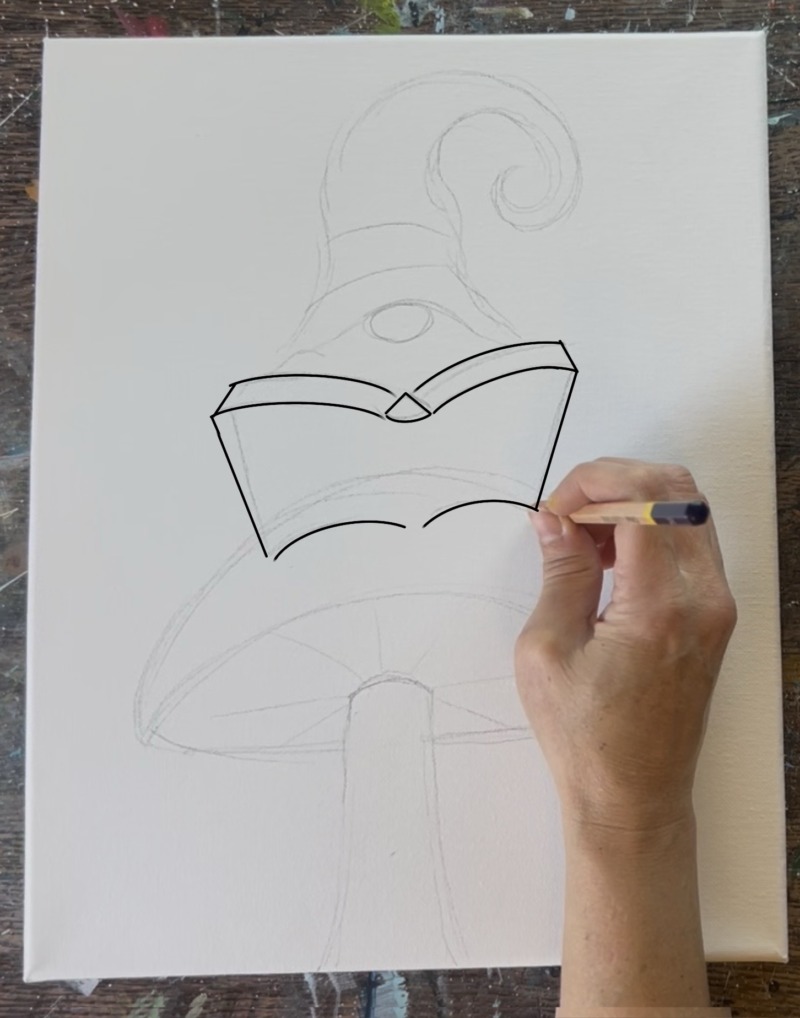
Draw the “spine” of the book by drawing a set of vertical lines. The bottom of this “spine” is a small curved line. Then draw a set of ovals for the gnome’s shoes and hands that overlap the sides of the book. Also, draw little curved/pointed lines to create the edge of the beard.
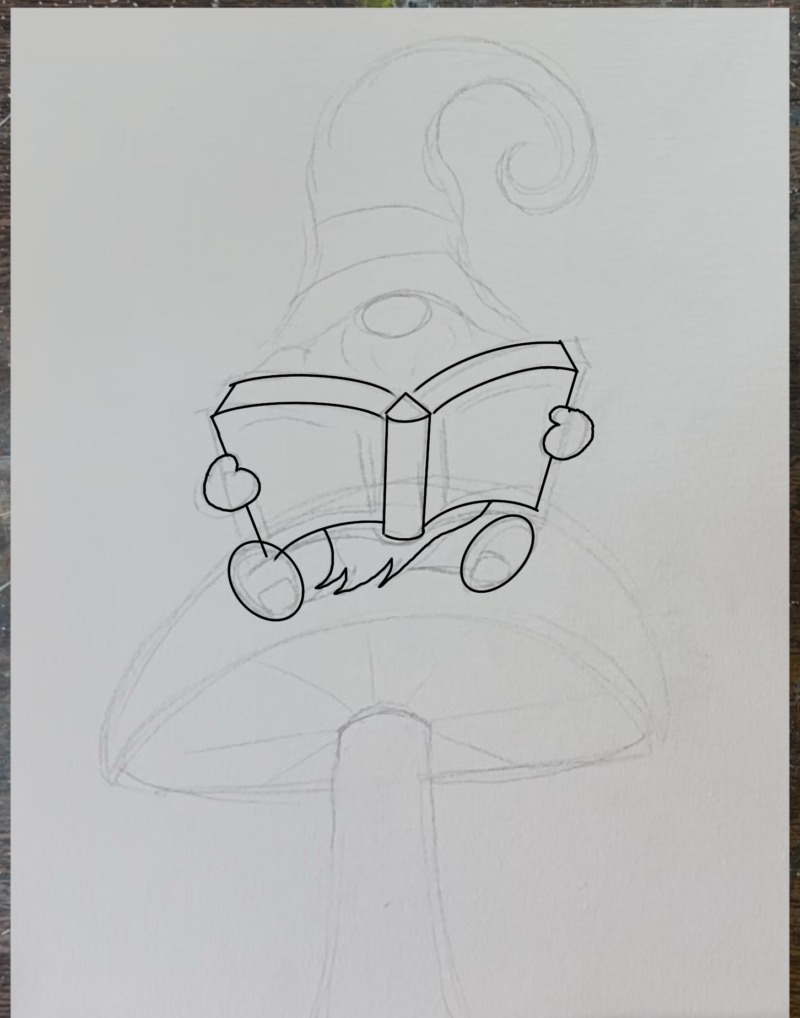
Draw little lines extending from the shoe and disappearing behind the beard edge for the pant legs.
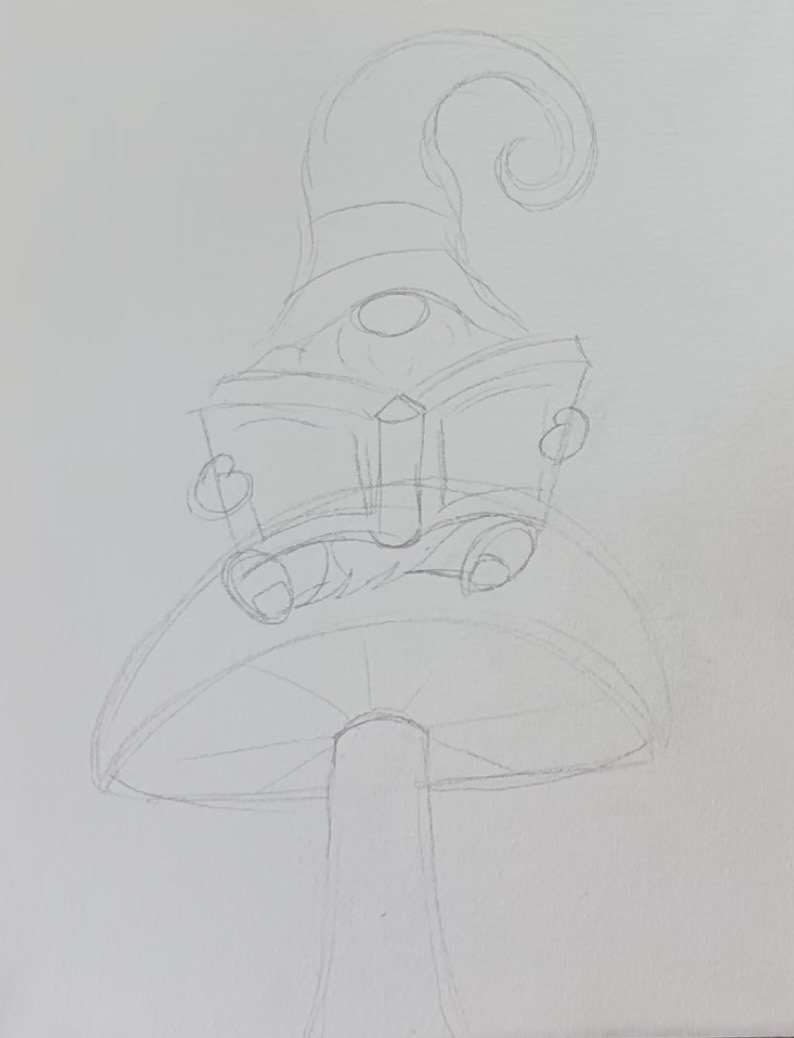
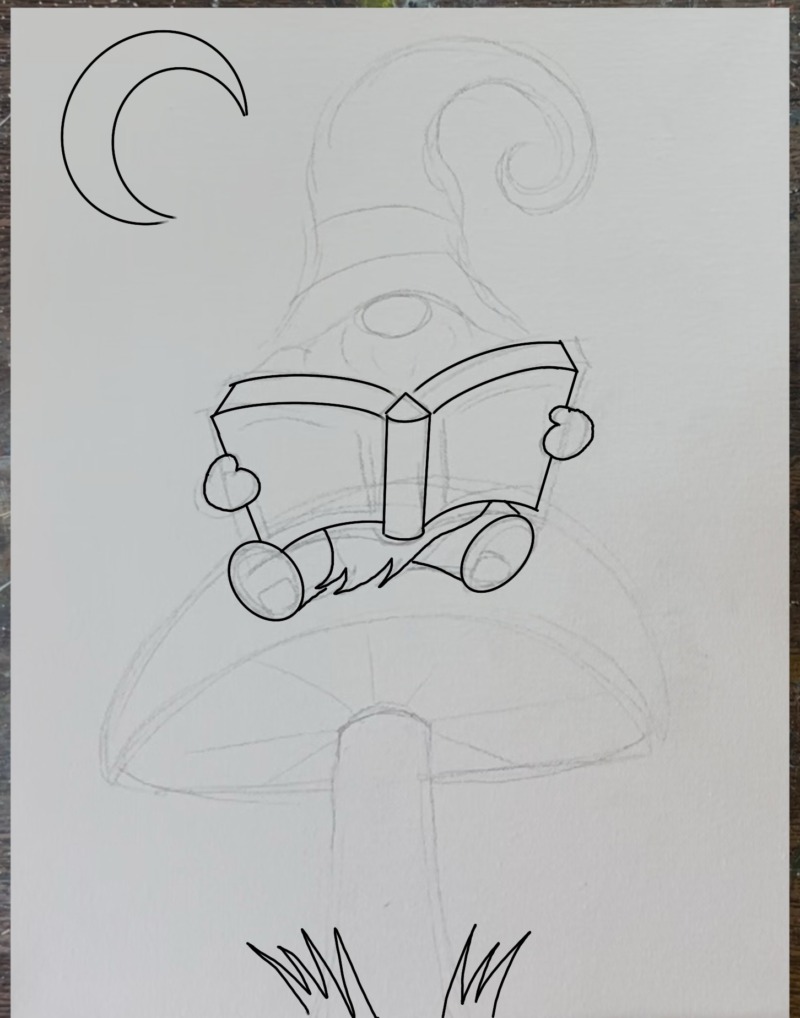
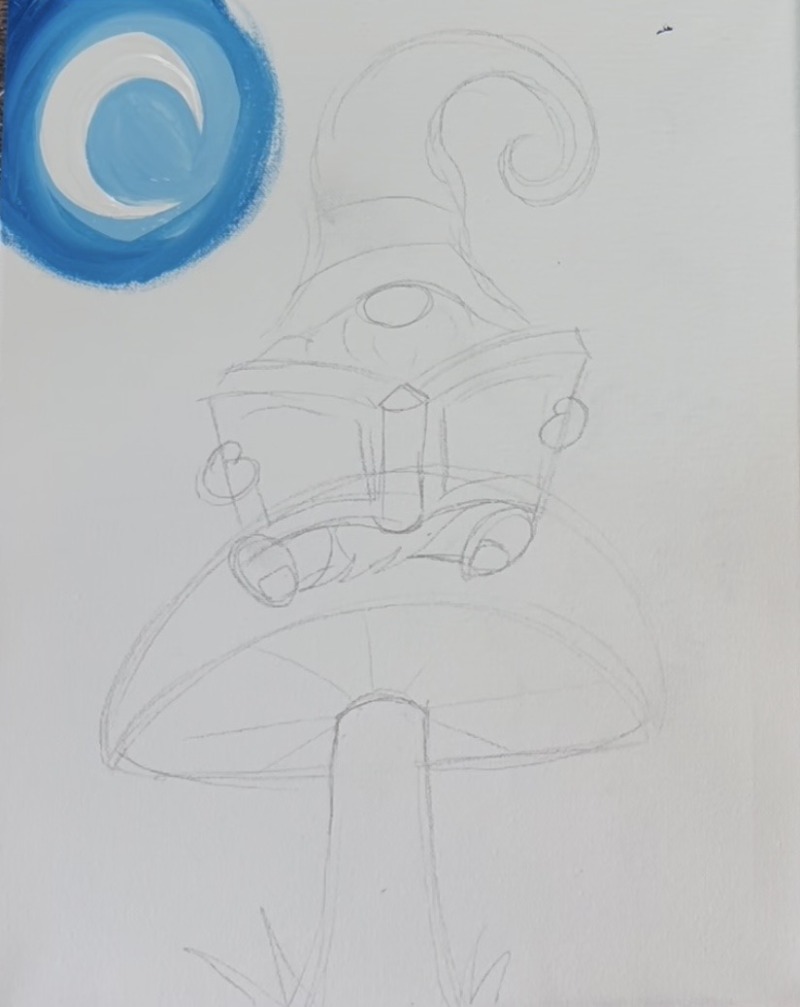
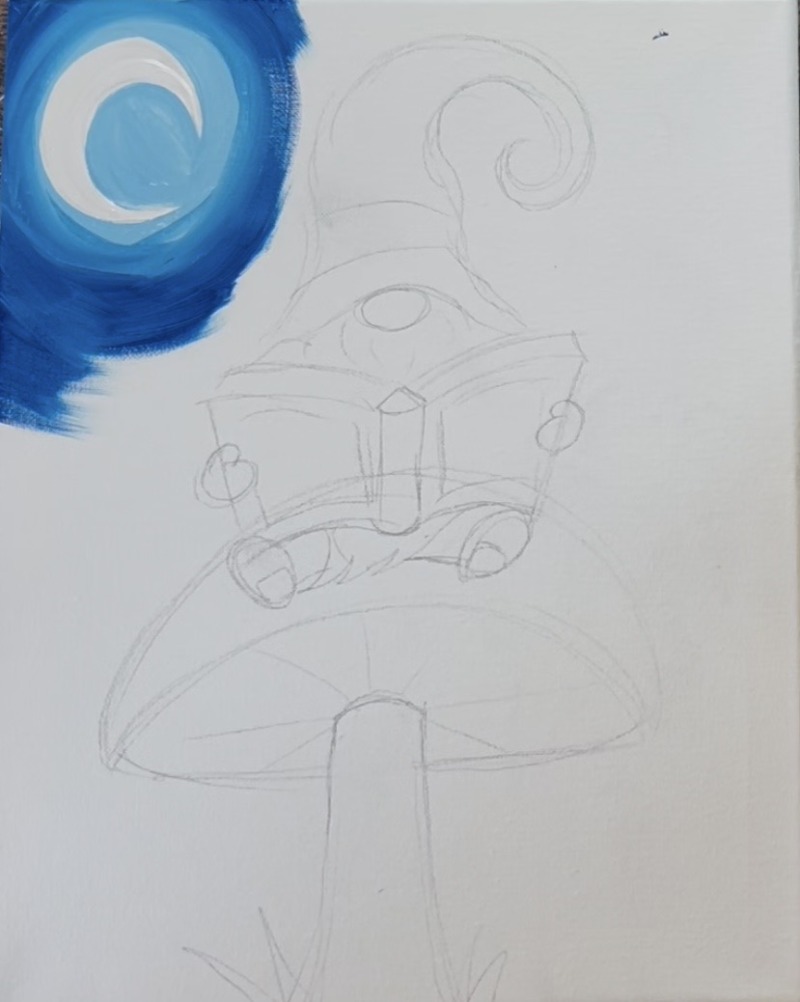
Then draw a crescent moon in the upper left corner of the canvas.
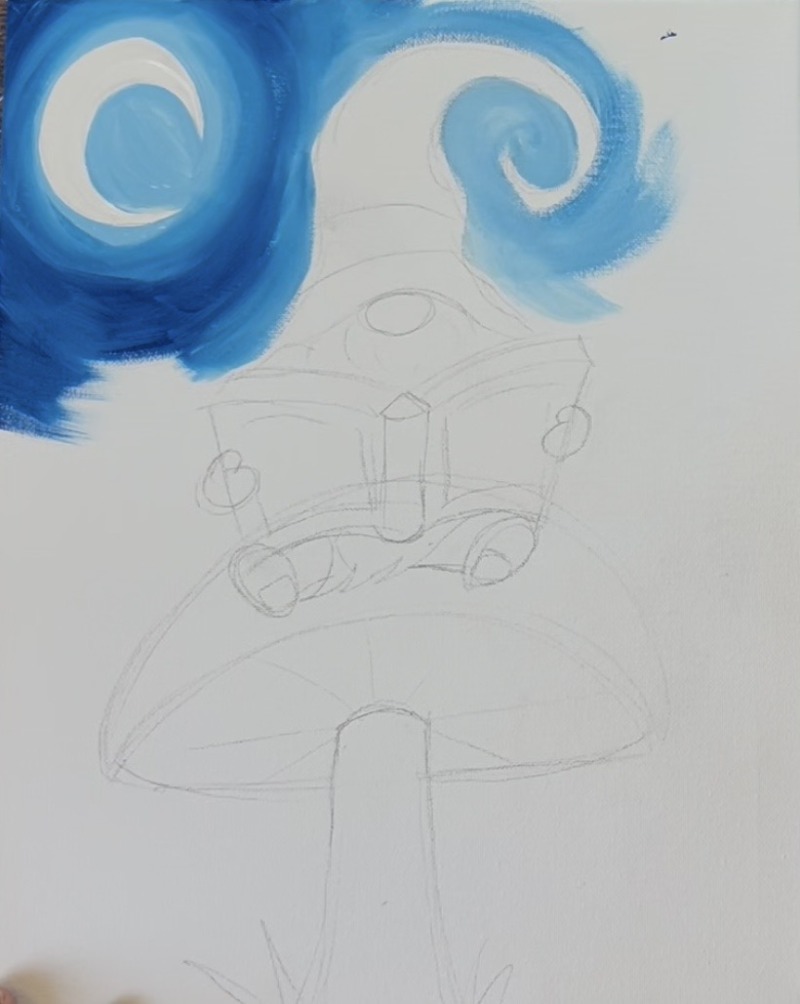
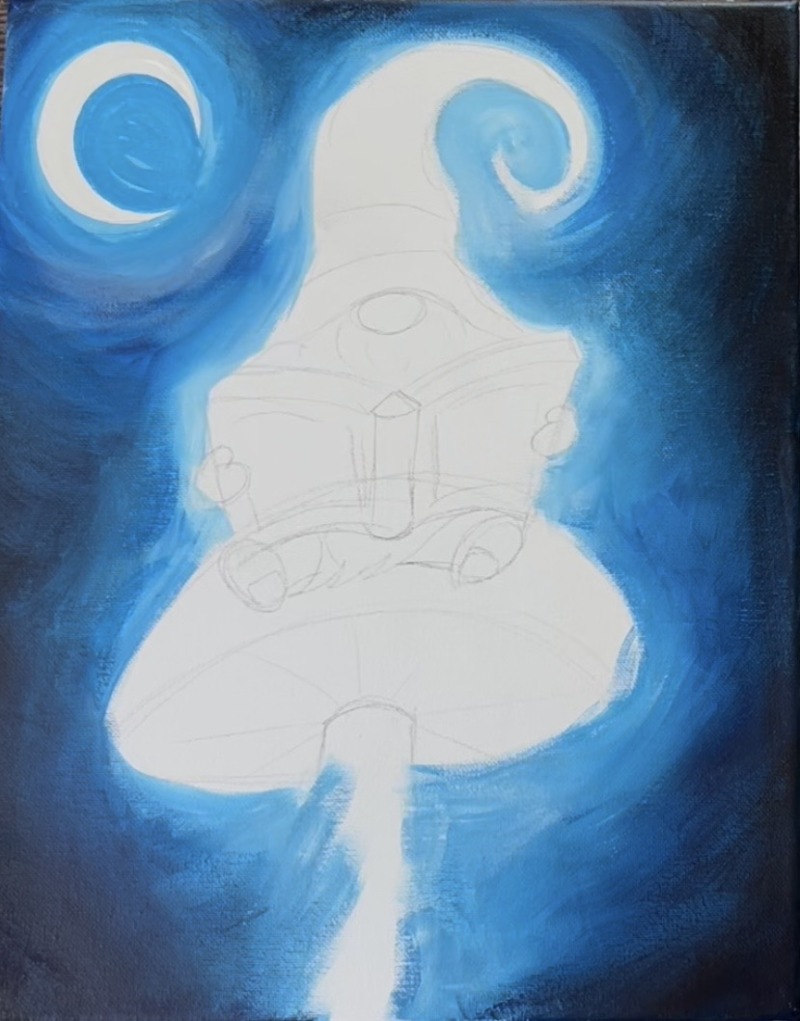
2. Paint Sky
Load your paint palette with the three colors: titanium white, phthalo blue and mars black. Start by painting the moon a solid coat of titanium white. Use the #8 long round brush for painting the crescent shape.
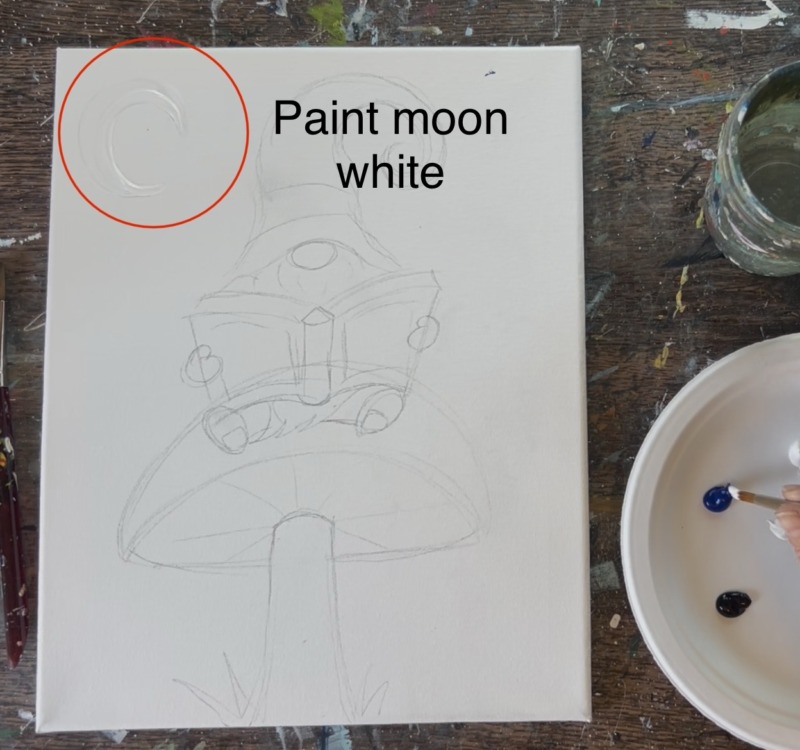
Then without rinsing the brush, mix titanium white with the blue to make a very light blue color (about 3 parts white to 1 part blue). Paint a circle around the crescent. This will be a lighter part of the sky!
Wipe the brush. Then load it into “phthalo blue” and blend darker blue outwards from the moon. Leave the area closest to the moon light and “bright blue” but the sky must blend darker as it goes outwards. Paint in circular strokes around the moon but don’t allow the paint to get close to the gnome drawing yet.
Switch to a #12 bright brush or a 3/4″ flat brush. Load this brush into just “phthalo blue”. Continue to paint circular strokes around the moon but leave about 1/4″ gap around the gnome.
Next, we will paint the light blue “glow” that is surrounding the gnome. To do this, use the same color as you used for around the moon (that light blue color). Paint light blue all around the gnome. Your paint strokes will curve around the shape of the gnome’s hat, book, mushroom, etc. Use a round brush to get into some of the tighter places.
Use this light blue color all around the gnome and mushroom. Get as close as possible to your drawing without leaving any gaps. It’s okay to paint over some of your lines.

Next we will blend the rest of the sky! It needs to be very dark on the outer edges that are not close to the gnome and moon. Use “phthalo blue” mixed with a small amount of “mars black”. Paint the corners and edges of the canvas. Then use a dry, clean brush to blend that into the rest of the lighter blue.
It’s okay if your background paint color looks choppy/ messy! Do your best to make sure the sky around the gnome and moon are very bright blue while the edges and corners of the canvas are very dark. This creates amazing contrast in the background of our painting!
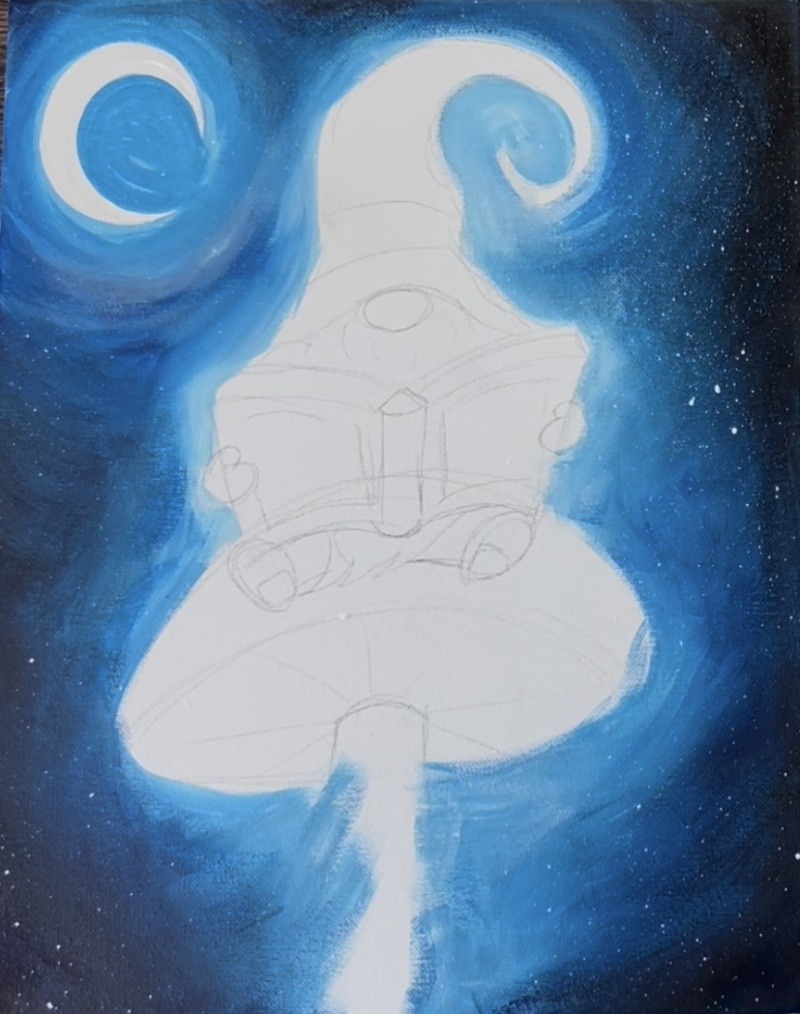
Next, use a toothbrush to “splatter” stars all over the canvas. I like to slightly wet the brush first and then load titanium white onto the brush. Test out a separate surface first to make sure the consistency is right! Then flick the brush all over the canvas to create little find star dots everywhere.
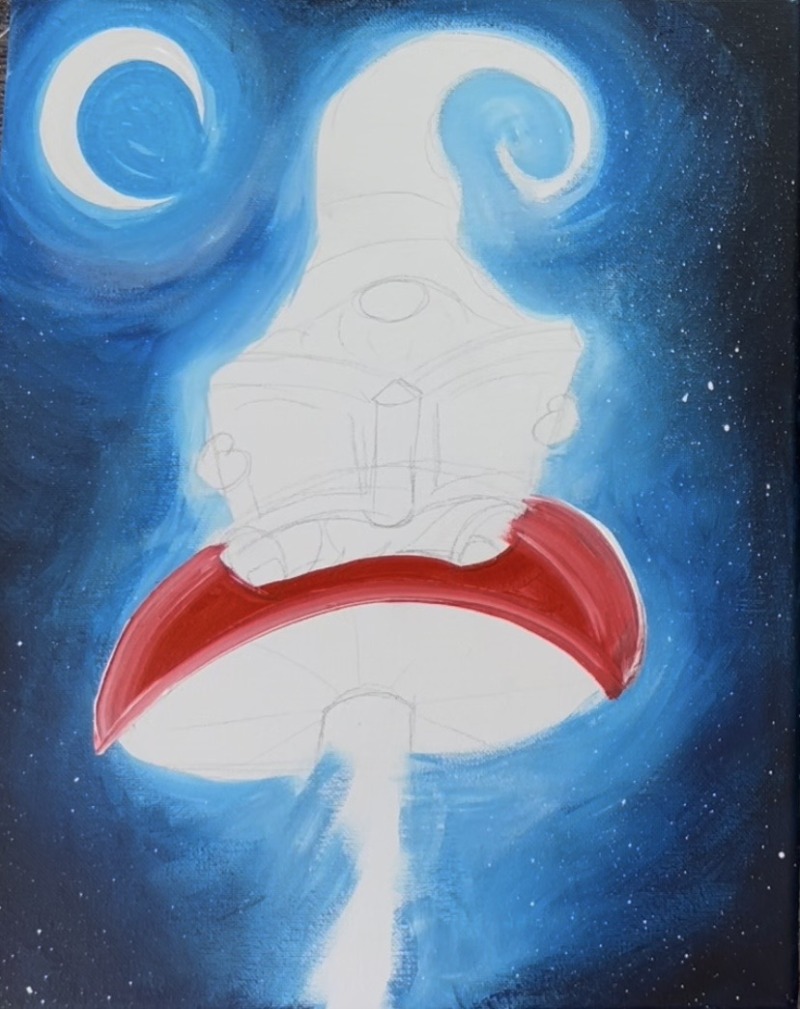
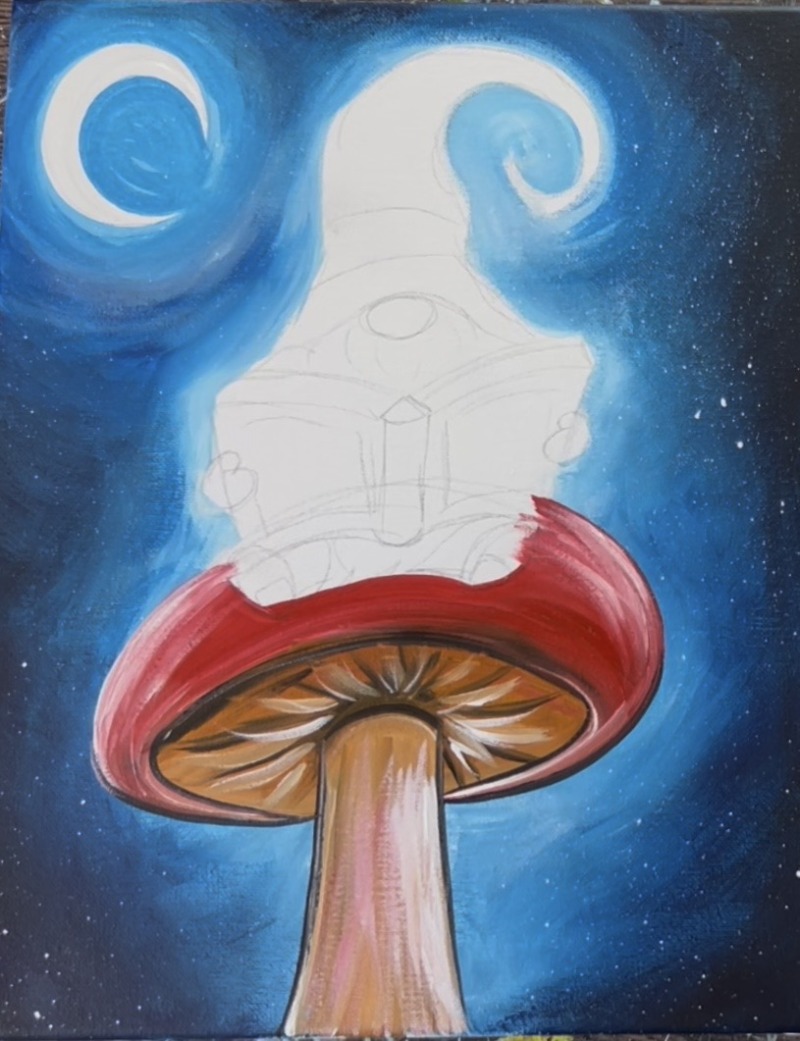
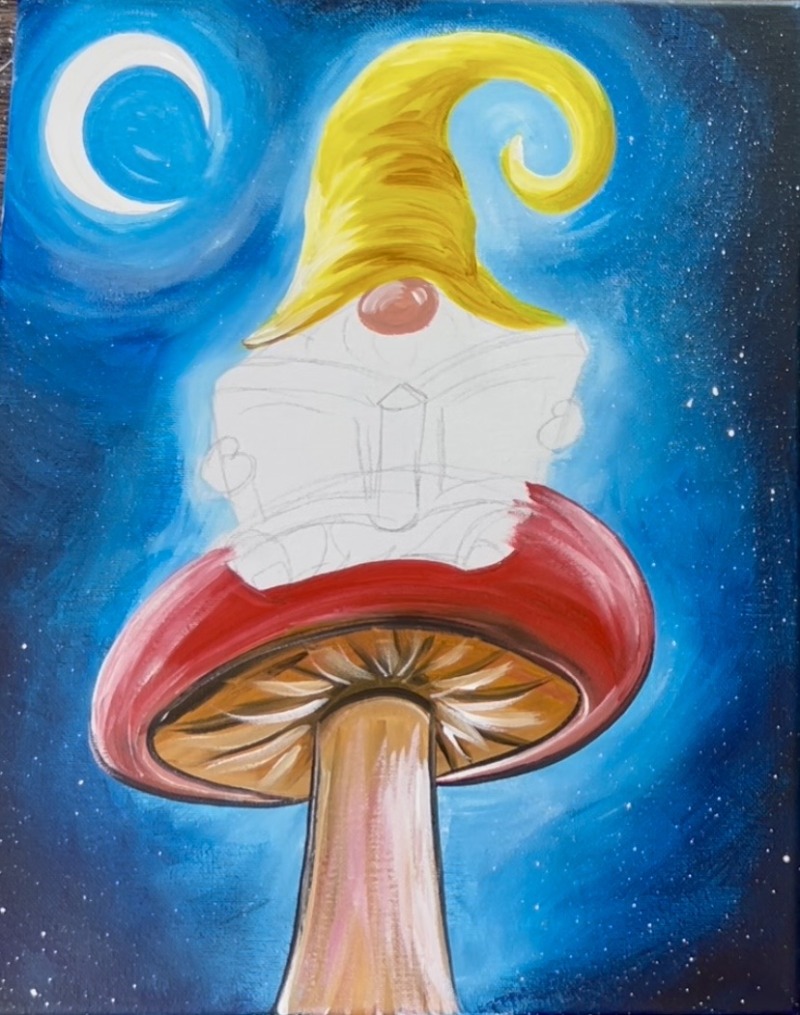
3. Paint Mushroom
Use the #12 bright brush and “cadmium red medium hue” to paint the mushroom top. Start by outlining the crescent shape and then fill it in solid red. Add a little bit of white to the edges of the mushroom and blend it in so the shape is darker in the middle but lighter on the edges.
Next, use “raw sienna” to paint the under part of the mushroom as well as the stem. The first layer of both of those pieces is this brown color. We will highlight/ detail it after it dries.
Let this dry a little bit. Then use the #12 bright brush. Double load the brush into both “mars black” and “raw Sienna” (or you can mix the two together to make a very dark brown). Outline the top inner edge of the mushroom with this dark color (the curved/ arc line on the bottom of the red top part). Then paint the “gills” of the mushroom. Paint little angle lines that “array” around the top of the mushroom stem. Paint the top of the mushroom stem that darker brown color for shadowing.
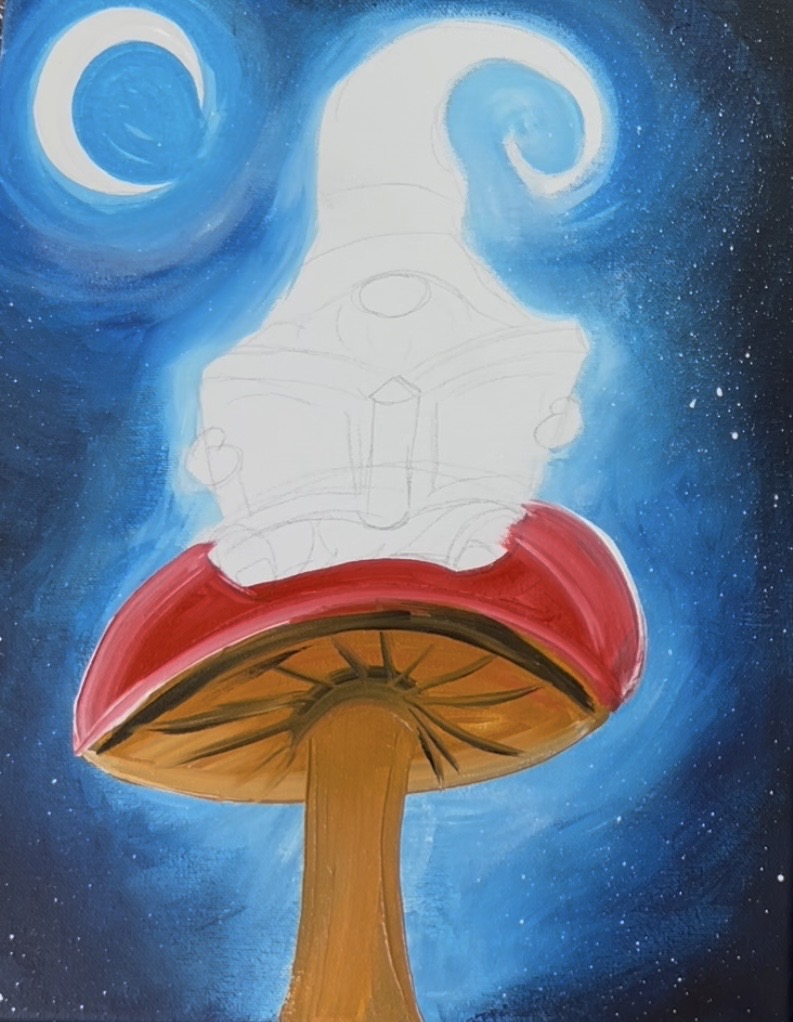
Rinse the brush. Then load it into “titanium white” mixed with “raw Sienna” (about equal parts). Use this lighter brown color to add more lines to the “gills” of the mushroom. These lines go in between the darker lines. Then paint vertical paint strokes along the stem of the mushroom. I made the stem slightly wider on the bottom and then thickened the entire shape.
Next, use the round brush or #12 bright brush to paint the red top of the mushroom so that it wraps under and around the stem (as shown in picture below). It goes narrow and disappears but we can still see some red!
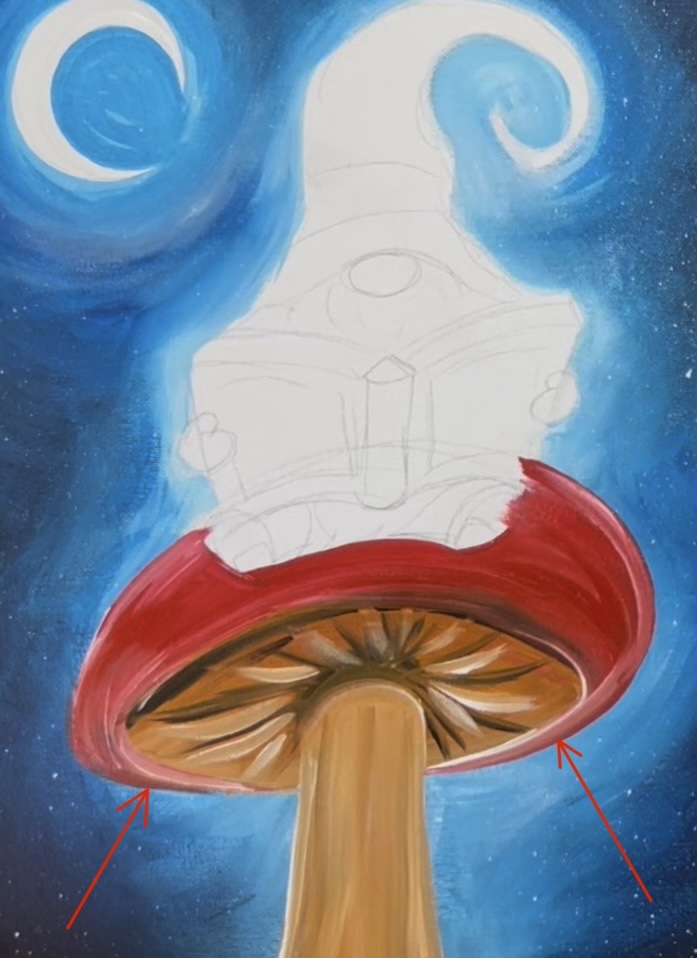
Next we are going to outline the mushroom with black! Use the #4 round brush (or a brush you like to use for outline work). Load it into mars black. I like to water my black down slightly for easier flow of paint. Outline the stem of the mushroom, the bottom red area and the under opening/ gills part. The only thing I did not outline was the very top edge of the mushroom because this will be highlighted white.
Use the #4 round brush and “titanium white” to dry brush white paint on the top edge of the mushroom going in a curved direction. Also, dry brush some white on the stem (over the brown) to lighten it up.
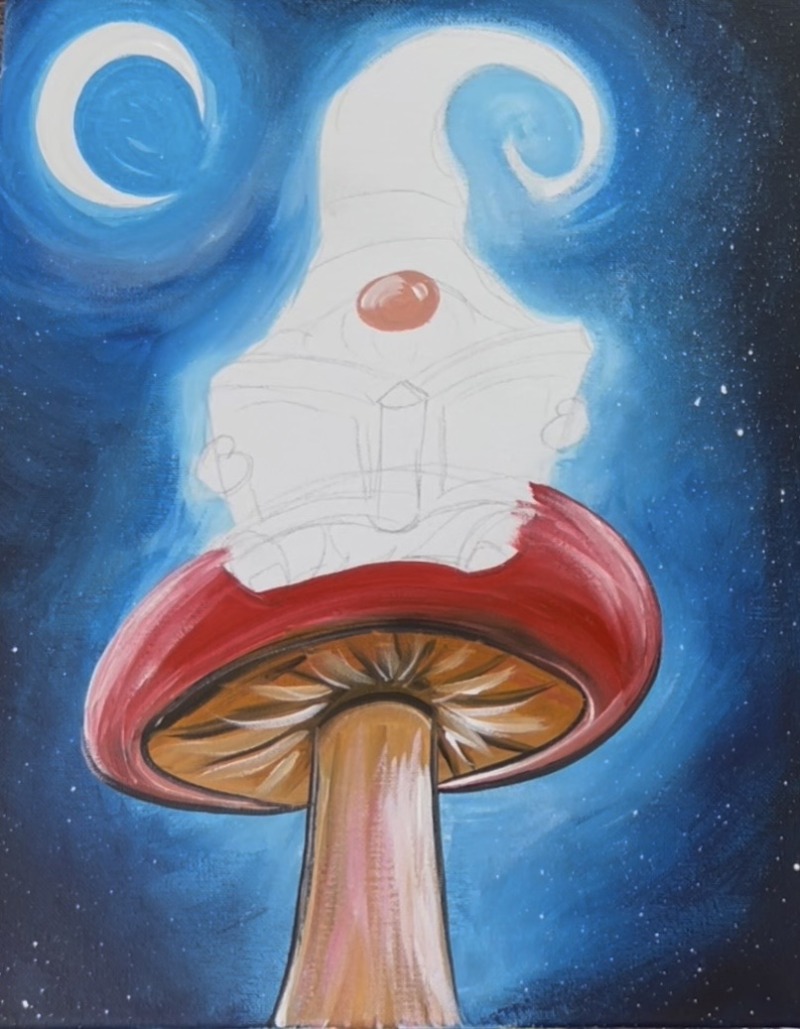
3. Paint Gnome Nose & Hat
Mix a “rosy brown” on your paint palette by mixing equal amounts of raw sienna with cadmium red medium hue. Then add a bunch of white into this to lighten it up! Paint the box this color using the #4 round brush. Then use “titanium white” to paint a little curved highlight in the upper left part and upper right part of the nose.
Rinse the #4 round brush. Use the color “primary yellow” to paint the hat. Outline the shape of the hat and then fill it in with curved strokes that go parallel with the bottom edge of the hat. Those curved directional paint strokes create form in the hat.
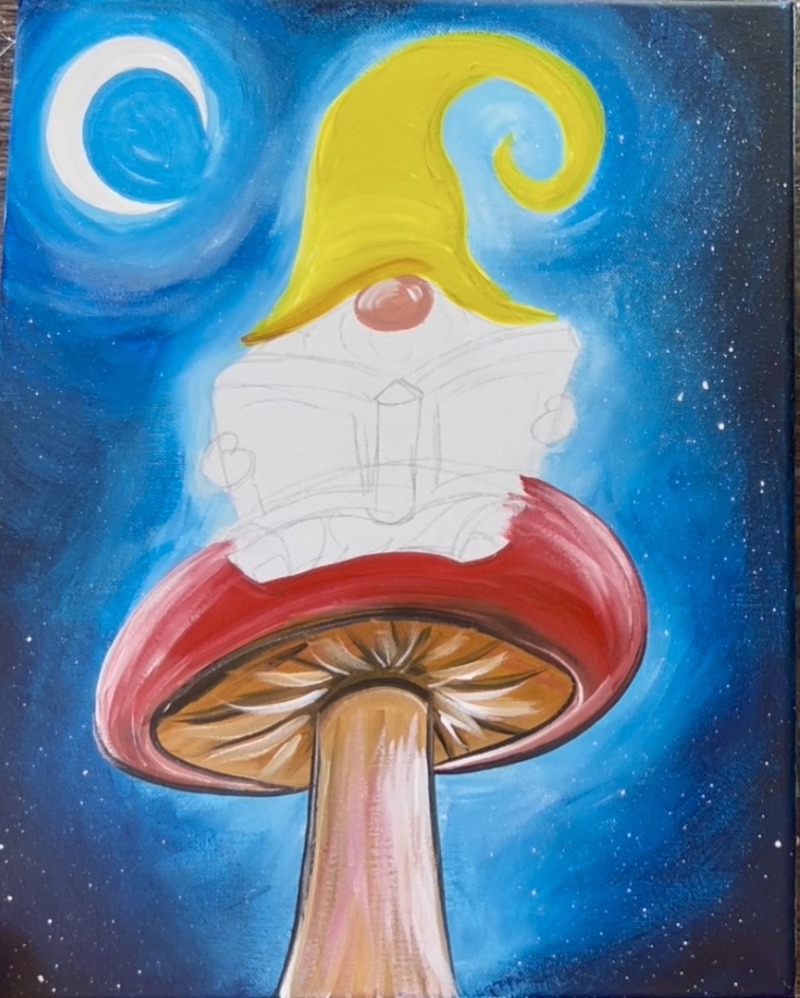
Optional: you can add highlights and shadows to this hat! For shadowing, mix “raw sienna” with “primary yellow” to make a dark yellow color. Blend curved paint strokes just on the right side of the hat.
Rinse the brush. Then mix yellow and white together to make your “highlight color”. Paint curved strokes on the left side of the hat (facing the moon) to highlight the hat.
4. Paint Beard
Mix equal amounts of white and black together to make dark gray. Then use the #4 round brush to drag little hair line paint strokes under the nose and under the hat. Leave a small gap above the book.
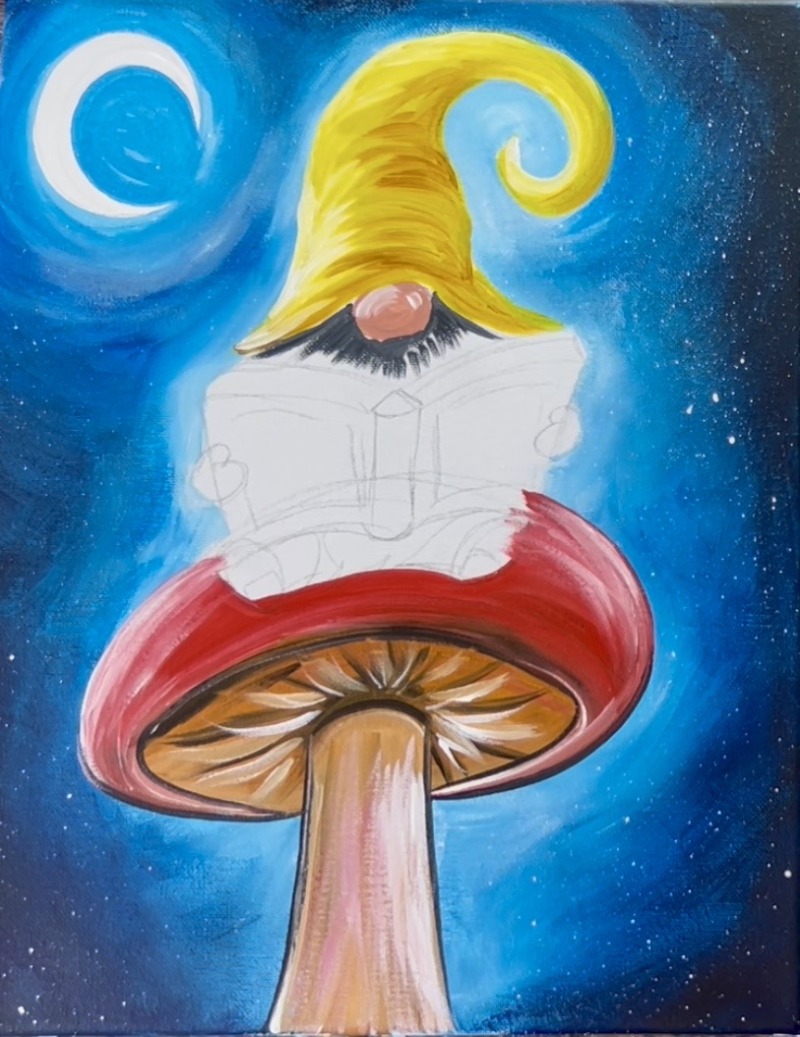
Without rinsing the #4 round brush, load “titanium white” onto the brush. Then drag little angle line paint strokes on the bottom of the beard (closest to the book). You want to make sure the beard stays darker/ shadowy under the nose and under the hat.
Touch up the nose again with another layer of your “rosy brown” paint color. The nose should be overlapping all parts of the beard.
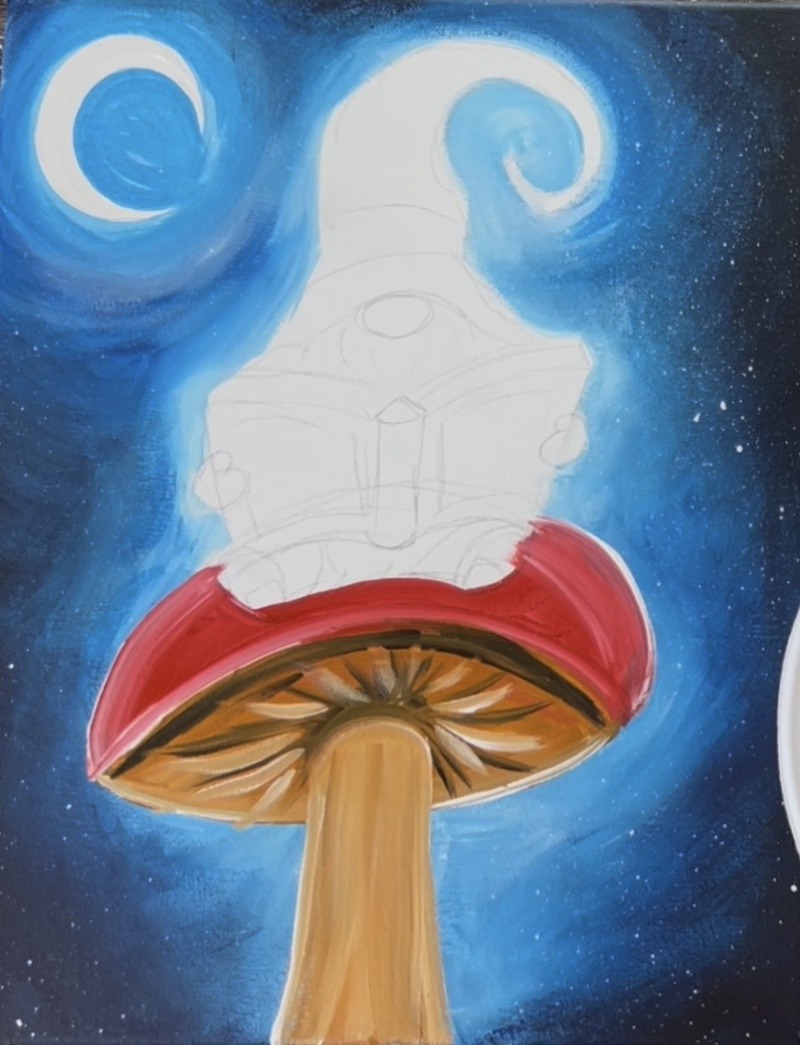
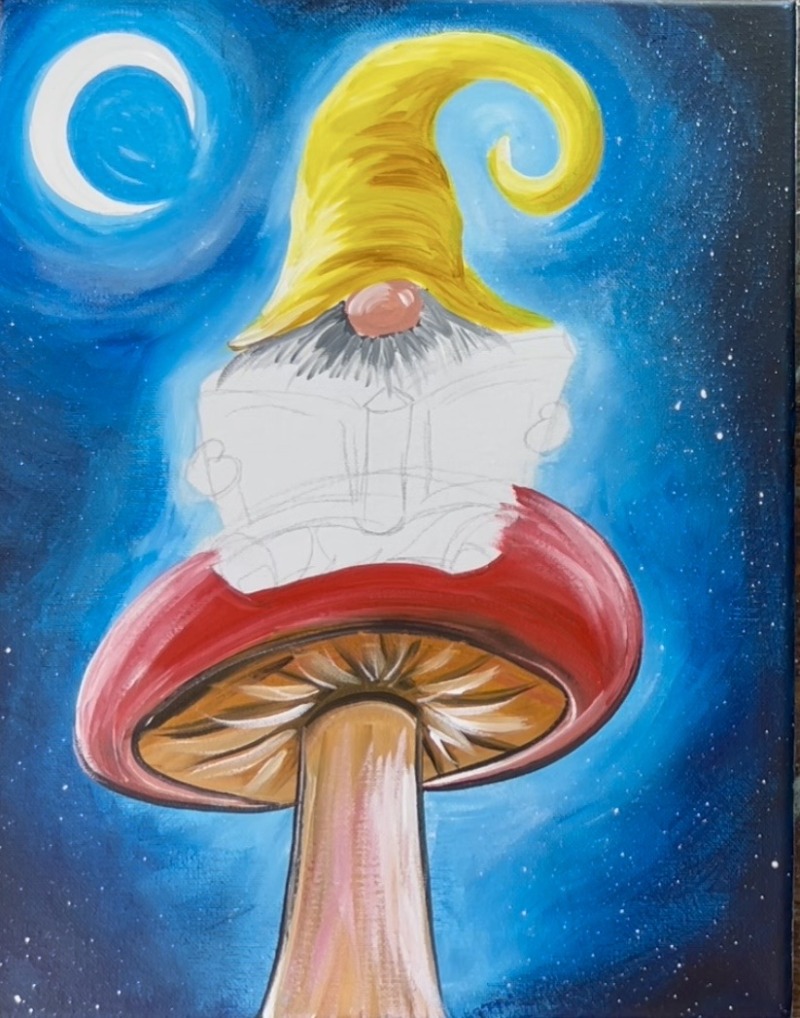
5. Paint Mushroom Dots
Next, use the #4 round brush and pure “titanium white” to paint the spots on the mushroom. These are a variety of different sized circles and some of them are on the edges of the mushroom.
6. Paint Book
Mix a light green on your paint palette by mixing equal parts: “hooker’s green hue”, “primary yellow” and “titanium white”. Use the round brush to outline the shape of the book cover. Then it is very important that you paint curved paint strokes to fill in the book cover shape. This gives it that three dimensional look!
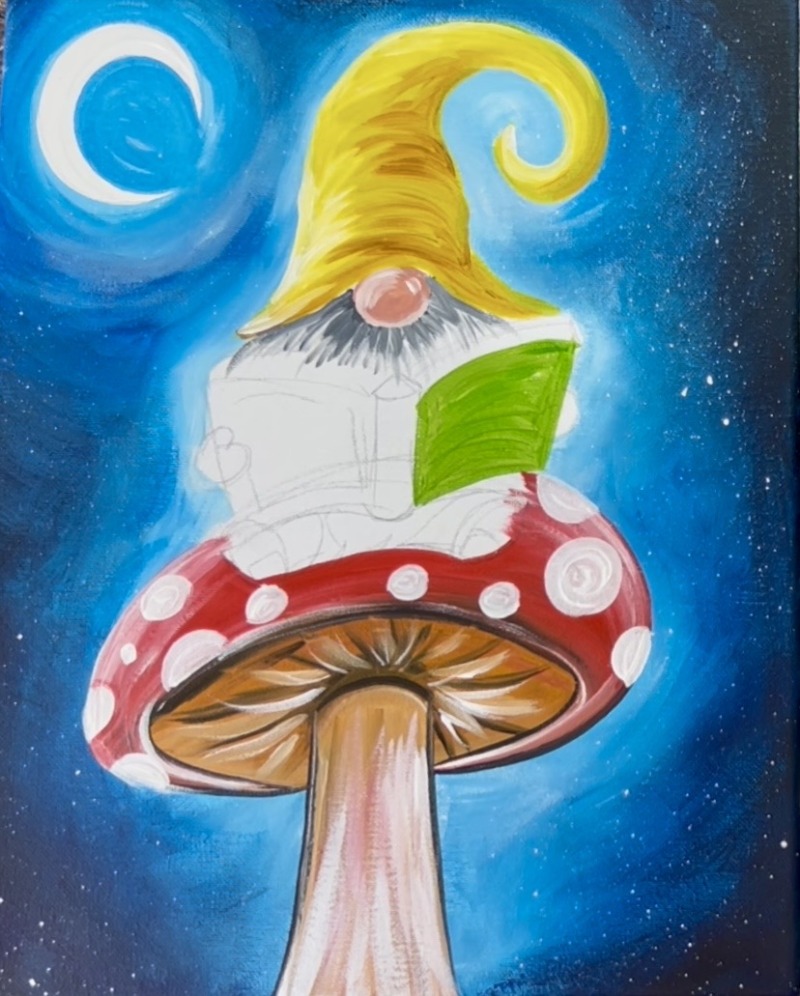
Repeat this on the other side. This time blend in darker green closest to the spine of the book. This gives it some “shadowing” to help the book look more three dimensional. You still want to make sure your paint strokes go curved and parallel to the top and bottom edges of the book cover.
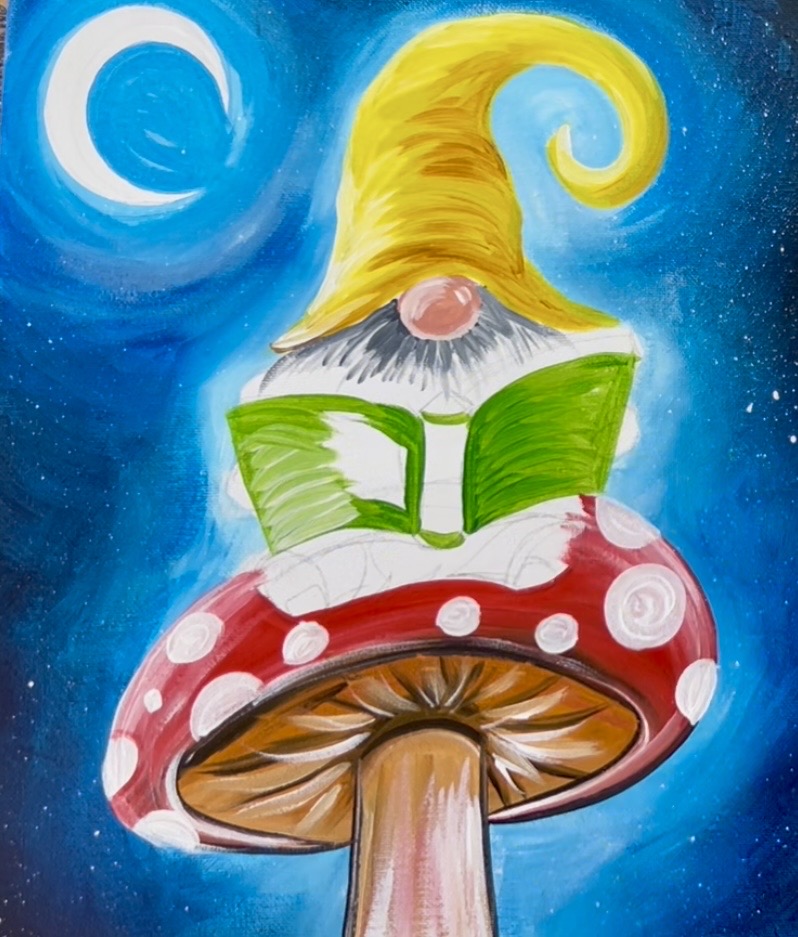
The “spine” of the book is painted light green (white mixed with yellow and green). Make those paint strokes go curved as well to create a 3D effect. Then the book cover is darkest closest to the spine and lightest on the far edges.
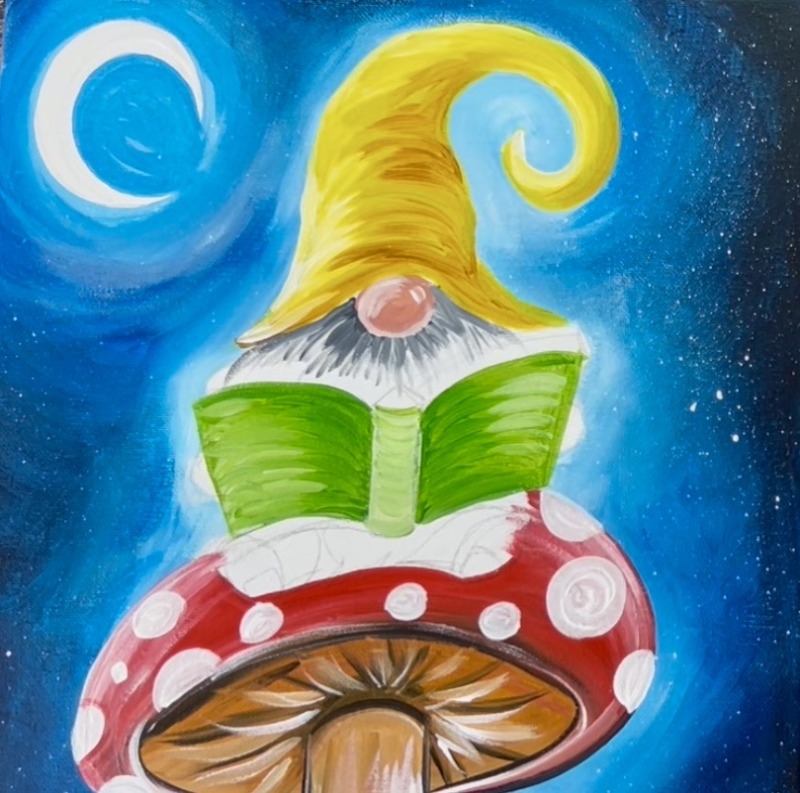
Next, paint the pages of the book. These are curved lines that go parallel above the book cover edge. To make the colors look “different” from the gnome’s beard color, mix a little “raw sienna” with “titanium white” to create a “cream” color. Use this cream color to paint the pages.
Next, use the color “mars black” to very lightly outline the edges of the pages and the little “triangle” shape above the book’s spine. This little bit of outlining helps the pages to stand out. Also, you can add a little bit of loose black lines over your cream colored pages to create shadowing.
7. Paint Hands, Shoes, Pants & Bottom of Beard
Use the same color as the nose (raw sienna mixed with titanium white and a little bit of red) to paint the hands of the gnome. These are overlapping the book. Note: I also added black outlining to the bottom edges of the book.
Then paint the shoes using the #4 round brush and “mars black”. You can really simplify this part of the painting by painting two simple black oval shapes that are going diagonally outwards. Then, if you want, you can add a little highlight on the shoes with “titanium white” for the heel and top sole of the shoe.
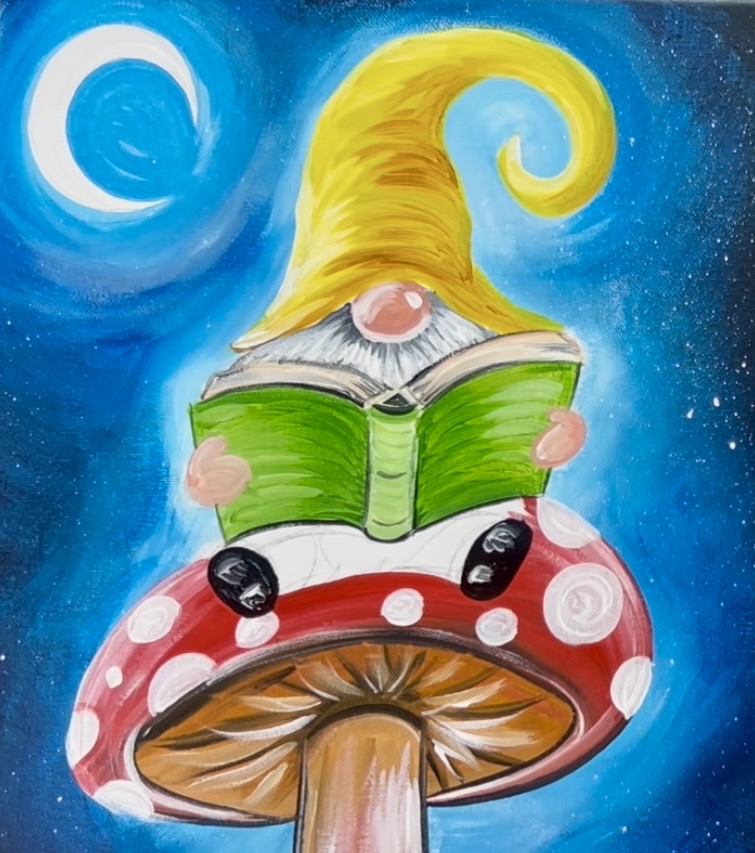
Next, paint the bottom of the gnome’s beard using the same gray color as earlier. Add some white texturing to it. Then paint the pant legs a dark brown color. To make “dark brown”, add a tiny bit of “mars black” into “raw sienna”.

8. Details on Book Cover & Belt on Hat
Optional: add a white border on the inside edges of both of the book covers. You can also decorate the book further or even put a book title on it!
Then paint a “belt” on the gnome’s hat. I did this with the same dark brown as the gnome’s paints. It’s a simple curved rectangular shape towards the bottom of the hat. Highlight the left side of the hat with some “titanium white”.
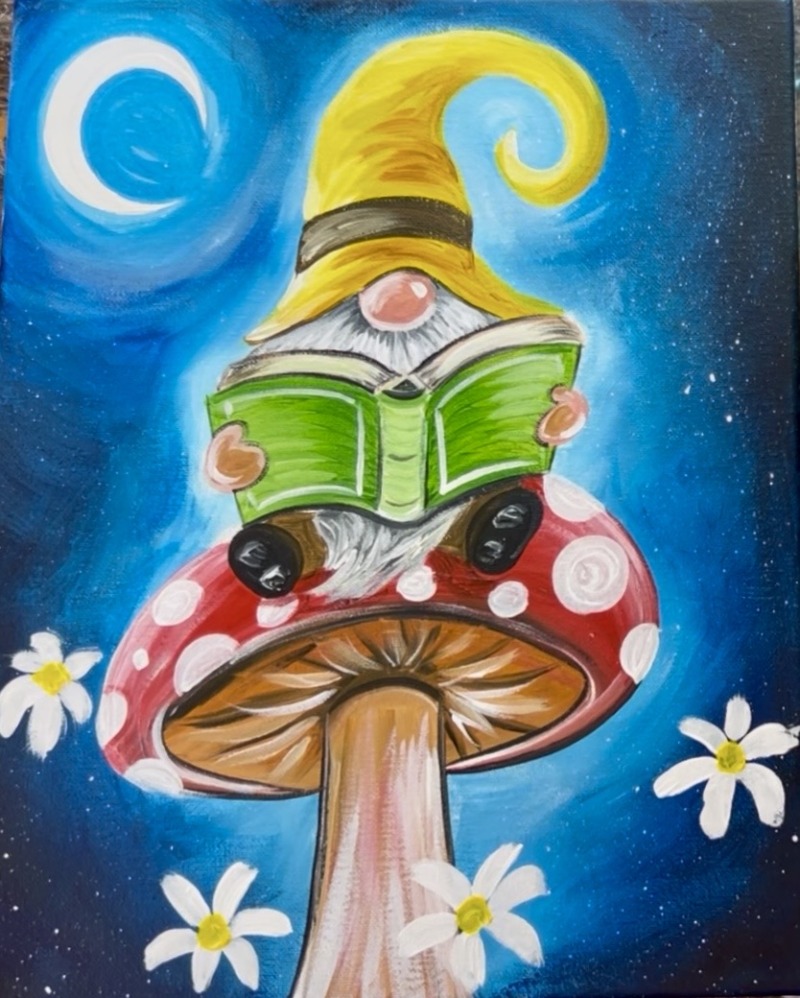
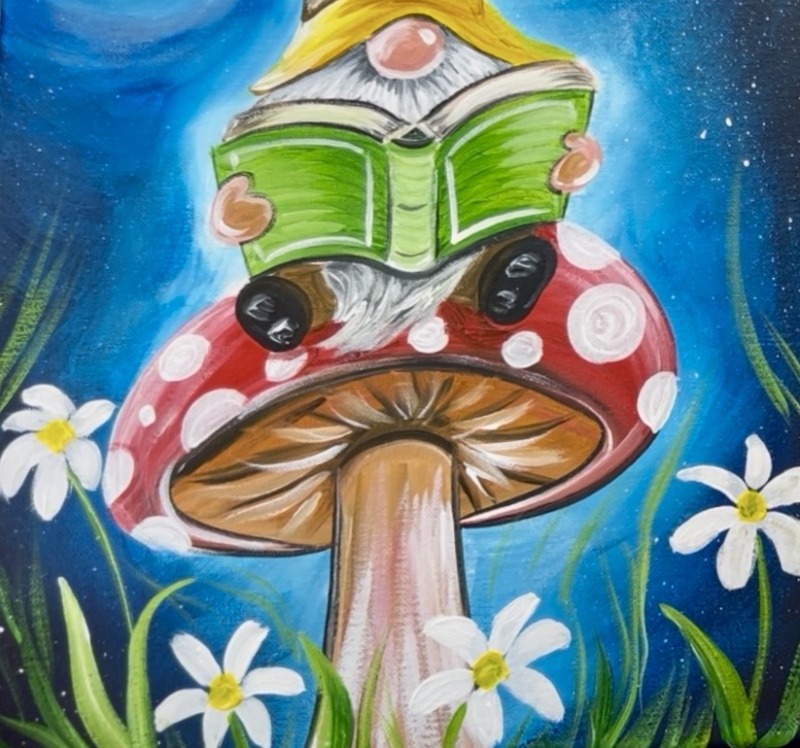
9. Paint Daisies & Grass
Use the #4 round brush and “titanium white” to paint 5-6 petal daisies. You can make them at various angles and heights in the painting. I did 4 daisies, all around the mushroom in the lower half of the canvas. One is even overlapping part of the mushroom stem. To make your petal stroke, start from the center of the flower and stroke outwards to create an oval, lightly bended petal shape.
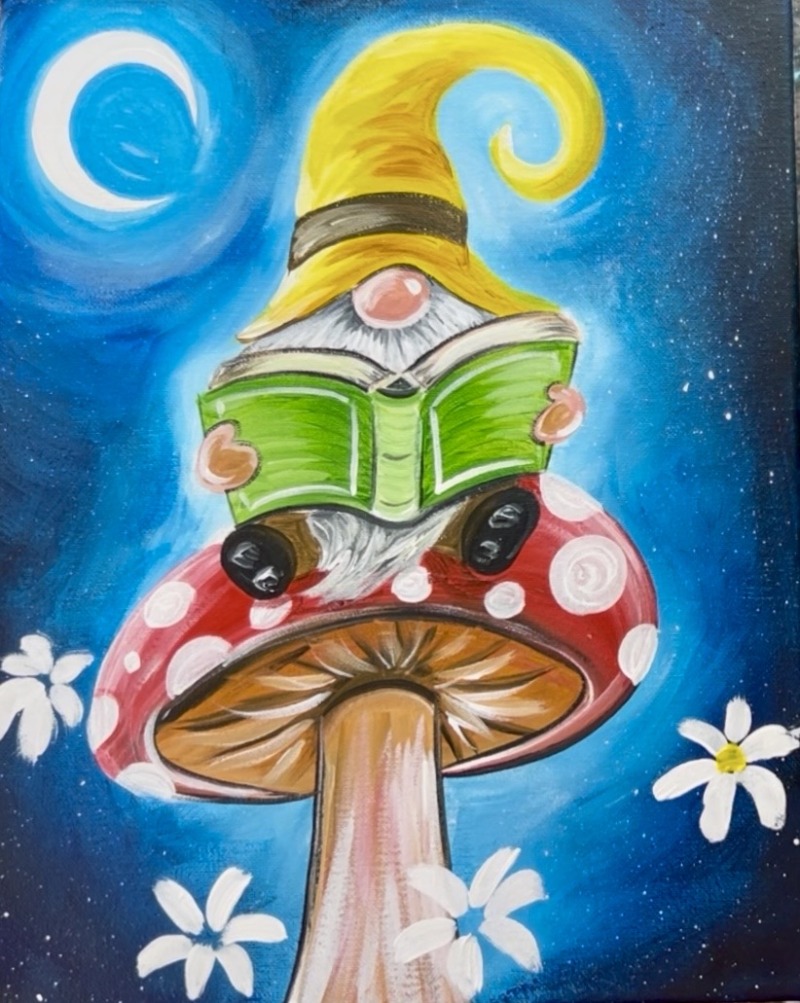
Then paint a little yellow circle on the inside of each of the daisies.
Use the #8 long round brush to paint stems for the daisies as well as grass. Mix equal parts: green, white and yellow together. Use the tip of this brush to create thin grass lines that sway different directions and have different heights. Change the color a bit by adding little bits of dark green in it or extra white. To create thicker “leaf” types of paint strokes, apply more pressure on the brush and stroke downwards to create a leaf shape that goes from thin to thick. Continue to layer on as much grass texture as you would like!
Next, paint a little white daisy in the gnome’s hat!
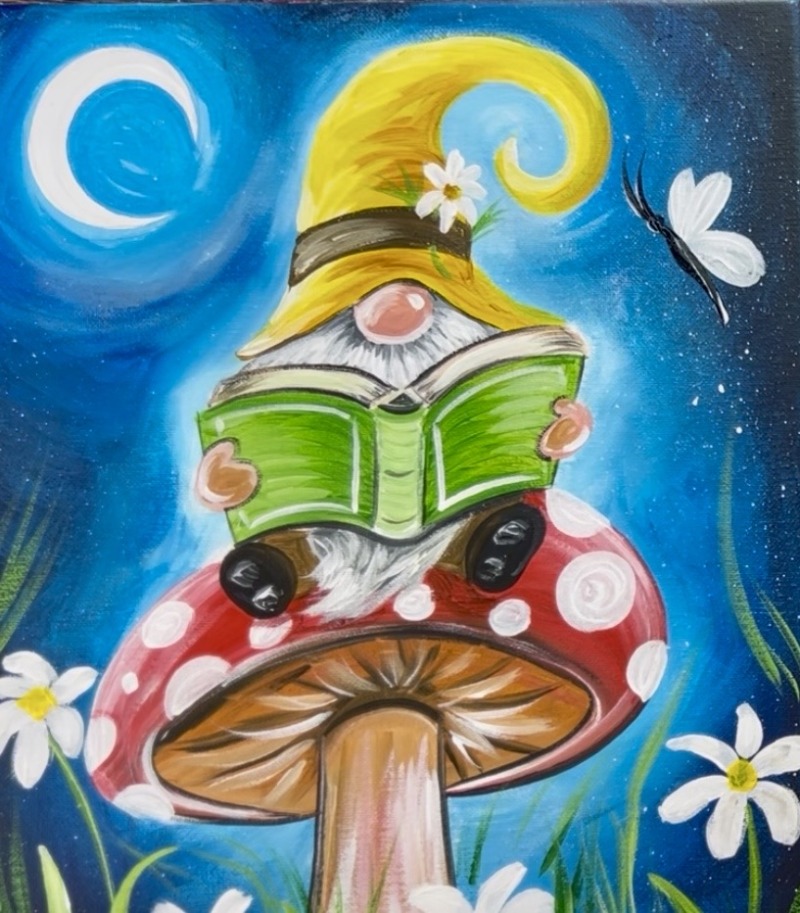
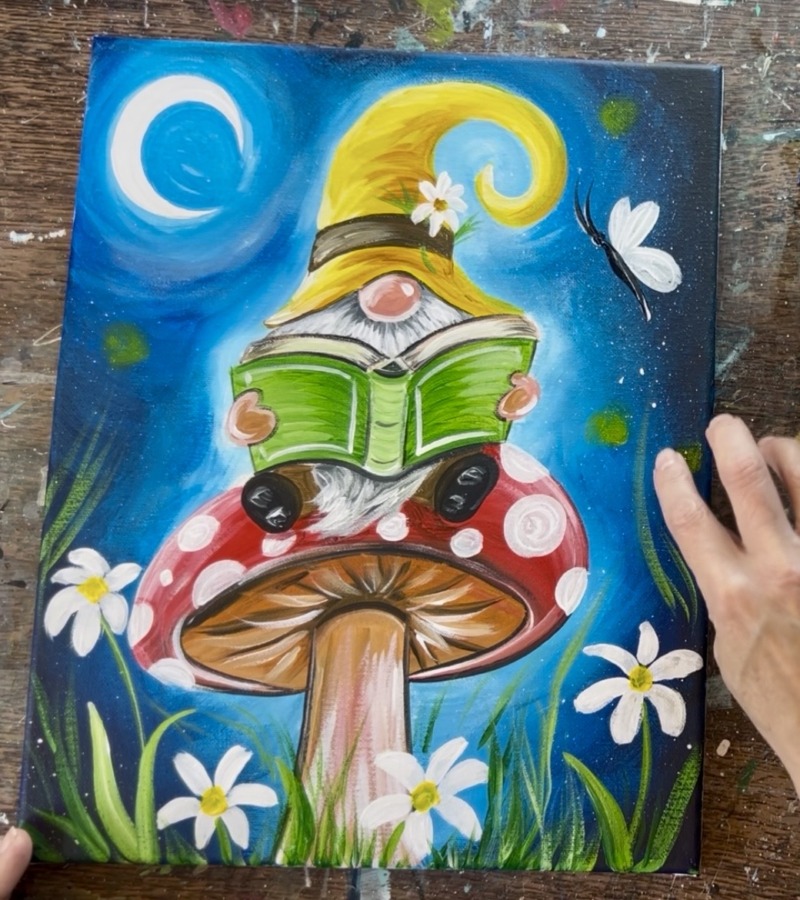
10. Butterfly, Fireflies & Twinkling Stars
Use “titanium white” to paint the butterfly’s wings as if it is on its side. I did two small “teardrop” shapes for the top wings and then one large teardrop shape for the bottom. Paint it at an angle.
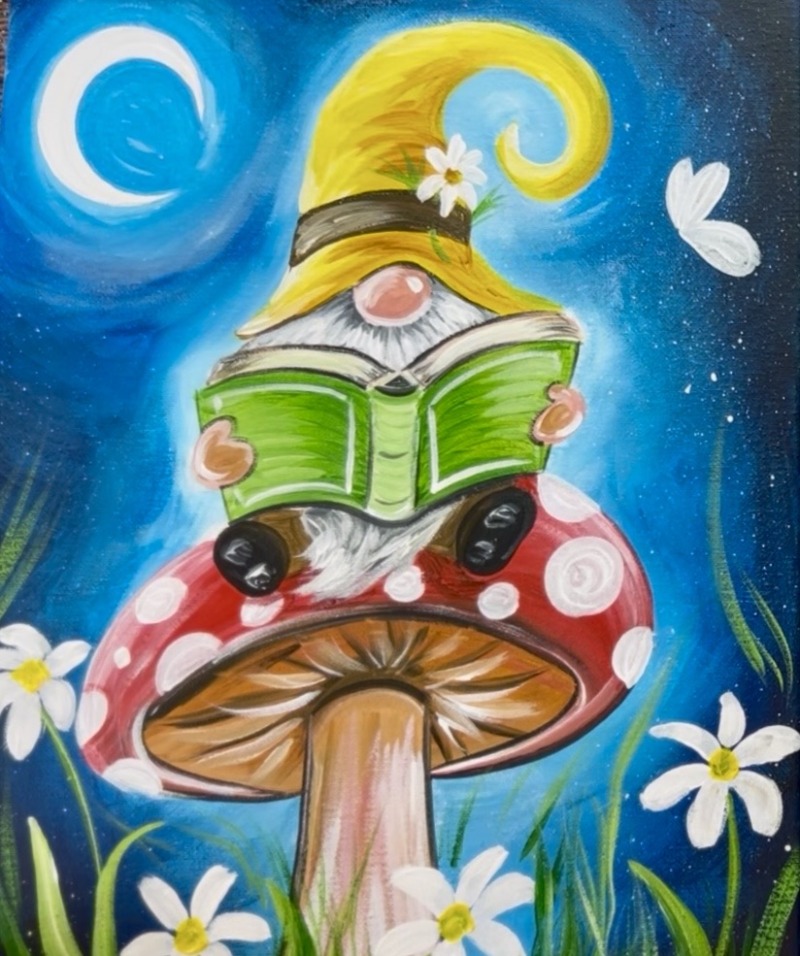
Then paint the body and antenna of the butterfly using mars black. If the black doesn’t show up well on the dark background, you can add a little white into it to highlight it.
Next, use your index finger to paint little fireflies in the sky! (You can also do this with a round brush). Simply load a very small amount of “primary yellow” onto your index finger. Press and smear the circle outwards. It should look very dim and blurry for this first layer.
Then load a very tiny dot of white on your finger and repeat! This will highlight all of your dim yellow circles and make them look brighter.
Use a round brush and “titanium white” to paint a small circle in all of those firefly lights for an extra glowing effect!
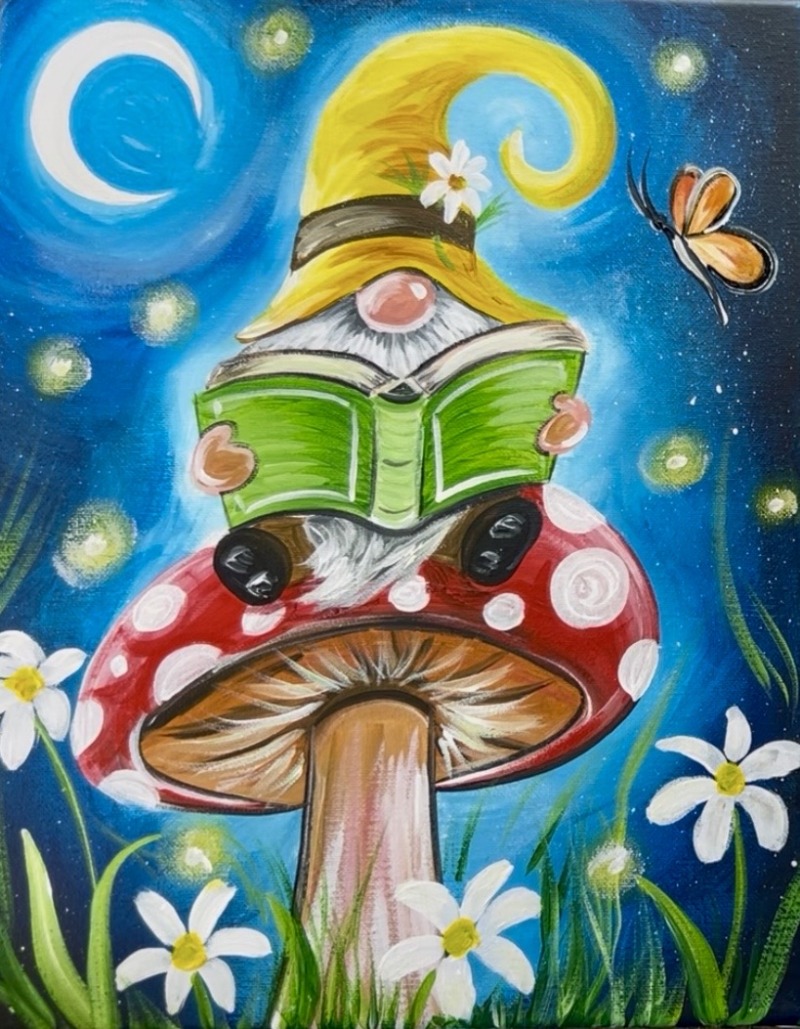
Next, mix an orange on your palette for the butterfly wings. Mix yellow and red together (about 2 parts yellow to 1 part red). Then paint the wings. Add a little bit more red to the wing that is in the back.
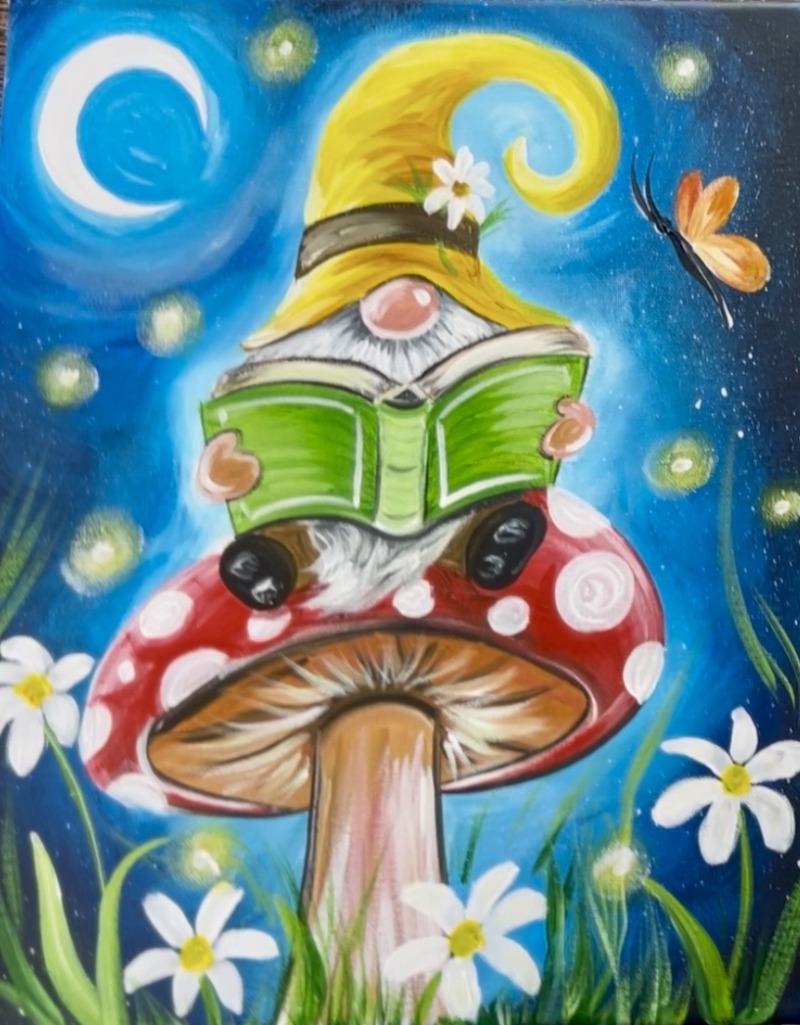
Outline the edges of the butterfly wings with “mars black” to create a border that resembles a monarch butterfly. Then lightly highlight the black borders with some white so that it shows up against the dark background.
Some final details in this painting includes: painting twinkling stars in the sky, adding white dots on the butterfly wing birder, adding more grass and/or more daisies and adding some grass/ stem in the gnome’s hat under the belt.