Would you like to save this?
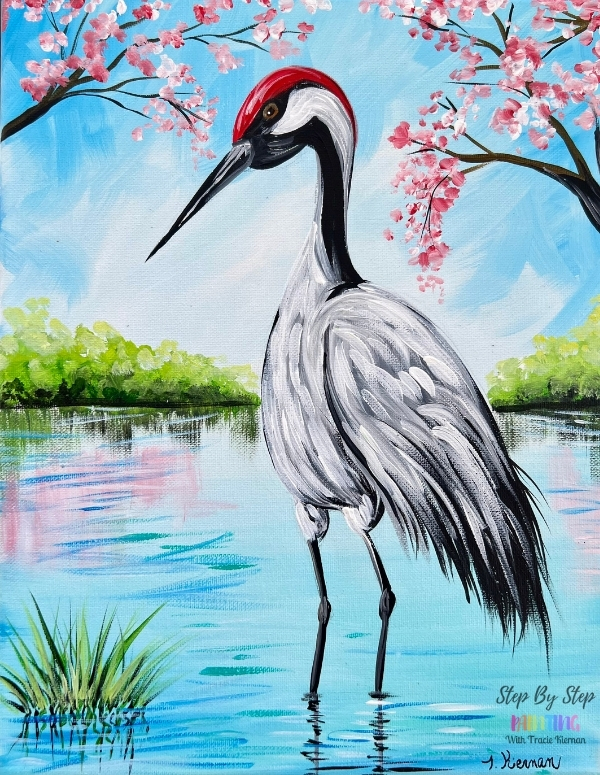
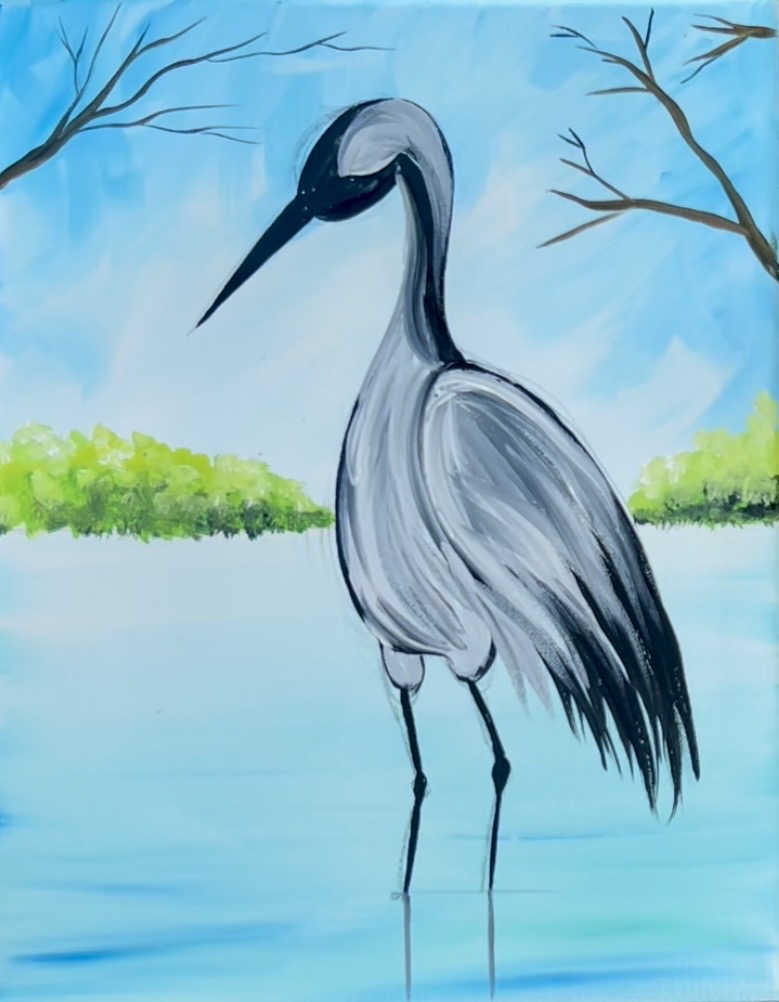
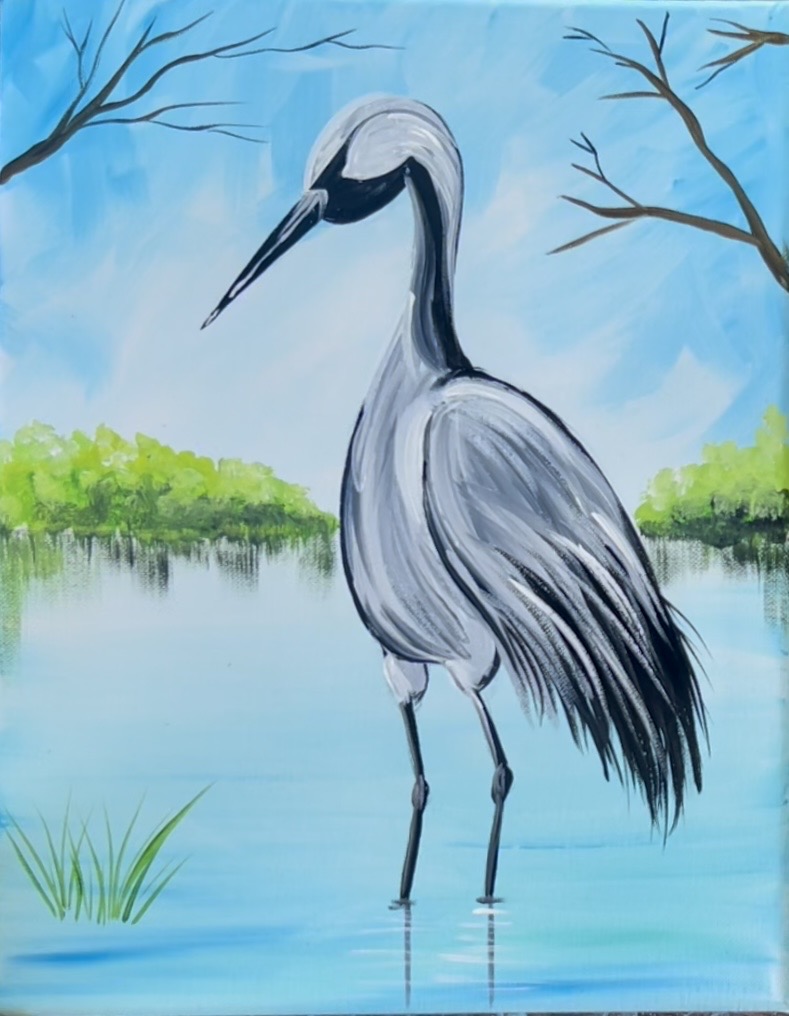
Learn how to paint this elegant red-crowned crane in a serene spring landscape with this step-by-step acrylic painting tutorial. In this lesson, you’ll create soft cherry blossoms, peaceful water reflections, and detailed feather textures while practicing blending techniques and brush control.
Perfect for beginners and intermediate painters, this tutorial will guide you through building depth, adding highlights, and bringing this graceful bird to life on canvas. There is also an optional traceable as well as instructions for how to draw the crane.
Enjoy and happy painting!
Materials Needed For This Painting:
How To Paint "Tranquil Crane" - Acrylic Tutorial

This beginner tutorial will show you how to paint a red crowned crane.
Materials
- 11x14 Canvas
- Acrylic Paint
- Brushes
- Pencil
- Eraser
- Ruler
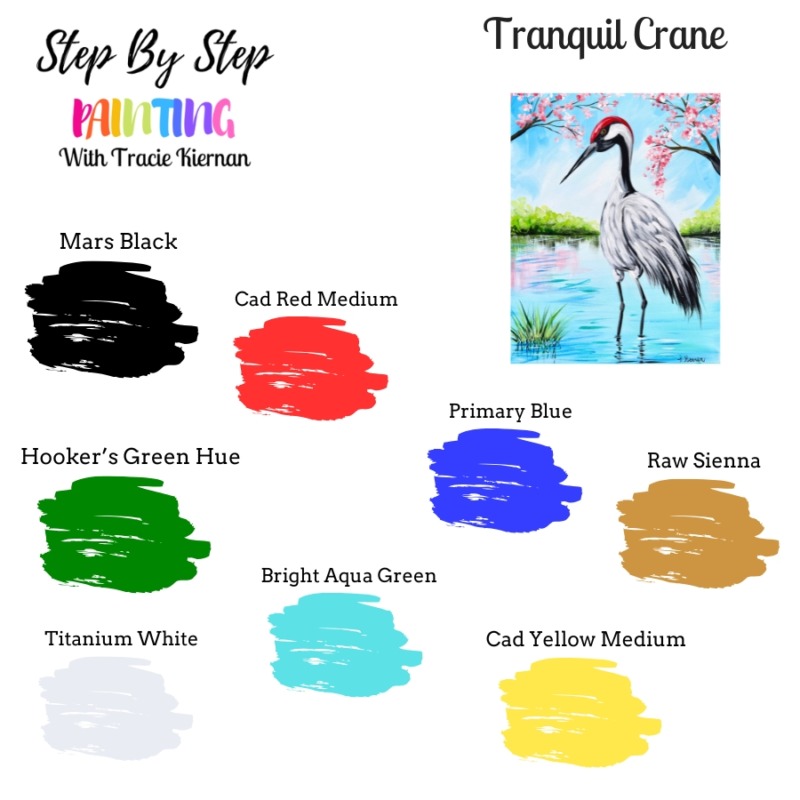
Colors
- Titanium White
- Mars Black
- Cadmium Red Medium Hue
- Cadmium Yellow Medium Hue
- Hooker's Green Hue
- Primary Blue
- Bright Aqua Green
- Raw Sienna
Brushes
- 8 Long Round
- 4 Round
- 3/4 Flat Wash

Colors
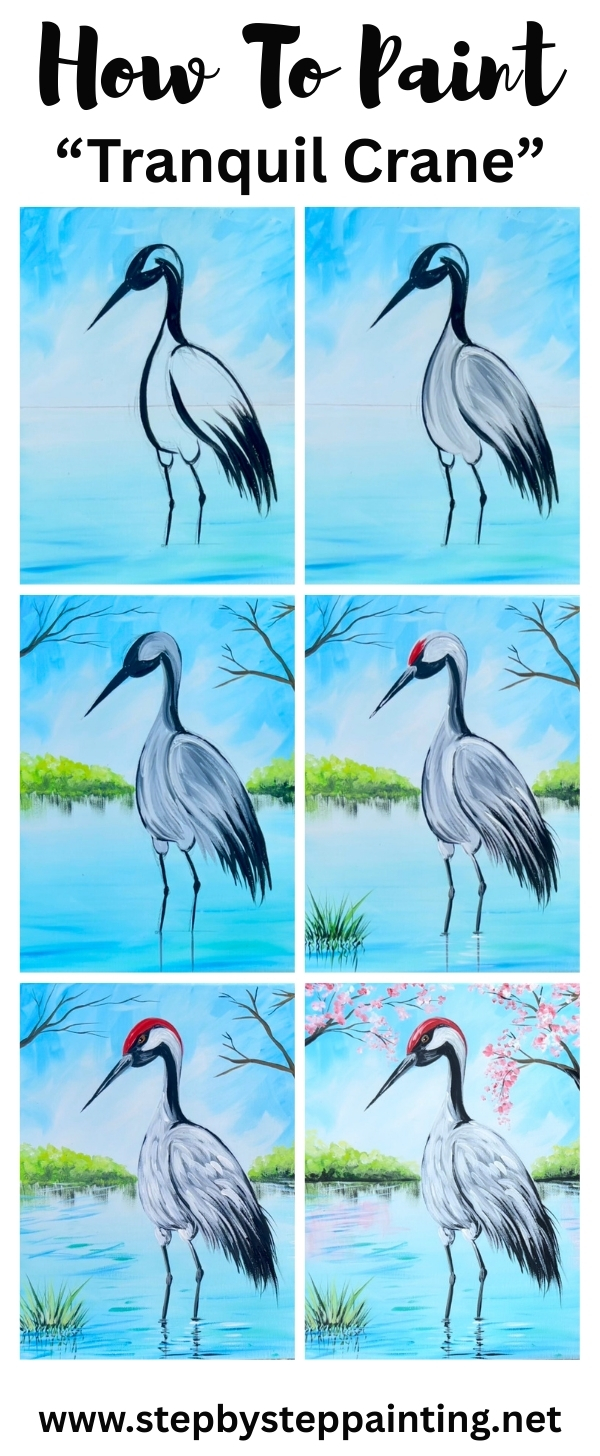
Directions At A Glance:
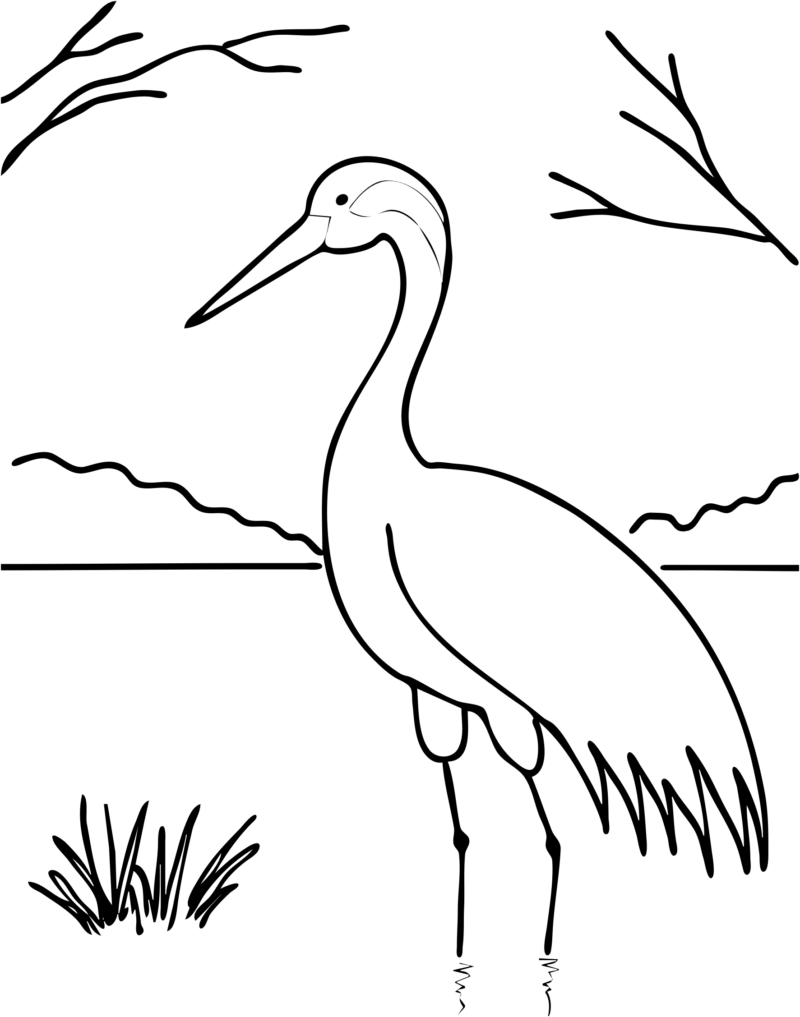
Optional Traceable
Video
Step By Step Instructions
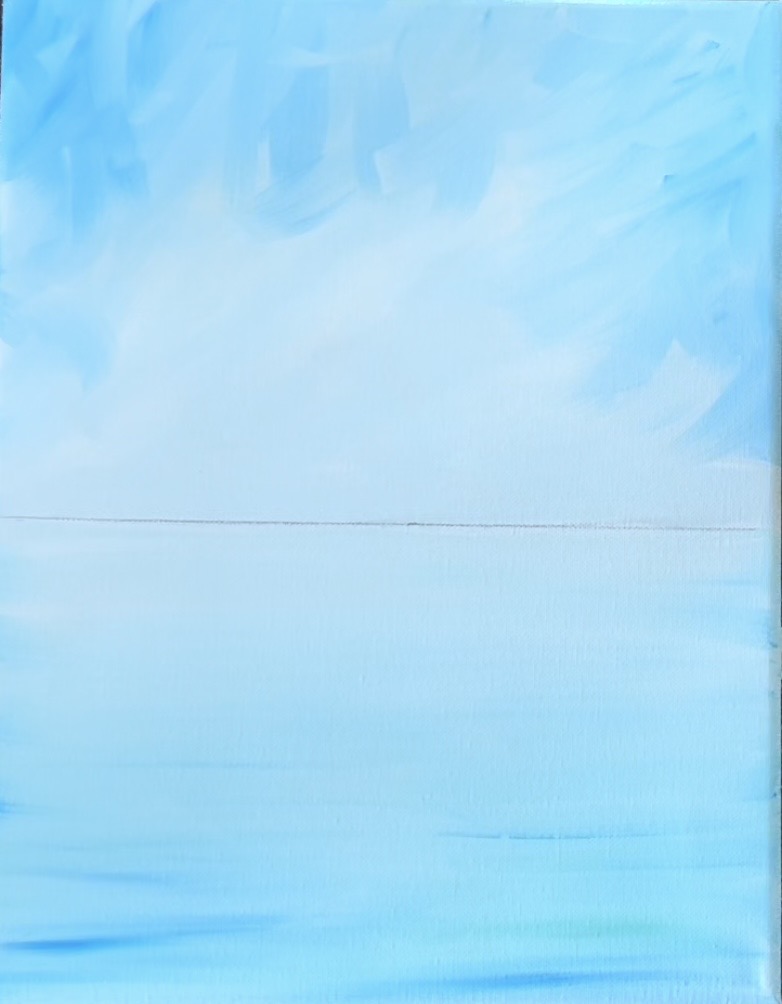
1. Draw Horizon Line/ Paint Sky
Position the canvas in vertical format. Measure 6.5″ from the bottom edge of the canvas and draw a horizontal line using a pencil and ruler. Note: if you are using a different size canvas, measure about half the canvas for the horizon line.

Next, load your paint palette with the colors: primary blue, bright aqua green and titanium white. Use the 3/4″ flat brush and mix a very light blue! Mix about 4 parts white to 1 part “primary blue”. Start on the top corners and top edge of the canvas and paint diagonal paint strokes, blending the color on the canvas.
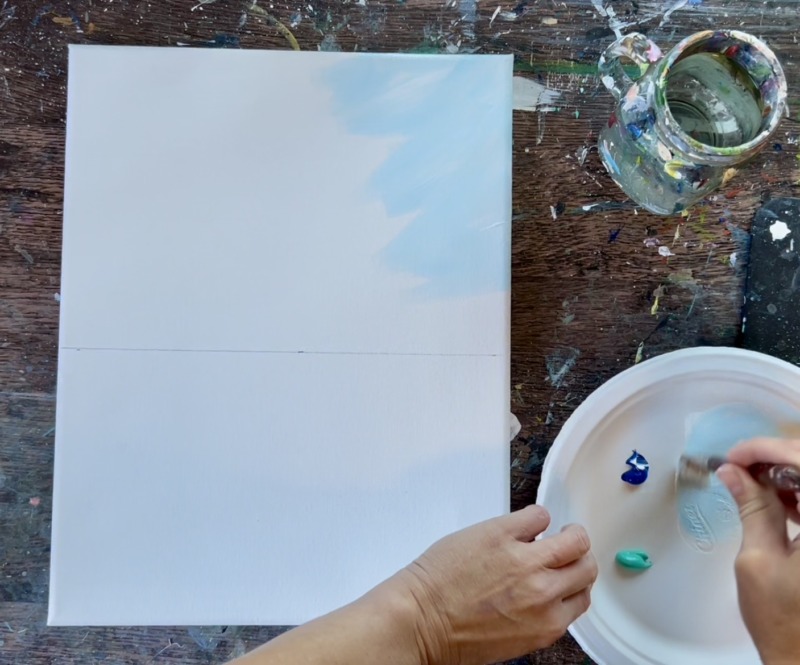
Leave the middle area of the sky blank. This will be a lighter, brighter area with more white. This whole sky is painted with diagonal/ cross hatching style paint strokes to create texture in the sky.
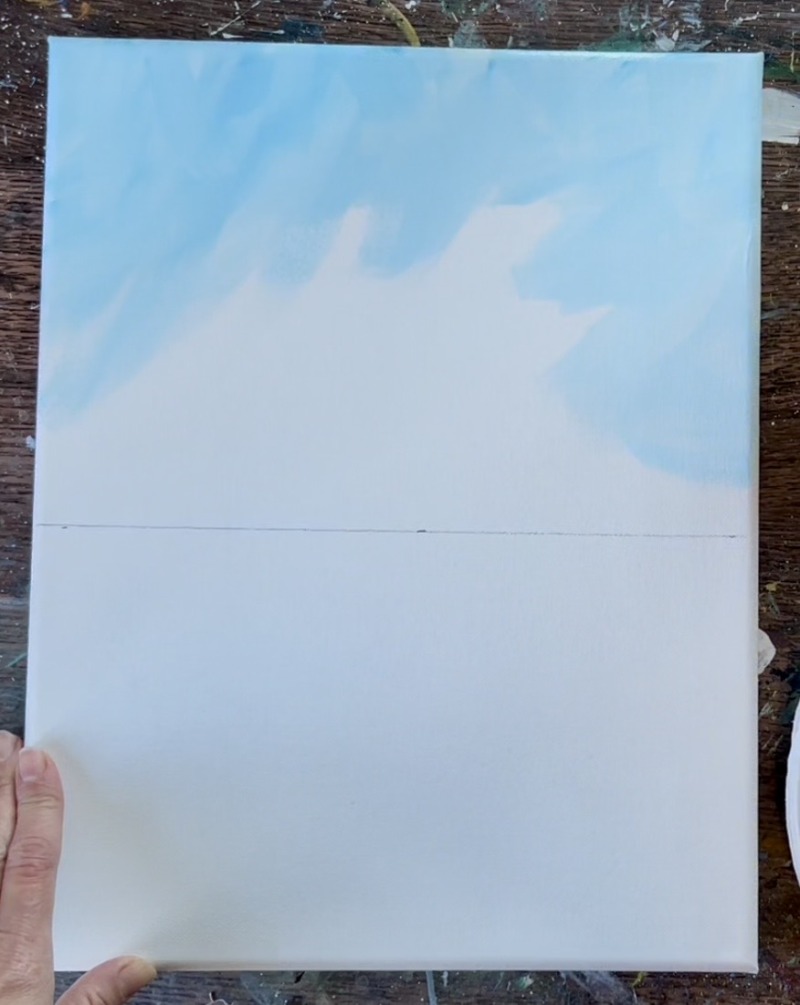
Load your brush into more of the “titanium white” and paint/ blend the middle and bottom area of the sky. Then add little bits of “primary blue” to the corner of the paint brush and blend this into the sky on the top left and right corners and top edge. This is to ensure this top area is slightly darker and the middle and bottom (above the horizon) is lighter.

2. Paint Water
We will use the same color as the sky but add a little bit of “bright aqua green” into it. Use the 3/4″ flat brush and start with your very light blue color (the color you used for the sky that was mixed with all that white). Add just a tiny bit of aqua into the color. Start on the bottom edge of the canvas and paint left and right paint strokes.
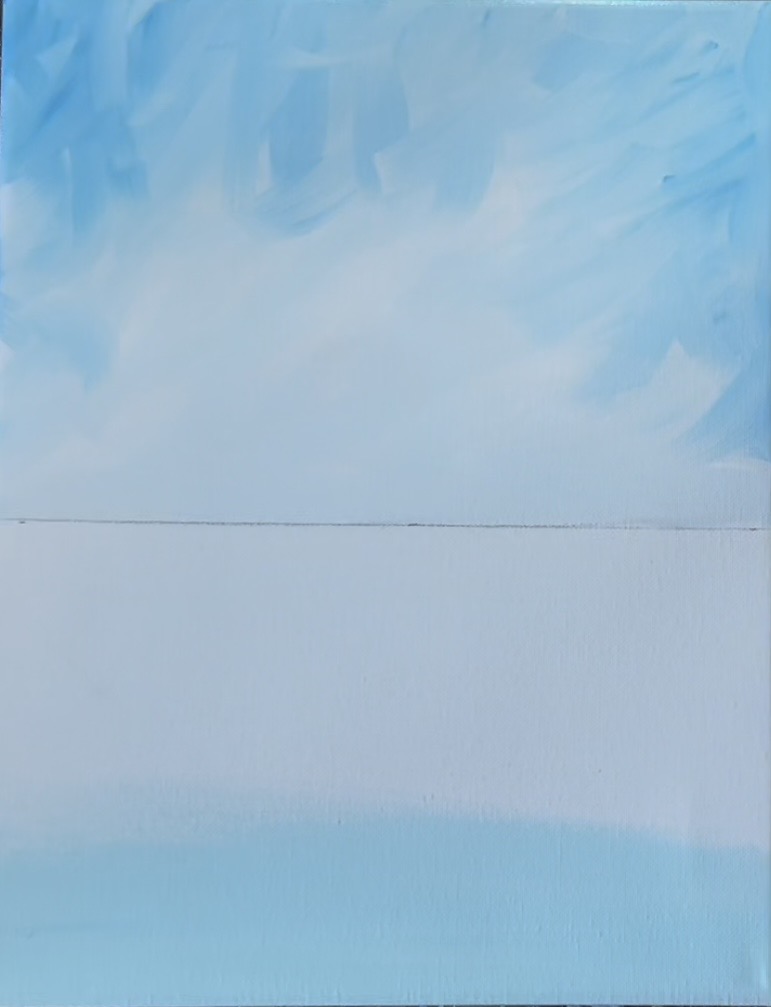
As you work your way up from the bottom to the “horizon line”, gradually add more “titanium white” into the color so the lake is lighter closest to the horizon line and darker on the bottom.
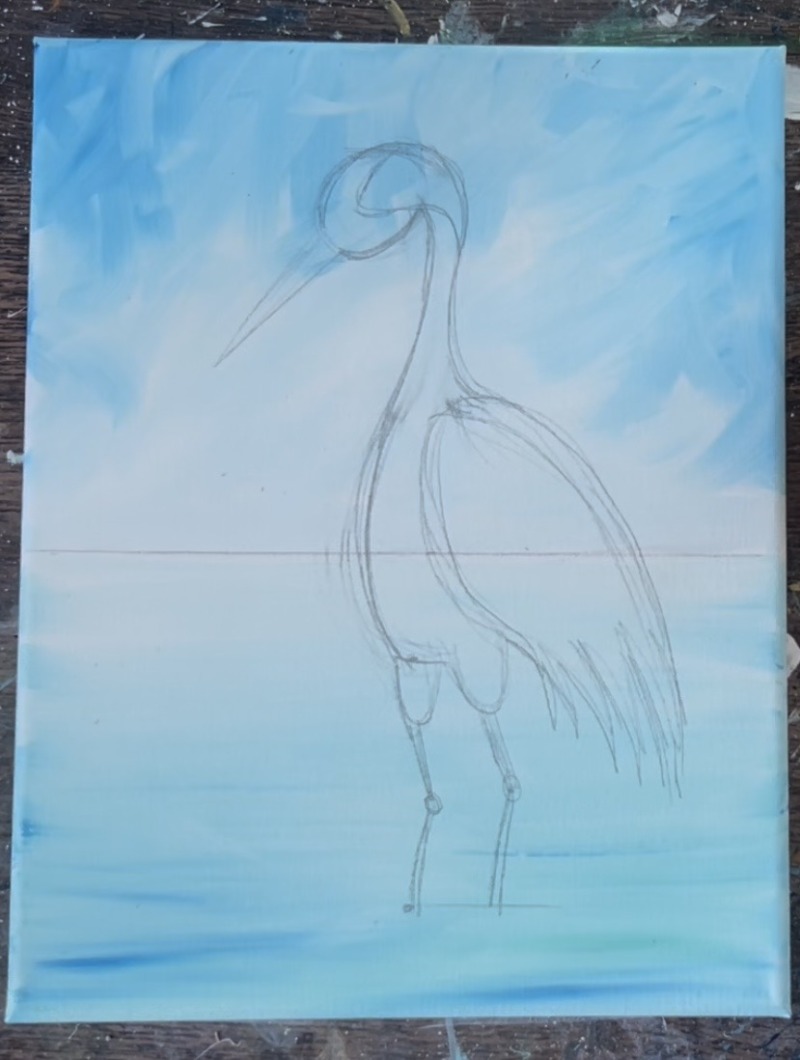
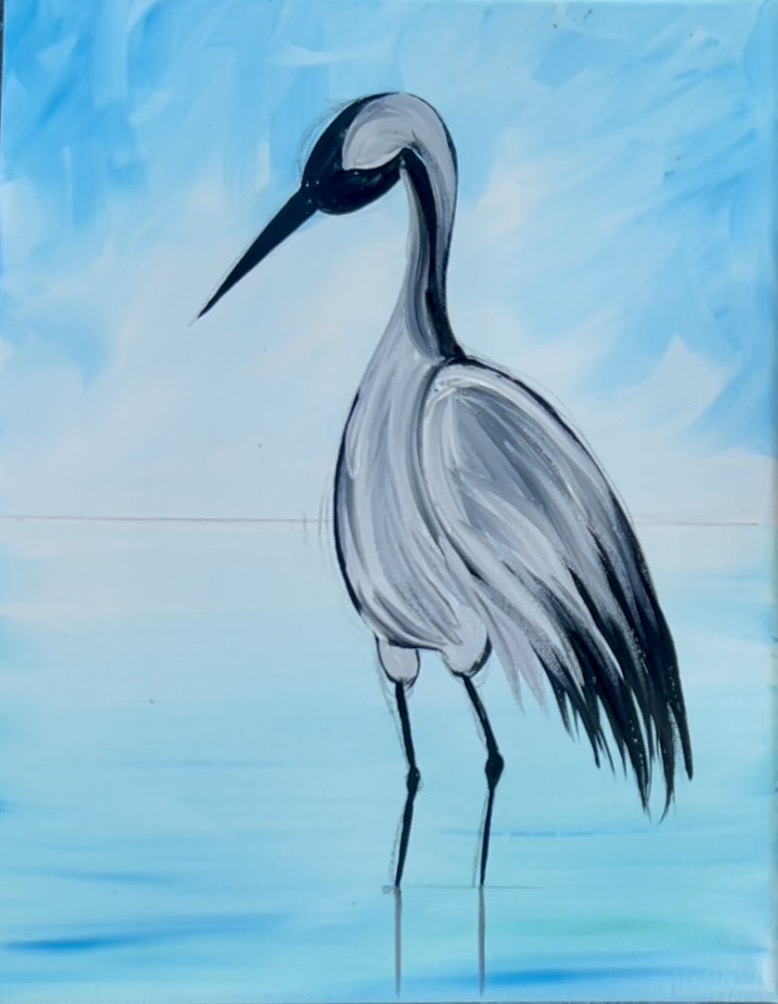
3. Draw Crane
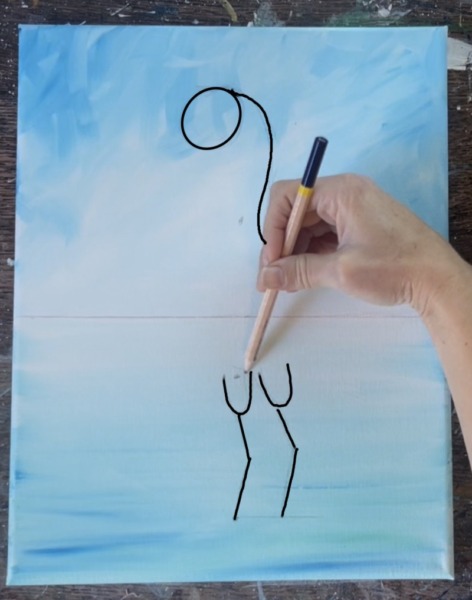
I started by making 4 marks on my canvas. The bottom line represents where the legs submerge into the water and the top line is the top of the crane’s head. The “X” marks are to divide this area into quarters. This will help with the proportion of the crane.
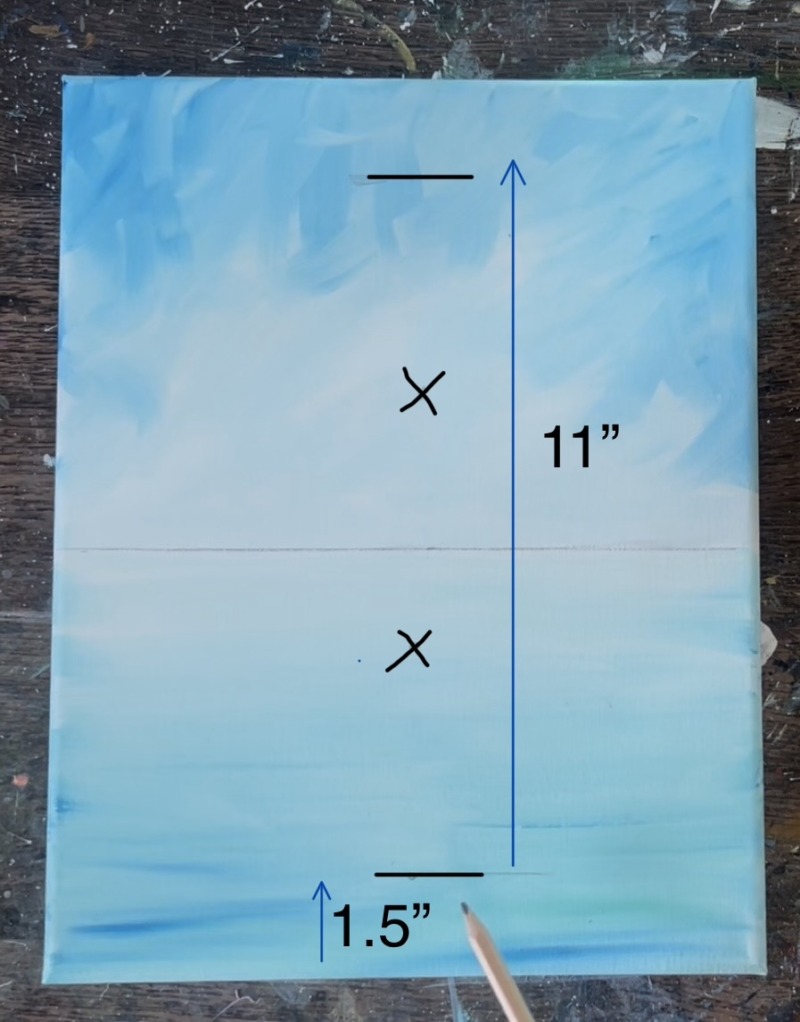
Start by making the bottom mark at about 1.5″ from the bottom of the canvas. Draw a small horizontal line. Then make your top little horizontal line mark at about 11″ from that bottom line. Then make two very light marks at about 1/4th of 11″ (you can definitely estimate this).
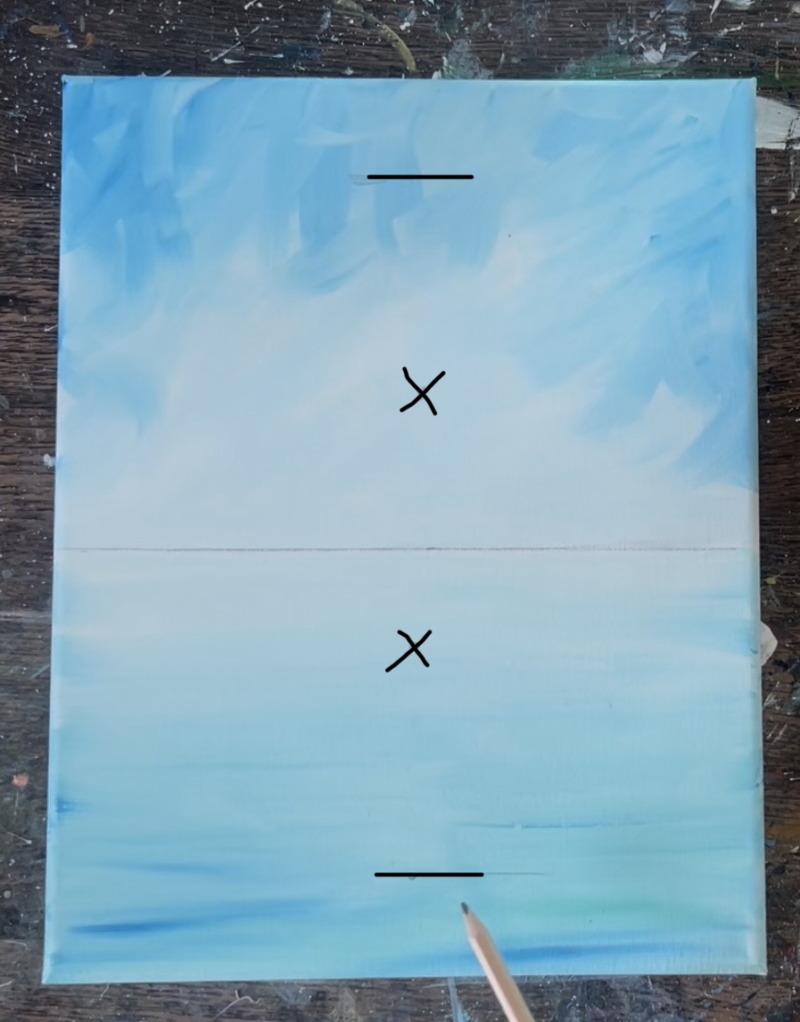
Now we can start drawing the crane! Draw this lightly with sketch-like lines. The lines below are darkened to show you the basic shapes/ lines. Also, the little “x’s” are only meant to be guide points to help you with the proportion of the bird.
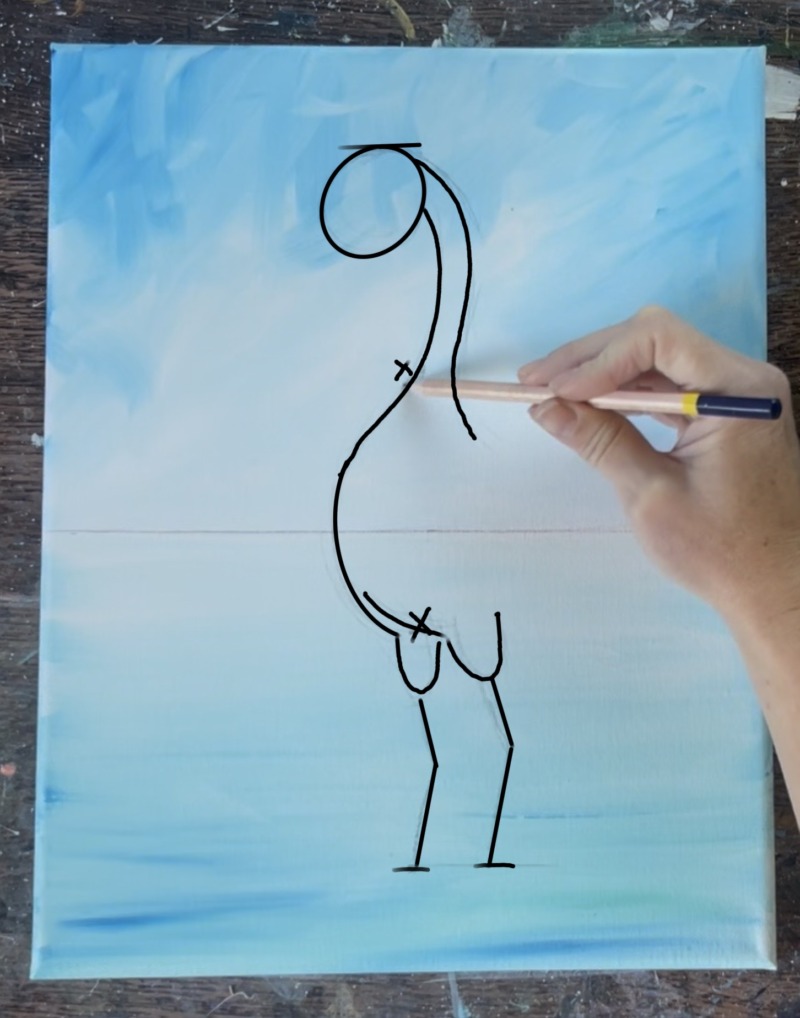
Start at the top and draw a small oval going slightly diagonal. Then draw the back of the neck. This line starts on the top of the oval and then curves backwards. It curves slightly inwards at about where the first “x” mark is.
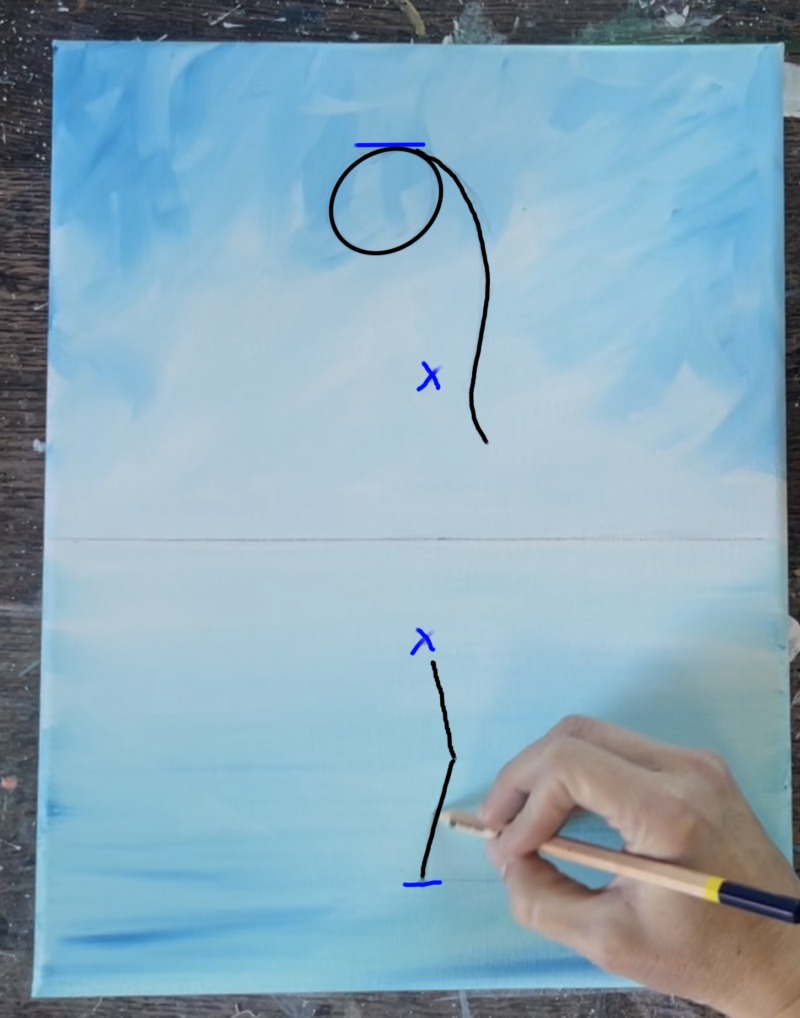
Then draw two “U” marks for the top of the legs. These are about where the bottom “x” mark is. Draw two segmented lines for the legs bending backwards to the right.
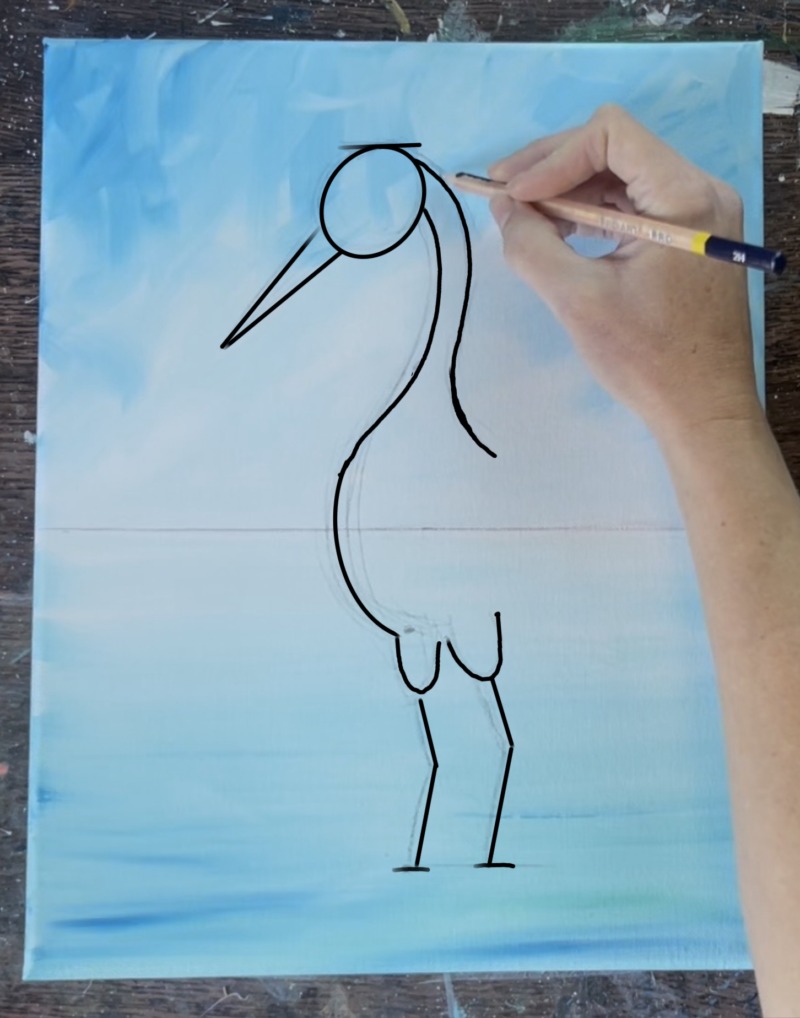
Draw the rest of the neck as a second curved line parallel to the line on the right. This line curves forward and then into the shape of the left side of the body of the bird. Draw a wider curve going outwards to the left and then down to the left “U” line of the leg.
Draw a narrow triangular shape for the beak.
Then draw the side wing of the bird. This is a basic teardrop shape with a zig-zag edging on the bottom.
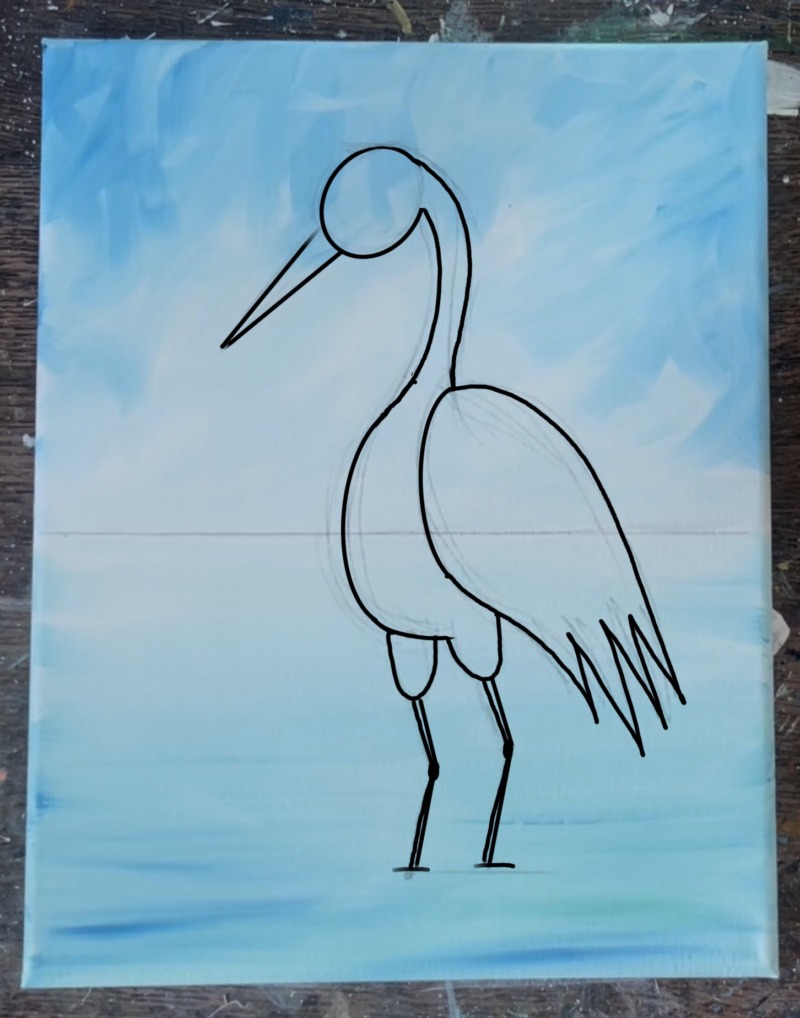
My final sketch of the crane looked like the sketch below. Additionally, draw a little curved area inside of the head. This creates a little divided area because this crane has black, red and white on its head.
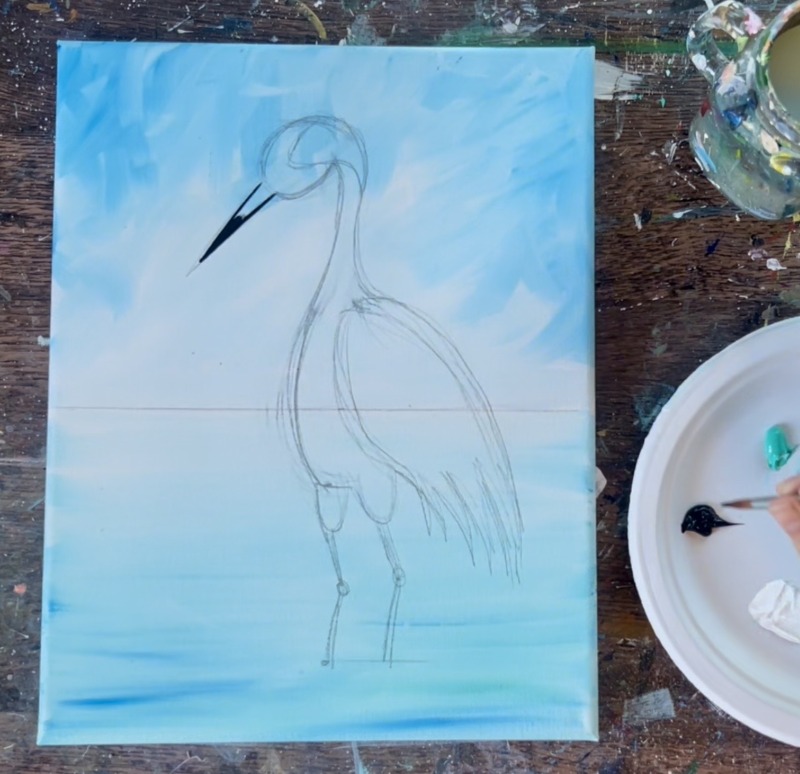
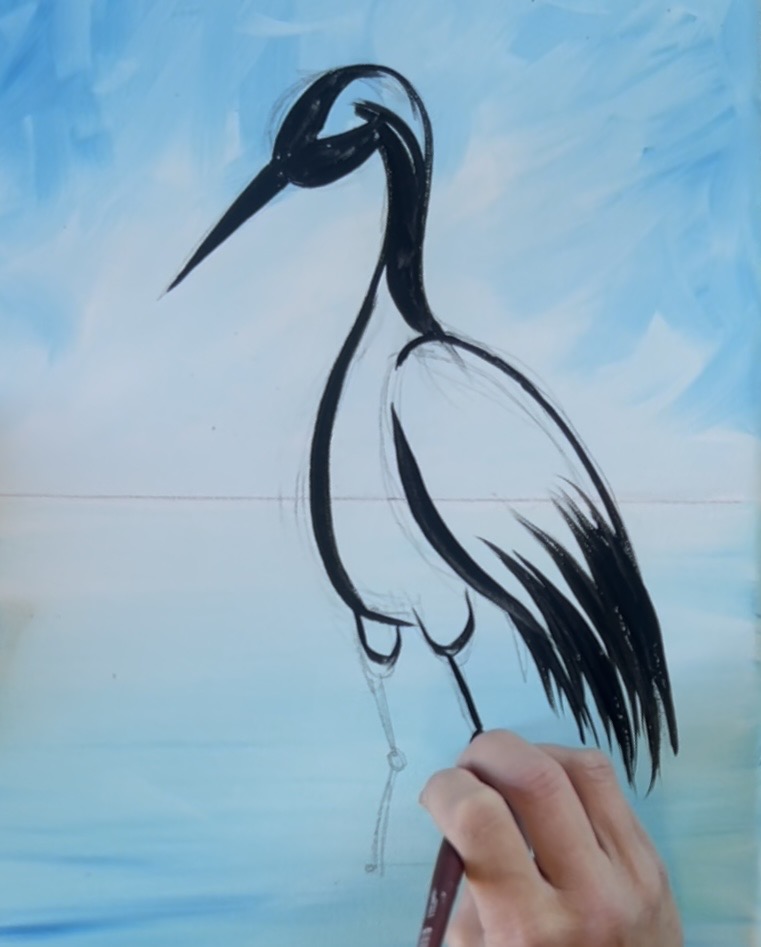
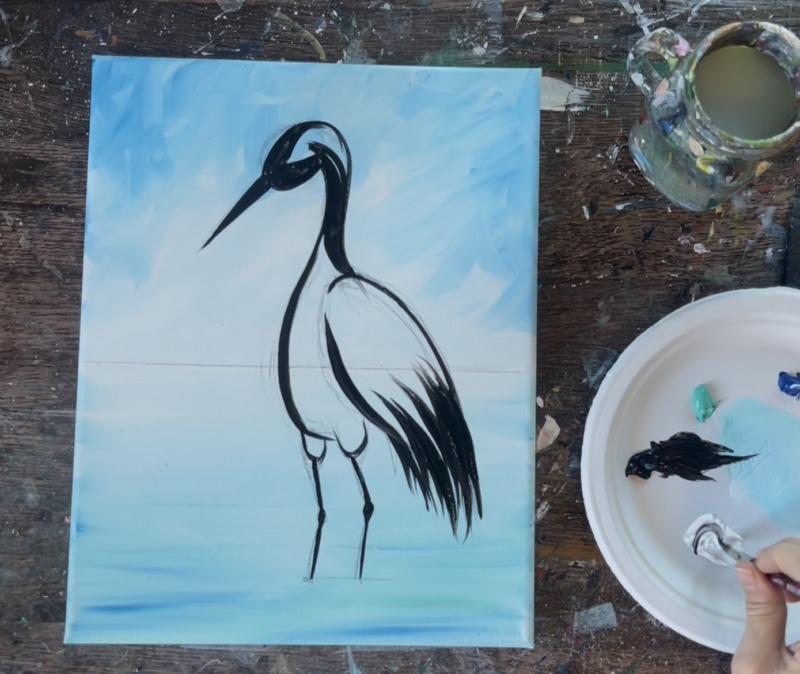
4. Outline/ Paint Black Areas
Use the #8 long round brush and “mars black”. You are going to outline everything you drew with the pencil and also paint black in the dark areas of the crane. Start with the beak. Use the long tip of the bristles to outline the beak and then paint the beak in solid black.
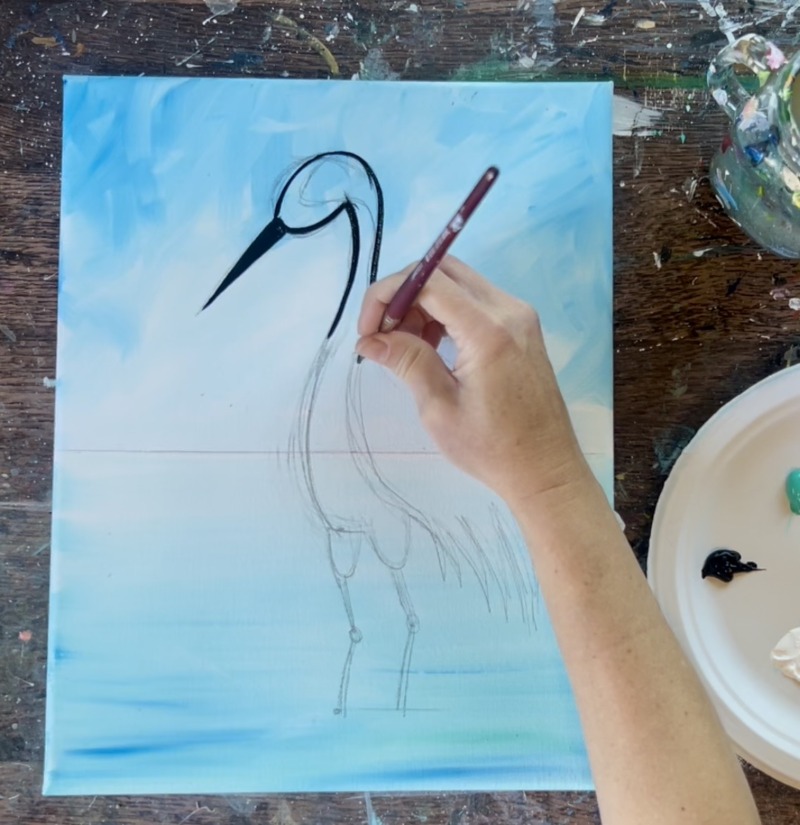
Outline the head and neck of the bird.
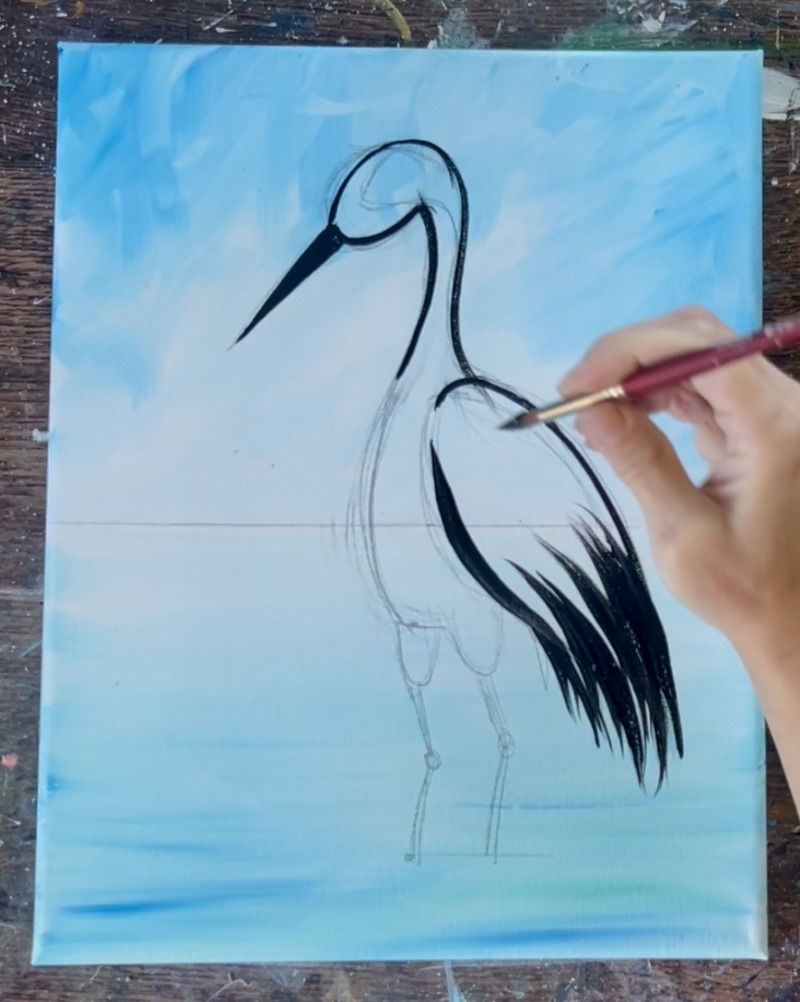
Outline the entire wing. Then paint the large black feathers on the bottom of the wing. When you paint these feathers, apply pressure on the brush at first for a thicker paint stroke and then release pressure to create a very thin and pointed paint stroke at the end of the feathers to make them look pointed on the ends.
Then paint black in the area of the head that goes around that center shape. Paint the neck black up until you get to the top of the wing. Outline the front of the bird as well as the legs.
We are going to paint in the gray areas of the bird next so don’t rinse your brush after you are done outlining/ filling in black areas.
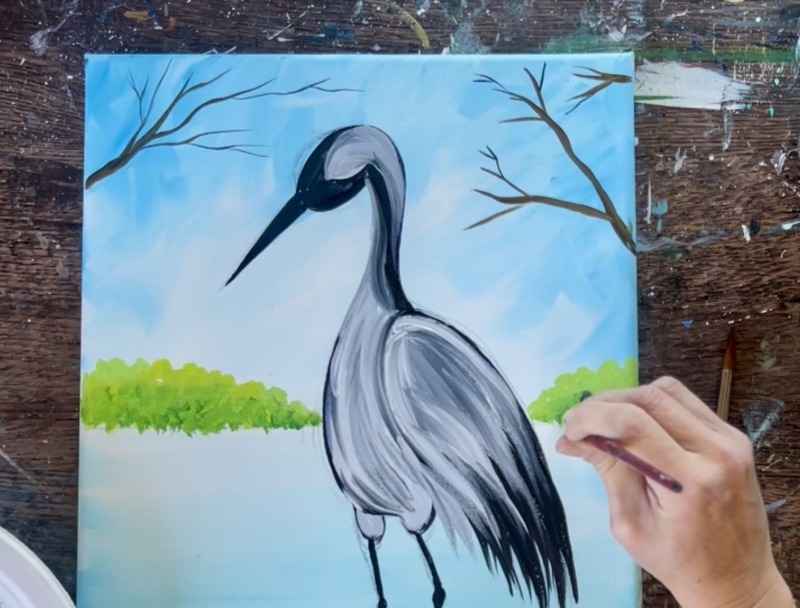
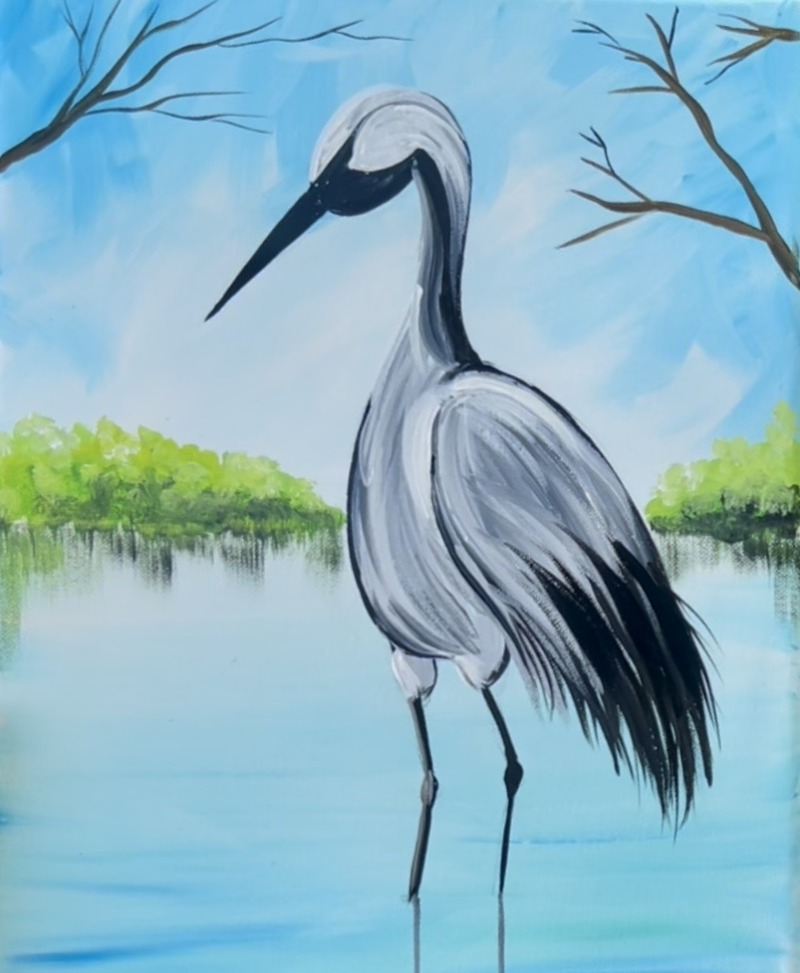
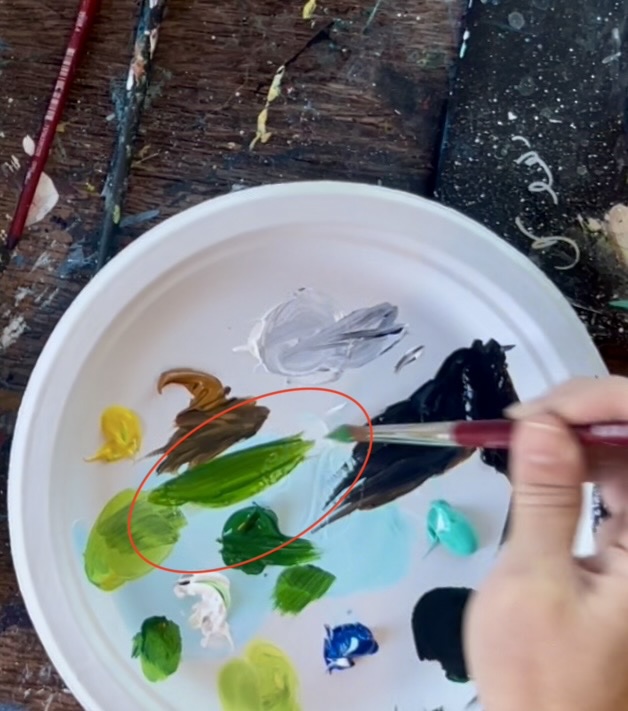
5. Paint Gray Areas
Without rinsing the brush, load the #8 long round into titanium white (you have black and white on the brush). This will blend into a gray when we paint it on the canvas and the black/ white will create streaks of different grays to create feather texture.
Paint the front part of the bird with paint strokes going in a curved direction. Then paint the bird’s side wing also with paint strokes that curve and “contour” in the direction of the wing. Overlap some of your gray color over the end black tips of the wings (but don’t cover it).
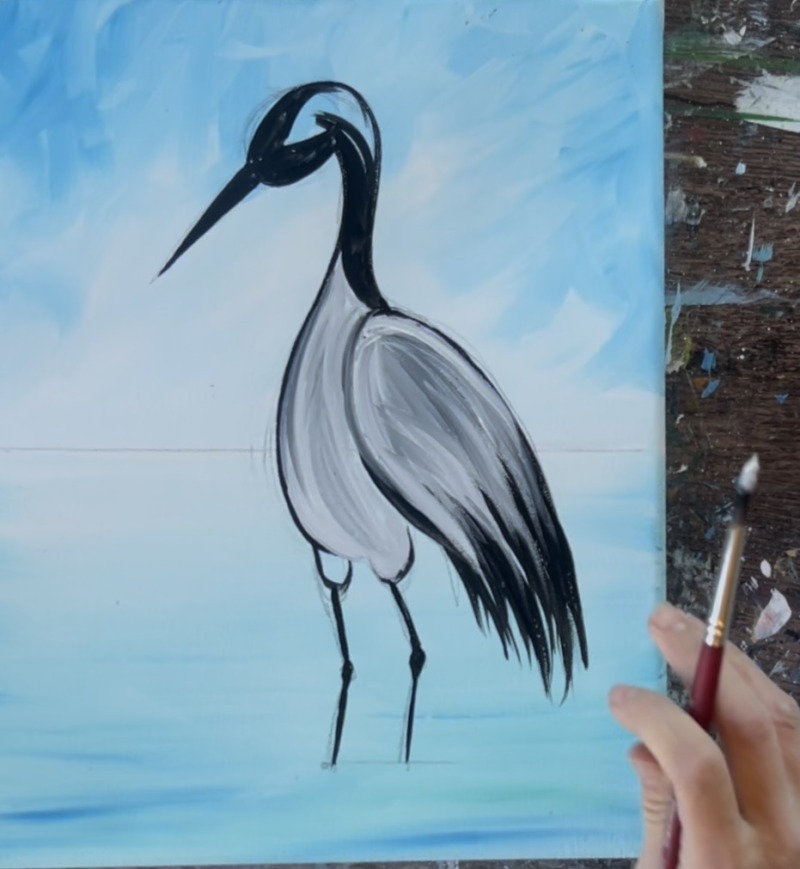
Paint the top part of the head area and back of neck with this gray color and paint the top leg area with gray.
Note: when this gray dries, we will layer on bright white layers of feather which will make the crane look much brighter!
Then paint vertical lines in the water under the crane’s legs. This will represent the reflection of the legs. Do this with dark gray color and the round brush. Paint two simple vertical lines just under the legs where they submerge in the water.
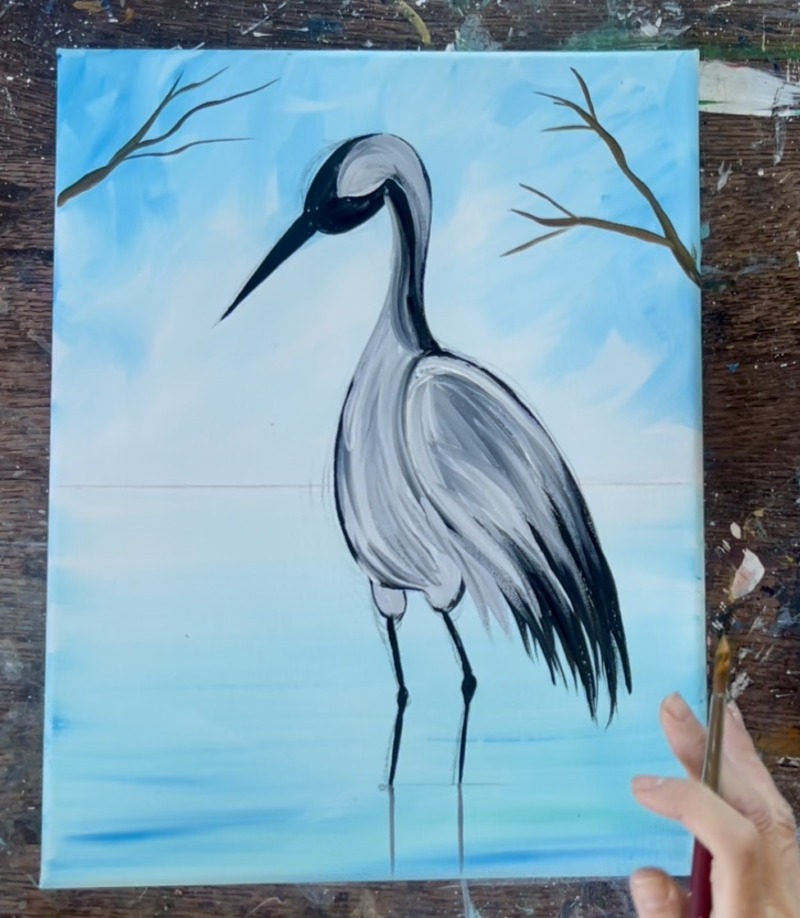
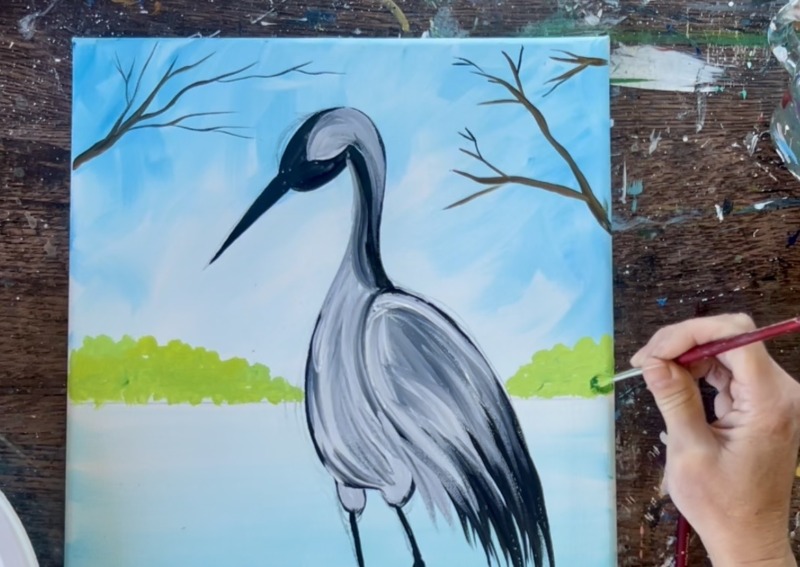
6. Paint Branches & Bushes
Load your paint palette with “raw sienna”. Mix about equal parts of this brown with “mars black” to make a very dark brown. Use the #8 long round brush to paint branches on both sides of the canvas edges. These branches go diagonally upwards but do not touch or go behind the crane.
Then paint bushes along the horizon line at the end of the lake. Mix a light yellow-green color on your paint palette. Mix about 1 part “hooker’s green hue”, 1 part “cadmium yellow medium hue” and 1 part “titanium white”. Use the #4 round brush (this is a smaller round brush) and “dab” or “stipple” the bushes above the horizon line on each side of the crane. These bushes only go up about 1.5″ high and then go lower in the middle.
Then, without rinsing the brush, load it into just “hooker’s green hue”. Dab this darker green on the bottom of the bushy area to darken it.
Add just a tiny dot of “mars black” to the brush and dab darker marks just along the bottom of the bushes for more shadowing. Then rinse the brush. Load it into “titanium white” and dab little bits of white just at the top of the bushes. Let it blend with the green. This will highlight the top of the bushes.
Paint reflections of the bushes in the water. Use the #12 bright brush (or 3/4″ flat brush). Load the brush into the dark green color (mix a little black with green). Then wipe the brush so only a small amount of paint is left on the brush. Drag the brush down in vertical strokes. It should look very thin and translucent. Make some marks that are longer, some shorter.

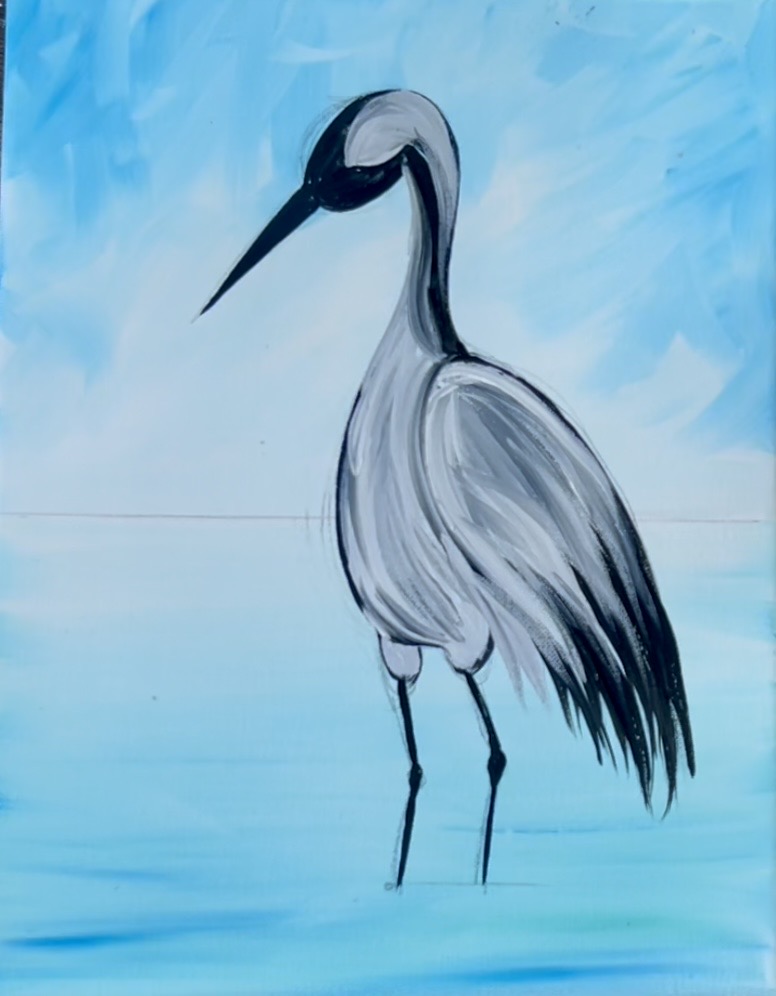
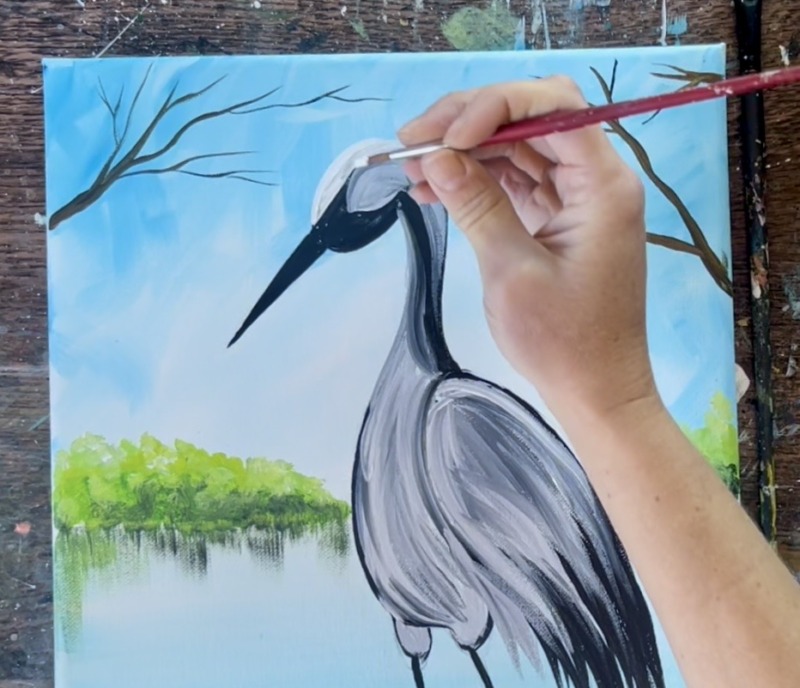
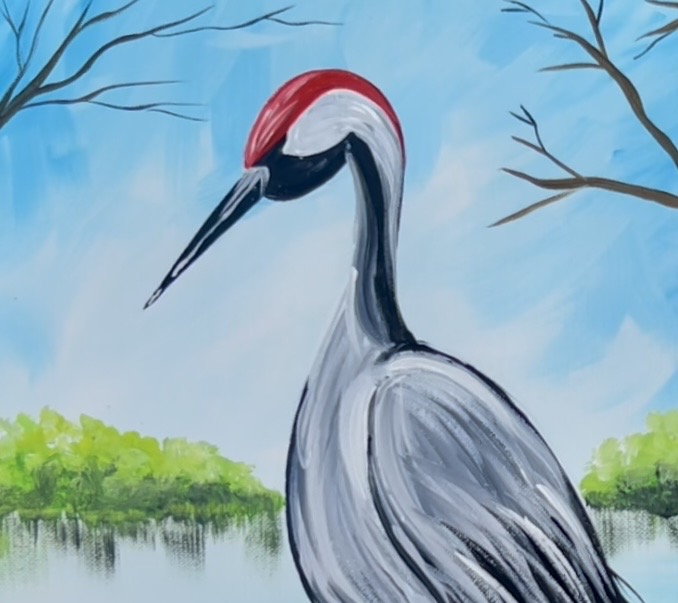
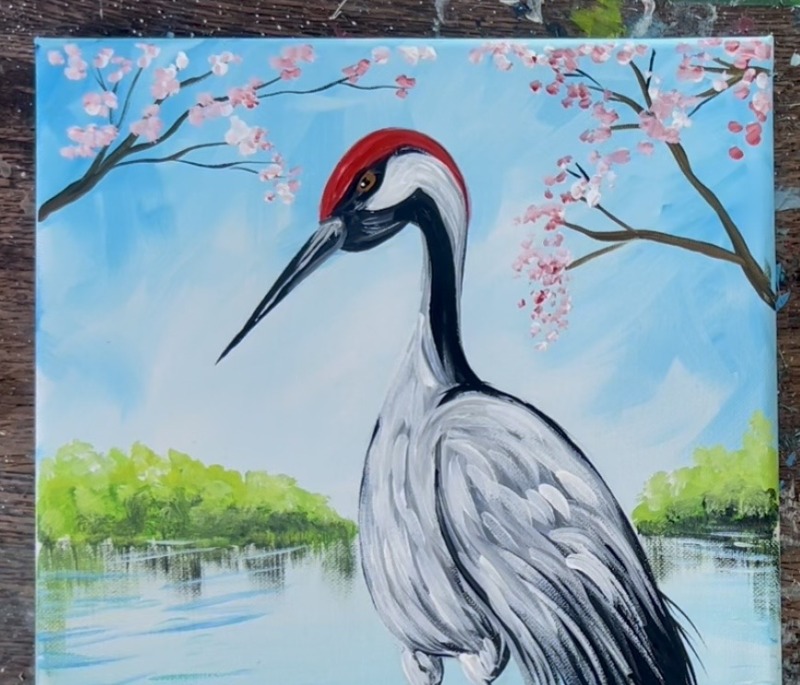
7. Paint White Areas/ Detail Work On Crane
Use the #4 round brush and “titanium white”. You are going to “white out” the area where the crane’s red crown will be so the red will show up bright. Paint a sore of “banana shape” on the top of the head starting at the top of the beak and curving to the back of the upper neck.
Then add some more detail in the beak and feathers. Use the #8 long round brush to paint a line down the middle of the beak. Then paint a little “notch” on the right of the beak to create the start of the beak/ where the beak attaches to the head. Additionally, use the #8 long round brush to paint thin, pointed white feathers that overlap the black feathers on the bottom of the side wing.

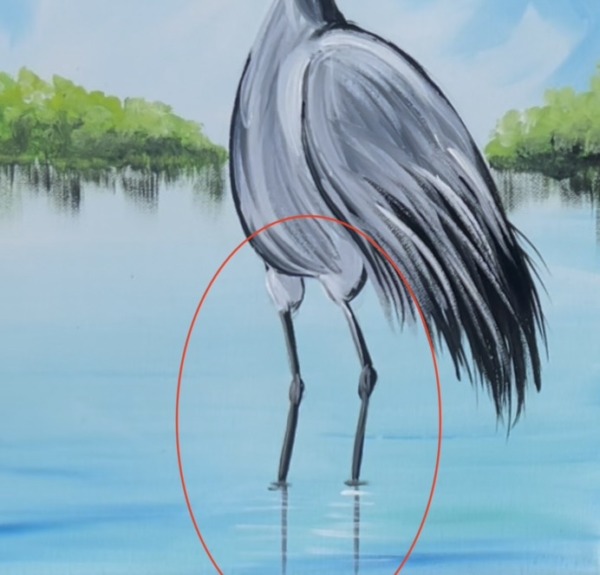
Then paint a second coat of paint on the legs by using titanium white mixed with a little black (to make a medium gray). Paint the left side of each of the legs but leave the right side white. Use this gray to paint two small horizontal lines at the point where the legs submerge in the water.
Rinse the brush. Then add a few white, thin horizontal lines that overlap the vertical reflections on the water on the bottom.
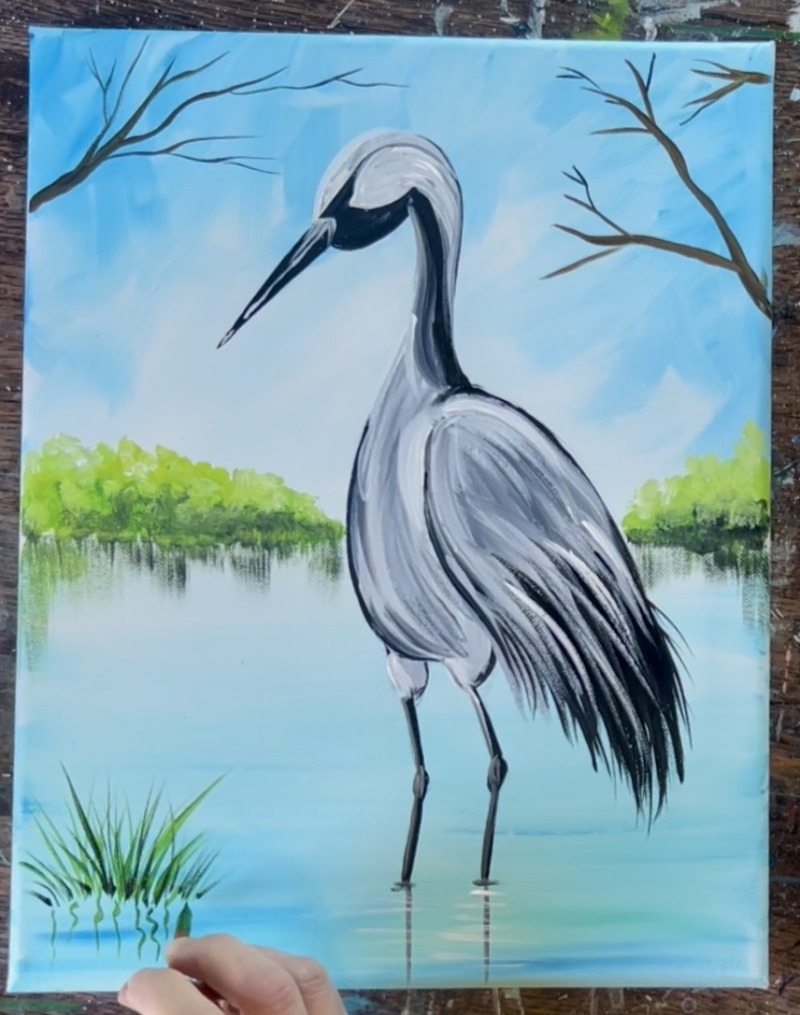
8. Paint Grass
Mix your “base color” for the grass. This is about 2 parts “hooker’s green hue”, 1 part “raw sienna” and 1 part “cadmium yellow medium hue”. Use a #8 long round brush and add just a tiny bit of water into that color on the palette to thin it down.
Paint little grass blades sticking out of the water on the lower left of the painting. These are little diagonal/ curved lines and are very thin. Use just the tip of the bristles to paint these lines.
Add a tiny bit of black to the green “base color” and paint a few more grass blades in that area. Then start painting the reflections under the grass. These are simple “wiggle” lines that go vertically directly under the grass. Use the same colors as the grass blades (you don’t need to lighten or thin the color down).
Continue to add more layering to the grass and more reflections. Use a variety of light and dark in your colors.
9. Paint Red Crown
Use the #4 round brush and “cadmium red medium hue”. Paint red on the top curved “banana” shape where you painted it white earlier. You can also add a few white highlight/ texture lines on the red on this area.
Then add more bright white feather details on the side wing, front area, upper part of the legs as well as the side of the head. This second coat of white should really brighten the bird up. You can paint little feather paint strokes by making your little curve marks thicker. Don’t cover up all of your previous layers, the gray/ black lines help to create depth on the bird.
10. Water Reflection Lines
Use either of the round brushes for this step. Make sure the grass line reflections are dry. Then use the round brush and “primary blue” mixed with a little “titanium white” and paint little horizontal lines that overlap the vertical grass reflections. Make these lines very loose! Some go completely horizontal and some are a little more zig-zagged.
Then continue to paint more water lines throughout the lake. Paint lines in the back of the lake that overlap your vertical “bush reflections”. These lines in the back should be “dense” and closer together because they are further away. Paint a few more loose lines in the middle of the lake. Alter your color a bit by adding “aqua” to some of the lines and white to others. Then paint some darker little horizontal line reflections that overlap the vertical lines of the legs reflecting in the water.
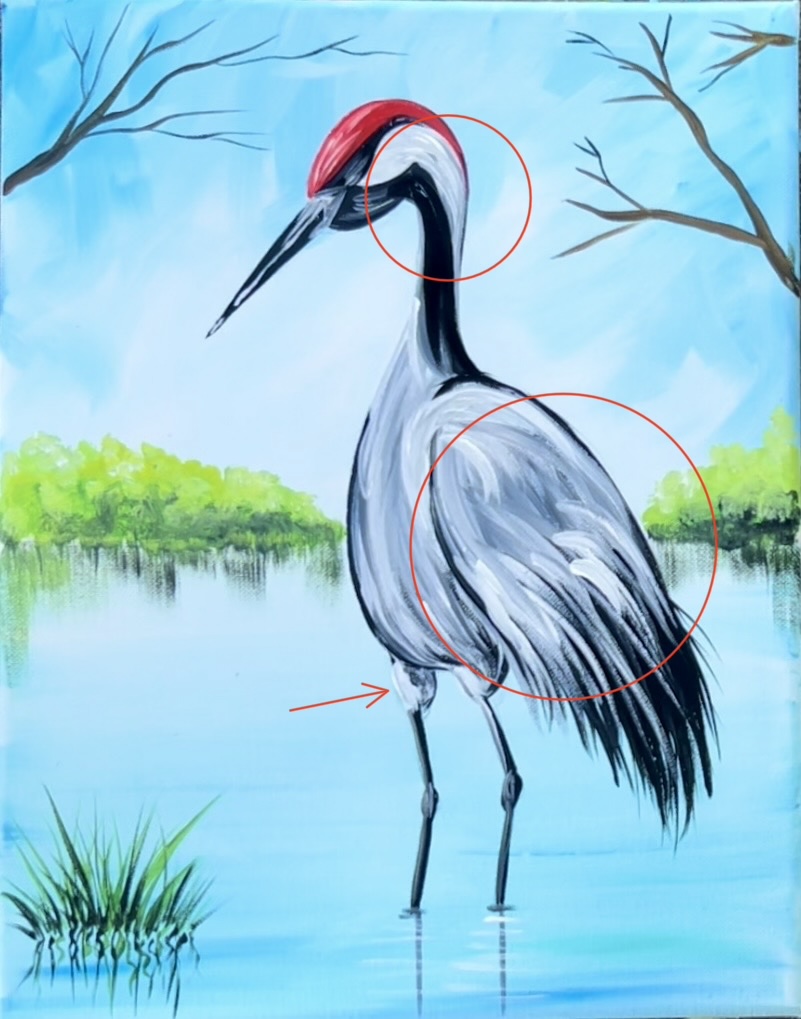
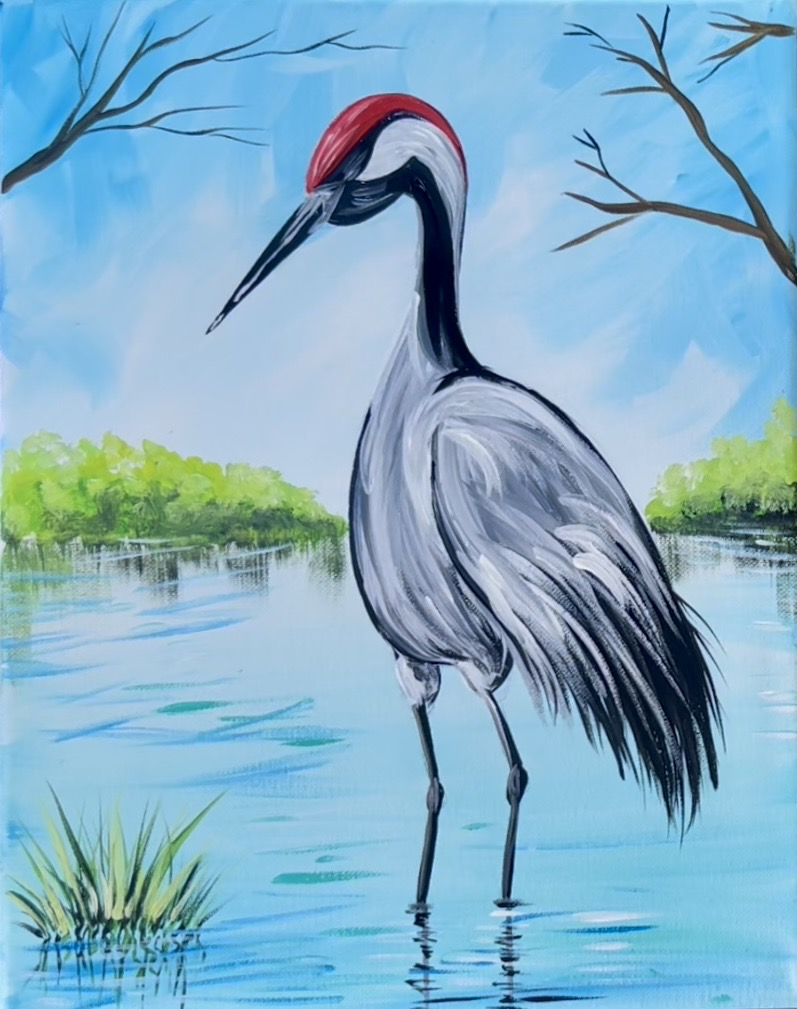
11. More White Feather Details
Add even more white feather details using the #4 round brush. This is the final layer of feathers, also bright white and this also adds brighter depth to the bird’s feathers. Do this on the side wing and front chest area.
12. Paint Eye
Use “raw sienna” mixed with just a tiny bit of white to paint an oval for the eye. This eye is on the black area between the red and white coloring on the head. Wipe the brush and then load it into “mars black”. Paint a little black oval inside of this oval for the pupil of the eye (you can also do this tiny detail with a toothpick).

Next, paint just a very tiny white dot inside of the black oval for a highlight.

13. Paint Cherry Blossoms
Use the #4 round brush to paint cherry blossoms on the branches. Mix “cadmium red medium” with “titanium white”. You want your proportion of white to be very high and only add a tiny bit of red into it in order to make a pink color. “Dab” the brush to create the little blossoms on the ends of the branches.
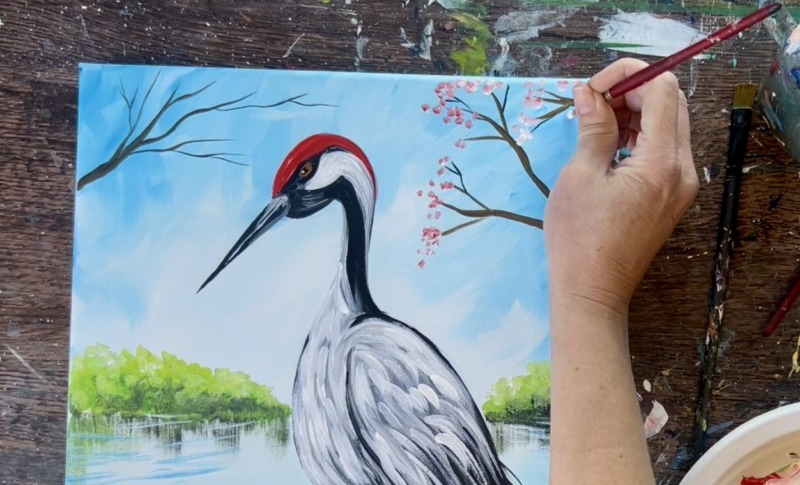
Make a variety of darks and lights in these blossoms by varying the amount of red you add into the color.
Add pink reflection into the water! Use the #12 bright brush and load it into the same color used for the blossoms. Wipe the brush off so only a small amount of paint is left on the brush. “Dry brush” the color using vertical paint strokes in some of the middle areas of the lake (below the bush reflections). This adds a pretty pop of pink color reflection on the lake! After doing the pink reflections, you can paint more water lines overlapping that color.
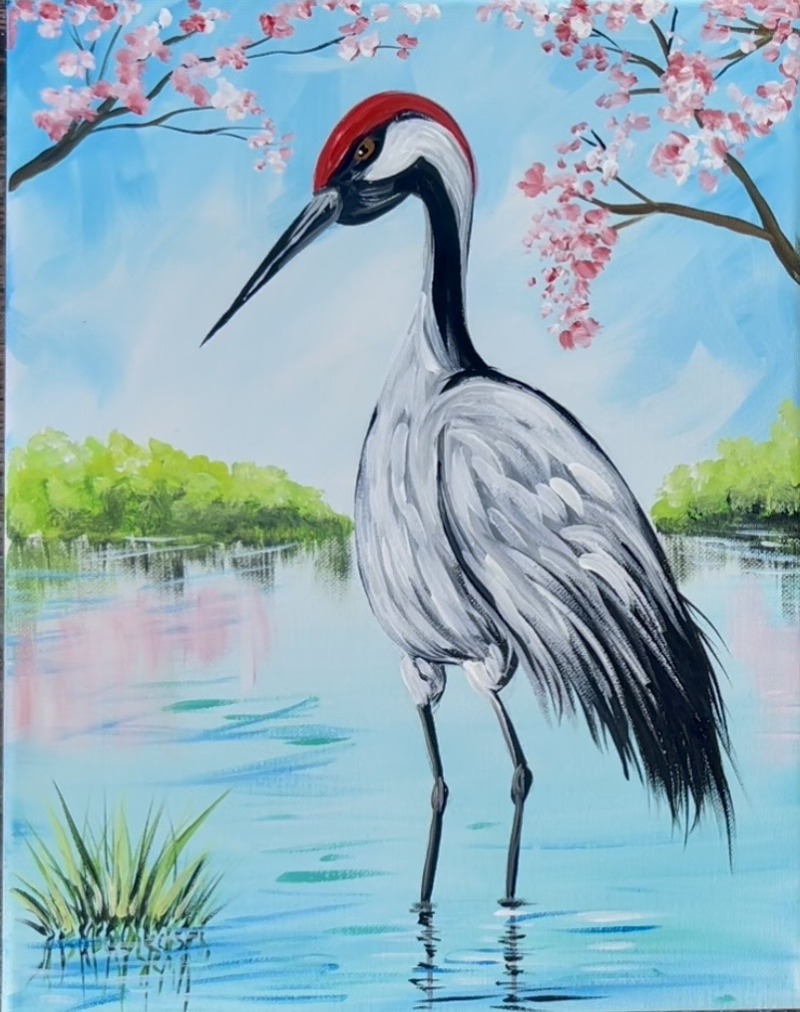
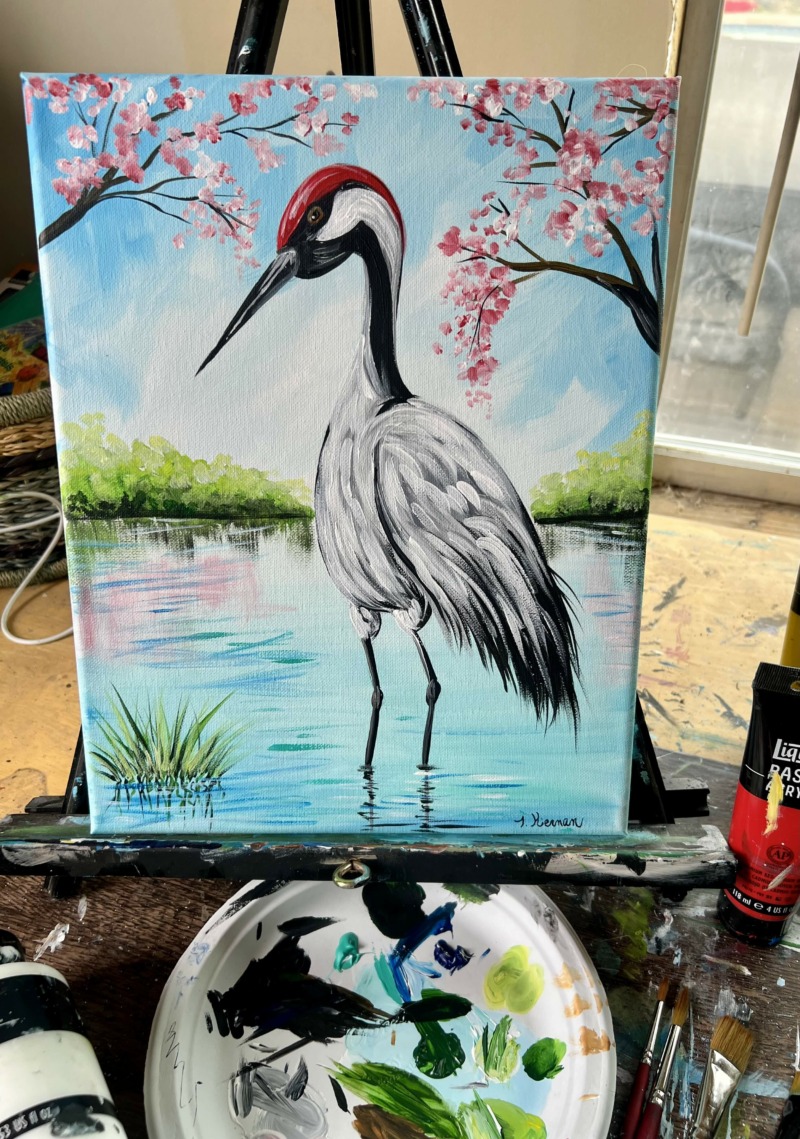
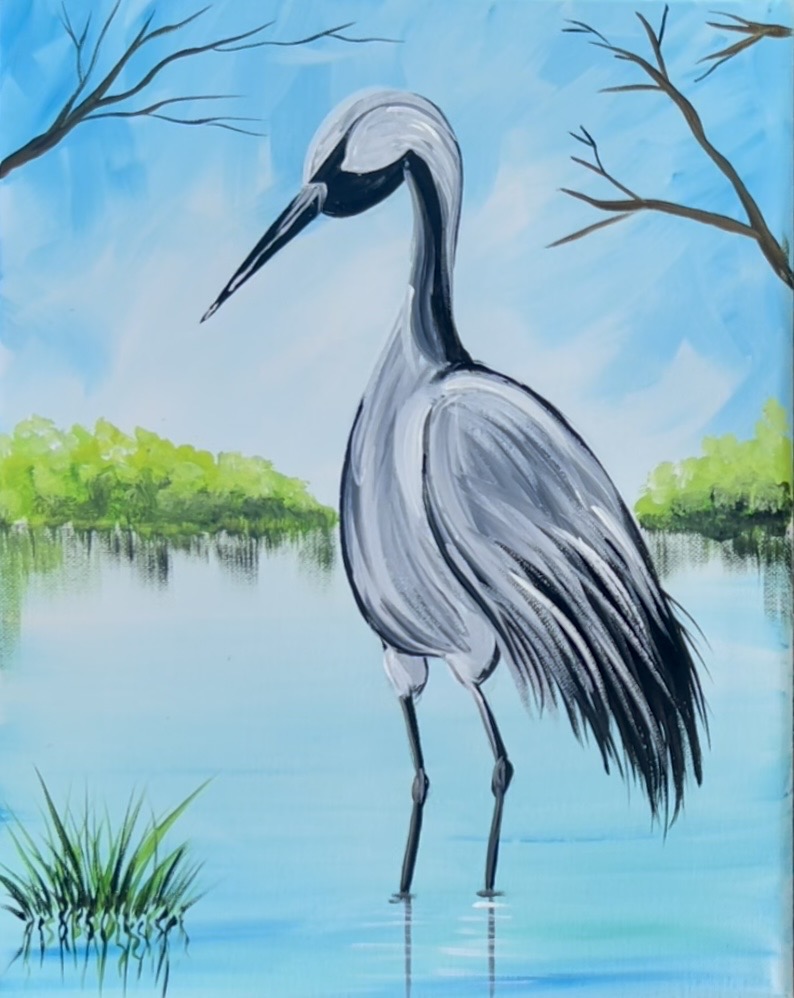
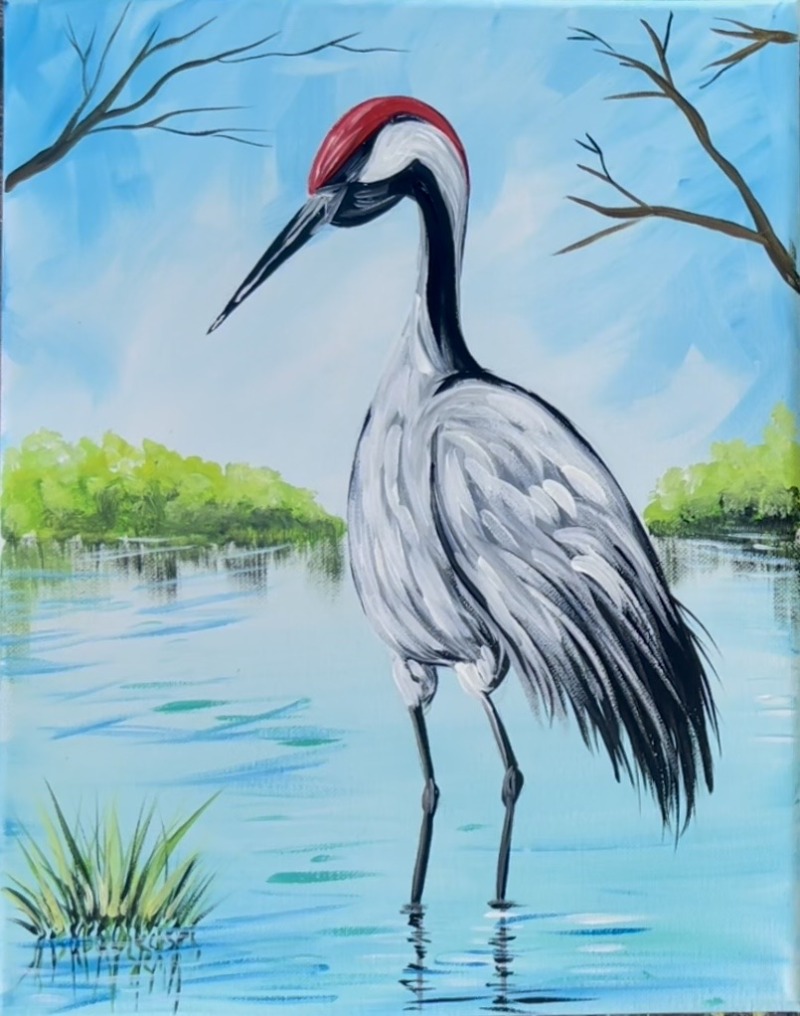
Finished!
Sign your name and show it off!