

Would you like to save this?
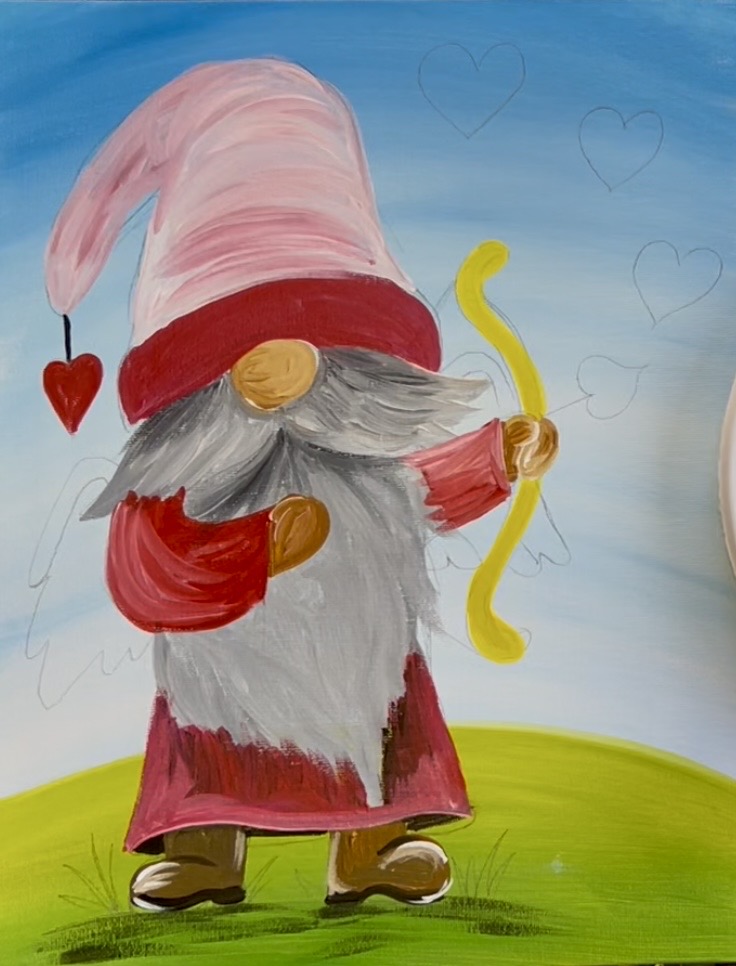
This beginner-friendly acrylic painting tutorial walks you step by step through creating an adorable Valentine gnome filled with hearts and charm. You’ll learn simple brush techniques, easy blending, and how to add soft details, with an optional traceable template included to make the process relaxing and approachable for all skill levels.
Enjoy and happy painting!
Materials Needed:
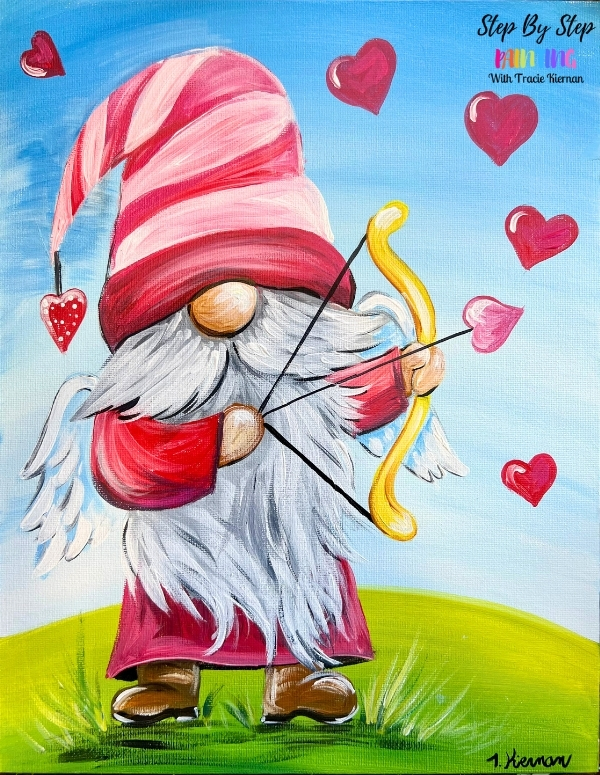
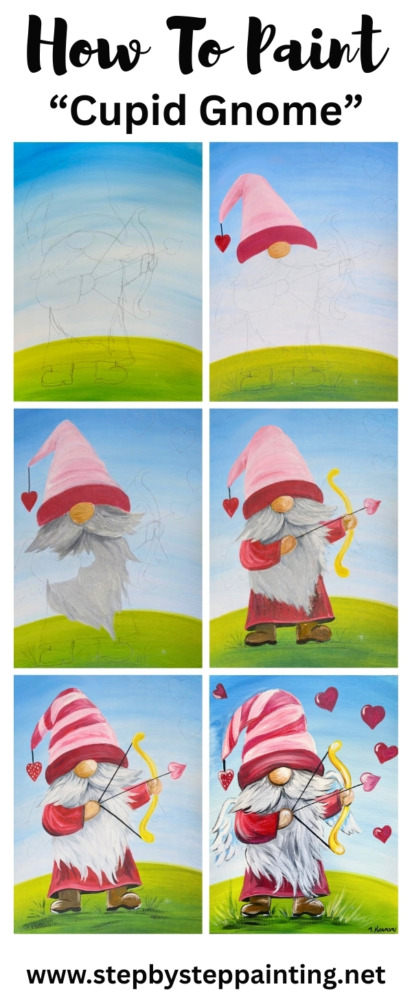
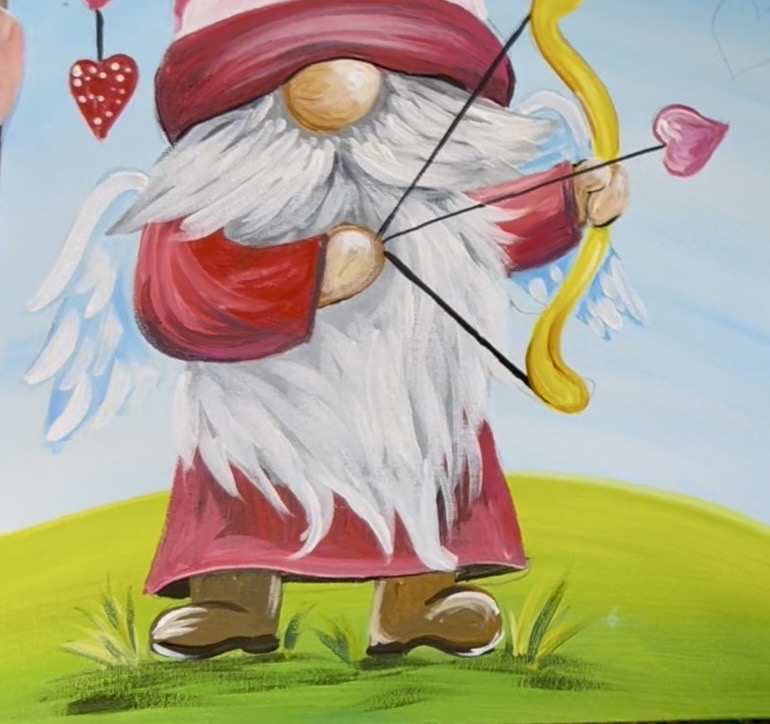
How To Paint A "Cupid Gnome" - Acrylic Painting Tutorial
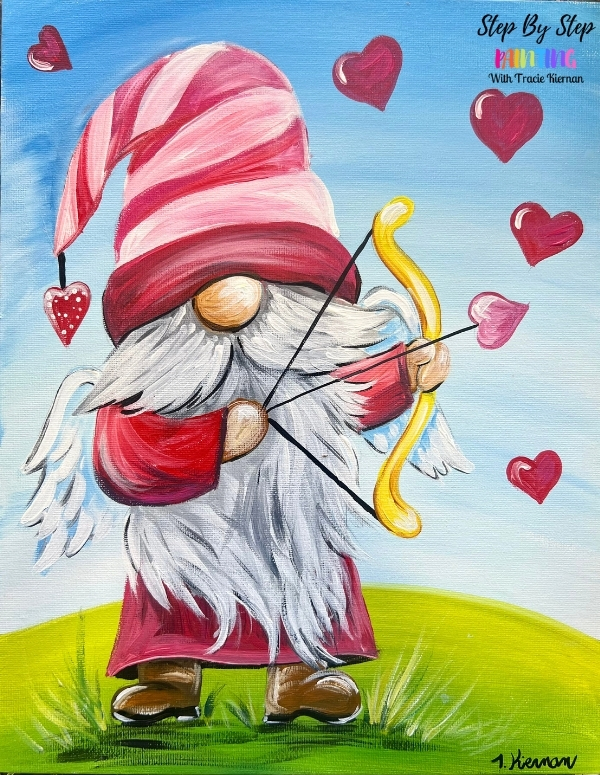
Learn how to paint a cupid gnome with acrylics on canvas.
Materials
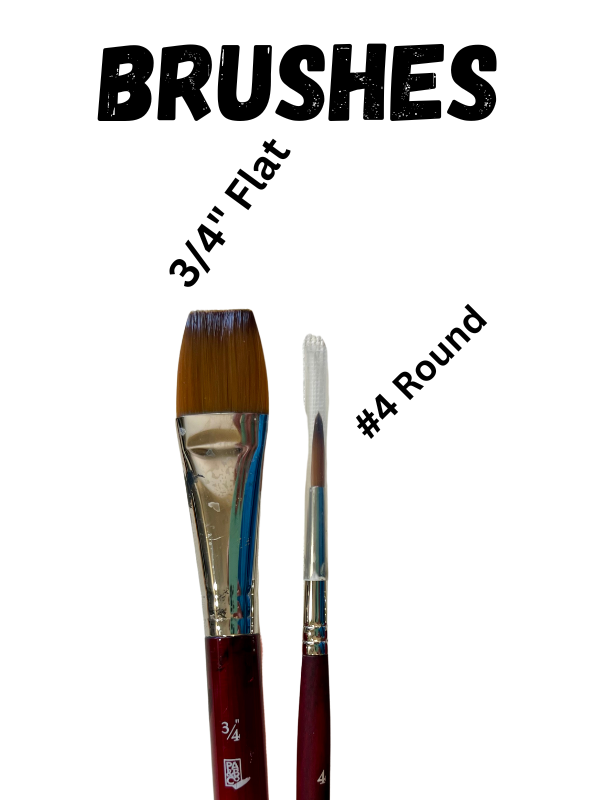
- 11 x 14 Canvas (or any size)
- Pencil
- Optional Traceable
- Optional Graphite Paper
- Paint Brushes (see sizes below)
- Acrylic Paints (I use Liquitex BASICS)
- Ruler
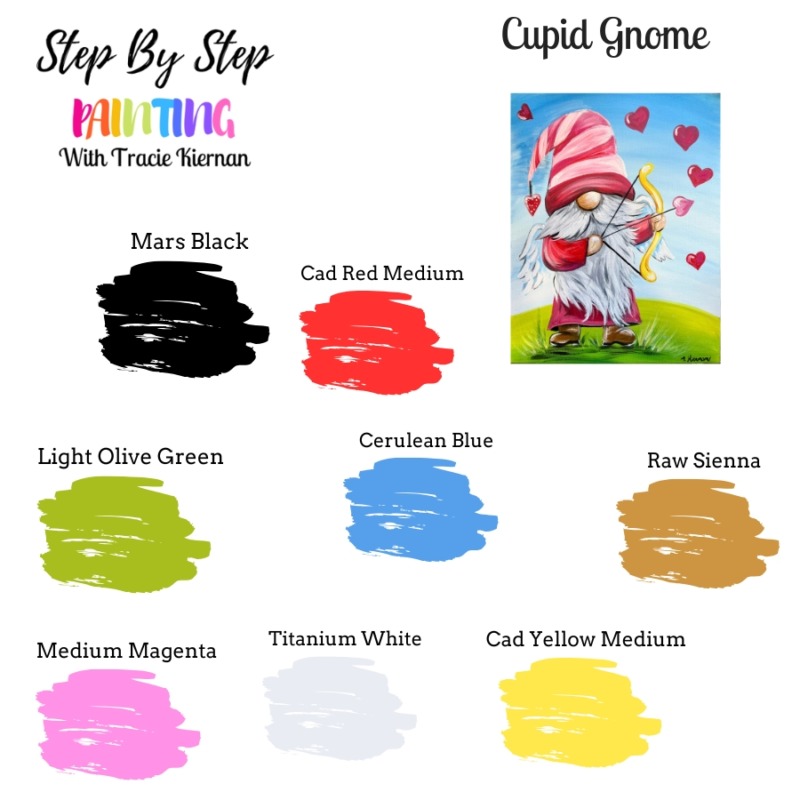
Paint Colors
- Titanium White
- Mars Black
- Cerulean Blue
- Light Olive Green
- Cadmium Red Medium Hue
- Medium Magenta
- Raw Sienna
- Cadmium Yellow Medium Hue
Brushes
How to download this tutorial:
You can find my $5 tutorial downloads in my online digital shop! This download includes PDF ad-free instructions, video download and bonus sized traceables (sized for other canvas sizes). Find out more here.

Color Palette
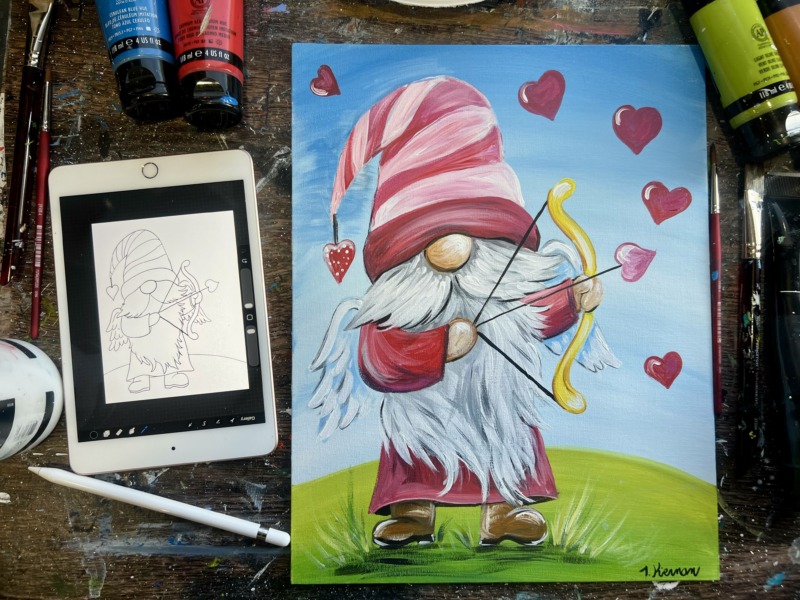
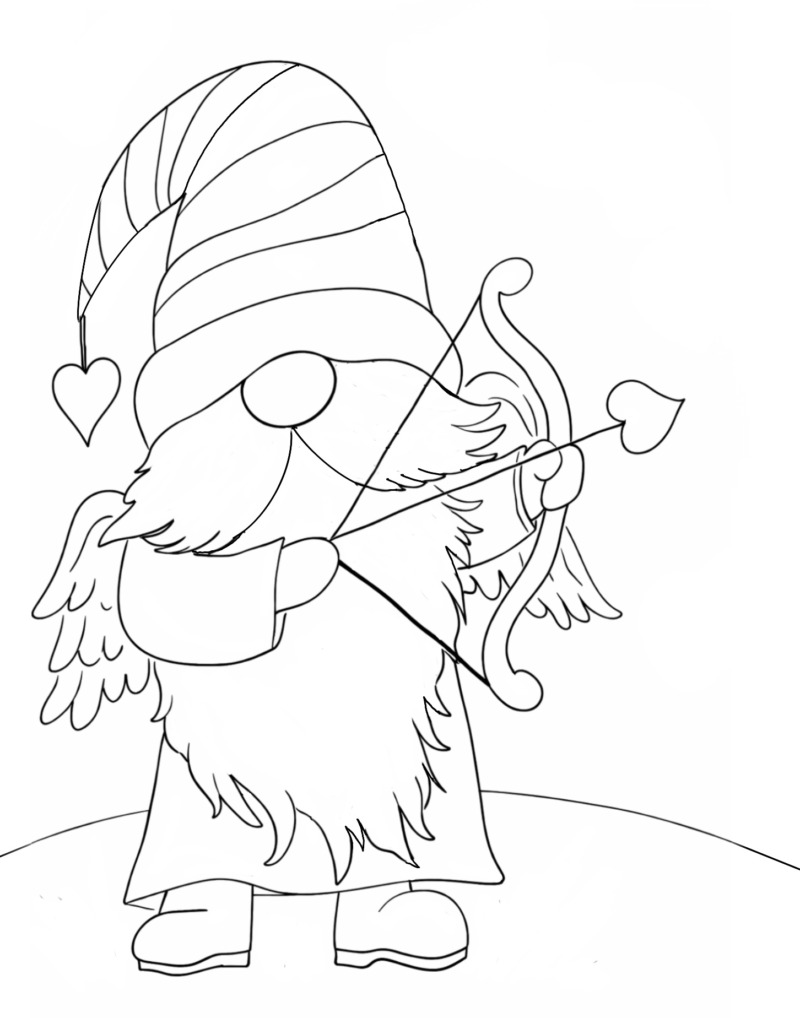
Optional Traceable:
This traceable can be printed out and traced onto an 11 x 14 canvas. You can trace onto a blank white canvas and then outline with sharpie so the lines show through the first background layer of paint. Alternatively, you can paint the background and then trace onto the canvas. I recommend dark graphite paper for tracing.
Directions At A Glance:
Video:
Step By Step Instructions
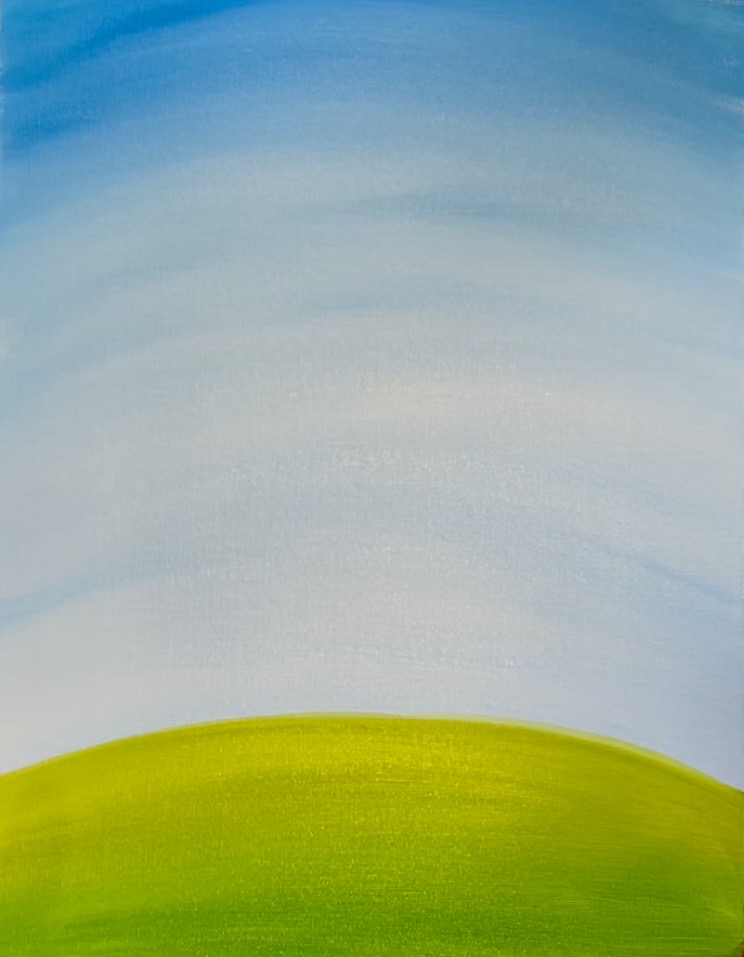
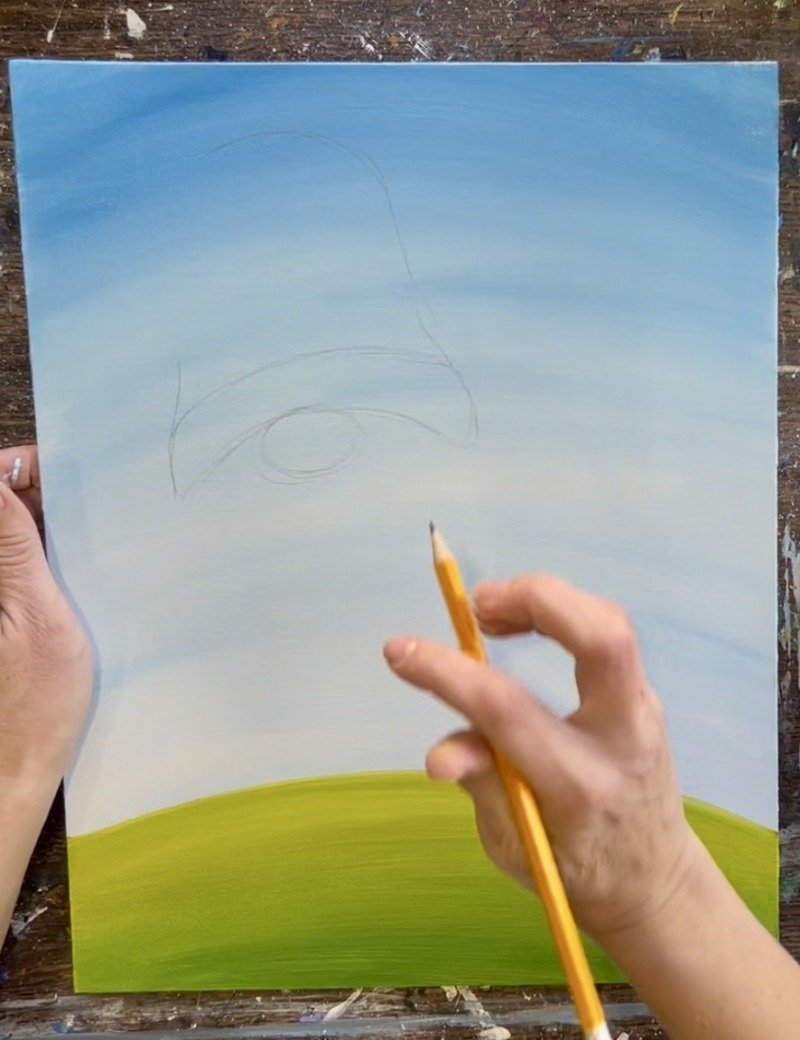
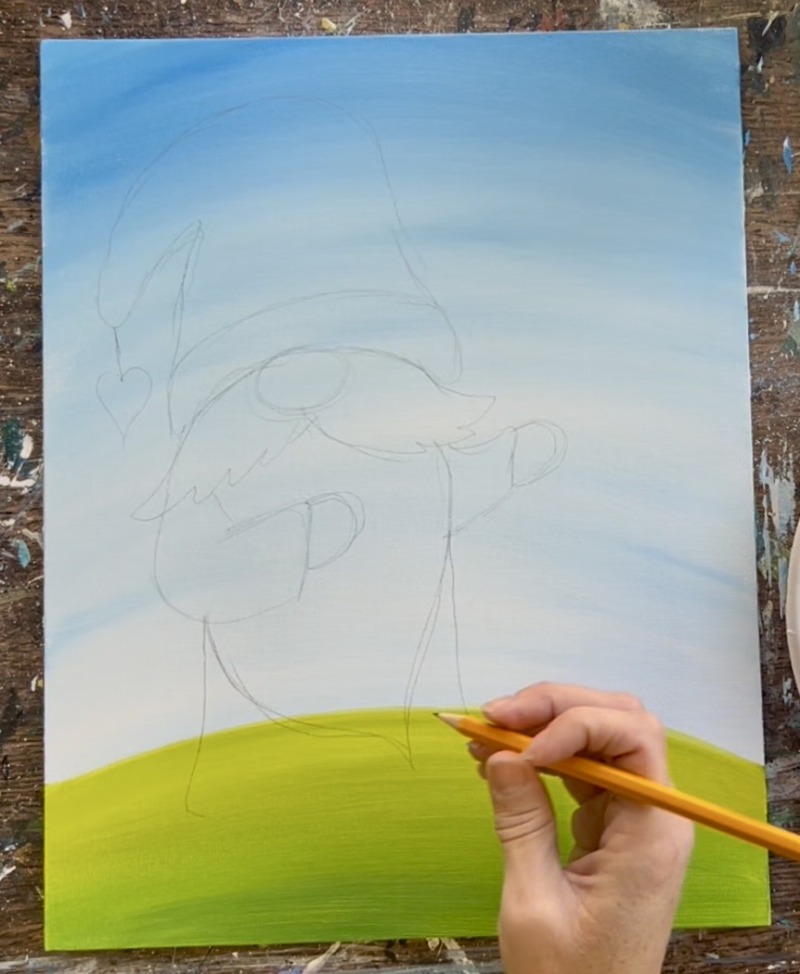
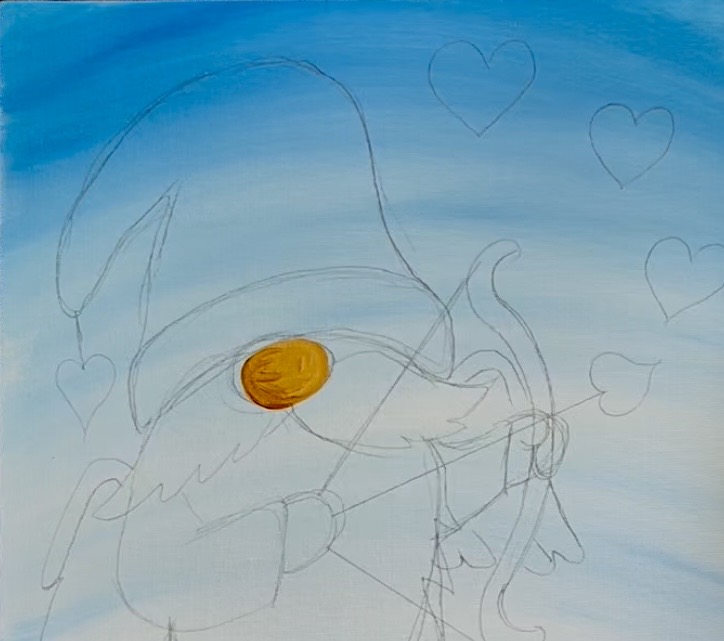
1. Paint Sky & Ground
First use a pencil to lightly draw a hill line. I didn’t measure mine. Just estimate about 3-4″ from the bottom of the canvas and draw a slightly curved line.
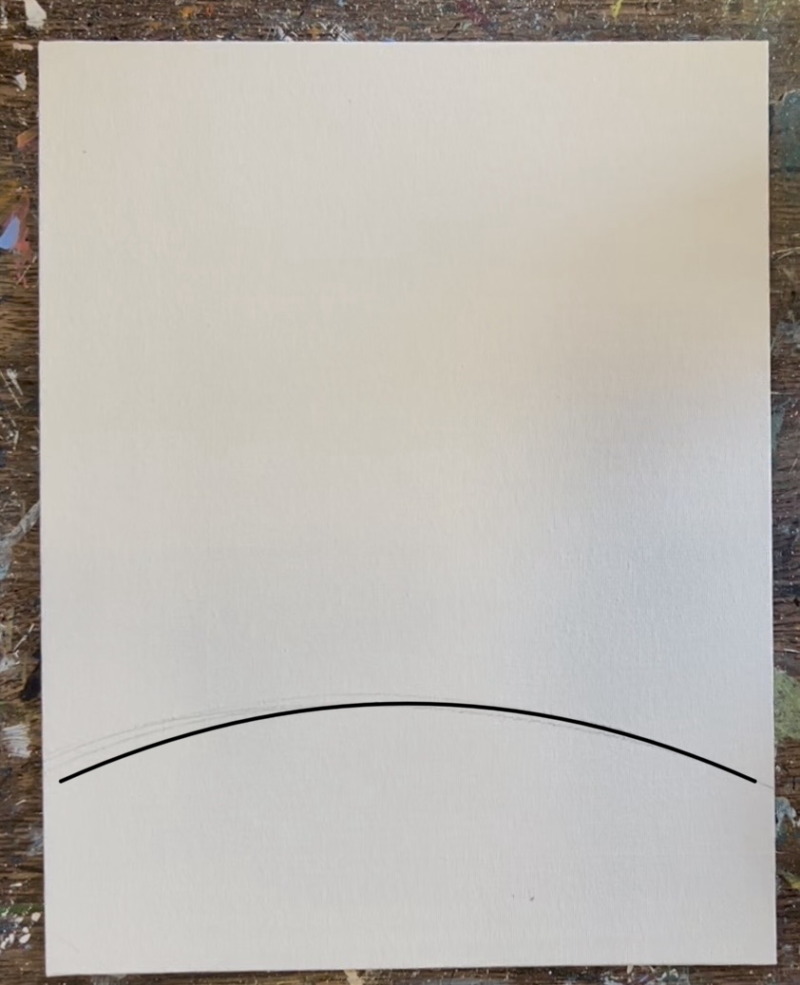
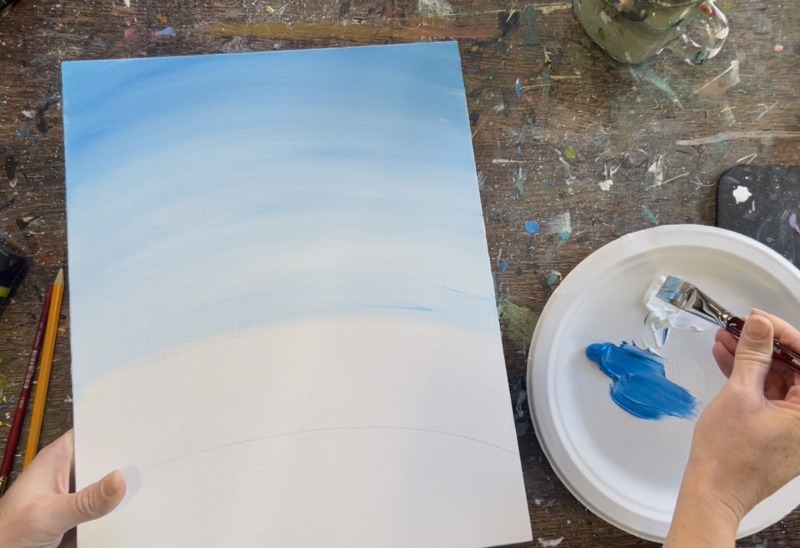
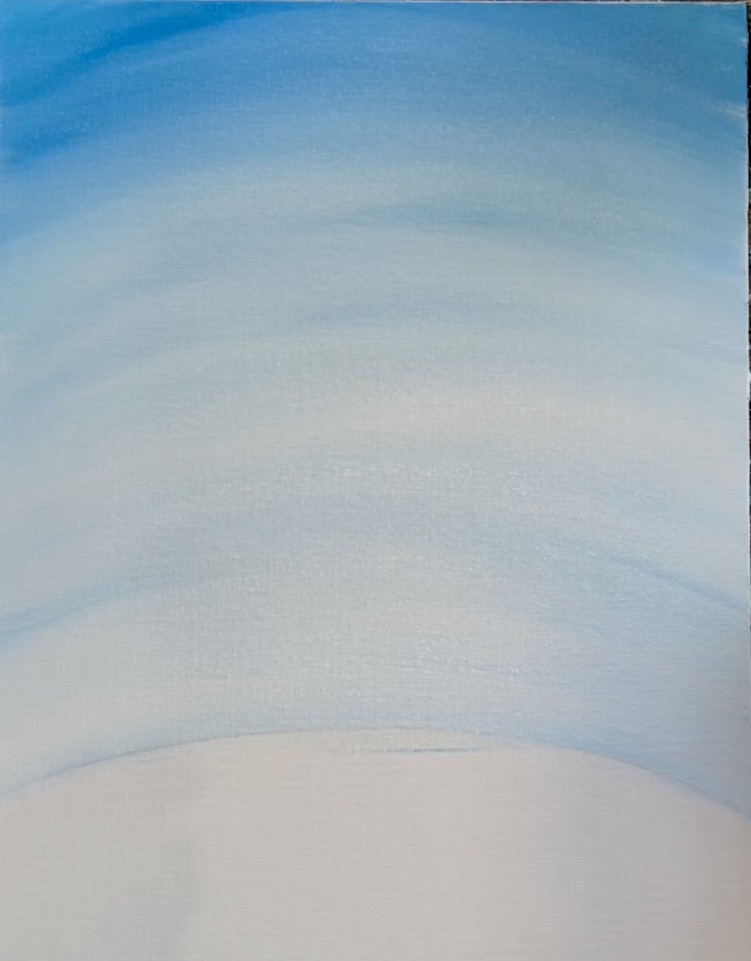
Load your paint palette with the two colors: “cerulean blue” and “titanium white”. Use a 3/4″ flat wash brush to mix equal parts both of those colors together. Start at the top and paint large, curved paint strokes that go parallel to the hill line you drew.
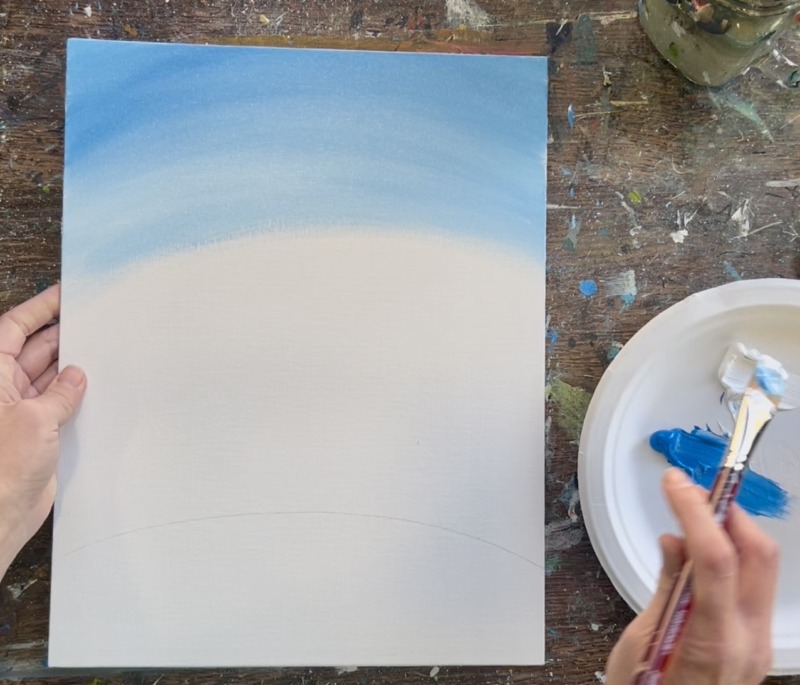
As you paint the sky and work your way downwards, add more “titanium white” to the brush and blend up into the darker blue in the sky. You want a gradient of dark at the top and light on the bottom. Make the sky very light, especially in the middle and bottom!
Next, rinse the brush. Load the color “light olive green” onto your paint palette. Use the 3/4″ flat brush to paint the top of the hill.
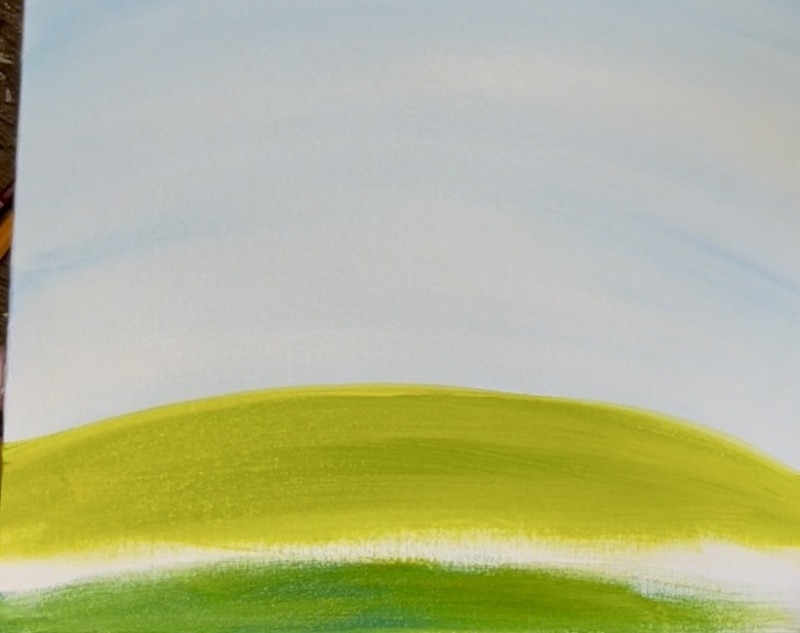
Then mix the “light olive green” with “cerulean blue” on your paint palette. This will darken the green. Paint this darker green on the bottom of the canvas and blend it up into the lighter part of the hill. Create a gradient of light to dark green. This creates a little bit of “perspective” in the hill.
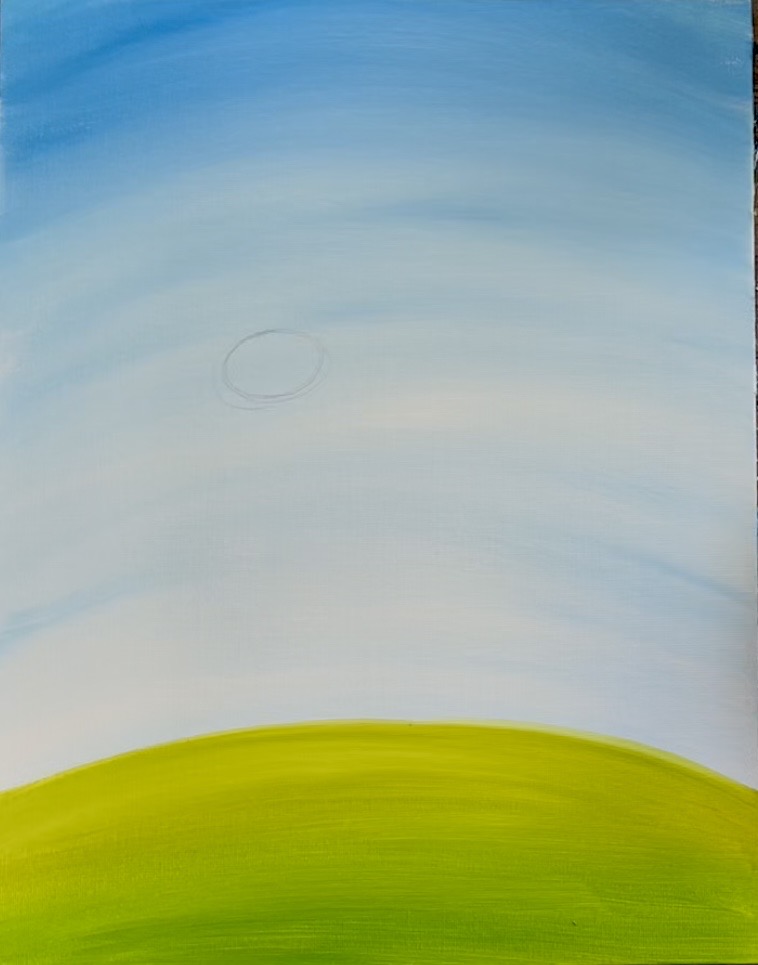
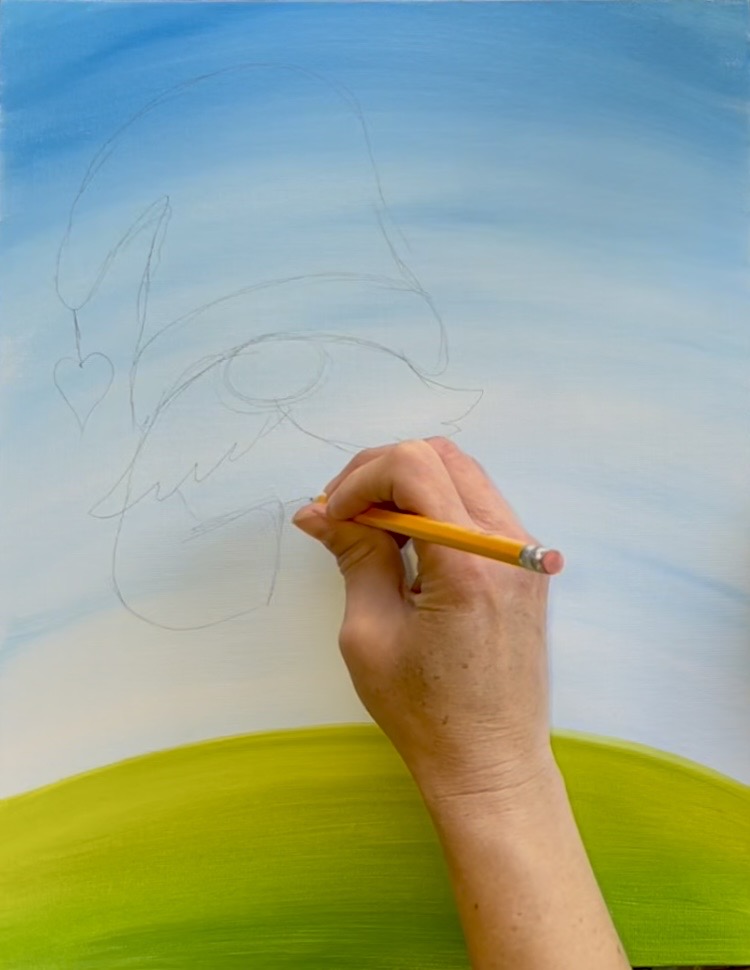
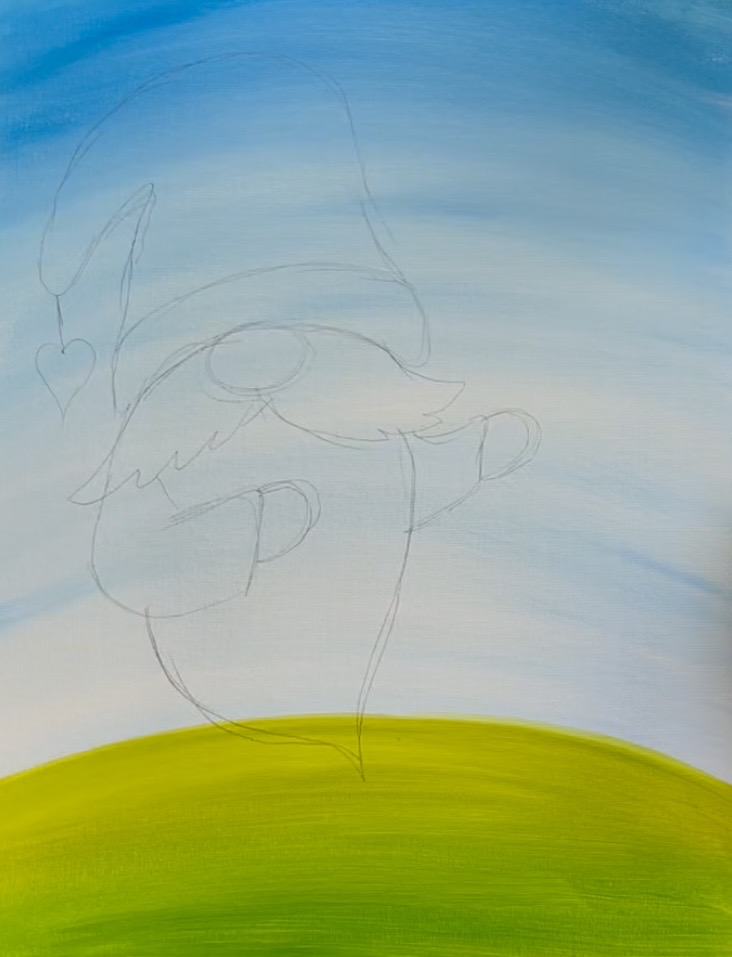
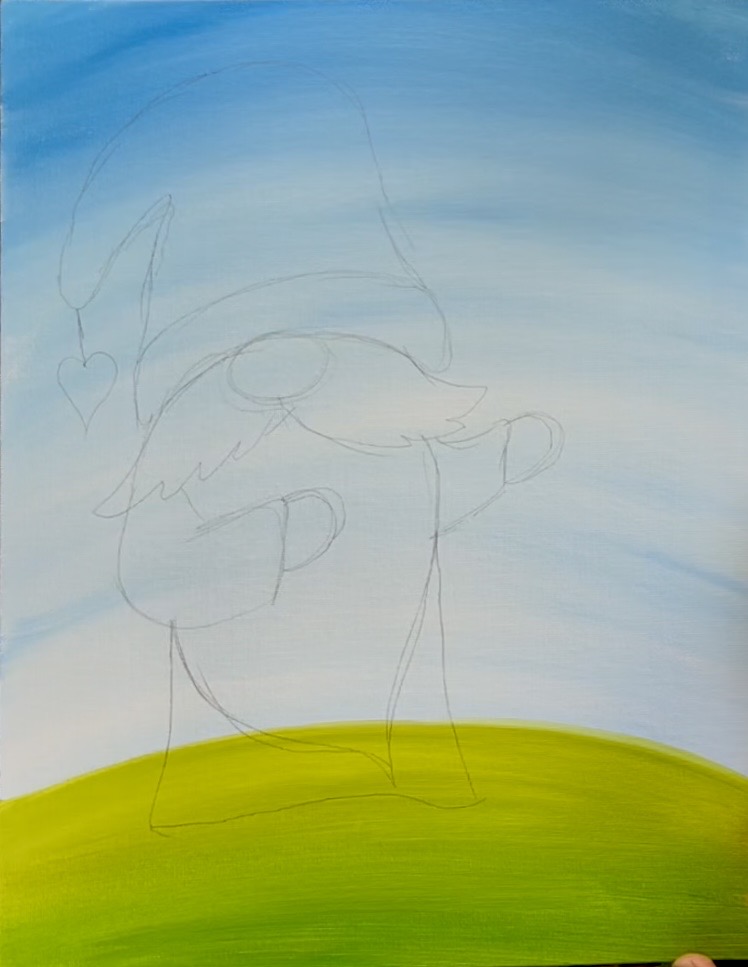
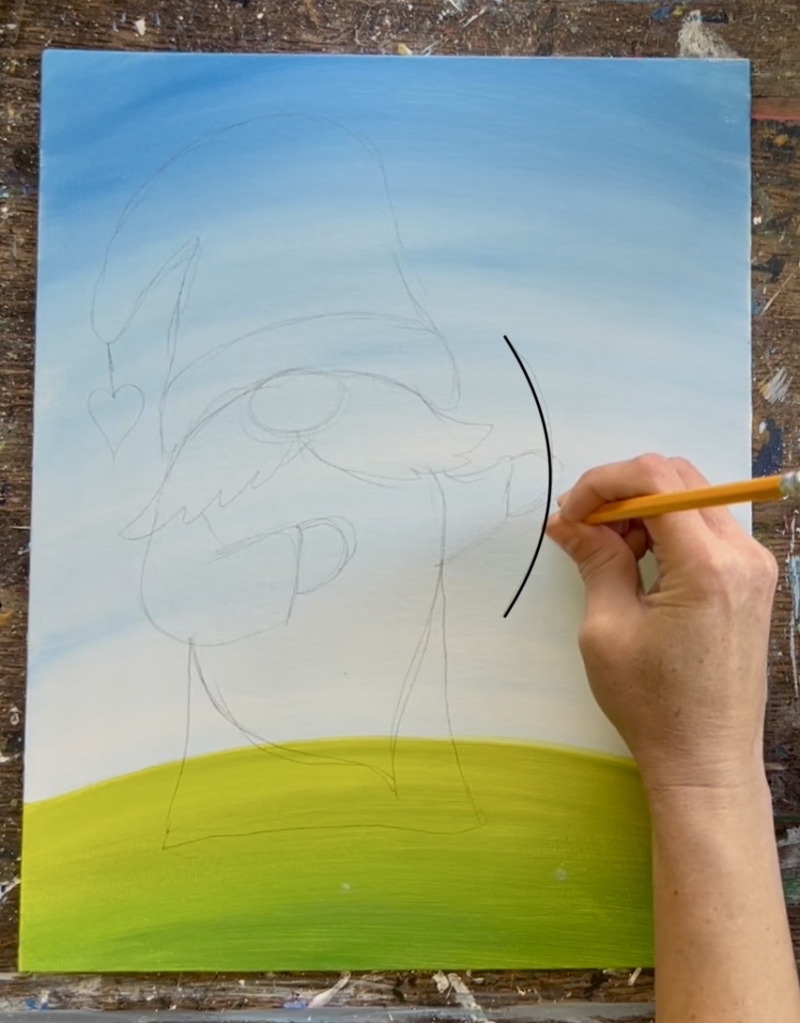
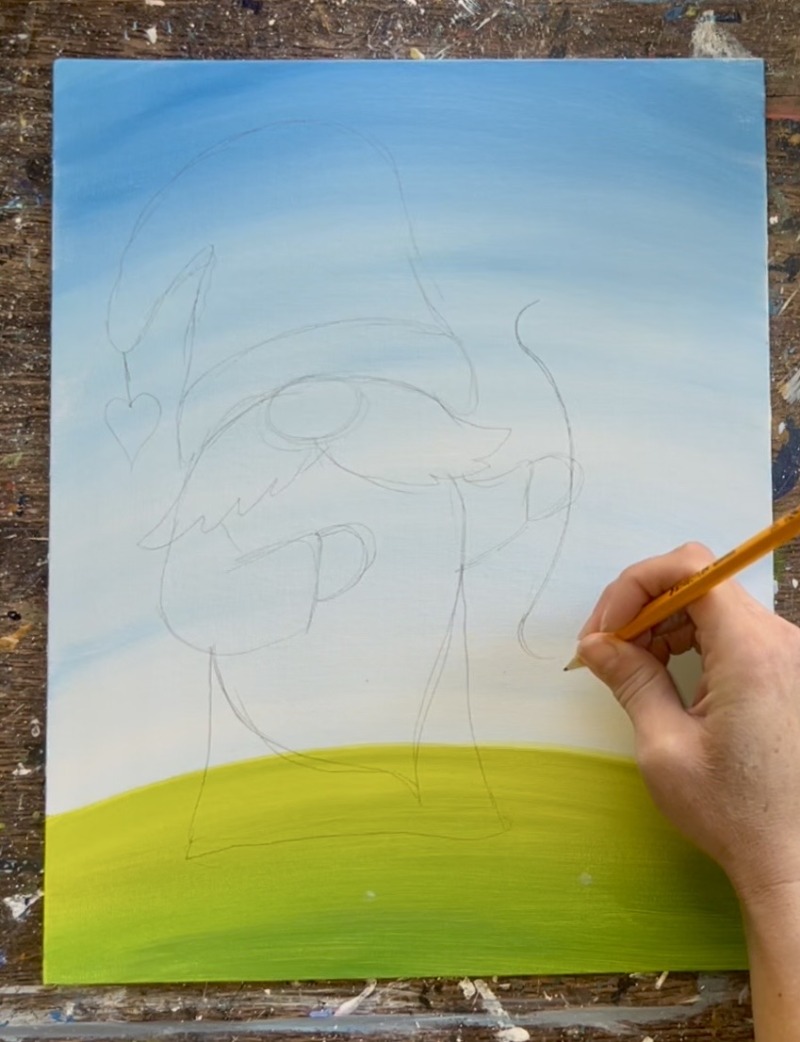
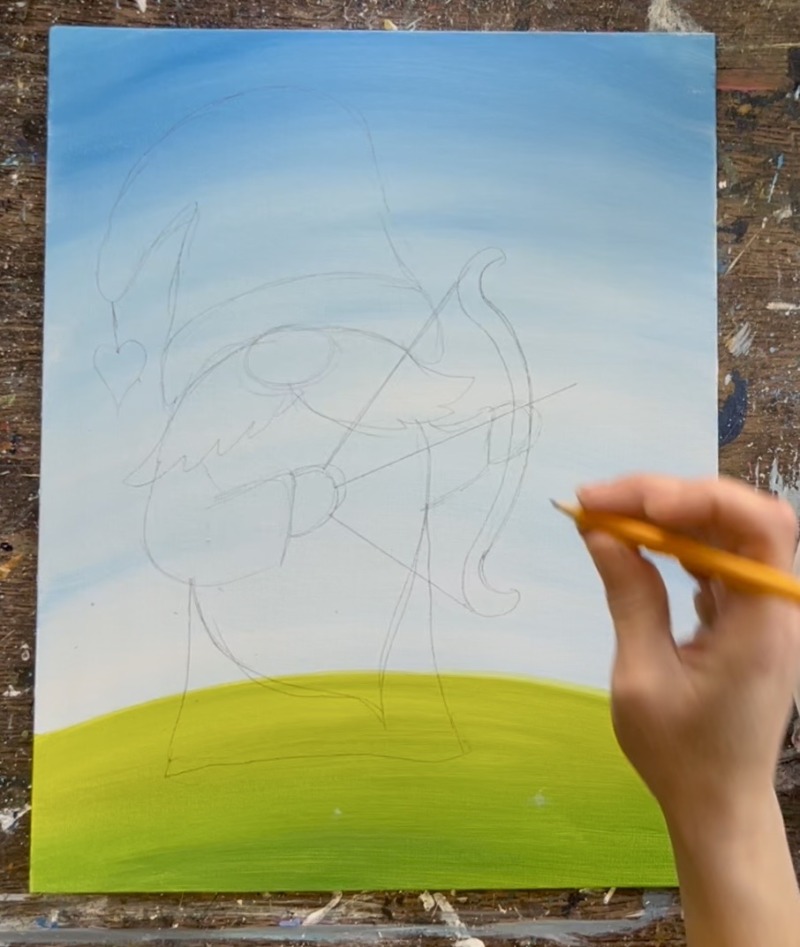
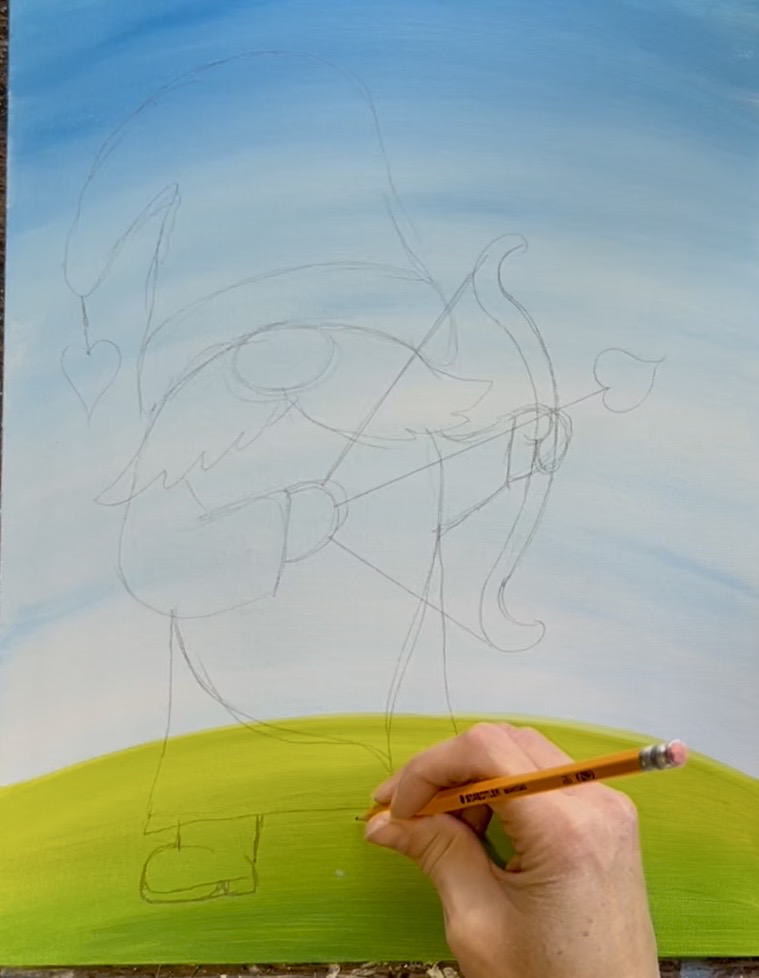
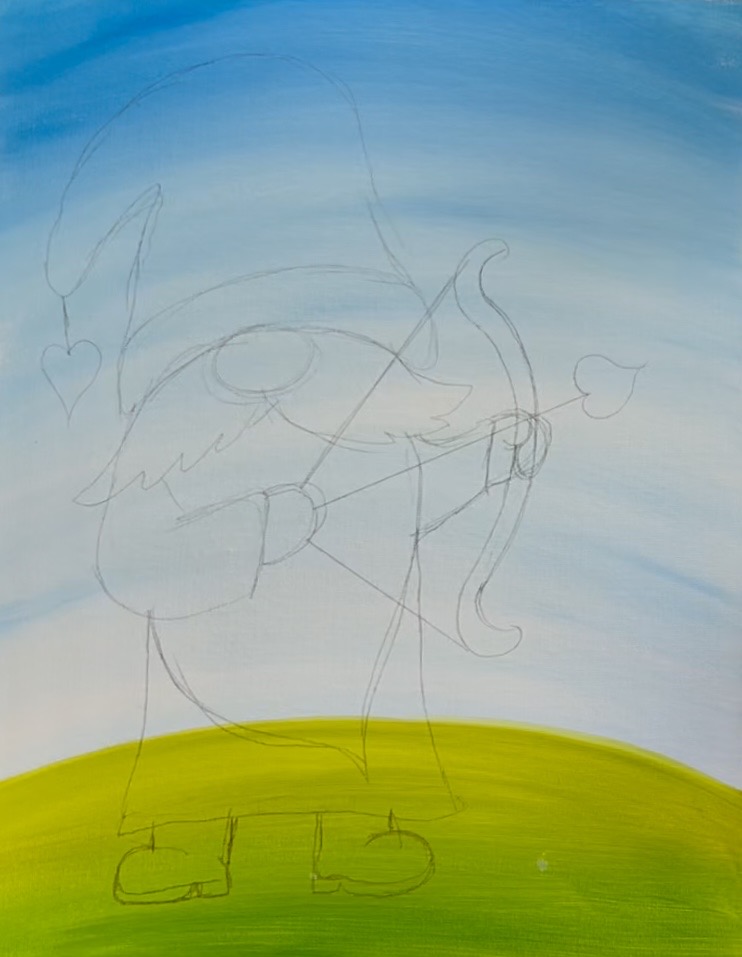
2. Draw Gnome or Transfer Tracer To Canvas
If you are using the tracer, place a sheet of graphite paper below and trace onto the canvas. You can also hand draw this gnome! Follow instructions below:
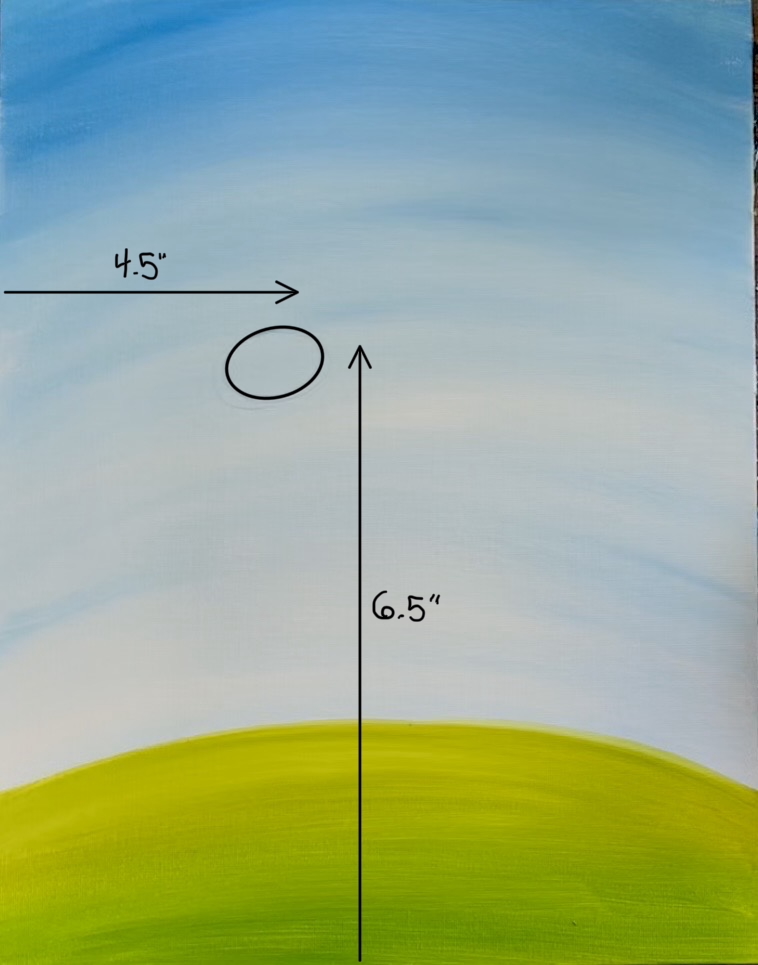
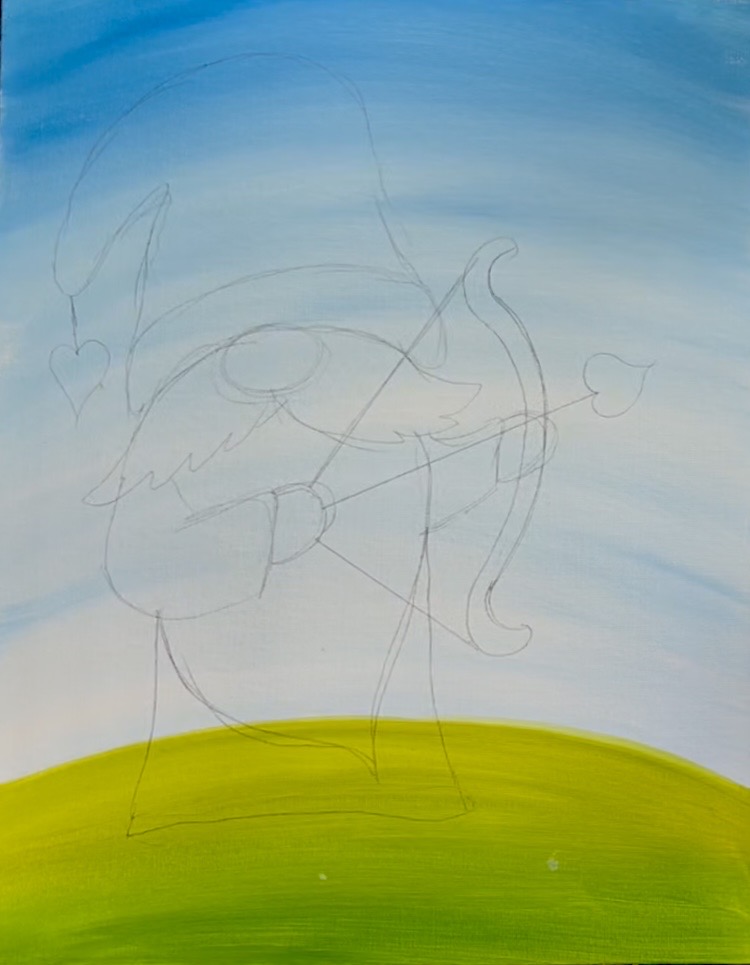
- Draw the nose of the gnome. This is an oval that is about 1.5″ wide by 1″ high (does not have to be exact). The oval is slightly going diagonal (because the gnome will be slightly tilting head to the left. The placement of this oval is about 6.5″ from bottom edge of the canvas to center of oval and about 4.5″ from left edge of canvas. The placement of this nose needs to be off center to the left to ensure room for the bow and arrow.
2. Next, draw the bottom lining of the hat. This is a curved shape that hugs the top of the nose. It, too, is going slightly diagonal.
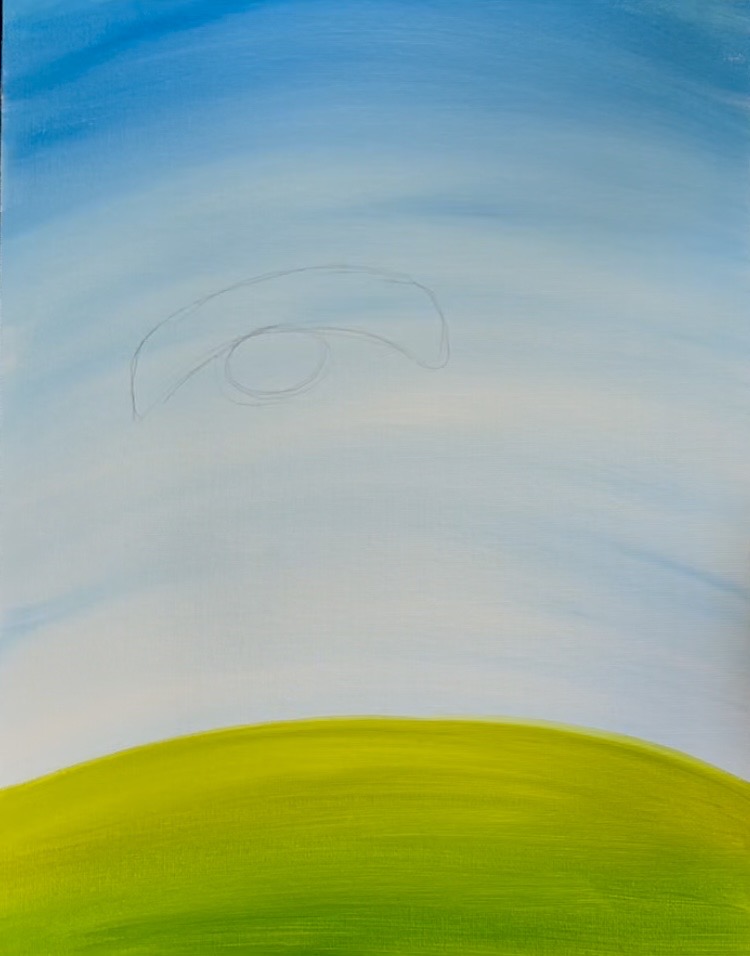
3. Then sketch the hat. This goes almost all the way up and bends backwards and down to a point.
4. Draw a heart and a string at the end of the hat.
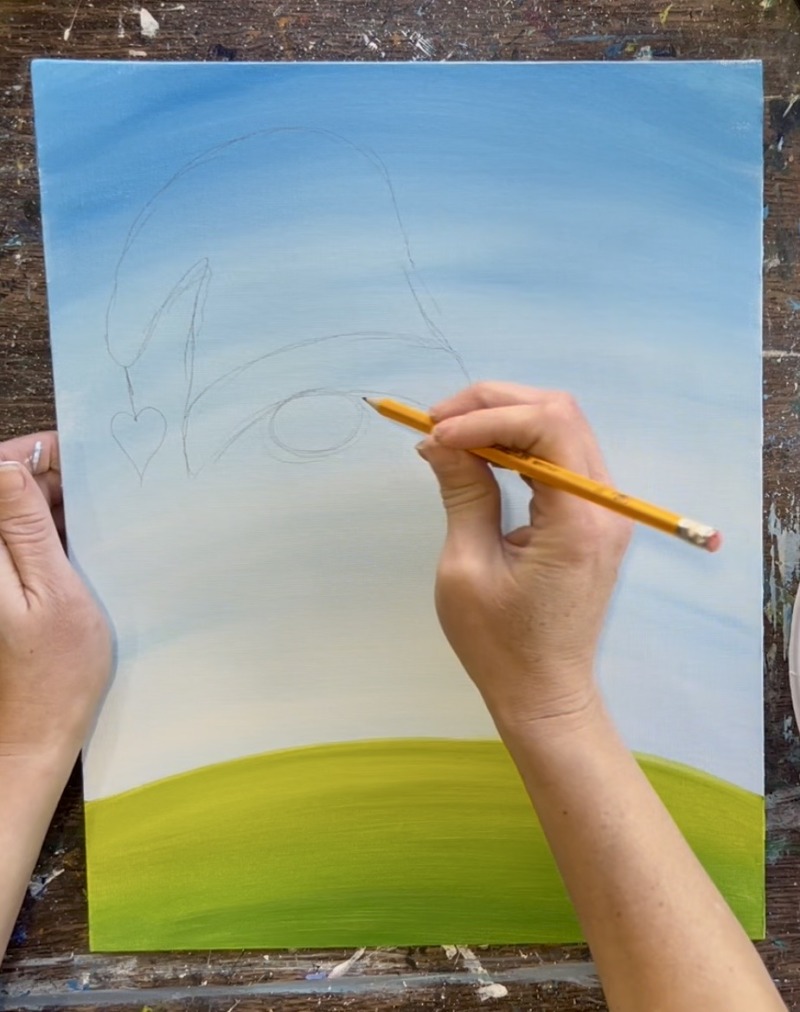
5. Draw the mustache under the nose.
6. Each side of the mustache meets in the middle of the nose and also goes slightly diagonal up.
7. Next draw the gnomes sleeve that bends 90 degrees. For the hand, draw a simple half circle shape.
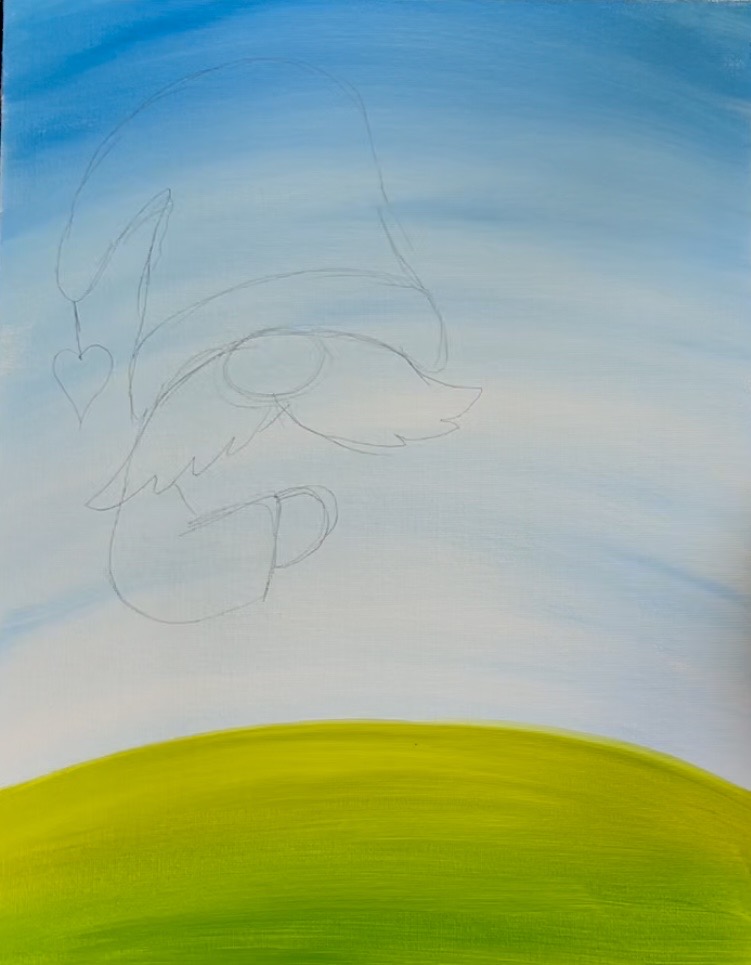
8. Then draw the other hand and sleeve on the right side. It also goes slightly diagonal upwards.
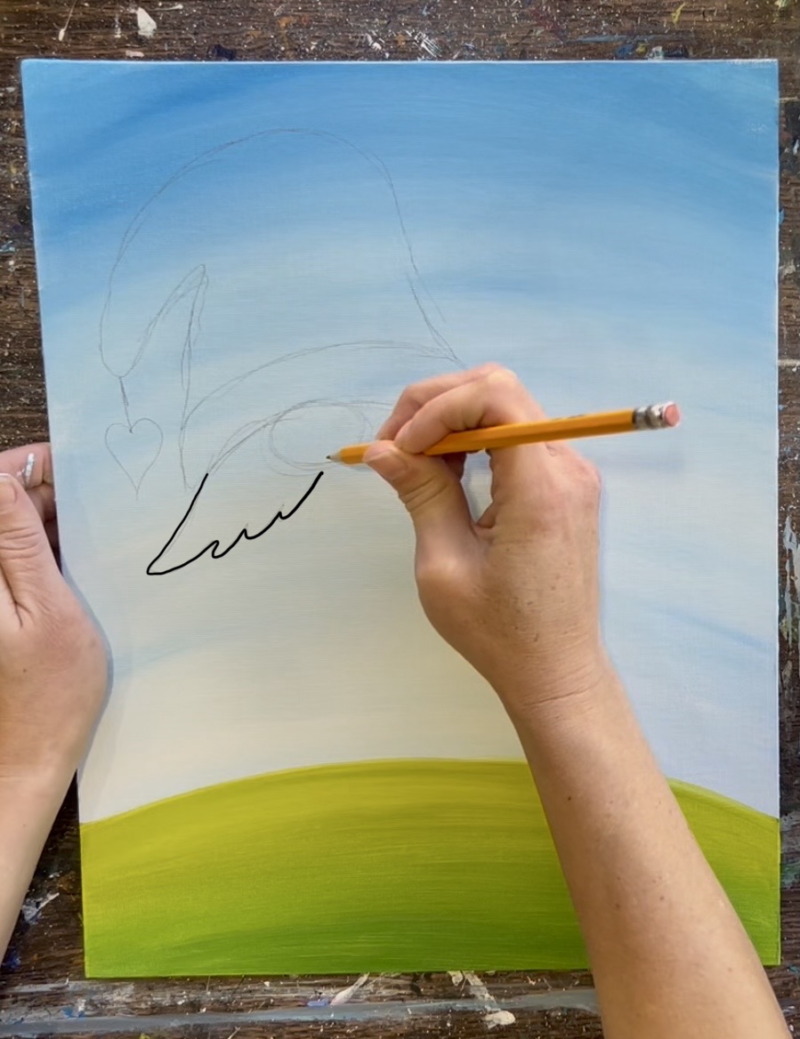
9. Draw the beard as a simple line that curves and meets at a point.
10. Then draw the robe of the gnome. This can be a simple rectangular shape with the bottom meeting at the point where the end of the beard meets.
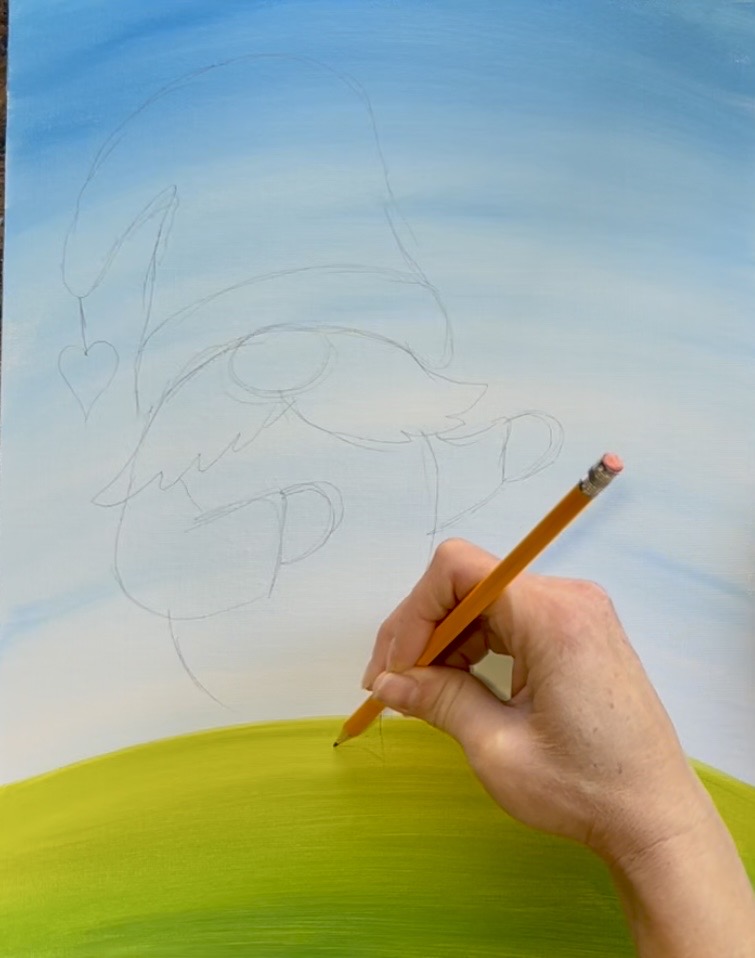
11. Next, draw the bow. This starts as an arc line that overlaps the hand on the right.
12. Draw two curved lines on the top and bottom of the arc.
13. Then turn this into a shape to create the bow.
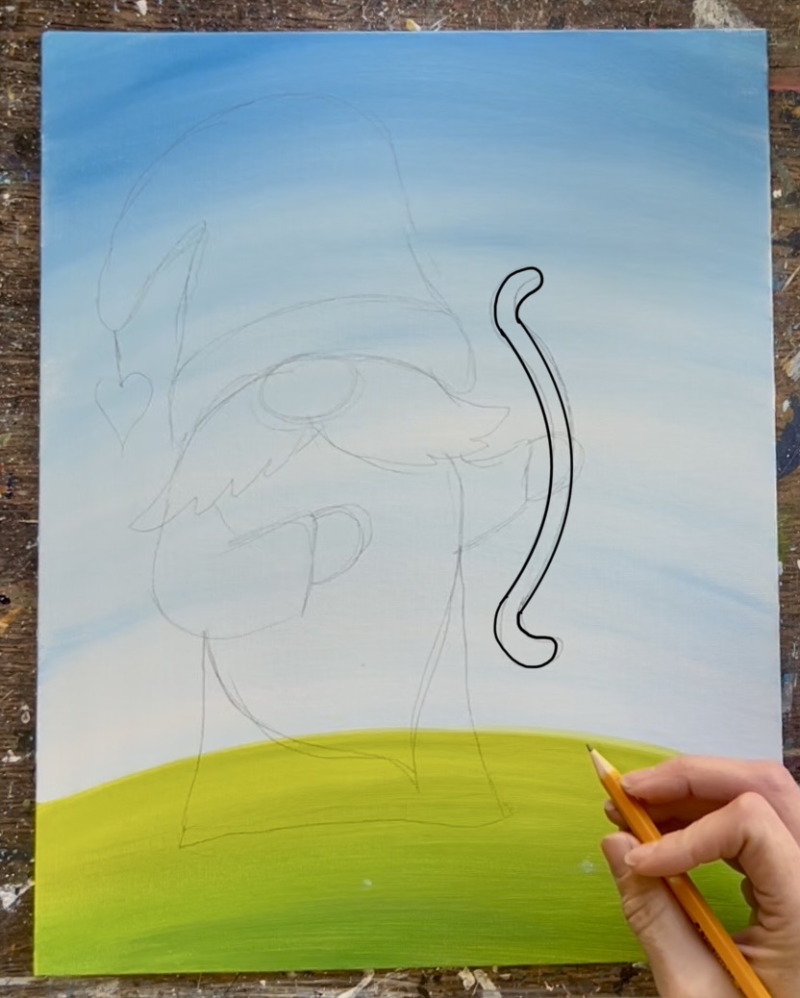
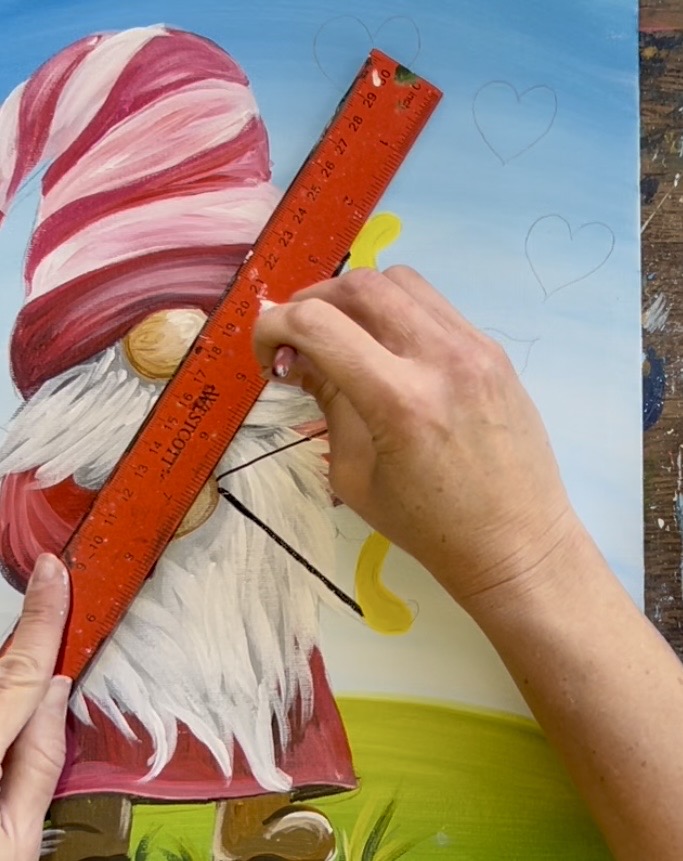
14. Next, use a ruler to draw two lines for the string of the bow and have it meet at the gnome’s hand.
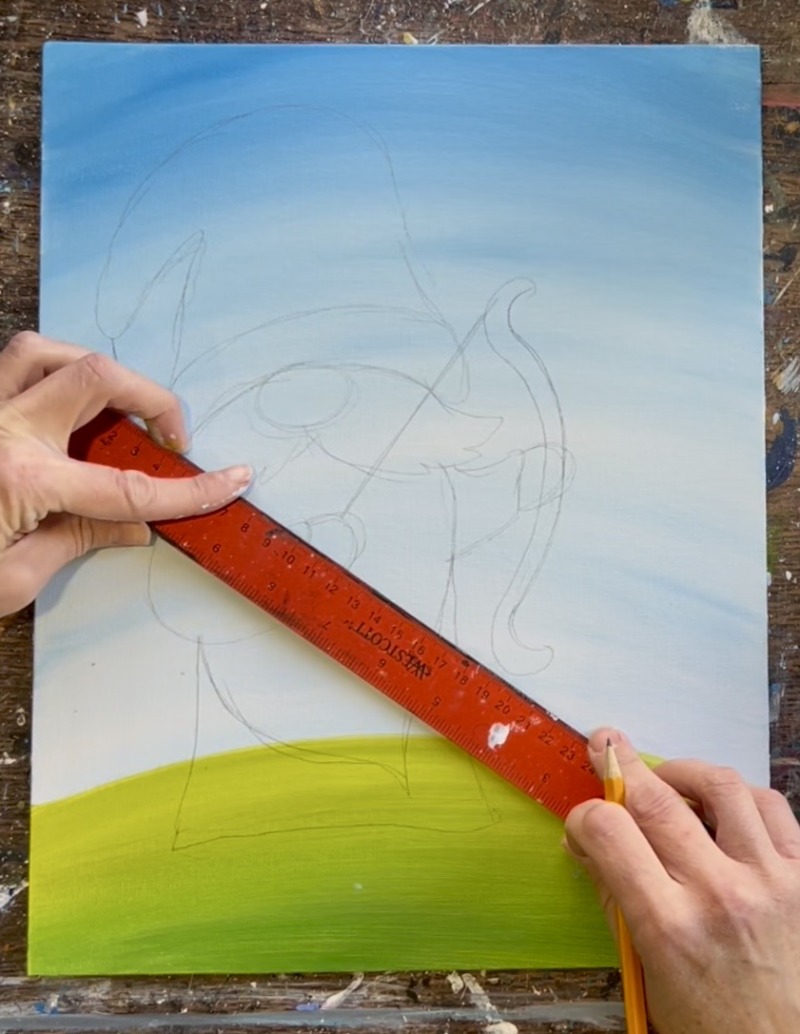
15. Use a ruler to draw the arrow. Mine ended up overlapping the gnome’s hand on the right but yours can go at a different angle if you prefer.
16. Then draw a heart at the end of the bow.
17. If you want to make the hand hold the bow, you can sketch a thumb and folded hand that overlaps the bow (advanced).
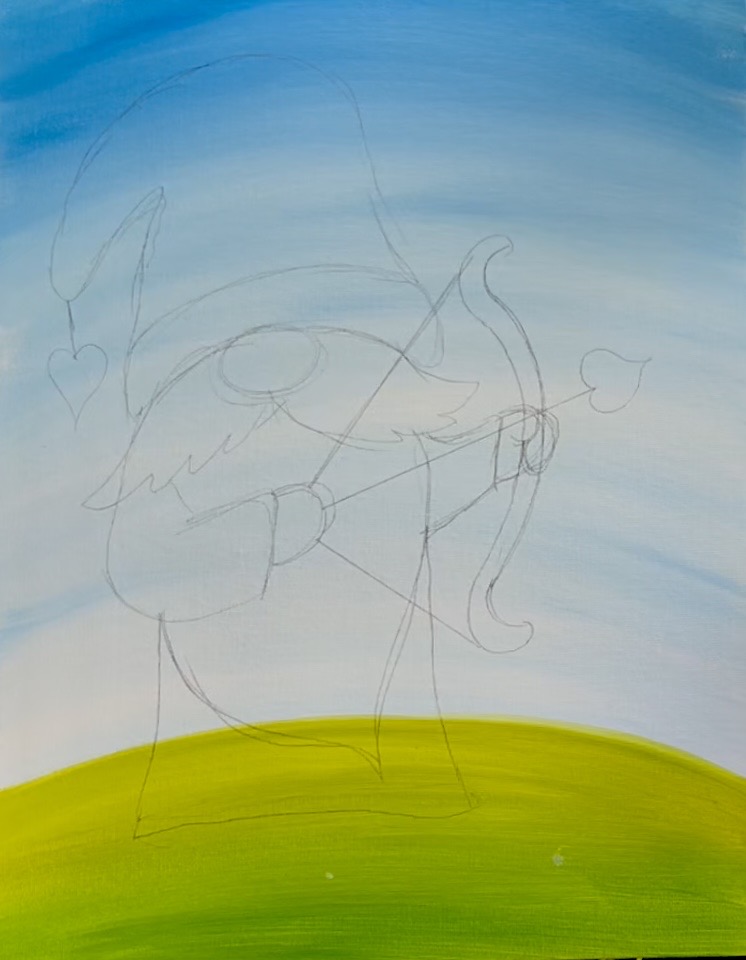
18 .Next, sketch the boots. I did two that are facing outwards. You can simplify these boots into simpler shapes if you prefer.
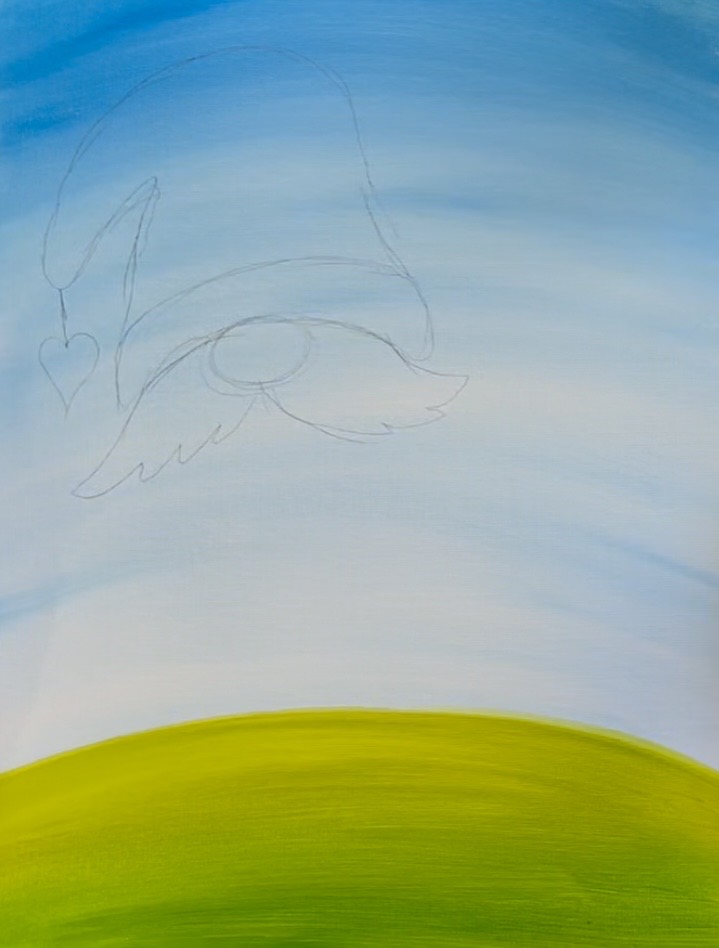
19. Optional: add edging to the beard by drawing zig-zag like lines for texture.
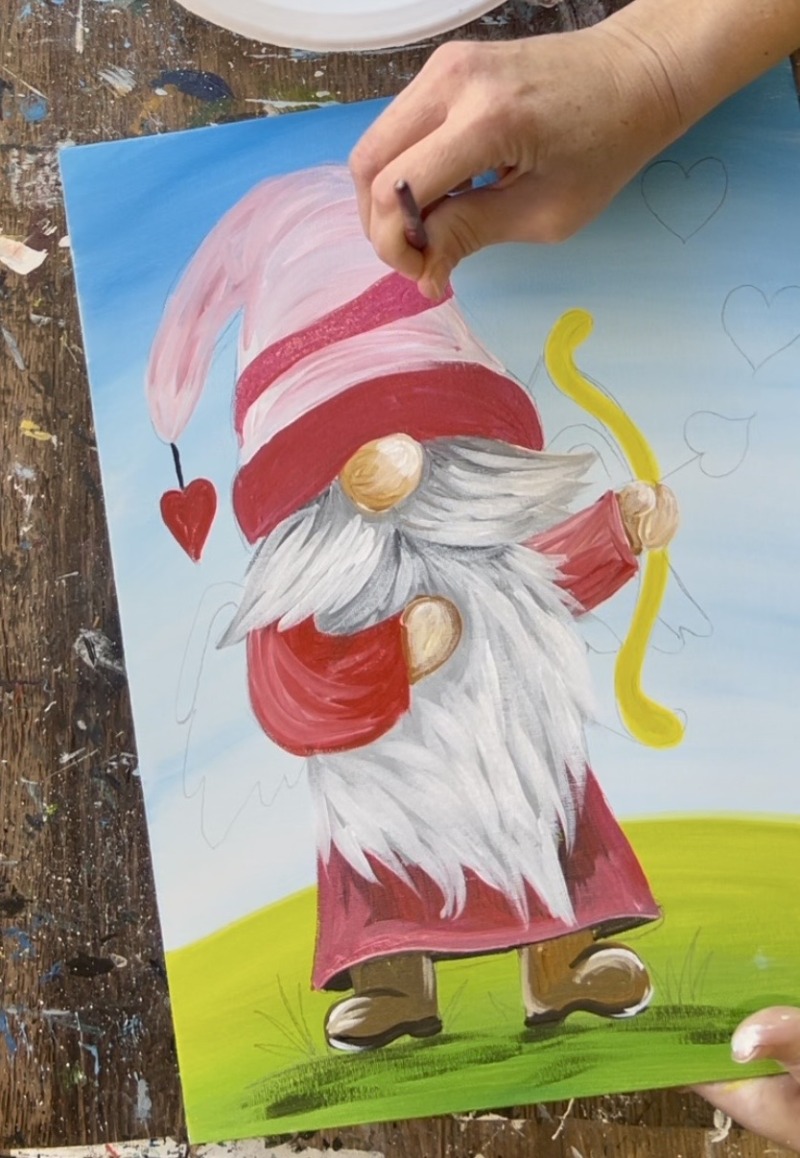
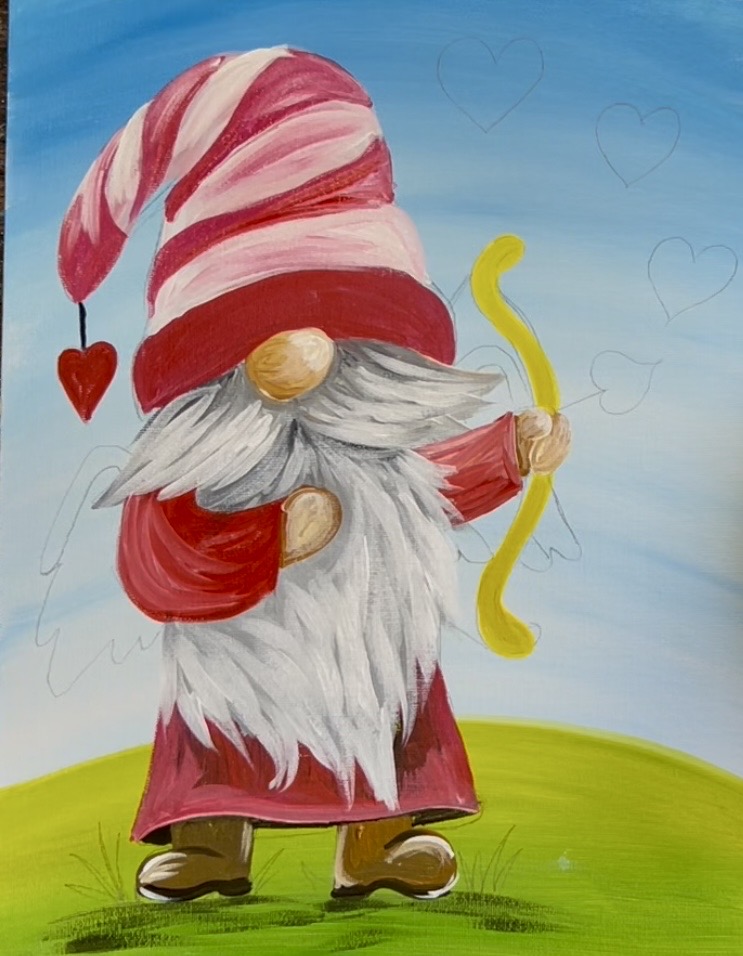
3. Paint Nose & Hat
Load your paint palette with the two colors: “raw sienna” and “titanium white”. Use the #4 round brush to mix equal parts of both of those colors together. Then use the #4 round brush to paint the nose. Add a little extra “raw sienna” on the left side of the nose for some shadowing.
Next load your paint palette with the colors: “cadmium red medium hue” and “medium magenta”. Mix both of those colors together to create a dark magenta color. Use the #4 round brush to paint the bottom lining of the hat.
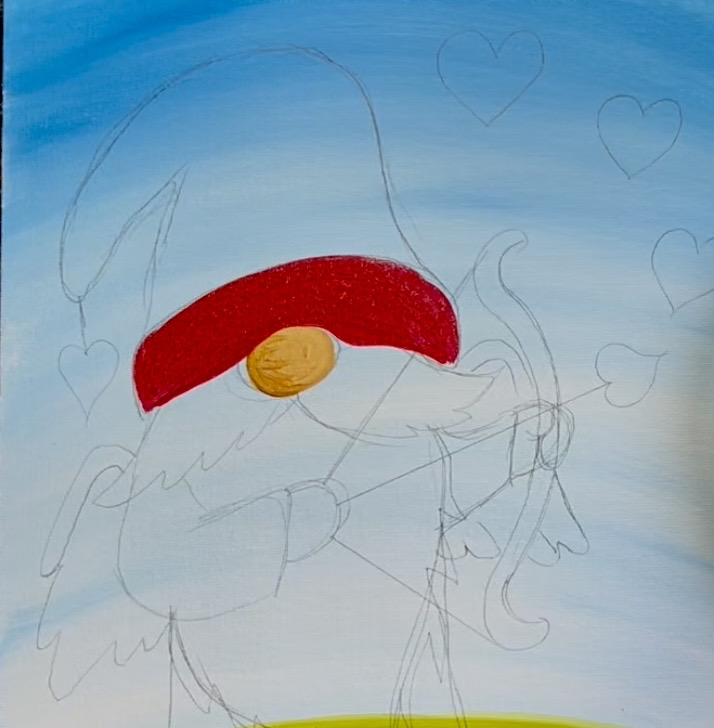
Next, wipe the brush (but do not rinse). Load the brush into “titanium white” and paint the hat. You want to create a light pink first layer for the hat. The white will blend with the red already on the brush. Outline the shape of the hat and fill it in using curved paint strokes in the middle of the hat. Curving the strokes in the middle large part of the hat will create some form/ dimension in the hat.
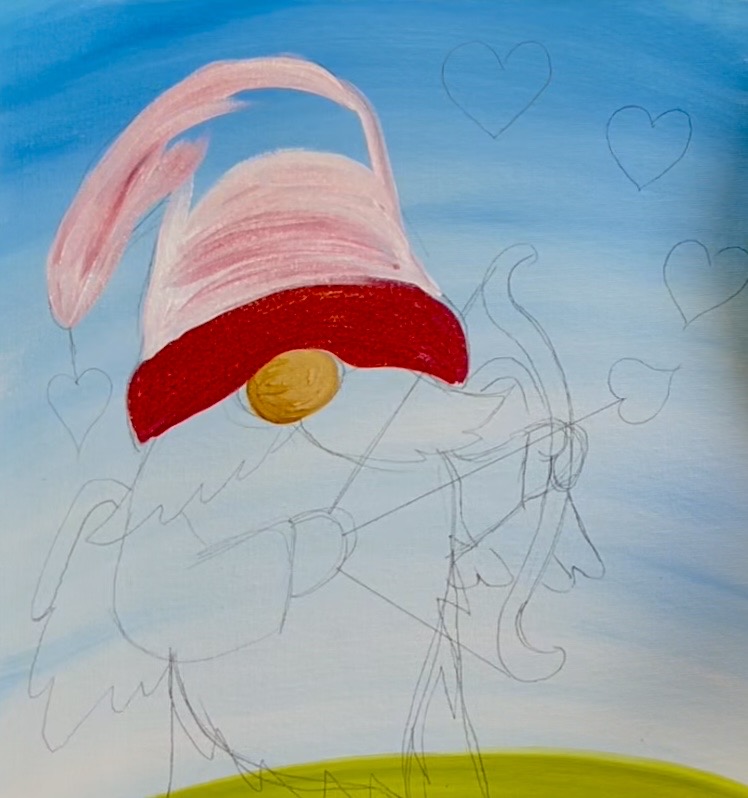
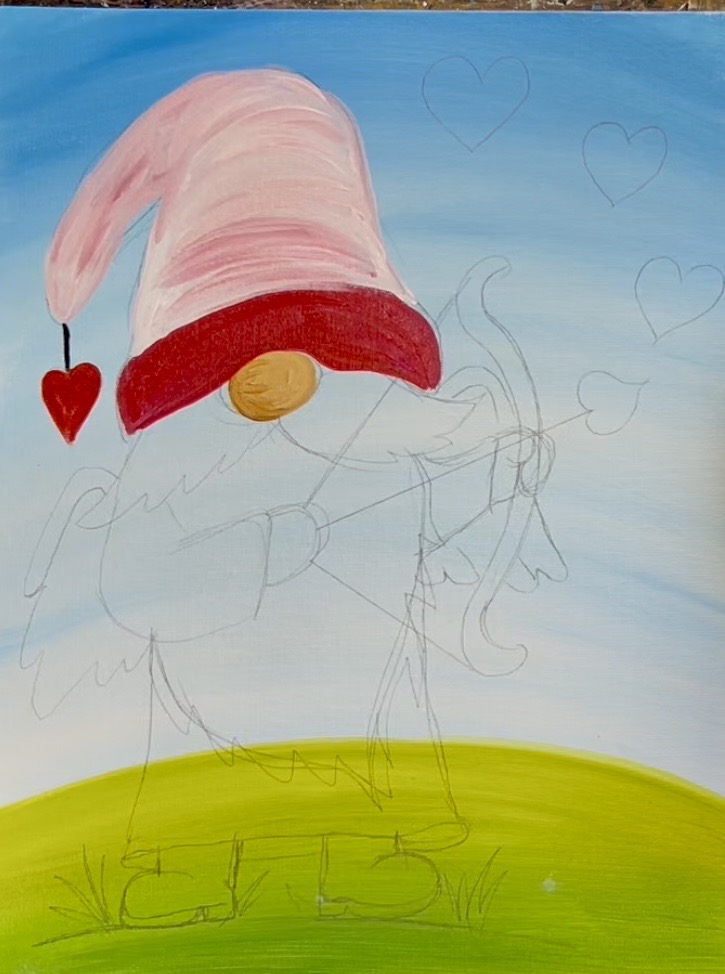
Then paint the heart accent using black for the string and red for the heart.
4. Paint Beard (first dark layer)
Mix a medium gray color on your palette by mixing 1 part black to 2 parts white. Then use the round brush. Paint the shape of the mustache first. Outline the shape and then fill it in with curved paint strokes that go outwards in the direction of the mustache.
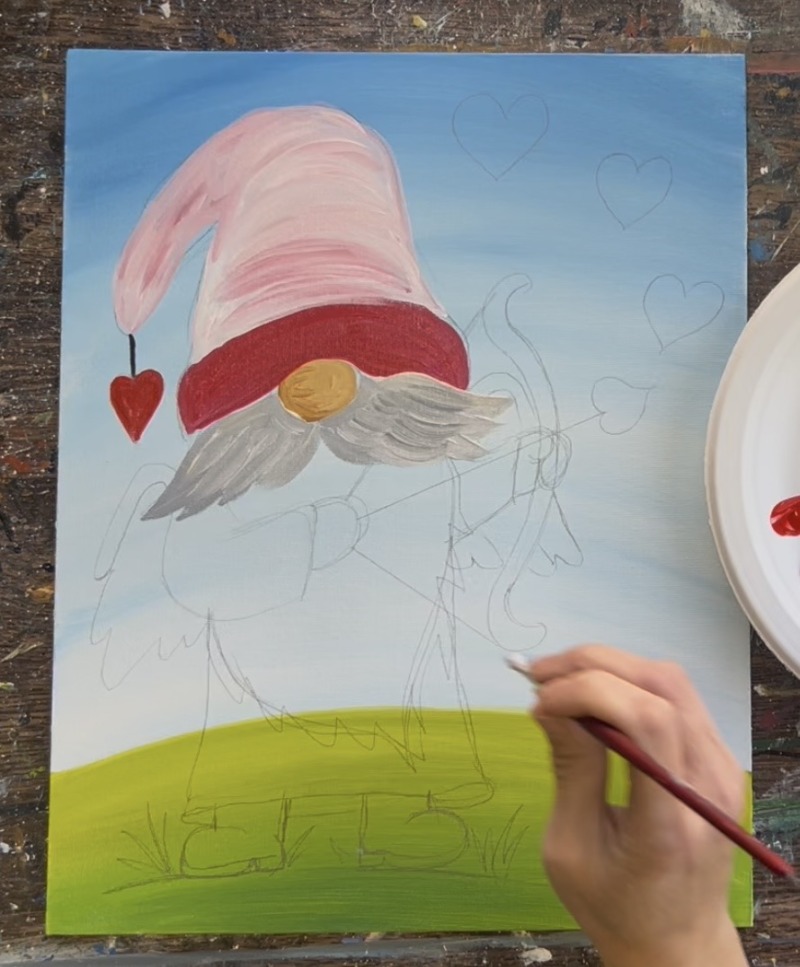
Paint the bottom beard area using the same medium gray color. Outline the edge of the beard and then fill in with long, curvy paint strokes that go in the direction of the shape of the beard. Then add a little black to the brush without rinsing. Add some dark shadowing under the mustache.

Then add the medium gray over that black to blend it in better. You want that area under the mustache to be shadowy so that it stands out from the rest of the beard. Add some additional shadowing with a little bit of black on the upper part of the mustache under the hat.
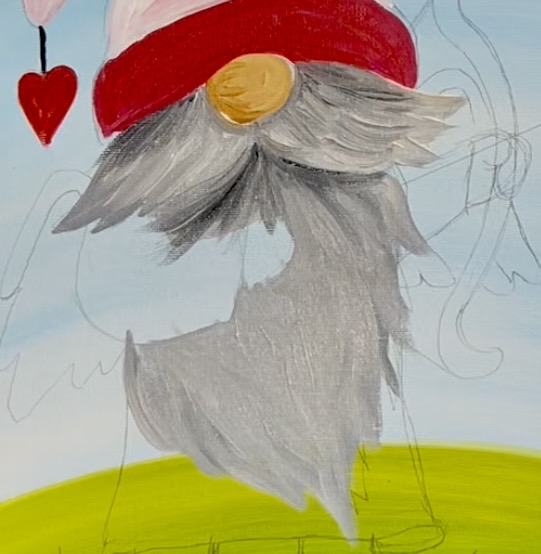
This first layer of the beared will look dark for now. We will layer on lighter white hair in a later step.
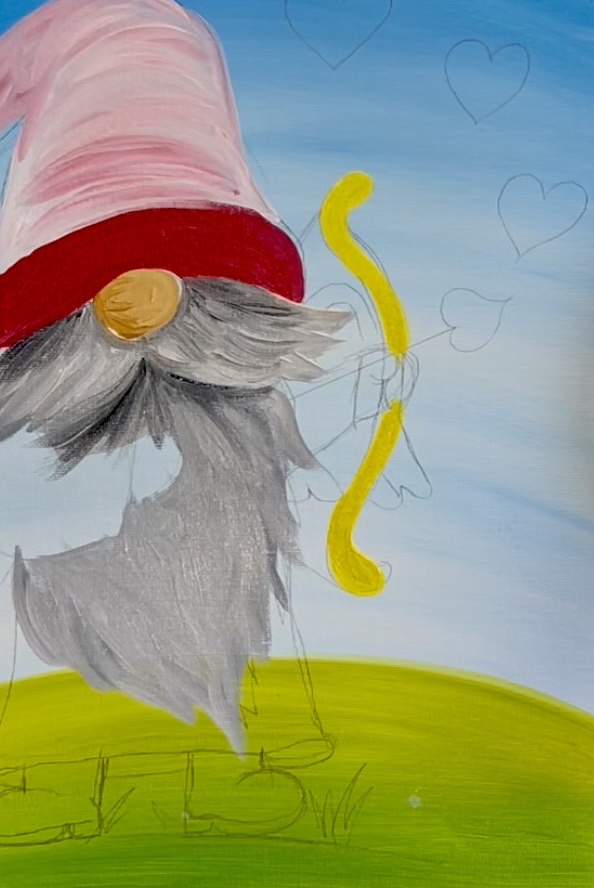
5. Paint Bow
Use the color “cadmium yellow medium hue” and “titanium white” mixed together (to make a light, opaque yellow). Then use the #4 round brush to paint the bow shape. We will paint the arrow and string in a later step.
6. Paint Hands, Sleeves, Robe & Boots
Use “raw sienna” mixed with “titanium white” (same color as nose) to paint the gnome’s hands. Add a little white on the edges of the thumb and folded hand part so that it stands out. You can also outline this with black in a later step to help with the shape.
Use the color “cadmium red medium hue” to paint the sleeves on the gnome. You can also blend a little white into the red before it dries on the edges of the sleeves for a little bit of highlighting.
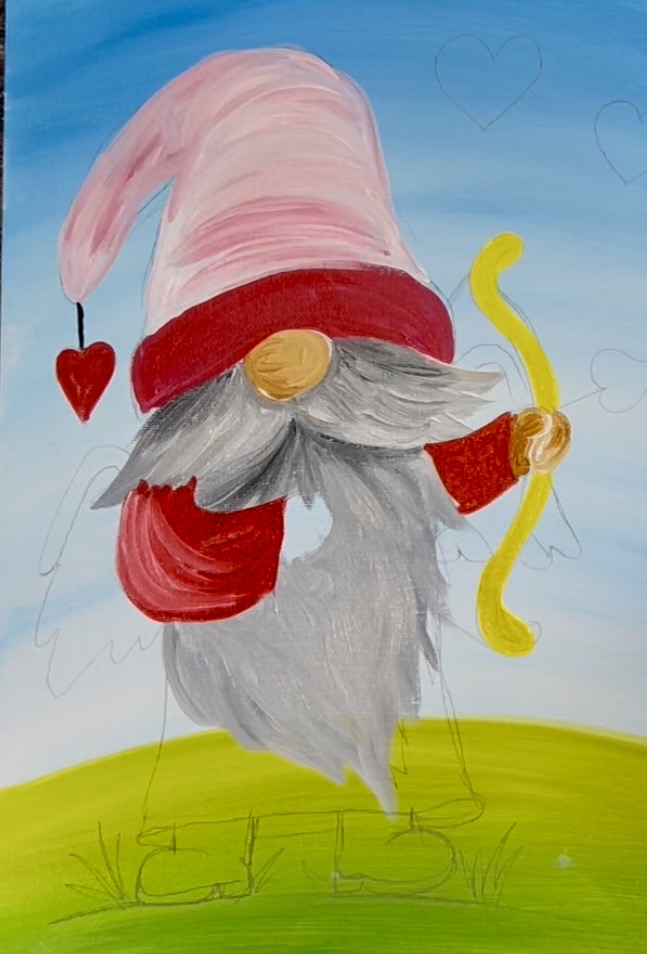
Then paint the robe using “cadmium red medium hue”. You can go around the beard for now. When we layer the white on in a later step, we can have the beard edging overlap the red better. Add a little black to the bottom of the robe where it goes around the gnome’s boots.
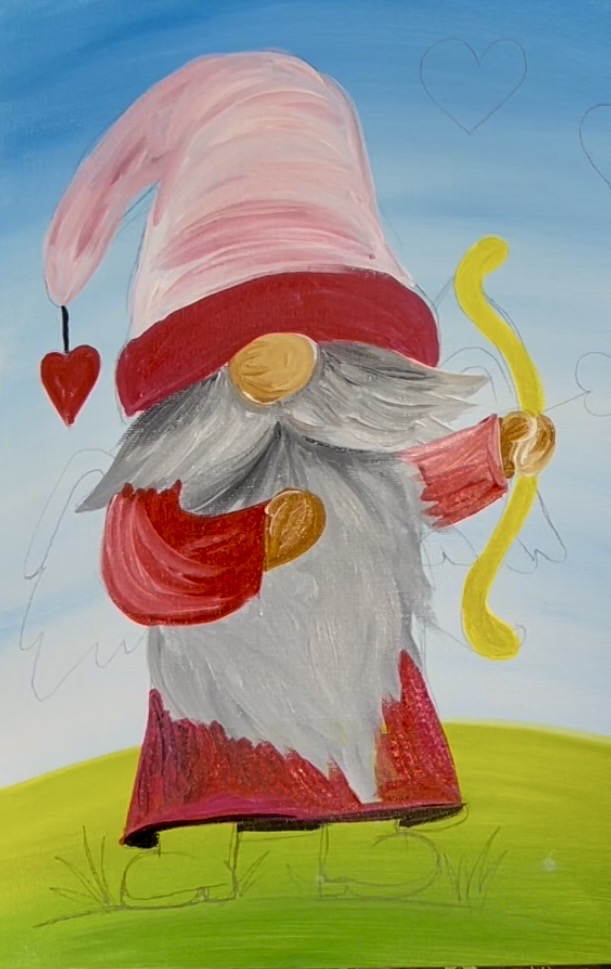
Next, mix a dark brown on your paint palette by mixing about 1 part black to 3-4 parts “raw sienna”. Use the #4 round brush to paint the shape of both of the boots in with solid brown.
Then use black to paint the bottom sole of both of the boots. Paint a little curved line on the top of the top of both of the boots to give them a more rounded look.
Add some white highlights to the boots by painting a white curve on the toe tip of both of the boots. Add a little white to the inner edges as well. Tip: if the white is too bright, try mixing a little “raw sienna” into it to make it more of a subtle highlight.
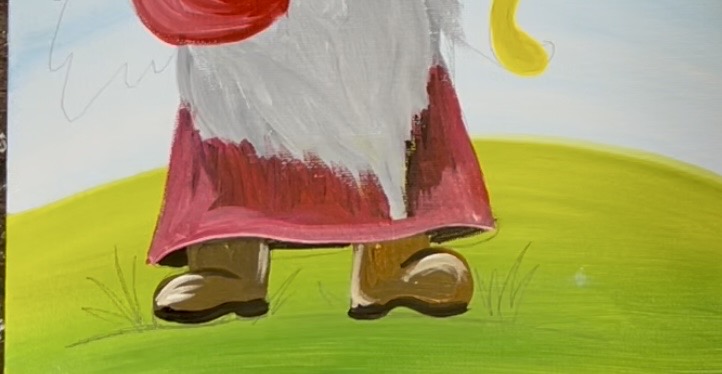
Then paint shadowing on the ground under the boot. Mix about 1 part black to 3-4 parts green to make a very dark green color. Use the #4 round brush to “dry brush” this dark green with left and right, loose paint strokes under the boots.
Let everything dry before going onto the next step!
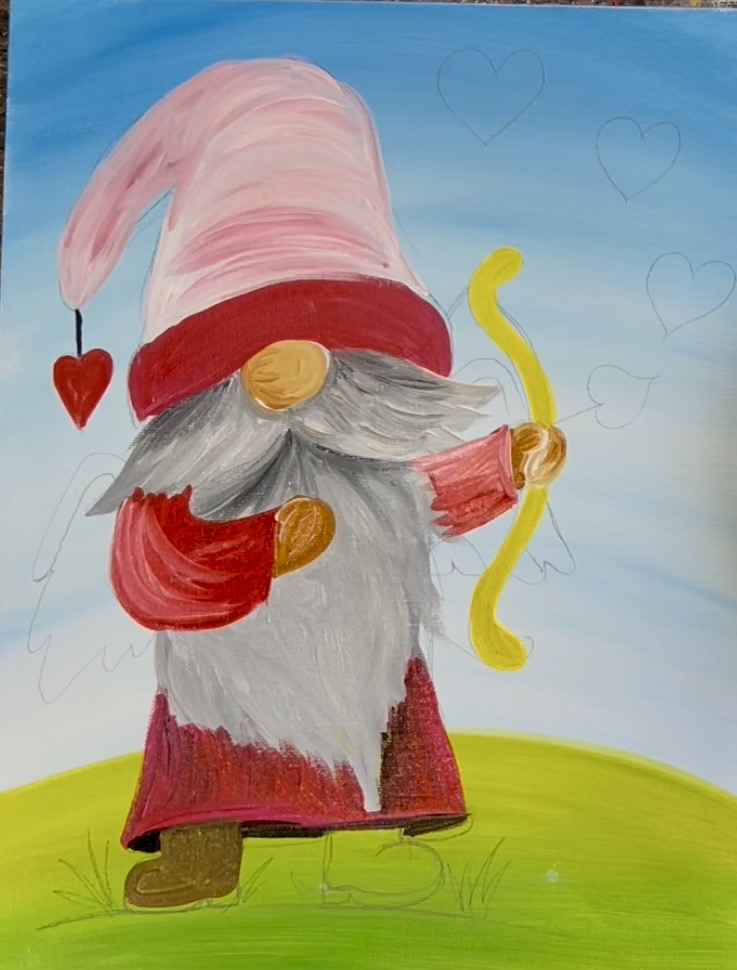
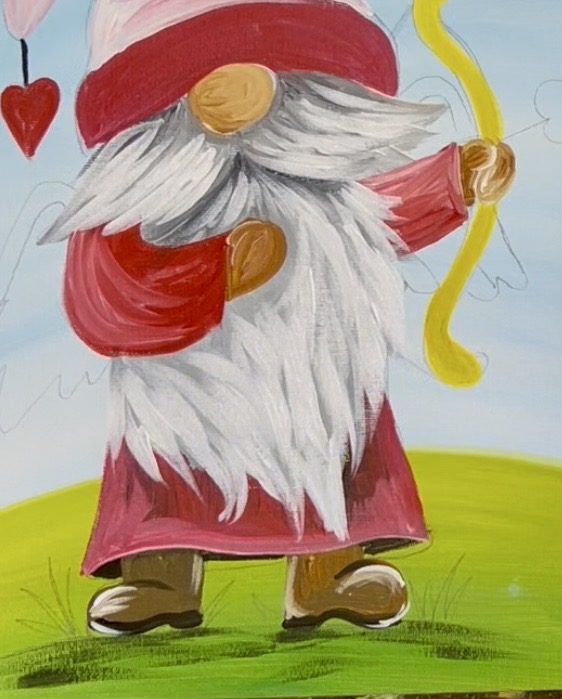
7. Paint White Layer On Beard
Use the #4 round brush and “titanium white” to add your bright white layer to the beard! The trick with this is to not cover up all of the darker gray but to use it as shadowing. Start with the mustache. Leave a little bit of dark ground around the nose and below the hat. Make your paint strokes go outwards in the same direction as your first dark layer.
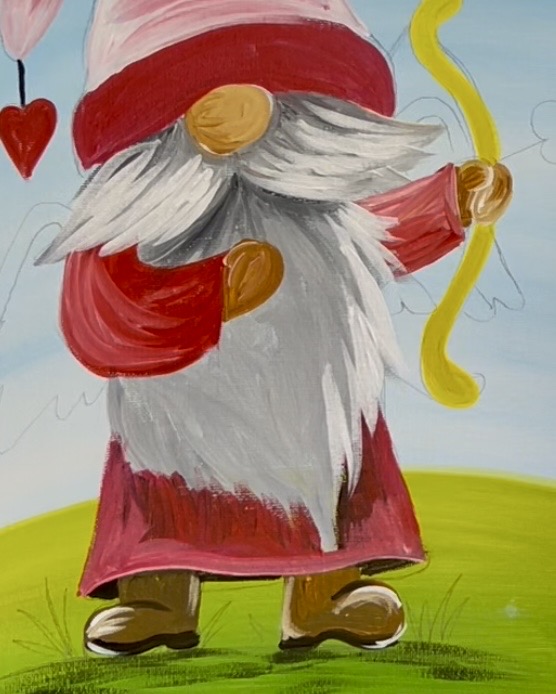
Then do the rest of the beard. Leave shadowing below the mustache by not adding as much white in that area. Paint your large curved paint strokes that go in the direction of the gnome’s long bead. Pay particular attention to the edging. This is where you can paint curved hair pieces that overlaps the gnome’s robe’ sleeve and also overlap parts of the sky.
8. Highlight hands/ nose
After the first dark layer of the nose and hands dry, you can layer on lighter brown (mix a little white into the original base color). For the nose, I layered on lighter color only on the right side and then an extra “blob” of white on the far right side. This gives it that shiny look. Do the same for the hands.
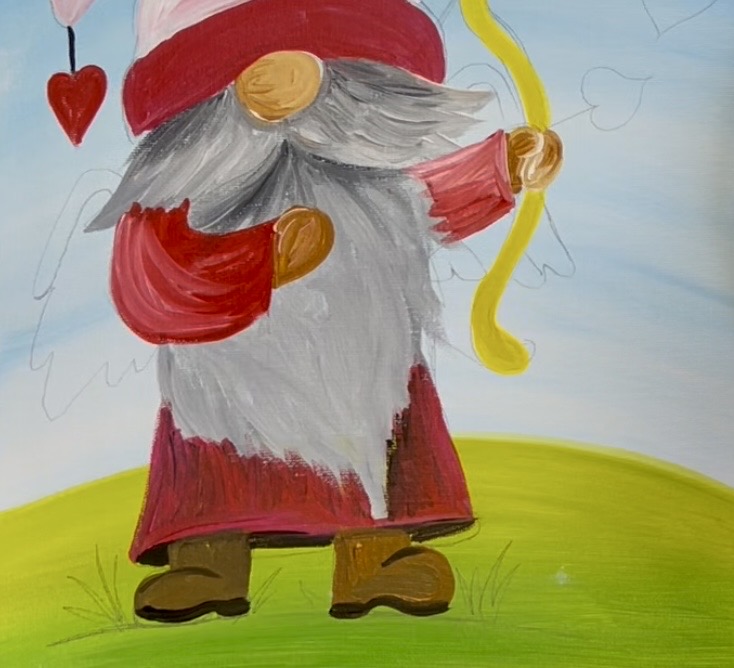
9. Paint Stripes On Hat/ Shadowing/ More Details On Hat
Paint the stripes going diagonally upwards. To make the dark colors stripes, mix red and magenta together to create the dark pink. For the light colored stripes, you can either leave the first layer as is or add a second coat of paint with white mixed with a little medium magenta.
You can optionally highlight the darker stripes with your lighter pink color.
Advanced: If you want to add some shadowing to the bottom of the hat, mix a little bit of “cerulean blue” with “cadmium red medium hue”. This will make a dark purple color that works nicely for shadowing. Blend it at the bottom of the hat. Then add a little bit of light pink highlight in the center of the bottom of the hat. You can also use this “darker purple color” to add shadowing on the bottom of both of the gnome’s sleeves.
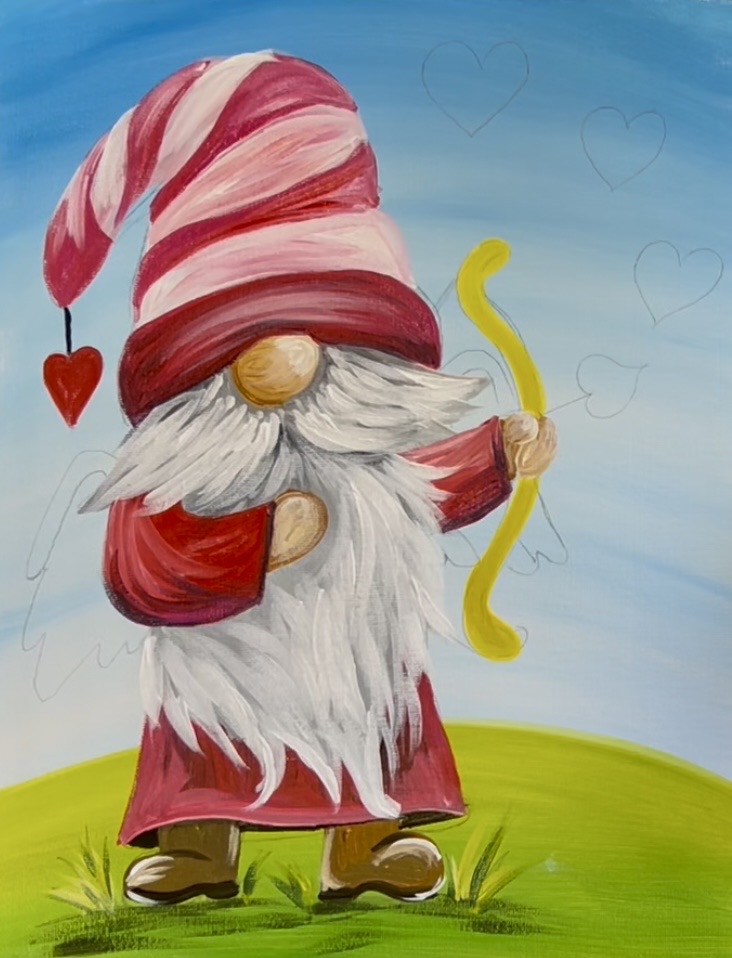
Also, I added little white dots to the heart that is hanging on the end of the hat.
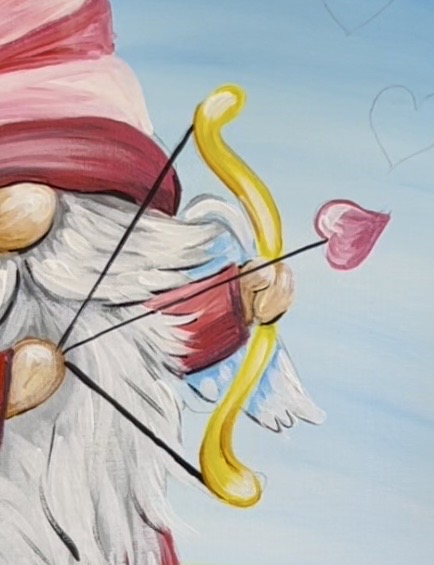
10. Paint Arrow
I recommend using a ruler to get the lines to be straight. Line the ruler up to where you want the line and use the #4 round brush and mars black to paint the line for the arrow as well as the string. Then paint a heart at the end of the arrow. I used “medium magenta” mixed with a little bit of red to make a medium pink color. Then lightly highlight one side of the heart with white.
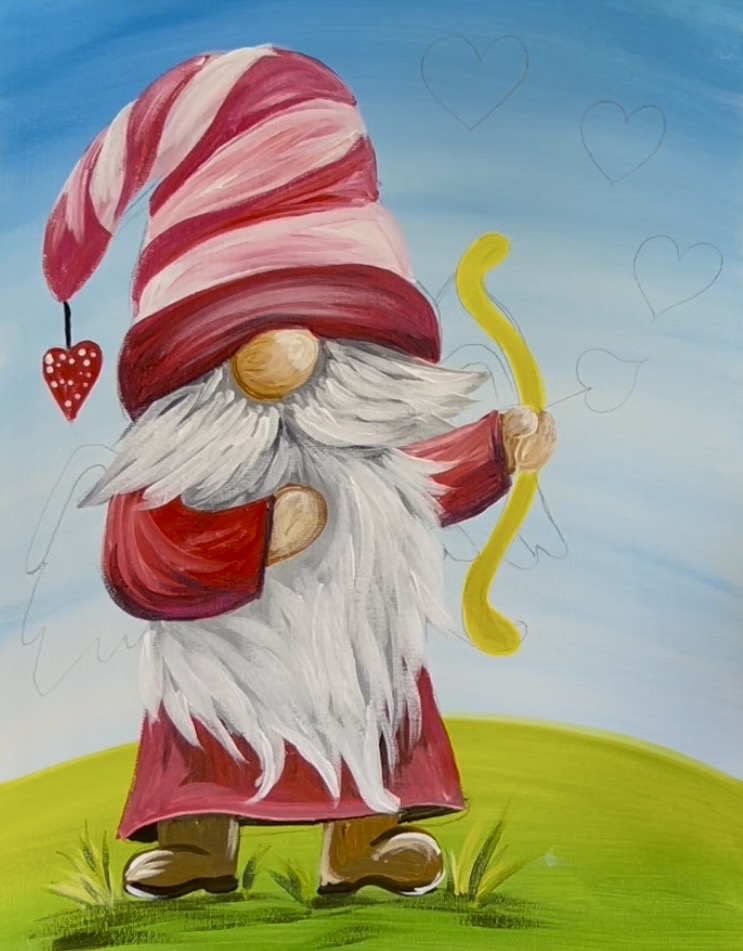
11. Paint Wings & Add Detail To Bow
The wings are a little tricky but we can simplify them! I started with a medium blue layer. Mix “cerulean blue” with “titanium white”. You want a blue that is slightly darker than the sky so that it will stand out. You can even add just a dot of black into it to make it more of a gray-blue. Paint the shape of both of the wings. Do this very lightly. It doesn’t have to be a solid, thick coat of paint.
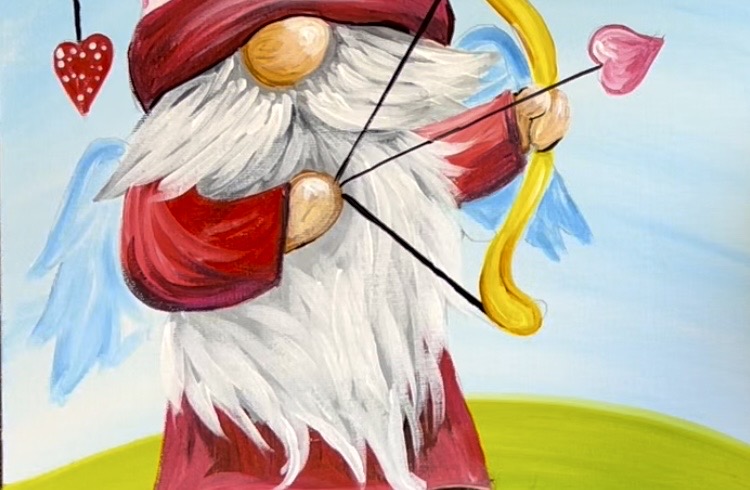
Let that first layer dry. Then use “titanium white” and the #4 round brush to add the details on the wings. Start by outlining the top edge of the wing on the left. Then paint white curved marks going upwards to create the feather look on the wings.
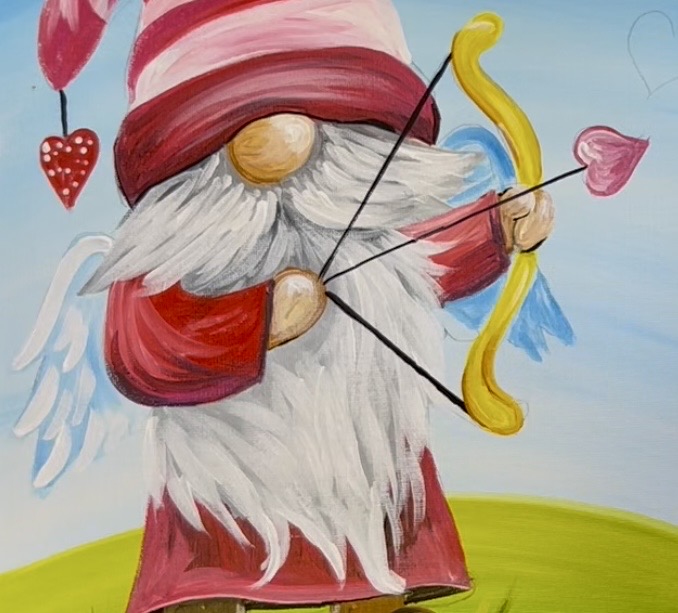
Repeat that on the other side for the other wing.
To help with “contrast”, you can use “mars black” to lightly outline the edges of the wings and parts of the gnome that overlap the wings. You can also add a few dark lines on the beard to add to the texture and lightly outline some of the edges of the beard and mustache.

For detail on bow, use “raw Sienna” mixed with “cad yellow medium” to make a darker yellow. Use that color to lightly outline the bow. Then use “titanium white” and add a pop of white in the very center of the bow (without taking away from the main yellow color).
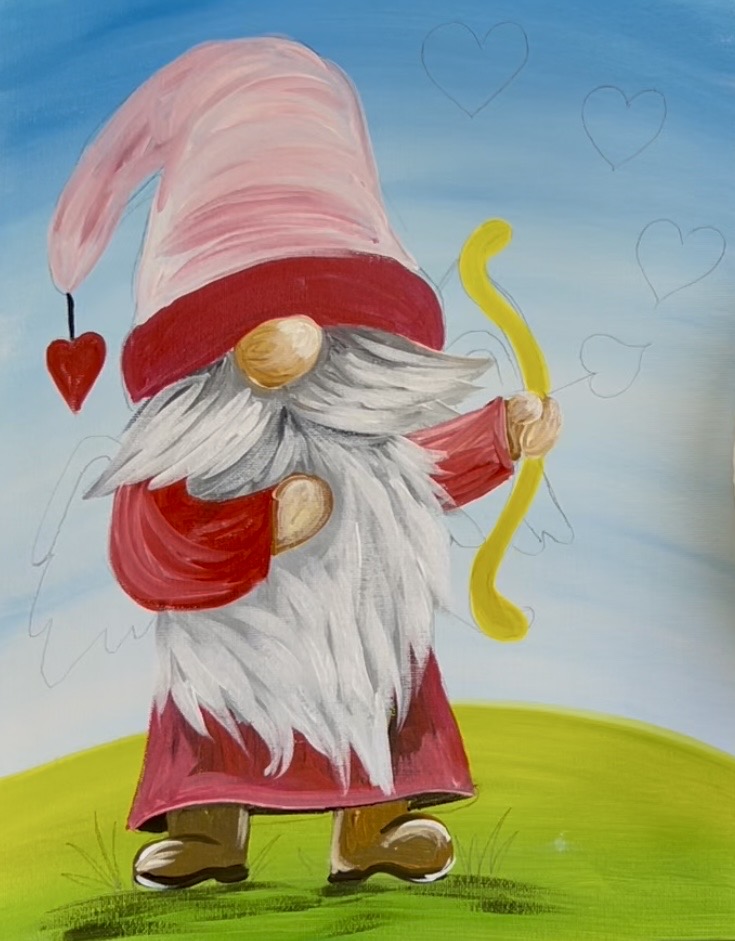
12. Hearts/ Final Details
Use the #4 round brush to paint hearts in the background to fill up some of the blank spaces in the sky. You can do the hearts with any color. I used “cad red medium” mixed with “medium magenta”.
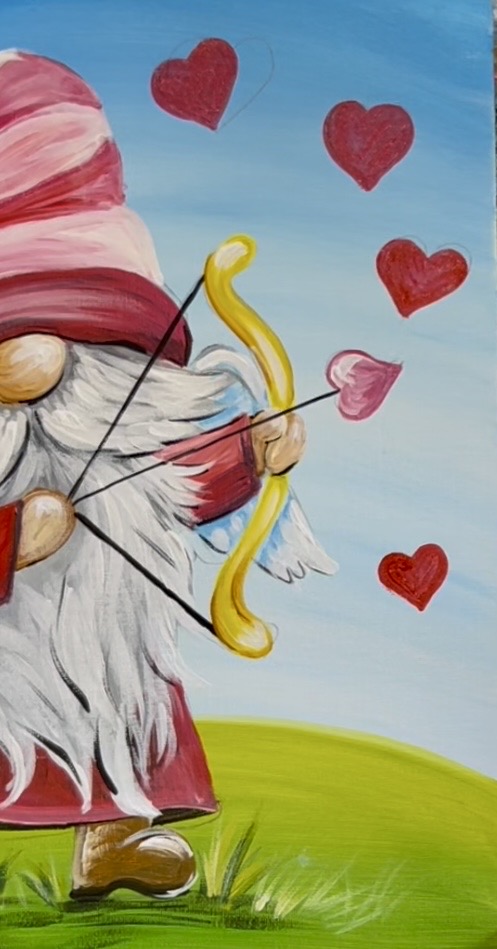
Give the hearts highlights for a fun bubbly look!
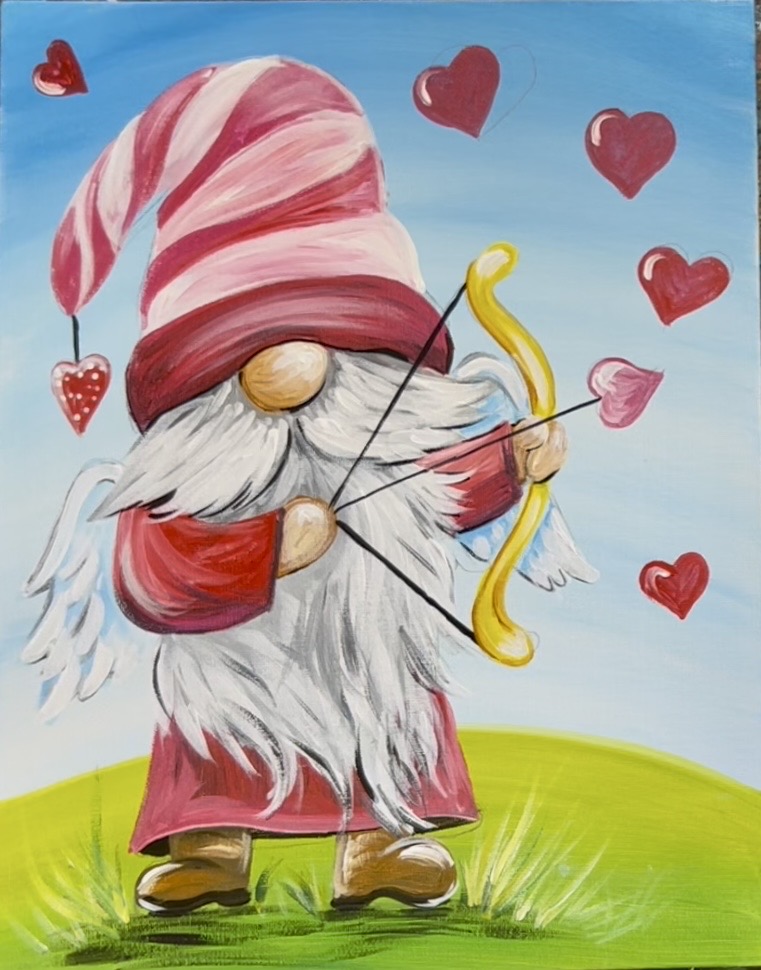
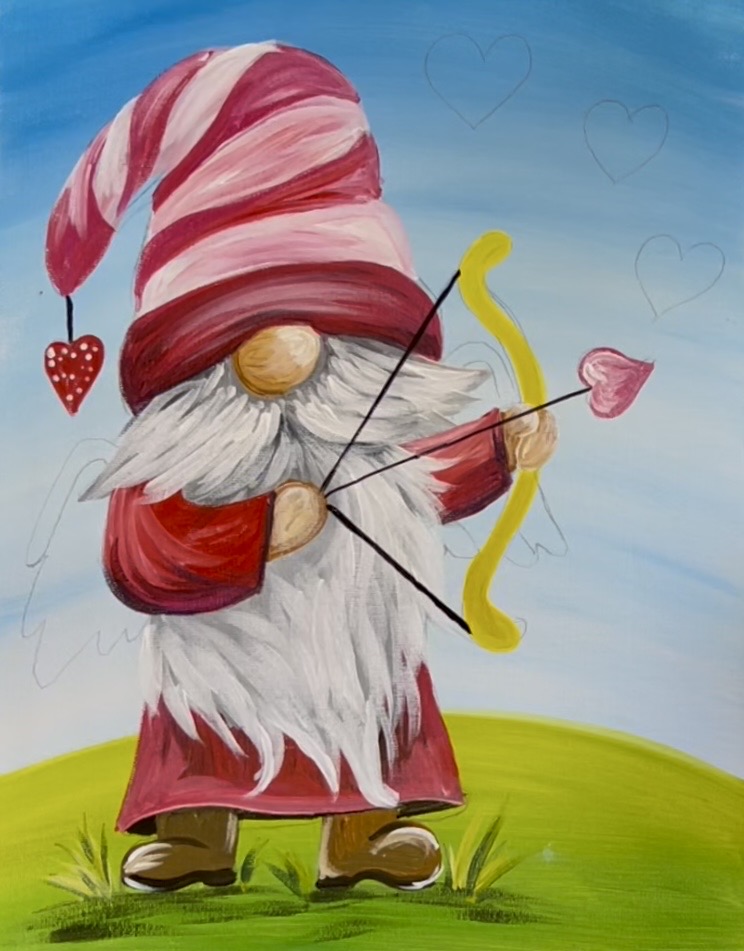
Some final touches include: painting more grass, adding more texturing on beard. I also adjusted the end of the hat to make it more pointed to give it more of that classic gnome hat look (repainted part of sky to adjust). And that is it! Sign your name and show it off! A super cute Valentine Cupid Gnome!
I absolutely love your Valentine’s Day gnome.
Your amazing!!❤️
Thank you Lynne!