

Would you like to save this?
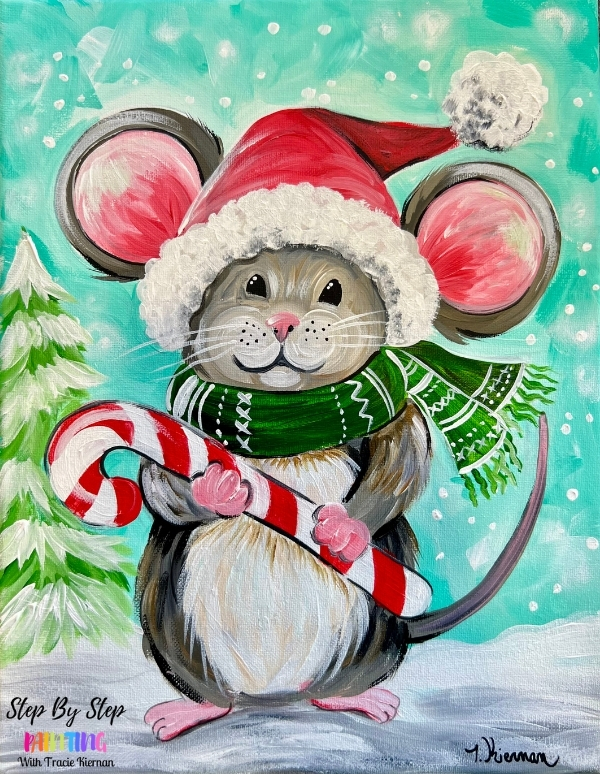
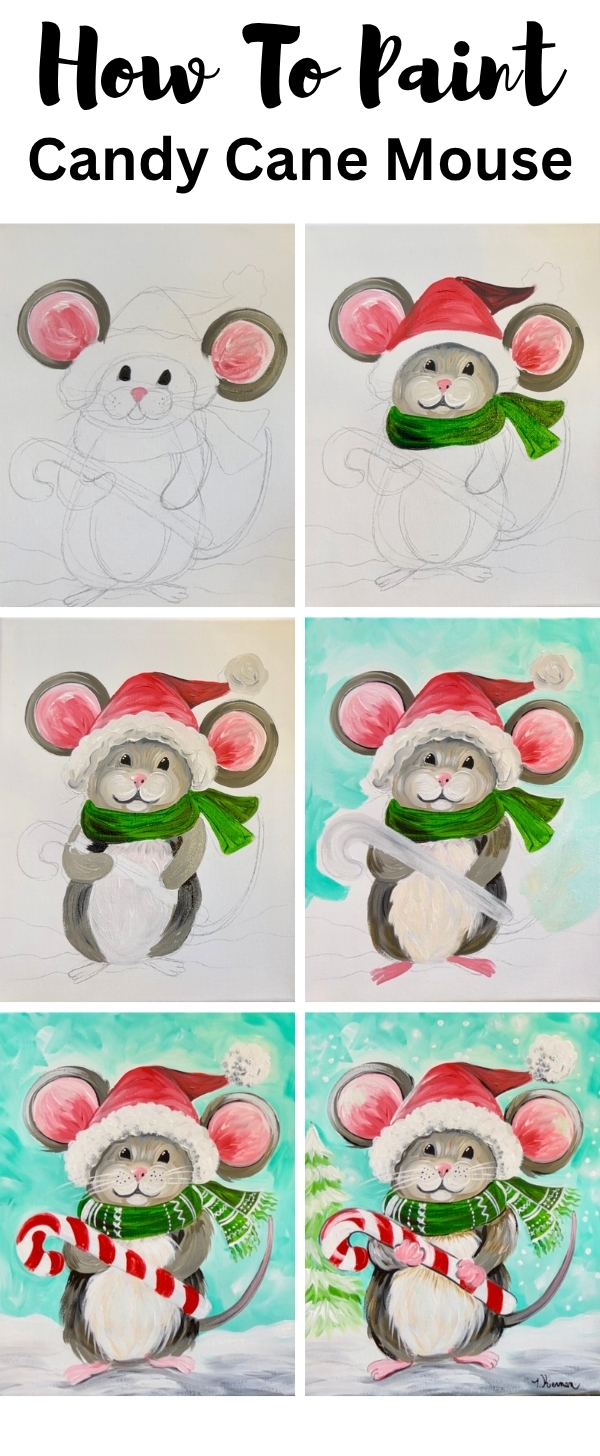
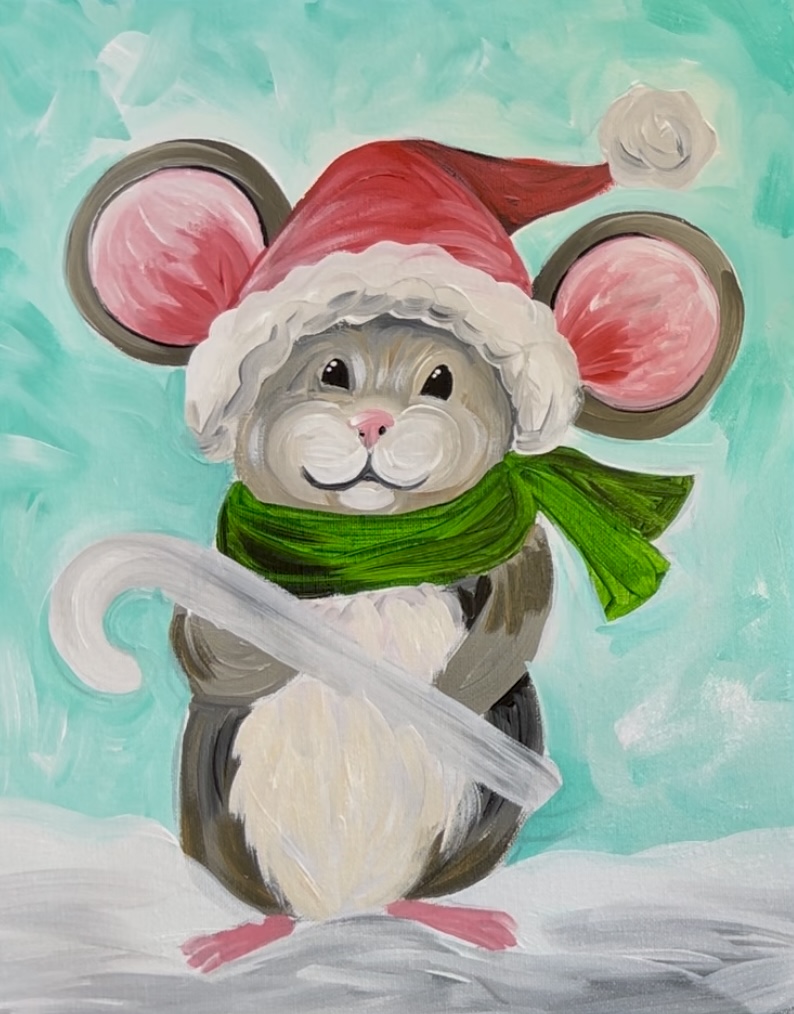
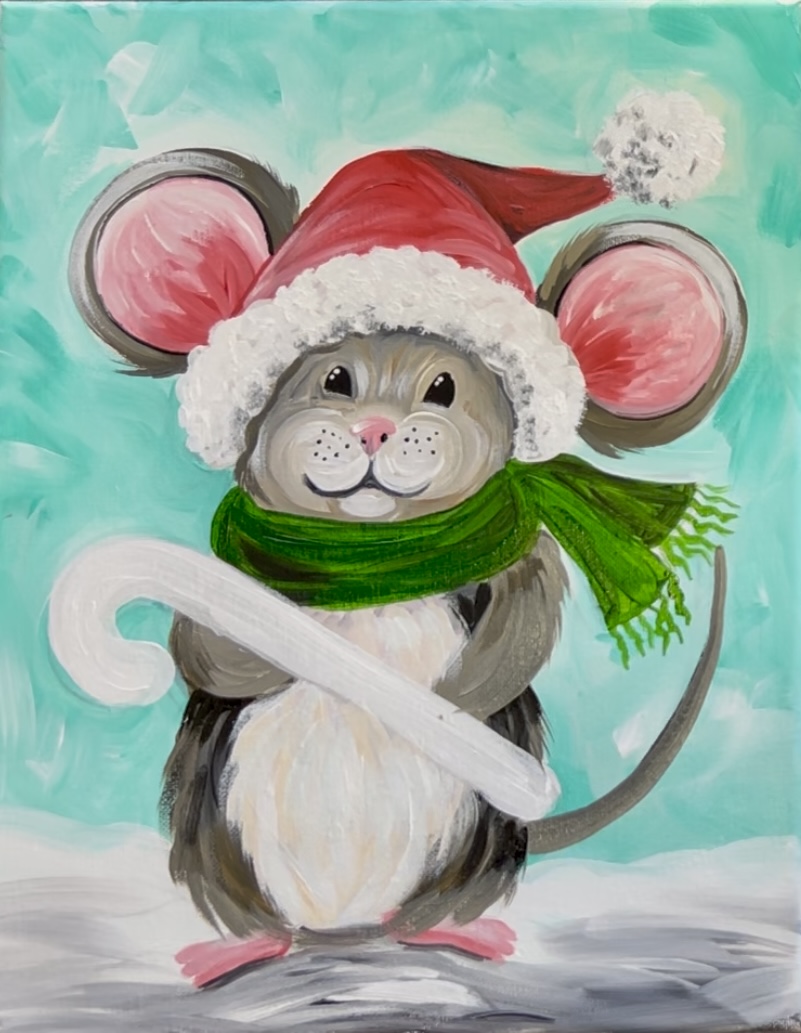
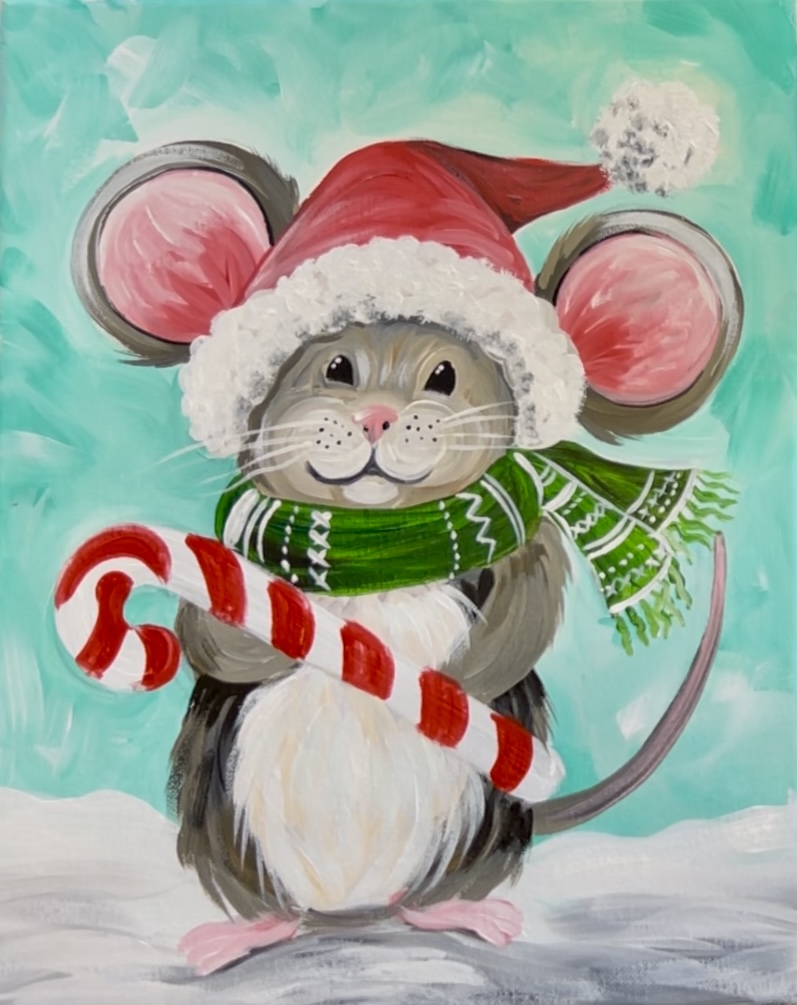
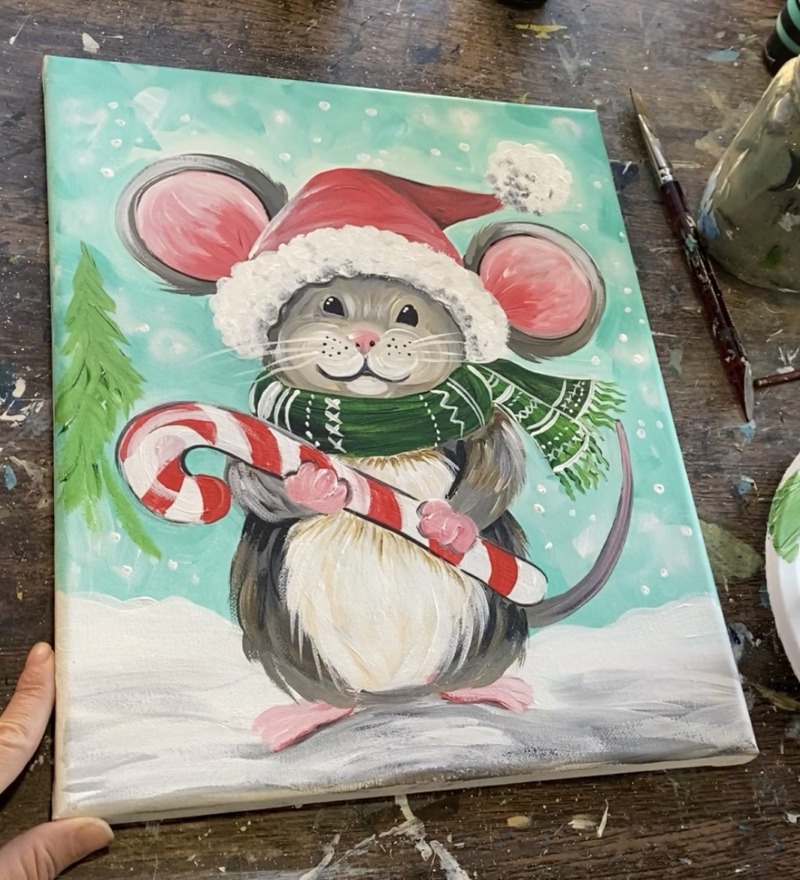
In this tutorial, you’ll paint a winter background with snowy trees, a sweet mouse in a Santa hat, and a green Christmas scarf using acrylic techniques. Follow along as we blend soft winter skies, layer fur textures, and add fun holiday details.
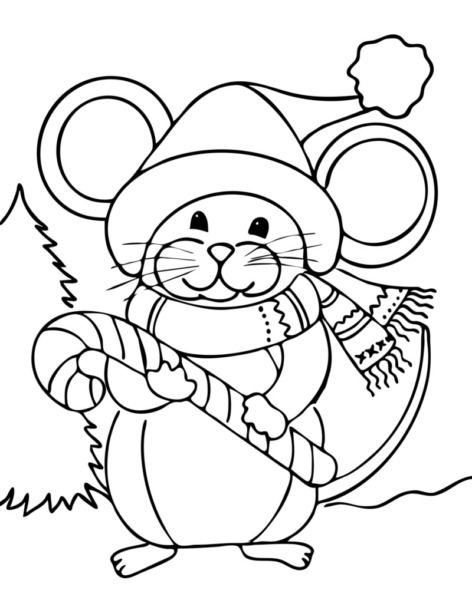
🎨 Optional Traceable Available!
If you prefer, download the optional mouse traceable template to easily transfer the design to your canvas — great if you want to skip the drawing portion of the tutorial!
Enjoy and happy painting!
Materials:
- 11 x 14 Canvas (or any size)
- Acrylic Paints (see colors below)
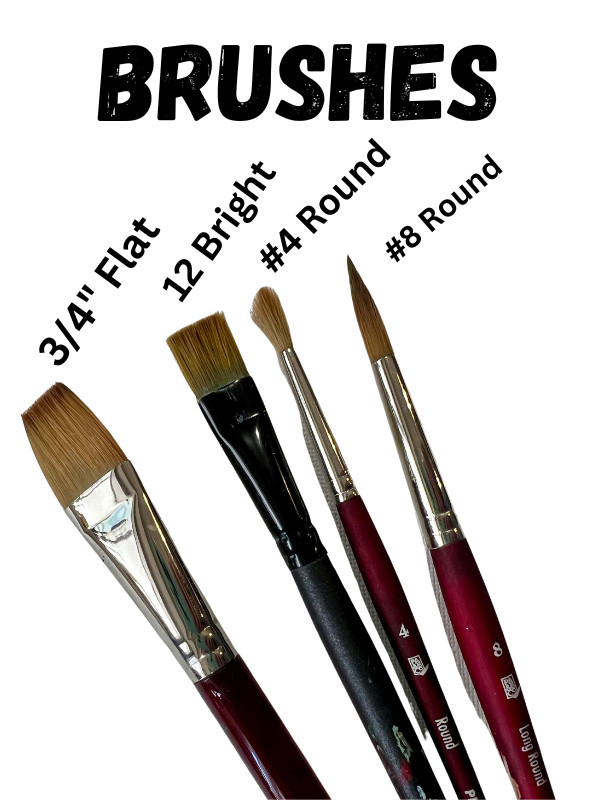
- Brushes (see sizes below)
- Toothpick (optional)
- Optional Traceable
- Optional Graphite Paper (if using traceable)
- Pencil & Eraser
Colors

Brushes
Traceable
This is an optional template you can use to trace the design onto your canvas and skip the drawing portion of the tutorial!
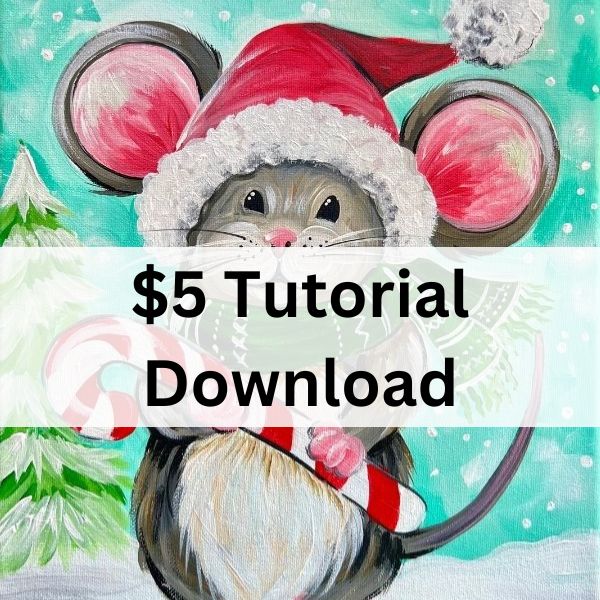
PDF Download
Available in my PDF shop! You can purchase different sized traceables, PDF download and video download for this tutorial!
Directions At A Glance
Video
Step By Step Directions
Note: a lot of times I paint the background first in my paintings! This time, I decided to try painting the subject first and then the background just to see how the process differs. It does end up working out! There’s no “under painting” in this tutorial (where you paint the entire canvas a color first). If you prefer painting the background first (around the drawing not over the drawing) you can do it that way! If you prefer “under painting” you can also do that too!
1. Draw Mouse
This drawing is a little tricky! If you want to skip the drawing portion and use a template, you are welcome to use the and trace it on the canvas.

If you are drawing this with me, here are the steps that I did to draw this cute mouse:
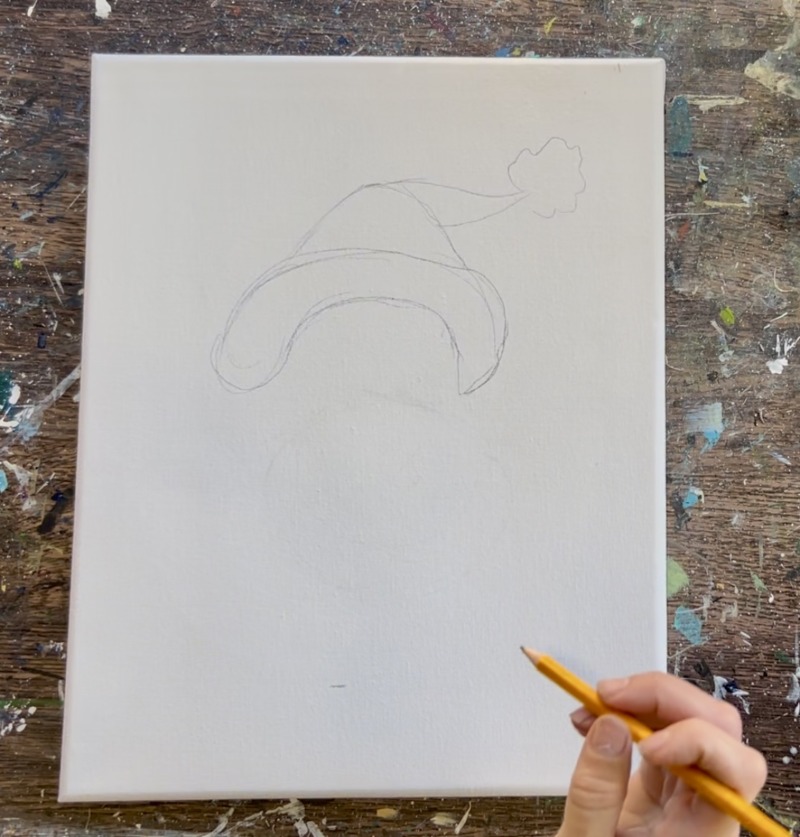
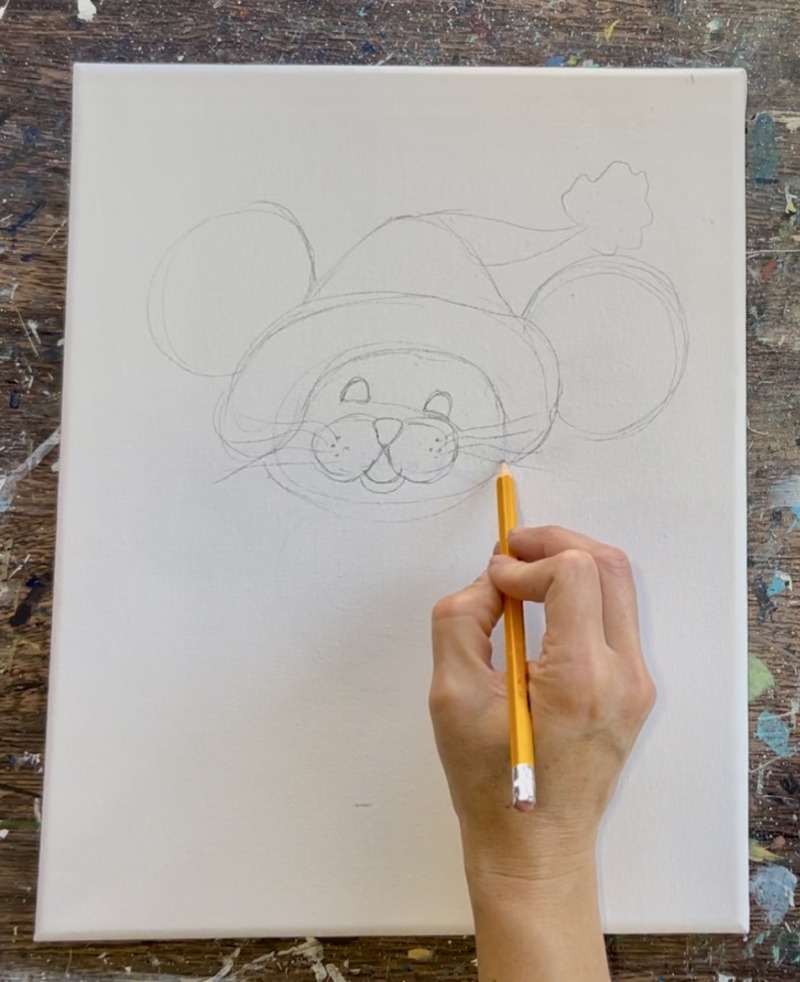
- Start at the top of the canvas and sketch the Santa hat. Leave about 2.5″ of space above the top of the hat. Draw a little arc and then a triangular shape where the hat folds backwards. Then draw a fuzzy circle shape for the end of the hat tip.

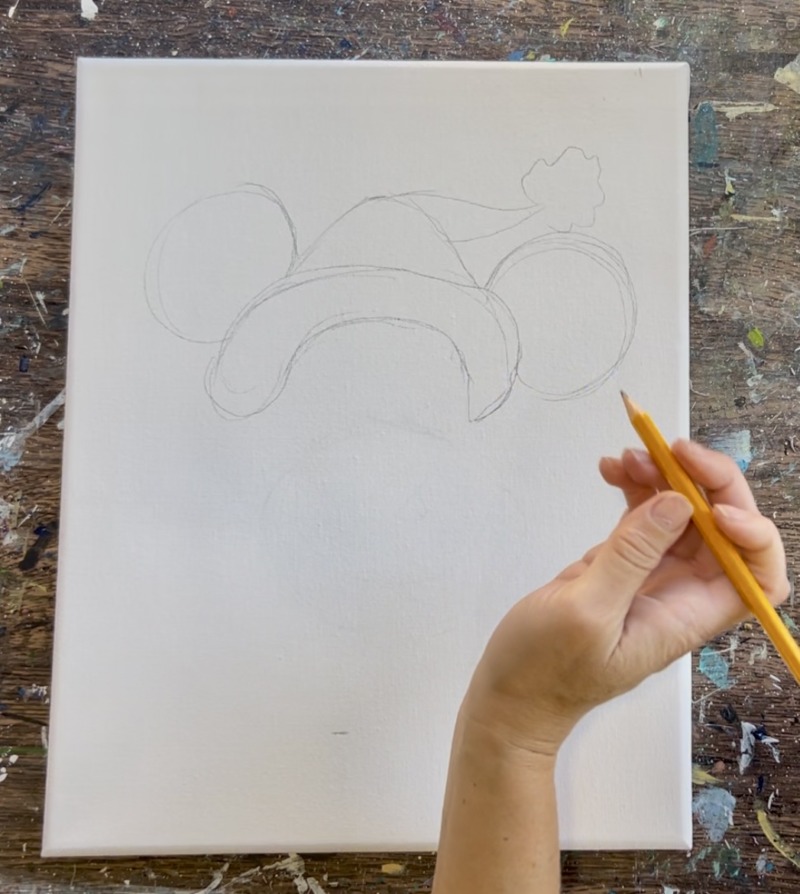
2. Draw an arch shape on the bottom of the hat. This hugs the top of the mouse’s head and also defines the width and height of the mouse’s head.
3. Draw two large circles on each side of the hat for the mouse’s ears. The ear on the left side of the canvas is slightly angled upwards from the ear on the right side of the canvas.
4. Draw an oval shape to define the mouse’s head. Then draw the nose as an upside down triangle with curved corners. This is in the middle of the oval. Then draw a mouth.

5. Since the eyes are slightly at an angle for each other, draw a slightly diagonal line to define the bottom of the eyes.

6. Then draw two arch shapes for the eyes. You can also simplify this and just do the eyes as small oval shapes!
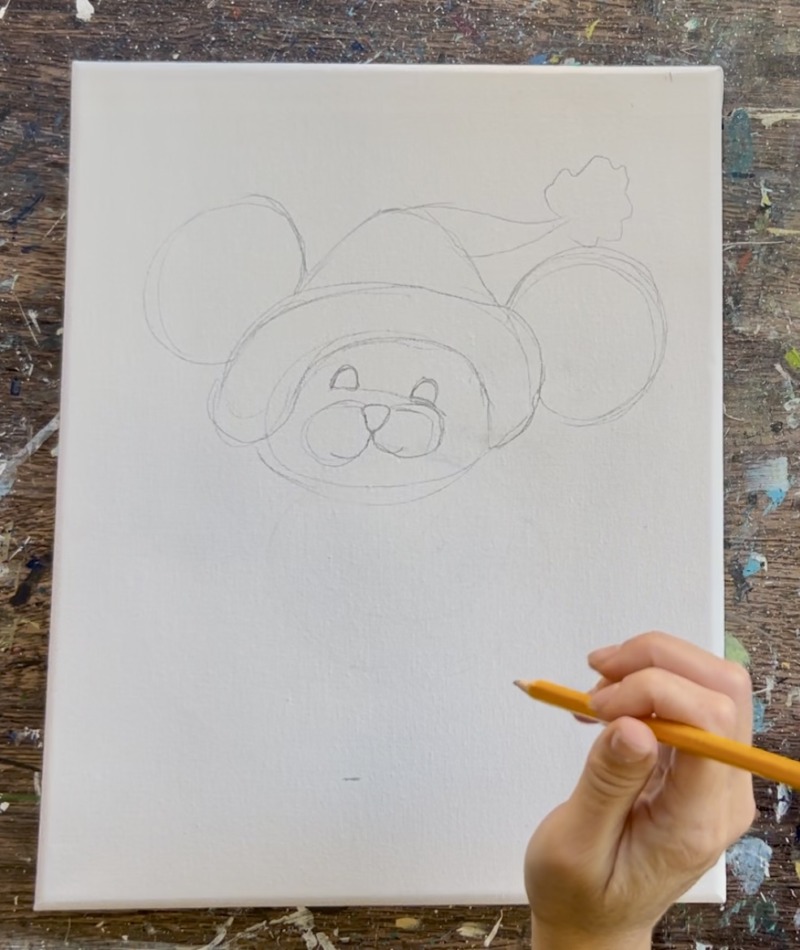
7. Draw two circular shapes for the cheeks that go from the top of the nose, around and down. Then draw a mouth shape in between the cheeks under the nose/ mouth.

8. Draw little dots and lines for the whiskers.
9. Draw the scarf. This slightly overlaps the bottom of the mouse’s face and curves around the neck (which we don’t see). The height of the scarf is about 1″ wide. Then draw two pieces of the scarf where they tie together on the right side of the canvas.

10. Draw the candy cane. To do this, draw a basic line first to define the size of the candy cane. Then turn that line into a shape.
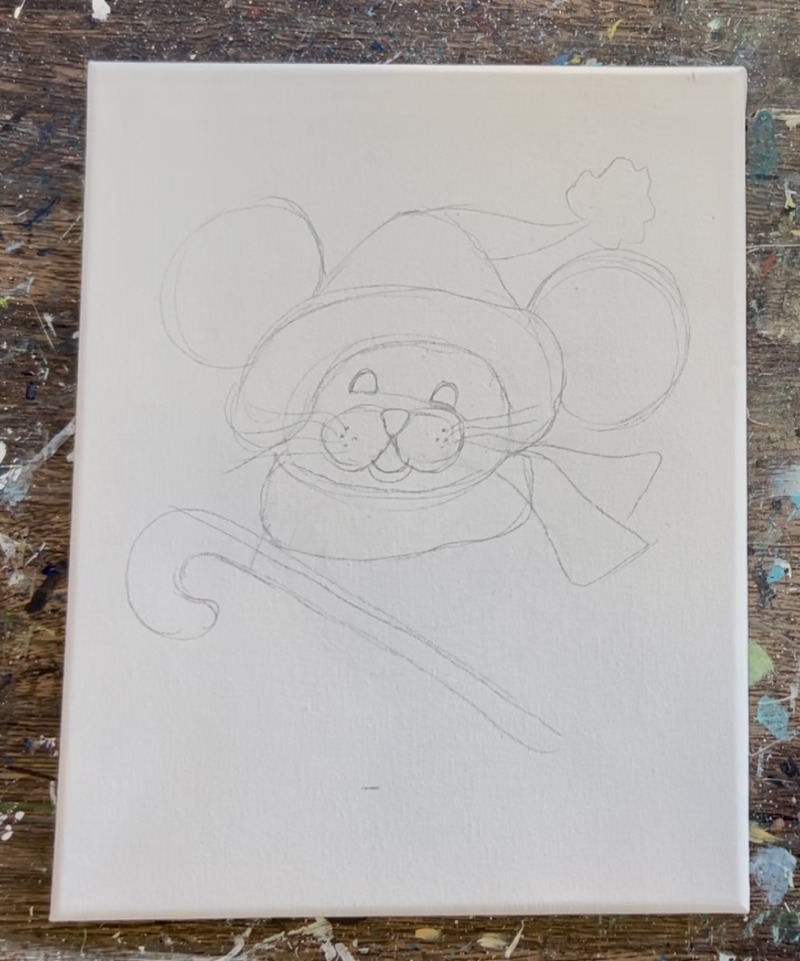
11. Draw the arms so they are holding the candy cane. You don’t have to draw the hands.
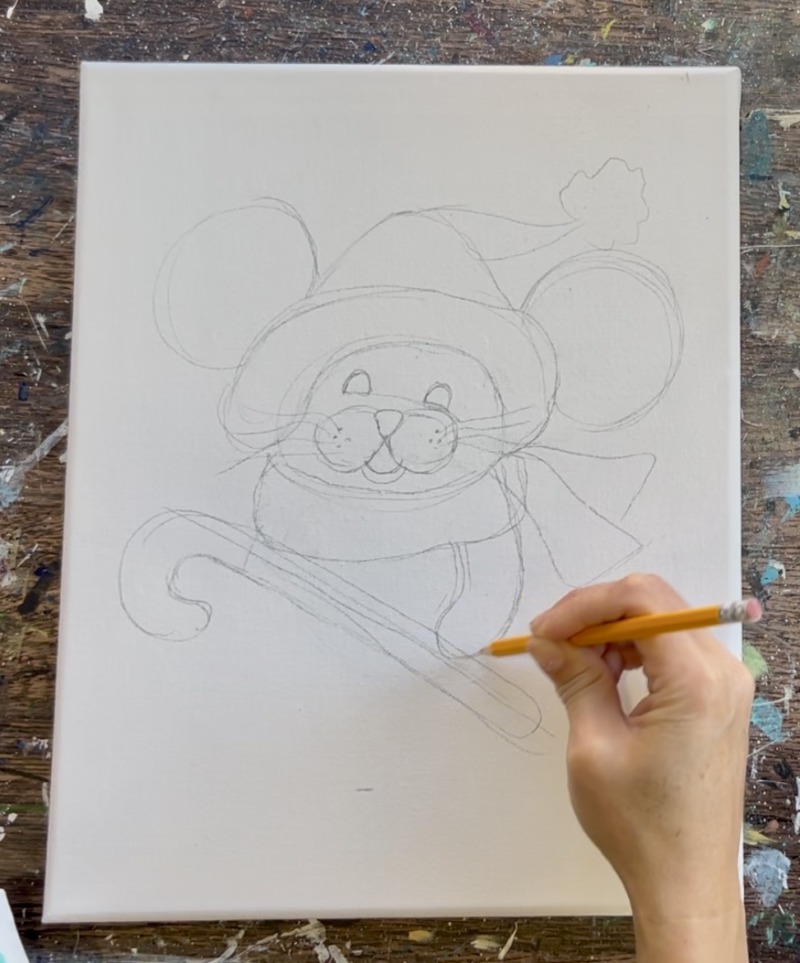
12. Draw the body of the mouse. If it helps, you can make the lines on the body overlap the scarf/ arms/ candy cane so you can get the shape defined. The shape is wide and rounded on the bottom but goes more narrow at the top when it reaches the mouse’s head (like a teardrop or a candy corn shape). It is slightly flat on the bottom.
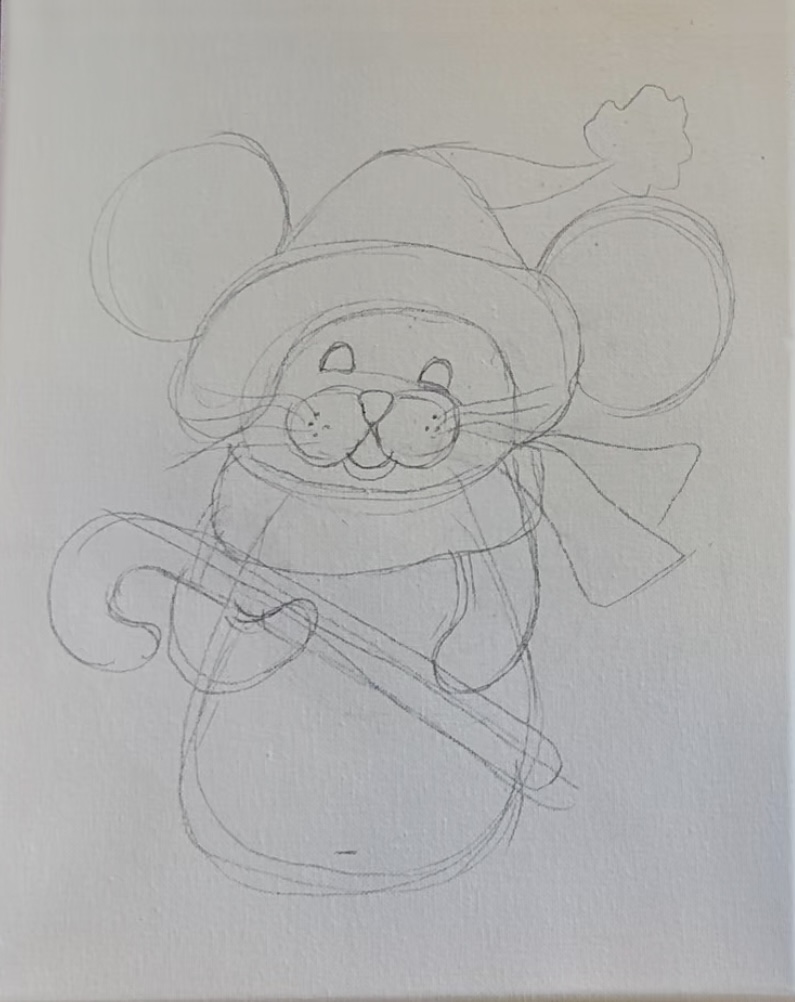
13. Then draw the feet. These are two webbed shapes/ triangular shapes with toes. They are going diagonally outwards.
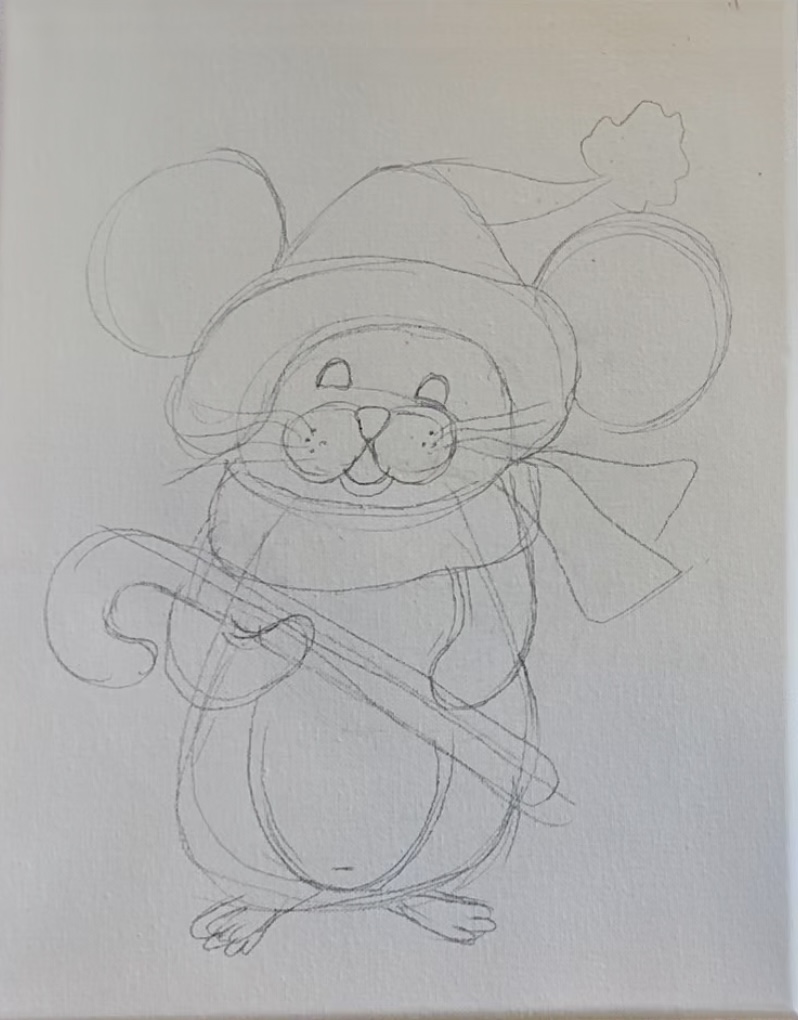
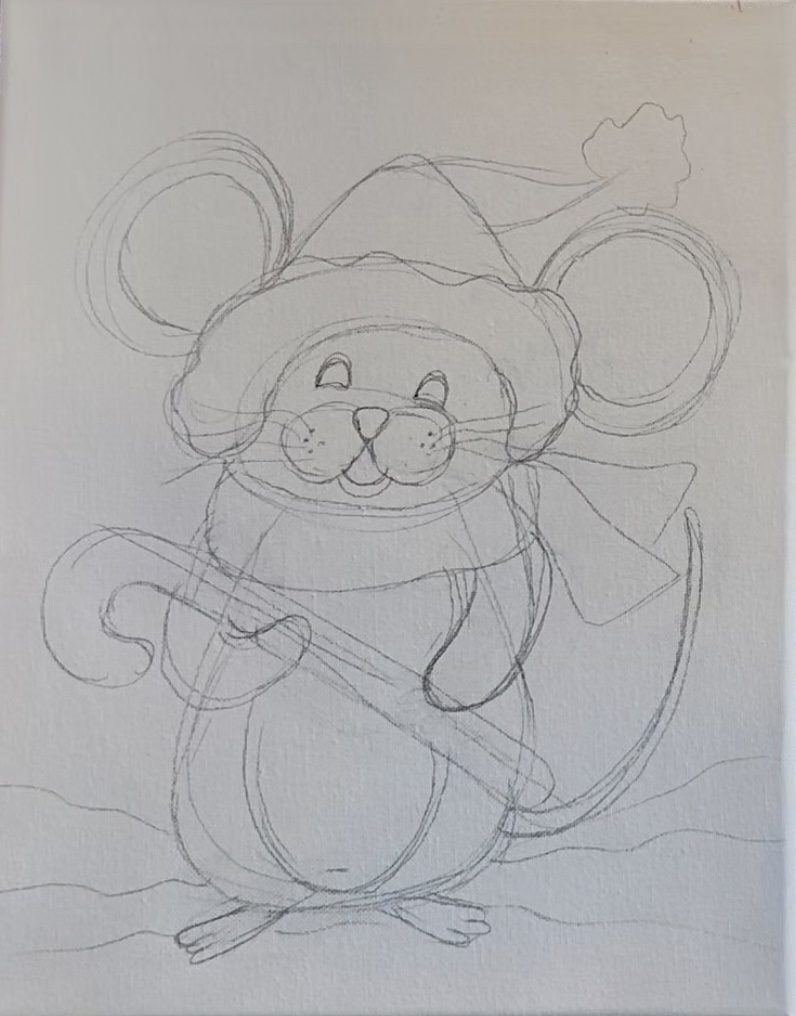
14. Lightly draw the “snow line” behind the mouse. This will define where the sky stops and where the snow starts.
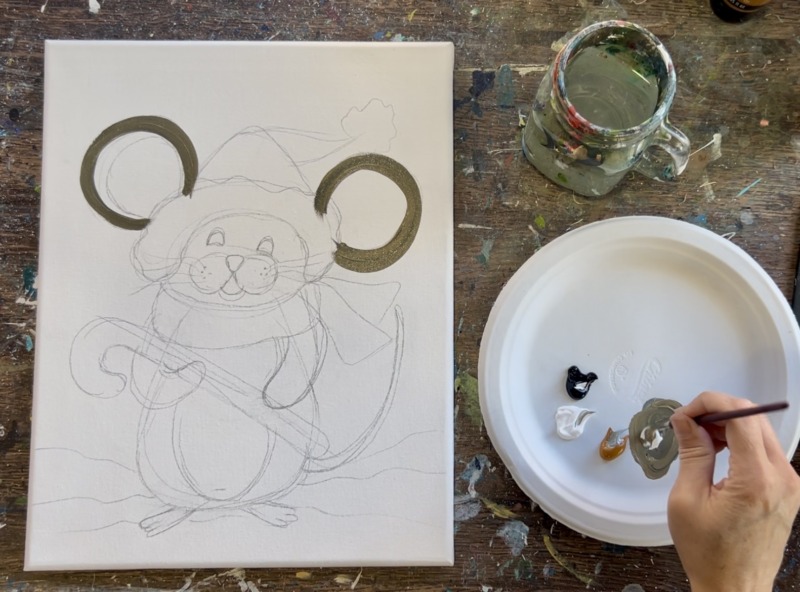
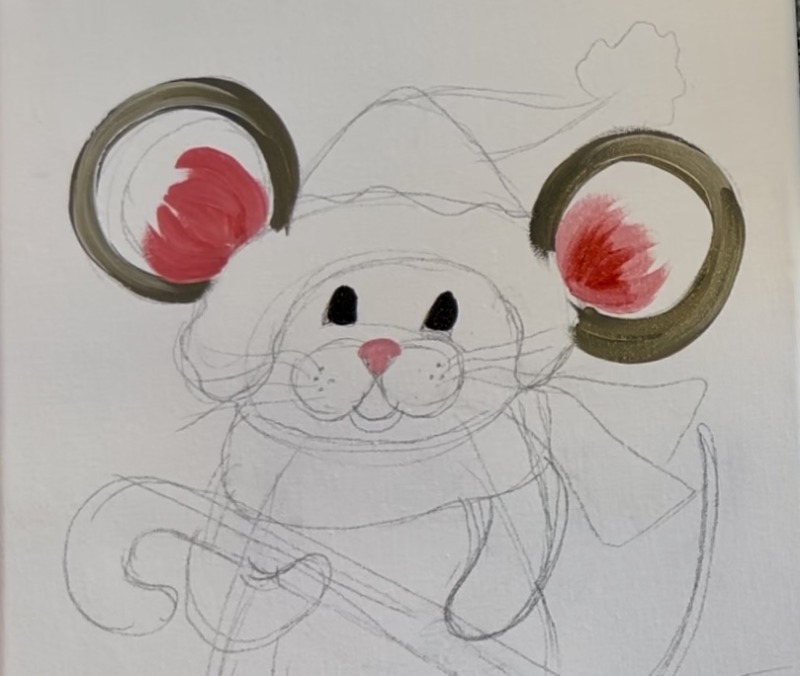
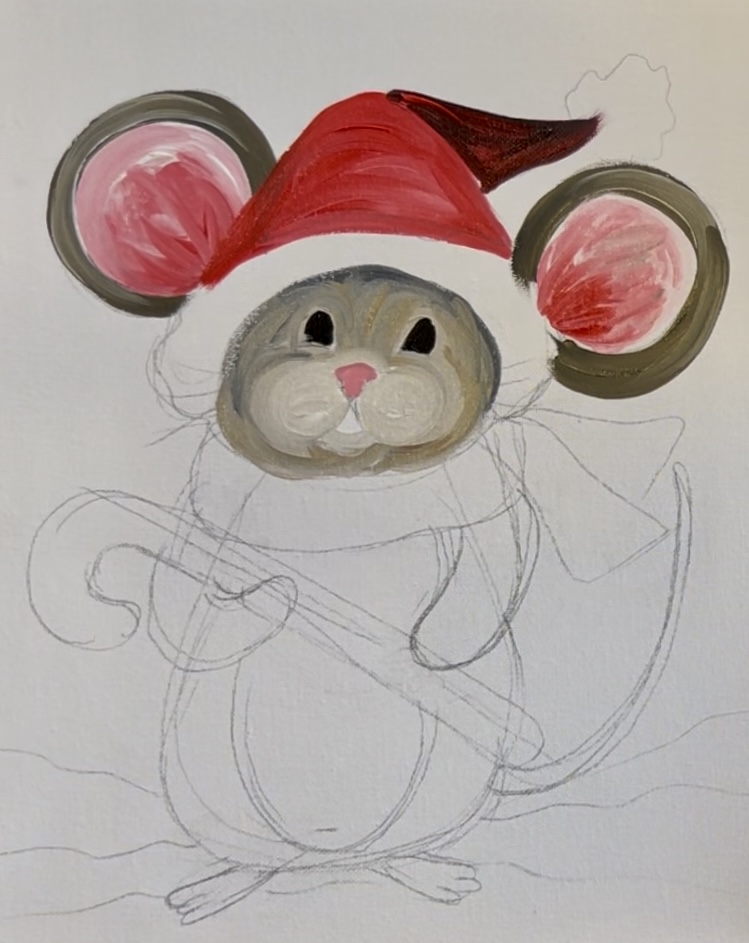
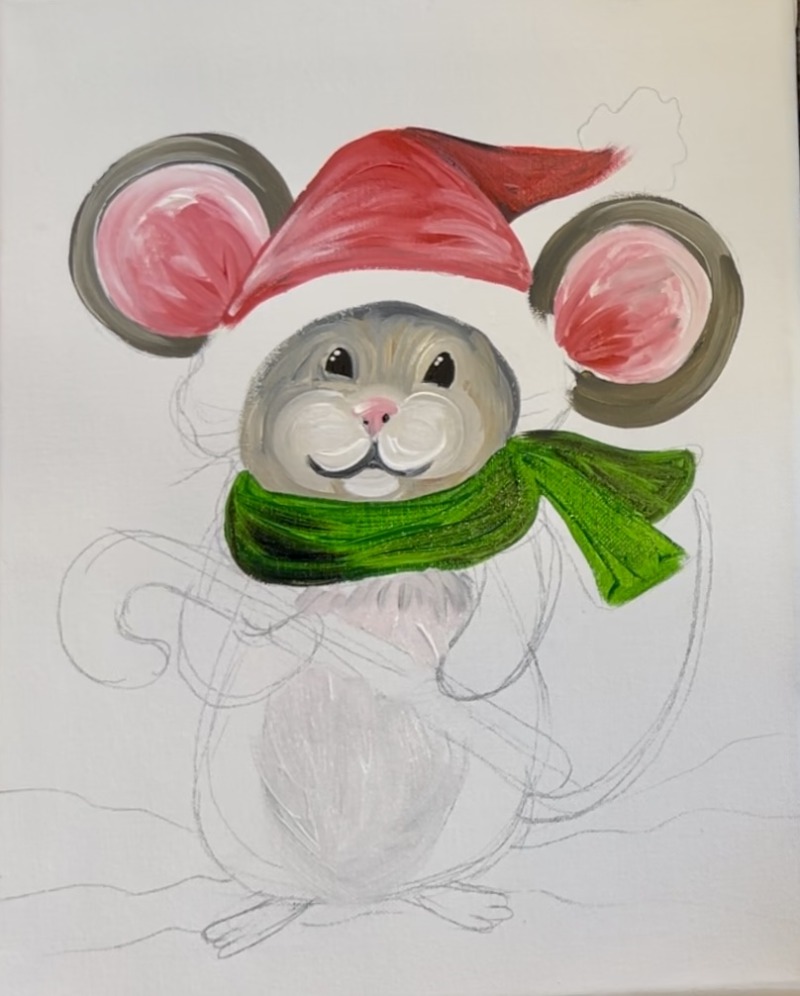
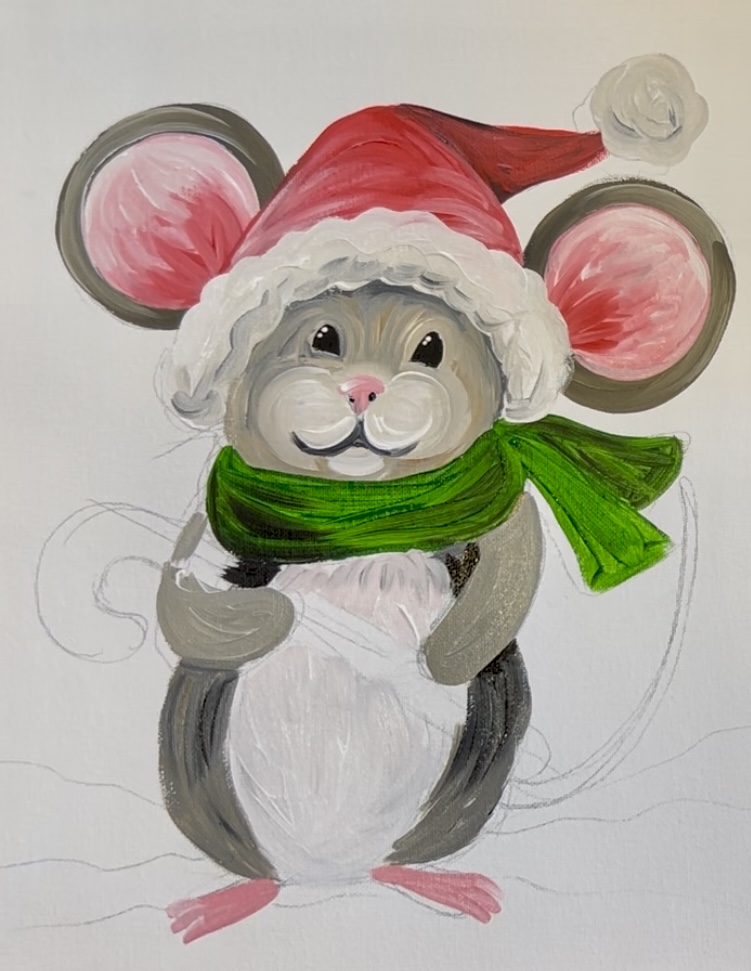
2. Paint Ears, Eyes & Nose
Mix a dark brow-gray color on your paint palette by mixing equal parts black, “raw sienna” and white. Use the #4 round brush to paint the outer edge of the mouse ears.
Then use “mars black” to paint the eyes.
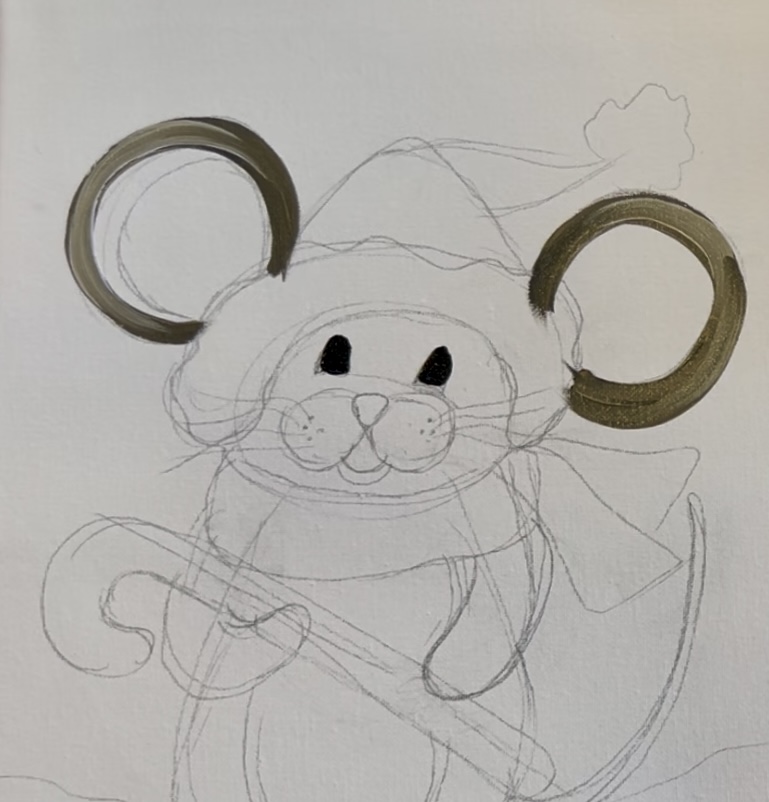
On your paint palette, mix “cadmium red medium hue” with “titanium white” to make various shades of pink. For the nose, I mixed about 1 part red to 2 parts white to make a lighter pink color.
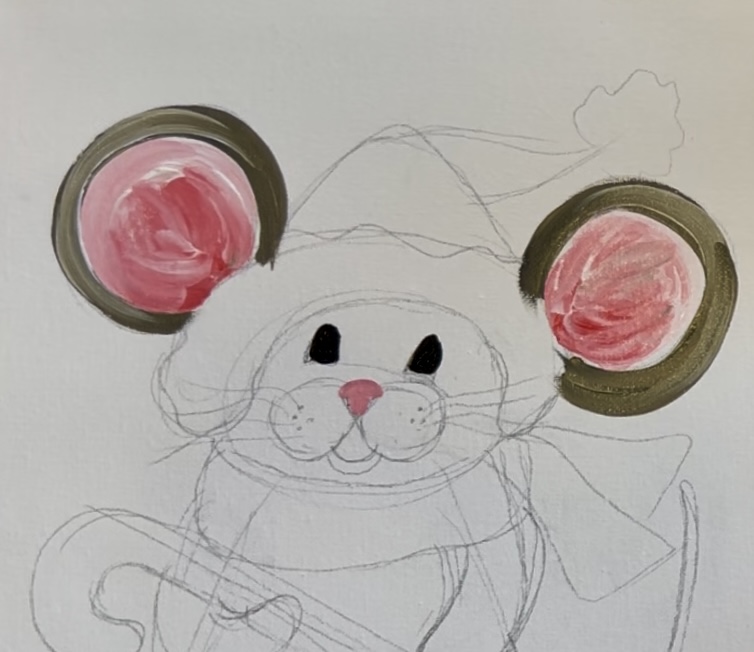
Paint the base of the ears (bottom portion of the circle) with a darker pink. Then blend lighter pink colors at the top. This will create a “gradient” in the ears where they are darker on the bottom and lighter at the top. I actually used my finger to blend the colors gently together.
3. Paint Santa Hat
Use “cadmium read medium hue” to paint the top of the Santa hat. Then mix a tiny bit of black into the red to make a shadowy red color. Paint the back part of the hat with this darker color where the hat folds.

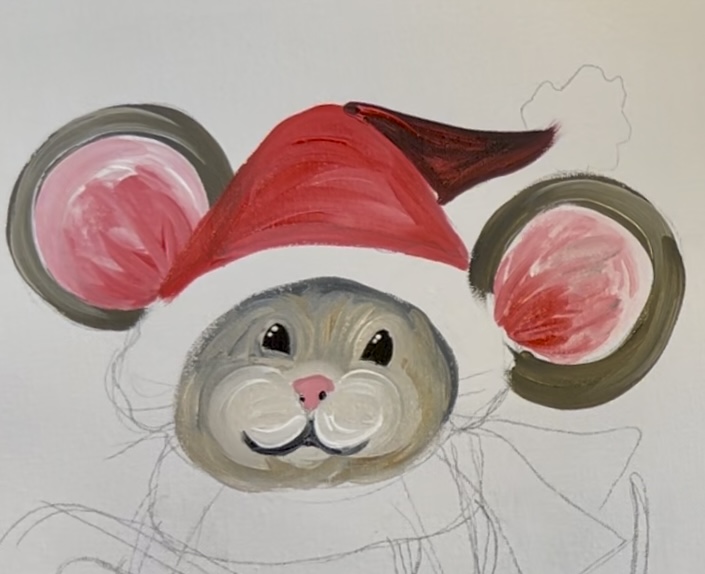
4. Paint Head, Cheeks, Mouth
Use the same color you used for the ears but add more “titanium white” into the color. Use the round brush to paint around the eyes and cheeks. The paint strokes contour around those shapes.
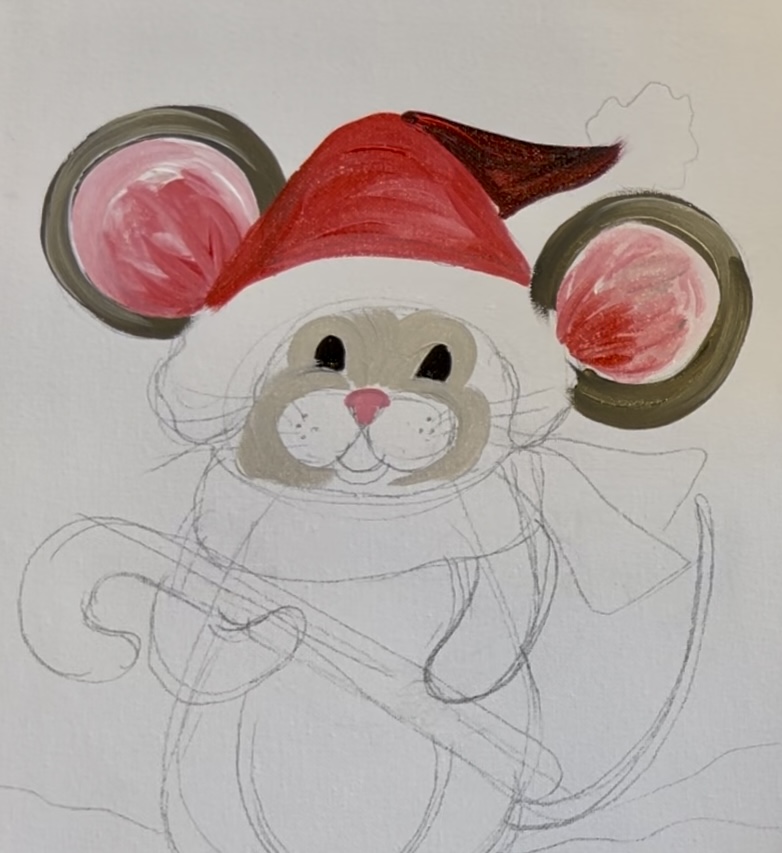
Under the hat and around the edges, blend just a little more black to the gray-brown color to make it a little more “shadowy”.
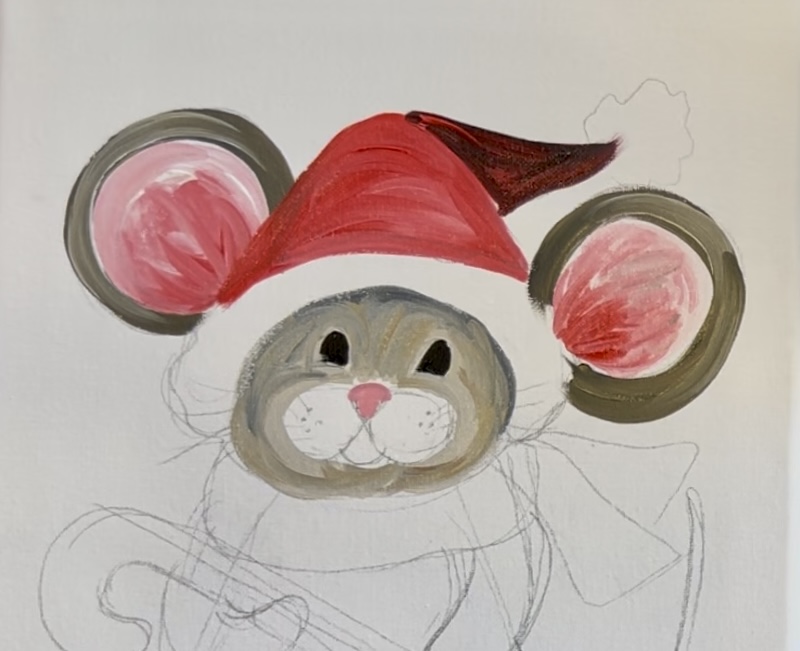
Next, paint the cheeks of the mouse. Mix a little more white into your gray-brown color. Paint the cheeks with circular paint strokes so the color shows up lighter in this area. Paint a little curve for the bottom of the mouth.

5. Highlights On Eyes
Use a toothpick to paint two little white dots in the upper left parts of both of the eyes. (You can also do just one dot highlight instead of two).
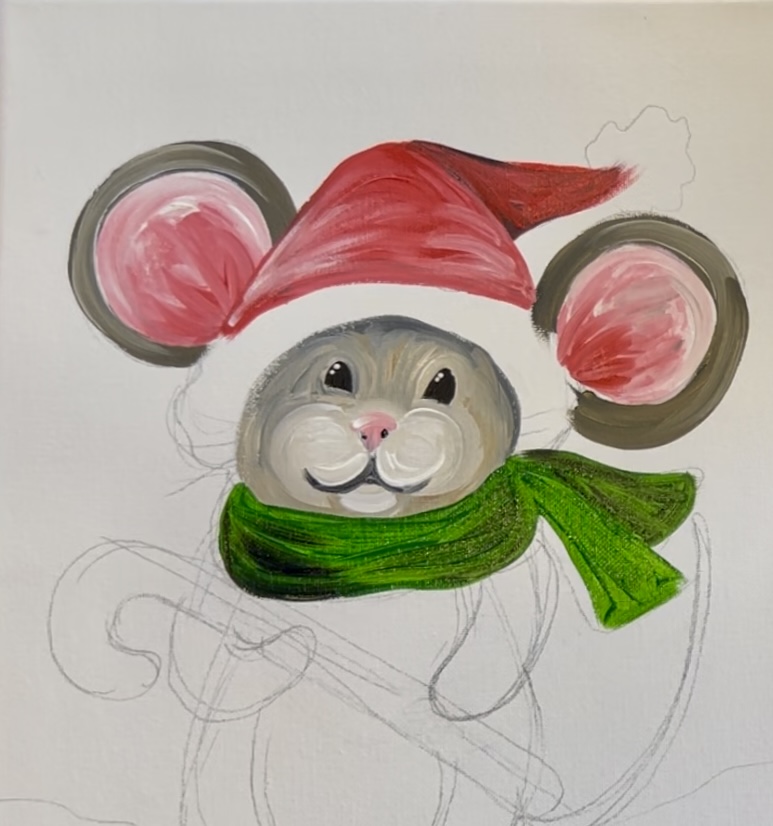
6. Paint Scarf
Use “hooker’s green hue” to paint the scarf. This scarf overlaps a portion of the bottom of the mouse’s head and completely covers its neck.
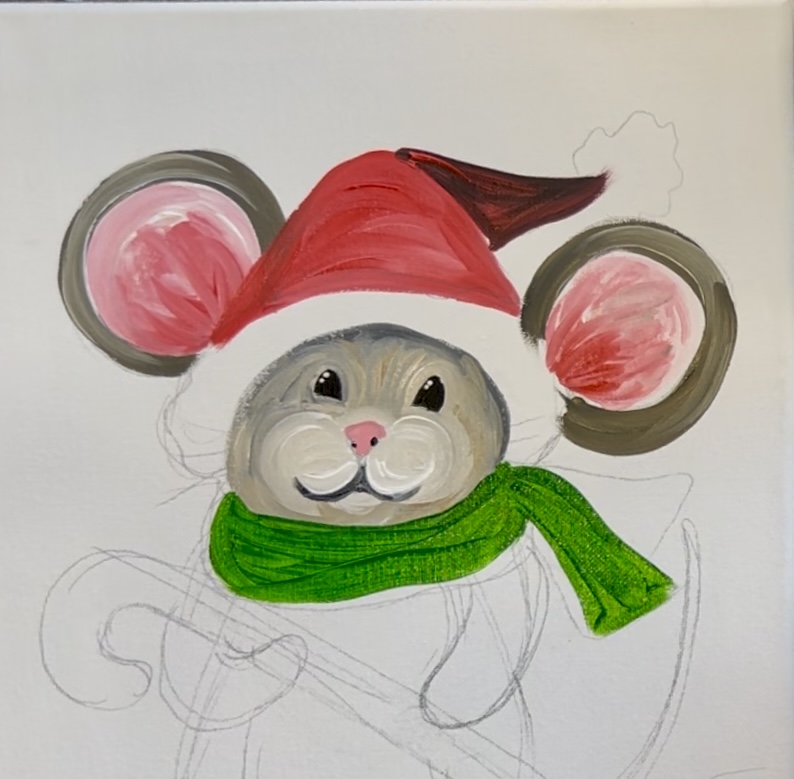
Before the first layer of green dries, blend just a little bit of black into the scarf on the left and a little bit of the scarf on the back tie. This gives the scarf a little bit of shadowing! We will paint a second layer of the green in a later step.
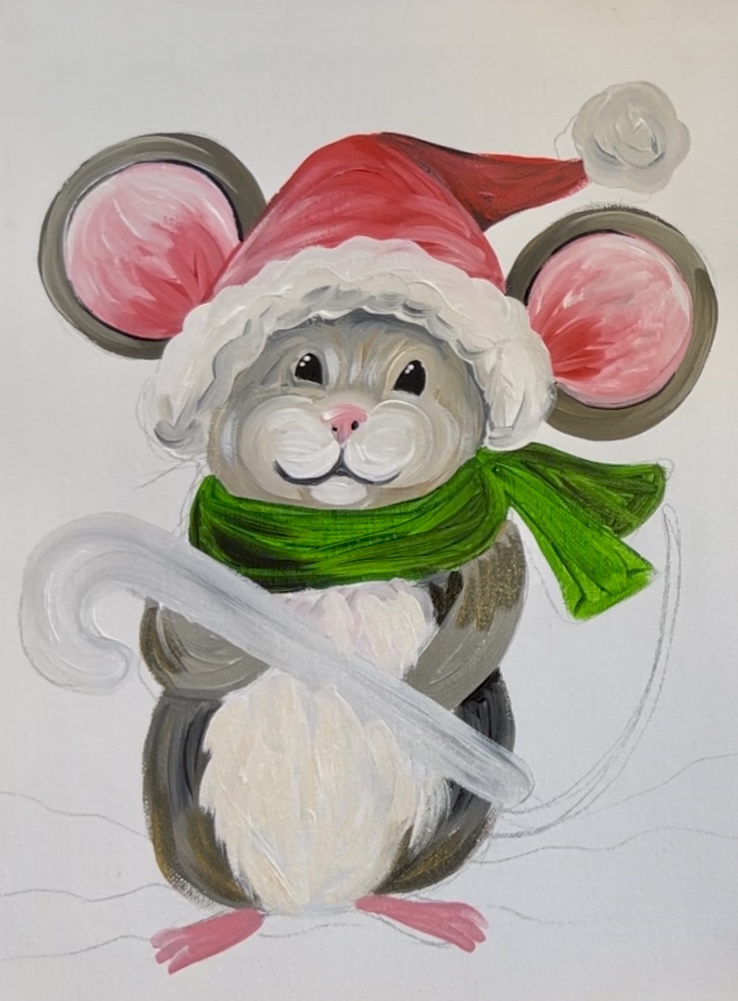
7. Paint Fur On Belly
Use titanium white mixed with just a tiny bit of your “brown-gray” color on your palette (that you used for the head & ears). Paint the belly using paint strokes that go in a downwards direction. Start from the bottom and work your way to the top. Then paint a few darker paint strokes at the top just under the scarf (to give this area a little bit of shadowing).
8. Paint Arms & Sides Of Body
Mix on your palette the same color you used for the mouse’s ears (raw Sienna, titanium white and mars black). Use this color to paint the sides of the mouse’s body and arms.
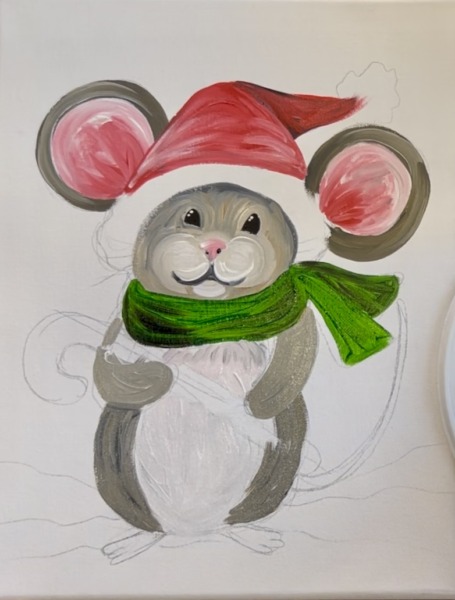
Then add a little bit of black to the areas above and under the arms for “shadowing”. This also helps the arms stand out better.
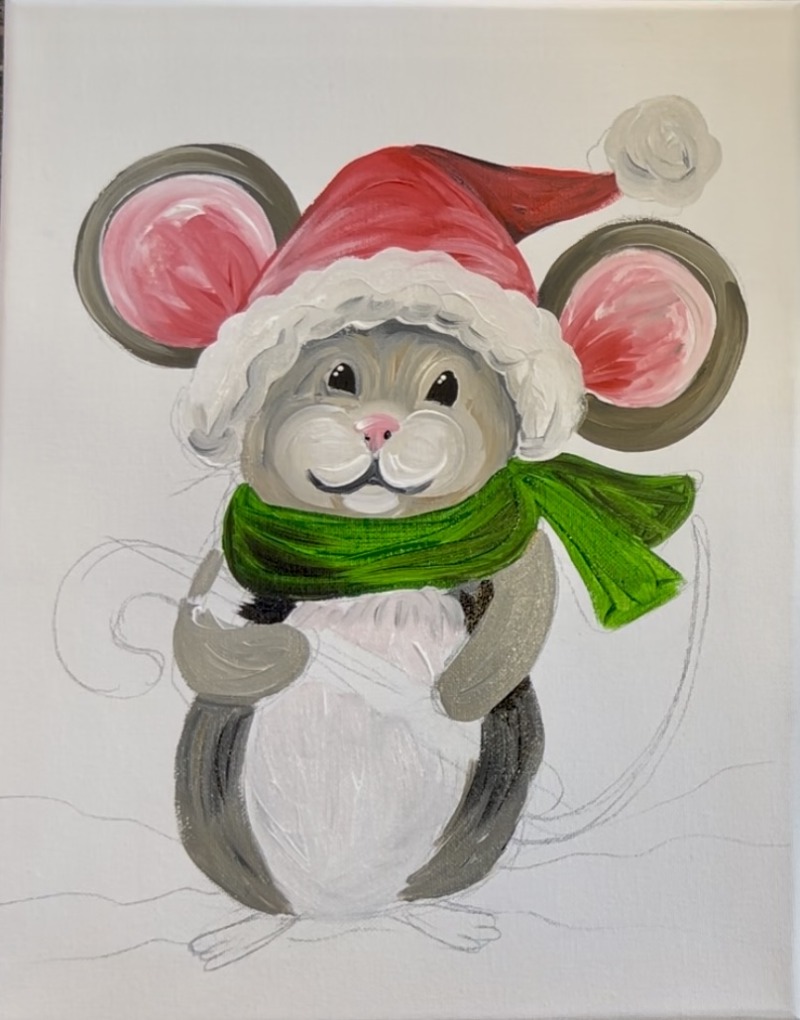
9. Paint White Fluffy Parts On Santa Hat
Use titanium white mixed with a tiny bit of black (to make a very light gray) to paint the bottom fluffy part of the Santa hat as well as the small fluffy ball on the end of the hat. Make sure the edging of the white fluffy part is a little bit wavy for fun texture!
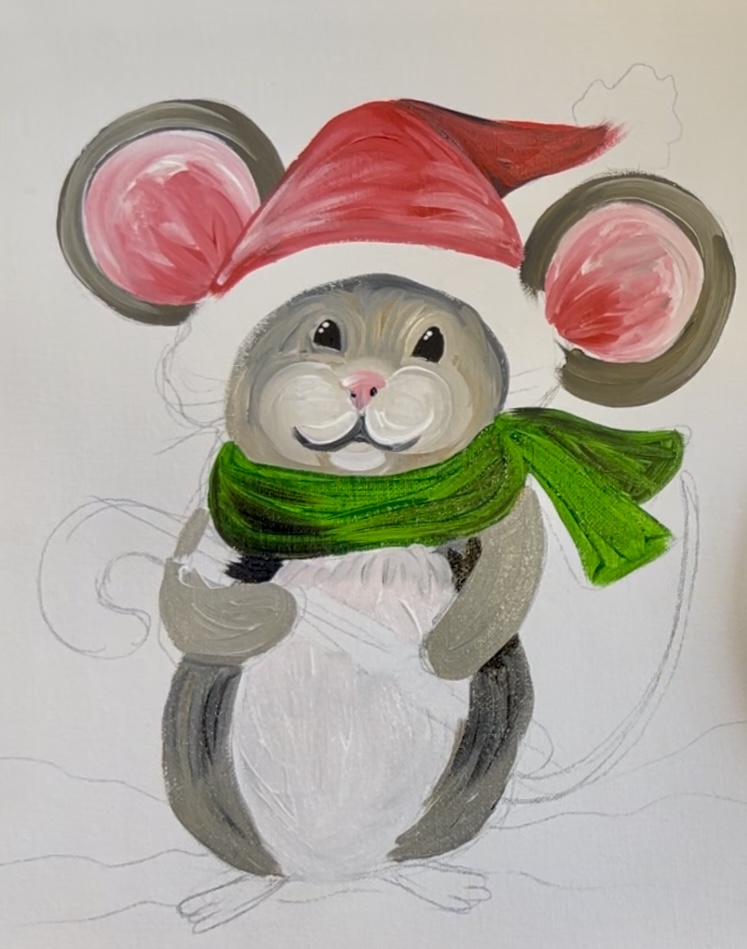
10. Paint Feet
Mix a pink on your palette by mixing equal parts red and white together. Use the #4 round brush to paint the feet.
11. Paint Candy Cane
Use “titanium white” to paint the candy cane shape. I made this overlap the arms for now! Also, the white from the candy cane ended up getting a little gray in it so that is why it looks light gray. This is fine because we can paint a second layer over it later!
12. Paint Background
Use the colors “bright aqua green” and “titanium white” to paint the background. Double load the 3/4″ flat brush OR the #12 bright brush in both the turquoise and the white. Paint angled paint strokes blending the turquoise and white together. Go around the mouse. If needed, use the round brush to get into some of the tiny areas around the mouse. Fill the larger parts of the background in with bigger angle/ expressive paint strokes.
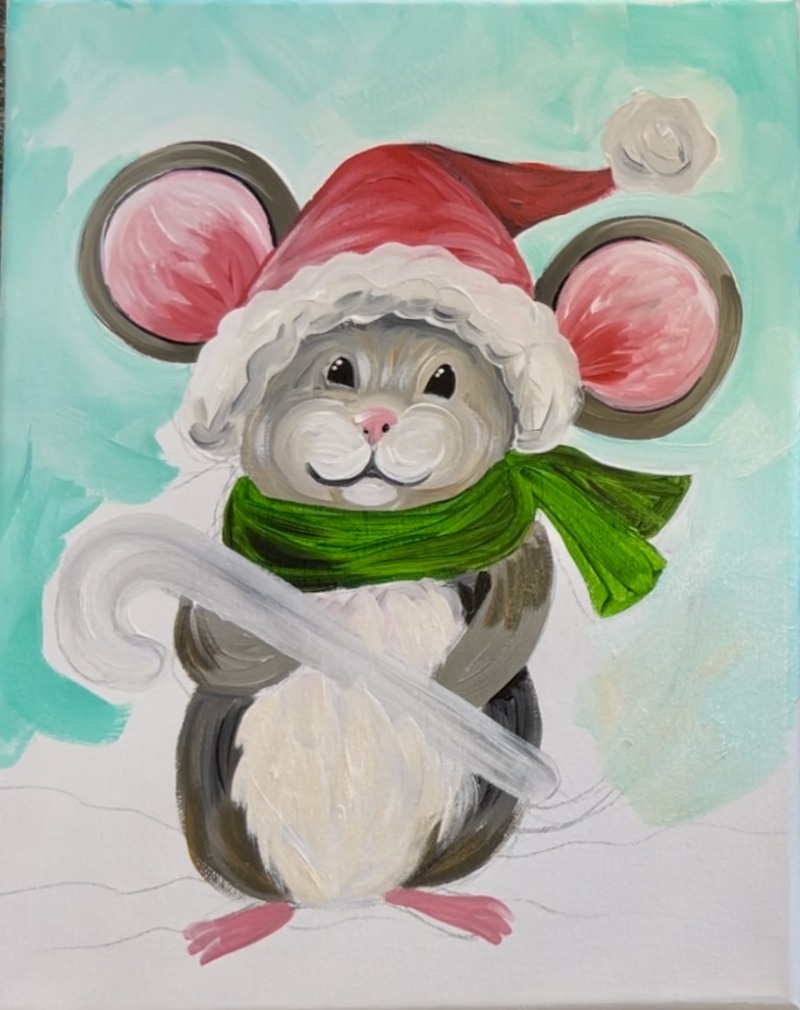
I did a little extra darker aqua closer to the edges of the canvas (with less white) and a little extra white closer to the mouse. This helps create some added contrast in the background around the mouse.
13. Paint Snowy Ground
Use either the 3/4″ flat or the #12 bright brush to paint the ground titanium white. Define the edge of the snow line (where it meets the sky) with a wavy white line. Then use “mars black” to blend in some gray on the bottom of the snow so that it is shadowy on the bottom. Blend a little more white into the gray if needed.
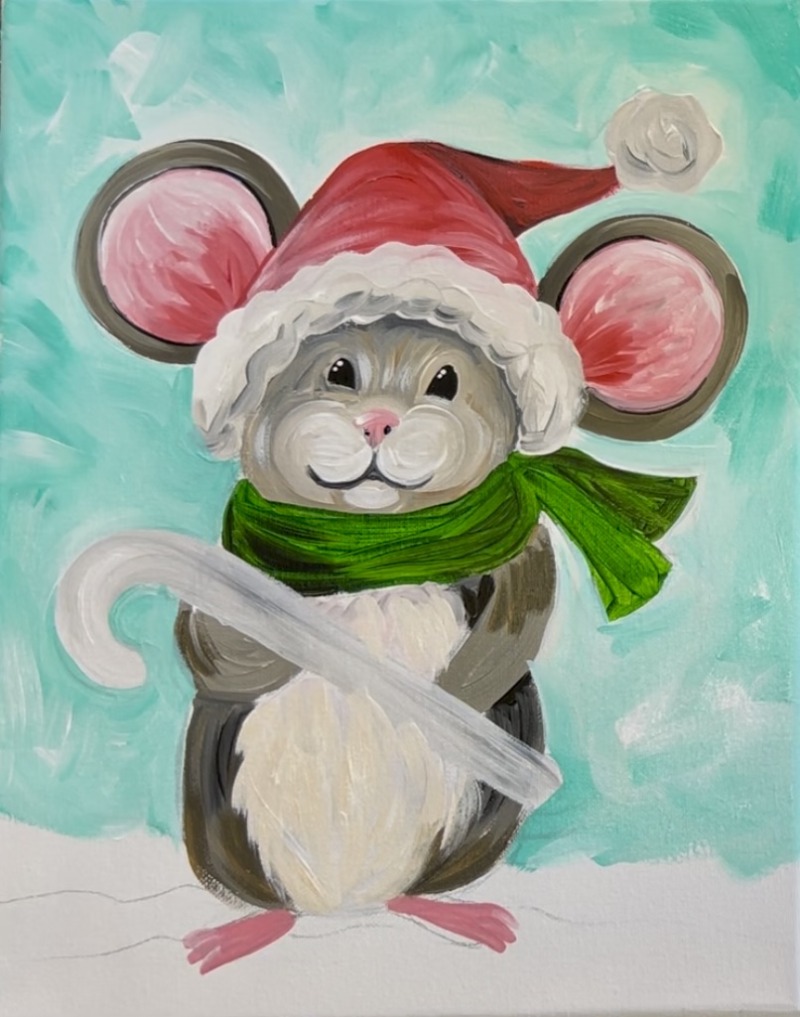
14. Second Layers On Santa Hat & Candy Cane
Use the #4 round brush and “titanium white” to “stipple” on texture over the fuzzy parts of the hat. When you “stipple”, you load white on the end of the paint brush and tap the end of the brush to make a bunch of thick dots that are bunched together. To add “shading” to this, add a little bit of gray on the bottom of the hat and bottom of the fuzzy ball.
15. Fur Textures & Tail
Use the same dark brown-gray color and the #4 round brush to add some fur texture sticking out towards the bottom of the mouse’s ears. Drag little pointed brush strokes in an outwards direction. Do this on the arms and sides of the mouse’s body. These little fur paint strokes will overlap your background.
Use the dark gray-brown color & the #4 round brush to paint the mouse’s tail.
16. Tassels On Scarf & Stripes On Candy Cane
Add a second coat of paint over the scarf using “hooker’s green hue”. Use the #4 round brush (or the tip of the #8 long round brush) to paint little green tassels on the ends of the scarf.
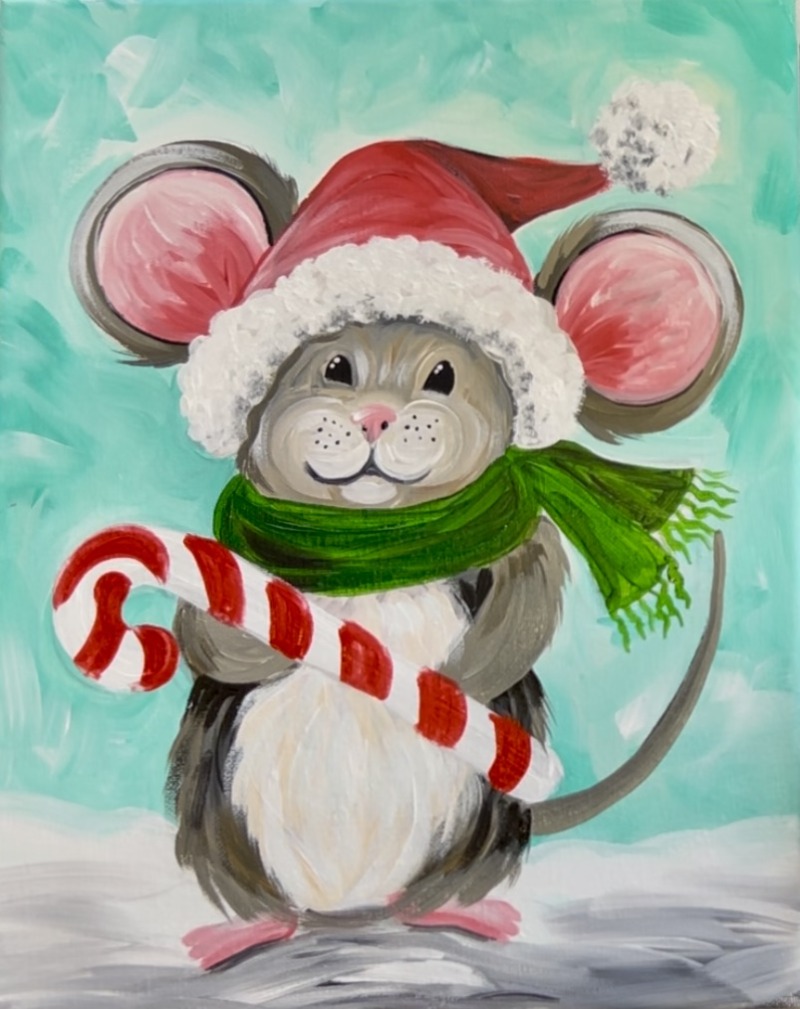
Next, use “cadmium red medium hue” to paint red stripes on the candy cane.
17. Whiskers, Patterning On Scarf
Use a toothpick, the end of one of the round brushes or a black paint pen to paint little black dots on the cheeks of the mouse. Then use “titanium white” and the #8 long round brush (or a white paint pen) to paint whiskers. When you do whiskers with the “long round brush” you really want to make sure the paint is just slightly watered down and paint is only loaded on the end tip of the brush. Lightly paint the thin lines starting from the dots and dragging the line quickly outwards.
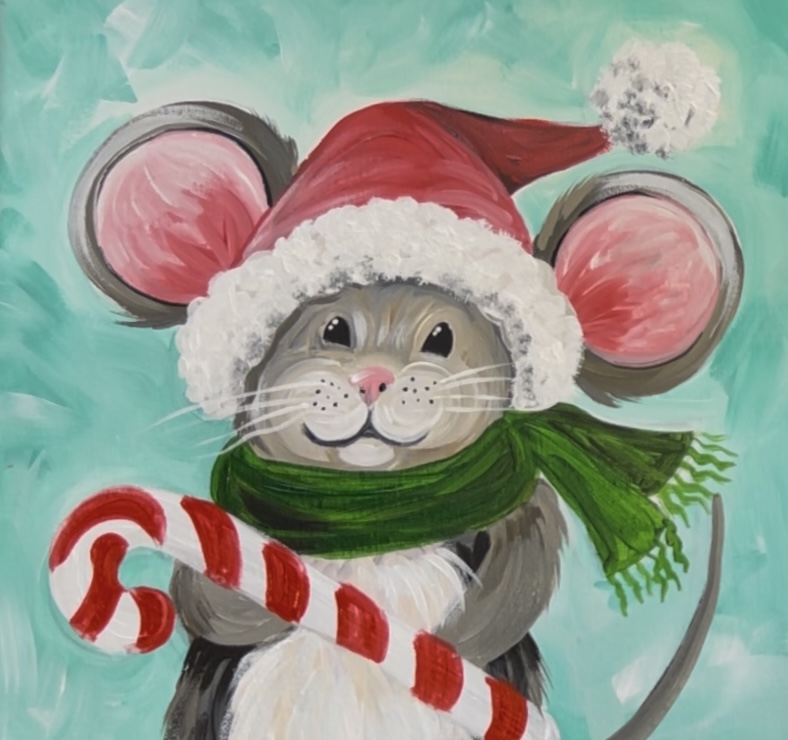
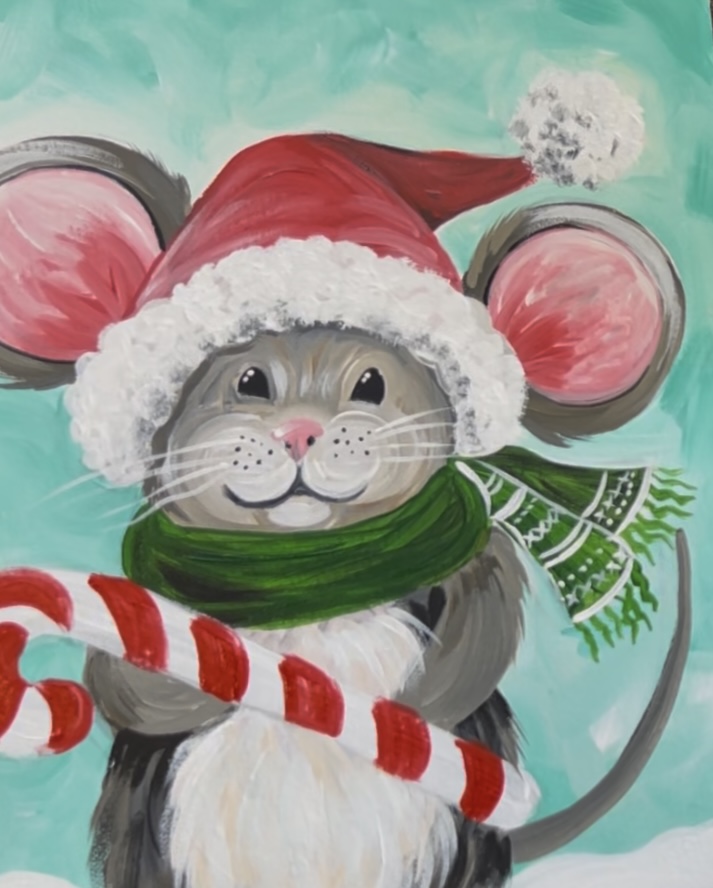
Next, paint white patterns over the scarf! I used the end tip of the #8 long round brush but you can use any round brush for this or even a white paint pen.
18. Paint Hands & Lightly Outline Candy Cane
Use the same light pink color you used in the feet to paint the hands. These are simple 4 finger curved paint strokes that overlap the candy cane. The hand on the left is pointing upwards and the hand on the right is pointing downwards. Blend a little white into the pink to make some “color variation” that blends on the canvas.
If needed, paint a second layer over the candy cane (white or red stripes). Then loosely outline the edges of the candy cane with “mars black”. You don’t need to outline the entire candy cane but you can outline some of it to help define the shape.
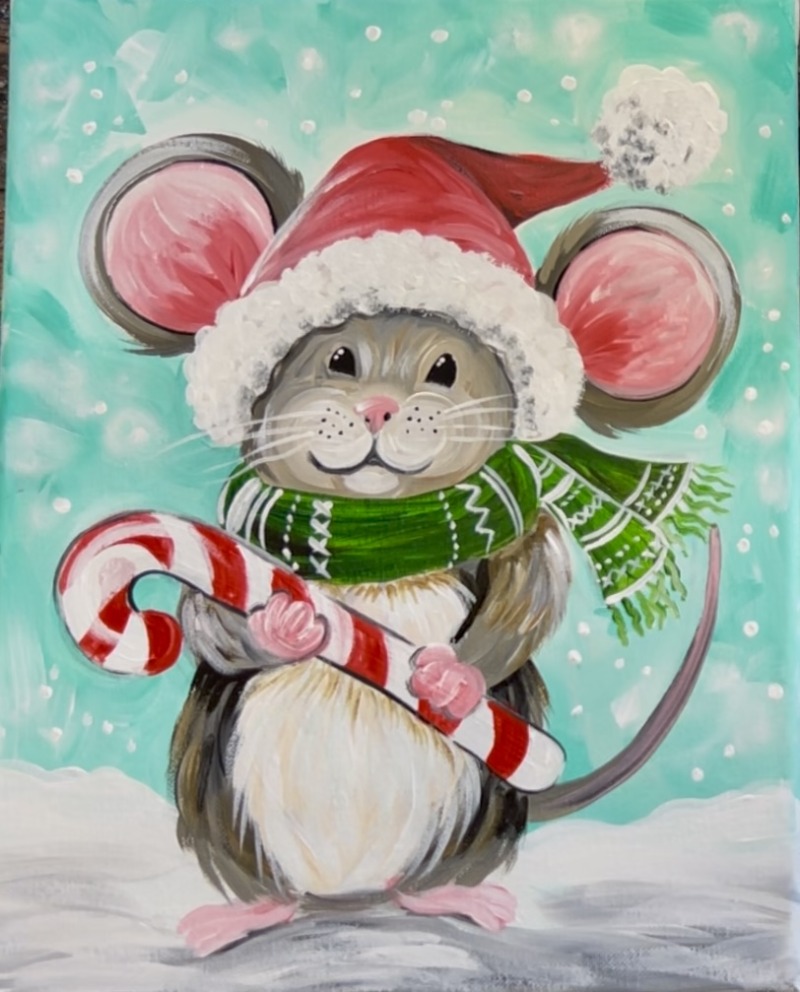
19. Snow Dots In Background
Use titanium white to paint dots all around the background. You can also use your finger to “smear” some of the dots to create large blurry circles.
When the candy cane dries, dry brush a “highlight line” over the top curved part of the candy cane.
20. Christmas Tree in Background
Use the #12 bright brush and green mixed with white (equal parts) to paint the Christmas tree in the background. Start at the top of the tree and stroke each of the branches downwards. Use the tip of the brush (holding the bristles vertically) to create these branch strokes. As you work your way down, form the tree shape (go behind the candy cane and mouse).
The bottom of the tree rests at just the edge of the snow line in the background (it needs to be behind the mouse and not level with the mouse’s feet). Wait for this green layer to dry.
After this green layer dries, use “titanium white” to layer on the snow! Paint the same type of tree branch strokes (stroking down with the 12 bright brush). This time, leave gaps of green between each of the white rows of branches.

Finished! Some final touches for this painting could be adding another fur layer on the belly. I used some lighter bright to add some fur lines under the scarf and under the candy cane. This creates some shadowing! You can also add some shadowing under the mouse’s feet or loosely outline the shape of the feet (including the toes).