Would you like to save this?
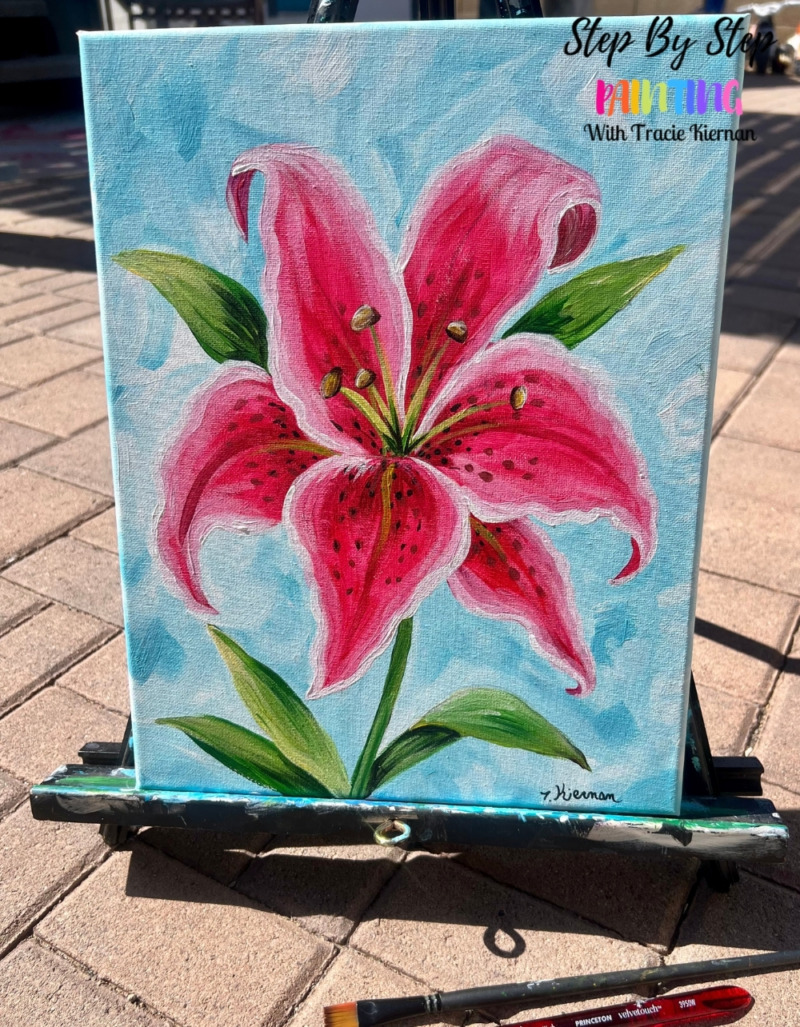
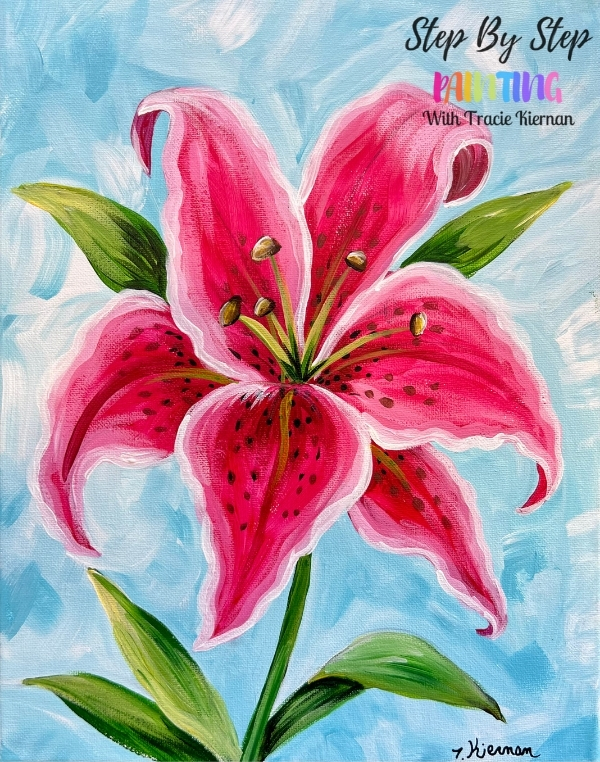
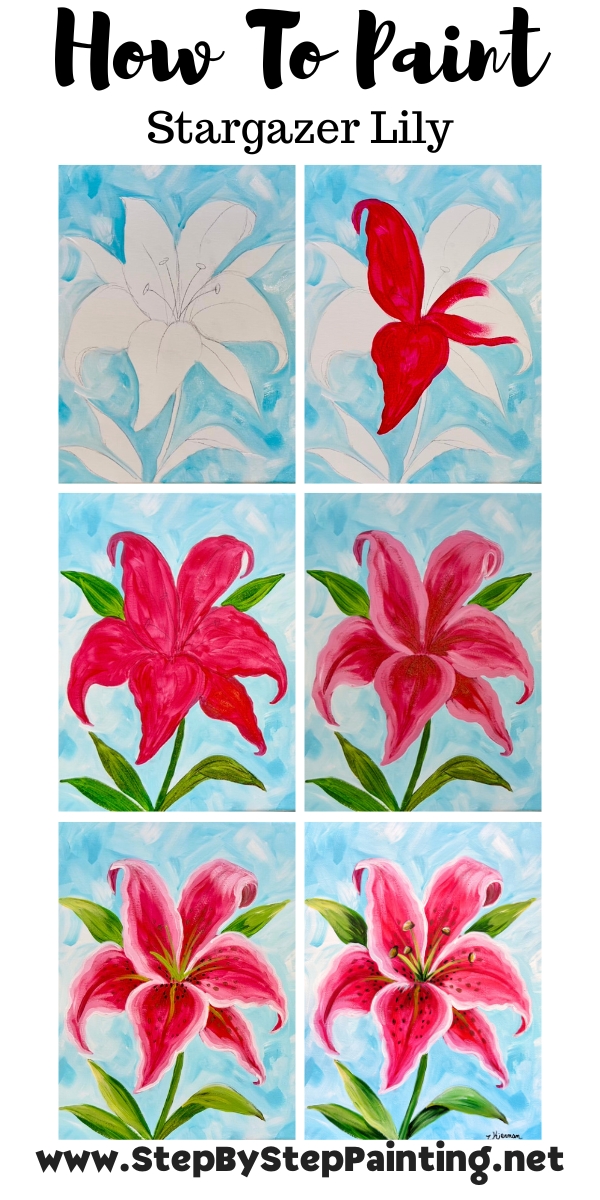
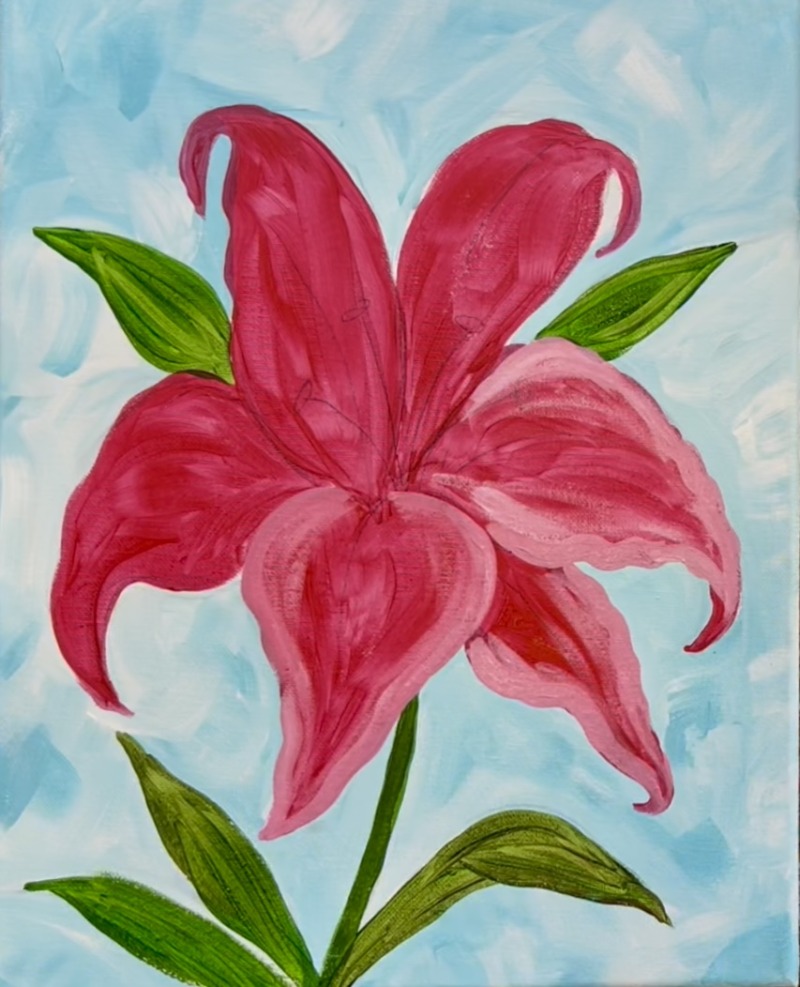
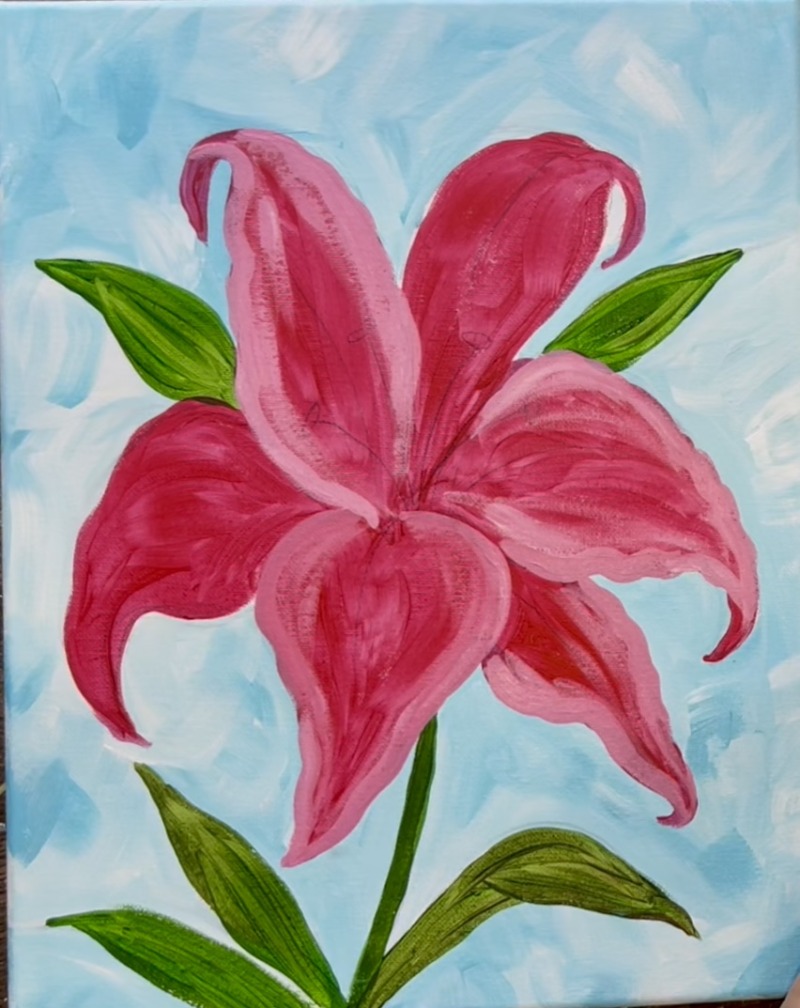
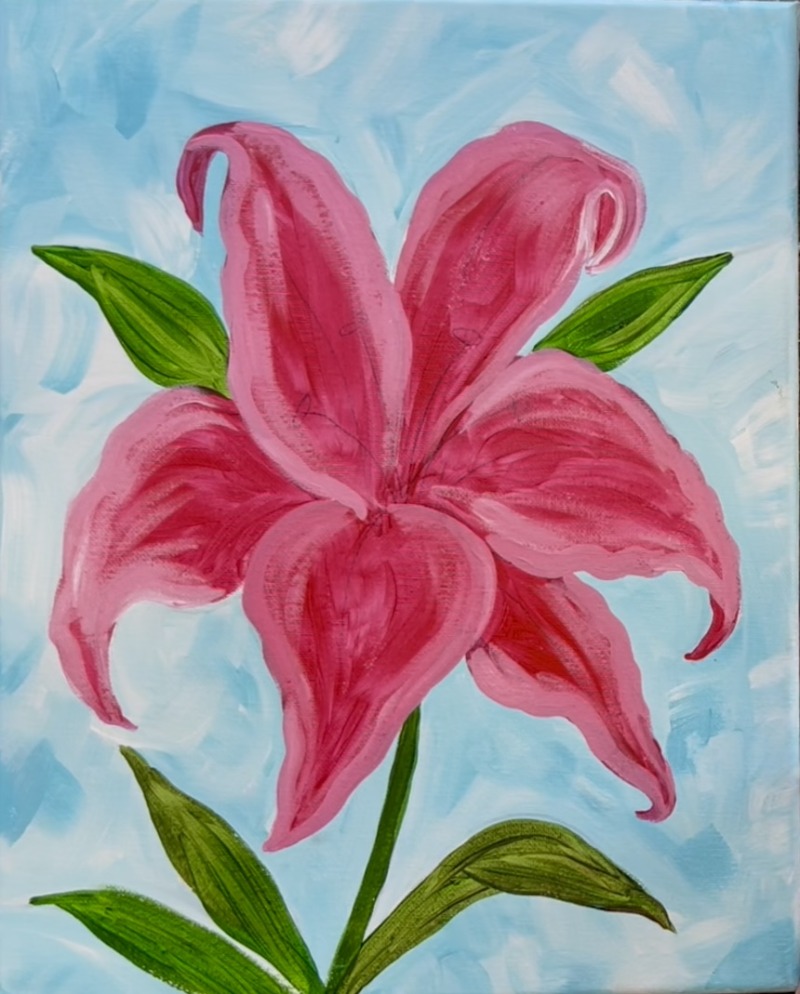
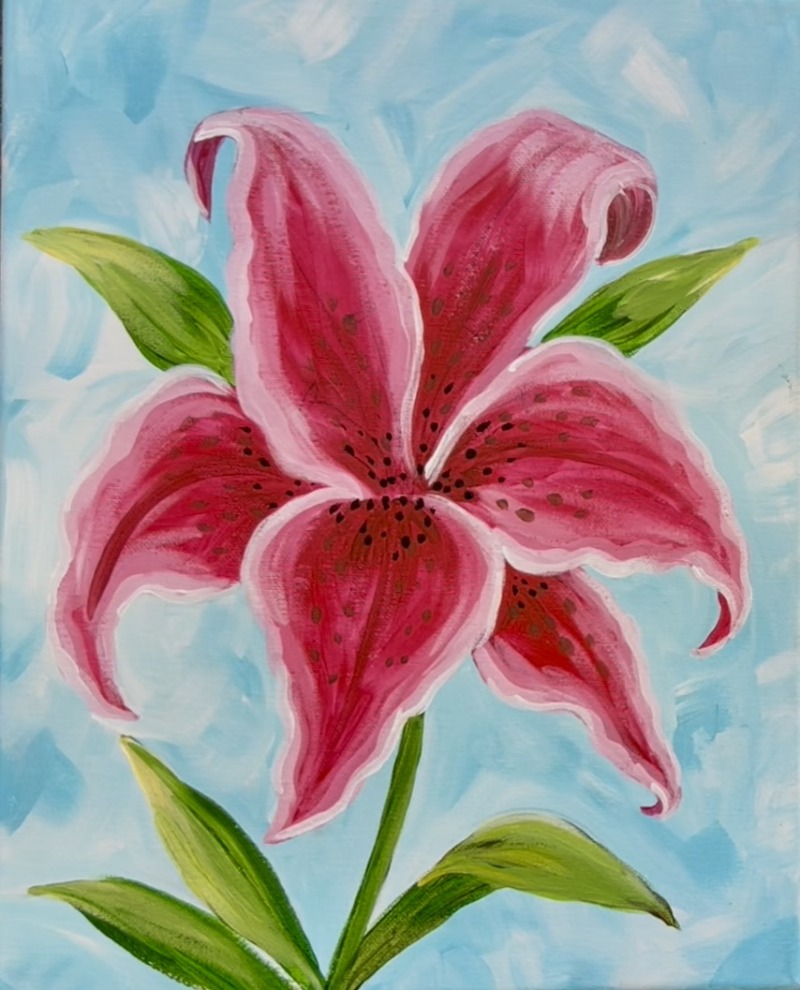
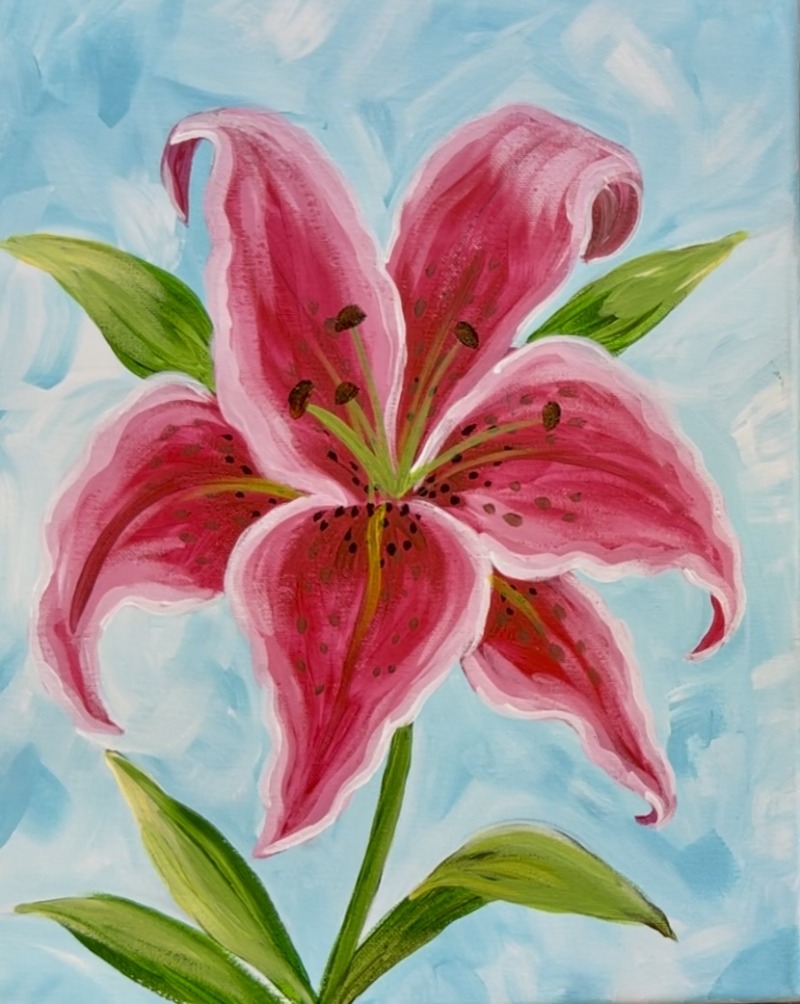
The Stargazer Lily is one of my favorite flowers and I’ve been wanting to create a painting tutorial of one for a while now! I love the bright fuchsia color of the petals!
This painting tutorial will show you how to draw and paint a stargazer lily. There is also an optional tracer template too!
Enjoy and happy painting!

Materials Needed:
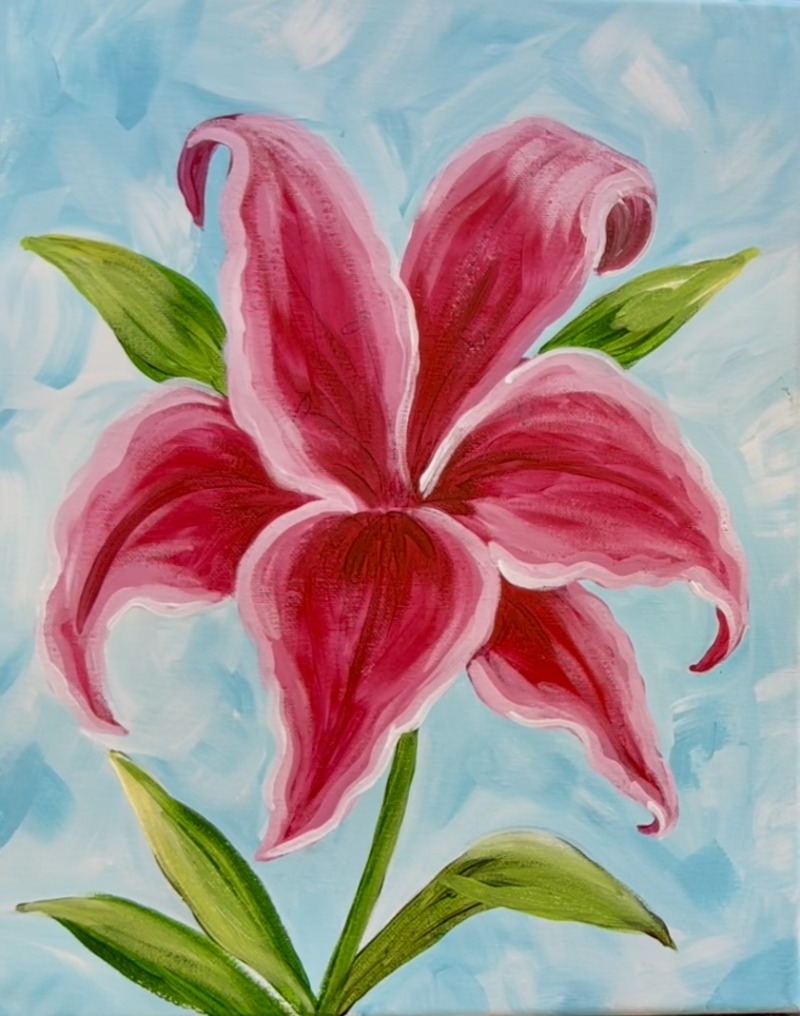
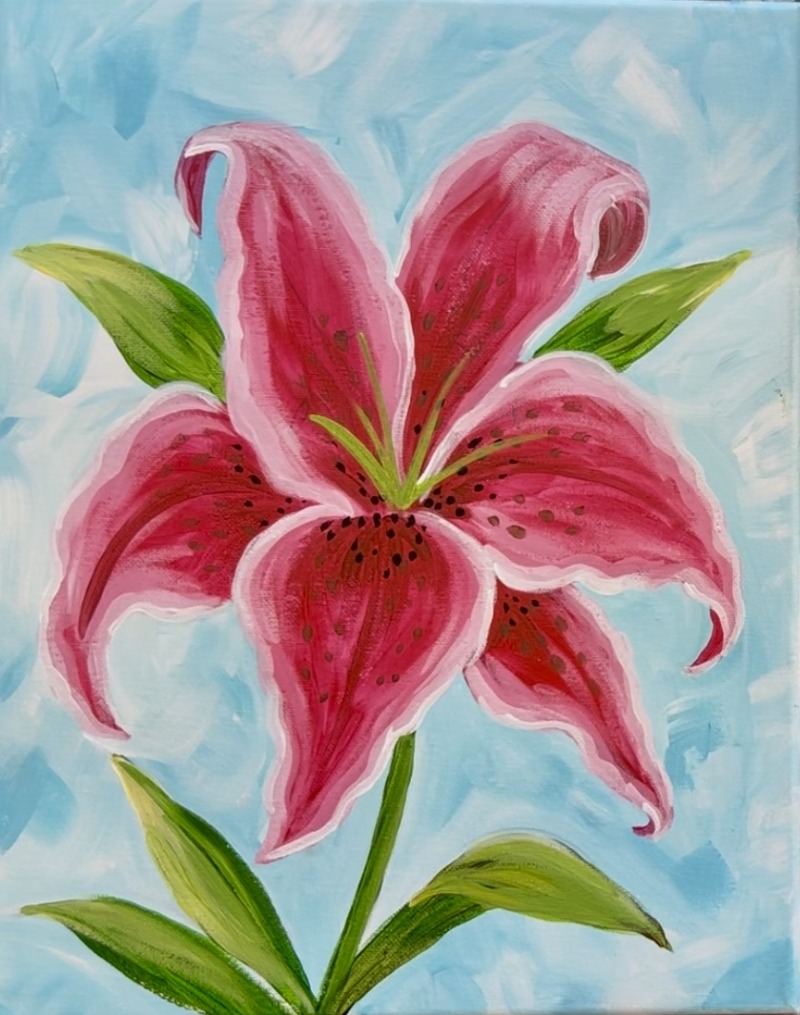
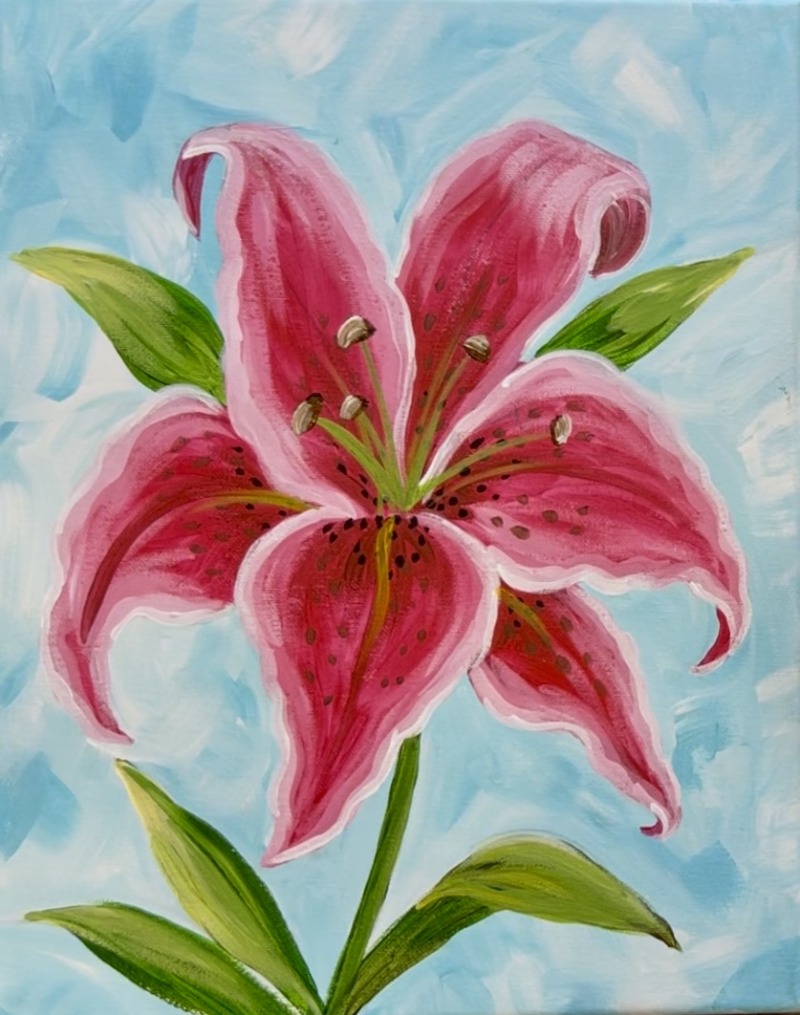
Stargazer Lily - Painting Tutorial
Learn how to paint a stargaer lily!
Materials
- 11 x 14 Canvas
- Acrylic Paint
- Brushes
- Pencil
- Optional Transfer Paper
- Optional Template
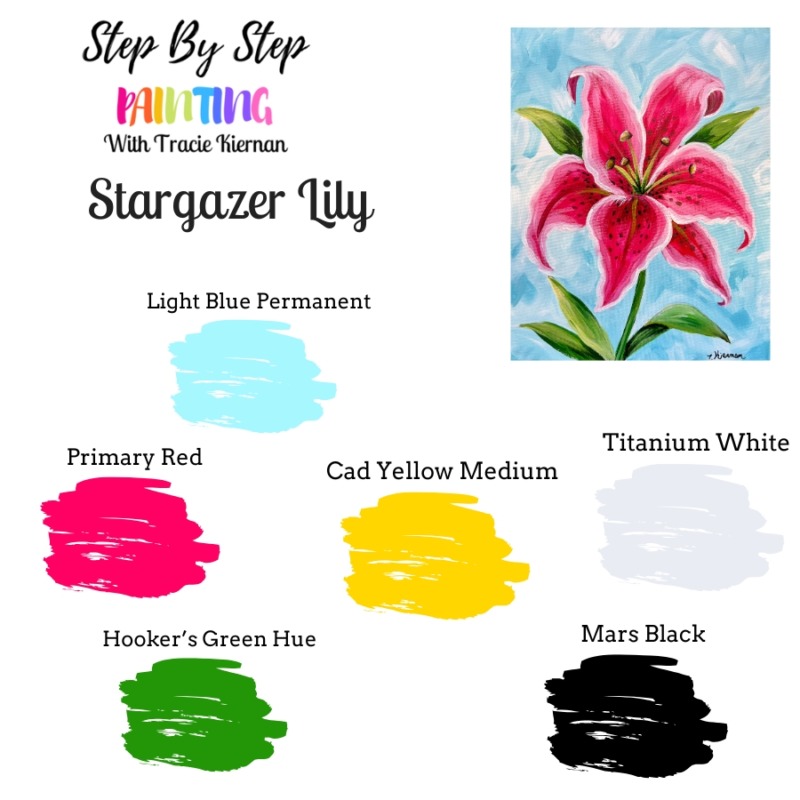
Colors
- Titanium White
- Mars Black
- Primary Red
- Cadmium Yellow Medium Hue
- Hooker's Green Hue
- Light Blue Permanent
Brushes
Download This Tutorial!
This tutorial is available as a $5 download in my PDF shop. Find out more!
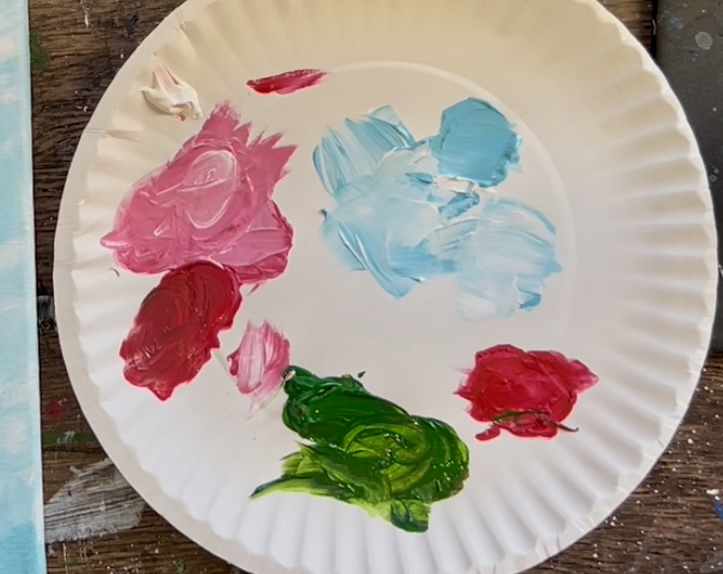
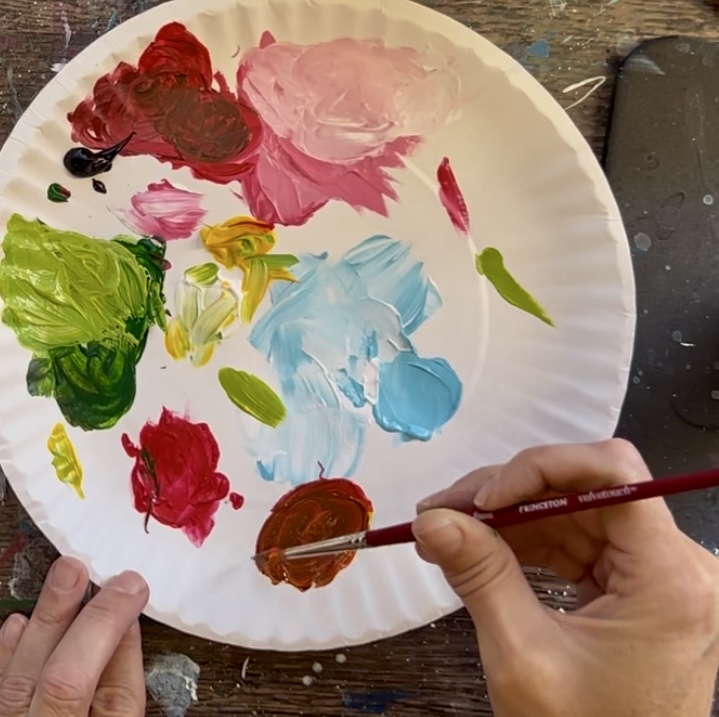
Color Palette
“Primary Red” is a critical color in this painting! If you need to substitute it, I recommend a red or magenta that has a cool undertone such as “alizarin crimson” or “quinacridone magenta”. Any magenta color or dark pink color works for this! Don’t use a red that has a “warm undertone” because it won’t pull the “pink” colors we are after for this lily.
Directions At A Glance
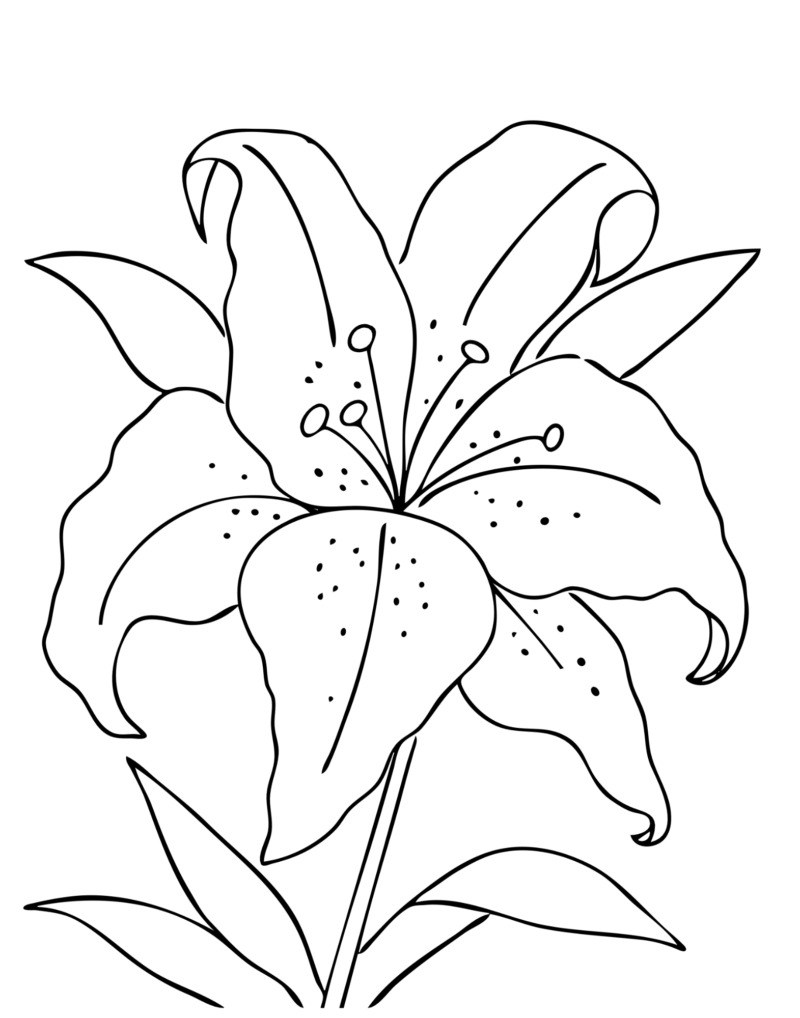
Traceable (optional)
Video
Step By Step Directions
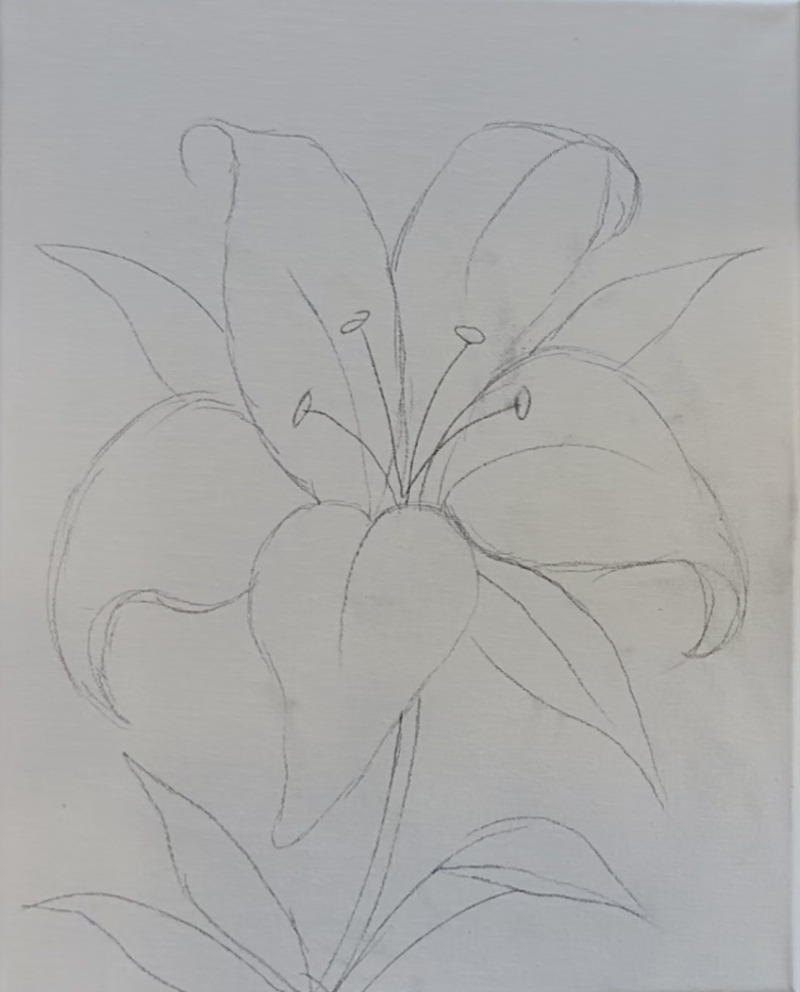
1. Draw Lily (Or Use Traceable)
Stargazer lilies have 6 petals. There are three front petals and three petals behind the front petals.
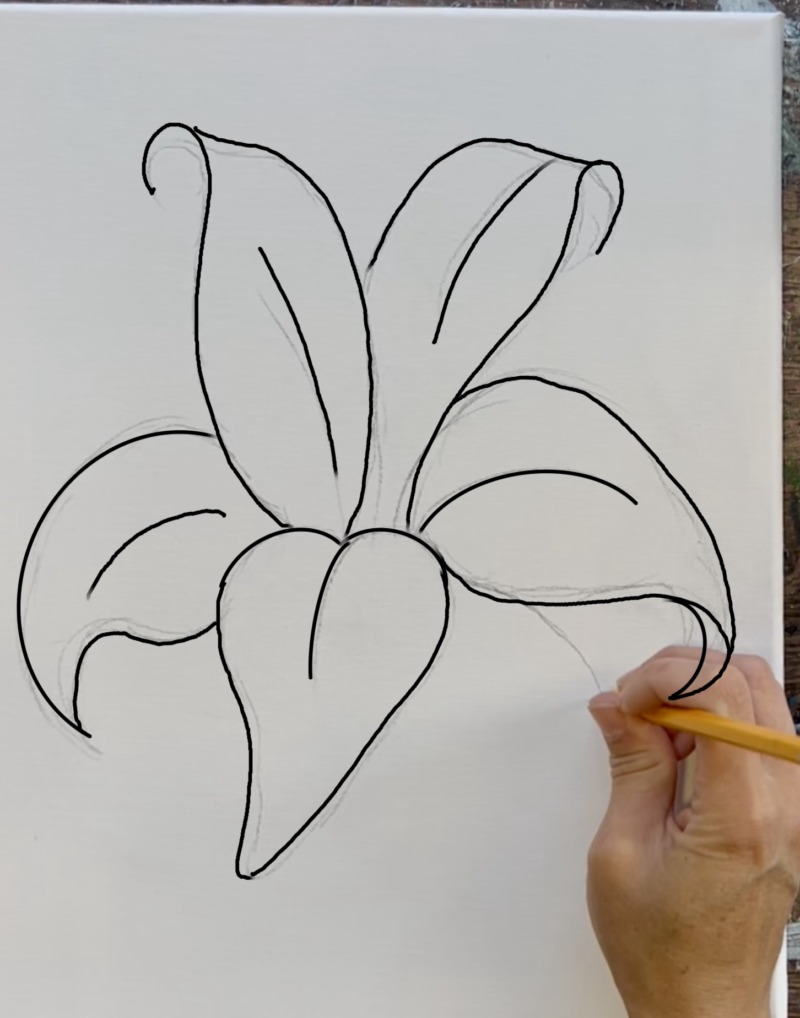
Use a pencil to lightly sketch the petals of the lily. Start with the bottom front petal. The shape is almost like a heart shape but elongated and slightly bent to the left. Start in the middle of your canvas for this first petal. Leave a little room on the bottom for the stem and leaves.
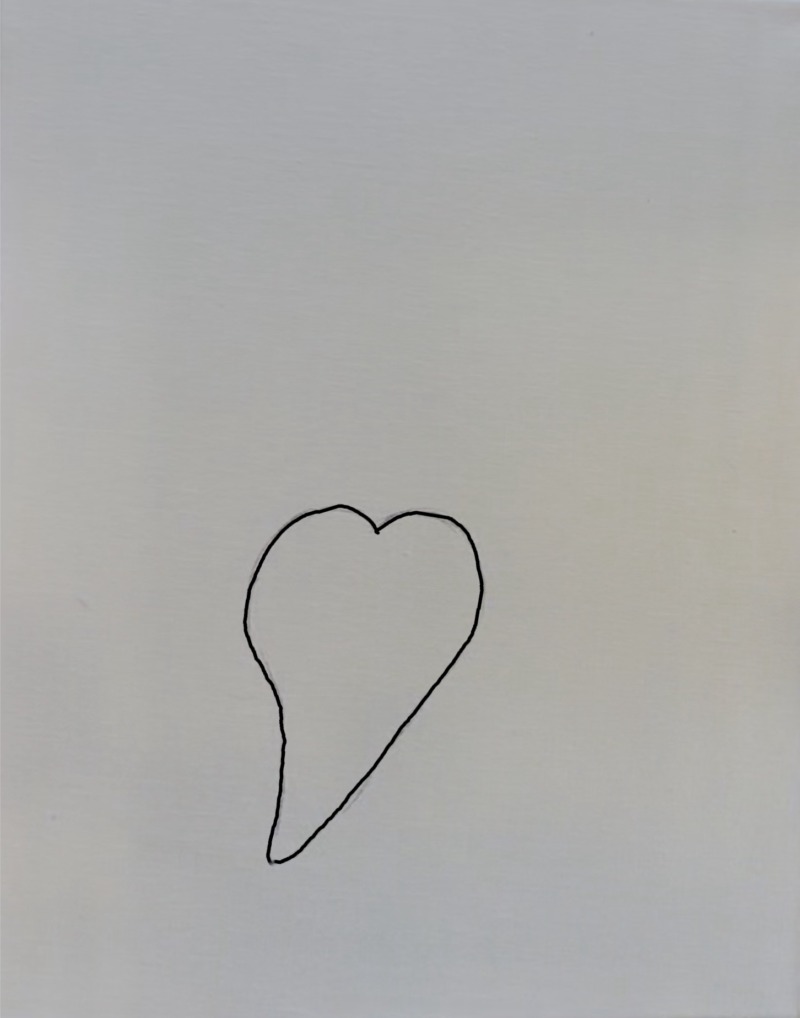
Stargazer lilies have petals that curve on the tips. To replicate the curves, draw the edge of the petal so that it curves downwards on the top edge.
Then connect this line to form an elongated petal shape.
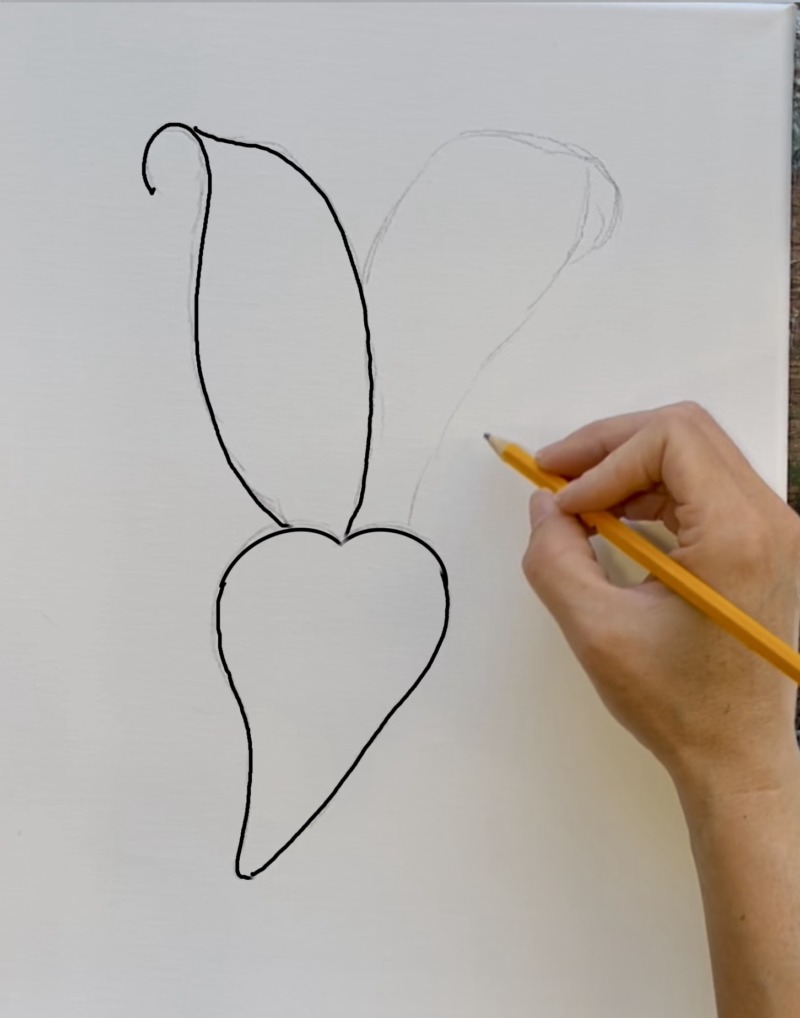
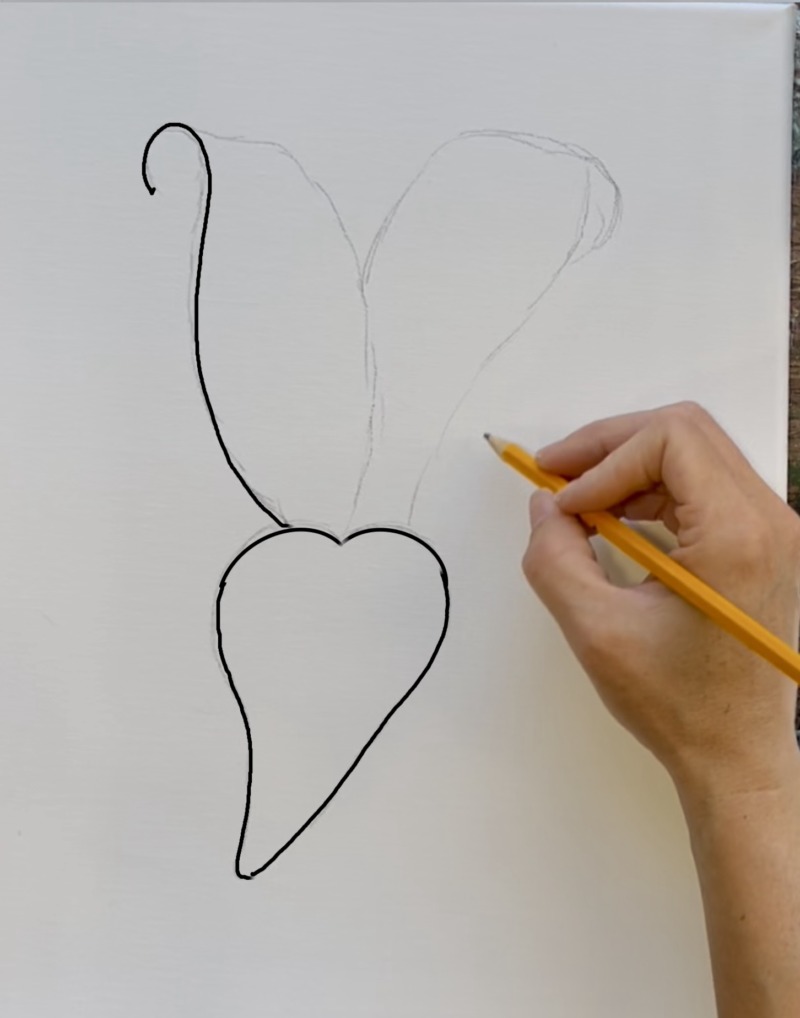
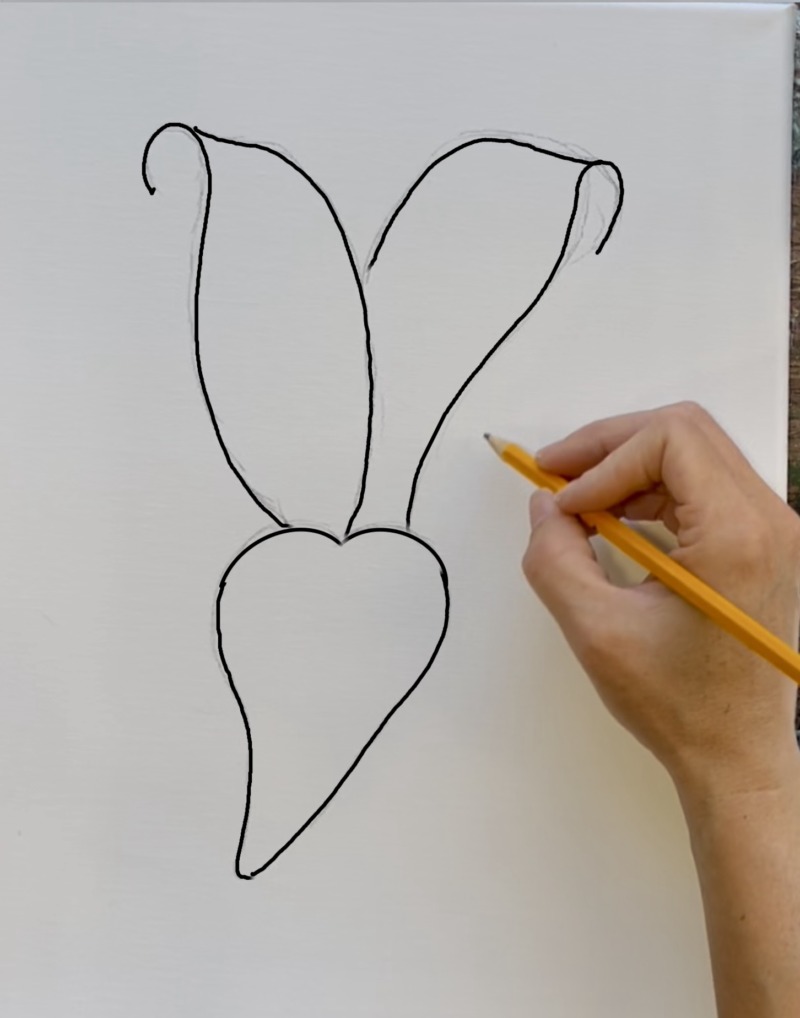
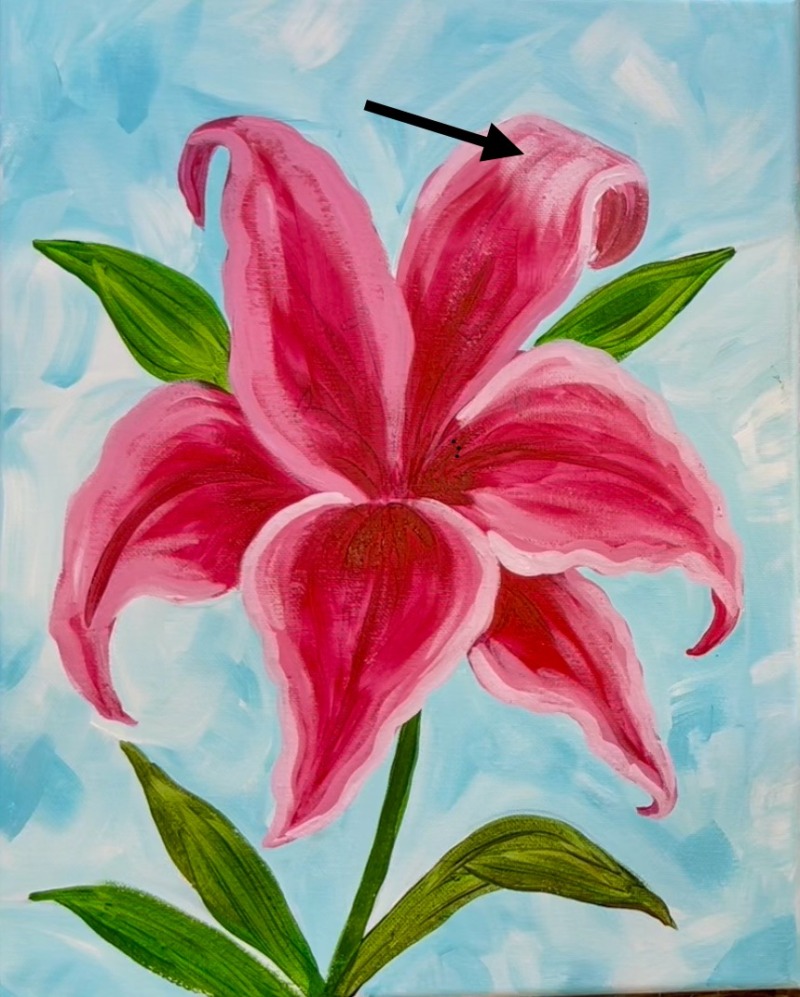
Draw another curved petal to the right of this. This time, this petal will be under the petal on the left. Draw the right edge and a sharp bend downwards.
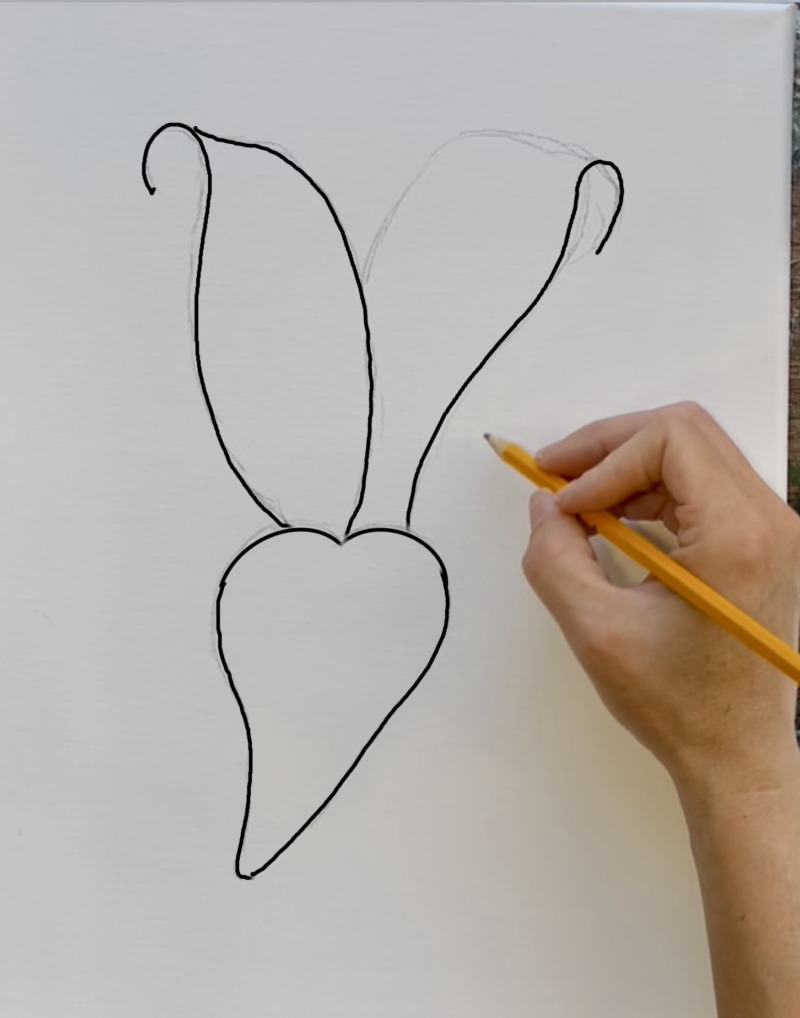
Then draw the left edging of the petal. Make the top edge sort of flat and connect to the bend. This will make the petal look like it is rolled backwards at the top edge.
Draw a fourth petal on the right. This one is more like a leaf shape with a pointed edge that folds and points downwards. Draw lines down the middle of the petals that sort of curve in the direction of the petal.
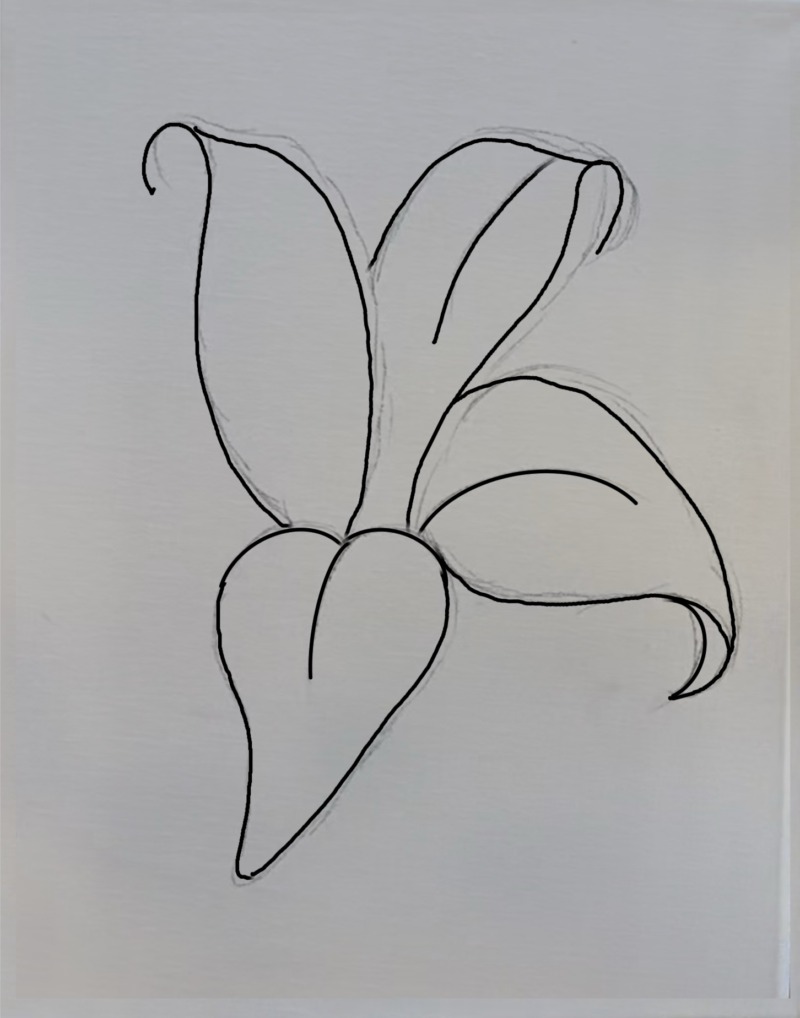
Draw a fifth petal that underlaps two of the petals. This one also is a curved and pointed leaf-like shape.
Draw a sixth petal. This one is under two petals and I also made this one smaller and more narrow. Draw a narrow stem that starts under the bottom petal and then goes all the way to the bottom edge of the canvas.
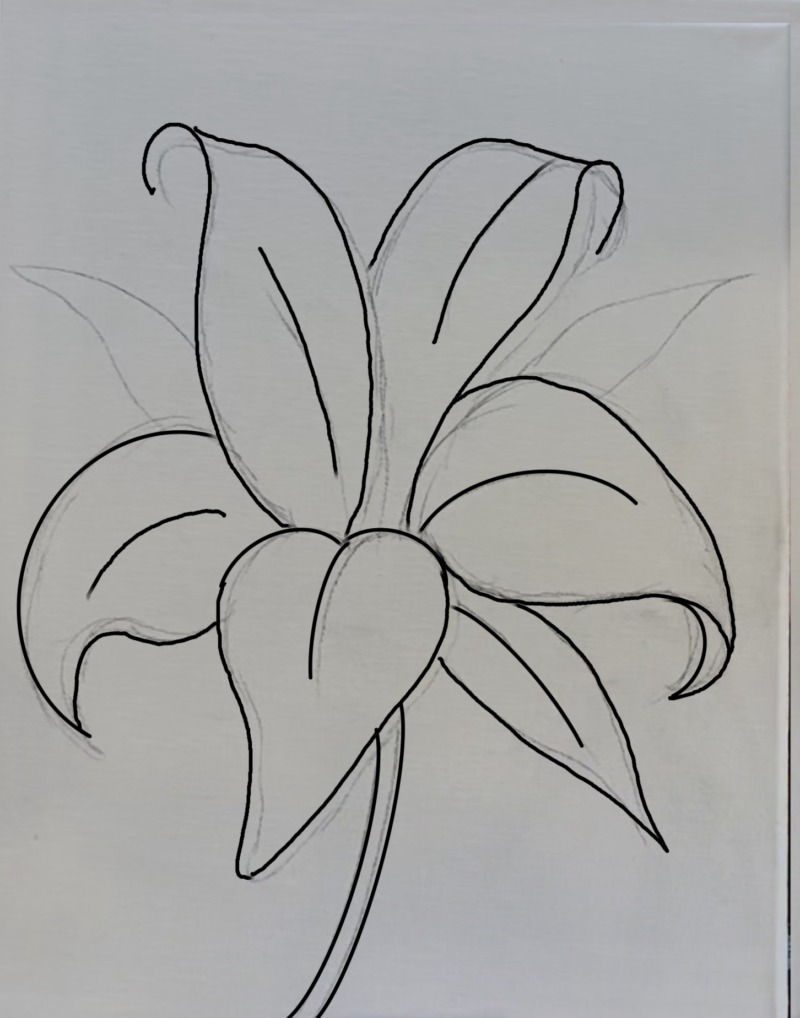
The next shapes are leaf shapes. Draw narrow pointed shapes. Two of these leaves are behind the lily and a set of three leaves are on the bottom of the canvas next the the stem.
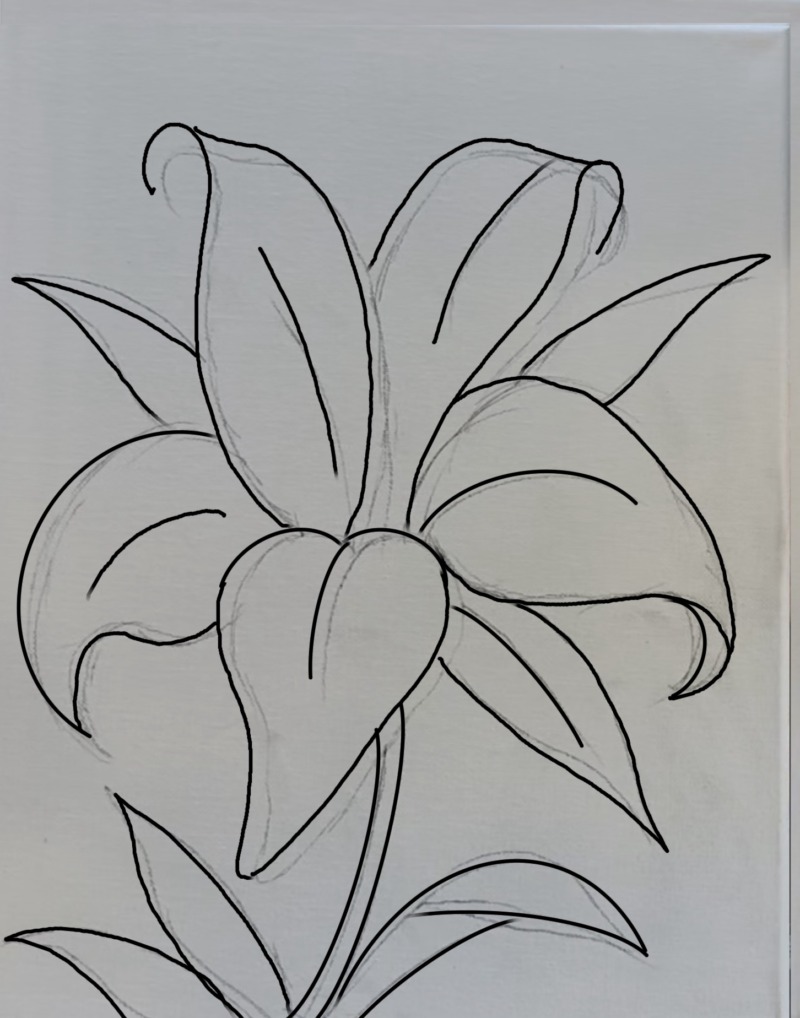
Draw the lily. There are usually 6 of them but I drew 4. These are just simple curved lines with little ovals on the tips.
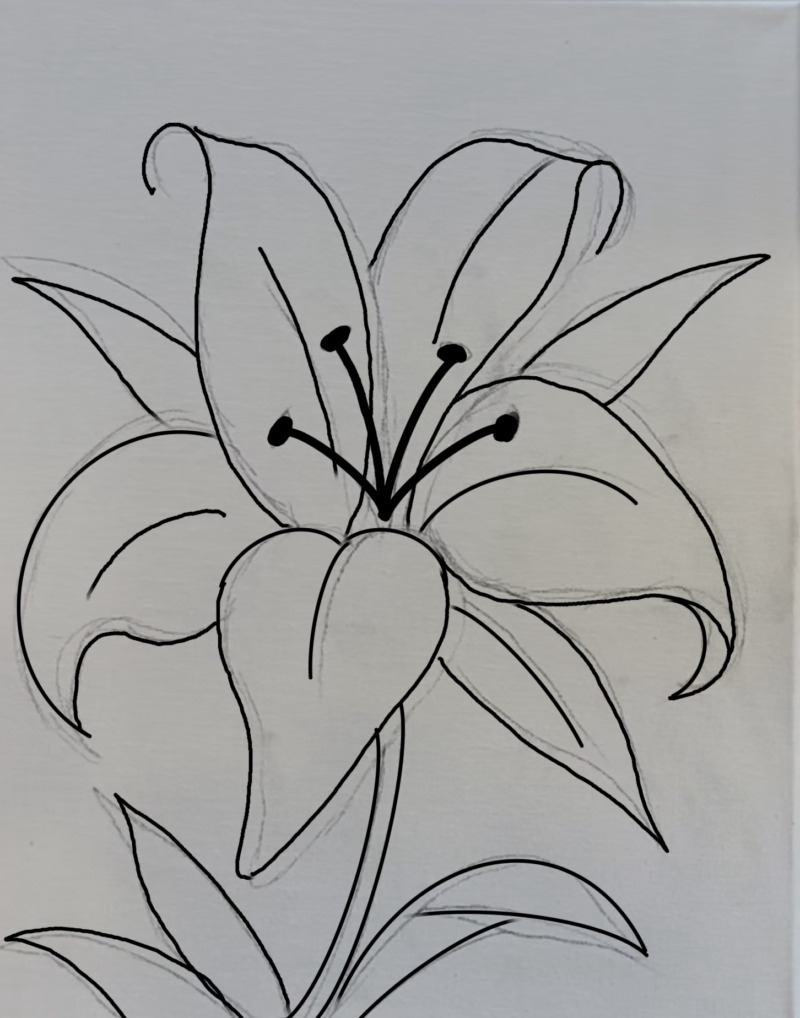
Below is my sketch from the pencil (without darkened lines).
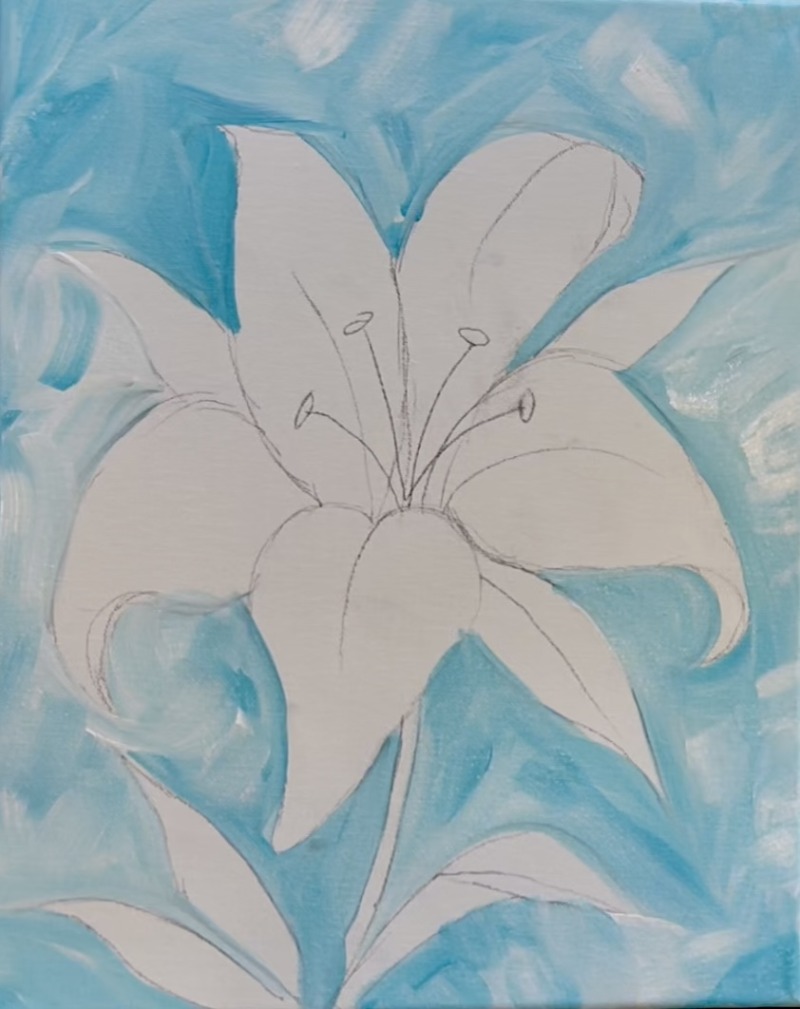
2. Paint Background
The background in this painting consists of light blue and white that are blended in a textured way all around the “negative space” of the lily. We are going to be painting around the drawing and leave the lily drawing blank with no paint.
Load your paint palette with the colors “light blue permanent” and “titanium white”. Use the 3/4″ flat brush. Double load your brush in both of these colors. Use the edge of the brush to paint angled paint strokes going around the edges of the drawing.
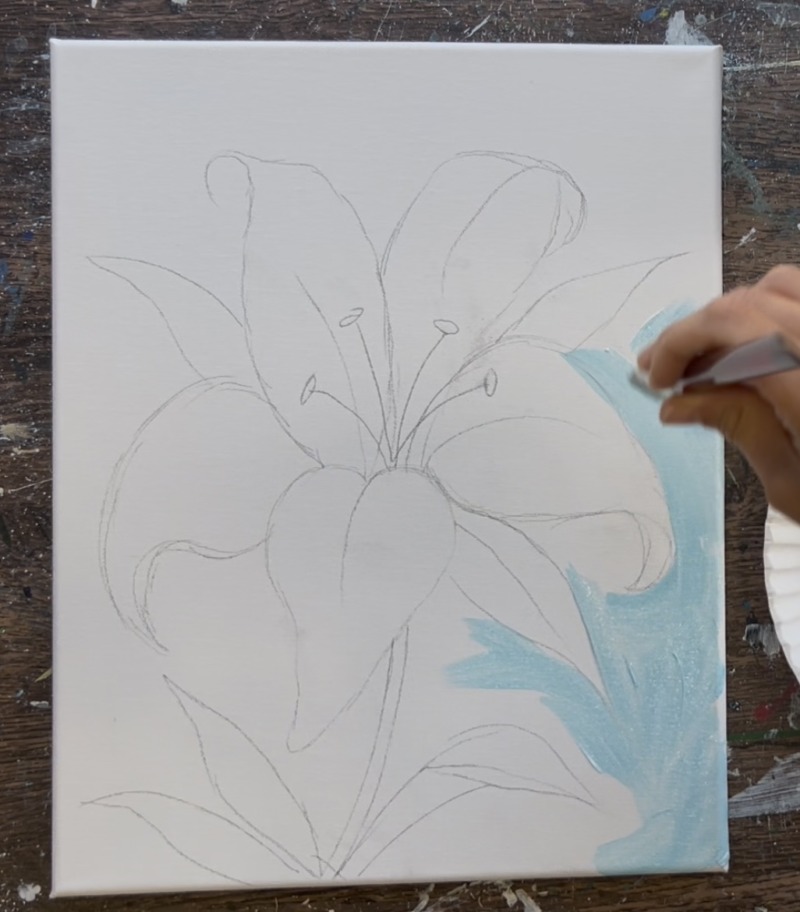
You want your blue and white to blend without blending all the way and create choppy brush strokes. That means we will see streaks of lighter colors and streaks of darker colors. This gives the background this textured look.
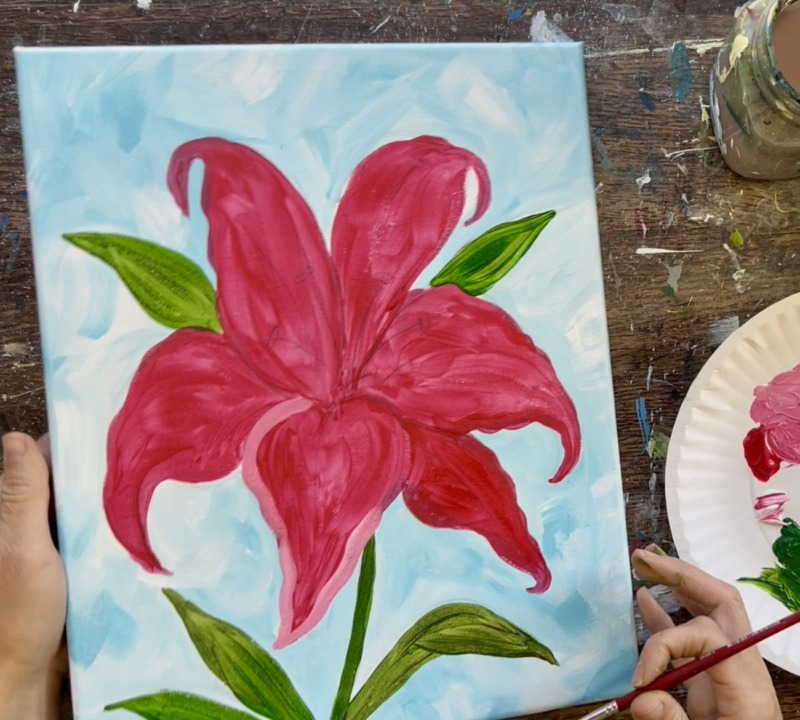
3. Paint First Layer Of Petals (Dark Pink)
For this first layer, we will be painting all the petals a solid coat of “primary red”. This first layer is not blended or mixed with any other color. It will be the foundation for our flower and we will be layering on the lighter colors after this dries.
Load your paint palette with the colors “primary red”. Use the #4 round brush and the #12 bright brush to paint the shapes of the petals. Use both of the brushes to paint the shapes. You’ll find that the #12 bright brush is helpful for the larger areas and the #4 round brush is helpful for the curved areas.
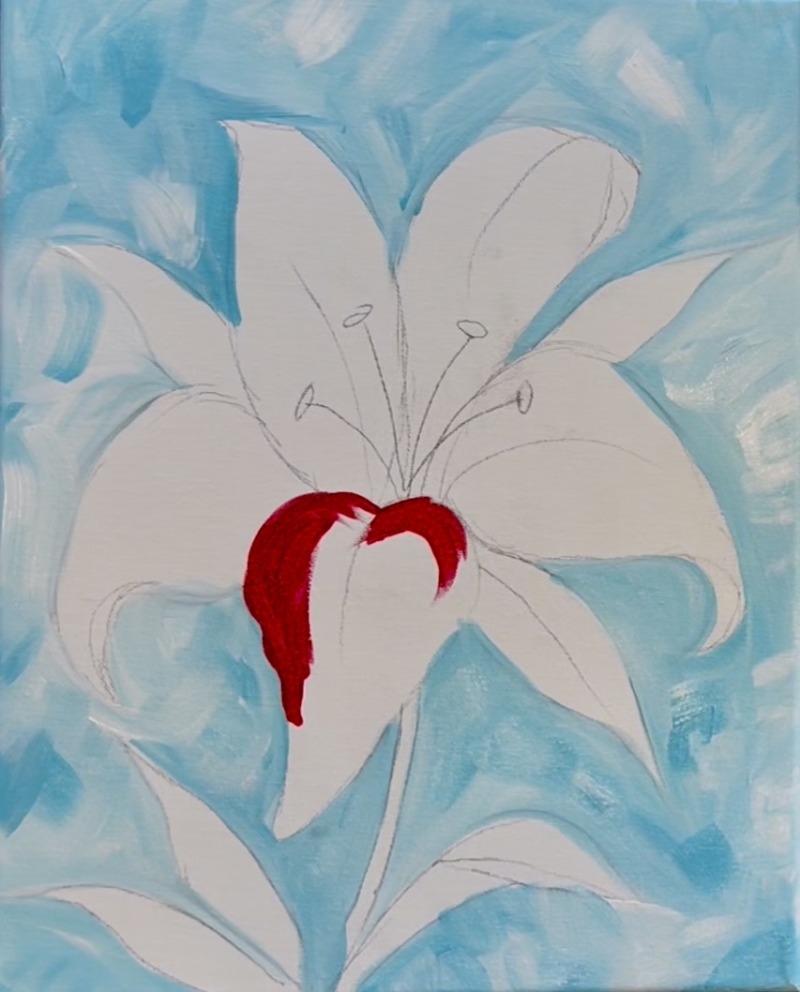
As you are filling these petals, pay attention to the edges. Make the edges a little bit wavy. This helps to replicate the ruffled edges that stargazer lily petals have! To do this, use your round brush and “wiggle the brush” along the edge.
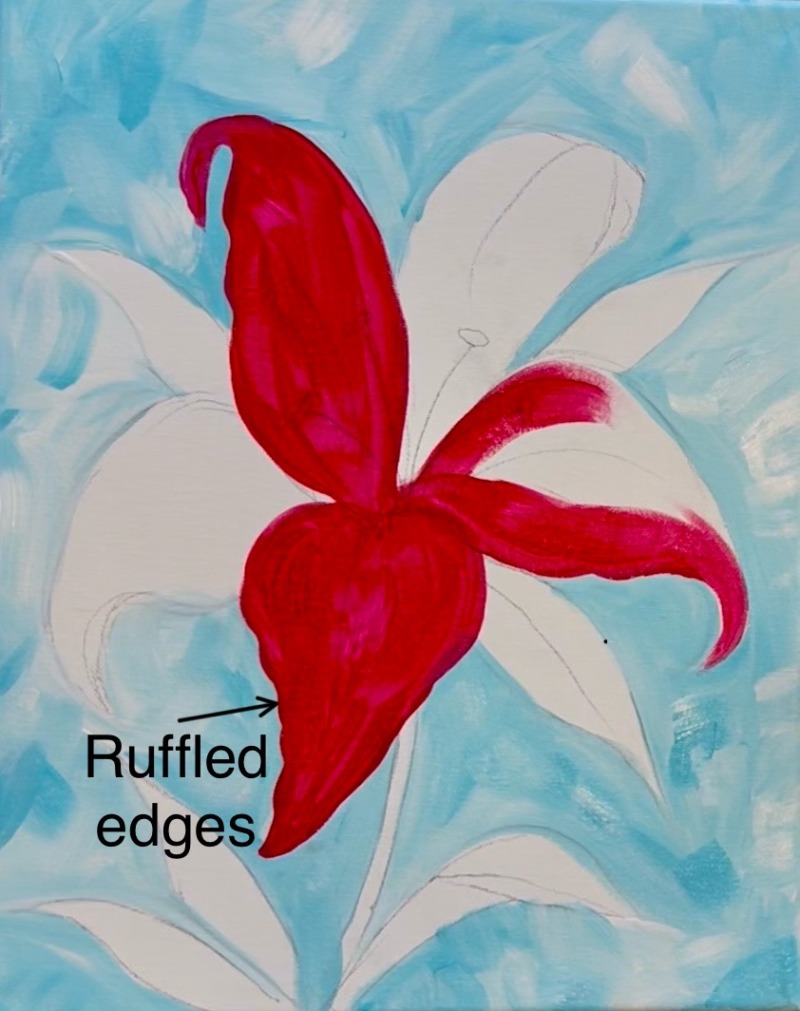
Each petal is painted in the image below.
Now we need to wait for that layer to dry. We will move onto the first layer for the leaves in the next step!
4. Paint First Layer Of Leaves
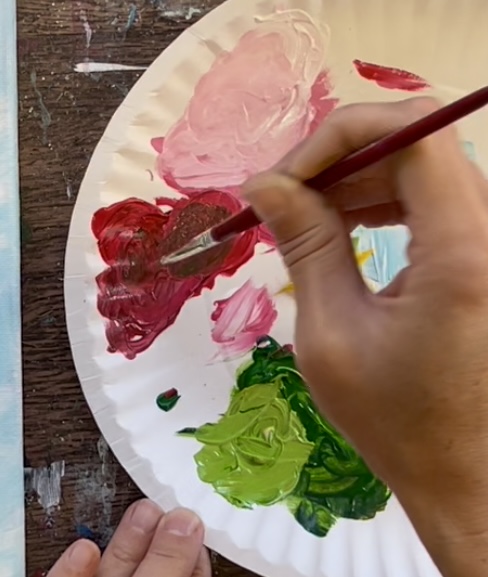
Load your paint palette with “hooker’s green hue” and a little bit of “primary red”. Mix a little of that red into your green! This gives your green a more natural color and darkens it (plus it’s fun to mix colors on the palette).
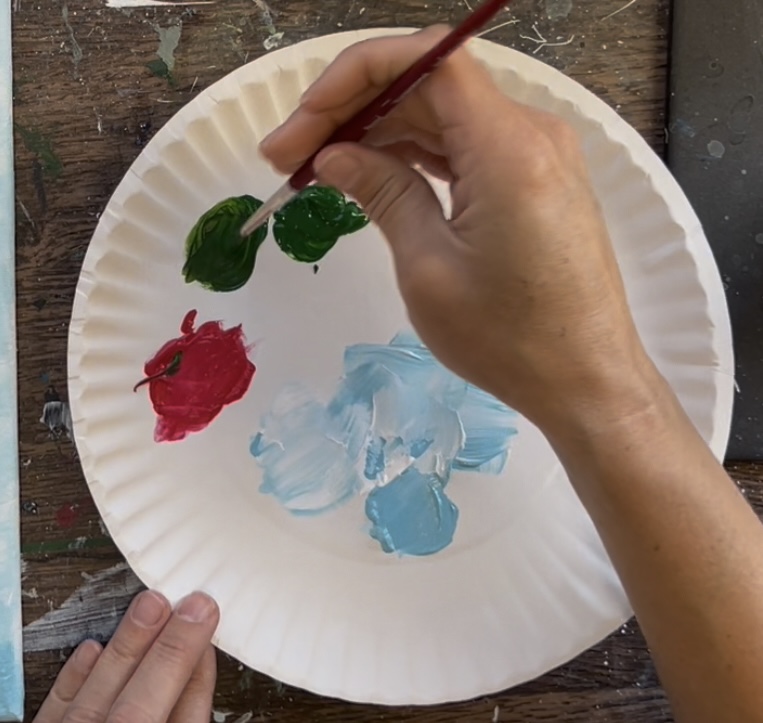
Use the #4 round brush to paint all the leaves and the stem of the lily. There is no need for blending right now. This is only the base color.
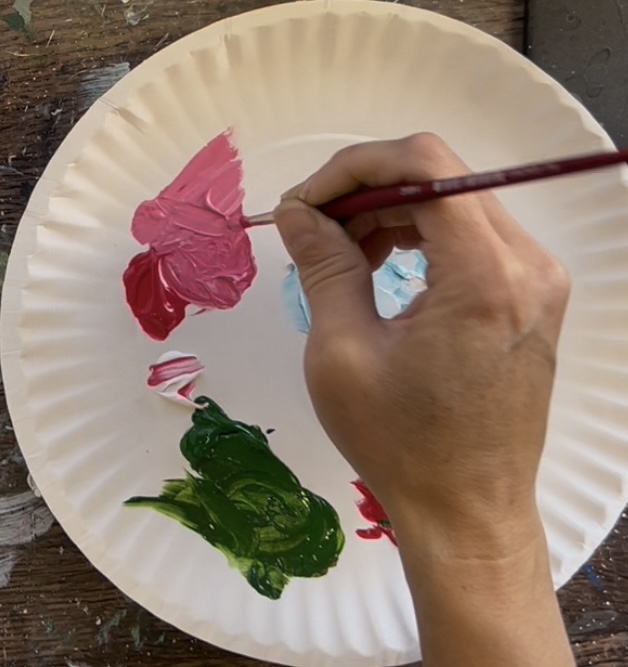
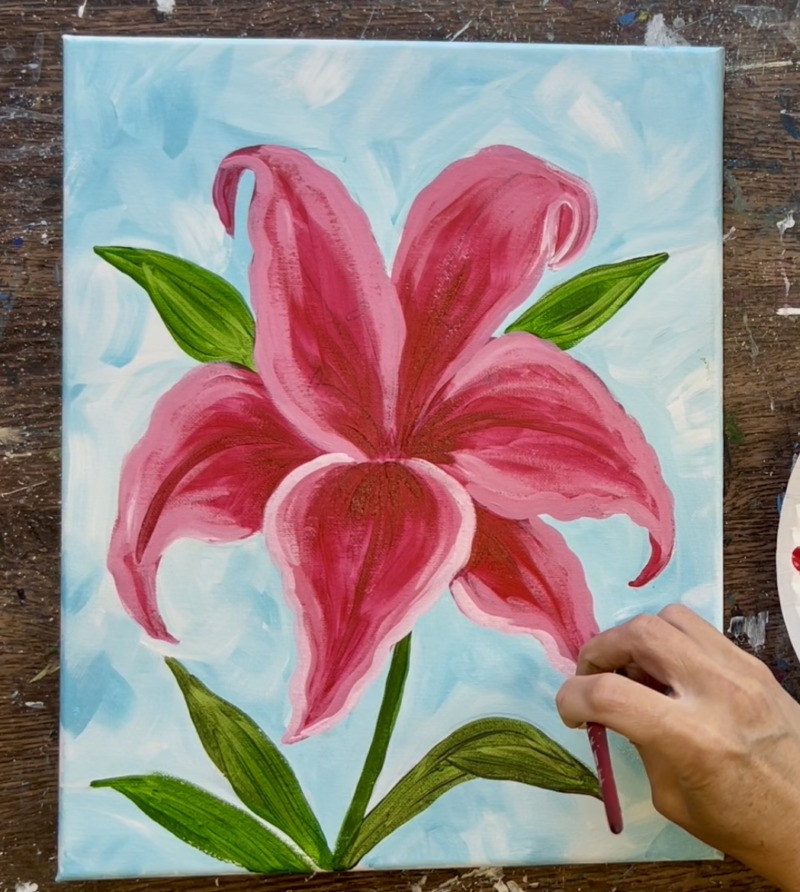
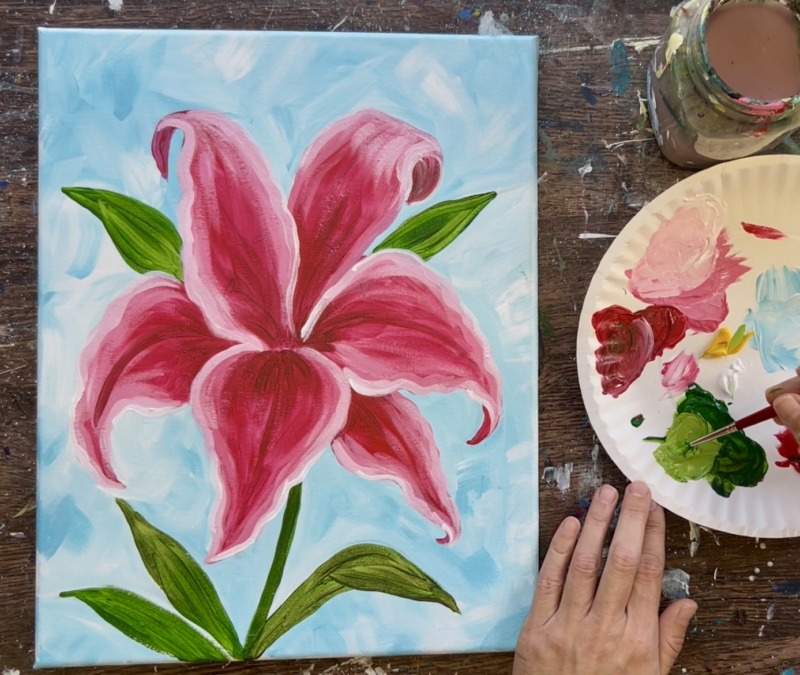
5. Paint Medium Pink Layer On Petals
Stargazer lilies have a light pink and white color border along the edges of the petals. We are going to layer on our next color but this won’t be the lightest color. Mix about 1 part white to 3 parts “primary red” to make a slightly lighter tint of your primary red.
Then take your round brush and outline the edges of each of the petals. You want to do about a 1/4″ outline but this may be different if you are working on a different size canvas.
After you outline one petal, take this lighter color and “dry brush” some of the inner part of the petal. The goal with this dry brushing is to kind of let this lighter color fad into the darker color which is the center of the petal. To do this, wipe your brush but don’t wipe all of the paint off your brush. Then lightly “glaze” the brush (barely let it touch the canvas) so that dry, translucent paint goes on the canvas with a lot of the dark layer shown through. When you “glaze” over already dried and dark paint, you are adding another layer with the intent for it to look translucent so you can see dark.
Do this to each of the petals! First outline the petal (make sure you are doing the ruffled edges). Then “glaze” the light colors a little bit next to the outline but not all the way in the center of the petal (we want the center of the petal to stay dark).

The glazed parts are not super noticeable but they give our petals a slightly lighter colors. The edges/ outlines should be more noticeable because we are applying a more solid layer there.
For the parts of the petals that are curving on the tips, I recommend outlining the shape with your flight color and then leaving the tips as the darker color.
Let this layer dry before going onto the next step.
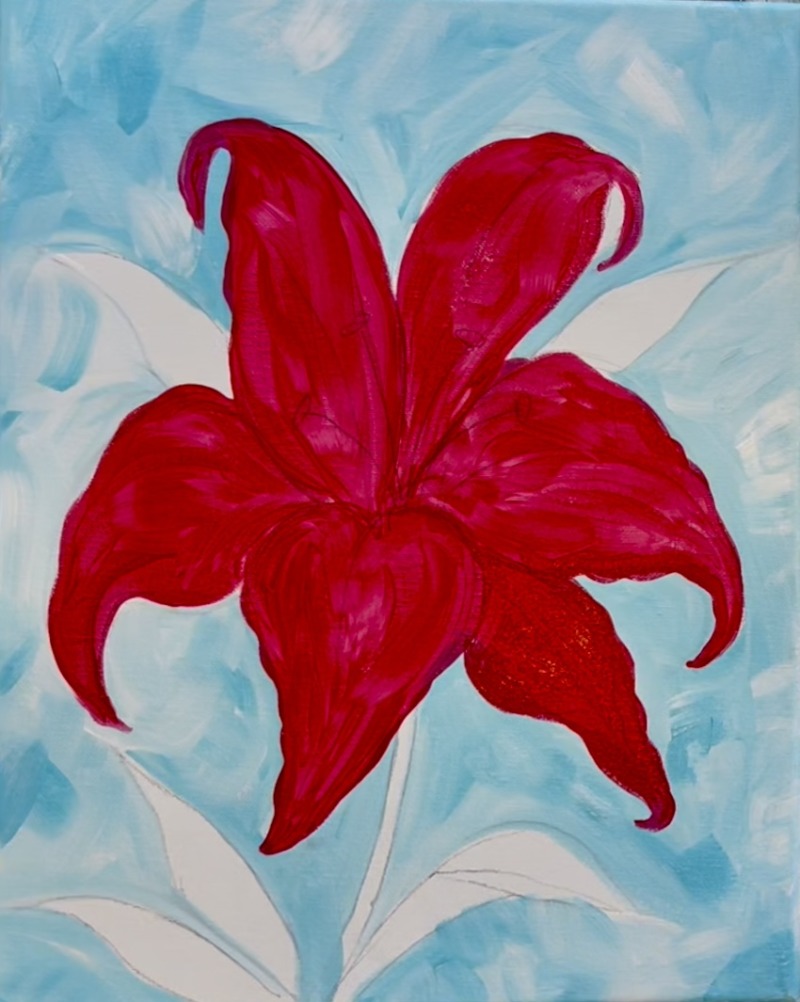
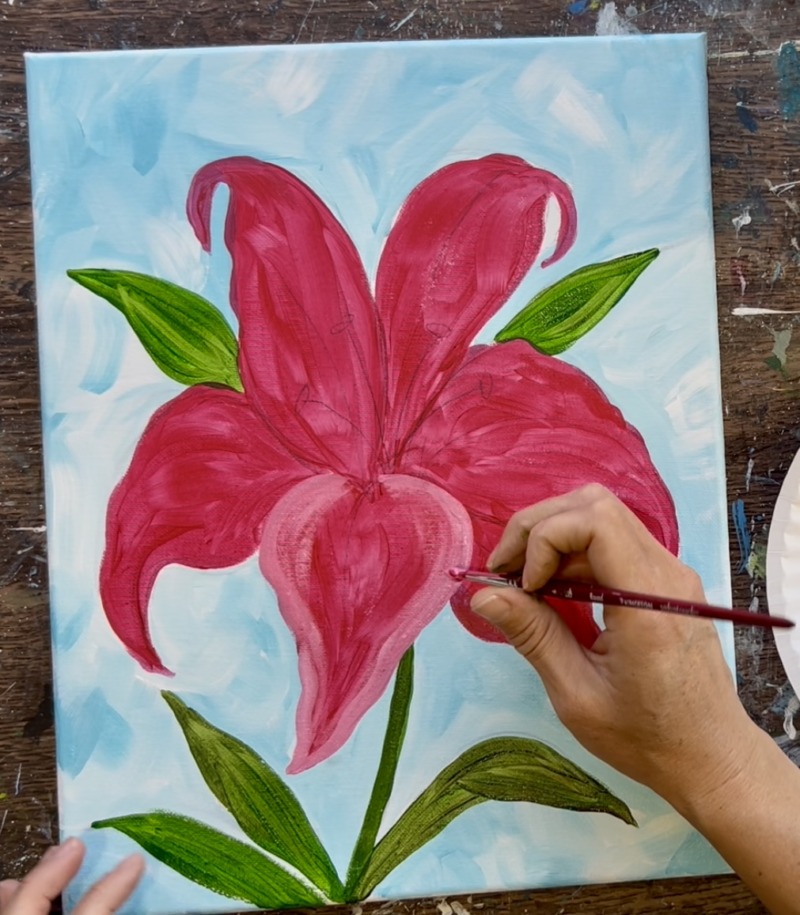
6. Paint Dark Pink Center Parts Of Petals
We already painted a dark layer for our first layer of the petals. In this next step, we are going to go back and paint just the center of the petals (the bottom parts of each of the petals that meet in the center). This time, we need to make a darker version of the “primary red”. To do this, mix a very small amount of “hooker’s green hue” into your “primary red”. Just a little bit is needed to darken the red! If you add too much green in there, it will turn brown.
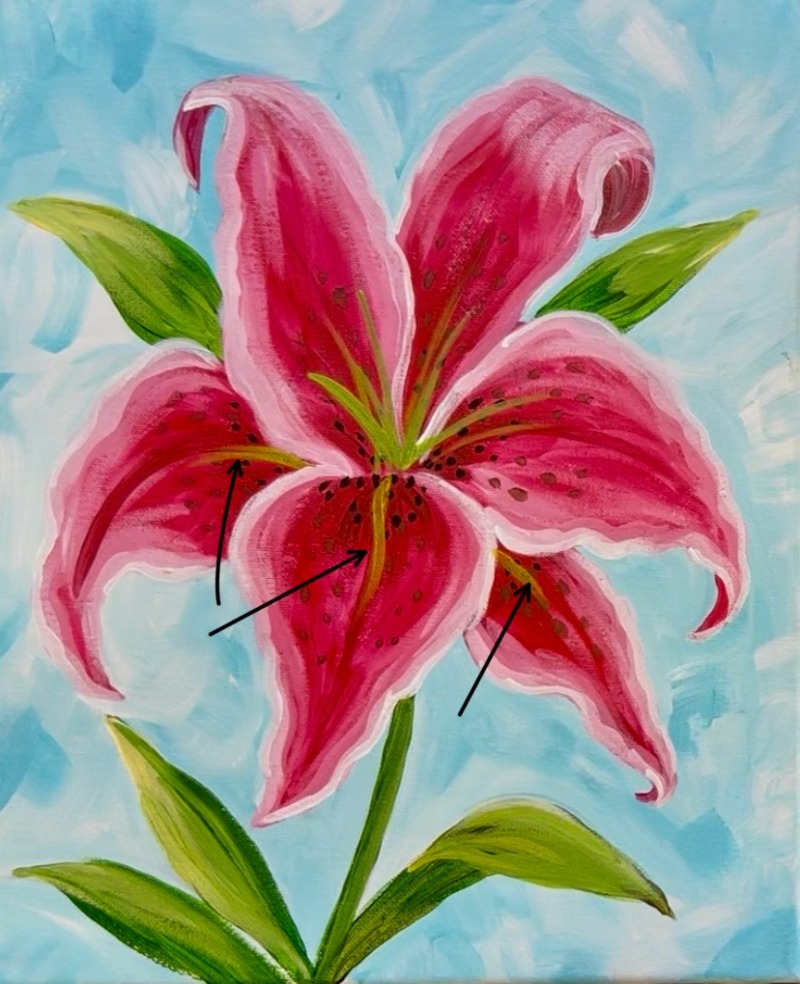
Then use your round brush and this “darkened red”. Brush the bottom part of each of the petals and drag your strokes in a curved direction outwards going in the direction of the shape of the petal. We are basically adding this dark layer in the center to help make the middle of the lily nice and dark and shadowy!

The image below shows where all the dark layer is applied (black arrows) and the direction of the paint strokes going from the center outwards (white arrows).
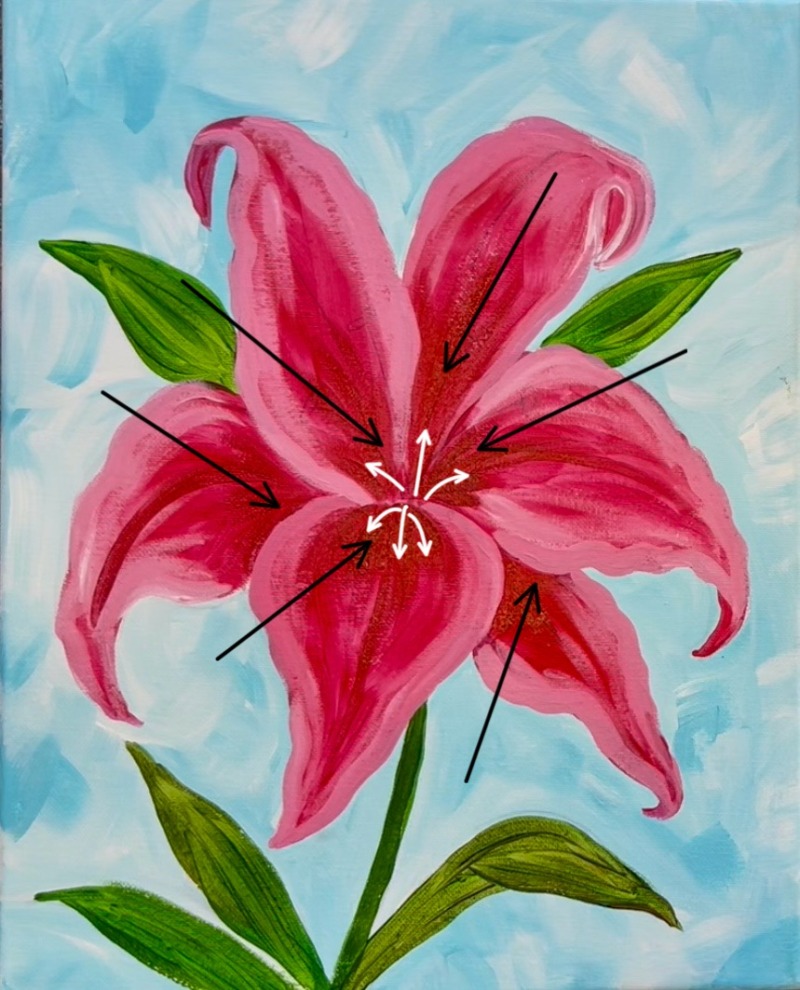
Now our lily has dark in the middle of the petals and a medium pink border along the edges of the petals.

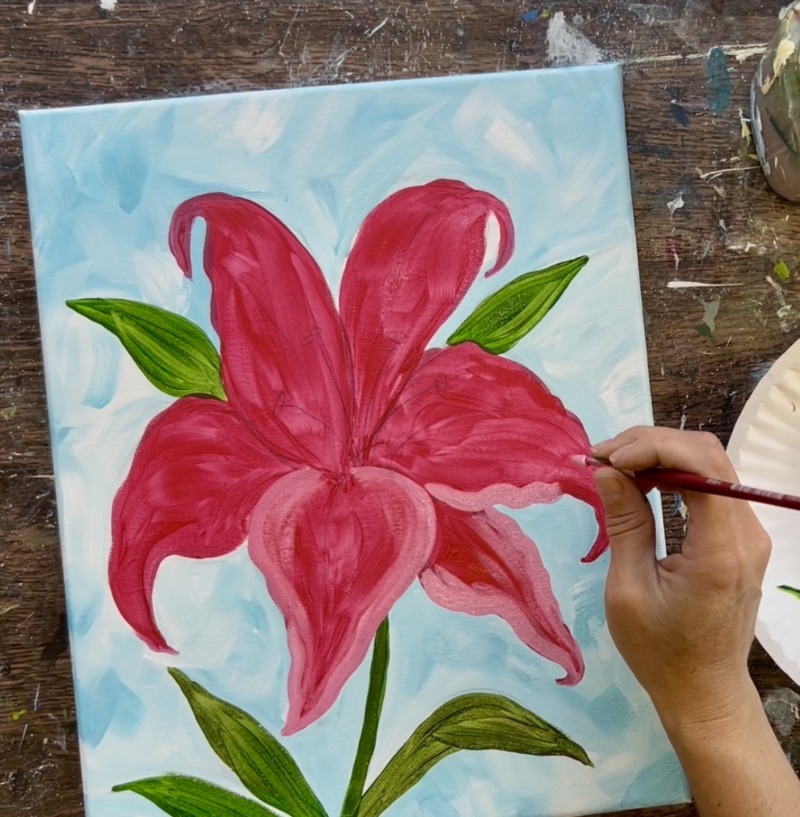
7. Paint Light Pink Borders On Petals
Let’s work more on the border of the petals! We want a much lighter layer to replicate the light colored border on stargazer lily flowers. This will really add contrast to our flower!
Mix white with a little primary red. We want a very light pink color, almost white but not quite pure white!
Use the #4 round brush to outline the edges of the petals. This is going over our first border we created but it isn’t as thick as that border so we should still see some of that medium pink next to this really light pink. If you want, you can even go outside the lines of your petals to make them slightly bigger when painting this border.
Do this to each of the petals. You can “glaze” (dry brush) a little at the top petal where it curves backwards.

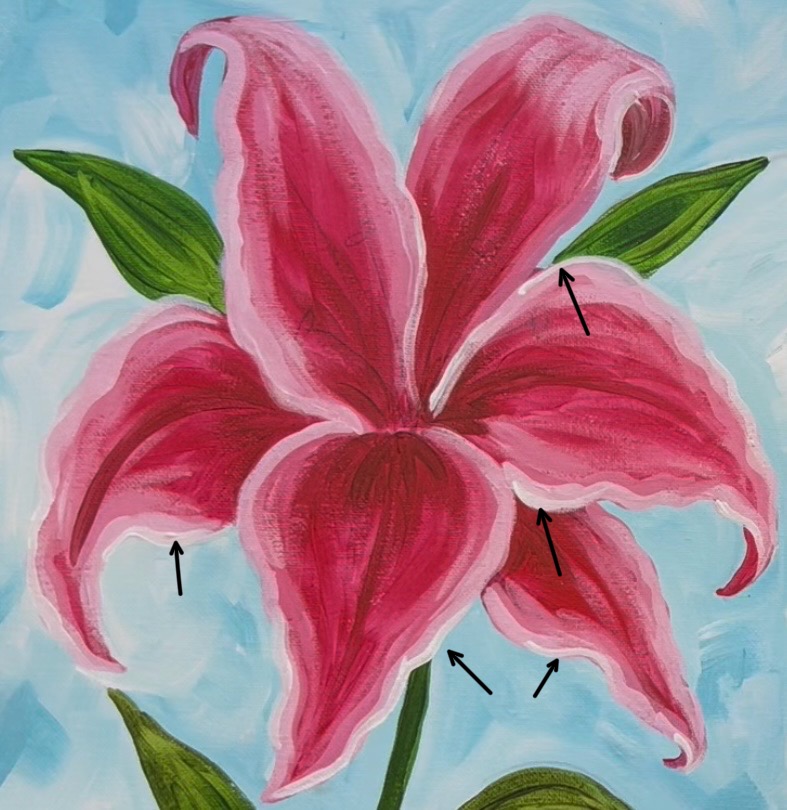
8. Paint White On Borders Of Petals
Wipe the #4 round brush. Load it into “titanium white”. Lightly add white along the border next to (or slightly on top of) your light pink border you just painted. You don’t want to add too much white but just the subtle white outlines on the edges of the petals really helps make the borders brighter! The arrows on the photo below show where the white is added. It is very loosely applied/ doesn’t outline all of the petals (just in some areas).
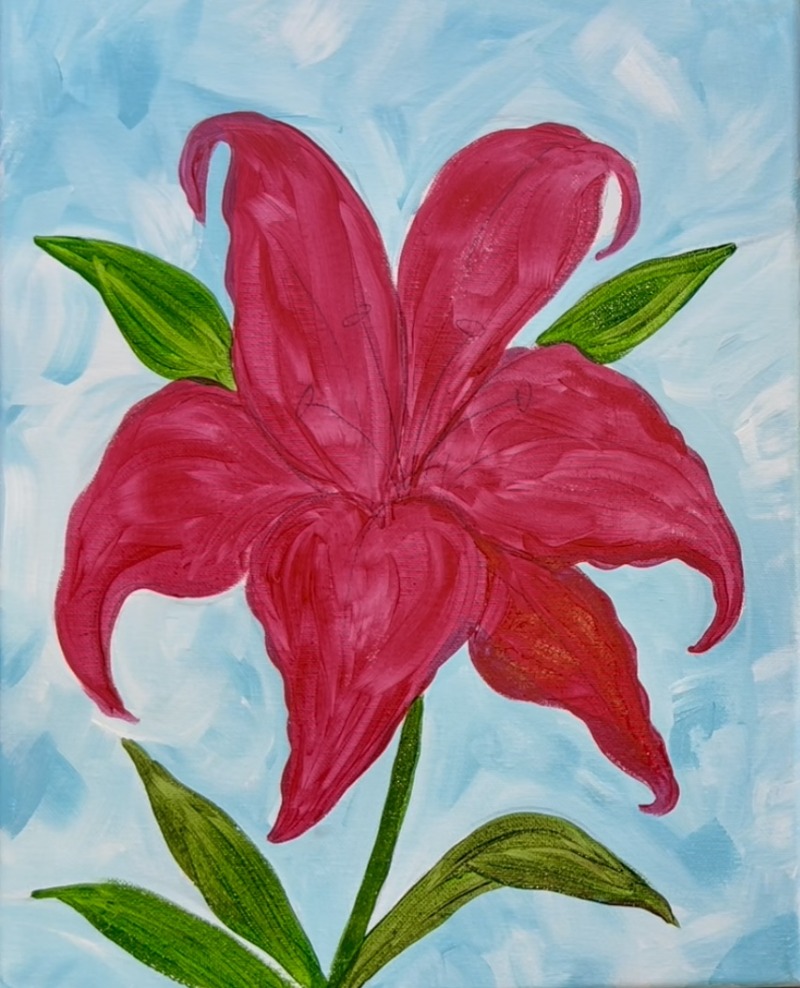
9. Paint Second Layer On Leaves
Load your paint palette with the color “cadmium yellow medium hue” (or any yellow). Mix a light yellow green on your paint palette by mixing equal parts: “hooker’s green hue”, “titanium white” and “primary yellow”.
Then paint this lighter yellow green over your leaves. I did this over the end tips of the leaves but left the darker green layer still showing through on the bottom of the leaves. You can also paint one side of the leaves and leave the other side dark. The idea is to give the leaves more dimension by adding this lighter layer. Since the lily is the “star of the show”, we don’t really need to focus on making the leaves too detailed or realistic.
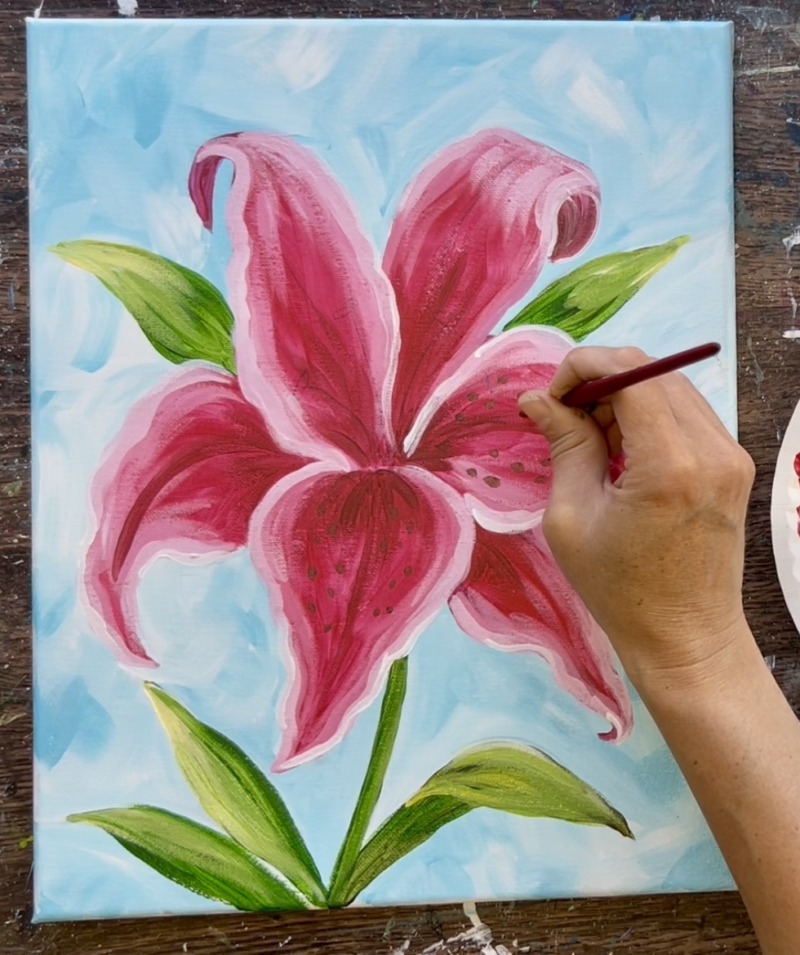
10. Paint Dark Spotted Marks On Petals
Stargazer lilies have dark spotted markings mostly on the middle parts of the petals. Create this dark color by mixing 1 part “hooker’s green hue” and 2 parts “primary red”. If the color looks a little brown from mixing these two colors, that is okay.
Then use the #4 round brush to paint little dotted markings. Start in the center of the flower (on the bottom of the petals) and paint the little dots in rows going in a curved direction (the direction of the petal depending on how it’s bending).
These first layer dots will look very subtle and that’s okay! The dots are also only on the bottom half of the petals and they don’t extend all the way to the pointed tips.

Next, wipe the brush. Load it into a very small amount of “mars black”. Paint a flew black dots on the bottoms of the petals. Don’t do as many dots and only put them towards the bottom. This really adds some dark contrast on the flower in the center!
Wait for everything to dry before going onto the next step.
11. Paint Stamen
Mix that same “yellow green color” you used for the second layer of your leaves. This is: “hooker’s green hue”, “titanium white” and “cadmium yellow medium” all mixed together in equal parts.
Use the #4 round brush to paint curved stamen lines in the very center of the lily. These lines will overlap your petals.
This step is optional! Then, take this green and paint a very loose line in the center of the petals. This line is very light and doesn’t go all the way across the center of the petal. It adds a pop of pretty yellow-green in the middle of your petals.
Next, make a dark orange-brown color on your palette! Mix equal parts: “primary red” and “cadmium yellow medium hue” together. Then mix a very tiny amount of “mars black” into it. This will darken the orange.
This will be used to paint the “anthers”. These are small, elongated ovals on the edges of those green “filament” lines we just painted. Paint little oval marks.
If you want, you can highlight those little ovals as well. Wipe the brush. Then add a little bit of “titanium white”. Paint a little white on the top edges of each of those ovals.
Fore even more contrast, paint dark green on the bottom of the stamens (the bottom of the lines at the center of the flower). Paint over your light yellow green liens with green mixed with a little black. This makes this bottom area a little extra shadowy.
12. Paint Final White Border On Petals
As a final touchup, go back over the edges of your petals with “titanium white” to make the border extra bright! Use the #4 round brush and paint along the border (you don’t have to outline all of it). Adding this pop of extra white really helps to brighten the flower and define the edges.

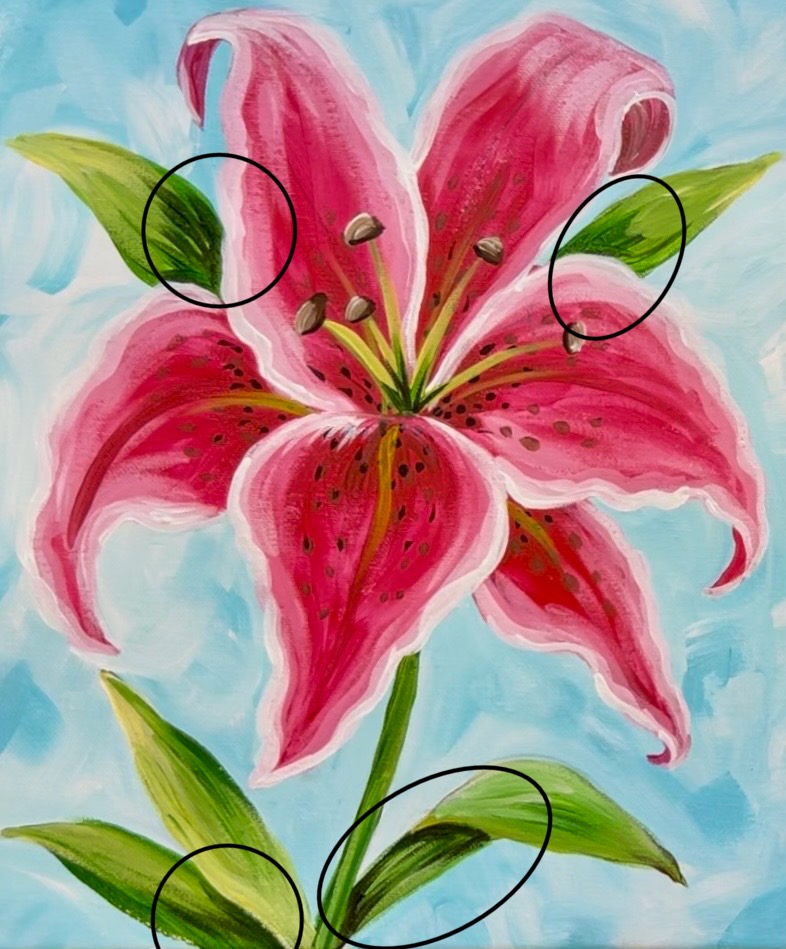
Another final touchup you can do is add some shadowing to the leaves. Use “hooker’s green hue” mixed with a little “mars black”. Use the #4 round brush and paint the bottom parts of the leaves, the leaves that go behind the petals and the part of the leaf that folds over. This adds some extra depth to the leaves!
And you are finished!