Would you like to save this?
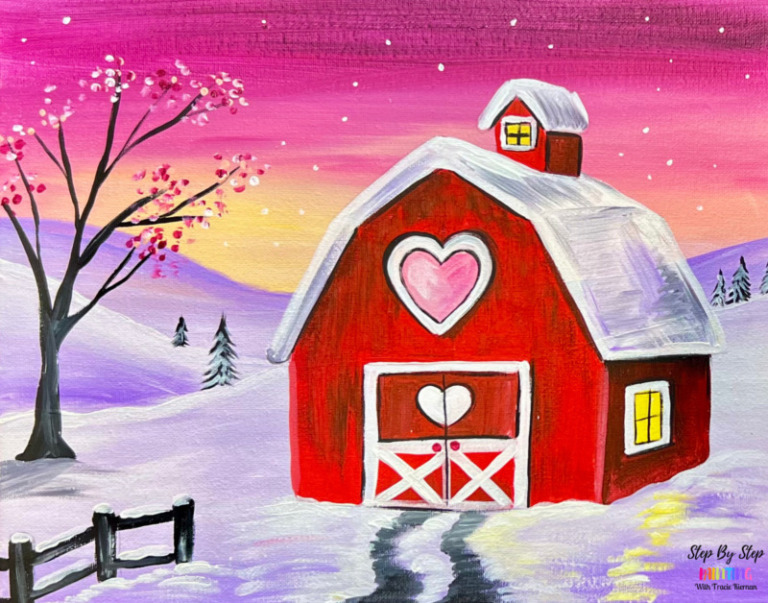
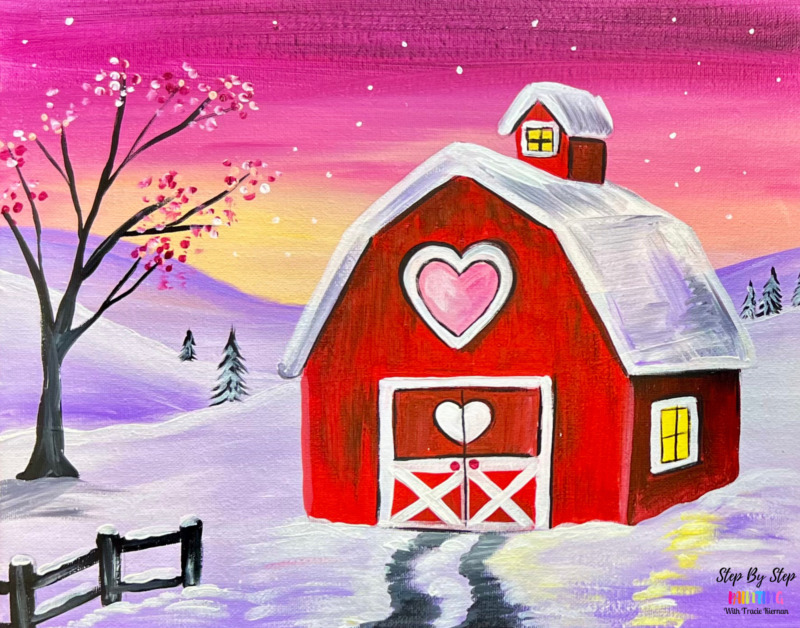
A splash of love on a classic red barn! In this tutorial, we will be painting an adorable barn with a pastel pink and purple snowy landscape.
Looking for more of a spring green landscape? You can actually take a look at the landscape in this painting (take out the tent and feet) and put the barn in it!
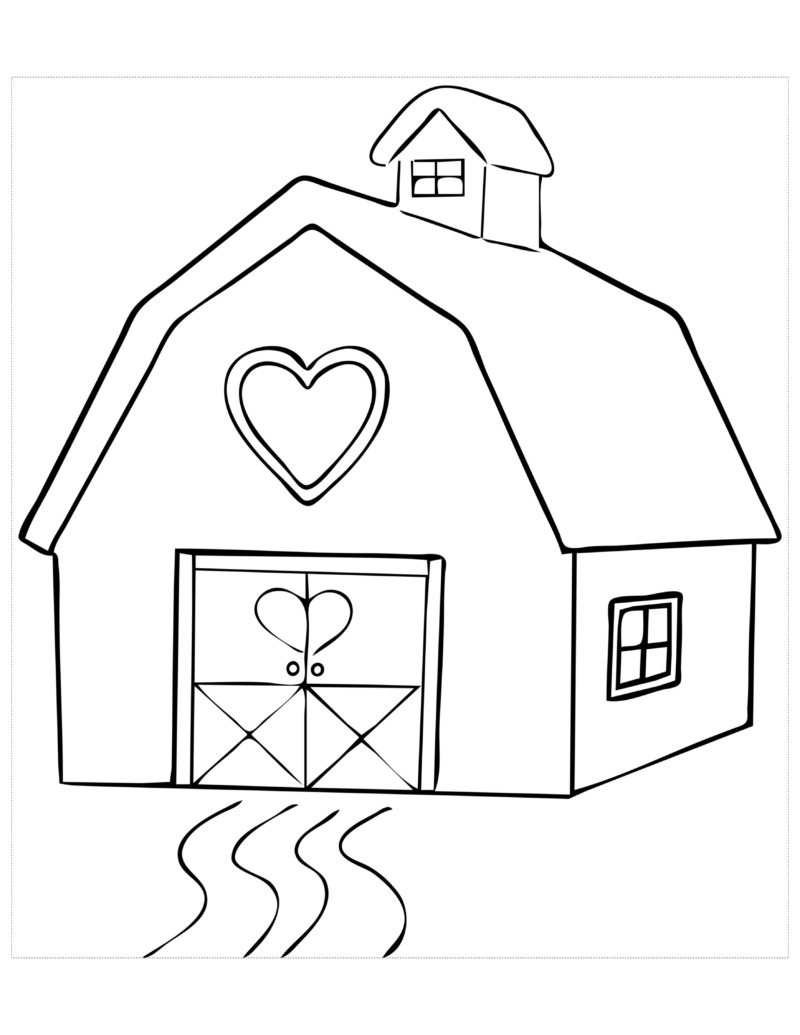
This tutorial requires the use of the traceable and I am providing it with this tutorial (scroll down to see it). It is printed on one sheet and you can use graphite paper to transfer the barn. Of course if you prefer you can hand draw the barn.
Enjoy and happy painting!
Materials
How To Paint A Valentine's Day Barn
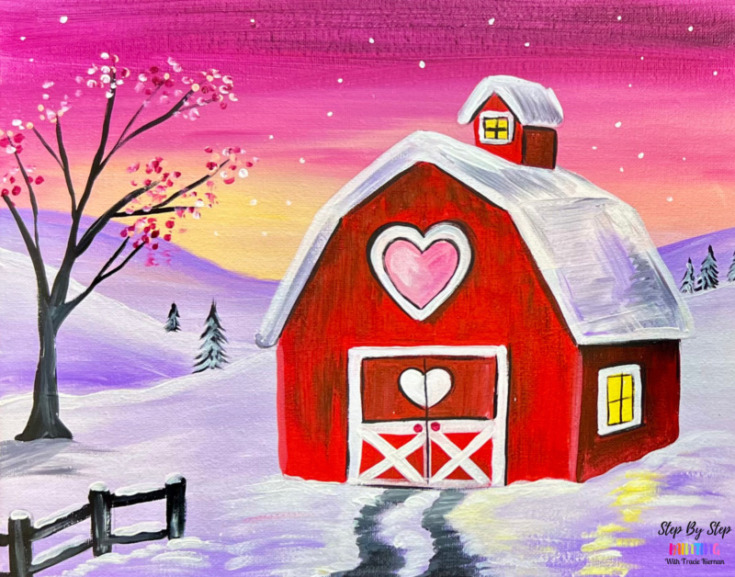
This beautiful red barn painted with hearts is giving us all the cozy vibes! This tutorial includes a traceable template for the barn and will guide you through step by step.
Materials
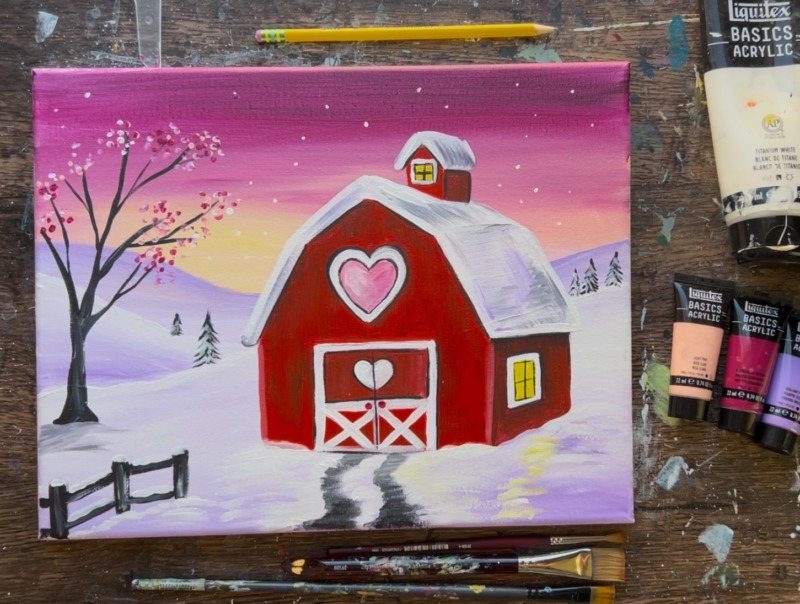
- 11 x 14 Canvas (or any size you want to paint on)
- Acrylic Paint
- Brushes
- Template
- Graphite Tracing Paper
- Pencil
- Water Jar
- T-Square Ruler
Colors
- Titanium White
- Mars Black
- Pyrrole Red
- Primary yellow
- Brilliant Purple
- Quinacridone Magenta
- Light Pink
Brushes
- #4 Round
- 3/4" Flat
- 12 Bright (1/2" Flat)
Color Palette
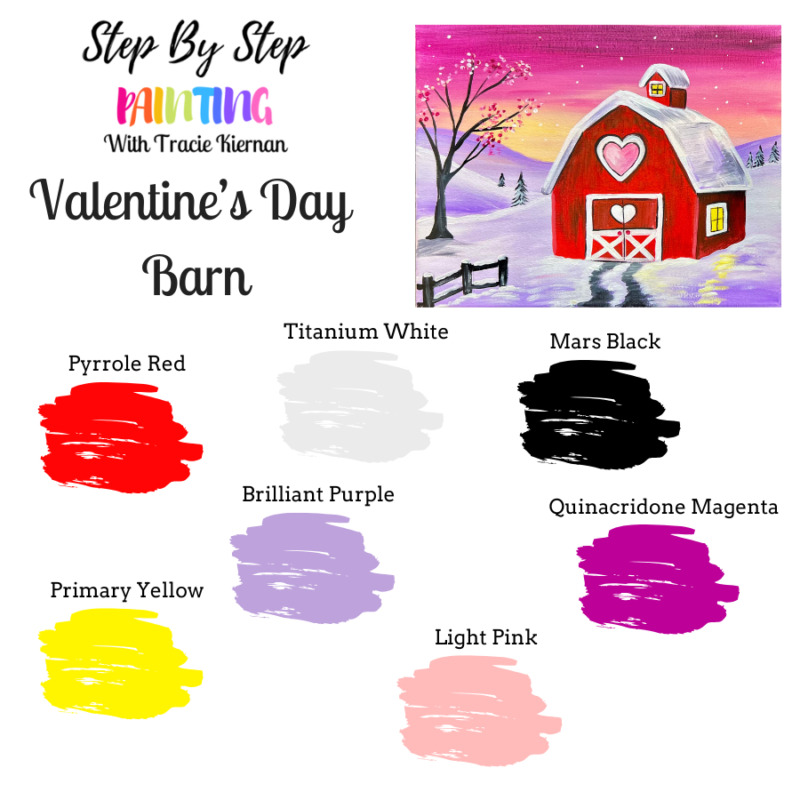

In addition to these brushed, a black POSCA paint pen may be helpful for some of the outlining work on the barn in this painting.
Traceable
This is for an 11 x 14 canvas. I have other sizes you can purchase in my PDF shop or you can use the tool “Rapid Resizer” to resize the tracer.
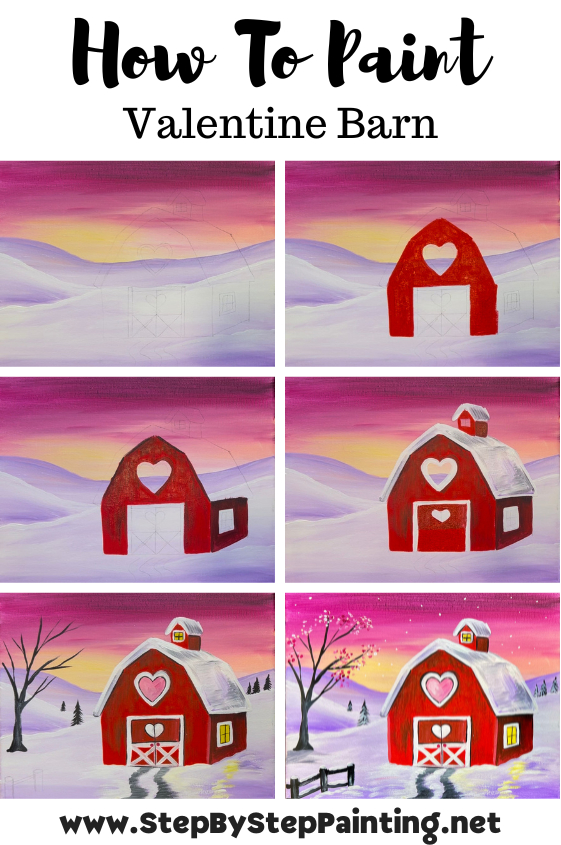
Directions At A Glance
Video
Step By Step Directions
1. Paint Sky
Position the canvas in “horizontal mode”. Located the center of the canvas. For an 11 x 14 canvas, the center is 5.5″. Draw a horizontal line across the canvas using a pencil and a t-square ruler. This line is our “horizon line”.
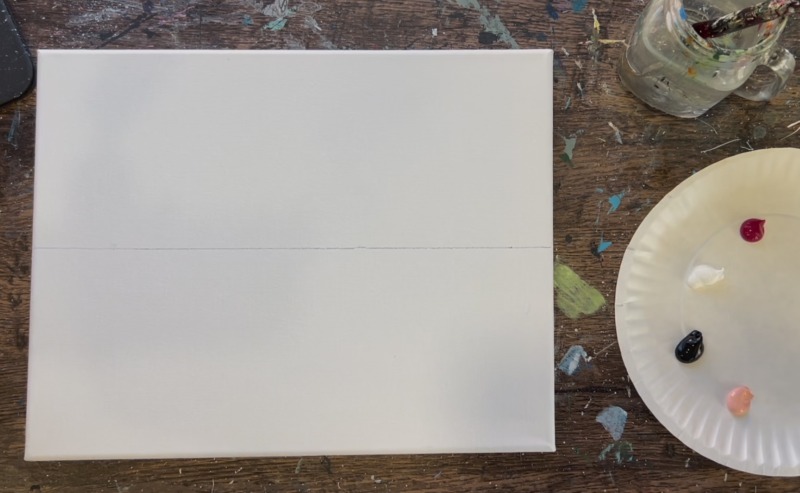
Load your paint palette with: quinacridone magenta, titanium white, mars black and light pink. Use the 3/4″ flat wish to mix about 1 part black to 4 parts quinacridone magenta. This will make a very dark magenta.
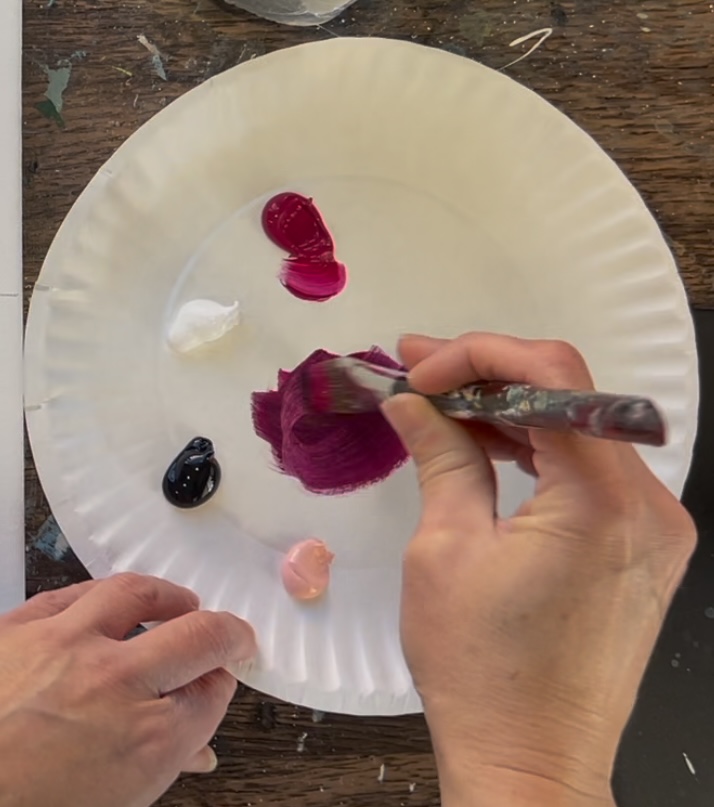
Then use your 3/4 flat bush to paint the very top of the sky. Paint large, left and right paint strokes that go all the way across the sky. You’ll want to work quickly because we will be blending “wet on wet” to create a gradient of different colors in this sunset style sky.
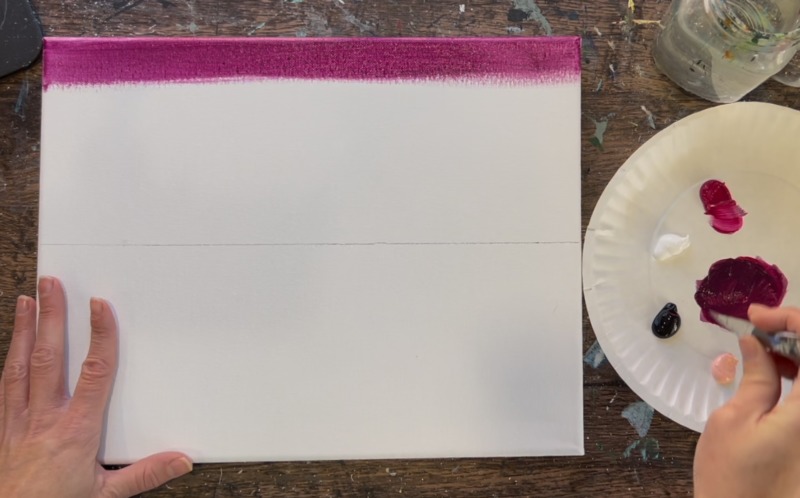
Without rinsing the brush, load the 3/4 wash into just magenta. Then blend it with the dark magenta at the top of the canvas.
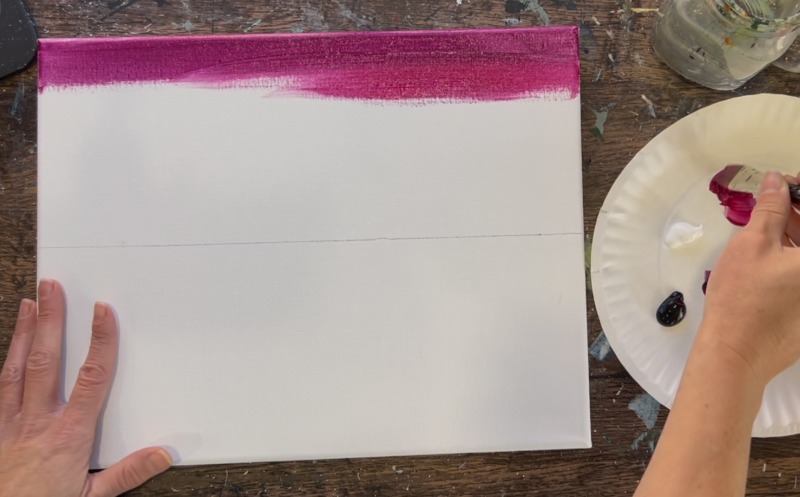
If needed, add a very tiny bit of black and blend a little more dark color at the top of the sky.
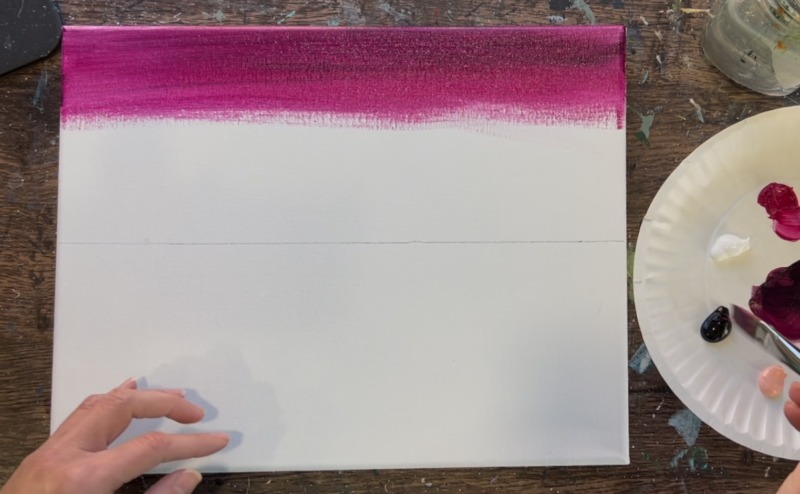
Either wipe or rinse the brush (you just don’t want a lot of black on the brush). Then load it into “light pink”. Blend the light pink up into the magenta color. You want to brush over the color several times to get it to blend. I like to start my color below the color I am going to blend and then brush it up into the color.
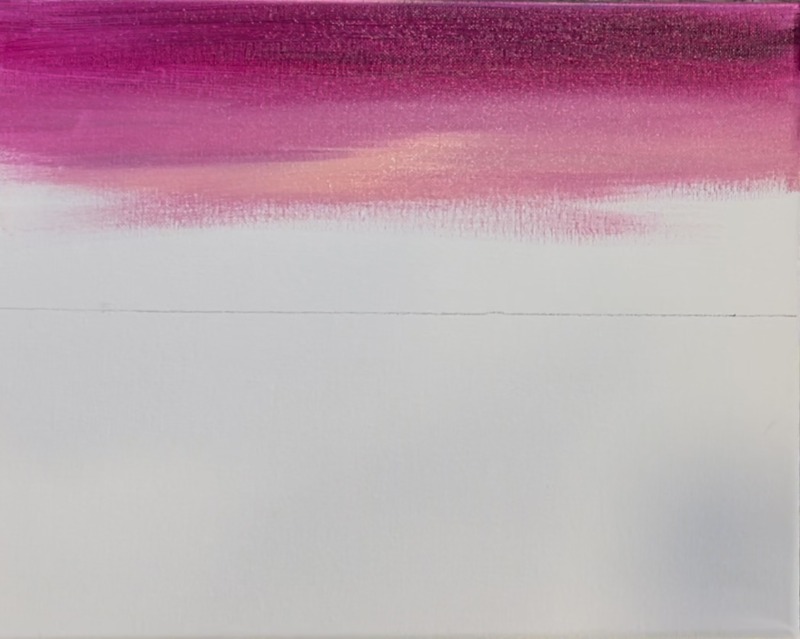
Go further down with this light pink color and leave about a 1″ gap above the horizon line.
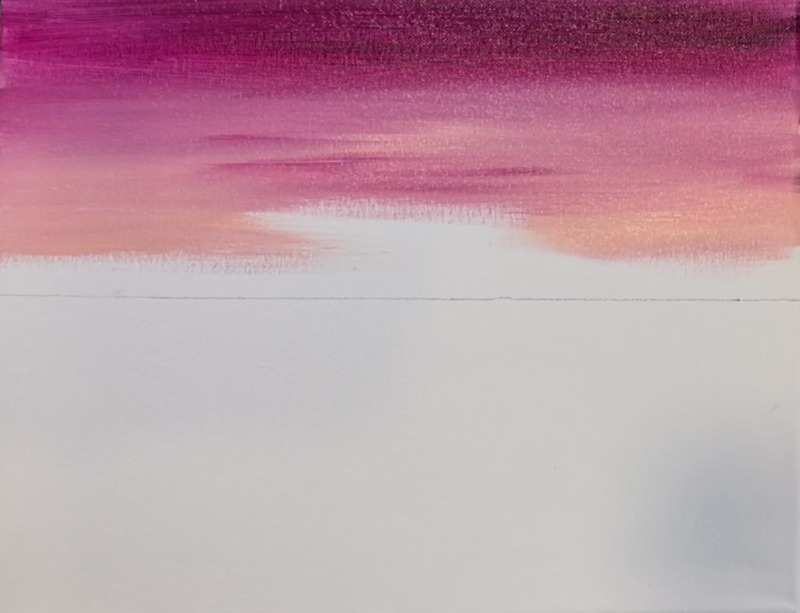
Next, rinse and dry the brush. Then load it into “titanium white”. Paint the rest of the way down to the horizon line. Blend the white with the light pink.
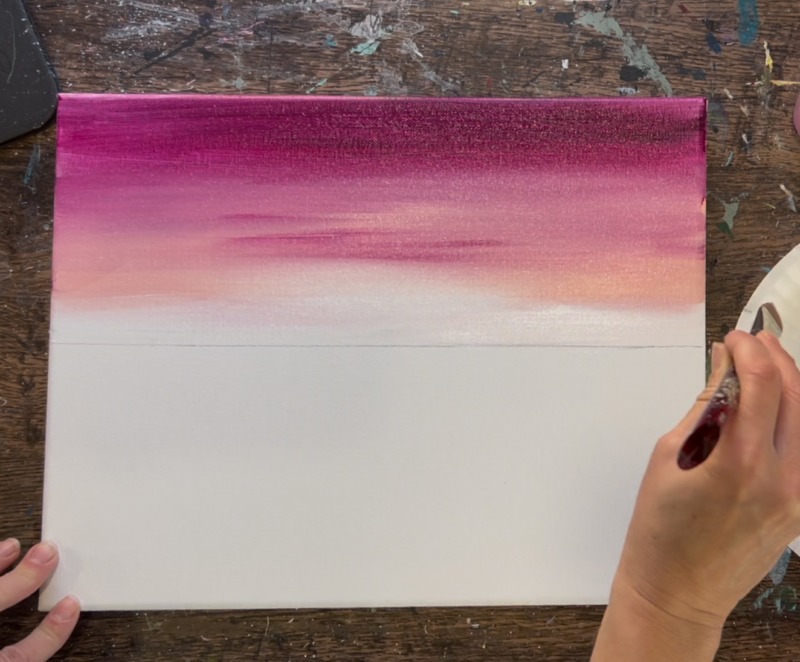
Then we want to paint a slight yellow “glow” in the sky on the lower left above the “horizon line”. Double load your brush in both white and yellow.
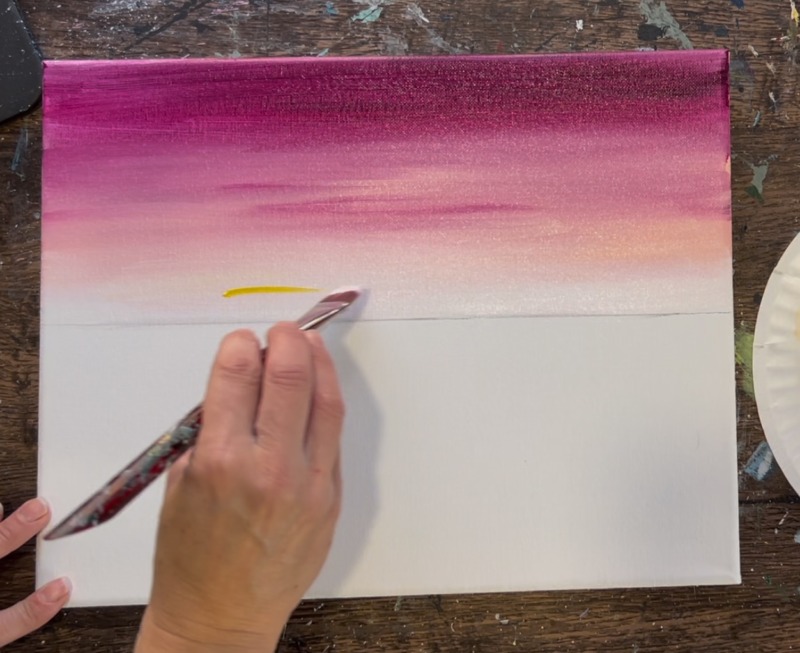
Lightly paint a yellow glow in the left area just above the horizon line. Let it blend with the other colors in the sky.
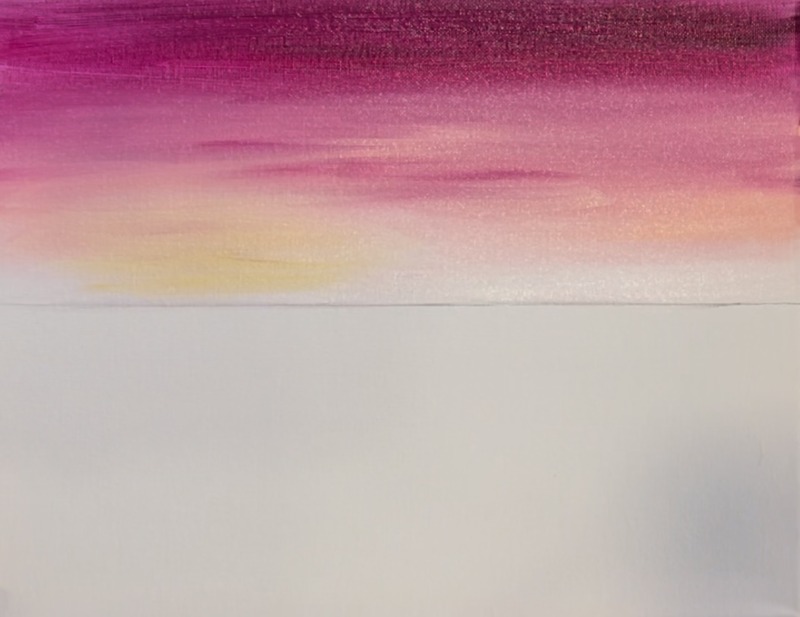
2. Paint Mountains
Use the #12 bright brush to paint mountains. Mix “brilliant purple” with “titanium white”. Then paint a hill that starts about 1″ above the horizon line on the left side of the canvas and dips down in the center and aligns with the horizon line.
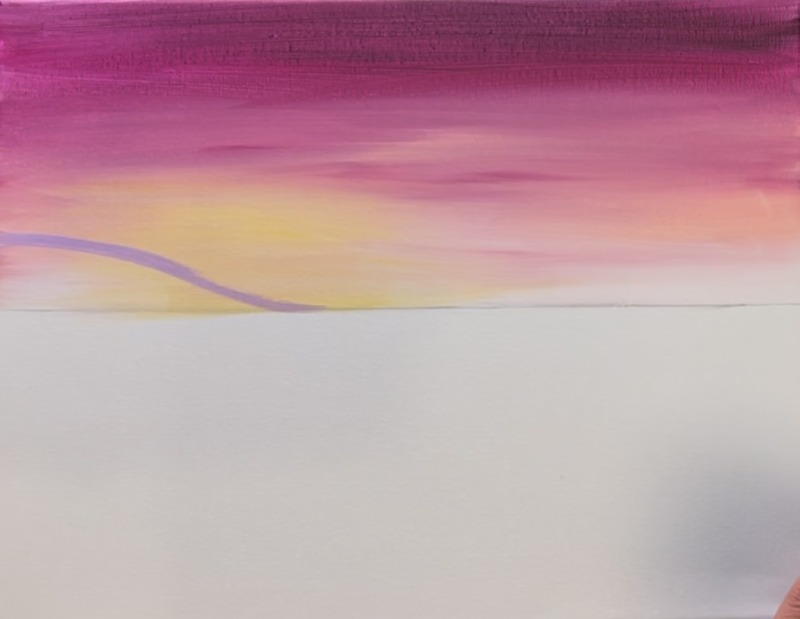
Then bring it back up on the right side to about 1″ above the horizon line.
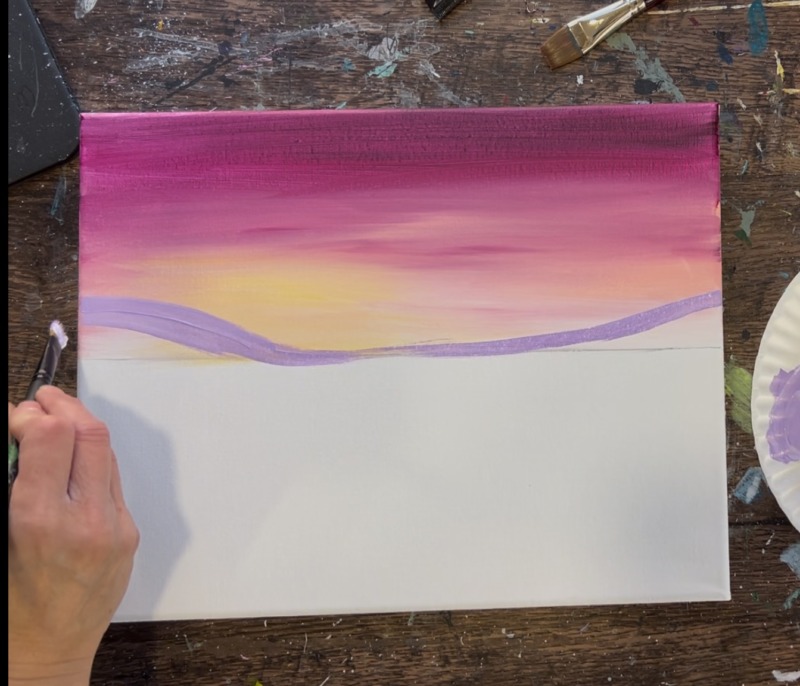
Fill the mountain in with brilliant purple mixed with titanium white.
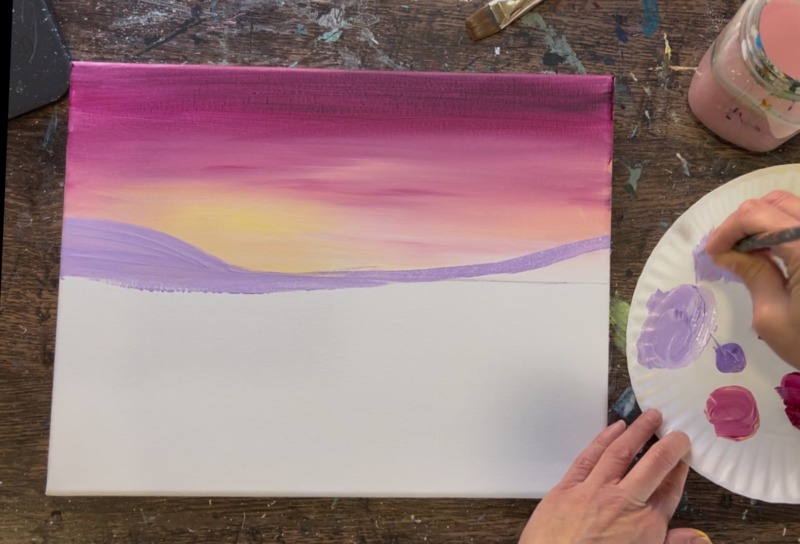
To create “perspective” in your mountains, blend a little “titanium white” on the bottom of the hill/mountain so the bottom is light and the top is dark.
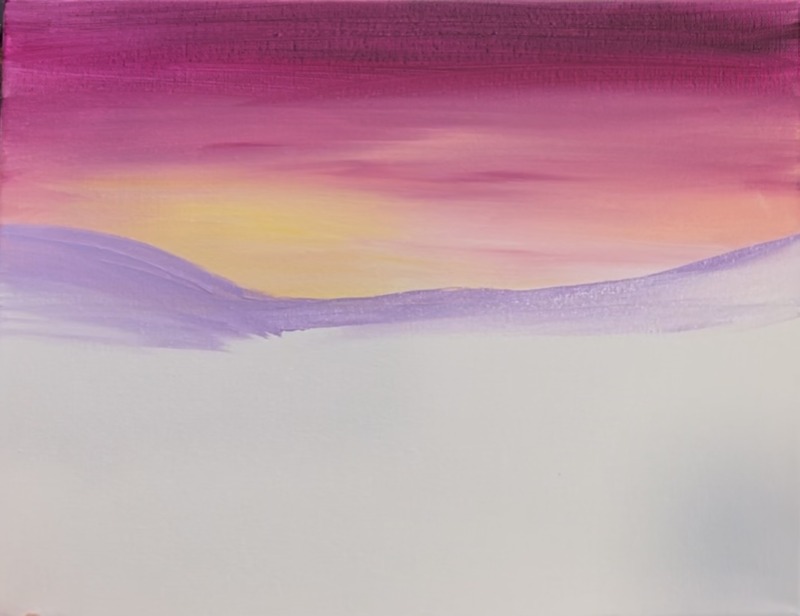
Take the white (mixed with a small amount of purple) and bring this mountain down below the “horizon line”.
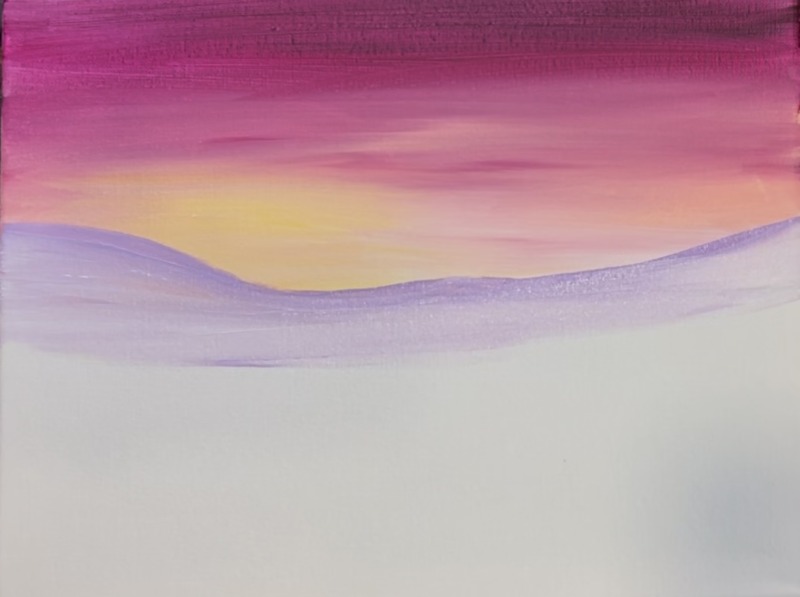
In the next step we will be filling up the rest of the landscape with snow…
3. Paint snow landscape
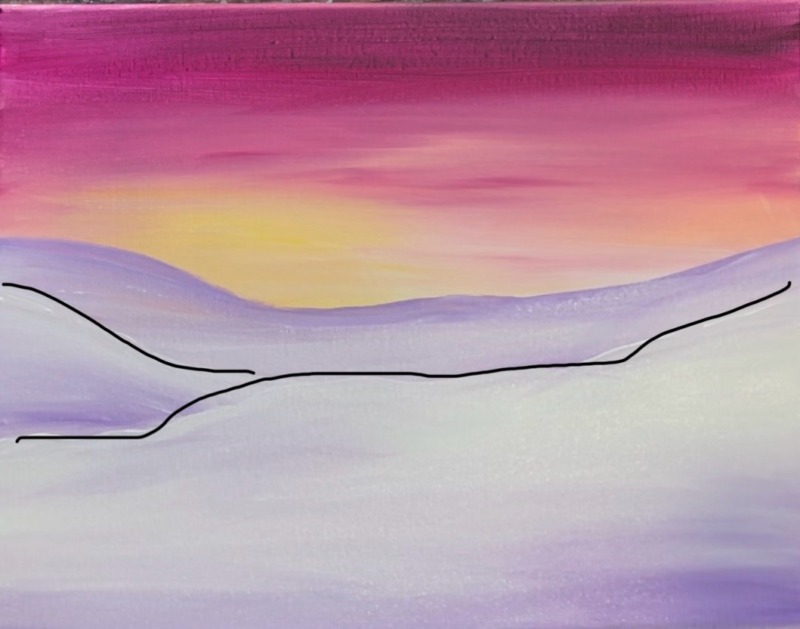
Use the 3/4″ wash brush. Load it into titanium white and a very small amount of purple. It needs to be lighter than the mountain you just painted. Use the edge of the brush to paint a line that cuts the bottom of the mountain, curves down in the center and then back up on the right. Basically, you are creating another layer of land and this land is not flat, it is a small hill.
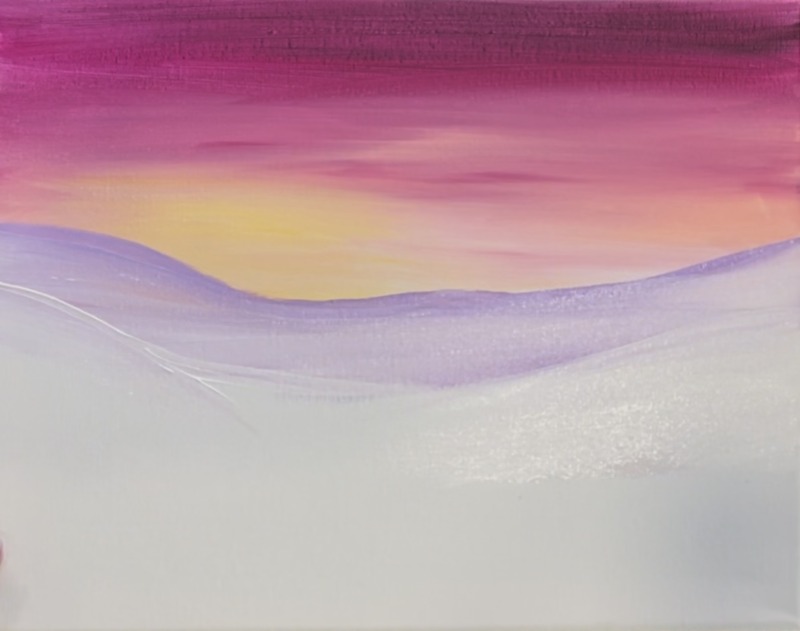
Brush white down to the middle part of the bottom half of the canvas.
Then create another layer of land using the edge of your brush. This cuts the land on the left. Go back and add some darker purple on the bottom of that left hill and blend it up into the white.
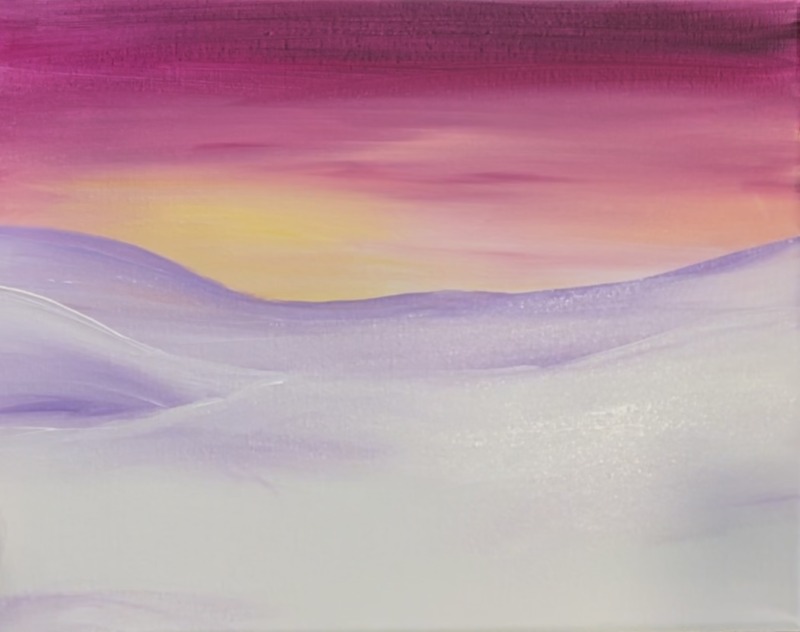
Paint the rest of the bottom half of the canvas white. Then add some “brilliant purple” to your brush and blend it at the very bottom of the canvas. We want the bottom of this land area to be slightly darker and blend to lighter towards the top middle of the land.
The picture below shows the land as it is divided up. There is darker purple on the bottom edging that blends to white towards the top (with the exception of the mountains which are dark on the top edging and lighter on the bottom).
Note: in the video, I paint another layer of land where the bottom of the barn will be, however, this is not needed because we can paint this layer of snow that overlaps the bottom of the barn later.
Let this dry before going onto the next step.
4. Transfer barn template
Print the barn template onto one sheet of paper (if using the 11 x 14 canvas). Then place the sheet of graphite paper below the template. Make sure the graphite paper is “shiny side down”.
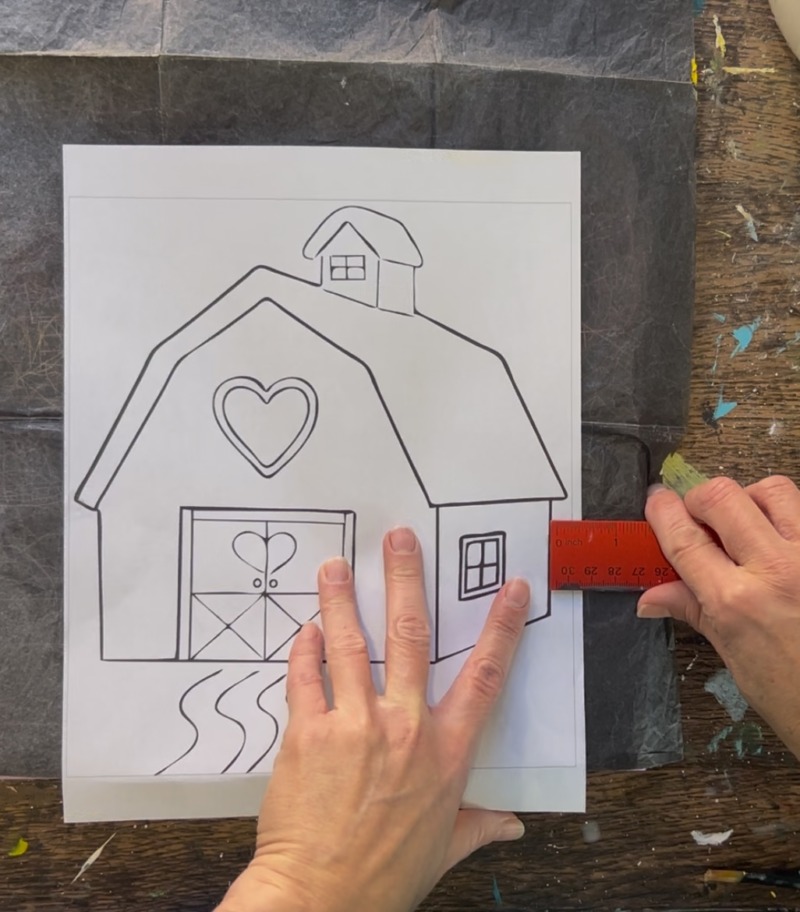
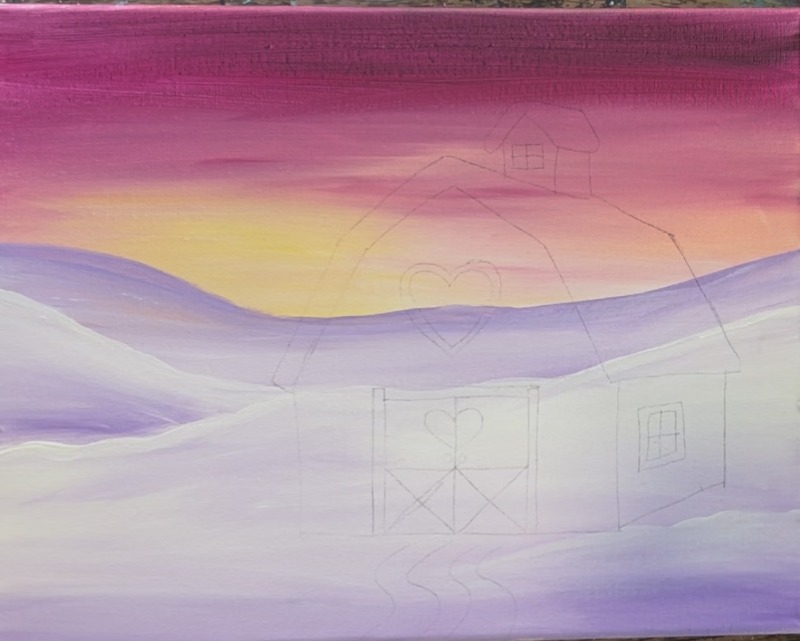
Position the barn so the dashed lines on the bottom of the paper are lined up with the bottom edge of the canvas. Also, the right vertical edge of the barn wall (as pictured) is approximately 1.5″ from the far right edge of the canvas. Placement of the barn is a little to the left because we are going to be painting a few trees in the area to the right of the barn.
Firmly trace over the lines so the barn drawing transfers visibly to the painting.
5. Paint barn walls
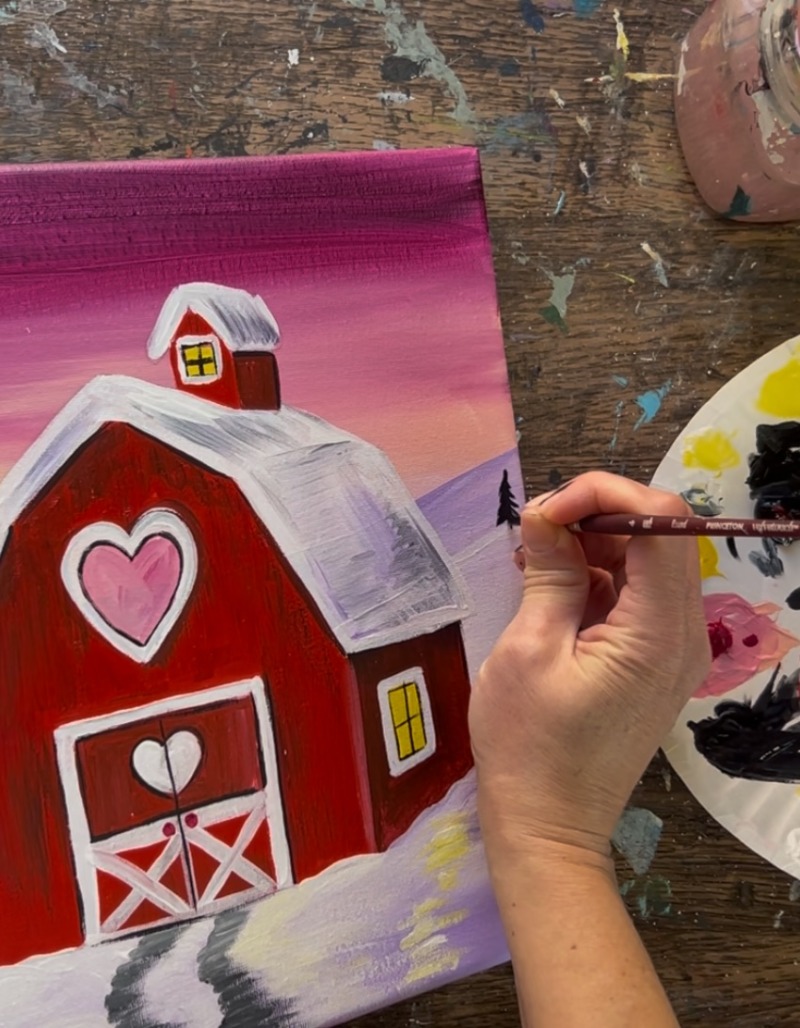
Use a combination of the 3/4 flat brush, 12 bright brush (if you prefer) and the #4 round brush to paint the front part of the barn. Do this with a solid coat of “pyrrole red”. It’s easier if you outline the shape first and then fill it in. I made my paint strokes go in vertical directions.
Go around the heart and the barn door for now.
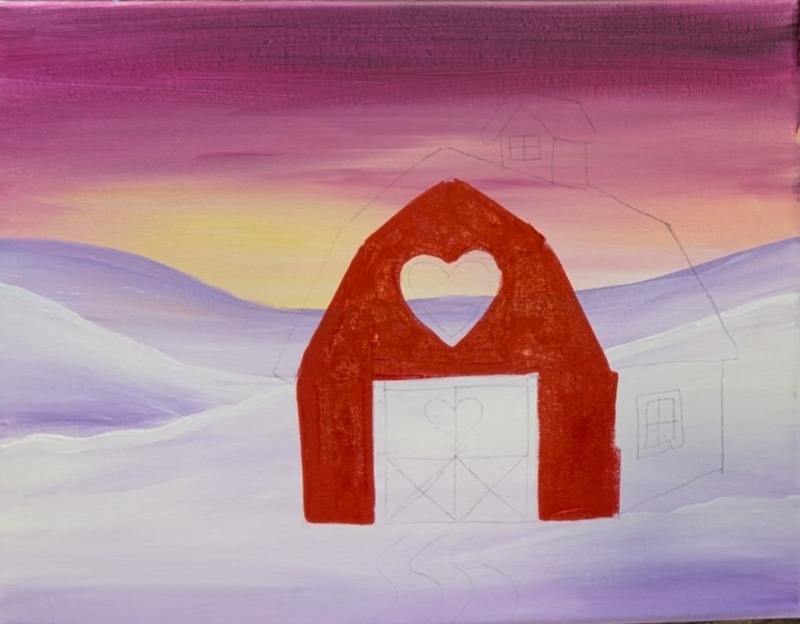
Next, paint the sides of the barn walls. This needs to be a darker red. To make this dark red, add a very small amount of black into “pyrrole red”. Then use any of the brushes to paint this in. Go around the window. For shadowing purposes, add just slightly more black to the top part of the wall that is just under the roof.
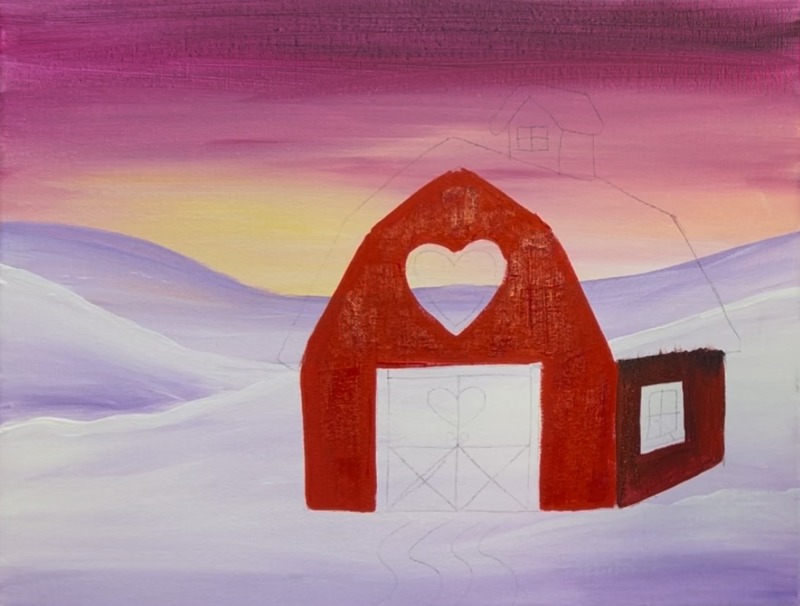
Next, add some darker red to the top parts just under the roof on the front part of the brown. Paint a few darker red streaks throughout the front part of the barn to create more of a “rustic barn” look.
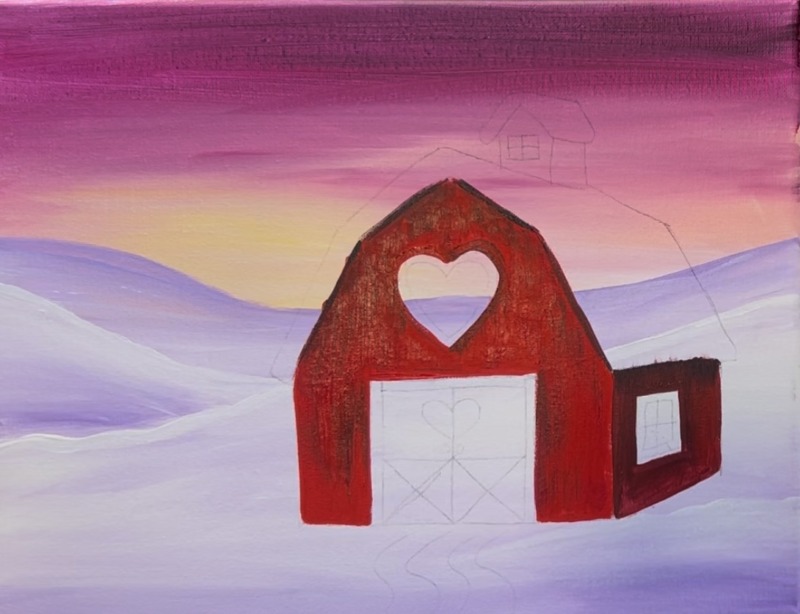
6. Paint snowy roof
Use the #4 round brush and titanium white to paint the roof. Fill in the entire shape of the roof with a solid and thick coat of white.
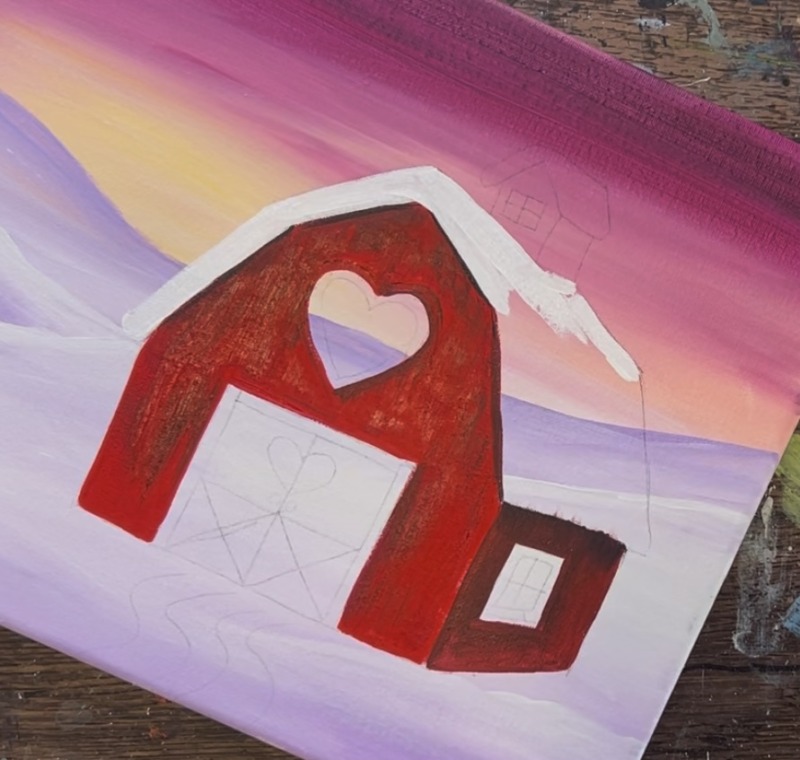
When you get to the side of the roof on the right, change your paint strokes to go in a diagonal direction.
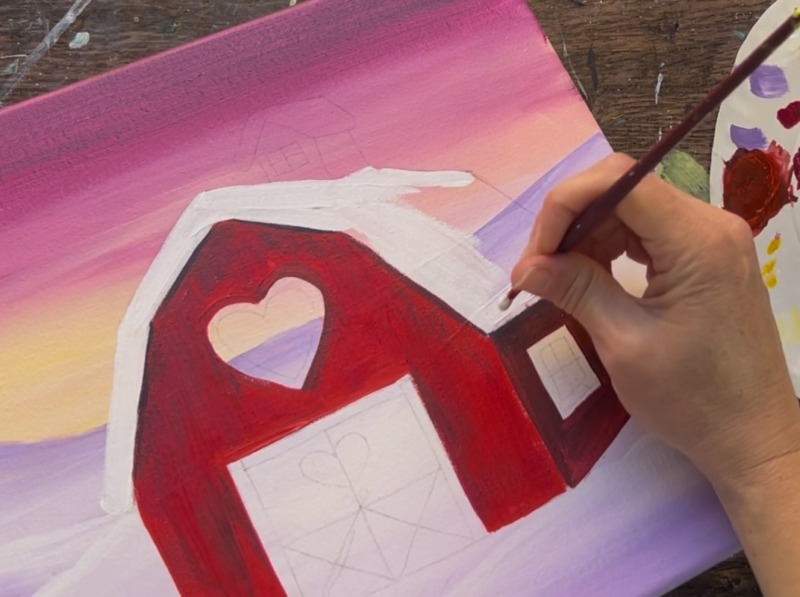
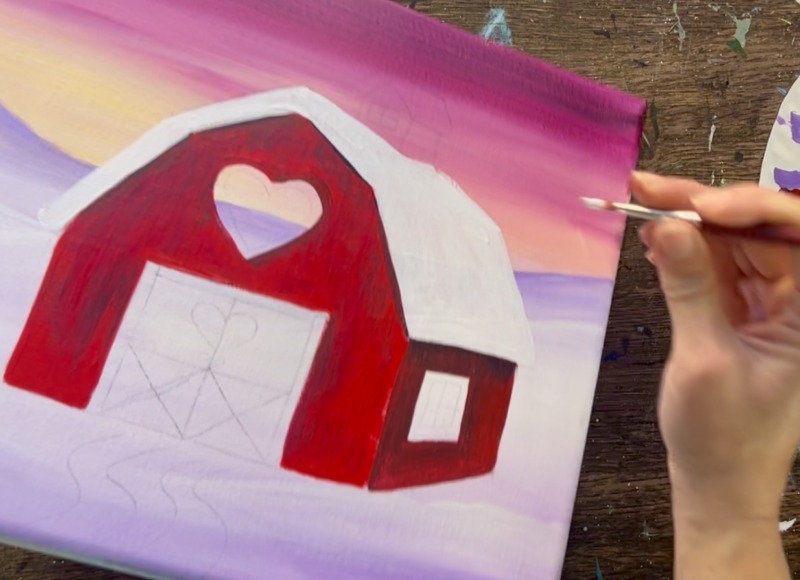
Next add shadow to this right side of the roof. To make the “shadow color”, mix brilliant purple with a small amount of mars black and a bunch of white (about 2 parts purple, 1 part black and 4 parts white).
Start on the bottom of the roof and paint diagonal paint strokes that go in the direction of the angle/ pitch of the roof.

Then paint the lower right corner but leave a little white on the far edge. Loosely outline this corner (I added a little more gray in this area).
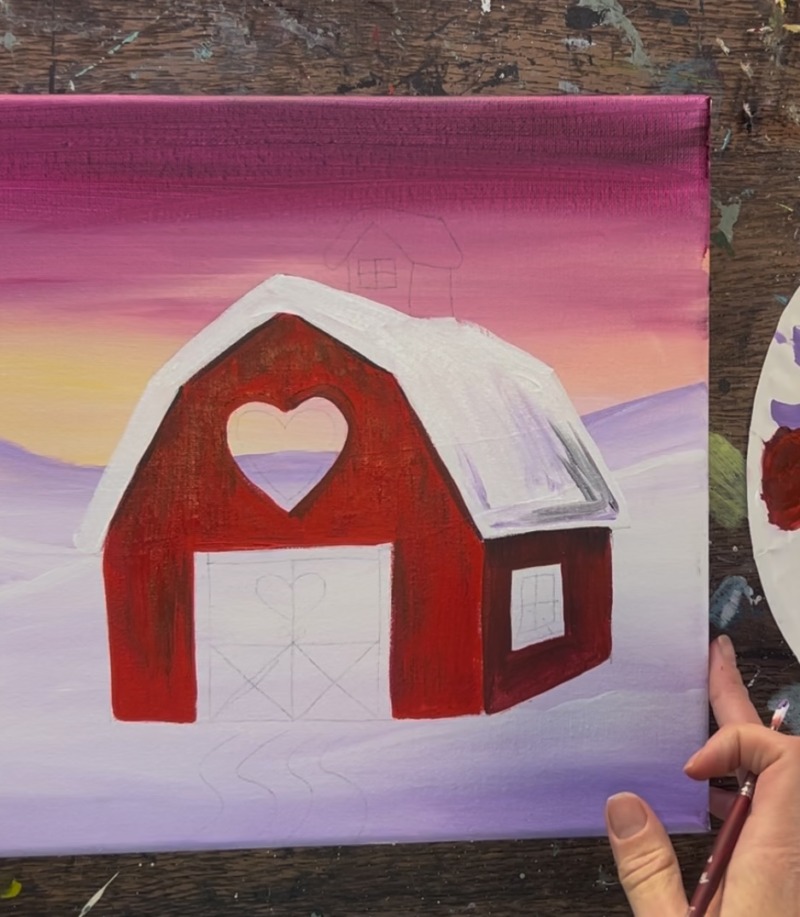
Paint the top of the roof on the right with this light gray/purple shadow color. Change the angle to match the pitch of the roof (it changes because it’s a gambrel roof).
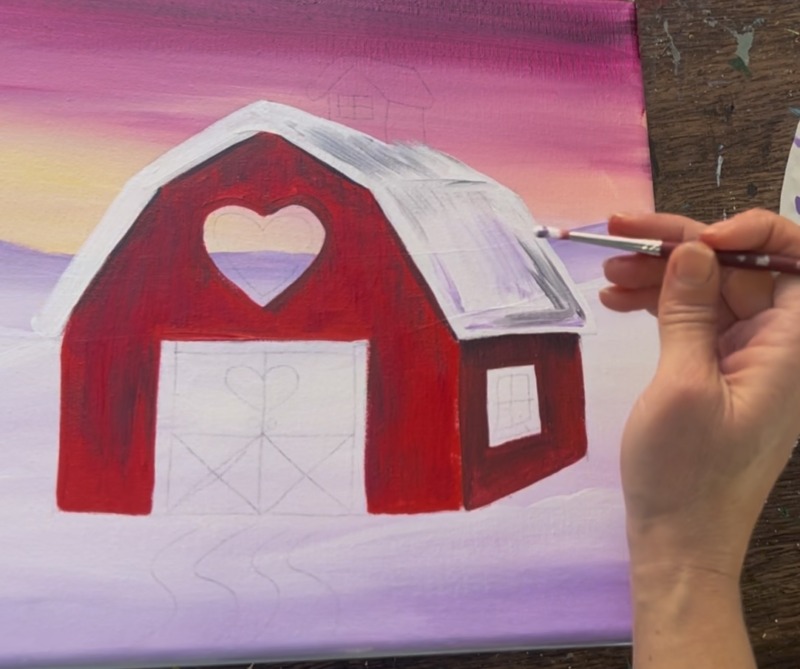
Tip with this roof: you want to blend gray in with the white for the purpose of making it look a little more “shadowy” but don’t over blend and paint over all of the first layer of white.
7. Paint tower on barn
Use the same technique for painting the snowy roof on the little tower part of the barn. Make the left side of the roof pure white and then add gray diagonal shadow lines on the right side of the roof.

Next, use titanium white to paint the trim/ edging of the large heart above the barn door, the edging of the barn door and the edging of the window on the right.
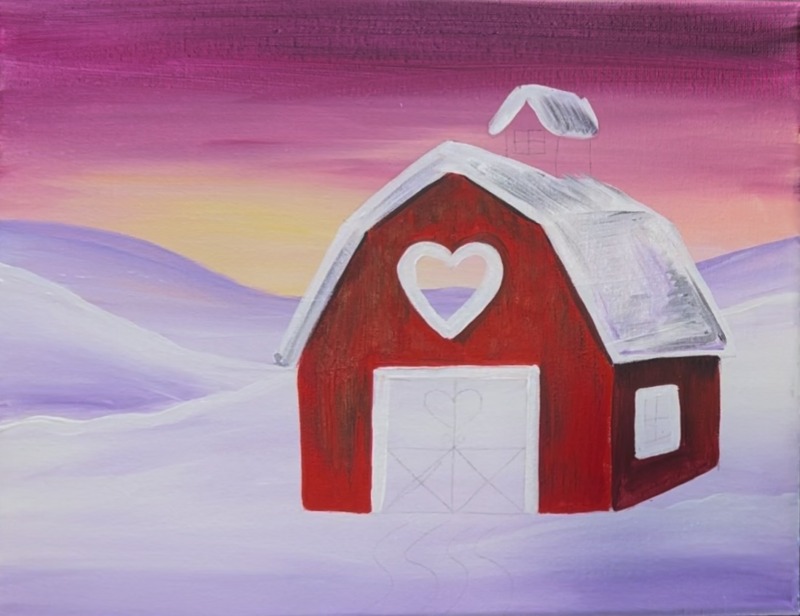
Next, paint the red part of the “watch tower” of the building. Use the #4 round brush (because it’s a smaller area). Paint the front with pyrrole red and then paint the right side with the dark red (pyrrole red mixed with black). Paint around the window.
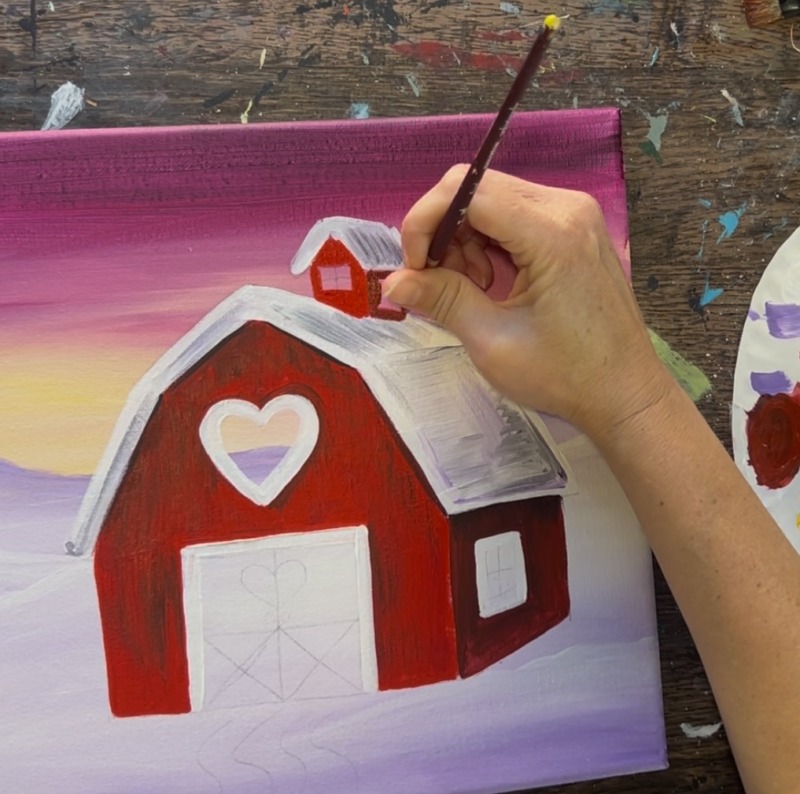
8. Paint barn door
Use the #12 bright brush to paint the barn door. I chose to paint the bottom half with just “pyrrole red” and the top half with the darker red. This helps divide the door in half and will help later when we paint the white trim. Paint around the heart.
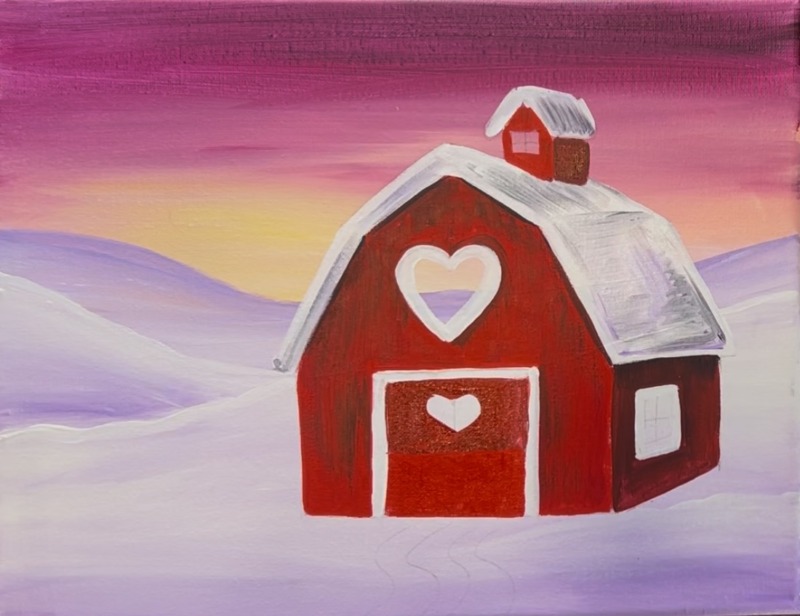
9. Paint hearts, windows and path
Use a #4 round brush to paint the inner heart pink. I decided to mix “light pink” with “quinacridone magenta” to make this pink a little darker.
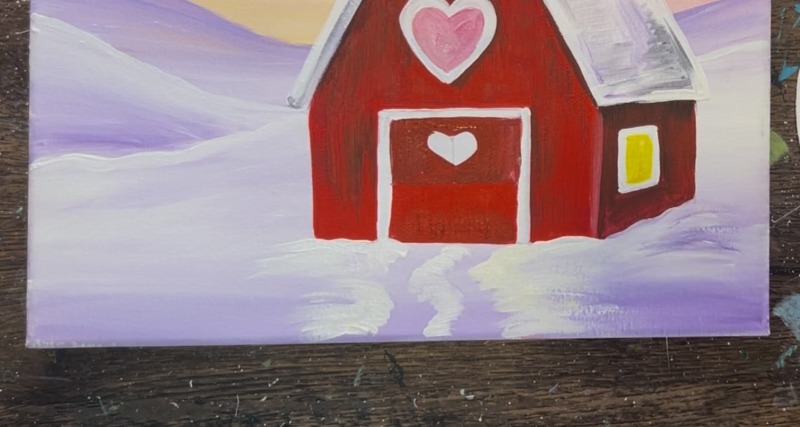
Then start painting the path. In the template we used, there are lines already drawn out for the path. Use a #4 round brush and titanium white. Paint loose, left and right paint strokes but leave the path un-painted. The purple layer will still be showing where the path is.
Then make a “dark gray” on your paint palette by mixing equal parts black and white together. Use the same #4 round brush to paint loose, left and right paint strokes on the path. It’s okay if you leave some of the purple showing through.

Make the path slightly darker on the bottom edge of the canvas by adding slightly more black towards the bottom. Then add slightly more white towards the back. This will create some “depth” with the path. Also, the path gets slightly wider and larger on the bottom of the canvas.
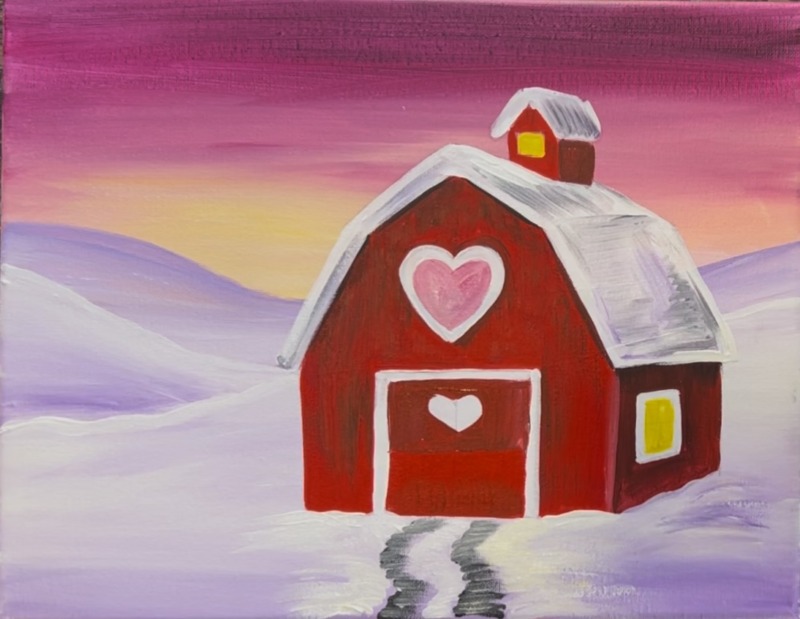
Paint the white heart on the barn door using the #4 round brush.
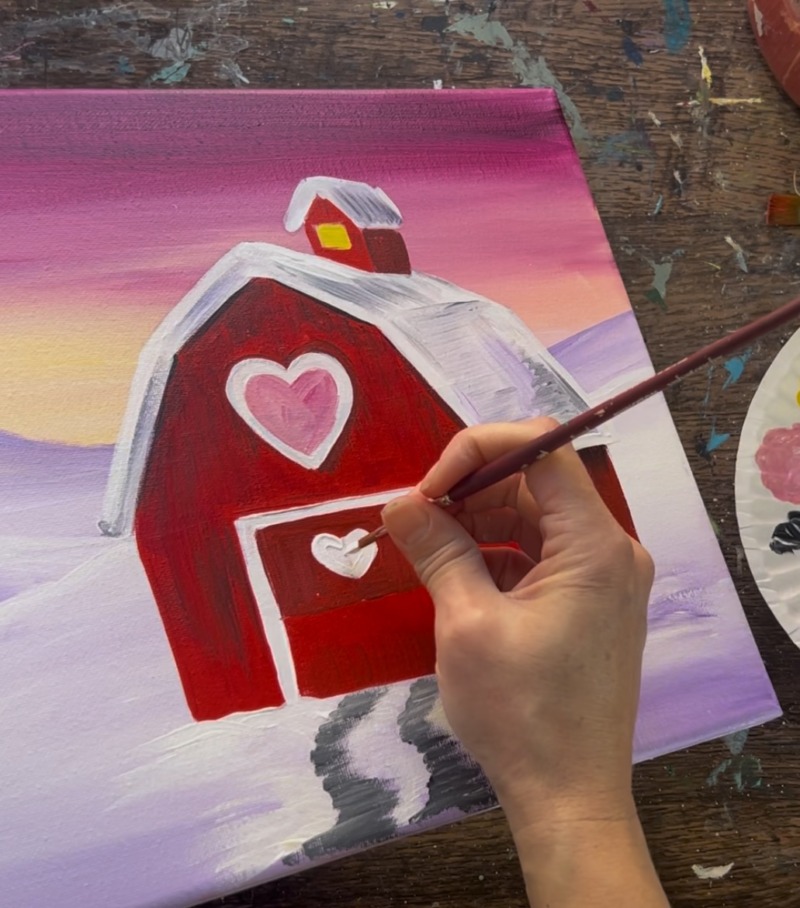
Then paint the white trim of the door. Paint the “X” pattern on the lower half of the door.
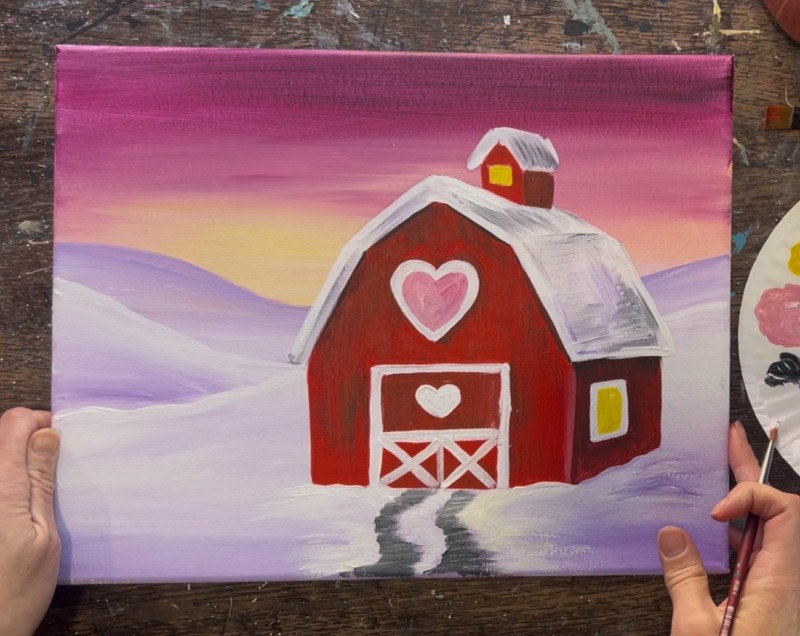
10. Outlining & snow detail on ground
You can use a black paint pen to make outlining easier. Outline the lines on the windows, the hearts, the inner parts of the barn door (including the line that divides the two doors in half where they open). Also, outline the bottom edging of the lines just below the roof.
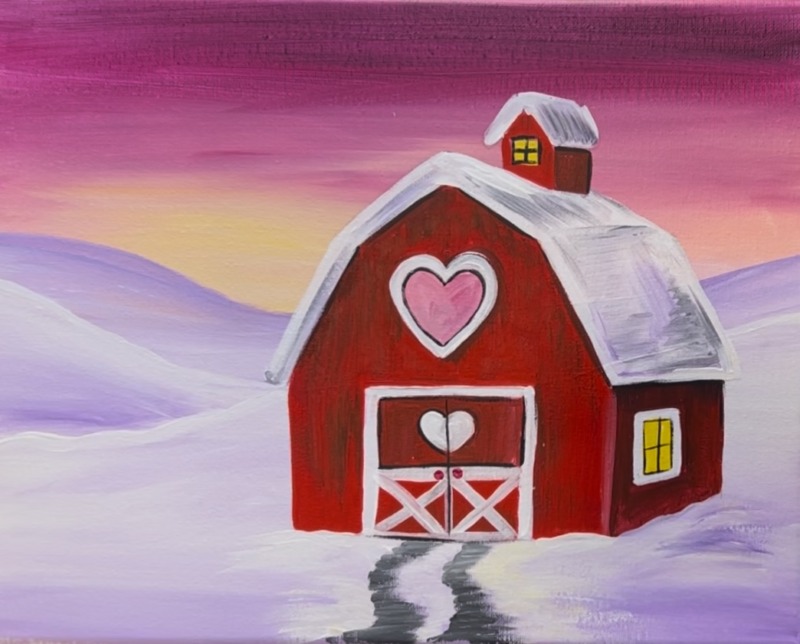
As far as snow detail on the ground, use primary yellow and white mixed together and your #4 round brush to loosely brush an area of bright yellow below the window. A
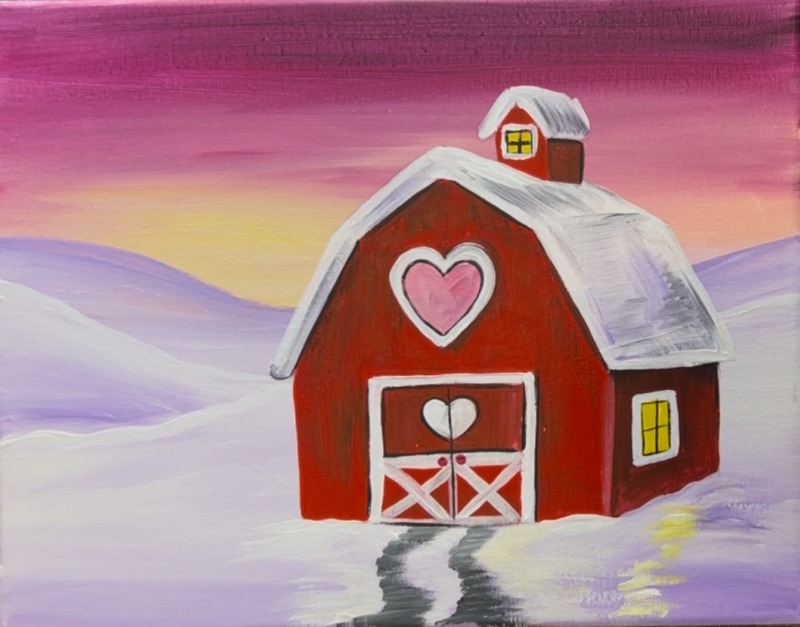
Also, paint the white trim around the small window and touch up and of the white trim or the roof as needed.
11. Paint trees
Use a #4 round brush and mars black. I like to slightly water down the black when painting trees. It helps the paint be more flowing and easier to get thinner paint strokes with.
Start by painting a wide trunk that goes thin and splits into two main branches.
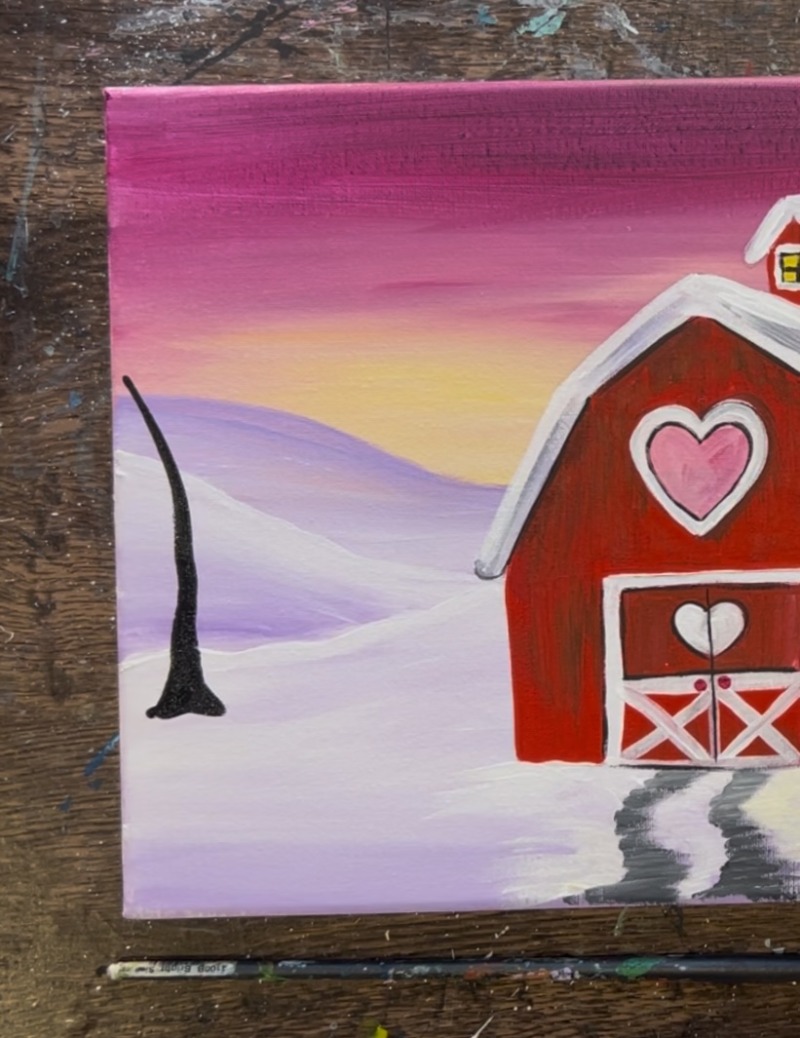
Then paint smaller branches extending from the two larger branches. You can either start at the end of the branch and brush to the main branch. Or start at the main branch and brush outwards. For the thinner parts of the branch, you use less pressure on the brush. For the thicker parts of the branch, you use more pressure on the brush.
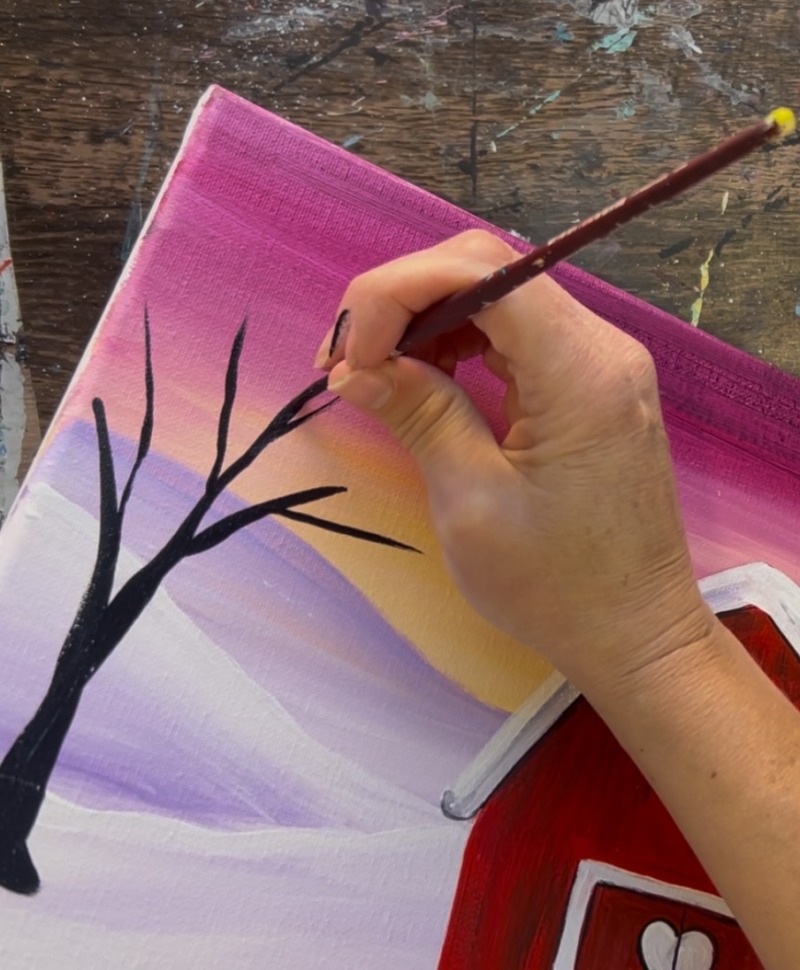
Add some highlighting to the trees (optional). Add a little bit of “titanium white” to the brush that already has black on it. Then loosely blend the white in with the black using loose paint strokes that go in the direction of the trunk and branches.
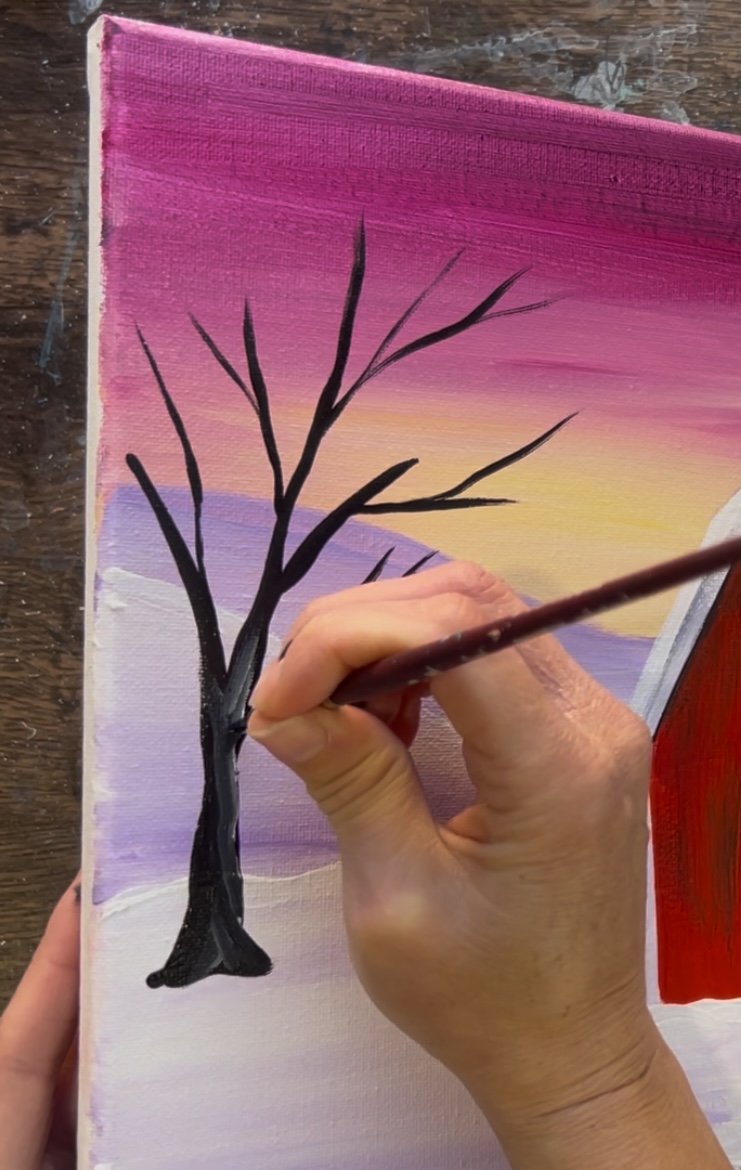
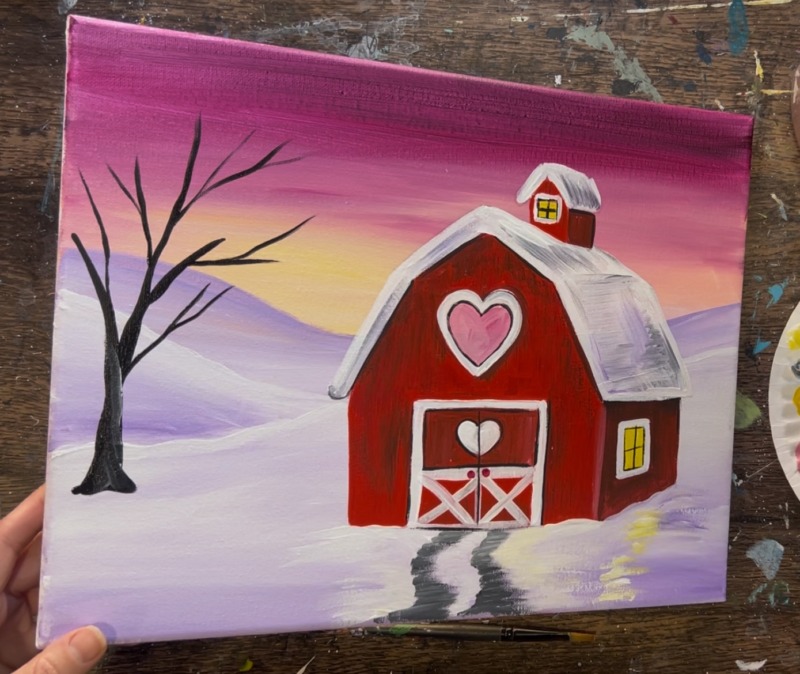
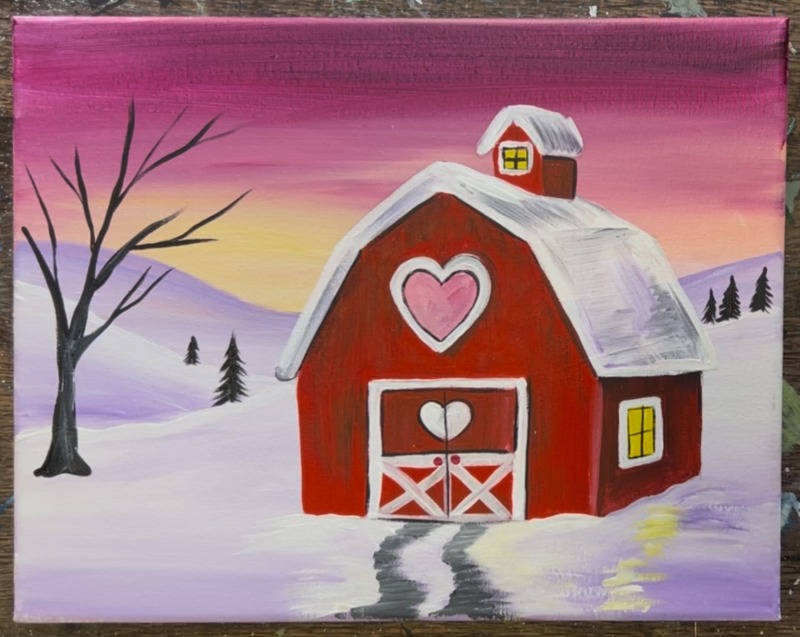
Then paint pine trees in the background. I did two smaller paint threes. Start by painting a thin vertical line. Start at the top of the line and stroke downwards to paint your pine tree branches.
I did three trees on the right and two trees on the left. If your tree is lower in the landscape, it would be bigger and further in the landscape would be smaller.
12. Draw & paint fence
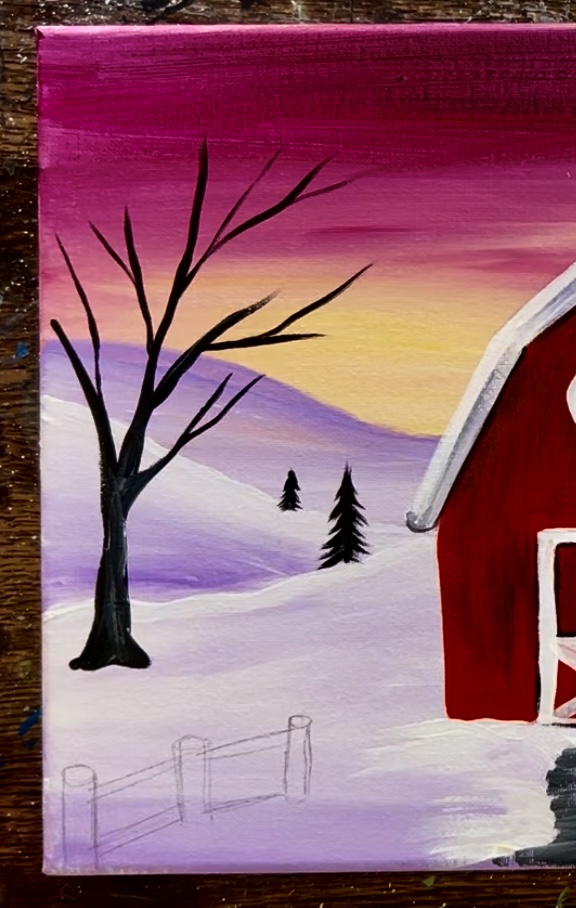
I chose to draw the fence with a pencil first. Draw three posts on the left. The tallest post is on the bottom left corner and each post gets slightly smaller because it is going further in the distance. Draw the vertical posts first and then two sets of horizontal beams connecting the posts. I also drew little ovals on the tops of the fence posts to make it look more three-dimensional.
Then use the #4 round brush to paint the fence solid black.
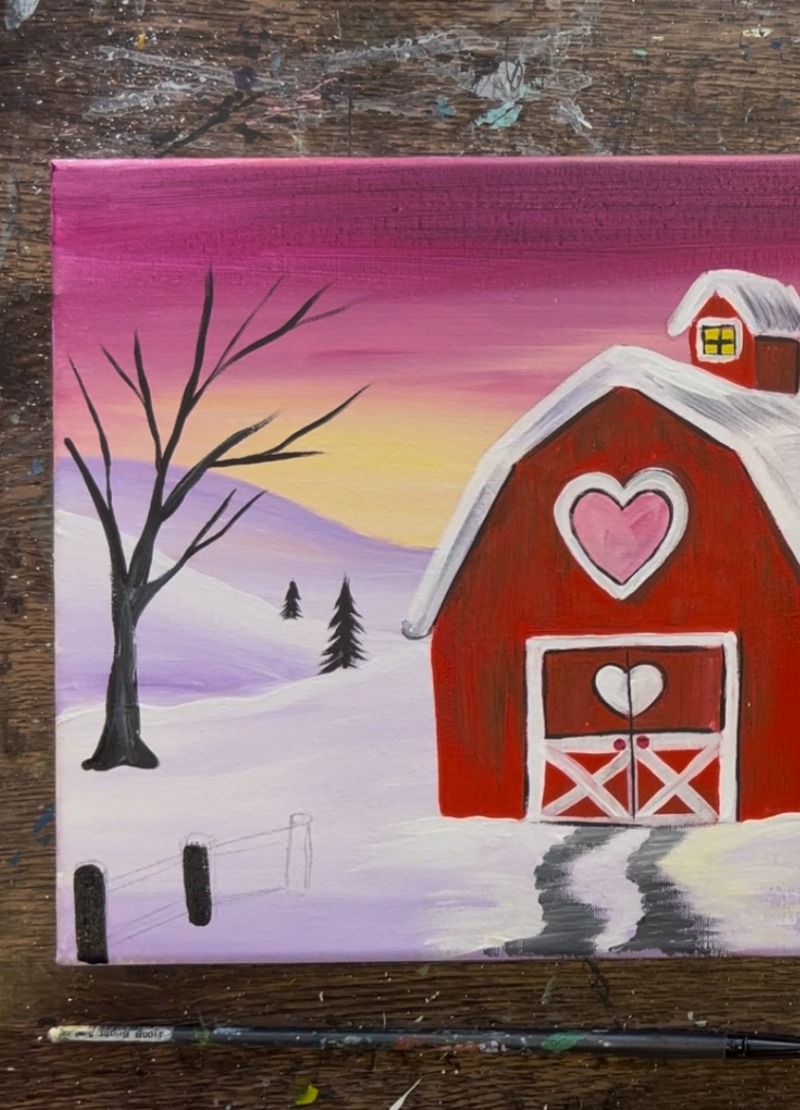
After painting the fence solid black, blend some white into the fence posts to highlight them (the same way we highlighted the black tree). Then paint a little bit of pure white on the bottom of the fence posts for bright white snow that is piling up by the base of the fence.
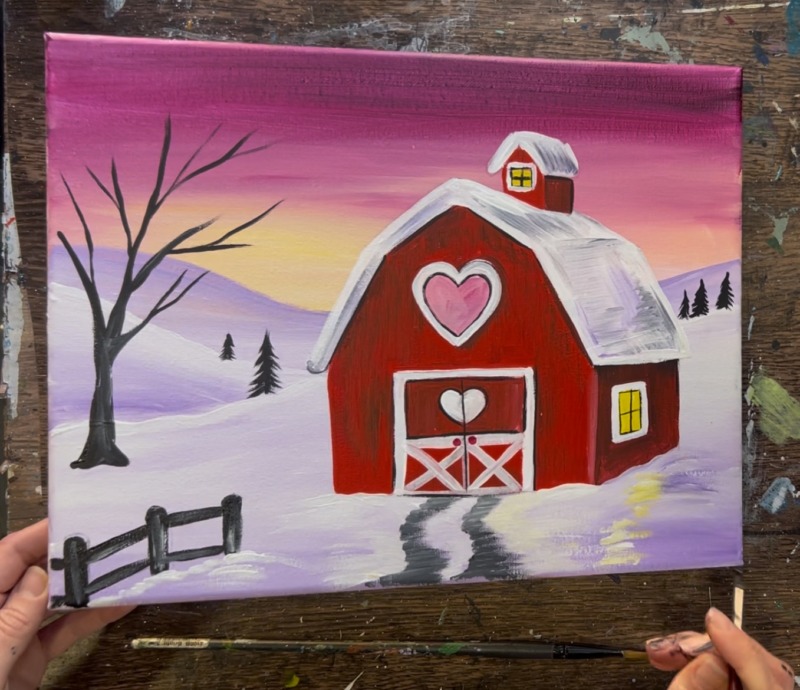
13. Paint tree blossoms & snow dots (optional)
We will call this an early blooming cherry tree! You can also paint little pink hearts on the tree instead. What I did was use the round brush and painted little round dots on the branches of the tree. Use a combination of the “quinacridone magenta”, “light pink” and “titanium white”.
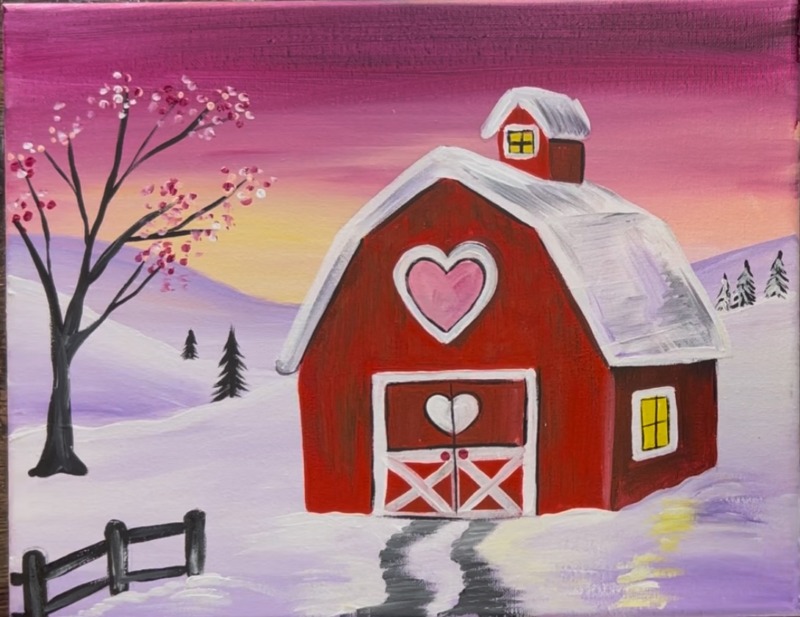
Then paint little white dots all throughout the sky for a light snowfall. To paint snow on the pine trees, paint white branches on the tree the same way you pained the black branches. Leave a lot of the black still showing through.
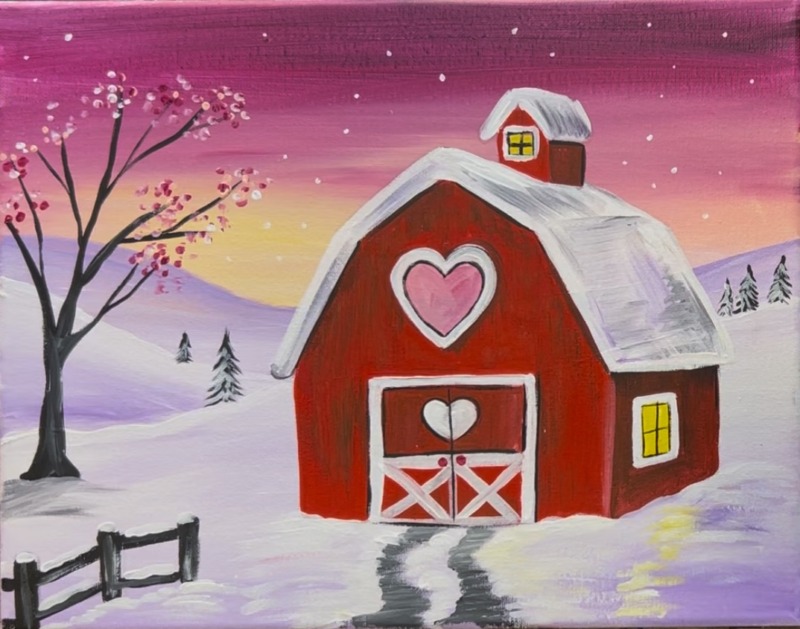
Then paint som snow piling on top of the fence.
As a final touch up, paint some shadowing under the tree on the left. Use “brilliant purple” mixed with some black and white to make a medium purple-gray color. Then loosely paint left and right strokes to form a shadowy area in the snow under the tree.
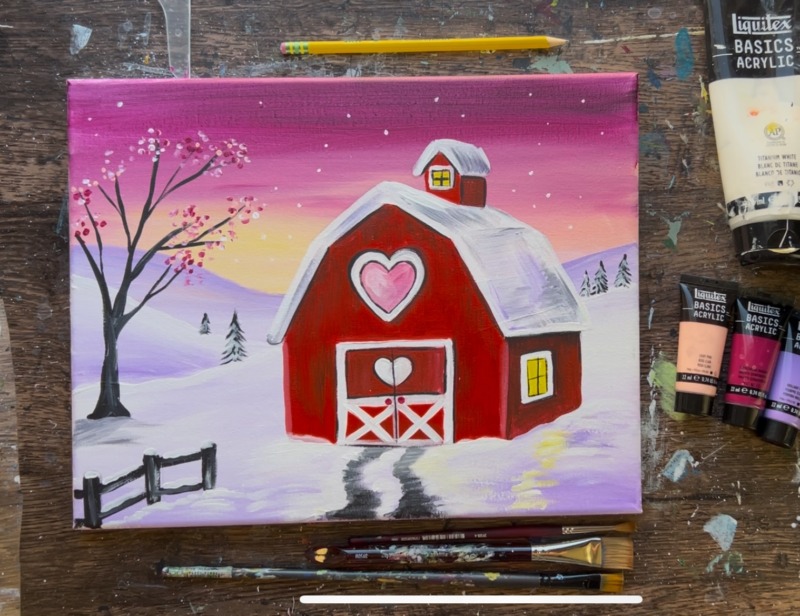
And you are finished!

